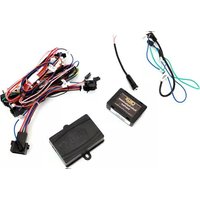
SWRFD-60E - Car kit CRUX - Free user manual and instructions
Find the device manual for free SWRFD-60E CRUX in PDF.


| Product Type | Car Kit (Hands-Free) |
| Brand | CRUX |
| Model | SWRFD-60E |
| Dimensions (approx.) | 10 x 5 x 2 cm |
| Weight (approx.) | 100 g |
| Power Supply | 12V DC (cigarette lighter adapter) |
| Bluetooth Version | 5.0 |
| Compatible Devices | Smartphones with Bluetooth |
| Main Functions | Hands-free calling, music streaming, voice assistant support |
| Speaker | Built-in speaker |
| Microphone | Built-in microphone with noise reduction |
| Controls | Buttons for answer/end call, volume, and music control |
| Mounting | Clip-on sun visor or dashboard |
| Bluetooth Range | Up to 10 meters |
| Charging Port | USB-C (for power only) |
| Battery | None (runs on car power) |
| Color | Black |
| Included Accessories | Power cable, adhesive mount |
| Maintenance | Clean with a dry, soft cloth |
| Safety Precautions | Do not operate while driving; use voice commands |
| Spare Parts Availability | Contact CRUX support |
| Warranty | 1 year limited |
Frequently Asked Questions - SWRFD-60E CRUX
User questions about SWRFD-60E CRUX
0 question about this device. Answer the ones you know or ask your own.
Ask a new question about this device
Download the instructions for your Car kit in PDF format for free! Find your manual SWRFD-60E - CRUX and take your electronic device back in hand. On this page are published all the documents necessary for the use of your device. SWRFD-60E by CRUX.
USER MANUAL SWRFD-60E CRUX
- Retains factory features in select Ford vehicles with 4" screen.
- Pre-programmed to retain factory Steering Wheel Controls.
- Retains factory 4" screen.
- Works on vehicles with or without Sync.
- Retains factory Aux-Input on vehicles without Sync.
- Retains voice command features on vehicles with Sync.
- Phone pick up and hang up functions using the steering wheel control buttons.
PARTS INCLUDED:

CAN Module

SWC Module

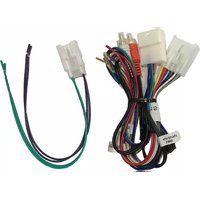
SWRFD-60E Harness
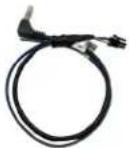
SWC Cable
INSTALLATION DIAGRAM:
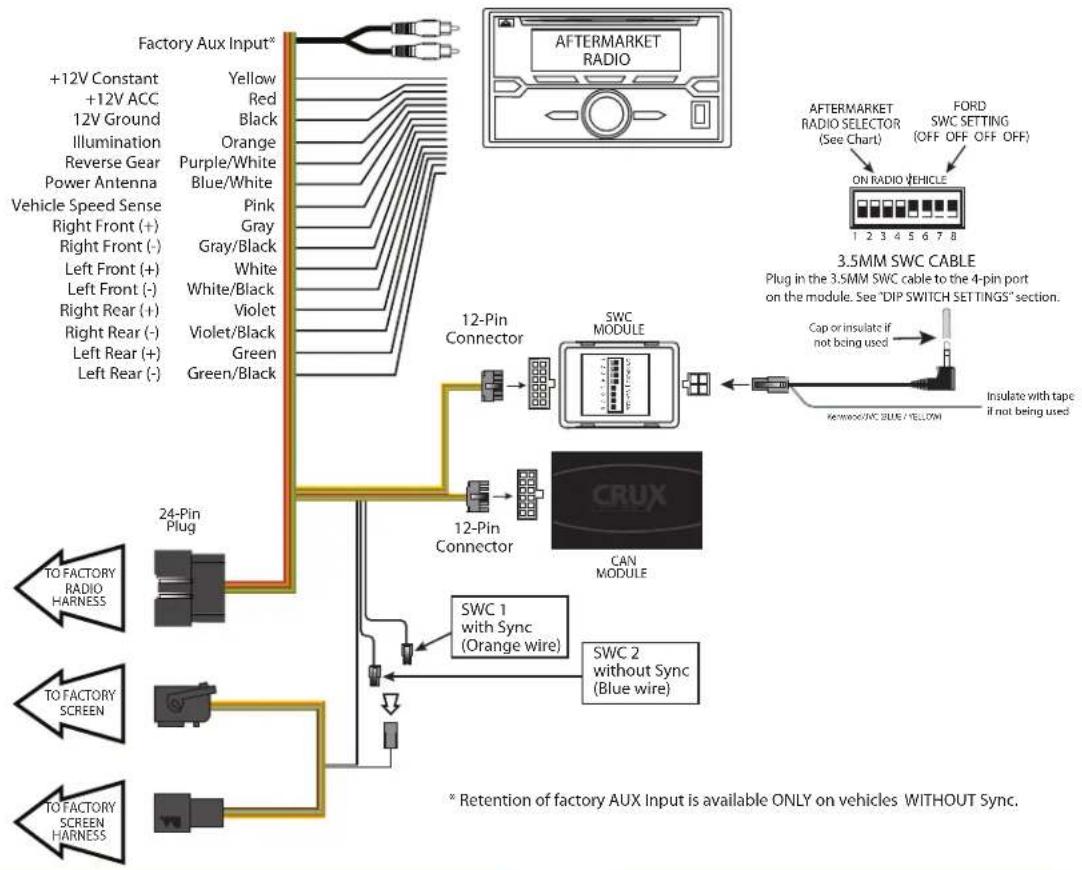
flowchart
graph TD
    A["Factory Aux Input"] --> B["+12V Constant"]
    A --> C["+12V ACC"]
    A --> D["12V Ground"]
    A --> E["Illumination"]
    A --> F["Reverse Gear"]
    A --> G["Power Antenna"]
    A --> H["Vehicle Speed Sense"]
    A --> I["Right Front (+)"]
    A --> J["Right Front (-)"]
    A --> K["Left Front (+)"]
    A --> L["Left Front (-)"]
    A --> M["Right Rear (+)"]
    A --> N["Right Rear (-)"]
    A --> O["Left Rear (+)"]
    A --> P["Left Rear (-)"]

    Q["24-Pin Plug"] --> R["TO FACTORY RADIO HARNESS"]
    S["TO FACTORY SCREEN"] --> T["TO FACTORY SCREEN HARNESS"]

    U["Yellow"] --> V["SWC 1 with Sync (Orange wire)"]
    W["Red"] --> X["SWC 2 without Sync (Blue wire)"]

    Y["Black"] --> Z["SWC 1 with Sync (Orange wire)"]
    AA["Orange"] --> AB["SWC 2 without Sync (Blue wire)"]

    AC["Purple/White"] --> AD["12-Pin Connector"]
    AE["Blue/White"] --> AF["12-Pin Connector"]
    AG["Pink"] --> AH["12-Pin Connector"]
    AI["Gray"] --> AJ["12-Pin Connector"]

    AK["Gray/Black"] --> AL["12-Pin Connector"]
    AM["White"] --> AN["12-Pin Connector"]

    AO["White/Black"] --> AP["12-Pin Connector"]

    AQ["Violet"] --> AR["12-Pin Connector"]

    AS["Violet/Black"] --> AT["12-Pin Connector"]

    AU["Green"] --> AV["12-Pin Connector"]

    AW["Green/Black"] --> AX["12-Pin Connector"]

    AY["Aftermarket RADIO"] --> AZ["FORD SWC SETTING OFF OFF OFF"]

    BA["3.5MM SWC CABLE"] --> BB["Plug in the 3.5MM SWC cable to the 4-pin port on the module. See "DIP SWITCH SETTINGS" section."]

    BC["AFTERMARKET RADIO SELECTOR (See Chart)"] --> BD["ON RADIO VEHICLE"]
    BE["FORD SWC SETTING OFF OFF OFF"] --> BF["Cap or insulate if not being used"]
    BG["CRUX"] --> BH["KIOSCUA BLUE YELLOW"]
    BI["Insulate with tape if not being used"] --> BJ["Insulate with tape if not being used"]

    BK["* Retention of factory AUX Input is available ONLY on vehicles WITHOUT Sync."]
NOTES:
- The factory AUX Input is retained ONLY on vehicles without Sync system.
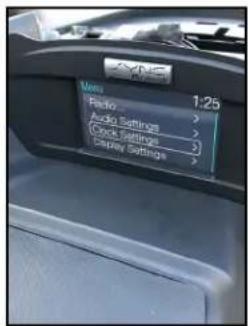
- The Date and Time display MUST BE adjusted prior to removal of the factory radio. You cannot make adjustments once the radio has been removed.
- The SWRFD-60E does not retain Sync features.
DIP SWITCH SETTINGS:
AFTERMARKET RADIO DIP SWITCH SETTINGS:

NOTE: For Atoto, Blaupunkt, Dual, Farenheit, Power Acoustik, Soundstream, and most off-brand radios, check the aftermarket radio's manual to see if the SWC buttons need to be programmed.
FORD STEERING WHEEL CONTROL DIP SWITCH SETTING:
| DIP: | 5 | 6 | 7 | 8 | |
| Ford | OFF | OFF | OFF | OFF |

3.5MM SWC CABLE
Plug in the 3.5MM to 4-Pin SWC cable to the SWC module. NOTE: Insulate the Blue/Yellow wire or 3.5mm plug if not being used.
For aftermarket radios that have wires for SWC connections, cut off the 3.5mm plug on the Crux SWC Cable and connect the SWC wires as follows:
Note that there are some radios that only have SWC1 and SWC2, in this case "shield" does not need to be connected.

RED to SWC Key 1 WHITE to SWC Key 2 SHIELD to SWC Ground
IMPORTANT INSTALLATION NOTES:
Plug the 12-pin Molex connector labeled "To CAN Module" to the CAN module
Plug the 12-pin Molex connector labeled "To SWC Module" to the smaller SWC Module
Failure to do so will damage the modules!

natural_image
Two electronic devices connected via wires, one with a labeled cable (no visible text or symbols)INSTALLATION INSTRUCTIONS:
IMPORTANT:
Set time and date before removing the factory radio. Go to Menu > Clock Settings > Set Time / Set Date.

Connect the SWRFD-60E T-harness to the aftermarket radio harness. Refer to the diagram on page 1 for wire color codes.

natural_image
Close-up of a car's hood with a hand adjusting the seat area (no visible text or symbols)- Carefully remove the top cover of the screen.

natural_image
Close-up of a hand holding a small electronic device on a car's front panel (no visible text or symbols)- Remove the rubber mat on top of the dashboard.

natural_image
Close-up of a car interior showing a screwdriver inserted into a component, with two yellow circles highlighting the ports (no text or symbols visible)- Remove the 2 screws under the rubber mat.
natural_image
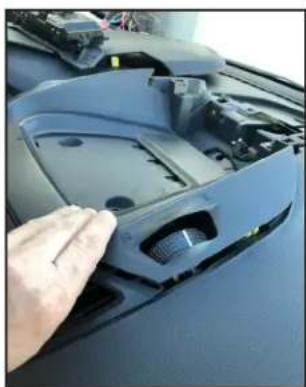
Close-up of a car hood with a hand adjusting the compartment, showing internal components and no visible text or symbols.- Pop up the top portion of the dashboard.
natural_image
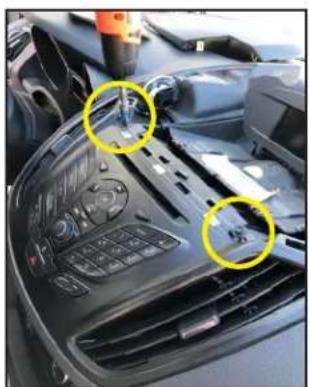
Close-up of a car dashboard with control panel and engine compartment, no visible text or symbols- Remove the 2 screws holding the radio faceplate.

natural_image
Close-up of hands installing or adjusting a mechanical component with a yellow circle highlighting a small component (no visible text or symbols)- Remove the radio faceplate and unplug the connector.

natural_image
Close-up of a car's engine compartment with yellow circles highlighting specific parts (no visible text or symbols)- Remove the 2 screws holding the headunit.

natural_image
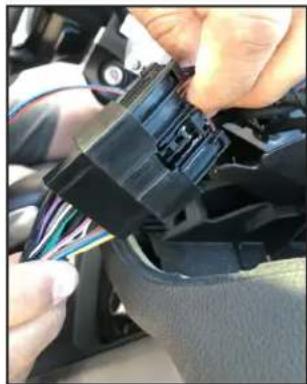
Close-up of hands installing a black plastic component into an electronic device casing (no visible text or symbols)- Unplug the headunit connectors. 9. Mate the headunit connectors to the SWRFD-60E T-harness connectors.
natural_image
Close-up of hands installing a black plastic connector into a car body (no visible text or symbols)
natural_image
Close-up of hands installing a black plastic component with a key inserted (no visible text or symbols)
natural_image
Close-up of hands installing or adjusting a car airbag component (no visible text or symbols)The 4" screen needs to be removed to plug in the SWRFD-60E factory screen retention harness. Unplug the factory 12 pin connector from behind the screen and plug it into the 12 pin male connector of the SWRFD-60E harness. Plug the 12 pin male connector of the SWRFD-60E harness to the screen.
OPERATION:
Bluetooth handsfree steering wheel controls:
natural_image
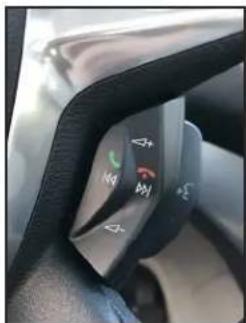
Close-up of a car seatbelt with directional control buttons (no readable text or symbols)For vehicles with Sync, long press of factory pick up and hang up buttons on SWC is retained.
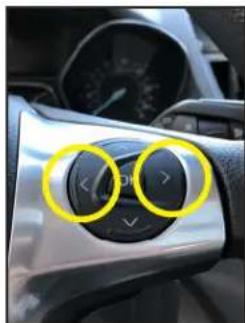
natural_image
Close-up of a car dashboard with two circular arrows pointing to the left and right panes (no text or symbols visible)For vehicles without Sync, long press of = pick up, long press of = hang up.
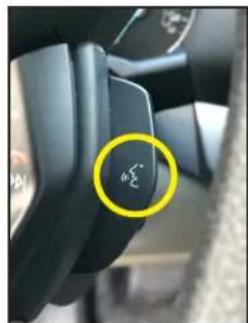
natural_image
Close-up of a car's head panel with a yellow circular indicator showing a speedometer symbol (no text or numbers visible)For vehicles with Sync, short press of CMD = Voice Command Activate / Deactivate
VEHICLE APPLICATIONS:
FORD
| 2011 - 2014 | Edge |
| 2013 - Up | Escape |
| 2011 - 2015 | Explorer |
| 2013 - 2014 | F-150 |
| 2014 - Up | Fiesta |
| 2012 - 2014 | Focus |
| 2015 - Up | Transit |
| 2014 - 2018 | Transit Connect |
SYSTEM COMPATIBILITY:
4" screen with or without MyFord Touch (Sync)

natural_image
Front view of a car dashboard with air filters and control panel (no visible text or symbols)2013 Escape 2015 Transit Connect
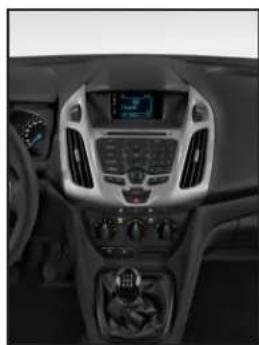
natural_image
Interior view of a car dashboard with steering wheel, dashboard panel, and control panels (no visible text or symbols)
natural_image
Interior view of a car dashboard with air conditioners and a central touchscreen (no visible text or symbols)2014 F-150 2014 Focus

natural_image
Interior view of a car dashboard with steering wheel, digital display, and control panel (no visible text or symbols)


Brand : CRUX
Model : SWRFD-60E
Category : Car kit