
CTO7100BKT - Oven BLACK & DECKER - Free user manual and instructions
Find the device manual for free CTO7100BKT BLACK & DECKER in PDF.


| Product Type | Toaster Oven |
| Brand | Black & Decker |
| Model | CTO7100BKT |
| Capacity | 25 liters |
| Power | 1500 W |
| Supply Voltage | 220-240 V / 50 Hz |
| Dimensions (W x D x H) | 44.5 x 33.0 x 30.0 cm |
| Weight | 5.9 kg |
| Material | Stainless steel and tempered glass |
| Cooking Functions | Grill, toast, conventional cooking, rotisserie (depending on model), keep warm |
| Temperature Setting | From 65 °C to 230 °C |
| Timer | Up to 60 minutes with auto shut-off |
| Interior Light | Yes |
| Controls | Mechanical knob for temperature, function and timer |
| Cleaning | Easy-to-clean non-stick interior |
| Safety | Auto shut-off at end of timer, cool-touch handle |
| Included Accessories | Metal rack, drip tray, rotisserie spit (depending on model) |
| Spare Parts | Available on manufacturer's website or authorized dealers |
| Repairability | Repairability index: 7.5/10 (subject to change) |
| Warranty | 2 years (excluding wear parts) |
Frequently Asked Questions - CTO7100BKT BLACK & DECKER
User questions about CTO7100BKT BLACK & DECKER
0 question about this device. Answer the ones you know or ask your own.
Ask a new question about this device
Download the instructions for your Oven in PDF format for free! Find your manual CTO7100BKT - BLACK & DECKER and take your electronic device back in hand. On this page are published all the documents necessary for the use of your device. CTO7100BKT by BLACK & DECKER.
USER MANUAL CTO7100BKT BLACK & DECKER
Please Read and Save this Use and Care Book
natural_image
Exterior view of a black and white electric cooktop oven with open lid and control buttons (no visible text or symbols)Register your product online at www.prodprotect.com/applica, for a chance to WIN \$100,000!
Accessories/Parts (USA/Canada)
1-800-738-0245
Model
Modelo
Modèle

CTO7100BKT
IMPORTANT SAFEGUARDS
When using electrical appliances, basic safety precautions should always be followed, including the following:
Read all instructions.
☐ Do not touch hot surfaces. Use handles or knobs.
☐ To protect against risk of electrical shock, do not immerse cord, plug, or any non-removable parts of this oven in water or other liquid.
☐ Close supervision is necessary when any appliance is used by or near children.
☐ Unplug from outlet when not in use and before cleaning. Allow to cool before putting on or taking off parts.
☐ Do not operate any appliance with a damaged cord or plug or after the appliance malfunctions or is dropped or damaged in any manner. Return the appliance to the nearest authorized service facility for examination, repair, or electrical or mechanical adjustment. Or, call the appropriate toll-free number listed on the cover of this manual.
☐ The use of accessory attachments not recommended by the appliance manufacturer may cause injuries.
☐ Do not use outdoors.
☐ Do not let cord hang over edge of table or counter, or touch hot surfaces.
☐ Do not place on or near a hot gas or electrical burner, or in a heated oven.
☐ Extreme caution must be used when moving an appliance containing hot oil or other hot liquid.
☐ To disconnect, turn any control to "off", then remove plug from wall outlet.
☐ Do not use appliance for other than intended use.
☐ Oversize foods or metal utensils must not be inserted in this appliance, as they may create a fire or risk of electric shock.
☐ A fire may occur if the toaster oven is covered or touching flammable material including curtains, draperies, walls and the like, when in operation. Do not store any item on top of unit when in operation.
☐ Do not clean with metal scouring pads. Pieces can break off the pad and touch electrical parts resulting in a risk of electric shock.
☐ Extreme caution should be used when using containers constructed of other than metal or glass.
☐ Do not store any material, other than manufacturer's recommended accessories, in this oven when not in use.
☐ Do not place any of the following materials in the oven: paper, cardboard, plastic wrap, and the like.
☐ Do not cover crumb tray or any parts of the oven with metal foil. This will cause overheating of the oven.
☐ To stop toasting, broiling or baking turn the controls to OFF.
☐ Use extreme caution when removing tray or disposing of hot grease.
SAVE THESE INSTRUCTIONS.
GROUNDED PLUG
As a safety feature, this product is equipped with a grounded plug, which will only lit into a three-prong outlet. Do not attempt to defeat this safety feature. Improper connection of the grounding conductor may result in the risk of electric shock. Consult a qualified electrician if you are in doubt as to whether the outlet is properly grounded.
ELECTRICAL CORD
a) A short power-supply cord is to be provided to reduce the risk resulting from becoming entangled in or tripping over a longer cord.
b) Longer extension cords are available and may be used if care is exercised in their use.
c) If an extension cord is used,
1) The marked electrical rating of the cord set or extension cord should be at least as great as the electrical rating of the appliance, and
2) The cord should be arranged so that it will not drape over the countertop or tabletop where it can be pulled on by children or tripped over unintentionally.
If the appliance is of the grounded type, the extension cord should be a grounding-type 3-wire cord.
TAMPER-RESISTANT SCREW
Warning: This appliance is equipped with a tamper-resistant screw to prevent removal of the outer cover. To reduce the risk of fire or electric shock, do not attempt to remove the outer cover. There are no user-serviceable parts inside. Repair should be done only by authorized service personnel.
Note: If the power supply cord is damaged, it should be replaced by qualified personnel or in Latin America by an authorized service center.
Product may vary slightly from what is illustrated.
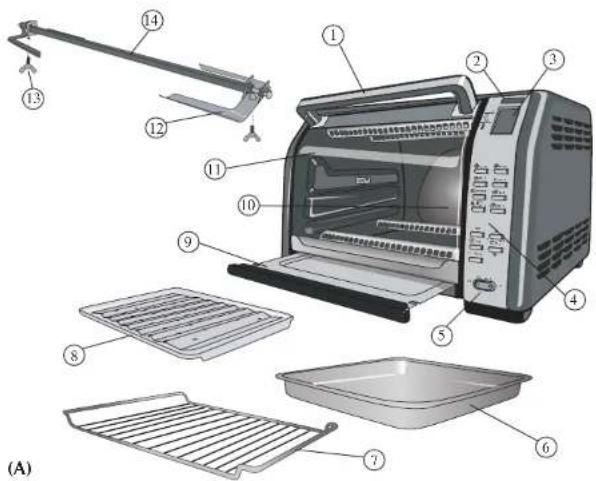
- Door handle
- On indicator light
- Digital display
- Electronic control panel (See B)
- Rotisserie On/Off switch
† 6. Bake/broil pan (Part # CTO7100-02)
† 7. Slide rack (Part # CTO7100-03)
† 8. Broil rack (Part # CTO7100-04)
† 9. Slide-out crumb tray (Part # CTO7100-01) - Extra-deep curved interior
- Curved glass door
- Forks (Part # CTO7100-07)
- Wing nuts (Part # CTO7100-06)
- Rotisserie spit (Part # CTO7100-05)
† Consumer replaceable/removable parts
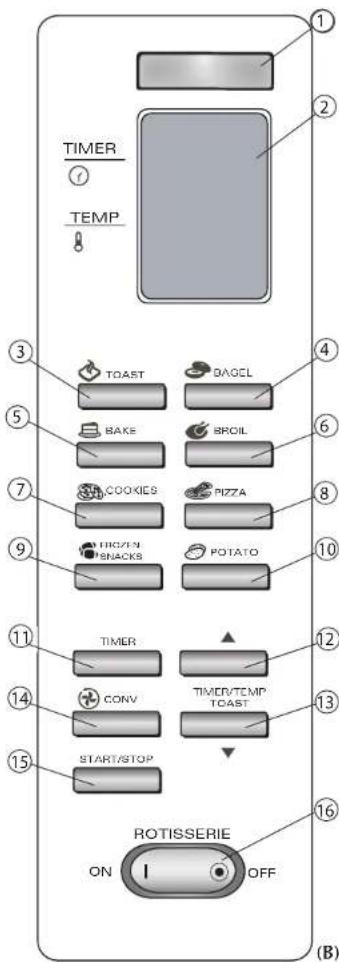
ELECTRONIC CONTROL PANEL FUNCTIONS (B)
- Indicates when a function is selected and then activated.
- Lets you monitor cooking time, temperature and toast/bagel shade levels.
- Sets toast shade level (1 - 7).
- Sets bagel shade level (1 - 7).
- Preheats and cooks to set temperature (350°F) and time (30 minutes) or you can adjust as desired.
- Broils at preset temperature (450 °F) and time (20 minutes) or you can adjust as desired. You do not need to preheat unit.
- Allows you to use preset cooking time (12 minutes) and temperature (350°F) or adjust as desired.
- Allows you to use preset cooking time (20 minutes) and temperature (400 °F) or adjust as desired.
- Allows you to use preset cooking time (6 minutes) and temperature (400 °F) or adjust as desired.
- Allows you to use preset cooking time (45 minutes) and temperature (400 °F) or adjust as desired.
- Sets desired cooking time up to 2 hours.
- Increases time, temperature and toast/bagel shade level.
- Decreases time, temperature and toast/bagel shade level.
- Turns on the internal fan to distribute heat evenly as it cooks. Works only with the Bake function. When using this function, lower the temperature 25 degrees.
- Press Start to activate all functions. Press Stop to end all functions; the On indicator light goes out.
- Use the Rotisserie function for roasting chicken, beef, pork and lamb roast.
How to Use
This product is for household use only.
GETTING STARTED
- Remove all packing material and any stickers; peel off clear protective film from control panel.
- Wash all removable parts as instructed in Care and Cleaning section of this manual.
- Select a location where this unit is to be used allowing enough space for back of the unit and the wall to allow heat to flow without damage to cabinets and walls.
- Insert crumb tray below lower heating elements.
- Remove tie from cord and unwind.
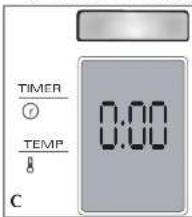
- Plug unit into electrical outlet. The digital display shows 0:00 (C).
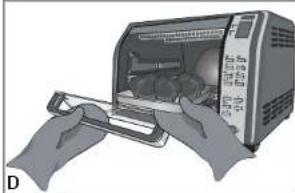
- This oven gets hot. When in use, always use oven mitts or potholders when touching any outer or inner surface of the oven (D).
NOTE: Before first use, run this oven empty for 15 minutes to remove/burn off any possible residues from manufacturing. You may notice some slight smoke and odor escaping from the oven. This is normal and will disappear with use of oven.
natural_image
Illustration of hands operating a toaster oven with a tray (no text or symbols visible)HELPFUL INFORMATION ABOUT YOUR OVEN
- There is a 5 second delay allowed between selecting functions and setting temperature and time. If not done within this time the oven reverts to 0:00 and selections must be made again.
- You can change the temperature from ^ to
°C by pressing the Timer (▲) and (▼) button at the same time.
- Once the selected temperature has been reached both the time and temperature can be changed at anytime during the cooking.
- When using convection it is not necessary to change the temperature from that suggested by the package or the recipe. However, the baking time may be shorter; check foods frequently during baking to check for doneness.
- When using the rotisserie it is suggested that foods be placed into a cold oven.
- The oven is preset for temperature and time for medium toast (4 setting). Use this for your first cycle then adjust lighter or darker to suite your taste.
- What is convection? Convection uses an internal fan that provides continuous circulation of hot air around the cooking food; the food is more evenly cooked and in some cases, is cooked faster.
SLIDE RACK POSITIONS
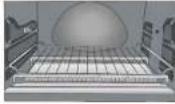
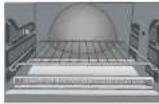
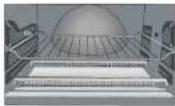
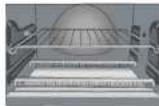
There are 4 possible positions for the slide racks. There is an upper and a lower slot; the rack can also be inverted for 2 additional positions (E).
Position
Use lower slots along oven walls. Insert rack using a rack-down position.
Position 2
Use lower slots along oven walls. Insert rack using a rack-up position.
Position 3
Use upper slots along oven walls. Insert rack using a rack-down position.
Position 4
Use upper slots along oven walls. Insert rack using a rack-up position.
E
TO BEGIN COOKING
To start cooking a series of buttons must be pressed (F).
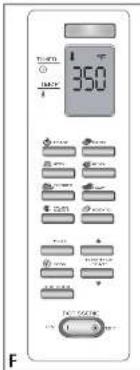
- Select type of food to be cooked: a digital display will show apreset temperature. On indicator light blinks YOU HAVE 5 SECONDS TO PROCEED.
- To change press (▲) or (▼).
NOTE:
- Tap button for temperature to change in 5 degree increments
- Press and hold to change in 25 degree increments
• The minimum temperature is 200^ F.
• The maximum temperature is 450°F
• To select preset temperature, press TIMER button YOU HAVE 5 SECONDS TO PROCEED. - Select time: a digital display will show a preset time. To change press (▲) or (▼).
NOTE:
- Tap button for time to change in 1 minute increments
- Press and hold to change in 10 minute increments
• The minimum time is 1 minute
• The maximum time is 2 hours - Press START/STOP button
• To select preset time press START/STOP button
-
Press CONVECTION if using BAKE mode and would like to use convection.
-
The oven starts pre-heating and will display the rising temperature beginning with "Lo" until the selected temperature is reached. The oven will beep.
-
The display will alternate between temperature and time as the clock runs down. The time will count down in 1 minute increments until the last minute when it will count down the seconds.
-
At end of cooking cycle oven turns off and there are 3 beeps.
- Time and temperature can be changed once the selected temperature has been reached.
- End the cooking cycle at any time by pressing the Start/Stop button.
- Convection can be turned on or off at any time.
NOTE: Keep oven unplugged when not in use.
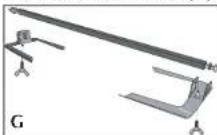
ROTISSERIE COOKING (G):
-
Insert pointed end of spit through one of the forks with pointed ends of fork facing toward the center of the spit. Slide the fork toward the square end of the spit and tighten the wing nut.
-
Insert spit through center of food to be cooked until fork is securely embedded in food.
TIP: For versatility, rotisserie spit forks are designed to bend slightly to accommodate various food shapes and sizes. Avoid excessive bending of spit forks as they may get
natural_image
Mechanical assembly diagram showing a cylindrical component with attached rod and housing (no text or symbols)damaged.
-
Slide second fork onto pointed end of spit with pointed ends facing the food. Continue until forks are securely imbedded into the food. Tighten the wing nut.
-
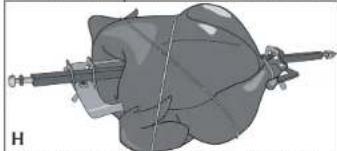
Check that food is centered on spit by
placing pointed end of spit into the drive socket on the right oven wall. Rest the square end of the spit in the support on the left oven wall. Press rotisserie button and allow food to make one full rotation to be certain food is evenly centered and does not touch the top heating elements or the bake/broil pan when rotating (H).
- Insert slide rack into position "1". Line bake/broil pan with foil and place on rack to catch drippings.
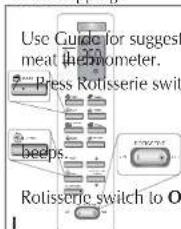
- Follow directions "To Begin Cooking", steps 1-4, page 6. Read roast times. Check doneness with
h (1).
-
For best results, baste food last 30 minutes of cooking.
-
At end of cooking cycle oven turns off and there are 3
-
The rotisserie must be turned off manually by pressing the
-
To remove food, using pot holders or oven mitts, lift left to and out. Pull spit out of drive
socket and carefully remove food from oven and place on heatproof platter.
- Tent food with foil and let rest 10 minutes. Unscrew wing nuts and remove fork from pointed end of spit. Using long kitchen fork as guide, remove the food from the spit and remove second fork.
ROTISSERIE COOKING GUIDE
| FOOD | MAXIMUM WEIGHT TO BE COOKED | COOKING TEMPERATURE | APPROXIMATE COOKING TIME | INTERNAL TEMPERATURE |
| Chicken 3 | 1⁄2 lbs. 350 | F 1 ° | 1⁄2 hours | 180°F |
| Eye Round Roast | 3 to 5 lbs. | 325°F | 1 1⁄2 to 2 hours | 160°F |
| FOOD | MAXIMUM WEIGHT TO BE COOKED | COOKING TEMPERATURE | APPROXIMATE COOKING TIME | INTERNAL TEMPERATURE |
| Round Roast | 3 to 5 lbs. | 325^ | 112 to 2 hours | 160^ for medium |
| Pork Loin with or without bone | 212 to 4 lbs. | 325^ | 112 to 2 hours | 160^ |
| Baby Back Spare Ribs | 2 to 3 lbs. | 325^ | 112 to 2 hours | 160^ |
Quick tips for rotisserie cooking:
- Recommended MAXIMUM size of foods cooked on the rotisserie: 3½ lb chicken, 4 lb roast.
• Use kitchen twine to truss chicken wings and legs to the chicken. - Tying roasts such as beef and pork at 1 12 -inch intervals and wrapping the twine around the length gives a neat compact shape to roasts done on the rotisserie.
- Begin with a cold oven.
- Once spit is in place check that food is centered by letting the rotisserie make one full turn before cooking begins.
BAKE FUNCTION
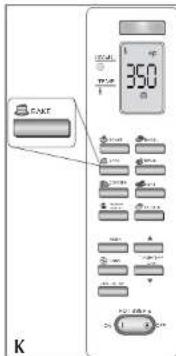
Preset temperature: 350°F
Preset Time: 30 minutes
Rack position: "2" lower slot; rack up
This function is ideal for baking casseroles, fresh or frozen pies and roasting meats and poultry.
- Place rack in lower slot with rack up.
- Press Bake button (K).
- On indicator light blinks, YOU HAVE 5 SECONDS TO PROCEED.
- Preset temperature flashes on digital display. To change temperature press (▲) or (▼).
- Press Timer button, YOU HAVE 5 SECONDS TO PROCEED.
- Preset time flashes on digital display. To change time press (▲) or (▼).
- Press Start/Stop button to begin cooking.
- Oven begins preheating; in about 5 minutes the selected
temperature will show on the digital display and begin alternating between temperature and cook time remaining.
NOTE: This is the only function that allows cooking using convection.
| FOOD | WEIGHT | COOKING TEMPERATURE | APPROXIMATE COOKING TIME | INTERNAL TEMPERATURE |
| Chicken 3 | 12 lbs. 350 F 1 | 12 hours 180 F | ° | |
| Casserole | 1 to 2 quarts 350 F 45 to 60 minutes 165 F | ° | ||
| Standing Rib Roast | 4 to 5 lbs. | 450°F for 15 minutes then 325°F | 2 to 2 12 hours | 160°F for medium |
| Eye Round Roast | 4 to 5 lbs. 325 F 2 to 2° | 12 hours | 160°F for medium | |
| Leg of Lamb | 4 to 5 12 lbs. 325 F 2 to 2° | 12 hours 135 F | ° | |
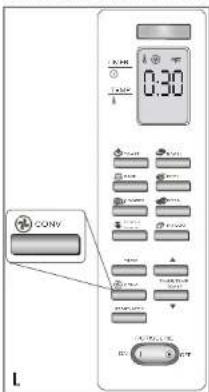
CONVECTION FUNCTION (L)
This function uses an internal fan to distribute the heat evenly.
The Convection button can be selected anytime once the Bake function has been selected. The fan symbol is visible on the digital display.
NOTE: Some foods will bake faster than expected; watch coking time.
SPECIAL FOOD FUNCTIONS
These functions have pre-selected temperatures and cooking times based on the most popular foods in these categories.
You can change the cooking temperature and time in each category as desired.
To use convection to bake these foods use the Bake function changing temperature and time as desired.
- Press button for desired food (see below).
- On indicator light blinks, YOU HAVE 5 SECONDS TO PROCEED.
- Preset temperature flashes on digital display. To change temperature press (▲) or (▼).
- Press Timer button, YOU HAVE 5 SECONDS TO PROCEED.
-
Preset time flashes on digital display. To change time press (▲) or (▼).
-
Press Start/Stop button to begin preheating of oven.
- Oven beeps when set temperature is reached; insert food.
- Close oven door.
- At end of cooking cycle, unit beeps and oven turns off.
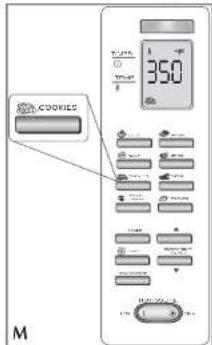
COOKIES: (M)
Preset temperature: 350°F
Preset Time: 12 minutes
Rack position: "2" lower slot, rack up or "3" upper slot, rack down (refer to illustration page 6)
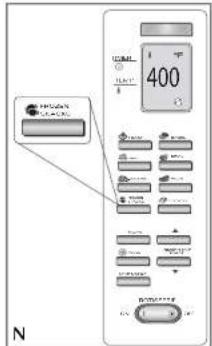
FROZEN SNACKS: (N)
Preset temperature: 400°F
Preset Time: 6 minutes
Rack position: "2" lower slot, rack up or "3" upper slot, rack down (refer to illustration page 6)
PIZZA: (P)
Preset temperature: 400°F
Preset Time: 20 minutes
Rack position: "2" lower slot, rack up (refer to illustration page 6)
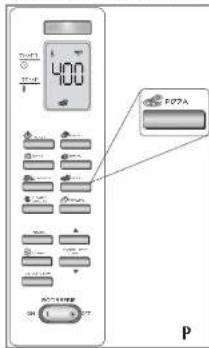
For crisp crust bake pizza directly on oven rack. For softer crust place pizza on double layer of heavy duty foil. For even browning, turn pizza quarter turn half way through baking.
POTATO: (Q)
Preset temperature: 400°F
Preset Time: 45 minutes
Rack position: "2" lower slot, rack up (refer to illustration page 6)
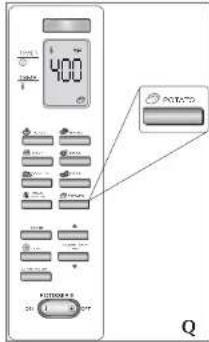
BROIL FUNCTION (R)
Preset temperature: 450°F
Preset Time: 20 minutes
Rack position: "3" upper slot, rack down or "4" upper slot, rack up
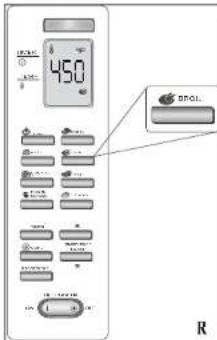
(refer to illustration page 6)
- Press Broil button.
- On indicator light blinks, YOU HAVE 5 SECONDS TO PROCEED.
- Preset temperature flashes on digital display. To change temperature press (▲) or (▼).
- Press Timer button, YOU HAVE 5 SECONDS TO PROCEED.
- Preset time flashes on digital display. To change time press (▲) or (▼).
- Press Start/Stop button to begin preheating of oven.
- Oven beeps when set temperature is reached.
- Place food on broil rack inserted into bake/broil pan. Insert into oven.
-
Allow at least 2-inches between top of food and top heating elements.
-
Close oven door.
- At end of cooking cycle, unit beeps and oven turns off.
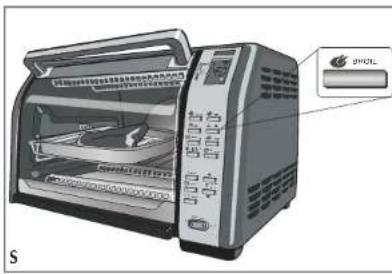
BROILING TIPS (S)
- Placing food on broiler rack allows the drippings to flow into the bake/broil pan and helps to eliminate or prevent smoking from the broiler.
• For best results, thaw frozen meat, poultry and fish before broiling. -
If frozen steaks and chops are broiled allow 1 12 to 2 times the broiling time as required for fresh.
-
Trim excess fat from meat and score edges to prevent curling.
- Brush foods to be broiled with sauce or oil and season as desired before broiling.
- Fish fillets and steaks are delicate and should be broiled on bake/broil pan without the broil rack.
- There is no need to turn fish fillets during broiling. Carefully turn thick fish steaks midway through broiling cycle.
- If broiler "pops" during broiling, reduce the temperature or lower the food in the oven.
- Wash broiler pan and clean inside of oven after each use with non-abrasive cleaner and hot water. Too much grease accumulation will cause smoking.
TOASTING BREAD AND BAGELS (T)
Preset: 4 Medium
Rack position: "2" lower slot; rack up (refer to illustration page 6)
The oven is preset for temperature and time for medium toast (4 setting). Use this for your first cycle then adjust lighter or darker to suite your taste.
NOTE: The BAGEL function toasts the cut side and gently warms the outside.
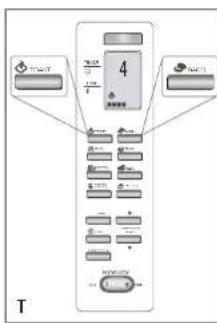
- Preheating is not necessary.
- Place up to 6 slices of bread or 6 bagels halves (cut side up) on slide rack.
- Close oven door.
- Press Toast or BAGEL button.
- The On indicator light blinks and the digital display shows "4" flashing, YOU HAVE 5 SECONDS TO PROCEED.
- To change the shade level press (▲) or (▼).
- Press Start/Stop button to begin toasting.
- At end of toasting cycle the appliance beeps and the oven turns off.
NOTE: For your convenience, the oven is designed to remember the last selected shade level, unless unplugged.
RECIPES
ASIAN GLAZED ROTISSERIE CHICKEN
3½ lb. roasting chicken
Olive oil
Salt and pepper
14 cup pineapple, apricot preserves
1/4 cup finely chopped green onions
1 tbsp. gated fresh ginger
2 large cloves garlic, minced
2 tbsp. toasted sesame seeds
2 tbsp. low sodium soy sauce
1 tbsp. rice vinegar
Position one set of rotisserie forks at end opposite point on the spit and secure by tightening the wing nut. Insert the spit through the chicken so that the forks are securely inserted into the meat. Place the second rotisserie forks onto the spit and secure it into the chicken. Make certain the chicken is centered on the spit and well balanced. Using kitchen twine, secure the chicken so that the wings and legs are securely tied to the body of the chicken. Rub the chicken with olive oil and season with salt and pepper.
Insert the pointed end of the spit into the right side of the oven and place the left side into the spit support. Place the rack in the lower rack position with the rack down. Place the broiler/bake pan on the rack centering it below the chicken.
Press the Bake button, the oven is preset to bake at 350°F. Set the time for 1½ hours. Turn on the Rotisserie and Convection.
Meanwhile, combine the remaining ingredients in small saucepan and bring to a boil; reduce heat and simmer 5 minutes. Baste chicken several times during last 30 minutes of cooking. Test chicken for doneness by inserting a meat thermometer into the breast which should register 180^ , or pierce breast with fork and see that juices run clear.
Allow chicken to stand 10 minutes before serving. Serve with remaining sauce. Makes 4 to 6 servings.
8 ounces elbow macaroni
1 ½ tsp. salt
1 can (14½ oz.) petite diced tomatoes with jalapeños
½ cup sliced green onions
1 large clove garlic, minced
2 tbsp, butter or margarine
2 tbsp. flour
1½ cups milk
2 cups shredded Cheddar cheese
1 cup shredded Mexican blend cheese
1 can (4½ oz.) chopped green chilies
½ tsp. chili powder
1 cup crushed nacho cheese flavored corn chips
In large saucepan cook macaroni in boiling water flavored with salt for 5 minutes. Drain and keep warm. Drain tomatoes, reserving liquid. Add milk to reserved liquid to make 2 cups.
Place rack in position "2". Preheat oven on Bake and Convection at 350°F. In saucepan, cook green onion and garlic in butter until softened. Add flour and cook stirring until bubbly. Gradually add milk mixture and cook, stirring, until thickened and smooth. Remove from heat and stir in Cheddar cheese and ½ cup Mexican cheeses. Stir in macaroni, reserved tomatoes, chilies and chili powder. Spoon into 2-quart baking dish. Top with remaining ½ cup Mexican cheeses and sprinkle corn chips evenly around edge of casserole. Cook for 25 minutes or until golden and bubbly.
Remove from oven and let stand 5 minutes before serving.
Makes 6 to 8 servings.
HAM AND NOODLE SPINACH BAKE
8 ounces wide egg noodles, cooked and drained
1 ½ cups diced cooked ham
1 package (16 oz.) frozen spinach, defrosted and squeezed dry
1 can (4.5 oz.) chopped green chilies
¼ cup sliced green onions
1 cup cottage cheese
1 cup light sour cream
1 tbsp. Worcestershire sauce
12 tsp. salt
4 thick slices fresh tomato
1 cup shredded Monterey Jack cheese
Place rack in position "2". Preheat oven on Bake and Convection at 350°F.
In large bowl, combine all ingredients, except tomato slices and Jack cheese. Spoon into shallow 2-quart baking dish. Cover and bake for 45 minutes. Uncover, place tomatoes on top and sprinkle with shredded cheese. Bake 15 minutes longer until mixture is bubbly and cheese is beginning to brown.
Remove from oven and let stand 5 minutes before serving.
Makes 6 to 8 servings.
MEDITTERANEAN ZUCCHINI BAKE
6 cups thinly sliced zucchini
1 cup chopped onion
1 large red pepper, chopped
3 large cloves garlic, minced
2 tbsp. olive oil
1 tbsp, chopped fresh oregano or 1 tsp, dried
2 eggs, slightly beaten
12 tsp. salt
¼ tsp. black pepper
1 cup shredded Monterey Jack cheese
½ cup crumbled feta cheese
V_3 cup chopped Italian parsley
2 tbsp. fresh lemon juice
2 tbsp. grated Parmesan cheese
In large skillet, sauté zucchini, onion, red pepper and garlic in olive oil over medium heat until just softened, stirring often. Place rack in position "2". Preheat oven on Bake and Convection at 350°F.
Meanwhile, in large bowl, combine egg, salt and pepper. Stir in zucchini mixture and remaining ingredients, except Parmesan cheese. Spoon into 2-quart shallow baking dish. Top with Parmesan cheese. Bake for 25 minutes or until golden and bubbly.
Remove from oven and let stand 5 minutes before serving.
Makes 6 to 8 servings.
½ lb. fresh mushrooms, sliced
12 cup sliced green onion
2 large cloves garlic, minced
2 tbsp. butter or margarine
1 cup brown rice
^3/4 cup coarsely chopped cashews
14 cup chopped Italian parsley
1 tbsp. chopped fresh thyme leaves
½ tsp. salt
14 tsp, black pepper
2 cups chicken broth or stock
Pour boiling water over dried mushrooms in small bowl; let stand 15 minutes. Remove and chop mushrooms, reserving liquid. Place rack in position "2". Preheat oven on Bake and Convection at 400°F.
In large skillet, brown fresh mushrooms in butter. Add green onion and garlic and cook over medium heat until onions are just softened, stirring often. In large bowl, combine all ingredients, stir to blend. Spoon into 2-quart baking dish. Cover with aluminum foil and bake for 1 12 hours or until liquid is absorbed and rice is fully cooked.
Remove from oven and let stand 5 minutes before serving. Just before serving, stir to blend. Sprinkle with additional chopped parsley, if desired. Makes 6 to 8 servings.
ROTISSERIE PORK LOIN WITH APRICOT MARMALADE
2½ lb. boneless pork loin
1 tsp. grated ginger
1 tsp. salt
14 tsp. ground allspice
14 tsp. ground cloves
¼ tsp. black pepper
MARMALADE:
2 tbsp. butter or margarine
2 large onions cut in strips (about 4 cups)
1 cup chopped dried apricots
1 tbsp. sugar
1 tbsp. grated ginger
1 tbsp. grated orange peel
12 tsp. salt
Position one set of rotisserie forks at end opposite point on the spit and secure by tightening the wing nut. Insert the spit through the pork loin so that the forks are securely inserted into the meat. Place the second rotisserie forks onto the spit and secure it into the meat. Make certain the meat is centered on the spit and well balanced. Using kitchen cord, secure the pork. Combine ginger, salt, allspice, cloves and pepper in a small bowl. Rub evenly over pork. Insert the pointed end of the spit into the right side of the oven and place the left side into the spit support. Place the rack in the lower rack position with the rack down. Place the broiler/bake pan on the rack centering it below the pork.
Press the Bake button, the oven is preset to bake at 350° F. Set the time for 1½ hours. Turn the Rotisserie and Convection on.
Meanwhile, cook onions in butter until softened. Add remaining marmalade ingredients and bring to a boil; reduce heat and simmer mixture 15 minutes or until mixture is thickened and almost all liquid evaporates. Keep warm. Allow pork to stand 5 minutes before serving. Serve with marmalade. Makes 4 to 6 servings.
SUNDAY DINNER BEEF ROAST
4 lb. eye round roast
1 tsp. herbs de Provence
1 tsp. garlic pepper
1 tsp, salt
8 small red bliss potatoes
8 oz. small white onions, peeled
8 oz. small whole carrots
1 tbsp. olive oil
Preheat oven on Bake and Convection at 325°F. Season roast with herbs, garlic, pepper and salt. Place on bake/broil pan. Place rack in position "1". Bake for 1 hour.
Toss vegetables with olive oil. Arrange potatoes and onions around roast and bake 1 hour longer. Add carrots and bake 30 minutes longer or until beef and vegetables test done. Remove from oven. Tent food with aluminum foil and let rest 10 minutes before serving. Makes about 8 servings.
Care and Cleaning
This product contains no user serviceable parts. Refer service to qualified service personnel.
-
Turn off unit, unplug from wall outlet and let it cool before cleaning.
-
Clean the glass door with a nylon pad and sudsy water. Do not use a spray glass cleaner.
-
To remove slide rack, open the door, pull the rack forward and out. Wash in warm, sudsy water or in a dishwasher. To remove stubborn spots, use a polyester or nylon pad. To replace the slide rack, open the door completely and slide into the rail and close the door.
-
Wash the bake pan, broil rack, rotisserie spit and forks in warm, sudsy water or in the dishwasher. To minimize scratching, use a polyester or nylon pad.
-
To remove the crumb tray, grasp the handle at the front of the oven and pull it out. Dispose of crumbs and wash the tray in warm, sudsy water. Remove stub born spots with a nylon mesh pad. Be sure to dry thoroughly before inserting the tray back into the oven.
Exterior Surfaces
Let the oven cool completely before cleaning any outer surface. Wipe with a damp cloth or sponge and dry with paper towel or soft cloth.
Cooking Containers
- Metal, ovenproof glass or ceramic bake ware without glass lids can be used in your oven. Follow manufacturer's instructions.
- Be sure the top edge of the container is at least 2" away from the upper heating elements.
natural_image
Illustration of hands operating a microwave oven with a tray (no text or symbols visible)natural_image
Illustration of a modern toaster oven with a digital display and control panel (no text or symbols visible)natural_image
Illustration of hands operating a toaster oven with a tray (no text or symbols visible)RENSEIGNEMENTS UTILES À PROPOS DU FOUR
natural_image
Mechanical component diagram showing a cylindrical assembly with attached shafts and housing (no text or symbols)natural_image
Illustration of a modern microwave oven with a digital display and control panel (no text or symbols visible)For service, repair or any questions regarding your appliance, call the appropriate "800" number on the cover of this book. Do not return the product to the place of purchase. Do not mail the product back to the manufacturer nor bring it to a service center. You may also want to consult the website listed on the cover of this manual.
One-Year Limited Warranty
(Applies only in the United States and Canada)
What does it cover?
- Any defect in material or workmanship; provided; however, Applica's liability will not exceed the purchase price of the product.
For how long?
• One year after the date of original purchase.
What will we do to help you?
- Provide you with a reasonably similar replacement product that is either new or factory refurbished.
How do you get service?
- Save your receipt as proof of the date of sale.
- Check our on-line service site at www.prodprotect.com/applica, or call our toll-free number, 1-800-231-9786, for general warranty service.
- If you need parts or accessories, please call 1-800-738-0245.
What does your warranty not cover?
• Damage from commercial use
• Damage from misuse, abuse or neglect
• Products that have been modified in any way
- Products used or serviced outside the country of purchase
- Glass parts and other accessory items that are packed with the unit
- Shipping and handling costs associated with the replacement of the unit
- Consequential or incidental damages (Please note, however, that some states do not allow the exclusion or limitation of consequential or incidental damages, so this limitation may not apply to you.)
How does state law relate to this warranty?
- This warranty gives you specific legal rights, and you may also have other rights that vary from state to state or province to province.
¡NECESITA AYUDA?
San Jose, Costa Rica
Tel.: (506) 257-5716
223-0136
Ecuador
Castelcorp
Km 2-1/2 Avenida Juan T.
Edil, Lishoa Local #21
San Salvador, El Salvador
Tel.: (503) 274-1179
2/4 02/9
Guatemala
MacPartes, S.A.
Guatemala City, Guatemala
Tel.: (502) 331-5020
360-0521
Honduras
Lady Lee
Centro Comercial Mega Plaza
Carretera a la Lima
San Pedro Sula, Honduras
Tel.: (504) 553-1612
México
Authorized Service Center
Electrodomésticos, S.A
33 Independence Square,
Port of Spain
Trinidad, W.I
Tel.: (868) 623-4696
Venezuela
Col. Centro, Mexico D. F., CP 06050
Copyright © 2007 Applica Consumer Products, Inc.
Made in People's Republic of China
Printed in People's Republic of China
Importado por:
- IMPORTANT SAFEGUARDS
- SAVE THESE INSTRUCTIONS.
- GROUNDED PLUG
- ELECTRICAL CORD
- TAMPER-RESISTANT SCREW
- ELECTRONIC CONTROL PANEL FUNCTIONS (B)
- How to Use
- GETTING STARTED
- HELPFUL INFORMATION ABOUT YOUR OVEN
- SLIDE RACK POSITIONS
- Position
- Position 2
- Position 3
- Position 4
- TO BEGIN COOKING
- NOTE:
- ROTISSERIE COOKING (G):
- Quick tips for rotisserie cooking:
- BAKE FUNCTION
- CONVECTION FUNCTION (L)
- SPECIAL FOOD FUNCTIONS
- COOKIES: (M)
- FROZEN SNACKS: (N)
- PIZZA: (P)
- POTATO: (Q)
- BROIL FUNCTION (R)
- BROILING TIPS (S)
- TOASTING BREAD AND BAGELS (T)
- Preset: 4 Medium
- RECIPES
- ASIAN GLAZED ROTISSERIE CHICKEN
- HAM AND NOODLE SPINACH BAKE
- MEDITTERANEAN ZUCCHINI BAKE
- ROTISSERIE PORK LOIN WITH APRICOT MARMALADE
- SUNDAY DINNER BEEF ROAST
- Care and Cleaning
- Exterior Surfaces
- Cooking Containers
- RENSEIGNEMENTS UTILES À PROPOS DU FOUR
- One-Year Limited Warranty
- (Applies only in the United States and Canada)
- What does it cover?
- For how long?
- What will we do to help you?
- How do you get service?
- What does your warranty not cover?
- How does state law relate to this warranty?
- ¡NECESITA AYUDA?
- Ecuador
- Guatemala
- Honduras
- México
- Venezuela
Brand : BLACK & DECKER
Model : CTO7100BKT
Category : Oven