
DO265HD - Humidifier DOMO - Free user manual and instructions
Find the device manual for free DO265HD DOMO in PDF.


| Product Type | Ultrasonic Humidifier |
| Brand | DOMO |
| Model | DO265HD |
| Power Supply | 220-240 V ~ 50/60 Hz |
| Power | 30 W (cold diffusion) / 200 W (hot diffusion) |
| Tank Capacity | 1.2 L |
| Runtime | Up to 10 hours (depending on mode) |
| Diffusion Modes | Lo (low), Mi (medium), Hi (high) |
| Timer | 2 h, 4 h, 6 h |
| Hot Mist | Yes, automatically activates Hi power |
| Ambient LED Lighting | Yes |
| Essential Oil Compartment | Yes, with aromatic pad |
| Filter | Yes, cleanable, replacement recommended every 6 months |
| Warranty | 2 years |
| Cleaning | Tank with clear water; vinegar for limescale; do not immerse |
| Safety | Automatic shut-off if tank empty; flashing light |
| Dimensions (approx.) | 200 x 200 x 300 mm |
| Weight (approx.) | 1.5 kg |
Frequently Asked Questions - DO265HD DOMO
User questions about DO265HD DOMO
0 question about this device. Answer the ones you know or ask your own.
Ask a new question about this device
Download the instructions for your Humidifier in PDF format for free! Find your manual DO265HD - DOMO and take your electronic device back in hand. On this page are published all the documents necessary for the use of your device. DO265HD by DOMO.
USER MANUAL DO265HD DOMO
natural_image
Close-up of a purple and white electronic device with no visible text or symbols on its body.DO265HD
| Handleiding Ultrasone luchtbevochtiger |
| Mode d'emploi Humidificateur d'air à ultrasons |
| Gebrauchsanleitung Ultraschall-Luftbefeuchter |
| Instruction booklet Ultrasonic air humidifier |
| Manual de instrucciones Humidificador de aire ultrasónico |
| Istruzioni per l'uso Umidificatore ad ultrasuoni |
| Návod k použití Ultrazvukový zvlhčovač vzduchu |
| Návod na použitie Ultrazvukový zvlhčovač vzduchu |

natural_image
Two symbolic icons: a warning triangle with an exclamation mark and an open book (no text or labels)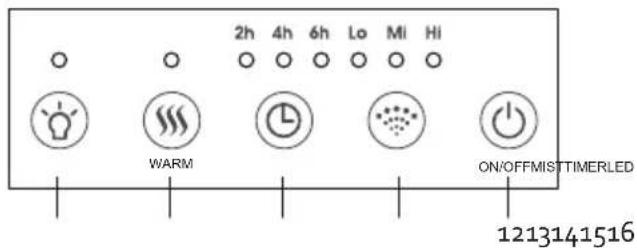
GEBRUIK
WATERRESERVOIR VULLEN
natural_image
Line drawing of a bowl with chopsticks and a spoon, no text or symbols present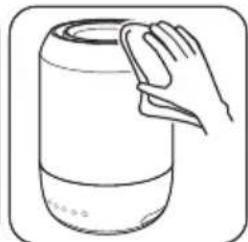
natural_image
Line drawing of a hand holding a cylindrical container (no text or symbols)FILTER
MOGELIJKE PROBLEMEN
natural_image
Recycling symbol with three chasing arrows forming a triangle (no text or labels)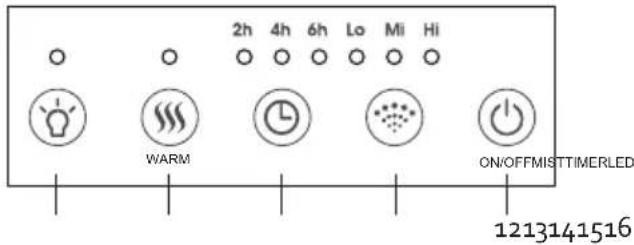
UTILISATION
REMLISSEZ LE RESERVOIR D'EAU
natural_image
Line drawing of a kitchen appliance with a spoon and lid (no text or symbols)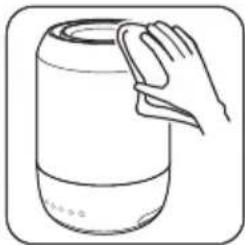
natural_image
Line drawing of a hand holding a cylindrical container (no text or symbols)FILTRE
natural_image
Technical line drawing of a mechanical device with internal components and a small inset view (no text or symbols)PROBLEMES POSSIBLES
natural_image
Recycling symbol with three chasing arrows forming a triangle (no text or labels)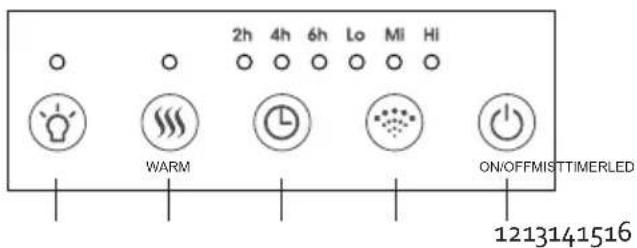
GEBRAUCH
WASSERTANK FÜLLEN
natural_image
Illustration of a hand holding a tool with a curved handle and arrow indicating motion (no text or symbols)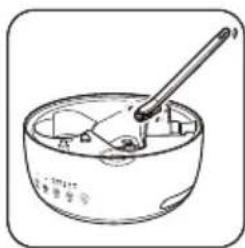
natural_image
Line drawing of a cooking pot with a stirring rod and lid (no text or symbols)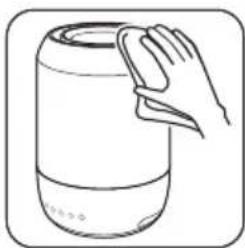
natural_image
Line drawing of a hand holding a cylindrical container (no text or symbols)FILTER
MÖGLICHE PROBLEME
natural_image
Recycling symbol with three chasing arrows forming a triangle (no text or labels)All of our products are always submitted to a strict quality control before they are sold to you.
Should you nevertheless experience problems with your device, we sincerely regret this. In that case, we kindly request you to contact our customer service.
Our staff will gladly assist you.

+32 14 21 71 91

info@linea2000.be
Monday – Thursday: 8.30 – 12.00 and 13.00 – 17.00
Friday: 8.30 - 12.00 and 13.00 - 16.30
This appliance has a two year warranty period. During this period the manufacturer is responsible for any failures that are the direct result of construction failure. When these failures occur the appliance will be repaired or replaced if necessary. The warranty will not be valid when the damage to the appliance is caused by wrong use, not following the instructions or repairs executed by a third party. The guarantee is issued with the original till receipt. All parts, which are subject to wear, are excluded from the warranty. If your device breaks down within the 2-year warranty period, you can return the device together with your receipt to the shop where you purchased it.
The guarantee on accessories and components that are liable to wear-and-tear is only 6 months.
The guarantee and responsibility of the supplier and manufacturer lapse automatically in the following cases:
- If the instructions in this manual have not been followed.
· In case of incorrect connection, e.g., electrical voltage that is too high.
· In case of incorrect, rough or abnormal use.
· In case of insufficient or incorrect maintenance.
· In case of repairs or alterations to the device by the consumer or non-authorised third parties. - If the customer used parts or accessories that are not recommended or provided by the supplier / manufacturer.
SAFETY INSTRUCTIONS
When using electrical appliances, basic safety precautions should always be taken, including the following:
- Read all instructions carefully. Keep this manual for future reference.
- Make sure all packaging materials and promotional stickers have been removed before using the appliance for the first time. Make sure children cannot play with the packaging materials.
· This appliance is intended to be used in household and similar applications such as:
- staff kitchen areas in shops, offices and other working environments;
· farm houses; - by clients in hotels, motels and other residential type environments;
- bed and breakfast type environments.
· Children should be supervised to ensure that they do not play with the appliance.
This appliance can be used by children aged from 16 years and above and persons with reduced physical, sensory or mental capabilities or lack of experience and knowledge if they have been given
supervision or instruction concerning use of the appliance in a safe way and understand the hazards involved. Children shall not play with the appliance. Cleaning and user maintenance shall not be made by children unless they are older than 16 and supervised.
- Keep the appliance and its cord out of reach of children younger than 16 years.
- Before use, check if the voltage stated on the appliance corresponds with the voltage of the power net at your home.
- Do not let the cord hang on a hot surface or on the edge of a table or counter top.
- Never use the appliance when the cord or plug is damaged, after malfunction or when the appliance itself is damaged. In that case, take the appliance to the nearest qualified service center for check-up and repair.
- Close supervision is necessary when the appliance is used near or by children.
- The use of accessories that are not recommended or sold by the manufacturer can cause fire, electrical shock or injuries.
- Unplug the appliance when it is not in use, before assembling or disassembling any parts and before cleaning the appliance. Put all buttons and knobs into the 'off' position and unplug the appliance by grasping the plug. Never unplug by pulling the cord.
· Do not leave a working appliance unattended. - Never place this appliance near a gas stove or electrical stove or in a place where it may come into contact with a warm appliance.
- Do not use the appliance outdoors.
- Only use the appliance for its intended use.
· Always use the appliance on a steady, dry and level surface. - Only use the appliance for domestic use. The manufacturer can not be held responsible for accidents that result from improper use of the appliance or not following the instructions described in this manual.
· All repairs should be carried out by the manufacturer or its aftersales service.
· Never immerse the appliance, the cord or the plug in water or any other liquid. - Make sure that children do not touch the cord or appliance.
- Keep the cord away from sharp edges and hot parts or other heat sources.
- Only to be used as an ambiance diffuser; not to be inhaled.
- Use in an environment between 10^ and 30^ .
· For optimal maintenance, use mineral water (bottled or tap water).
Continuous use of the diffuser may, in the long term, damage the product and shorten its lifespan.
· Empty the tank when the appliance is not in use.
- Do not remove the lid or cover the diffuser when the appliance is in use.
· Change frequently the water in the tank to avoid any dirt building up that may damage the appliance.
- Clean the water tank every week. Do not use chemical products (such as acids, alkaline, etc.) or any corrosive detergents to clean the appliance. Do not immerse.
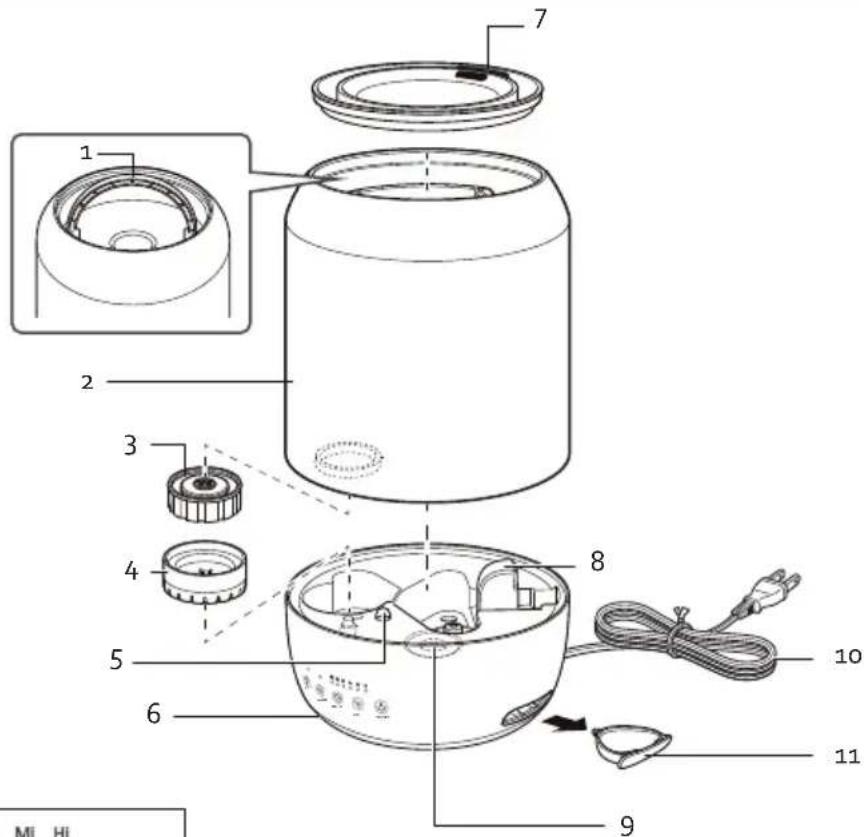
PARTS
- Handgrip
- Water reservoir
- Water reservoir cap
- Filter
- LED lighting
- Base
- Cover with mist opening
- Air outlet
- Ultrasonic membrane
- Cord
- Oil compartment
CONTROLLER
- On/off switch
- Atomising volume
- Timer
- Warm mist mode
- LED lighting
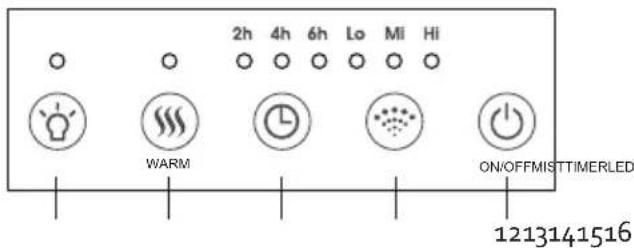
USE
FILLING THE WATER TANK
- Remove the lid and lift the reservoir from the base.
- Turn the water reservoir upside down, open the cap at the bottom of the device and then fill the reservoir with pure mineral water (bottled water or tap water).
- Put the reservoir back on the base. Use the recesses to ensure the reservoir is properly aligned before use. Put the lid back on the reservoir.
- Plug the power cord into a socket. The device is now ready for use.
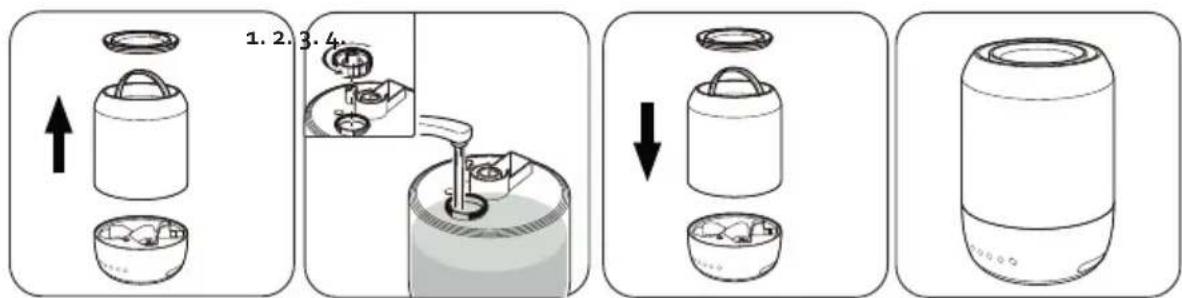
Attention: water may remain in the base. Be careful with spills.
The device will not work if the water reservoir is empty. The mood lighting switches on and off twice to indicate that the reservoir must be filled. Fill the water reservoir as described above.

ON/OFF SWITCH
Press the power button on the device to turn it on. Press again to switch the device off.

ATOMISING VOLUME
The atomising volume can be changed with this button. The default setting is low atomising volume. Press the button several times to switch. The indicator light for the selected volume lights up.
· Lo: low
· Mi: middle
· Hi: high
You can adjust the mist direction by turning the openings in the lid to the desired position.

TIMER
Use the timer button for automatic switch-off. You can set the timer to 2 hours, 4 hours and 6 hours. Press the button several times to switch. The indicator light for the selected time lights up.

WARM MIST MODE
Press the warm mist mode button to activate the heating function. The indicator light lights up. The heating function ensures the humidifier works at optimum efficiency. By spreading warm mist, a pleasant air humidity is reached even faster. For this function, the atomising volume will automatically be changed to Hi: high. You cannot change this yourself.

LED LIGHTING
Press the LED lighting button to switch on the device's ambient lighting. The indicator light lights up.
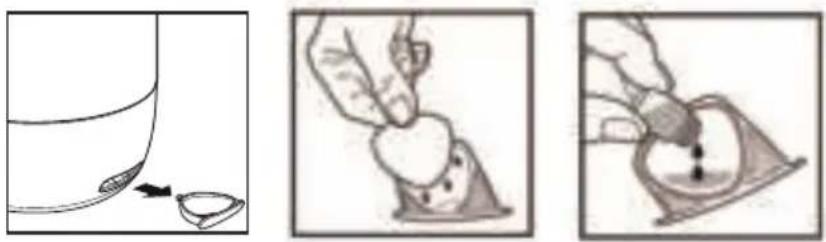
OIL COMPARTMENT
Push the oil compartment on the side of the device. Remove the compartment by pulling it towards you. Place an aroma pad in the compartment. Dose 5 - 7 drops of essential oil on the pad. You can add more or less as desired. Attention: only add oil to the device using the pad. Never add oil to the water tank. Put the compartment back in the device.
Tip: use a different aroma pad for each fragrance.
CLEANING AND MAINTENANCE
It is advisable to change the water in the reservoir often and to clean the humidifier every time you use it.
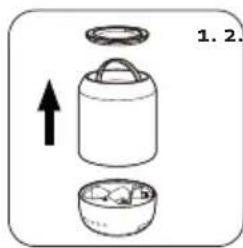
- Turn off the device and unplug the power cord. Remove the cover. Lift the reservoir from the base and empty it. Rinse the reservoir with clean water and drain.
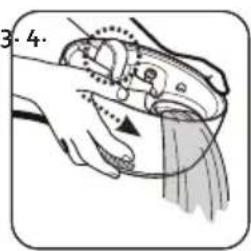
- Water may remain in the base. Pour the water out, in a direction away from the air outlet.
- Do not pour water into the air outlet: this can damage the atomiser.
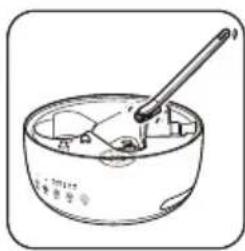
- Clean the inside of the injector with a soft brush and some water. Do not use corrosive detergent. Should there be a build up of limescale, use a little cleaning vinegar on a cotton ball and wipe the inside clean.
- Wipe the outside with a soft cloth.
natural_image
Line drawing of a cooking pot with a spoon and cooking utensils (no text or symbols)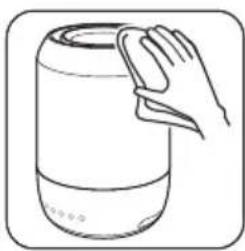
natural_image
Line drawing of a hand cleaning a cylindrical container (no text or symbols)FILTER
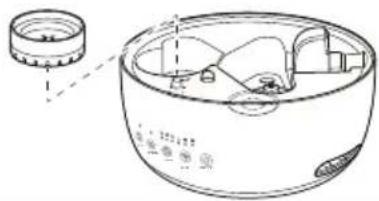
Clean the filter after each use. Remove the filter from the base and rinse it under pure water. It is recommended that the filter is replaced every 6 months. Put the filter back after cleaning.
POSSIBLE PROBLEMS
The device does not work when I press the power button.
- There is no power applied to the device; check whether the power supply is OK.
- Check the plug is placed in the socket.
The device is working. The indicator lights are lit, but there is no mist coming out of the openings.
· The water reservoir is empty. Fill the water reservoir.
· The water reservoir is not in the correct position. Check the water reservoir is in the correct position.
There is an unpleasant odour coming from the humidifier.
- The water in the water reservoir is dirty or has been standing still for too long. Replace the water in the reservoir.
- There is limescale on the ultrasonic membrane. Clean the device according to the "cleaning and maintenance" section.
ENVIRONMENTAL GUIDELINES
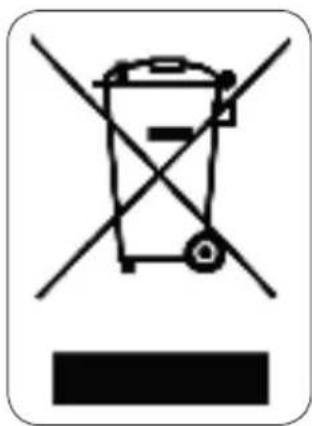
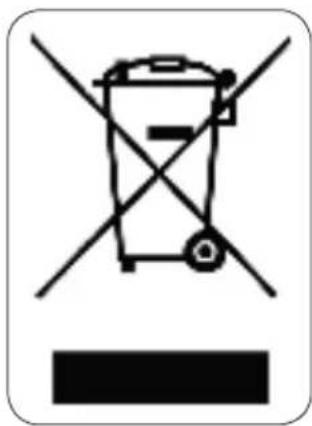
This symbol on the product or on its packaging indicates that this product may not be treated as household waste. Instead it must be brought to the applicable collection point for recycling of electrical and electronic equipment. By ensuring this product is disposed of correctly, you will help prevent potential negative consequences for the environment and human health, which could otherwise be caused by inappropriate waste handling of this product. For more detailed information about recycling of this product, please contact your local city office, your household waste disposal service or the shop where you purchased the product.
natural_image
Recycling symbol with three chasing arrows forming a triangle (no text or labels)The packaging is recyclable. Please treat the packaging ecologically.
GARANTIA
CONTROL
natural_image
Simple line drawing of a container with a handle and a small bowl, no text or symbols present
natural_image
Illustration of a hand holding a heart-shaped object (no text or symbols)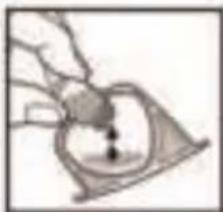
natural_image
Illustration of a hand holding a small object over a triangular container (no text or symbols visible)LIMPIEZA Y MANTENIMIENTO
natural_image
Line drawing of a bowl with a spoon and internal components (no text or symbols)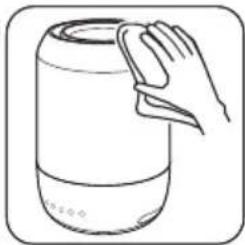
natural_image
Line drawing of a hand cleaning a cylindrical container (no text or symbols)FILTRO
POSIBLES PROBLEMAS
natural_image
Symbol of a trash bin crossed with no visible text or numbers, accompanied by a black rectangular block at the bottom (no text or symbols present)natural_image
Recycling symbol with three chasing arrows forming a triangle (no text or labels)CONTROLLO
POSSIBILI PROBLEMI
natural_image
Recycling symbol icon with three chasing arrows forming a triangle (no text or labels)OVLÁDÁNÍ:
natural_image
Illustration of a hand holding a tool with a curved handle and a pointed tip, no text or symbols present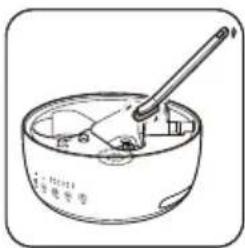
natural_image
Line drawing of a bowl with a spoon and lid, no text or symbols present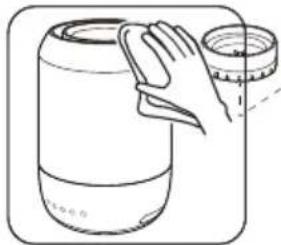
natural_image
Illustration of a hand holding a cylindrical object with a handle, next to a container (no text or symbols)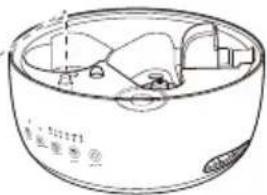
natural_image
Technical line drawing of a circular mechanical component with internal cavities and mounting holes (no text or symbols)FILTR
OHLED NA ŽÍVOTNÍ PROSTŘEDÍ
natural_image
Recycling symbol icon with three chasing arrows forming a triangle (no text or labels)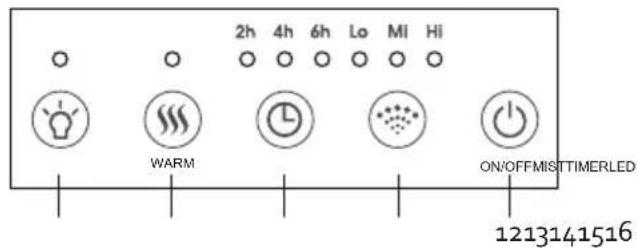
POUŽITIE
NAPLNENIE ZÁSOBNÍKA VODY
natural_image
Recycling symbol icon with three chasing arrows forming a triangle (no text or labels)natural_image
Four-panel image showing different food items: milk bottles, rolled food with cards, a glass pitcher with black handle, and a dark container (no text or symbols visible)of scan hier:
ou scannez ici:
oder hier scannen:
or scan here:

- GEBRUIK
- WATERRESERVOIR VULLEN
- FILTER
- MOGELIJKE PROBLEMEN
- UTILISATION
- REMLISSEZ LE RESERVOIR D'EAU
- FILTRE
- PROBLEMES POSSIBLES
- GEBRAUCH
- WASSERTANK FÜLLEN
- MÖGLICHE PROBLEME
- SAFETY INSTRUCTIONS
- PARTS
- CONTROLLER
- USE
- FILLING THE WATER TANK
- ON/OFF SWITCH
- ATOMISING VOLUME
- TIMER
- WARM MIST MODE
- LED LIGHTING
- OIL COMPARTMENT
- CLEANING AND MAINTENANCE
- POSSIBLE PROBLEMS
- ENVIRONMENTAL GUIDELINES
- GARANTIA
- CONTROL
- LIMPIEZA Y MANTENIMIENTO
- FILTRO
- POSIBLES PROBLEMAS
- CONTROLLO
- POSSIBILI PROBLEMI
- OVLÁDÁNÍ:
- FILTR
- OHLED NA ŽÍVOTNÍ PROSTŘEDÍ
- POUŽITIE
- NAPLNENIE ZÁSOBNÍKA VODY
Brand : DOMO
Model : DO265HD
Category : Humidifier