
DKGM-49A - Car audio accessory CRUX - Free user manual and instructions
Find the device manual for free DKGM-49A CRUX in PDF.


| Product Type | Car Stereo Installation Kit / Interface |
| Brand | CRUX |
| Model | DKGM-49A |
| Compatible Vehicles | Select General Motors models (2000-2010) |
| Radio Size Supported | Double DIN (4" height) |
| Main Functions | Retains factory chimes, RAP, SWC, OnStar, and data bus |
| Power Handling | Passive (no external power required) |
| Wiring | Plug-and-play harnesses included |
| Dimensions (approx.) | 7 x 4.5 x 1.5 inches |
| Weight | 0.5 lbs |
| Installation Difficulty | Easy to moderate, DIY-friendly |
| Included Components | Dash kit, wiring harness, antenna adapter, installation guide |
| Materials | High-grade ABS plastic, brass terminals |
| Maintenance | Wipe with dry cloth; no special care required |
| Safety | Disconnect vehicle battery before installation |
| Repairability | Non-repairable; replace unit if damaged |
| Certifications | CE, RoHS compliant |
| Warranty | 1-year limited warranty |
Frequently Asked Questions - DKGM-49A CRUX
User questions about DKGM-49A CRUX
0 question about this device. Answer the ones you know or ask your own.
Ask a new question about this device
Download the instructions for your Car audio accessory in PDF format for free! Find your manual DKGM-49A - CRUX and take your electronic device back in hand. On this page are published all the documents necessary for the use of your device. DKGM-49A by CRUX.
USER MANUAL DKGM-49A CRUX
- Retains factory features in select GM LAN 29 Bit trucks and SUVs while functioning with an aftermarket radio.
- Pre-programmed to retain factory Steering Wheel Controls.
- iPhone Voice Recognition (VR) feature from SWC on select Kenwood, Pioneer, Alpine and JVC radios.
- Supports Pick Up/End Call, Pick-up and Toggle between 1st and 2nd incoming call, AVRCP Track, Seek.
- Supports Bose, non-Bose and Y-91 audio systems.
- Retains chime functions.
- Provides Factory Rear Seat Entertain ment Activation. Requires Cable #CRUX2444A (sold separately).
- Retains factory back-up camera.
- EIA color coded wiring for easy installation.
PARTS INCLUDED:
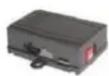
GM-49A Module

GM-49A Harness

SWC Cables

Antenna Adaptor

CRUX2444
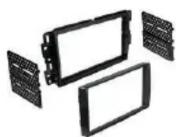
Dash Kit
INSTALLATION DIAGRAM:

flowchart
graph TD
    A["TO FACTORY HARNESS"] --> B["16-Pin Black Connector"]
    B --> C["CRUX"]
    C --> D["Mini USB for Software Updates"]
    D --> E["3.5MM SWC CABLES (Option A or B)"]
    E --> F["LED LIGHT"]
    E --> G["LED MODULE FEEDBACK"]
    E --> H["LED Light"]
    E --> I["LED MODULE FEEDBACK"]
    E --> J["LED Light"]
    E --> K["LED MODULE FEEDBACK"]
    E --> L["LED Light"]
    E --> M["LED MODULE FEEDBACK"]
    E --> N["LED Light"]
    E --> O["LED MODULE FEEDBACK"]
    E --> P["LED Light"]
    E --> Q["LED MODULE FEEDBACK"]
    E --> R["LED Light"]
    E --> S["LED MODULE FEEDBACK"]
    E --> T["LED Light"]
    E --> U["LED MODULE FEEDBACK"]
    E --> V["LED Light"]
    E --> W["LED MODULE FEEDBACK"]
    E --> X["LED Light"]
    E --> Y["LED MODULE FEEDBACK"]
    E --> Z["LED Light"]
    E --> AA["LED MODULE FEEDBACK"]
    E --> AB["LED Light"]
    E --> AC["LED MODULE FEEDBACK"]
    E --> AD["LED Light"]
    E --> AE["LED MODULE FEEDBACK"]
    E --> AF["LED Light"]
    E --> AG["LED MODULE FEEDBACK"]
    E --> AH["LED Light"]
    E --> AI["LED MODULE FEEDBACK"]
    E --> AJ["LED Light"]
    E --> AK["LED MODULE FEEDBACK"]
    E --> AL["LED Light"]
    E --> AM["LED MODULE FEEDBACK"]
    E --> AN["LED Light"]
    E --> AO["LED MODULE FEEDBACK"]
    E --> AP["LED Light"]
    E --> AQ["LED MODULE FEEDBACK"]
    E --> AR["LED Light"]
    E --> AS["LED MODULE FEEDBACK"]
    E --> AT["LED Light"]
    E --> AU["LED MODULE FEEDBACK"]
    E --> AV["LED Light"]
    E --> AW["LED MODULE FEEDBACK"]
    E --> AX["LED Light"]
    E --> AY["LED MODULE FEEDBACK"]
    E --> AZ["LED Light"]
    E --> BA["LED MODULE FEEDBACK"]
    E --> BB["LED Light"]
    E --> BC["LED MODULE FEEDBACK"]
    E --> BD["LED Light"]
    E --> BE["LED MODULE FEEDBACK"]
    E --> BF["LED Light"]
    E --> BG["LED MODULE FEEDBACK"]
    E --> BH["LED Light"]
    E --> BI["LED MODULE FEEDBACK"]
    E --> BJ["LED Light"]
    E --> BK["LED MODULE FEEDBACK"]
    E --> BL["LED Light"]
    E --> BM["LED MODULE FEEDBACK"]
    E --> BN["LED Light"]
    E --> BO["LED MODULE FEEDBACK"]
    E --> BP["LED Light"]
    E --> BQ["LED MODULE FEEDBACK"]
    E --> BR["LED Light"]
    E --> BS["LED MODULE FEEDBACK"]
DIP SWITCH SETTINGS:
SETTING THE AFTERMARKET RADIO BRAND
With the key in the off position, set the DIP switches to the corresponding radio listed below.
| RADIO BRAND: | DIP#: | 1 | 2 | 3 |
| Atoto, Dual, Fahrenheit, Jensen | OFF | ON | ON | |
| Pioneer, Power Acoustik, Soundstream | OFF | ON | ON | |
| Blaupunkt, Most off-brand Radio | OFF | ON | ON | |
| Alpine | OFF | OFF | OFF | |
| Clarion | ON | ON | OFF | |
| Kenwood | ON | ON | ON | |
| JVC | ON | OFF | ON | |
| Boss, Old Sony | ON | OFF | OFF | |
| New Sony | OFF | ON | OFF |
SWC MODULE
DIP SWITCH

NOTE: For Atoto, Blaupunkt, Dual, Farenheit, Power Acoustik, Soundstream, and most off-brand radios, check the aftermarket radio's manual to see if the SWC buttons need to be programmed.
3.5MM SWC CABLE
Use the proper 3.5 to 4 pin SWC cable for the aftermarket radio being used:
OPTION A is used for ALPINE, CLARION, (JVC and KENWOOD units will use the Blue/Yellow wire). OPTION B is used for ATOTO, BOSS, DUAL, FAHRENHEIT, JENSEN, POWER ACOUSTIK, PIONEER, SONY, SOUND STREAM and most OFF-BRAND radios.
NOTE: Cap or insulate the 3.5mm plug or Blue/Yellow wire if not being used.
For aftermarket radios that have wires for SWC connections, cut off the 3.5mm plug on the Crux SWC Cable (option B) and connect the SWC wires as follows:

natural_image
Pure electrical circuit lines without any symbolsRED to SWC Key 1 WHITE to SWC Key 2 SHIELD to SWC Ground
Note that there are some radios that only have SWC1 and SWC2, in this case “shield” does not need to be connected.
SELECTING THE AUDIO SYSTEM:
If the vehicle is equipped with a Bose system, the DKGM-49A module has a built-in Bose adaptor that allows the proper audio input gain from the aftermarket radio to the Bose amplifier. To use this feature, plug in the male 8-pin connector on the harness to the GRAY female 8-pin connector on the DKGM-49A module. The module is also labeled "Bose" and "Non Bose" to avoid confusion. (see picture below)
If the vehicle is NOT equipped with a Bose system, plug in the male 8-pin connector to the BLACK female 8-pin on the GM-49A module.

CHIME VOLUME ADJUSTMENT:
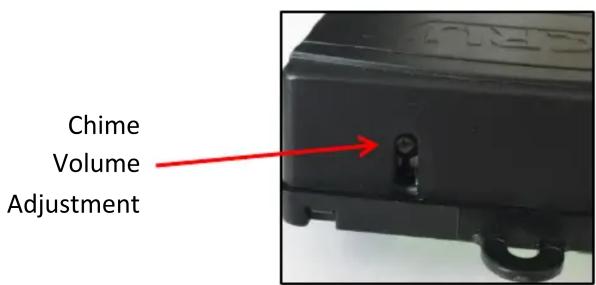
The DKGM-49A module has a potentiometer to adjust the chime volume. It is set at halfway by default. To adjust the volume, simply use a suitable screwdriver and turn the potentiometer clockwise to increase the volume and counter-clockwise to decrease the volume.
BACK UP CAMERA CONNECTION:
You can retain use of the factory backup camera by using the CRUX2444 harness provided in the kit. See below for connection instructions. (Note: Loose wires may not be needed in the installation.)
- Connect the Crux back-up camera 20 pin connector to the vehicle 20 pin conenctor
- Connect the yellow video RCA to the new aftermarket radio reverse camera input.
- Test the video feed before installing the radio back into the dashboard. (Radio may need to be set prior to testing).

flowchart
graph LR
    A["To Factory 20-Pin Connector"] --> B["AV INPUT"]
    A --> C["TO FACTORY OVERHEAD SCREEN"]
    B --> D["To AV Input"]
    C --> E["To AV Output"]

NOTE:
Does not retain the factory backup camera on models that show the camera image on the rearview mirror.
DASH KIT INSTALLATION:
A double DIN radio replacement dash kit is included in the kit to make the installation quick and easy. You have the option of installing a Double DIN or two Single DIN radios. The DKGM-49A kit includes:

natural_image
Black plastic enclosure with multiple side panels, no visible text or symbolsINSTALLATION:
Before installation:
- Locate the main trim.
- Locate the left and right mounting brackets.
- Slide the appropriate mounting bracket into the trim ring, aligning the holes in the trim ring to the clips on the bracket. (See Diagram B)
- For two Single DIN radio installation, slide the stacked ISO DIN unit into the trim ring bracket assembly and secure the unit to the kit using the screws supplied with the radio. (See Diagram C)


VEHICLE APPLICATIONS:
CHEVROLET
2012-2013 Avalanche
2012-2014 Silverado 1500-3500 Pickup
2012-2014 Suburban
2012-2014 Tahoe
GMC
2012-2013 Sierra 1500-3500 Pickup
2012-2014 Yukon
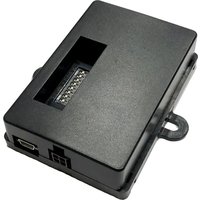
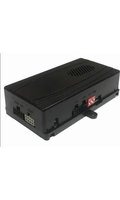
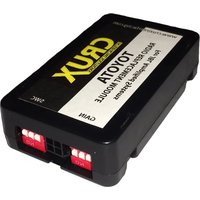


Brand : CRUX
Model : DKGM-49A
Category : Car audio accessory