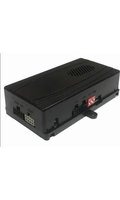
SOOGM-15V - Car audio accessory CRUX - Free user manual and instructions
Find the device manual for free SOOGM-15V CRUX in PDF.


| Product Type | Vehicle Integration Interface |
| Compatible Vehicles | Select GM Models (Chevrolet, GMC, etc.) with 15-pin connector |
| Dimensions (approx) | 4.0 x 2.0 x 1.0 in |
| Weight | 0.5 lb |
| Power Input | 12V DC (vehicle battery) |
| Primary Function | Retains factory features when installing aftermarket radio |
| Steering Wheel Control Retention | Yes |
| Factory Chime Retention | Yes |
| Included Items | Interface module, wiring harness, installation instructions |
| Installation | Plug-and-play; requires connection to vehicle harness |
| Maintenance | Clean with dry cloth; avoid liquids |
| Safety Warning | Disconnect battery before installation |
| Spare Parts | Contact CRUX customer support |
| Repairability | Not user-serviceable; consult professional installer |
| General Information | Designed to maintain factory audio features in select GM vehicles |
Frequently Asked Questions - SOOGM-15V CRUX
User questions about SOOGM-15V CRUX
0 question about this device. Answer the ones you know or ask your own.
Ask a new question about this device
Download the instructions for your Car audio accessory in PDF format for free! Find your manual SOOGM-15V - CRUX and take your electronic device back in hand. On this page are published all the documents necessary for the use of your device. SOOGM-15V by CRUX.
USER MANUAL SOOGM-15V CRUX
- Retains factory features in select GM Class II vehicles while functioning with an aftermarket radio.
- Pre-programmed to retain factory Steering Wheel Controls.
- Retains OnStar and chime functions.
- Adds Forced front and rear aftermarket camera inputs while in motion using the SOURCE DOWN or AM/FM button on the steering wheel controls on select vehicles.
- Supports Bose, non-Bose and Y-91 audio systems.
- EIA color coded wiring for easy installation.
NOTES:
- The Front and Rear fading are not retained on Y-91 Bose System.
- Chime includes: seat belt, check engine, key in ignition, low fuel, low oil and lights on.
PARTS INCLUDED:

SOOGM-15V Module SOOGM-15V Harness Video Harness Antenna Adaptor SWC Cable
DIP SWITCH SETTINGS:
SETTING THE AFTERMARKET RADIO BRAND
With the key in the off position, set the DIP switches to the corresponding aftermarket radio setting:
| RADIO BRAND: | DIP#: | 1 | 2 | 3 | 4 |
| Atoto, Dual, Fahrenheit, Jensen, Pioneer, Power Acoustik, Soundstream Blaupunkt, Most off-brand Radio Alpine Clarion Kenwood JVC Boss, Old Sony New Sony | OFF | OFF | ON | ON | |
| OFF | OFF | ON | ON | ||
| OFF | OFF | ON | ON | ||
| OFF | OFF | OFF | OFF | ||
| OFF | ON | ON | OFF | ||
| OFF | ON | ON | ON | ||
| OFF | ON | OFF | ON | ||
| OFF | ON | OFF | OFF | ||
| OFF | OFF | ON | OFF |
SWC MODULE
DIP SWITCH

1 2 3 4
NOTE: For Atoto, Blaupunkt, Dual, Farenheit, Power Acoustik, Soundstream, and most off-brand radios, check the aftermarket radio's manual to see if the SWC buttons need to be programmed.
3.5MM SWC CABLE
Plug in the SWC cable to the SWC module and the 3.5mm plug to the aftermakert radio SWC port or use the Blue/Yellow wire for JVC and Kenwood.
For aftermarket radios that have wires for SWC connections, cut off the 3.5mm plug on the Crux SWC Cable (option B) and connect the SWC wires as follows:
Note that there are some radios that only have SWC1 and SWC2, in this case “shield” does not need to be connected.

RED to SWC Key 1 WHITE to SWC Key 2 SHIELD to SWC Ground

1 of 4
rev.113020
INSTALLATION DIAGRAM:
![graph TD A["TO FACTORY HARNESS"] --> B["VIDEO HARNESS"] B --> C["3.5MM SWC CABLE"] C --> D["4-Pin Connector"] D --> E["JVC/Kenwood (Blue / Yellow)"] D --> F["Insulate if not being used"] C --> G["24-Pin Connector"] G --> H["SWC DIP"] G --> I["SWC"] G --> J["CAM"] G --> K["Chime Volume Adjustment"] C…](/content/2026/05/1064155/images/8132048c223a52776f13317b1d0f92bac6f066757e1eb779fb9ea422b501384b.jpg)
SELECTING THE AUDIO SYSTEM:
If the vehicle is equipped with a Bose system, the SOOGM-15V has a built-in Bose adaptor that allows the proper audio input gain from the aftermarket radio to the Bose amplifier. To use this feature, plug in the male 8-pin connector on the harness to the GRAY female 8-pin connector on the SOOGM-15V module. The module is also labeled "Bose" and "Non Bose" to avoid confusion. (see picture below)
If the vehicle is NOT equipped with a Bose system, plug in the male 8-pin connector to the BLACK female 8-pin on the SOOGM-15V module.

Bose
Connection
Non Bose Connection
CHIME VOLUME ADJUSTMENT:
The SOOGM-15V has a potentiometer to adjust the chime volume. It is set at half way by default. To adjust the volume, simply use a suitable screw driver and turn the potentiometer clockwise to increase the volume and counter-clockwise to decrease the volume.

ONSTAR VOLUME ADJUSTMENT:
To adjust the OnStar volume, turn on OnStar and adjust the volume using the Steering Wheel Control volume adjustment. Once it is set, the SOOGM-15V will memorize this level.
CAMERA CONNECTION:
The SOOGM-15V has 2 video inputs for front and rear cameras. To turn on the front camera input, set DIP #3 to ON. The 3 position DIP switch is on the opposite side of the SOOGM-15V module where SWC and CAM connections are found.

DIP 1: ON = OnStar Activation on SWC
OFF = Aftermarket Radio VR Function*
DIP 2: ON = Front Camera ON
DIP 3: No Function
*NOTE: If DIP 1 is set to OFF, use the OnStar button on the rear view mirror to activate OnStar.
![graph TD A["To SOOGM-15V Module (CAM)"] --> B["Switch to Rear Camera"] A --> C["Switch to Front Camera"] A --> D["Switch to Aftermarket Radio REAR CAM Input"] E["SWC DIP"] --> F["ON 1 2 3 4"] G["SWC CAM"] --> H["ON 1 2 3 4"] I["+"] --> J["Output"]](/content/2026/05/1064155/images/19674c080b5e34554c3d98c2a58fb98427d8f64450206f6495f6b4022875714f.jpg)
FORCED CAMERA FEATURE:
The SOOGM-15V can force the aftermarket radio to show the front1 video camera on select GM trucks and SUV's at any time while driving. To force the front camera while driving do the following...
- To force the Front camera mode, press and hold the SOURCE DOWN or AM/FM button on the steering wheel controls until the video shows on the aftermarket radio screen.
- To turn Off forced camera mode, press and hold the SOURCE DOWN or AM/FM button on the steering wheel controls. The radio will revert to the original source screen.
- The reverse camera has priority over the front camera when driving the vehicle in reverse.
1 (Requires installation of aftermarket camera)
STEERING WHEEL CONTROL BUTTON FUNCTIONS:
| Aftermarket Radio Command | |||
| 8 Button | 4 Button | Analog | |
| Short Press | |||
| PRESET/PROG | PROG | Mute | |
| VOLUME_DOWN | VOLUME_DOWN | Volume Down | |
| VOLUME_UP | VOLUME_UP | Volume Up | |
| SEEK_UP | Track up/Seek Up | ||
| SEEK_DOWN | Track dn/Seek dn | ||
| SOURCE_UP | Source | ||
| SOURCE_DOWN | Preset up | ||
| AM/FM | Source | ||
| VOICE (not used) | |||
| Long Press | |||
| PRESET/PROG | PROG | VR | |
| VOLUME_DOWN | VOLUME_DOWN | Volume Down Continuous | |
| VOLUME_UP | VOLUME_UP | Volume Up Continuous | |
| SEEK_UP | Answer Call* | ||
| SEEK_DOWN | End Call* | ||
| SOURCE_UP | Source | ||
| SOURCE_DOWN | Forced Camera Input | ||
| AM/FM | Forced Camera Input | ||
| VOICE (not used) | |||


Long press of SOURCE DOWN
for forced camera option
8 Button SWC
VEHICLE APPLICATIONS:
| BUICK | CHEVROLET | GMC | OLDSMOBILE | ||||
| 2004-2005 | Century | 2003-2006 | Avalanche | 2004-2011 | Canyon | 2001-2004 | Alero |
| 2005-2007 | LaCrosse | 2000-2005 | Cavalier | 2002-2009 | Envoy | 2002-2004 | Bravada |
| 2004-2007 | Rainier | 2004-2011 | Colorado | 2003-2007 | Savana | 2000-2004 | Silhouette |
| 2003-2005 | Rendezvous | 2006-2013 | Corvette | 2003-2006 | Sierra | ||
| 2005-2007 | Terraza | 2004-2007 | Express | 2007 | Sierra Classic | PONTIAC | |
| 2000-2005 | Impala | 2003-2006 | Yukon | 2001-2005 | Aztec | ||
| CADILLAC | 2001-2003 | Malibu | 2001-2005 | Grand Am | |||
| 2004-2006 | Escalade | 2000-2005 | Monte Carlo | HUMMER | 2004-2008 | Grand Prix | |
| 2003-2004 | S-10 | 2003-2007 | H2 | 2000-2006 | Montana | ||
| 2003-2006 | Silverado | 2005-2010 | H3 | 2000-2005 | Sunfire | ||
| 2007 | Silverado Classic | ||||||
| 2003-2006 | SSR | ISUZU | SAAB | ||||
| 2003-2006 | Suburban | 2003-2008 | Ascender | 2005-2008 | 9-7X | ||
| 2003-2006 | Tahoe | ||||||
| 2002-2009 | Trailblazer | SATURN | |||||
| 2005-2008 | Uplander | 2005-2007 | Relay | ||||
| 2003-2005 | Venture | ||||||
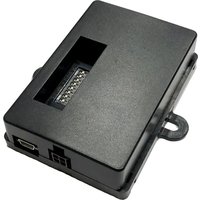
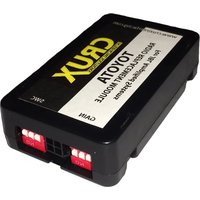


Brand : CRUX
Model : SOOGM-15V
Category : Car audio accessory