VC9E21 - Vacuum Cleaner Khind - Free user manual and instructions
Find the device manual for free VC9E21 Khind in PDF.


User questions about VC9E21 Khind
0 question about this device. Answer the ones you know or ask your own.
Ask a new question about this device
Download the instructions for your Vacuum Cleaner in PDF format for free! Find your manual VC9E21 - Khind and take your electronic device back in hand. On this page are published all the documents necessary for the use of your device. VC9E21 by Khind.
USER MANUAL VC9E21 Khind
USER MANUAL
SERIAL NO.
KHIND®
Experience More
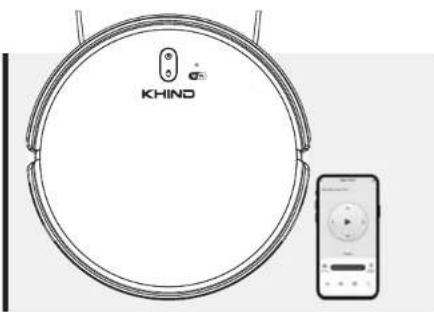
SMART Wi-Fi ROBOTIC VACUUM
VC9E21
natural_image
Line drawing of a circular robotic vacuum cleaner with a control panel and a separate remote control device (no text or symbols on the main subject)KHIND CARE Mobile App

Mobile App

Download to register for E-Warranty & enjoy hassle-free after-sales services.
1-800-88-0032
khind.com.my
IMPORTANT
Please read this manual carefully before operating this product. Keep this manual handy for further reference.
P/N: 40-51721-00

Safety Precaution Information
Safety & Warning Information
- Read the instruction manual carefully and follow the instruction closely.
- This appliance is intended for household use only; commercial use will void warranty.
- This appliance is not intended for use by persons (including children) with reduced physical, sensory or mental capabilities, or lack of experience and knowledge, unless they have been given supervision or instruction concerning use of the appliance by a person responsible for their safety.
Children should be supervised to ensure that they do not play with the appliance. - Use only the attached parts which are supplied by the manufacturer.
- This appliance can only use the adaptor provided by KHIND inside the packaging.
- Check to ensure your electricity supply matches that the voltage shown on the rating plate. The appliance must only be used as rated voltage.
- If the adaptor is damaged, it must be replaced by the manufacturer, its service agent or similarly qualified persons in order to avoid a hazard.
- Insert the adaptor to the AC mains securely. Do not operate the adaptor or charging base with wet hands.
- Keep appliance away from ovens and stoves etc.
- Do not approach the fire source or the heat source, and avoid direct sunlight.
- This appliance is not suitable for outdoors use or on wet surfaces. Use only on dry, indoor surfaces.
- Do not use the appliance in a suspended area without protective fences.
- Do not use the appliance if any parts appear to be faulty, missing or damaged.
- Ensure all parts are securely assembled before using the appliance
- Do not run the Robotic Vacuum during charging.
- Do not unplug the adaptor by pulling on the cable. To unplug, grasp the adaptor, not the cable.
- Do not use the try to ride on the main unit, place heavy objects on it or apply strong impacts to it
- Do not use the appliance under extremely hot or cold environments. It is recommended to use the appliance in the environment of 0°C \~ 40°C.
- Before each use, please clean the inner and suction mouth of the dust container, clean out the hair, cotton fibre and dust. Do not jam the suction of the dust container.
- Do not immerse any part of the appliance into the water or other liquids. (except for those parts and accessories that can be washed with water).
Risk of Personal Injury
- Charge the appliance for 5-6 hours before initial use
- Never use the appliance without the HEPA Filter or Dust Container in place.
-
Do not use the appliance in areas where flammable or combustible liquids may be present.
-
When using the Robotic Vacuum for the first time, a smell or vapour may be given off. This will dissipate after few uses.
- Keep hair, loose clothes, fingers and all parts of the body away from openings and moving parts.
- Do not insert any objects into openings or cover the appliance or charging base.
- Take extra care when cleaning and vacuuming at the staircase area.
- In order to prevent damage to the product and reduce risk of fire and/or personal injury, the following objects are strictly prohibited from being sucked up:
• Any large or broken objects such as glass. - Anything that is burning or smoking such as cigarettes, matches or hot ashes.
• Liquid spills
• Reactive liquids (solvents, corrosives, detergents) - Flammable or explosive substances such as alcohol, thinners etc.
- Pet litter or anything with pet waste attached.
- Pins, needles, toothpicks, coins, metals, plastics, food wrap, other wrapping films.
- Long pieces of string and belts
• Fringes of coverings and floor cushions or carpets
• The ends of the table cloths and curtains that reach to the floor.
• Damp or wet items. - In order to prevent injury, fire or electric shock due to falling of the main unit or charging base, please do not use in the following places:
- Spring layer or corridor without fence.
• In narrow areas where the main unit cannot turn around.
• In entrance halls, stairways or steep slopes. - Segment difference or concrete floors with hard or uneven surfaces.
- On top of refrigerators or high area locations with limited space (such as surface of the table/chair).
- Do not use the appliance on the carpets or flooring that can be easily damaged, such as waxed floors, marble floors, mirrored surfaces (glass, mirror) etc.
- Do not use it on damaged tiles, carpets, or old fatami mats.
- Discontinue usage and send to nearby KHIND Service Centre if encounter the below situations: -
- Battery runtime changes abruptly or the battery has been damaged.
- Charging base/ dock station, AC adaptor, plug or main lead are damaged.
- Do not touch the rotating wheels or side brushes.
- Do not block the sensors, infrared transmitters and receivers on the main unit or charging base by putting tape or stickers on them or blocking with cloth
- Do not block the suction port or exhaust port.
- Keep pets out of the way in their enclosures or in other areas.
- Turn off the main power switch, unplug from the socket - outlet before cleaning or maintenance or when children or pets are present.
- Use only the charger supplied by KHIND. If other chargers are used, this can cause damage to the battery, product or personal property.
- Store the appliance indoors, in a cool and dry place.
3
Safety Concern with Li-ion Batteries
- Before charging, please check whether the adaptor and dock station are properly connected.
- The battery is not fully charged at the time of purchase, so please charge the appliance before initial use. Full charging takes about 4 - 5 hours.
- It is recommended to recharge the appliance in area where the temperature is between 5°C and 35°C. The unit cannot charge properly if the room is too cold or too hot.
- If the operating time reduces significantly even after proper recharging, it means that the battery has reached the end of its service life. Please send in to KHIND Customer Service for battery replacement.
- In extreme application conditions or temperature conditions, the battery may leak. If the liquid of the battery has fluid to flow out and stick to the skin, please flush with water in time. If the liquid accidentally enters the eye, wash immediately with water and seek medical advice.
- Do not litter the battery together with the general household waste so as to prevent contamination of the environment. It should be safely discarded and recycle at the appropriate collection site.
- When not using the charging dock station for a long period of time, please unplug it.
WARNING!
Do not incinerate the appliance even if it is severely damaged.
The battery can explode and result in fire hazard.
Please dispose the battery according to local laws and regulations.
Parts Identification
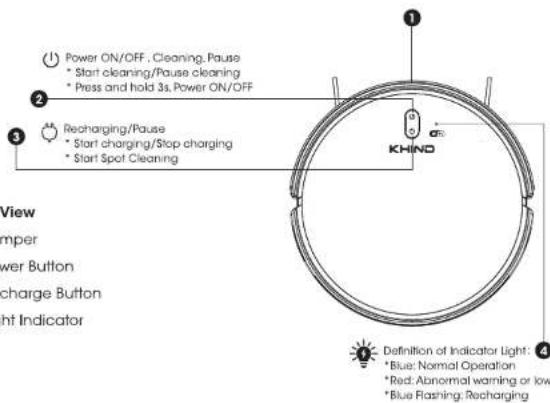
B. Bottom View
- Electrode
- (Left) & (Right) Side Brushes
- Cliff Sensor
- Drive Wheels
- Dust Box Buckle
- Power Switch
- 2-in-1 Dust Box
- Mop Board
- Cliff Sensor
- Universal Wheel
- Suction Inlet
- Mop Board
- Infrared Lens
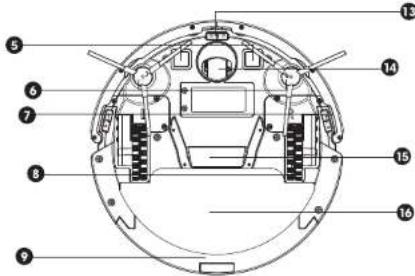
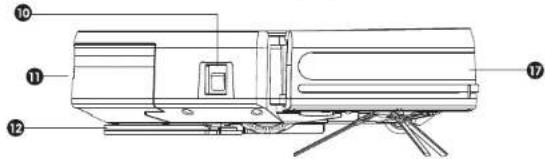
C. Charging Base
- Power Adaptor Plug
- Signal Indicator
- Infrared Lens
- Charging Plate
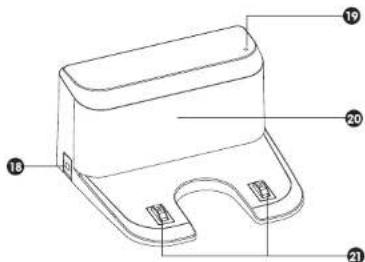
D. Remote Control
- Automatic Cleaning
- Start / Pause
- Spot Cleaning Mode
- Water Flow Adjustment
- Recharge Button
- Direction Control
- Edge Cleaning Mode
- Suction Adjustment
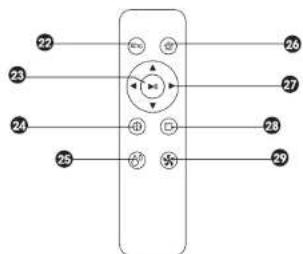
4
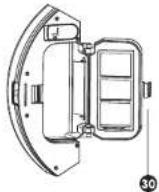
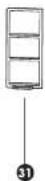


Packing List
Mop Cloth x2
(1 piece on the Mop Board, 1 piece in package)
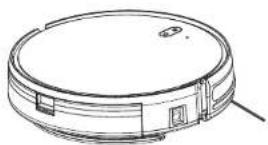
Robotic Vacuum *1
(The Mop Board has been installed)
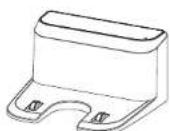
Charging Base*1

Side Brushes*4
(Left) Side Brushes *2
(Right) Side Brushes*2)
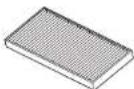
Filter*2
(1 piece in Dust Box,
1 piece in package)
User Manual*1

AAA Batteries for Remote Control*2
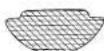
Mop Cloth*2
(1 piece on the Mop Board)
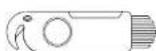
Cleaning Kit*1
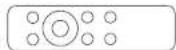
Remote Control*1
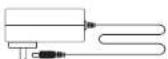
Adaptor*1
*Pictures are for illustration purposes only.
Specifications
| Model | VC9E21 |
| Power | 28W |
| Motor | Brushless Motor |
| Adaptor Input Voltage | AC 100 - 240V - 50/60Hz |
| Adaptor Output Voltage | 19V: 0.6A |
| Battery Type | Lithium - Ion Battery Pack |
| Battery Voltage | 14.4V 2500mAh |
| Filtration Type | HEPA Filter, Sponge Filter & Net Filter |
| Dust / Water Container | Dust 200mL / Water 230mL |
| Suction Power | 1600 Pa |
| Operation Time | 120 min |
| Coverage Area | 120m^2 |
| Charging Time | 5 - 6 hours |
| Noise Level | <72 dB |
| Net Weight | 2.5kg |
| Product Dimension (LxWxH) | 300 x 300 x 75mm |
| Feature | IEEE 802.11 b/g/n |
| Frequency Band | 2412MHz - 2472MHz |
| Channel Bandwidth | 20MHz |
| Half / Full Duplex | Full |
| Radio Technology | CKK DSSS / OFDM / OFDM |
| Modern Compatibility | 2.4G (5G is not supported) |
*Specifications are subject to change without prior notice.
Quick Install Guide
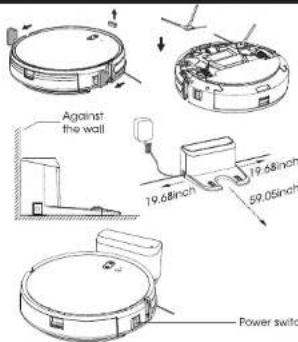
a. Please remove the protective foams from the main unit and install the Left and Right Side Brush correctly.
b. Place the charging base on a flat ground against the wall. Do not place any objects within 19.6 inches by sides and 59.05 inches in front of the charging dock.
(Tips: Please tie the extra wires length together)
c. Power on and full charge the device before use.
C. Use of Cleaning Function
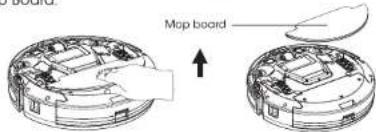
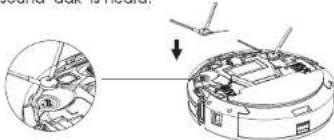
- Remove the Map Board before using cleaning function by clasping the middle of the Map Board.
- Install the Side Brushes in correct position corresponding "L / R", and press down vertically until the sound "dak" is heard.
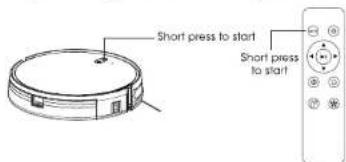
- Short press the ⏻ Power Button or ⏻ Auto Button to start the cleaning function.
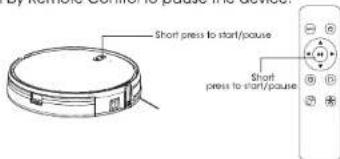
- Short press the ⏻ Power Button on the device to pause or press the ▶ Start / Pause button by Remote Control to pause the device.
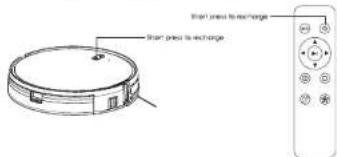
- Recharge, if the device is in low battery, it will automatically return for charging. It can also return to base by pressing 🙏 Recharge button on device and Remote Control.
-
Working Mode
a. Automatic Cleaning - the device will sweep in a zigzag way or random way and finishes entire area in order and efficient. It will automatically return to the base after completed cleaning or battery life left 15%.
b. Spot Cleaning - Press "⊕" button on Remote Control, the device performs cleaning in a spiral clockwise from the inside to outside. After the maximum radius 24.6 inches, it returns to the starting point and cleaning is completed.
c. Edge Cleaning - Press "☐" button on Remote Control, the device cleans the periphery of indoor fixed objects and returns to the Charging Base after all edges cleaning completed.
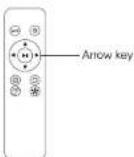
d. Manual Mode - the device can be controlled by the arrow key in Remote Control as moving direction. -
Water Flow Adjustment - Press "向" from Remote Control to choose 3 different modes including high, mid and low, otherwise it is set as default with mid.
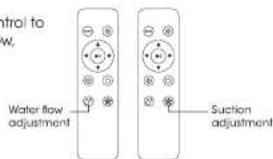
- Suction Adjustment - Press "⑤" from Remote Control to choose 3 different suction level including strong, normal and quiet, otherwise it is set as default with normal.
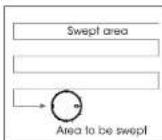
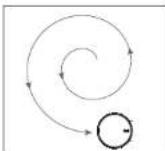
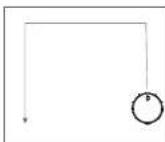
7
Method of Usage
A. Preparations Before Usage
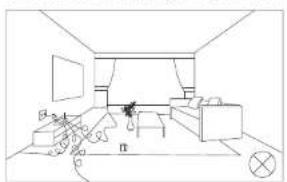
- Clear up objects such as clothing, loose papers, power cords and cables, cords for blinds or curtains and any fragile objects before start operating the robot.
natural_image
Line drawing of a minimalist living room interior with furniture and objects (no text or symbols)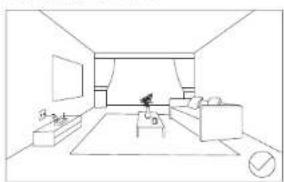
natural_image
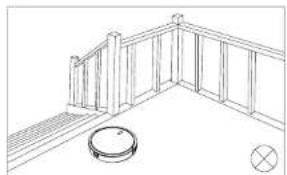
Line drawing of a minimalist living room interior with sofa, coffee table, and wall (no text or symbols)- Set up protective fences or barricades at the entrance of the stairs, upper floor edges, corridor, kitchen, bathroom and other rooms to avoid any incident and damage the robot.
natural_image
Line drawing of a wooden fence with a circular drain cover and a cross symbol (no text or labels)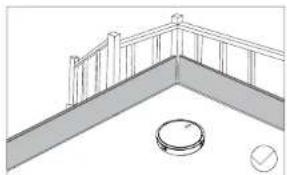
natural_image
Architectural line drawing of a balcony with railing and circular base (no text or symbols)Note: Do not use the device to clean up puddle of water.
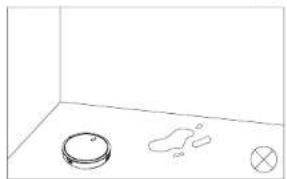
natural_image
Simple line drawing of a room corner with a circular object, abstract shapes, and a cross symbol (no text or labels)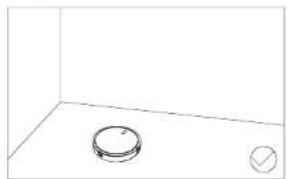
natural_image
Simple line drawing of a room corner with a circular object and a checkmark symbol (no text or labels)B. Use of Mopping Function
- Press the Dust Box Buckle and pull the Dust Box to remove the water tank from robot.
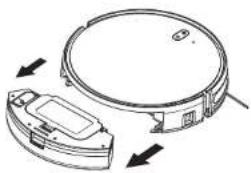
natural_image
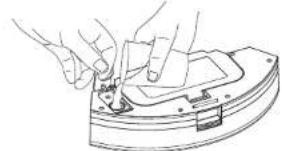
Diagram of a robotic vacuum cleaner with internal components and directional arrows indicating motion (no text or symbols)- Pour small amount of water into the Water Tank and close its cover tightly.
natural_image
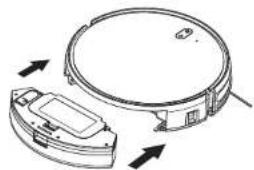
Line drawing of hands using a tool to adjust or install a mechanical component (no text or symbols visible)- Install the Dust Box / Water Tank back to the robot.
natural_image
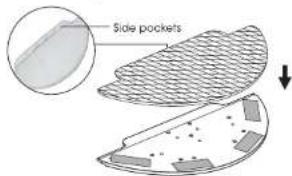
Diagram of a circular device with internal components and directional arrows indicating rotation or movement (no text or symbols)- Place the raised part of the Mop Board into Mop Cloth pocket, and then press the Mop Cloth to hold light on the Velcro.
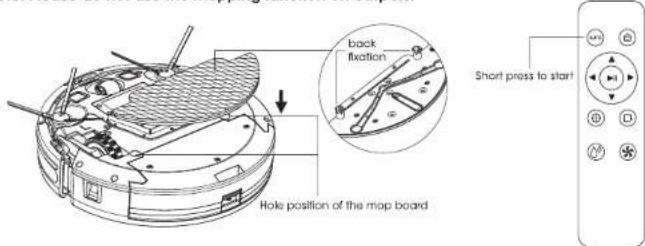
- Press the fixation down against the hole on the Mop Board till the sound "clak" appears. (When the mopping board is installed, and the robot will automatically be in mopping mode after it is turned on.)
- Gently flip the device over, place it on the floor and turn on the power. Then short press Power button (☐) or Auto button ⏻ to start the mapping function.
Note: Please do not use the mopping function on carpets.
8
11
D. Maintenance
Note: Recommended to clean at least once a week to keep it at best performance.
- Suction Inlet cleaning - wipe the suction port with a clean dry cloth.
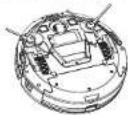
- Side Brushes cleaning
a. Remove the Side Brushes by pulling out vertically.
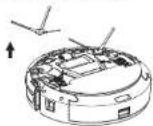
b. Reinstall it after cleaning the entanglement and dirt.
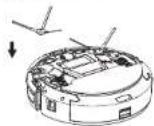
Note:
- Please confirm the correct position corresponding to the left (L) and right (R) Side Brush installation.
-
Side Brushes are recommended to be replaced every 3 months to ensure the cleaning effect.
-
Water Tank, Dust Box and Filter cleaning
a. Press the Water Tank/ Dust Box Buckle and pull it out.
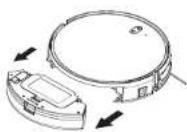
b. Press the Filter Buckle and open the filter cover to remove the trash in Dust Box.
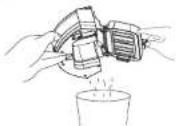
c. Remove the Primary filter, HEPA filter and Sponge Wash them with water or clean with cleaning tools but they have to be fully dry before putting them back for use.
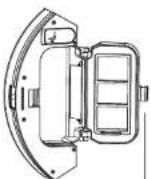
Filter Buckle
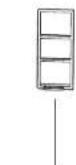
Primary Filler
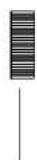
HEPA
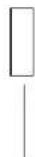
Sponge
Note:
- Do not dry the filters with heater or hair dryer or expose to sunlight.
- Let the filters dry naturally by putting at dry places for approx. 8 - 12 hours depending on condition.
d. Make sure the Water Tank is filled with water before using the mopping function. Press the button on the Water Tank / Dust Box and pull it out. Open the Water Tank cover, fill up with water and fasten the cover. Reinstall the 2-in-1 Dust Box in the opposite direction from which it was removed.
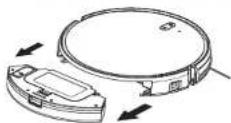
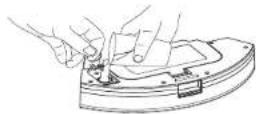
Note: Do not add detergent into the water and do not wash or soak the Water Tank.
- Mop Board cleaning
a. Remove the Mop Board vertically from the device.
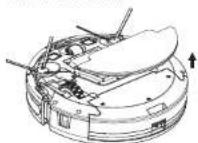
b. Wash the dirty Mop Cloth and fully dry it before fasten it back to the Mop Board.
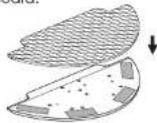
c. Install the Mop Board to the device.
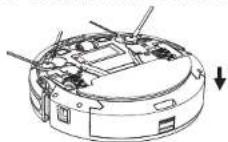
Note:
- Do not use the mopping function on carpets.
- Make sure the Mop Cloth is clean before operation to keep its best performance.
12
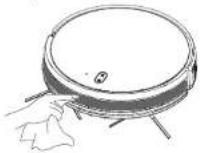
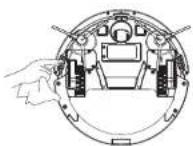
- Equipment signal sensor maintenance.
Note: Clean at least once a month to avoid misdetection.
a. Wipe the front anti-collision sensor with a soft dry cloth.
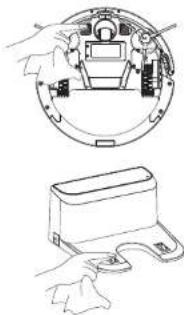
c. Clean the charging contact area with a soft dry cloth.
natural_image
Technical line drawing showing a circular component with internal components and a separate box-like device (no text or symbols)b. Wipe the sensor with a soft dry cloth.
d. Clean the signal transmission area maintenance with a soft dry cloth.
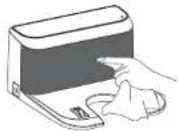
- Battery maintenance
a. Keeping the device in charging status would help to maintain battery performance as it does not over loss electricity and battery life can be longer.
b. If it is not in use for a long time, please fill charge and turn off to be stored.
c. Charging at least every 3 months, avoiding the battery to cause overhang damage
d. Must use original power adaptor when charging
e. Lithium battery is full charged randomly for ready to use. No need to be charged with whole 12 hours.
Troubleshooting
| Problem | Solution |
| Unable to boot | When the battery is low, place the device on the Charging Base, align it with the contact point, and the device will start up automatically.Check whether the plug of the device power adaptor is properly connected and the power supply of the socket is normal. |
| Unable to charge | Bad contact, please clean the dirt on the charging contact point, or unplug the continuous brush.The device is too far away from the Charging Base. Please place the device near the charging base. |
| Unable to return for recharge | Shut down and restart. |
| Abnormal running | The main brush, side brush or wheel may be entangled with foreign objects, please clean it after stopping the device. |
| Abnormal noise when cleaning | The Dust Box is full, please clean the Dust Box |
| Decreased cleaning ability or dust drop | The filter is clogged, please clean or replace it.The brush is entangled by foreign objects, please clean the brush. |
| Unable to connect to Wi-Fi | The Wi-Fi signal is not good, please make sure that the device is in a good Wi-Fi (2.4G frequency band, does not support 5G) signal coverage area.Please reset Wi-Fi and download the latest mobile App to try to connect againCheck if your password is entered incorrectly. |
| Scheduled cleaning failed | If the battery is insufficient, the scheduled cleaning will be started only when the remaining battery is more than 15%. |
Wi-Fi Connection
- Download App / Register
Scan the QR code in below picture or search "TUYA SMART" from App Store / Play Store and download it. Register it according to the App operation instruction.


- Wi-Fi Connection
There are two Wi-Fi connection modes: EZ mode and AP mode. Note: Only support 2.4 GHz Wi-Fi for connection.
a. EZ Mode
-
Power on the robot, press and hold Power Button & Recharge Button for 3 seconds to enter EZ mode, you will hear a beep voice, Wi-Fi light flashes faster.
-
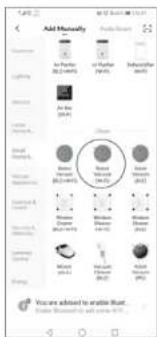
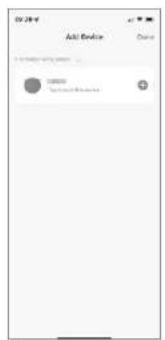
Log in your TUYA App and click "Add Device"
- Select "Small Home Appliance", then choose "Wi-Fi Robot Vacuum Cleaner".
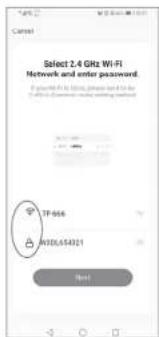
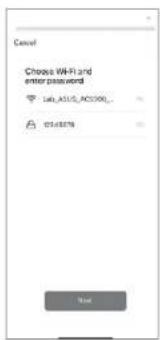
- Select 2.4GHz Wi-Fi network and enter Wi-Fi name and password, then click "Next".
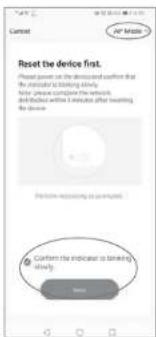
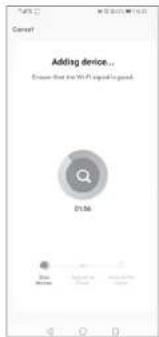
- Select EZ Mode, Click "Confirm the indicator is blinking rapidly" and "Next" to wait for connection result.
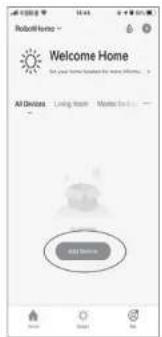
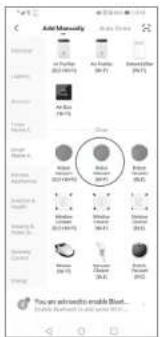
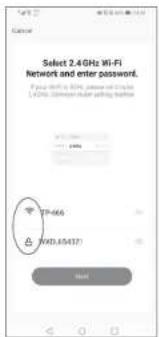
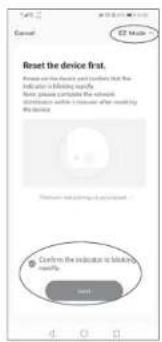
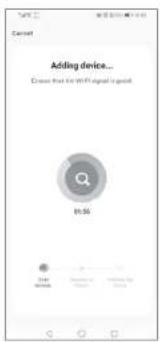
b. AP Mode
- Power on the robot, press and hold Power Button & Recharge Button for 6 seconds to enter AP mode, you will hear a beep voice. Wi-Fi light flashes slowly.
- Log in your TUYA App and click "Add Device"
- Select "Small Home Appliance", then choose "Wi-Fi Robot Vacuum Cleaner"
- Select 2.4GHz Wi-Fi network and enter Wi-Fi name and password, then click "Next".
- Select AP Mode and click "Confirm the indicator is blinking rapidly" and "Next".
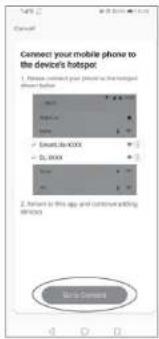
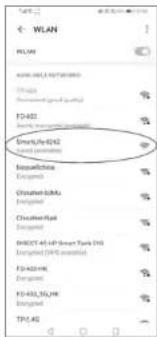
- Go to connect with the hotspot Wi-Fi which start with "SmartLife XXX".
- After connected with hotspot Wi-Fi, return to TUYA App Interface and wait for robot connection result.
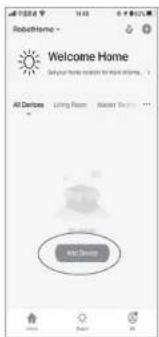
Bluetooth Connection
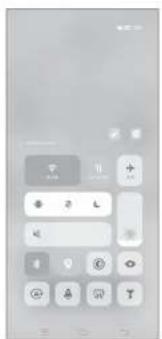
a. Make sure your phone's Bluetooth is turned on.
b. Press and hold the Power Button and the Recharge Button on the robot at the same time for 3 seconds to make sure the WiFi light is blinking.
c. Open "Tuya APP" to log in.
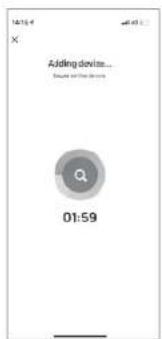
d. The APP will automatically search for nearby robots, click "Add".
e. Select 2.4 GHz Wi-Fi network and enter Wi-Fi name and password, then click "Next".
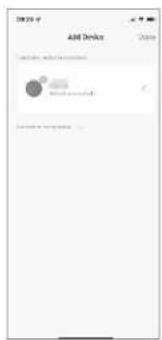
f. Wait the connection and select "Done".
![注册 Log 1.447 Password tuya QUICKLEIGN Try note [ ] [ ] [ ] [ ] [ ] [ ] [ ] [ ] [ ] [ ] [ ] [ ] [ ] [ ] [ ] [ ] [ ] [ ] [ ] [ ] [ ] [ ] [ ] [ ] [ ] [ ] [ ] [ ] [ ] [ ] [ ] [ ] [ ] [ ] [ ] [ ] [ ] [ ] [ ] [ ] [ ] [ ] [ ] [ ] [ ] [ ] [ ] [ ] [ ] [ ] [ ]](/content/2026/05/941778/images/dd67d855d40024667d1a00f90fddd19d1174b8a0ed69814d6f8bf7e1ee4e5846.jpg)
Tuya APP Control
Follow instruction in the APP to set up the Wi-Fi connection. After connected successfully, you can control Robot via APP such as cleaning mode, time settling, schedule, network connection status, notification and additional features.
Reset the Wi-Fi Connection
a EZ mode:
After power on the machine, press and hold the Power Button and the Recharge Button for around 5 seconds till hearing the sound of BEEP and release the buttons, while the Wi-Fi indicator on the machine FLASHING QUICKLY, which means device gets into EZ mode.
b. AP mode:
After power on the machine, press and hold the Power Button and the Recharge Button for around 5 seconds till hearing the sound of BEEP and release the buttons, while the Wi-Fi indicator on the machine FLASHING QUICKLY, which means device gets into EZ mode. After getting into EZ mode successfully, then press and hold two bottoms for around 5 seconds again till hearing the sound of BEEP and release the buttons, while the Wi-Fi indicator on the machine FLASHING SLOWLY, which means device gets into AP mode.
- IMPORTANT
- Safety Precaution Information
- Safety & Warning Information
- Risk of Personal Injury
- Safety Concern with Li-ion Batteries
- WARNING!
- Parts Identification
- Bottom View
- Charging Base
- Remote Control
- Packing List
- Quick Install Guide
- Use of Cleaning Function
- Method of Usage
- Preparations Before Usage
- Note: Do not use the device to clean up puddle of water.
- Use of Mopping Function
- Note: Please do not use the mopping function on carpets.
- Maintenance
- Note:
- Wi-Fi Connection
- Bluetooth Connection
- Tuya APP Control
- Reset the Wi-Fi Connection
Brand : Khind
Model : VC9E21
Category : Vacuum Cleaner