
BCHTS2340N - Range hood Becken - Free user manual and instructions
Find the device manual for free BCHTS2340N Becken in PDF.


| Product Type | Range Hood / Cooker Hood |
| Brand | Becken |
| Model | BCHTS2340N |
| Power Supply | 220-240 V, 50 Hz |
| Motor Speeds | 3 (Low, Medium, High) |
| Controls | Push buttons with indicator lights |
| Lighting Type | LED |
| Number of Lights | 2 |
| Light Power | 1.5 W each |
| Light Voltage | DC 12 V |
| Grease Filter Material | High-density stainless steel mesh |
| Filter Cleaning | Dishwasher safe at 60°C or hand wash |
| Carbon Filter | Yes (replaceable) |
| Installation Height | 65-75 cm above cooking surface |
| Maintenance Interval | Clean body every 2 months; filter as needed |
| Warranty | 2 years |
Frequently Asked Questions - BCHTS2340N Becken
User questions about BCHTS2340N Becken
0 question about this device. Answer the ones you know or ask your own.
Ask a new question about this device
Download the instructions for your Range hood in PDF format for free! Find your manual BCHTS2340N - Becken and take your electronic device back in hand. On this page are published all the documents necessary for the use of your device. BCHTS2340N by Becken.
USER MANUAL BCHTS2340N Becken
MANUAL DE INSTRUÇÕES
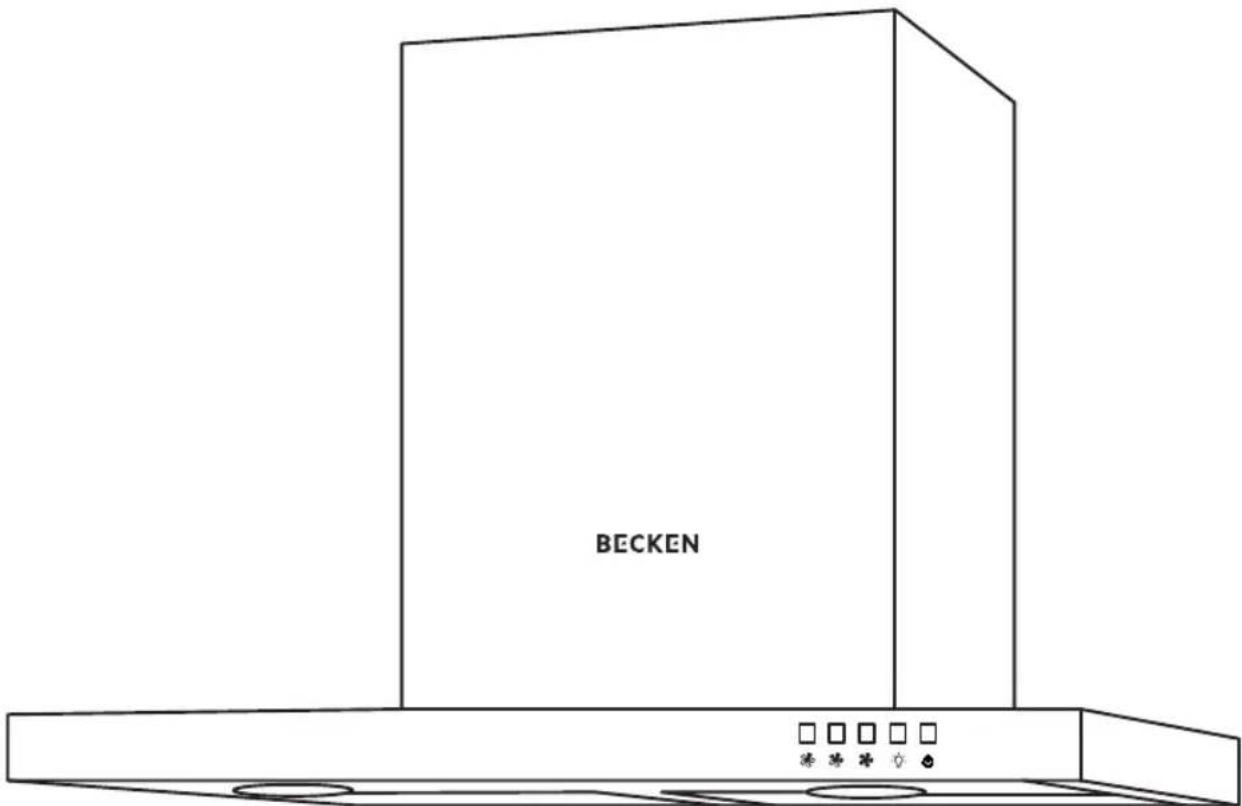
Dear client,
Thank you for purchasing this product.
The quality of this appliance has been certified by several laboratory tests. This instructions manual is provided to simplify the use of the appliance as well as to guarantee a safe use.
Please read carefully the instructions and safety measures described in this manual.
We sincerely hope you will be satisfied when using your new appliance.
INDEX
1. SAFETY INSTRUCTIONS 4
1.1. Power Supply 5
1.3. Humidity and Water 5
1.4. Cleaning 6
1.5. General Precautions 6
1.2. Power Cord and Other Cables 5
2. OPERATING INSTRUCTIONS 8
2.1. Product Description 8
2.2. Using the Product 12
2.3. Maintenance 13
2.4. Troubleshooting 15
-
POST-SALE SERVICE 17
-
ENVIRONMENTAL PROTECTION 17
Cooker Hood | Campana de cocina | Exaustor
BECKEN
1. SAFETY INSTRUCTIONS
 | WARNING |  |
| RISK OF ELECTRIC SHOCKDO NOT OPEN | ||
| Warning: to avoid the risk of electric shock, do not remove the cover. The interior does not contain any parts that can be repaired by the user. Ask for assistance from qualified personnel. | ||
Important Warnings
Before using your appliance read this instructions manual carefully and keep it in a safe place as you may need to consult it in the future.
Before turning on your appliance, and to ensure a safe and correct operation, do not use if:
- It has fallen to the ground;
- You notice any evidence of damage;
- Any anomaly occurs during its operation.
To avoid hazards or deterioration of your appliance through incorrect use it is advisable to read these instructions thoroughly.
Your appliance may not be used for other purposes than the ones intended and solely for household use. Any damage resulting from using the appliance outside this scope, any incorrect use, as well as any manual modifications to the product will not be covered and automatically voids the warranty.
[you can trust]
Assistance
In case of malfunction, take your appliance to a qualified technician for assistance.
This appliance can be used by children from the age of 8 and by people with reduced physical, sensorial or mental capabilities and/or lack of experience and knowledge if they have been given instructions on using the appliance safely and if they understand the hazards involved. Children may not play with the appliance. Cleaning and maintenance must not be carried out by children without supervision.
These instructions are also available at www.suporteworten.pt
1.1. Power Supply
Make sure the main voltage is compatible with the appliance's. If this is not the case please consult the Customer Support Service.
1.2. Power Cord and Other Cables
Do not tangle the cord or pull it to disconnect the appliance. Also, keep the cord away from warm surfaces.
Never use the appliance if it has a damaged cable or socket.
Take it to the Technical Support Service for replacement.
1.3. Humidity and Water
Do not use your appliance in humid places. Do not allow the appliance to become wet under any circumstances as this may be dangerous. To avoid fire hazard or electric shock do not expose your appliance to humidity or water. Furthermore, do not place your appliance under water (e.g. for cleaning).
BECKEN
1.4. Cleaning
Before cleaning, be sure to switch off the appliance and remove the plug from the main power supply. Always allow the unit to cool down before cleaning.
To clean the exterior of the product use a dry soft cloth only.
1.5. General Precautions
- Please follow the instructions in the user manual which help to properly install and operate this product and enjoy its advanced features. Please keep the instructions for future reference.
- Read all instructions before using the product.
- Maintenance and service operations are only to be carried out by authorized professionals.
- Any damage caused by manual modifications to the product is not covered by the warranty.
- If this product is used for other purposes than the ones originally intended, or if it is not correctly connected, the product may become damaged and the warranty will be voided.
- In order to get the most out of your cooker hood, please read the instruction manual before installing and using, and keep it in a safe place.
- The cooker hood and its mesh filter should be cleaned regularly in order to keep it in good working order.
- Your cooker hood is for domestic use only; it is not suitable for barbecue, roast shop or other commercial use.
[you can trust]
- Any installation work must be carried out by a qualified electrician or competent person.
- Do not use fire for drying your cooker hood.
- If there is any fault with your cooker hood, please call the service department appointed by the agent for servicing.
- Please keep the room ventilated when your cooker hood and gas hob are working.
- Before installation and use, read all the instructions and ensure that the voltage (V) and the frequency (Hz) indicated on your cooker hood are exactly the same as the voltage (V) and the frequency (Hz) in your home.
- Ensure that you obtain our warranty for your cooker hood, please provide the warranty card and purchase receipt, or the guarantee will not be offered.
- Do not check the filters with the hood working.
- Do not touch the lamps after a prolonged use of the appliance.
- No flambé food must be cooked underneath the hood.
- The use of an unprotected flame is dangerous for the filters and could cause a fire.
- Watch the fried food constantly in order to avoid the cooking oil to flare up.
- Before performing any maintenance operation, disconnect the hood from the mains.
BECKEN
2. OPERATING INSTRUCTIONS
2.1. Product Description
- Equipped with a high power, low noise electric motor and centrifugal leaf, it produces a strong low noise suction, non-stick grease filter, which is easy to clean.
- The lights are safer, due to the isolated low voltage circuit board control, 12 vAC input.
- A special wind tunnel construction and oil collector design has been used, instantly absorbing dirt.
Installation Instructions
- Before installation, please ensure the area is clean to avoid suction of the remaining bits of broken wood and dust.
- The air ventilation tube should not be shared with other appliances such as gas tube, warmer tube and hot wind tube.
- The inclination of the ventilation tube should be >120^ , parallel or above the start point and should be connected to the external wall.
- After the installation, make sure that the extractor is levelled to avoid grease from collecting on one end.

[you can trust]
Model without Glass
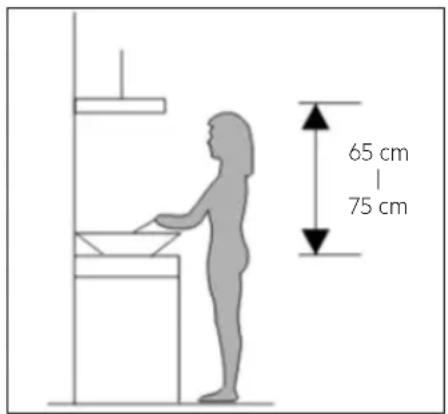
1) The cooker hood should be placed at a distance of 65-75 cm (26-30 inch) from the cooking surface for the best effect (See Pic 1).

Pic 1
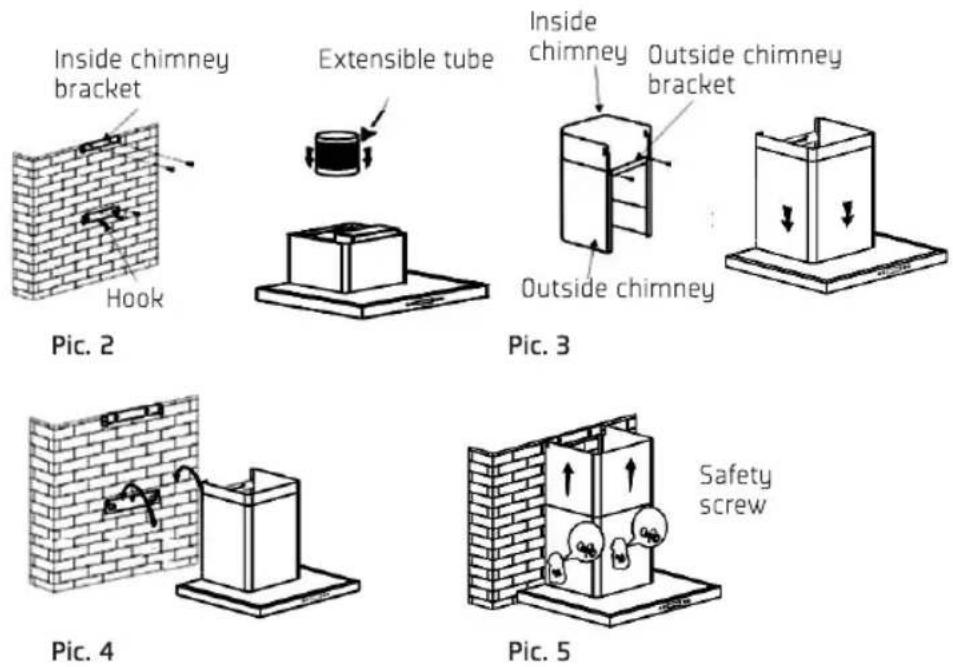
2) Install the hook on a suitable place once the installation height is fixed and keep it level. The fixed position of the inside chimney bracket is the place for the chimney (See Pic 2).
Cooker Hood | Campana de cocina | Exaustor
BECKEN
3) Fix the outside chimney bracket on the outside chimney and be sure that the height of the inside chimney can be adjusted freely, as well as to adjust the extensible pipe. Afterwards, install the extensible pipe and chimney on the cooker hood (See Pic 3).
4) Put the cooker hood on the hook (See Pic 4).
5) Adjust the height of the inside chimney to the position of the inside chimney bracket and fix it with a screw. After adjusting the position, fix the body with a safety screw (See Pic 5).
Note: The two safety vents are positioned on the back casing, with 6 mm in diameter.
Model with Glass
1) The cooker hood should be placed at a distance of 65-75 cm (26-30 inch) from the cooking surface for the best effect (See Pic 1).
Pic 1
2) Install the hook on a suitable place once the installation height is fixed and keep it level. The fixed position of the inside chimney bracket is the place for the chimney (See Pic 2).
[you can trust]
3) Fix the extensible pipe according to the lead direction and then put the cooker hood on the hook (See Pic 3).
4) Put the glass according to the lead direction on the cooker hood and then use the screws to fix the glass. Also, lead the extensible pipe outside of the room, meanwhile adjust the height of the inside chimney to the position of the inside chimney bracket and fix on it by screw. You should be sure the inside chimney can be flexed freely (See Pic 4).
5) Put the two chimneys together onto the cooker hood body, meanwhile adjust the height of the inside chimney into the suitable height and fix the inside chimney to the inside chimney bracket by screw. Finally, fix the body with the safety screw (See Pic 5).
Note: The two safety vents are positioned on the back casing, with diameter of 6 mm.

BECKEN
2.2. Using the Product
Speed Adjustment (See Pic 6A):
- Press the "low" button. The indicating light will turn on and the motor will run at low speed. Press it again and the motor will stop.
- Press the "middle" button. The indicating light will turn on and the motor will run at mid speed. Press it again and the motor will stop.
- Press the "high" button. The indicating light will turn on and the motor will run at high speed. Press it again and the motor will stop.
- Press the "light" button, the lighting lamps will turn on. Press it again and the lamps will turn off.
- Press the “on/off” button, the indicating lights for “on/off” button and low speed button will turn on and the motor will work at low speed. Press the button “on/off” again, the indicating lights will be off. All the function of the hood will be closed, the hood enters into standby mode.
Indicator light

Pic 6A
- Press the stop button and the motor will stop.
- Press the low button, the motor will run at low speed.
- Press the mid button, the motor will run at mid speed.
- Press the high button, the motor will run at high speed.
[you can trust]
- Press the light button and the two lights will turn on. Press it again and the lights will turn off.


Stop

Low


Mid
2.3. Maintenance
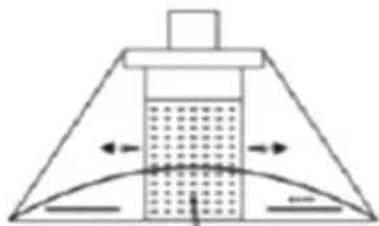
Cleaning of the carbon grease mesh filter:
The mesh filter is made of high-density stainless steel. Please do not use corrosive detergent to clean it. Keeping this filter clean will keep the appliance running correctly. Please follow the guidelines below strictly.
Method 1: Put the mesh into 40-50 cl of clean water, pour on detergent and soak for 2-3 minutes. Wear gloves and clean with a soft brush. Please do not apply too much pressure, as the mesh is delicate and can be easily damaged.
Method 2: If instructed to do so, it can be put in the dishwasher, set the temperature at around 60 degrees.

natural_image
Diagram of a conical container with internal grid pattern and directional arrows (no text or symbols)Oil soot mesh filter Oil soot mesh filter
natural_image
Simple line drawing of a hat and a rectangular object (no text or symbols)
natural_image
Simple line drawing of a hat and a placket (no text or symbols)Oil soot mesh filter Oil soot mesh filter
Cooker Hood | Campana de cocina | Exaustor
BECKEN
Cleaning the cooker hood:
A. To protect the main body from corrosion over a long period of time, the cooker hood should be cleaned with hot water and a non-corrosive detergent every two months.
B. Please do not use abrasive detergents for they will damage the body.
C. Keep the motor and other spare parts free from water, as this will cause damage to the appliance.
D. Before cleaning the appliance please remember to cut off the power.
E. The carbon filter shouldn't be exposed to heat.
F. Please don't tear open the fixed bar around the carbon filter.
G. If the plug or cord is damaged, please replace it with a special soft cord.
Changing the lights:
Warning: The LED light should be replaced by a competent person! If the LED light is damaged, contact the Customer Support Service for assistance.
- Remove the grease filter.
- Use a tool or the hand to press the spring splinter of both sides of LED light to the inside, until the light is pressed out, see pic 1. Then slightly pull the light connecting wire out, and dismantle the terminal of the light connecting wire. See pic 2.
[you can trust]
-
Apply the reverse procedure to install the light back.
-
ILCOS D code for this lamp is:DSR-1.5/65-S-64
- LED modules -round lamp
- Max wattage: 2×1.5 W
- Voltage range: DC 12V
- Dimensions:


natural_image
Mechanical component diagram showing a lever and base with arrows indicating motion (no text or symbols)Pic 1

natural_image
Diagram of a ceiling lamp with adjustable arm and base, showing no text or symbolsPic 2
2.4. Troubleshooting
| PROBLEM CAUSE SOLUTION | ||
| Light is on, but the motor does not work | The leaf is blocked Remove | the blocking |
| The capacitor is damaged | Replace the capacitor | |
| The motor is jammed and appears damaged | Replace the motor | |
| The internal motor is off or there is a bad smell coming from the motor | Replace the motor | |
BECKEN
| PROBLEM CAUSE SOLUTION | ||
| The light does not work; the motor does not work | Beside what is listed above, please check the following | |
| The light is damaged Replace the lights | ||
| The power cord is loose Connect the wires as per the electric diagram | ||
| Oil leakage The | one-way valve and the air ventilation entrance are not sealed tightly. | Take down the one-way valve and seal it with glue |
| Leakage from the connection between the U-shaped section and the cover | Take the U-shaped section down and seal it with soap or paint | |
| The body of the appliance shakes | The leaf is damaged and causes shaking | Replace the leaf |
| The motor is not hanged tightly | Lock the motor tightly | |
| The body is not hanged tightly | Fix the body tightly | |
| Insufficient suction | The distance between the body and the gas top is too long | Readjust the distance |
| Too much ventilation from open doors or windows | Choose a new place and reassemble the appliance | |
| The machine inclines | The fixing screw is not tight enough | Tighten the hanging screw and make it level |
| The hanging screw is not tight enough | Tighten the hanging screw and make it level | |
[you can trust]
3. POST-SALE SERVICE
BECKEN has designed this appliance in order to guarantee maximum reliability. However, if a problem occurs do not attempt to open the appliance - there is a risk of electrical shock. If you are not able to solve the problem, please contact the Costumer Support Service of any Worten, Modelo or Continente store in order to be assisted. Worten Equipamentos para o Lar provides a 2-year warranty for manufacturing defects from the date of purchase of the appliance.
WARNING: Any attempt to repair the appliance without contacting the manufacturer or seller will void the warranty.
All users must be familiar with these instructions. Knowing what could go wrong can help prevent problems from occurring.
4. ENVIRONMENTAL PROTECTION
In order to protect the environment we strive to reduce the volume of packaging used, limiting it to three easily sorted materials: cardboard, paper and plastic. The appliance is manufactured using recyclable materials after disassembled by a specialized company. Please comply with local regulations concerning the recycling of all materials.

natural_image
Symbol of a trash bin with crossed lines indicating no waste or discharge (no text or numbers present)Estimado cliente,

natural_image
Simple line drawing of a conical container with internal grid pattern and directional arrows (no text or symbols)natural_image
Simple line drawing of a hat and a rectangular object with a small mark, no text or symbols present.natural_image
Simple line drawing of a hat and a folded paper with a small rectangular object (no text or symbols)natural_image
Mechanical assembly diagram showing a rotating component with arrows indicating motion direction (no text or labels)Pic 1

natural_image
Diagram of a ceiling lamp with internal components and directional arrows indicating assembly or installation (no text or symbols)Pic 2
natural_image
Symbol of a trash bin crossed with no visible text or numbersCaro(a) cliente,
natural_image
Pure diagram of a conical structure with internal grid pattern and directional arrows, no text or symbols present.natural_image
Simple line drawing of a hat with a folded top and a flat base, no text or symbols present.natural_image
Simple line drawing of a hat and a tray with a handle, no text or symbols presentnatural_image
Mechanical assembly diagram showing a rotating component with arrows indicating motion direction (no text or symbols)Pic 1

natural_image
Diagram of a ceiling lamp with internal components and directional arrows indicating assembly or movement (no text or symbols)Pic 2
natural_image
Symbol of a trash bin crossed with no waste, representing discharge or disposal (no text present)PT
51
BECKEN
Imported, produced and distributed by:
Worten Equipamentos p/o Lar S.A.
- INDEX
- SAFETY INSTRUCTIONS 4
- OPERATING INSTRUCTIONS 8
- BECKEN
- SAFETY INSTRUCTIONS
- Important Warnings
- Assistance
- Power Supply
- Power Cord and Other Cables
- Humidity and Water
- Cleaning
- General Precautions
- OPERATING INSTRUCTIONS
- Product Description
- Installation Instructions
- Model without Glass
- Model with Glass
- Using the Product
- Speed Adjustment (See Pic 6A):
- Indicator light
- Maintenance
- Cleaning the cooker hood:
- Troubleshooting
- POST-SALE SERVICE
- ENVIRONMENTAL PROTECTION
Brand : Becken
Model : BCHTS2340N
Category : Range hood