
42510 - Environmental Thermometer Extech - Free user manual and instructions
Find the device manual for free 42510 Extech in PDF.


| Product Type | Non-contact Infrared Thermometer with Laser Pointer |
| Model | Extech 42510 |
| Temperature Range (IR) | -50 to 538°C (-58 to 1000°F) |
| Resolution | 0.1°C/°F from -50 to 200°C (-58 to 200°F); 1°C/°F above 200°C (200°F) |
| Accuracy | ±1% of reading or ±1°C (±1.8°F) whichever greater (15-50°C ambient); ±2% of reading or ±2°C (±4°F) for remainder |
| Emissivity | Fixed at 0.95 |
| Field of View | 8:1 (distance to spot ratio) |
| Laser Pointer | Class II, <1mW power |
| Display | Backlit LCD with function indicators |
| Display Update Rate | Approximately 1 second |
| Operating Temperature | 0 to 50°C (32 to 122°F) |
| Operating Humidity | Max 80% RH |
| Power Supply | 9V battery (included) |
| Auto Power Off | After 6 seconds of inactivity |
| Dimensions | 82 x 42 x 160 mm (3.2 x 1.6 x 6.3 in) |
| Weight | 180 g (6.4 oz) |
| Spectral Response | 6 to 14 μm |
| Over-range Indication | Display dashes when measurement exceeds 538°C (1000°F) |
| Battery Replacement | Replace with 9V battery when low battery symbol appears; compartment behind trigger panel |
| Safety Precautions | Do not point laser at eyes; avoid explosive environments; do not use near reflective surfaces to eye |
| Maintenance | Clean lens with soft cloth; avoid steam, dust, smoke; allow 30 min to stabilize after large ambient temp changes |
Frequently Asked Questions - 42510 Extech
User questions about 42510 Extech
0 question about this device. Answer the ones you know or ask your own.
Ask a new question about this device
Download the instructions for your Environmental Thermometer in PDF format for free! Find your manual 42510 - Extech and take your electronic device back in hand. On this page are published all the documents necessary for the use of your device. 42510 by Extech.
USER MANUAL 42510 Extech
Wide Range Mini InfraRed Thermometer with Laser Pointer
MODEL 42510
CE
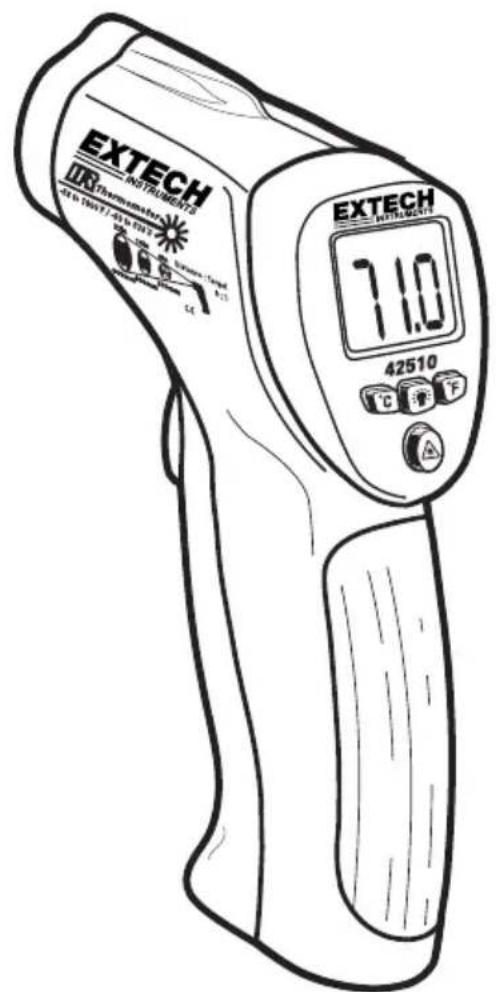
Congratulations on your purchase of the Model 42510 IR Thermometer. This thermometer measures and displays non-contact (infrared) temperature readings at the touch of a button. The built-in laser pointer increases target accuracy while the backlit LCD and handy push-buttons combine for convenient, ergonomic operation. Proper use and care of this meter will provide years of reliable service.
Safety
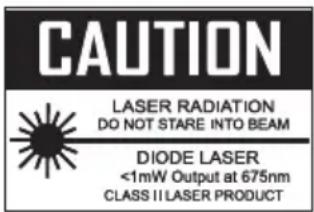
- Use extreme caution when the laser pointer beam is on
- Do not point the beam toward anyone's eye or allow the beam to strike the eye from a reflective surface
- Do not use the laser near explosive gases or in other potentially explosive areas
Specifications
Infrared Thermometer Specifications
| Range / Resolution | -50 to 200°C (-58 to 200°F)200°C to 538°C (200°F to 1000°F) | 0.1°1° |
| Accuracy ± 1% of reading or ±1 °C (1.8°F) whichever is greater, from 15 to 50°C (60 to 113°F)± 2% of reading or ±2°C (4°F) whichever is greater, for remainder of range: -50 to 537°C (-58 to 1000°F)Note: Accuracy is specified for the following ambient temperature range: 18 to 28°C (64 to 82°F) | ||
| Emissivity 0.95 fixed value | ||
| Field of View D/S = Approx. 8:1 ratio (D = distance; S = spot) | ||
| Laser power Less than 1mW | ||
| Spectral response | 6 to 14 μm (wavelength) | |
General Specifications
| Display Backlit LCD display with function indicators | |
| Display update rate 1 second approx. | |
| Operating Temperature | 0^ to 50^ ( 32^ to 122^ ) |
| Operating Humidity Max. 80% RH. | |
| Power Supply 9V battery | |
| Automatic Power Off Meter shuts off automatically after 6 seconds | |
| Weight 180g / 6.4 oz. | |
| Dimensions 82 x 42 x 160mm (3.2 x 1.6 x 6.3") | |
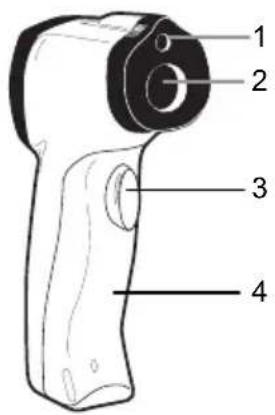
- Laser pointer beam
- IR Sensor
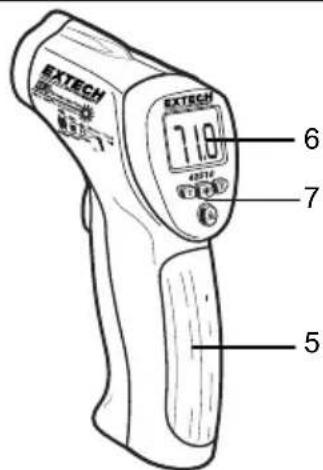
- Measurement trigger
- Battery compartment cover
- Handle grip
- LCD Display
- Function Buttons
Operating Instructions
- Hold the meter by its Handle Grip and point it toward the surface to be measured.
- Pull and hold the orange Trigger to turn the meter on and begin testing. The temperature reading, the 'SCAN' icon, the emissivity icon (E=0.95), and the unit of measure will appear. Note: Replace the battery if the display does not light.
- While continuing to pull the Trigger:
a. Push the laser button ⚙ to turn on the laser pointer. When the laser is ON the laser icon will appear on the LCD over the temperature reading. Aim the red beam approximately a half inch above the point of test (pressing the laser button again turns the laser off).
b. Select the temperature units using the °C or °F button.
c. Push the backlight button ⚙ to turn on the LCD backlighting function.
- Release the Trigger and the reading will hold for approximately 6 seconds (HOLD will appear on the LCD) and then the meter will automatically shut off.
Over-range Indicator
If the temperature measurement exceeds 538^ (1000°F), the thermometer will display dashes in place of a temperature reading.
Field of View
The meter's field of view is 8:1. For example, if the meter is 16 inches from the target (spot), the diameter of the target must be at least 2 inches. Other distance ratios are shown below in the field of view diagram.
Note that measurements should normally be made less than 2 feet from the target. The meter can measure from further distances but the measurement may be affected by external sources of light. In addition, the spot size may be so large that it encompasses surface areas not intended to be measured.
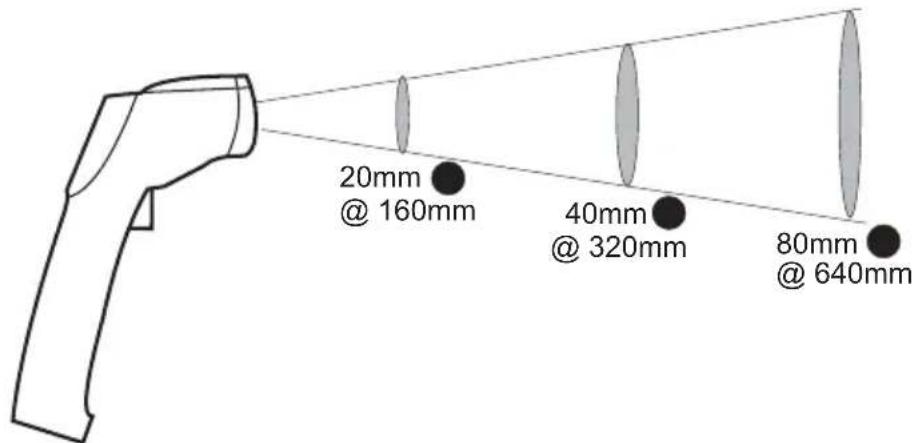
Measurement Notes
- The object under test should be larger than the spot (target) size calculated by the field of view diagram.
- If the surface of the object under test is covered with frost, oil, grime, etc., clean before taking measurements.
- If an object's surface is highly reflective, apply masking tape or flat black paint to the surface before measuring.
- The meter may not make accurate measurements through transparent surfaces such as glass.
- Steam, dust, smoke, etc. can obscure measurements.
- The meter compensates for deviations in ambient temperature. It can, however, take up to 30 minutes for the meter to adjust to extremely wide ambient temperature changes.
- To find a hot spot, aim the meter outside the area of interest then scan across (in an up and down motion) until the hot spot is located.
Battery Replacement
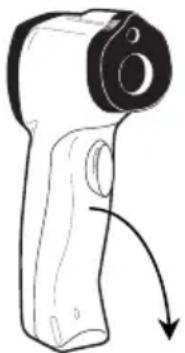
When the low battery symbol appears on the lower left side of the display, replace the meter's battery (9V). The battery compartment is located behind the light green panel that surrounds the meter's trigger (see diagram). Open the compartment by pulling the light green panel down from the trigger area. Replace the 9V battery and close the battery compartment cover.
natural_image
Line drawing of a handheld device with a curved arrow indicating rotation (no text or symbols)
You, as the end user, are legally bound (EU Battery ordinance) to return all used batteries, disposal in the household garbage is prohibited! You can hand over your used batteries / accumulators at collection points in your community or wherever batteries / accumulators are sold!
Disposal: Follow the valid legal stipulations in respect of the disposal of the device at the end of its lifecycle
Copyright © 2013 FLIR Systems, Inc.
All rights reserved including the right of reproduction in whole or in part in any form ISO-9001 Certified
www.extech.com
Brand : Extech
Model : 42510
Category : Environmental Thermometer