TP100 - Telephone Oricom - Free user manual and instructions
Find the device manual for free TP100 Oricom in PDF.


| Product Type | Corded Telephone |
| Brand | Oricom |
| Model | TP100 |
| Dimensions (approx.) | 21 x 15 x 10 cm |
| Weight (approx.) | 500 g |
| Power Source | Line powered (no batteries required) |
| Ringer Type | Electronic tone |
| Ringer Volume Control | Yes, adjustable |
| Handset Volume Control | Yes, adjustable |
| Last Number Redial | Yes |
| Mute Function | Yes |
| Caller ID | Yes (requires service from provider) |
| Number of Memory Buttons | 10 (one-touch dial) |
| Display Type | LCD |
| Wall Mountable | Yes |
| Handset Cord Length | 2.1 m |
| Line Cord Length | 2.5 m |
| Cleaning Instructions | Wipe with a soft, dry cloth. Do not use liquids or aerosols. |
| Safety Warnings | Keep away from water and moisture. Avoid exposure to extreme temperatures. |
| Spare Parts Availability | Handset cords and base units available through Oricom support |
| Repairability | Modular design; handset and base can be replaced separately |
| Intended Use | Home or office landline telephone |
Frequently Asked Questions - TP100 Oricom
User questions about TP100 Oricom
0 question about this device. Answer the ones you know or ask your own.
Ask a new question about this device
Download the instructions for your Telephone in PDF format for free! Find your manual TP100 - Oricom and take your electronic device back in hand. On this page are published all the documents necessary for the use of your device. TP100 by Oricom.
USER MANUAL TP100 Oricom
Oricom International Pty Ltd
Locked Bag 658
South Windsor NSW 2756
Australia
Customer support
Email: support@oricom.com.au
Web: www.oricom.com.au
Fax: +61 (02) 4574 8898
Ph: 1300 889 785
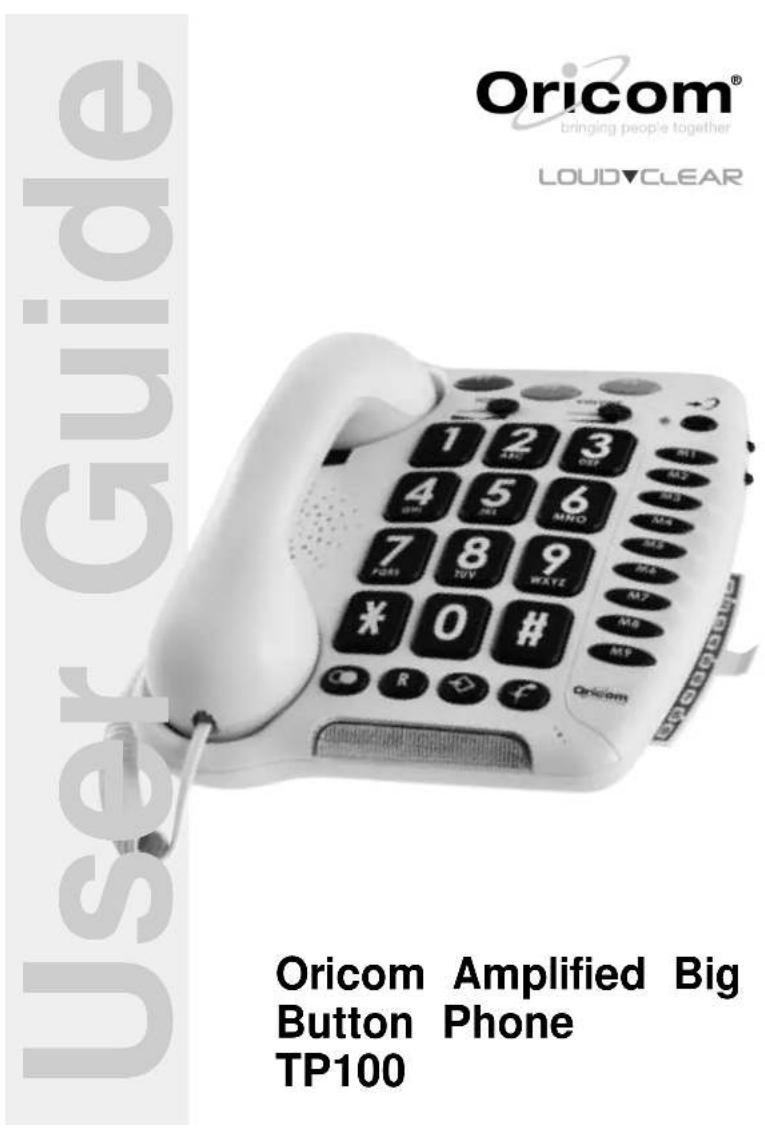

natural_image
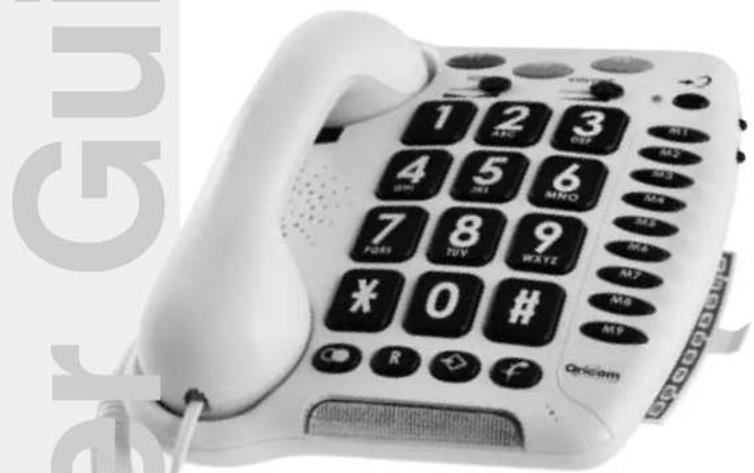
White telegraph telephone with keypad and function buttons, no visible text or symbols on the device itself.Oricom Amplified Big
Button Phone
TP100
Your Oricom TP100 features
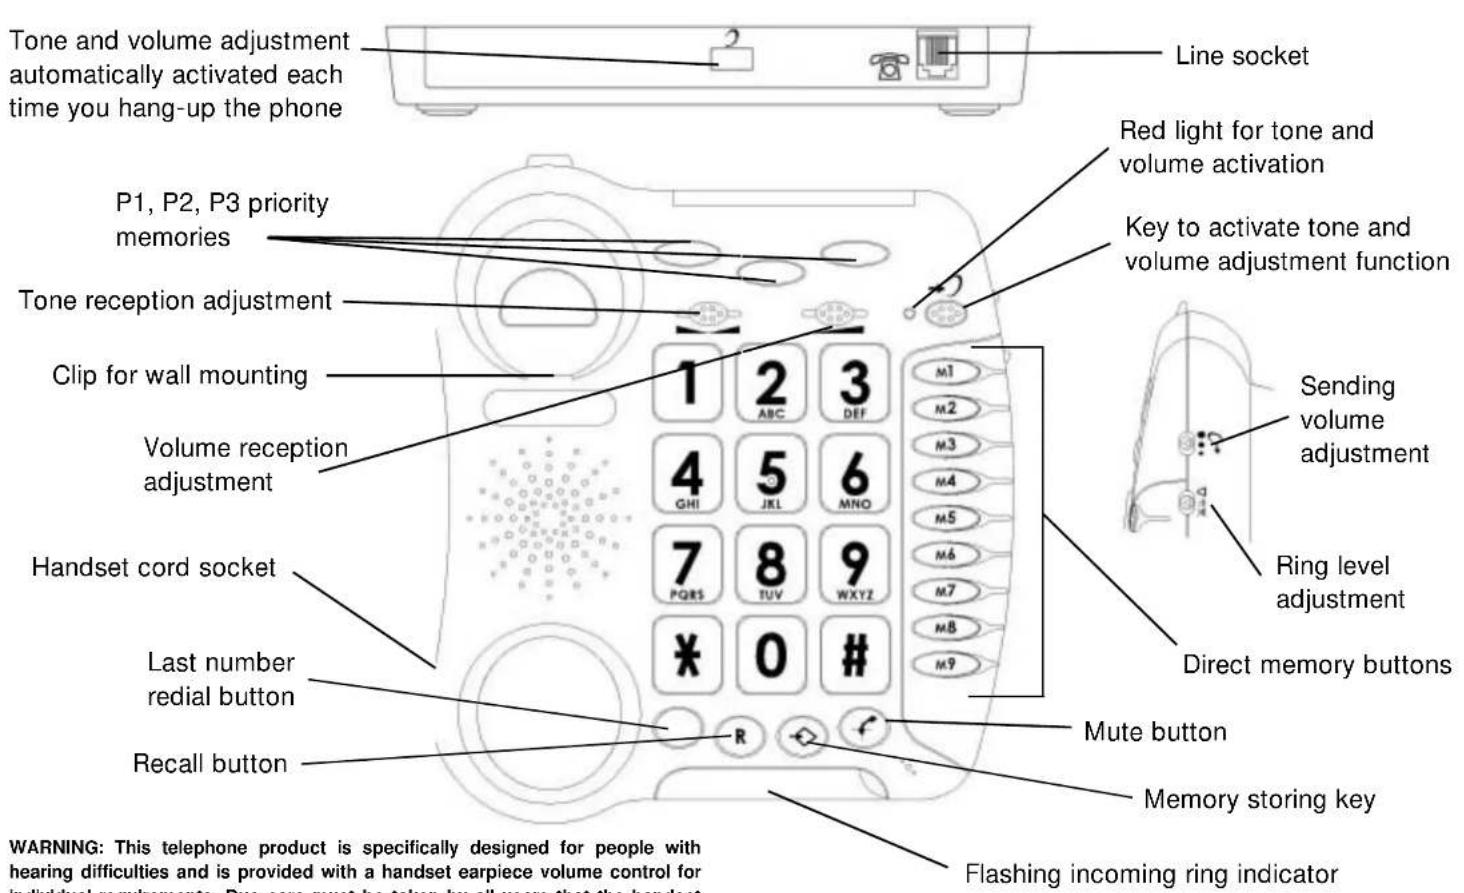
WARNING: This telephone product is specifically designed for people with hearing difficulties and is provided with a handset earpiece volume control for individual requirements. Due care must be taken by all users that the handset earpiece volume control is set to the lowest level acceptable by each respective user. Care should therefore be exercised to ensure that all users are familiar with this requirement.

N13134
The A-Tick shows this product complies with all current ACA standards.
Setting up your Oricom TP100
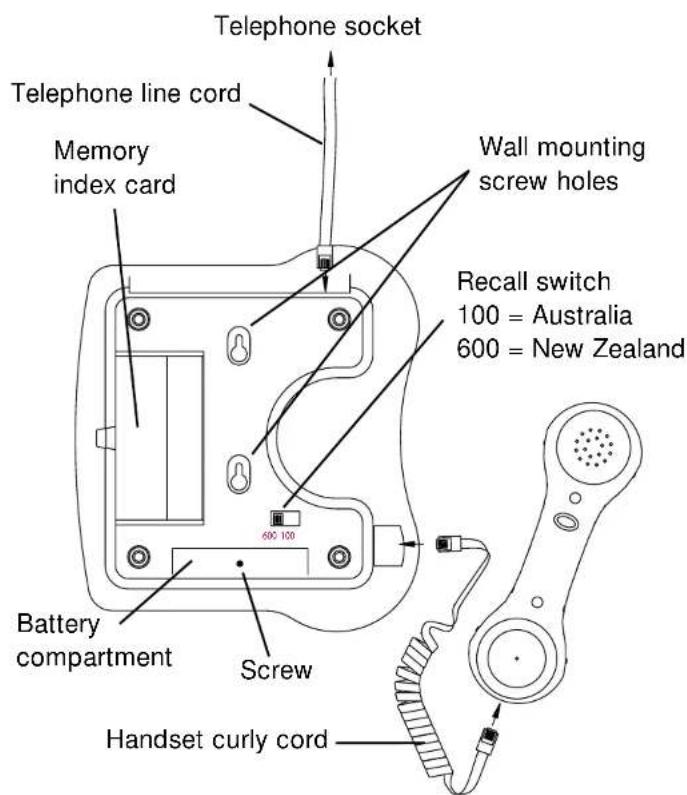
WARNING: Before installing or removing batteries, make sure the telephone is NOT connected to the telephone socket.
Connecting the telephone
- Connect the handset curly cord.
- Locate the battery compartment on the base of the phone. Using a small phillips head screwdriver unscrew the small screw and slide back the battery compartment door in the direction of the arrow.
- Insert four AAA 1.5V alkaline batteries (supplied) in the battery compartment, observing the correct polarity. Batteries must be installed if you wish to increase the ring level by 10 dB.
- Replace the battery door and replace the retaining screw.
- Connect the telephone line cord.
- Connect the telephone plug to the wall socket.
Warnings
- Do not use your telephone during an electrical storm/thunderstorm as it is possible to get an electric shock. Refer to information contained in Telstra White pages directory.
- The earpiece of the handset may attract small metal objects such as staples and pins. Care should be taken when placing the handset near these items.
- To prevent electric shock, do not open the handset or base cabinet.
- Clean with a dry, soft, lint-free cloth.
- Never use cleaning agents, particularly aggressive solvents.
- The telephone is designed for indoor use (temperature range of -10 °C to 50 °C).
- Do not install the telephone in areas where there is the risk of an explosion, excessive exposure to smoke, dust, vibrations, chemicals, moisture, and heat.
- The unit must not be installed in damp locations such as a bathroom or laundry, do not expose the unit to direct sun light.
Notes for operation in New Zealand
The grant of a Telepermit for any item of terminal equipment indicates only that Telecom has accepted that the item complies with the minimum conditions for connection to its network. It indicates no endorsement of the product by Telecom, nor does it provide any sort of warranty. Above all, it provides no assurance that any item will work correctly in all respects with another item of Telepermitted equipment of a different make or model, nor does it imply that any product is compatible with all of Telecom's network services. This equipment shall not be set to make automatic calls to the Telecom "111" Emergency Service. This equipment may not provide for the effective hand-over of a call to another device connected to the same line.
This device may be subject to ringing or bell tinkle when certain other devices are connected to the same line. If this occurs, the problem should not be referred to the Telecom Faults Service.
The Oricom TP100 telephone is intended to be used by people who are hearing impaired. When they use the telephone its loudness settings are likely to be set for their use. If a person with normal hearing then tries to use the telephone, they could receive a signal level into their ear that damages their hearing. Telecom takes no responsibility should such an event occur.
REN (RN for New Zealand)
The REN (Ringer Equivalence Number) or (RN) is of significance only if you wish to connect more than 1 telephone to your telephone line. A standard telephone line has a maximum REN capacity of 3 (RN of 5). It is possible to connect 3(5) devices with a REN of 1 (RN of 1) with no degradation to the product's performance. Exceeding this limit may cause the volume of the ringer in any phone to decrease or not ring at all.
Ringer settings
A switch located on the right side allows the ringer to be switched Hi, Low, and Off.


Off Low Hi
Note: The ring level will be increased by 10 dB if you insert batteries into the battery compartment.
Your phone comes with the ringer switched to High and the melody set to 6.
| Low | Mid | High | |
| Melody 1 | 1 | 2 | 3 |
| Melody 2 | 4 | 5 | 6 (by default) |
| Melody 3 | 7 | 8 | 9 |
If you don't like the ringer melody, you can choose a new one by changing the settings as follow:
- Lift the handset.
- Press → button.
- Press # button.
- Press any button 1 to 9.
Ringer will be activated on next call.
Recall switch (600/100)
You will use the RECALL button when using your network operator's services such as call waiting etc. If this feature is not working check the position of the Recall switch on the base of the phone. In Australia it should be set at 100ms and in New Zealand at 600ms.
Wall mounting
To wall-mount your telephone, slide out the clip, turn around and slide back into the wall mounting position (located in the base unit, just below the ear piece). This will ensure that the handset stays firmly in position. Drill 2 holes in the wall 80mm apart, insert the wall plugs into the wall if required. Insert two screws (not supplied). The screws should protrude from the wall by 6-7 mm. Place the phone onto the screw-heads and slide down to secure.
If you are using this telephone with a hearing aid, set your hearing aid to the "T" setting.
Answering an incoming call
- When an incoming call is received the phone will ring and flash, to answer the call lift the handset and speak.
- On completion of the call, carefully replace the handset in the cradle to release the line.
Volume and tone receiving adjustment
You can increase the volume and adjust the receiving tone according to your own hearing requirements.
The button allows extra receiving and tone functions to be activated during the conversation. When the function is activated, the red light located near the button is lit.
Adjust the tone and volume levels with the side switches according to your own hearing requirements.
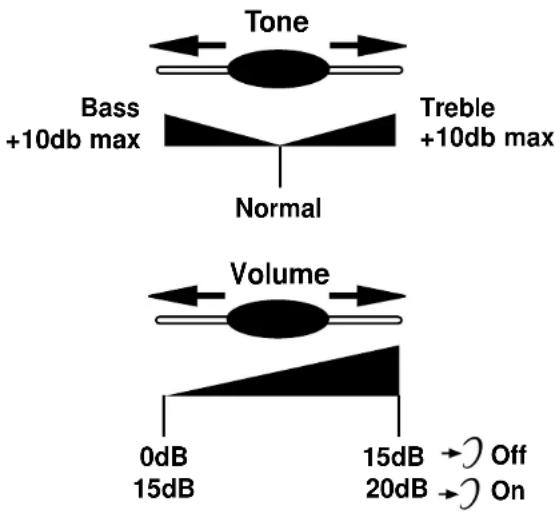
Note: When the tone (treble), earpiece volume and sending levels are set to the maximum, whistling may occur. If whistling occurs the sending level settings should be decreased with the switch ⬇. When the switch located on the rear of the phone is ON, the extra-receiving and tone functions are automatically activated each time you use the phone. When this switch is switched OFF, you will need to activate the function by pressing the button ⬇Tone and volume adjustment (15dB to 20dB) is only activated when the button ⬇ is set to ON. When this button is set to OFF only the volume can be adjusted from 0dB to 15dB.
Making a call
- Lift handset and dial required number.
- On completion of the call, replace the handset in the cradle.
Sending volume adjustment
If your voice is quiet or called parties have difficulty hearing you, you can increase the sending level volume with the switch located on the right side. You can also decrease the sending volume if required.
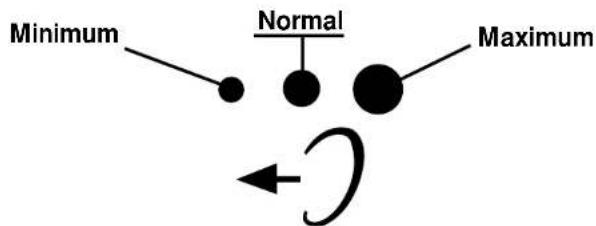
flowchart
graph TD
    A["Minimum"] --> B["●"]
    C["Normal"] --> D["●"]
    E["Maximum"] --> F["●"]
    G["arrow"] --> H["Curved Arrow"]
Last number redial
- Lift the handset.
- Listen for dial tone and press ● redial button.
Note: The previously dialled number will be automatically redialled (not in use for memory numbers).
Mute button
If you wish to speak privately to someone else, hold the button. You will still be able to hear the callers but they cannot hear you during the mute operation. To resume normal conversation, release the button.
Storing telephone numbers
Your phone can store 12 one touch memories (21 digits maximum for each memory).
To store a number please follow instructions below:
- Lift the handset.
- Press → button.
- Press M1, M2, ..., or M9 or P1, P2, P3 numbers to store your number.
- Dial the number you wish to store.
- Press → button again.
Note: Numbers will be lost after a few hours if you disconnect your phone. Entering a new number in memory will automatically erase the previous number stored in that location.
Dialling stored numbers
- Lift the handset and await the dial tone.
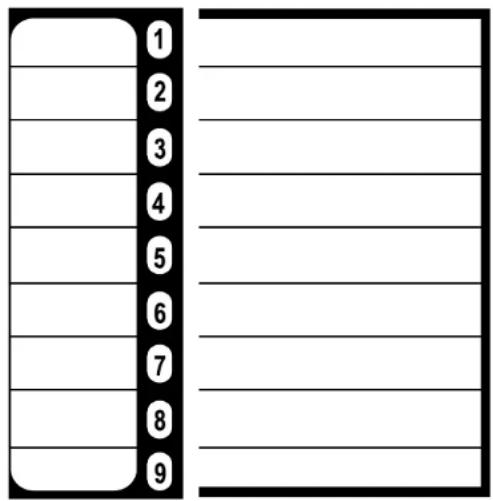
- Press appropriate button M1, M2, ..., or M9 or P1, P2, P3, the stored number will be dialled automatically. For easy reference to the numbers you have stored in memories M1-M9, use the index card located under the base of the phone.
Use this table below to prepare the phone book:
Example:

Warranty information
This product is covered by a 12 month warranty against defective workmanship or parts. The warranty does not extend to damage caused by misuse, negligence, water ingress, battery leakage or lightning. This guarantee in no way affects your statutory rights. Full details of the warranty are contained in the enclosed warranty card.
Important
Your receipt is part of your warranty and must be retained and produced in the event of a warranty claim.
If you feel this product is not working correctly please consult the user guide and ensure that you are using the product in accordance with the instructions.
For assistance with technical issues please consult our website for further information or send us an email for a prompt response to your enquiry. In the unlikely event of a fault developing, please contact us for assistance.
- Customer support
- N13134
- Setting up your Oricom TP100
- Connecting the telephone
- Warnings
- Notes for operation in New Zealand
- REN (RN for New Zealand)
- Ringer settings
- Recall switch (600/100)
- Wall mounting
- Answering an incoming call
- Volume and tone receiving adjustment
- Making a call
- Sending volume adjustment
- Last number redial
- Mute button
- Storing telephone numbers
- Dialling stored numbers
- Warranty information
- Important
Brand : Oricom
Model : TP100
Category : Telephone