
TPC-97150 - Graphic tablet Vivax - Free user manual and instructions
Find the device manual for free TPC-97150 Vivax in PDF.


| Product Type | Graphic Tablet |
| Brand | Vivax |
| Model | TPC-97150 |
| Dimensions (approx) | 350 x 240 x 10 mm |
| Weight (approx) | 600 g |
| Active Area | 200 x 125 mm |
| Pressure Levels | 2048 |
| Resolution | 2540 LPI |
| Pen Technology | Battery-free electromagnetic resonance |
| Connectivity | USB 2.0 |
| Power Supply | USB powered |
| Compatible Systems | Windows, macOS |
| Main Functions | Digital drawing, sketching, photo editing, note taking |
| Cleaning Instructions | Wipe with soft dry cloth; do not use solvents or abrasive cleaners |
| Safety Precautions | Keep away from liquids; do not disassemble; avoid dropping |
| Spare Parts Available | Replacement pen, USB cable |
| General Information | Suitable for artists and designers; driver installation required |
Frequently Asked Questions - TPC-97150 Vivax
User questions about TPC-97150 Vivax
0 question about this device. Answer the ones you know or ask your own.
Ask a new question about this device
Download the instructions for your Graphic tablet in PDF format for free! Find your manual TPC-97150 - Vivax and take your electronic device back in hand. On this page are published all the documents necessary for the use of your device. TPC-97150 by Vivax.
USER MANUAL TPC-97150 Vivax
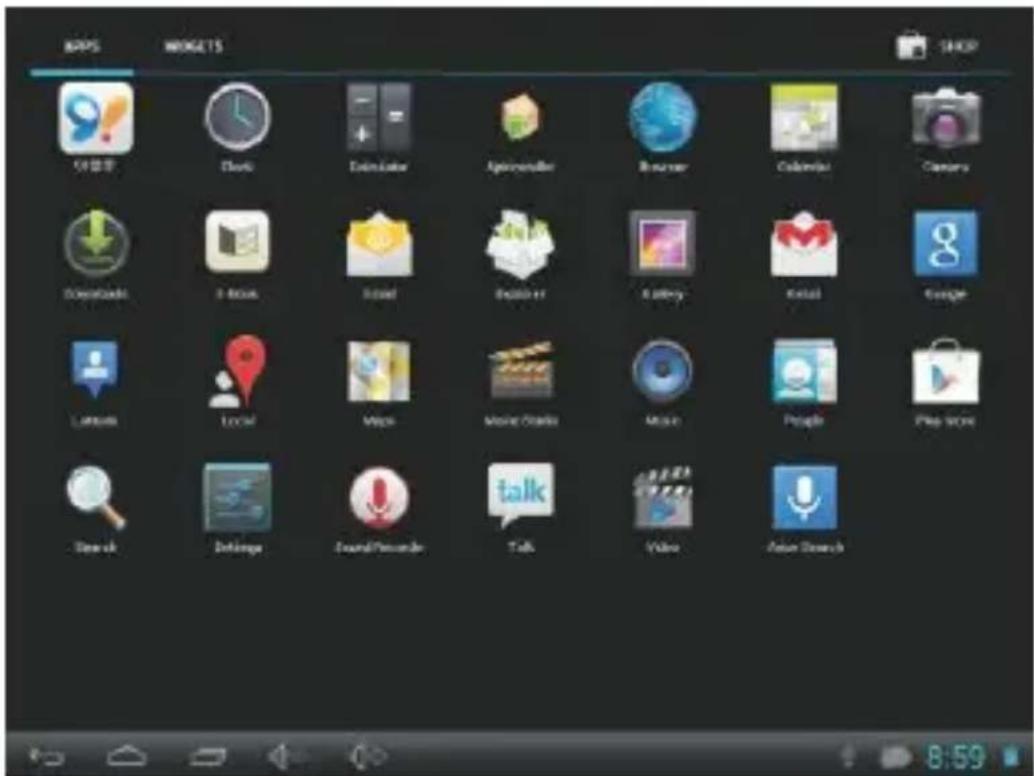
O aplikacijama
Kako biste pokrenuli neku aplikaciju, dotaknite sličicu aplikacije u home izborniku ili u pokretaču kojem možete pristupiti dodirom na sličicu na desnom gornjem dijelu home ekrana.
Izbornik pokretača:


Za spajanje tableta na TV:
natural_image
Three identical line drawings of a waste bin with no text or symbols, each marked with 'X' and a horizontal line (no text or symbols present)i
VIVAX
SR BiH CG
Korisničko uputstvo
Tablet 9,7" TPC-97150
Mogućnosti
Pretražujte internet Posetite svoje najdraže web stranice
O aplikacijama
Kako biste pokrenuli neku aplikaciju, dotaknite ikonicu aplikacije u home meniju ili u pokretaču kojem možete pristupiti dodirom na ikonicu na desnom gornjem delu home ekrana.
Meni pokretača:
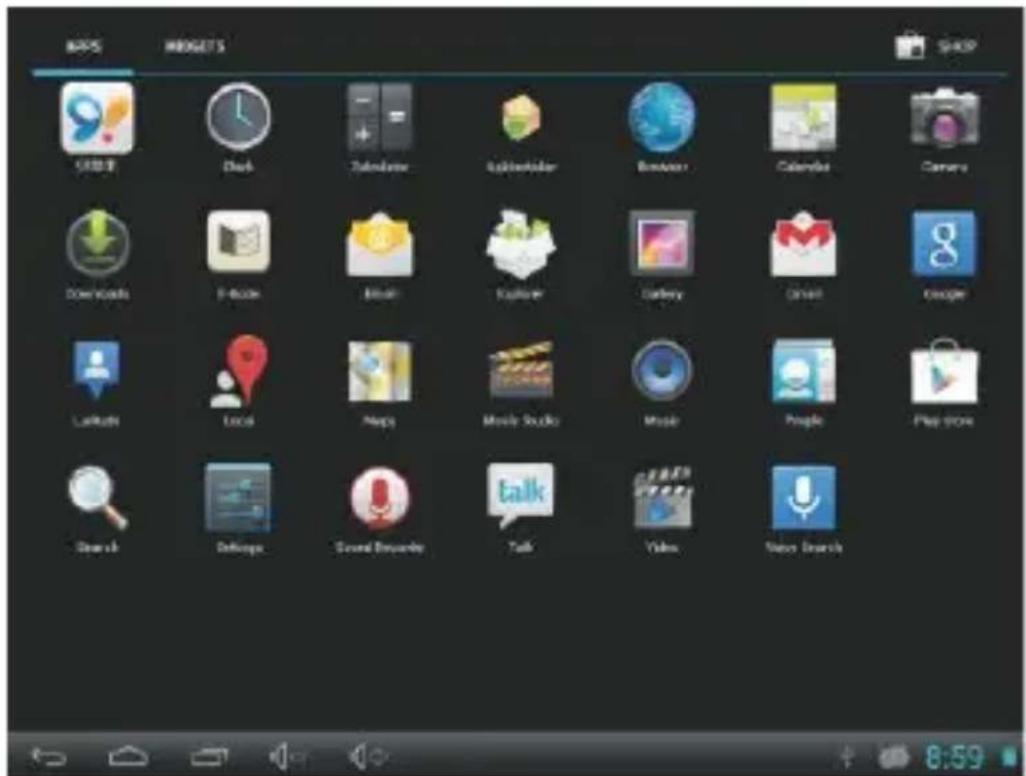

Prikazani ekran je samo u svrhu primera. Proizvođač zadržava pravo da modifikuje i poboljšava konačnu listu aplikacija dostupnih na tabletu
O aplikacijama Postavljene aplikacije
Neke aplikacije su već postavljene na vašem tabletu kako bi vam omogućili jednostavniju upotrebu. Te aplikacije uključuju:

Pretražuje internet.
Obavlja jednostavne matematičke operacije.


Ako želite da naučite kako dodati Wi-Fi mrežu kada nije u dometu ili kada je router podešen da skriva ime mreže (SSID) ili kako podesiti napredne Wi-Fi opcije, molimo proučite uputstva.
Bluetooth veza
Funkcije bluetootha:
- Možete da delite datoteke između dva bluetooth uređaja. Možete da delite datoteke sa drugim računarima, mobilnim telefonima i PDA-ima.
- Možete razmenjivati pims podatke s mobilnim telefonima, PDA-ima i laptopima koji podržavaju bluetooth (podaci outlook e-mail adrese).
- Možete razmeniti elektronsku karticu s imenom sa mobilnim telefonima, PDA-ima i laptopima koji podržavaju bluetooth.
- Možete da spojite tastaturu, miša ili joystick koji podržavaju bluetooth.
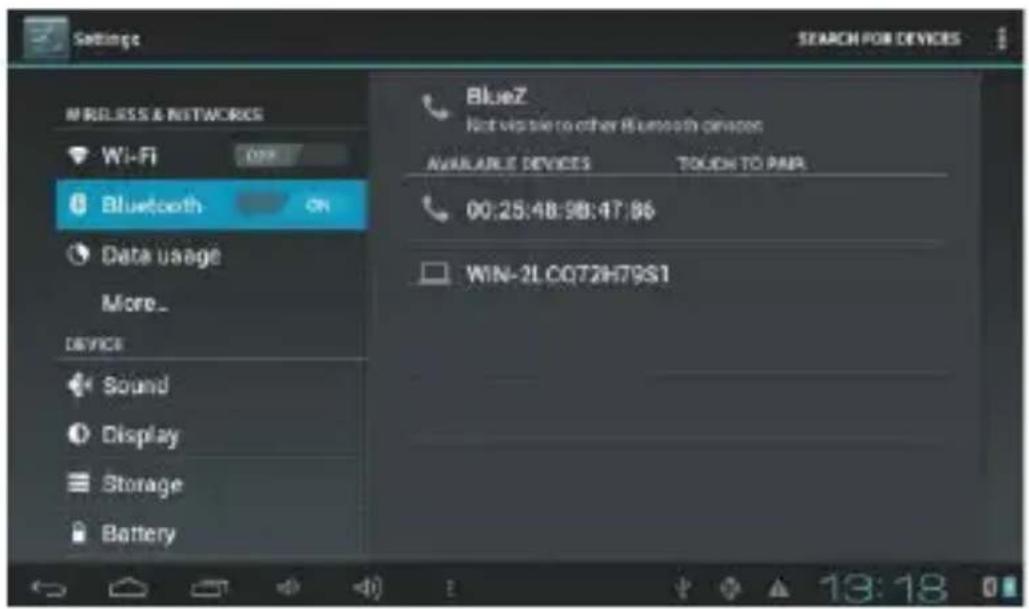
Podešavanje bluetootha
- Procedura podešavanja bluetootha: podešavanja -> podešavanja bluetootha, aktivirajte bluetooth na uređaju.
- Ime uređaja: možete nasumce menjati ime bluetootha za svoj MID, pritiskom na taster meni.
-
Prepoznatljivost: Ova funkcija omogućava prepoznavanje vašeg uređaja od strane drugih uređaja koji podržavaju bluetooth. Standardno vreme otvaranja uređaja za pretraživanje je 120 sekundi.
-
Traženje uređaja: ova funkcija služi za traženje drugih bluetooth uređaja sa kojima možete da se povežete
- Bluetooth: posle pretrage, svi bluetooth uređaji koje je vaš MID našao biće prikazani u sklopu ove funkcije
- Definišite prostor za čuvanje podataka.
Dotaknite taster Uključi USB snimanje kako biste definisali prostor za čuvanje podataka u tabletu. Kada je definisan, možete da kopirate datoteke na tablet i sa tableta.
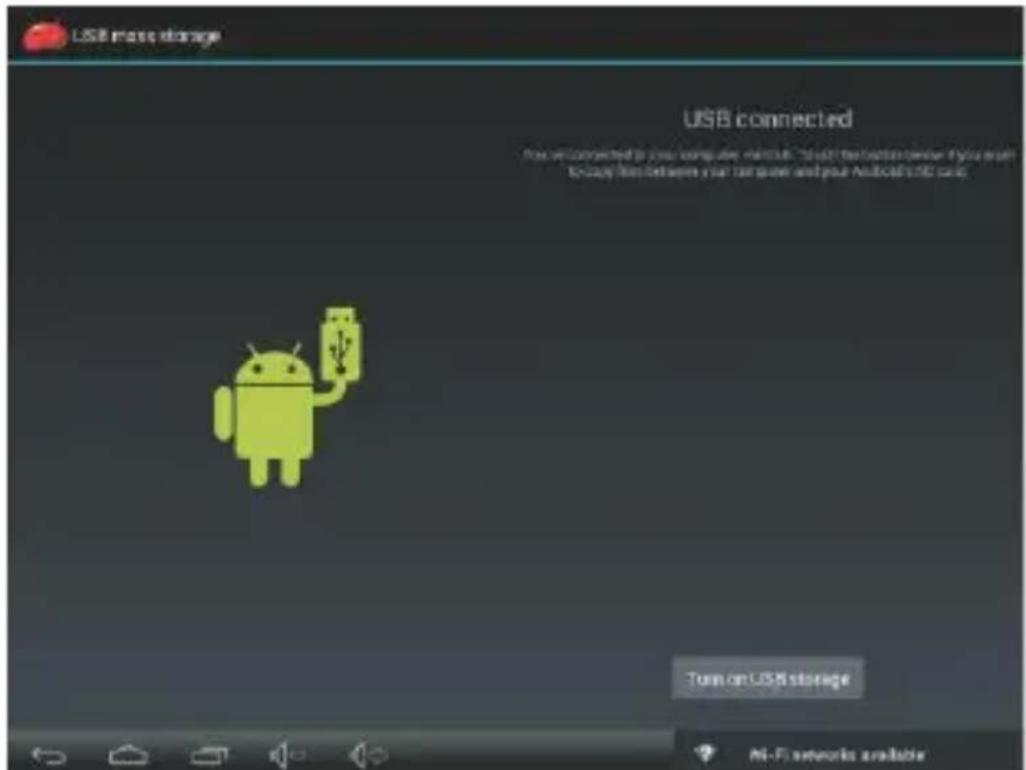
Za spajanje tableta na TV:
- Spojite manji kraj HDMI kabla u mini HDMI priključak na tabletu.
- Spojite veći kraj HDMI kabla u HDMI priključak na TV-u.
- Uključite TV i kao izvor signala postavite HDMI priključak na koji je tablet spojen.

Ako vam je potrebna pomoć s podešavanjem izvora signala TV-a, molimo proučite dokumentaciju koju ste dobili uz svoj TV uređaj od proizvođača. Ako se na TV-u ne čuje zvuk iz tableta, možda je potrebno da se obavi podešavanje zvuka HDMI-a.
Detalji o uređaju
| Procesor | ROCKCHIPS 1.5GHz dual-cove Cortex A9 |
| RAM | 1G DDR3 |
| Kapacitet | 4~16GB (option) flash built-in; microSD card slot (max.32GB supported) |
| Ekran | 9.7" TFT LCD(1024x768), Capactive touch screen |
| Wi-Fi umreženje | IEEE 802.11 b/g/n |
| Bluetooth | V4.0 |
| Video izlaz | Mini HDMI, type C(1080p and 720p supported) |
| Audio izlaz | 3.5 mm headphone |
| PC interfejs | USB 2.0 high speed |
| Dodatna svojstva | Built-in microphone Front facing camera(0.3MP), rear camera(2MP) 2x1W speaker |
| Operativni sistem | Android^TM 4.1 |
| Napajanje | Rechargeable Li-poly battery power Adapter(DC 9V,2A) |
VIVAX
MAK
упатства
3a
употреба
Таблет РС 9"
TPC-97150
Можности
За апликацијата

За спојување со TV:
- Prekeni OK ne ekran ne menyre qe ta shkycni tabletin.
Mbi aplikacionet
Kur deshironi me fillu ndonje aplikacion, prekeni ikonen ne menyne home ose ne levizje ne te cilen mundeni me u qas me prekjen ne ikonen ne anen e djathte te siperme te ekranit home.
Menyja fillestare:


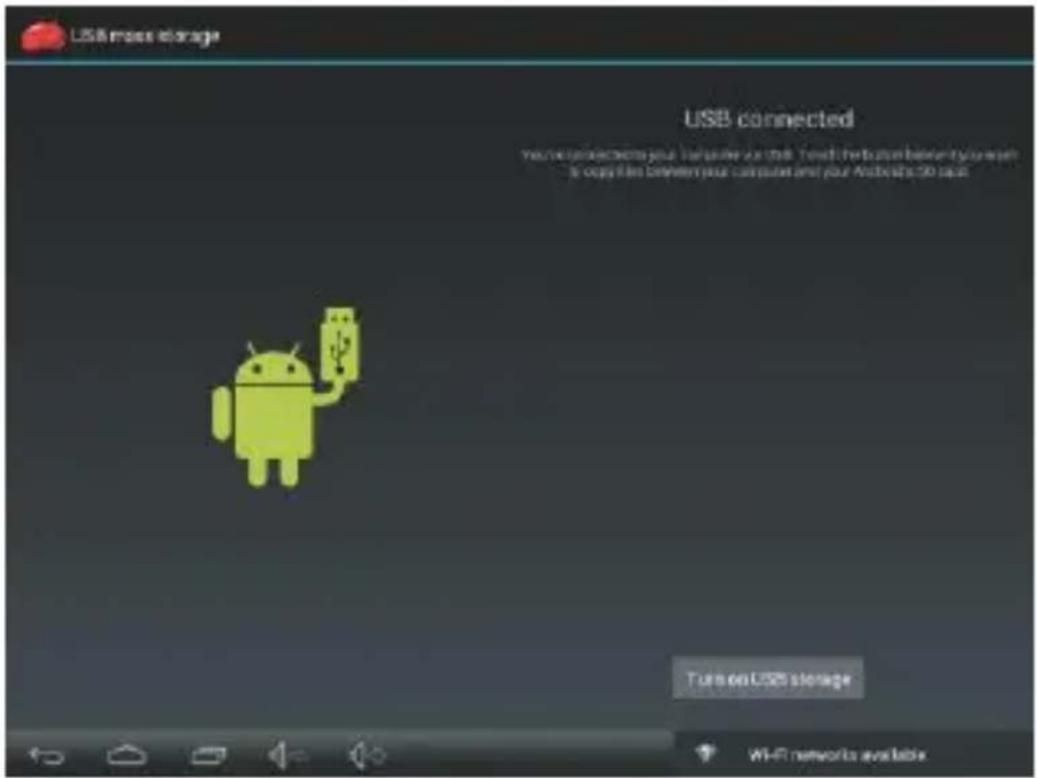
- Montoni hapesiren per memorie.
Shtypeni tastin kyçeni USB ne menyre qe ta montoni hapesiren ne tablet. Kur eshte i montuar, mundeni me i kopju fajllat ne tablet dhe prej tabletit.
Per lidhjen e tabletit ne TV :
- Lidhjeni pjese e vogel te HDMI kabllos ne mini HDMI hyrjen ne tablet.
- Lidhjeni pjesen e madhe te HDMI kabllos ne HDMI hyrje ne TV.
- Kyceni TV i si burim i sinjalit vendosni HDMI hyrjen ne te cilin tableti eshte i lidhur.

Nese ju duhet ndihme per shperndarjem e burimit te sinjalit te TV-se, ju lutem porositeni dokumentat qe i keni marre me TV paisjen prej prodhuesit Nese ne TV nuk degjohet zeri, ndoshta duhet te vendosni zerin permesHDMI-se.
Detajet mbi paisjen
| Procesori | ROCKCHIPS 1.5GHz dual-cove Cortex A9 |
| RAM | 1G DDR3 |
| Kapacitet ruajtese | 4~16GB(option) flash built-in; microSD card slot (max.32GB supported) |
| Ekrani | 9.7" TFT LCD(1024x768), Capactive touch screen |
| Wi-Fi rrjeti | IEEE 802.11 b/g/n |
| Bluetooth | V4.0 |
| Video dalje | Mini HDMI,type C(1080p and 720p supported) |
| Audio dalje | 3.5mm headphone |
| PC dalje | USB 2.0 high speed |
| Paisje shtese | Built-in microphone Front facing camera(0.3MP), rear camera(2MP) 2x1W speaker |
| Sistemi operativ | Android^TM 4.1 |
| Qasje | Rechargeable Li-poly battery power Adapter(DC 9V,2A) |
VIVAX
ENG
User manual
Tablet 9,7" TPC-97150
TPC-97150
Features
Browse the Web.
Visit your favorite websites
Check your e-mail
Keep in touch with friends and family
Watch YouTube™ videos
Browse the world's most popular
video-sharing community
Read your favorite books
Download thousands of books.
Discover thousands of apps for Android ^TM
Games, applications, and more with
marketplace(need for customer installed)
Connect to the Internet wirelessly
High-speed Wi-Fi 802.11 b/g/n networking
HDMI ^TM output to your TV ^TM
Enjoy in the comfort of your living room
Enjoy your media library anywhere Portable powerhouse plays popular music, video,and photo formats microSD memory card reader Increase your storage capacity (up to 32 GB supported)
Built-in camera Convenient front-facing camera and rear camera
Automatic orientation detection Read any way you want; the display adjusts automatically!
Requires optional HDMI cable (Type A-to-Type C). 1080p HD video playback requires a video file encoded at 1080p. Streaming video quality will be affected by the source, and the quality and condition of your network connection.
Unit at a Glance
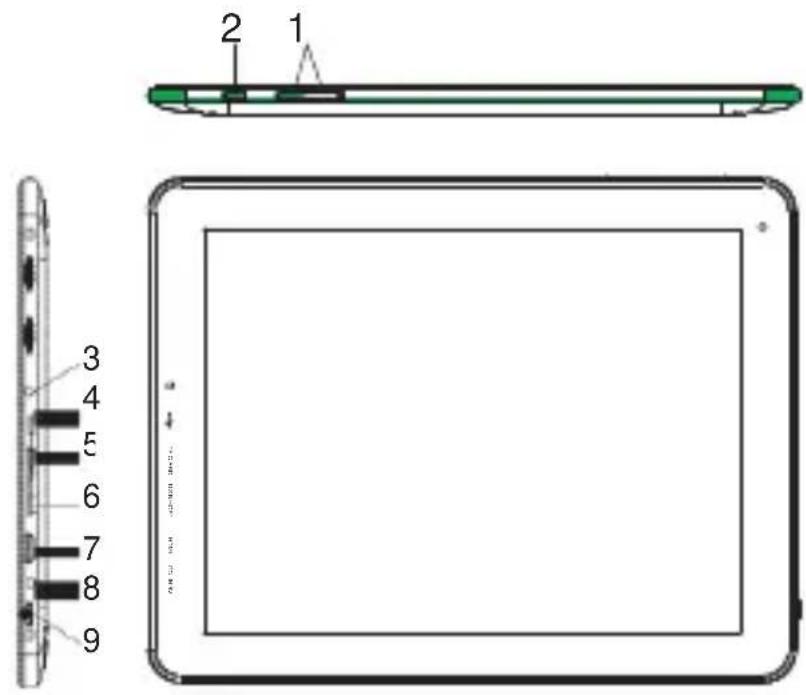
1. VOL-/VOL+
Press to decrease the volume level. Press to increase the volume level.
2. HOME
back to home interface.
3. Headphone
Audio output connection for headphones
4.USB OTG
Connect to transfer data (e.g. music, videos, photos, files).
5. TF card slot
Load external microSD memory cards here.
6.USB HOST
Connect to a USB device
7. HDMI
Connect to a TV or other displays.
8. DC IN 9V
Charge and power the tablet with the included power Adapter.
9. POWER
Press to turn the unit on, or to turn the screen on and off. Press and hold to access the Power Off menu
Getting Started Turning the Tablet on or off
To turn the tablet on:
Press and hold the Power key until the LCD screen turns on. Wait until the Home screen appears; the tablet is now ready for use.
To turn the tablet off:
- Press and hold the Power key until the Device Options menu appears.
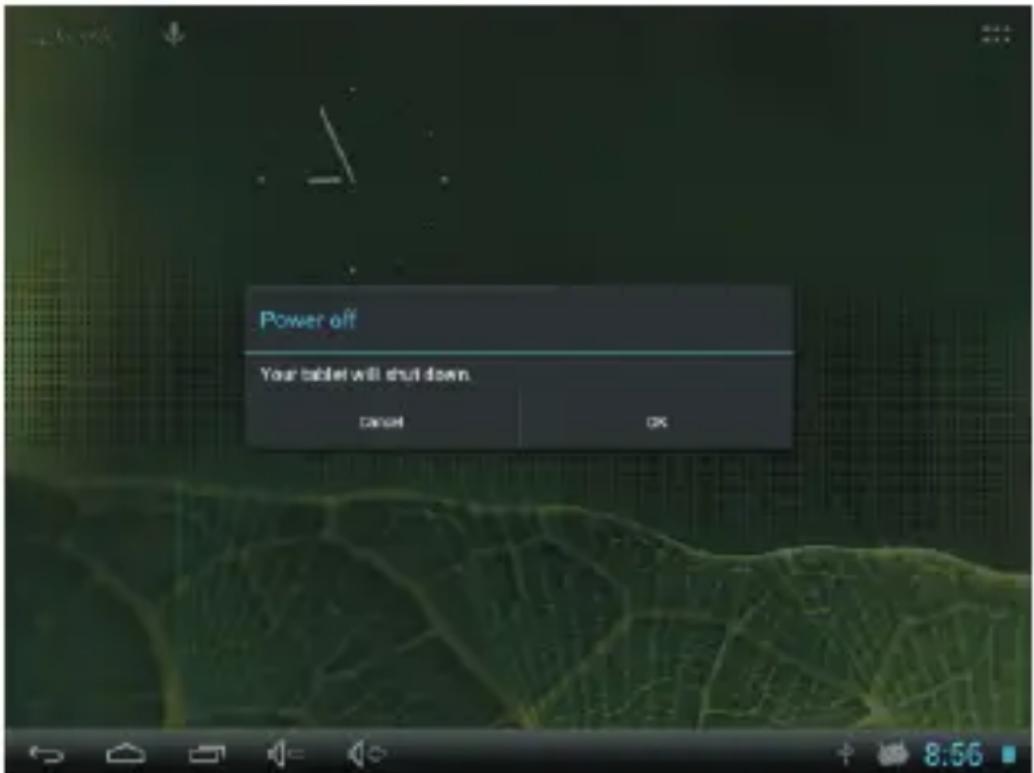
- Touch ok the screen to turn off the tablet.
Turning the Screen On or off (Standby)
When the tablet is on, you can turn off the screen to conserve battery power. Simply press the Power key once to turn the screen off. Press the Power key again to turn the screen back on.

To conserve battery power, the screen can be set to turn off automatically when the tablet is not in use (between 15 second and 30 minutes).
This Screen timeout option can be found in the Display menu.
Getting Started Unlocking the Screen
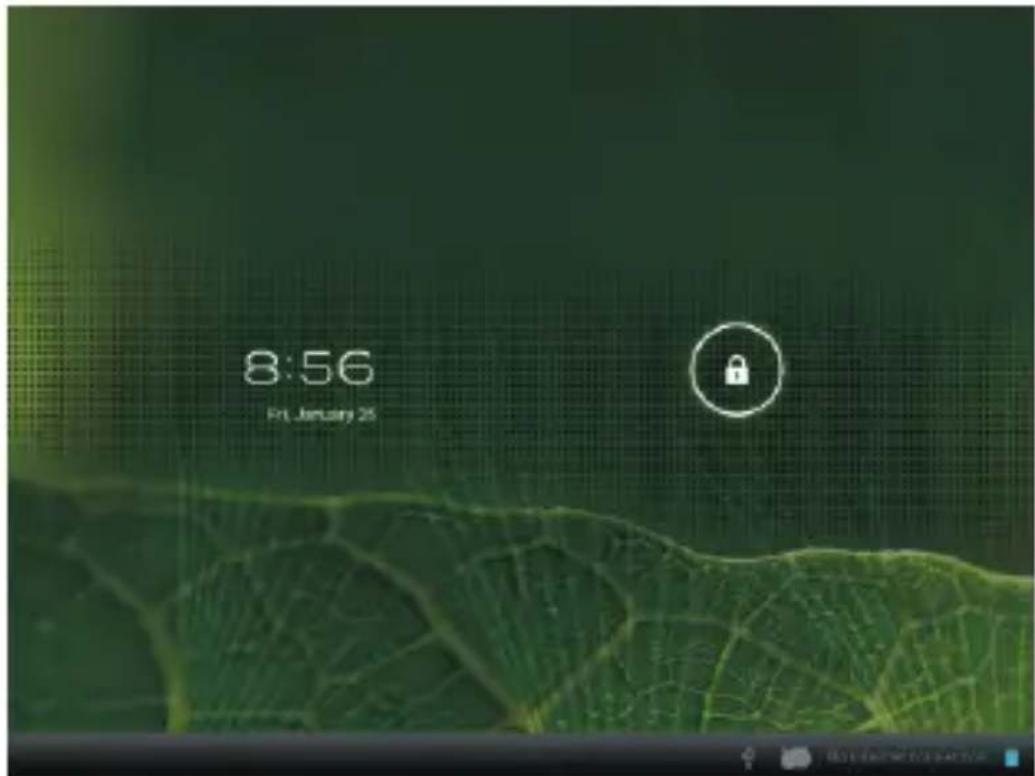
When the screen turns off, you will have to unlock the screen,when you turn it back on. To unlock the screen, drag the lock icon across the screen towards the unlock icon.
About Applications
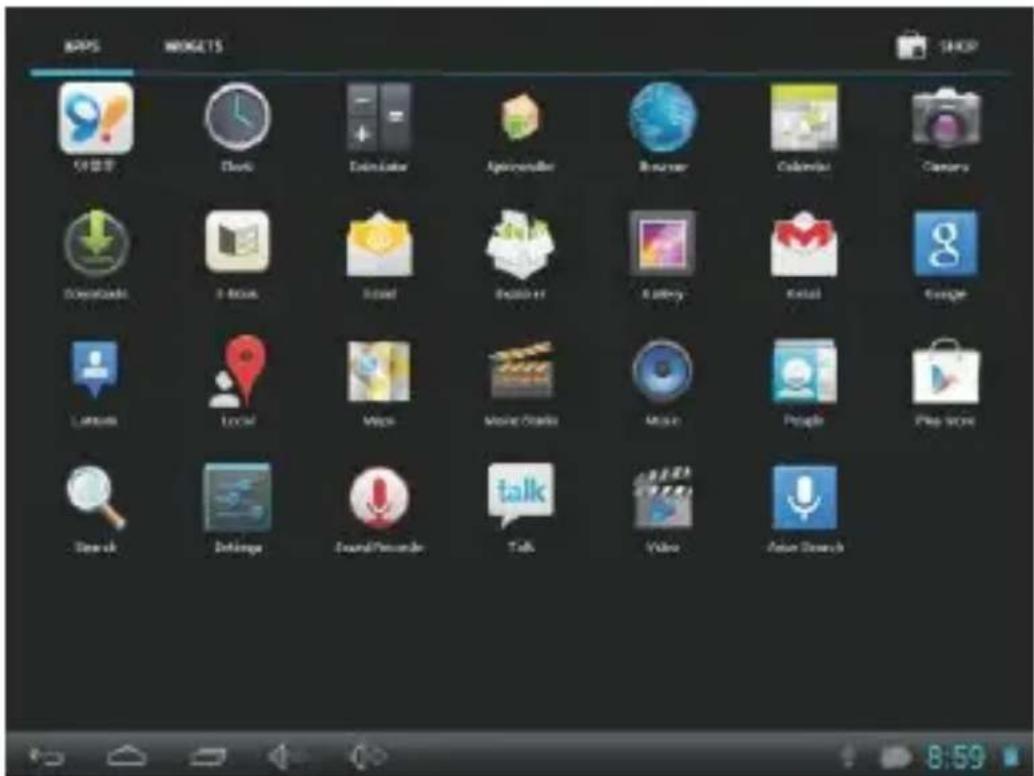
To open an application, touch the application icon on the home screen or in the Launcher where you can tap the icon right up on the home screen to get in..
Launcher screen:
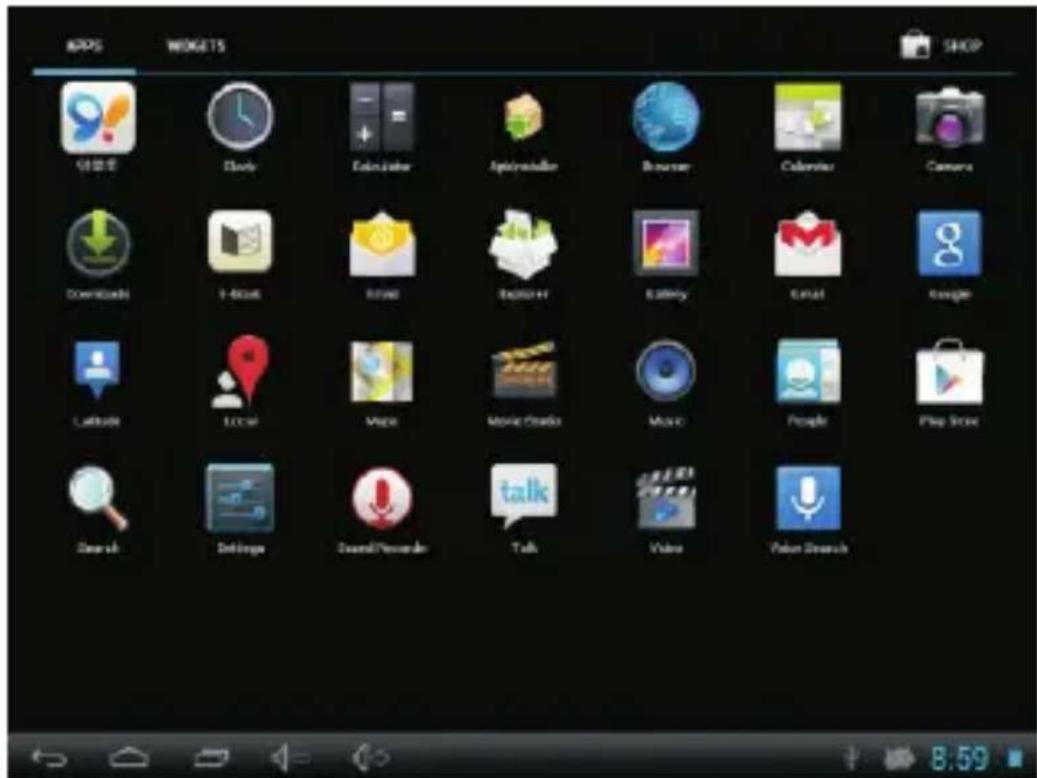

The screen shown above is for illustrative purposes only. Reserves the right to modify and improve the final list of applications available on the tablet.
About Applications Preinstalled Applications
Some applications have been installed on your tablet for your convenience.
These applications include:

Browse the web.
Perform simple mathematical operations.
Take pictures or videos with the frontfacing camera.

Check your e-mail.

Play music
Access the Settings menu to adjust the tablet's options.
Preinstalled Applications Installing Applications
You can also download an install additional applications from the device's applications marketplace, the web browser, or other sources.
Connect to a Wi-Fi network
The Notification bar displays icons that indicate your tablet's Wi-Fi status.

Notification that an open Wi-Fi network is in range.

Connected to a Wi-Fi network (waves indicate connection strength).
[no icon] There are no Wi-Fi networks in range, or the Wi-Fi radio is off.
- Turn on the Wi-Fi radio if it is not already on. To turn on Wi-Fi:
a. Go to the Home screen: Press the Home key. b. Open the Settings menu: tap the icon right up on the home screen to get into the launcher, then touch Settings icon.
c.Open the Wireless & networks menu: Slide the icon to ON status.
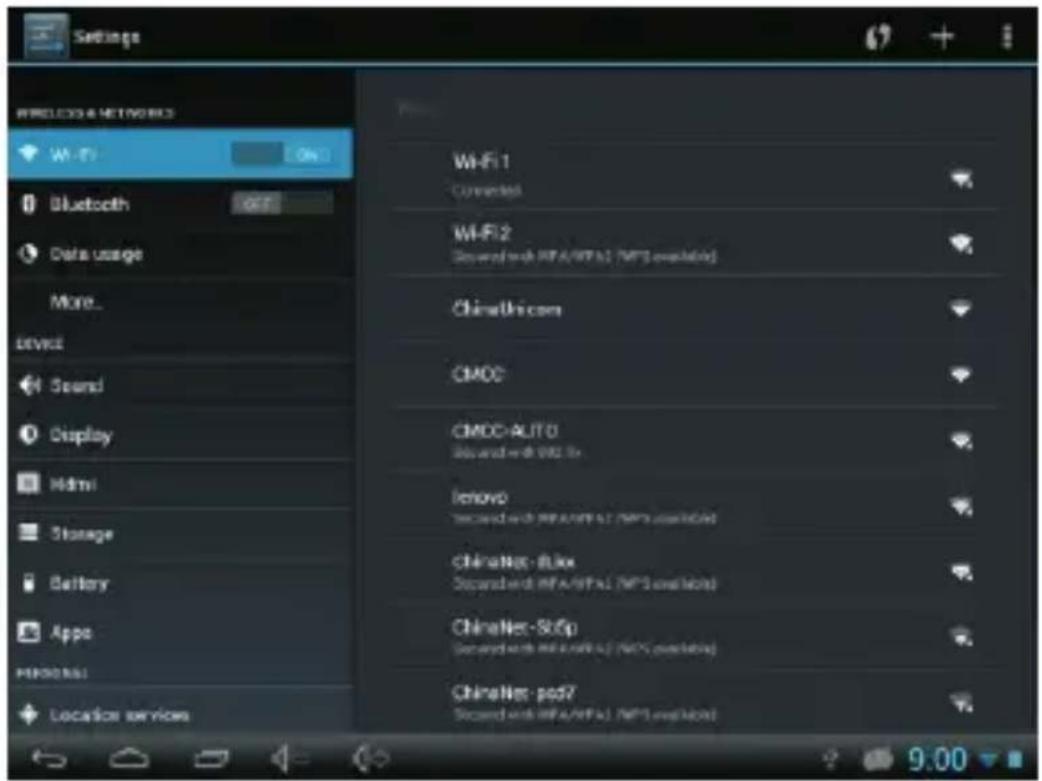
When Wi-Fi is on, the tablet will look for and display a list of available Wi-Fi networks.

If a network that you have connected to lously is found, the tablet will connect to it. If you don't see your network in the list, you can force the tablet to re-scan. To scan for networks, tap the Menu key, and then touch Scan.
- Select an available Wi-Fi network to connect to: In the same Wi-Fi settings menu above, touch a network in the list.
If the network is open, the tablet will prompt you to confirm connection to the network.
Touch Connect to confirm.
If the network is secured (as indicated by a Lock icon), the tablet will prompt you to enter a password or other credentials. Touch the Wireless password box to show the on-screen keyboard and then use it to enter the password. Touch Connect to confirm.
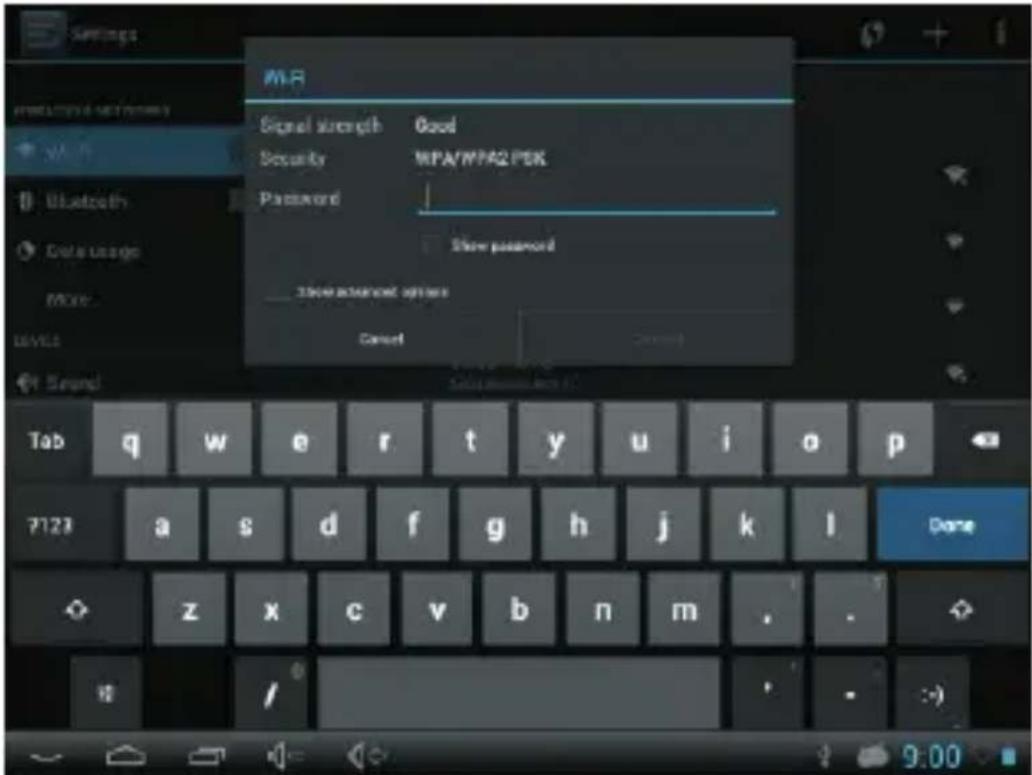
When you have successfully connected to a Wi-Fi network, the Notifications bar at the the low of the screen will show a Wi-Fi signal indicator.


To learn about how to add a Wi-Fi network, it is not in range or when the router is set obscure the network name (SSID); or to figure advanced Wi-Fi options, please to the manual.
Bluetooth Connection
Functions of bluetooth:
- You can exchange the files between two bluetooth device. You can exchange the files with other computers, mobile phones and PDA.
- You can synchronously exchange pims data with mobile phones, PDA and laptop to support the bluetooth (data of outlook E-mail address).
- You can exchange the electronic name card with mobile phones, PDA and laptop to
- You can connect the keyboard, mouse and joystick to support the bluetooth.
Application of bluetooth
- Setting procedure of entering into bluetooth: setting -> bluetooth setting, open the bluetooth equipment.
- Name of equipment: you can randomly change the name of bluetooth for your MID by pressing Menu key.
- Detectability: open this function by clicking the place for name of bluetooth, which indicates that your MID bluetooth can be searched by other bluetooth equipments, the default time for this opening is 120 seconds.
Optional Connections Connecting to a Computer
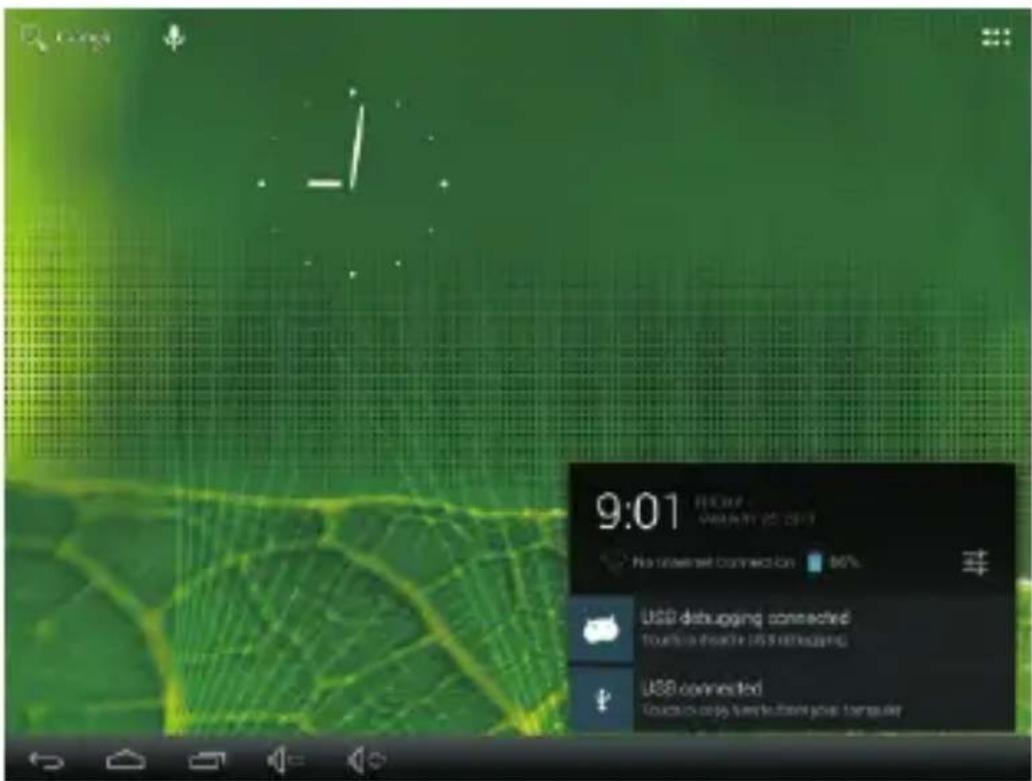
Connect the tablet to a computer to transfer files. 1. Connect your tablet to the computer. With the included USB cable: Plug the small end of the cable into the USB 2.0 high speed connector of the tablet. Plug the large end of the cable into an available USB 2.0 high speed port on the computer.
- When your tablet is connected, slide up the USB icon right down on the screen and then touch icon USB connected.
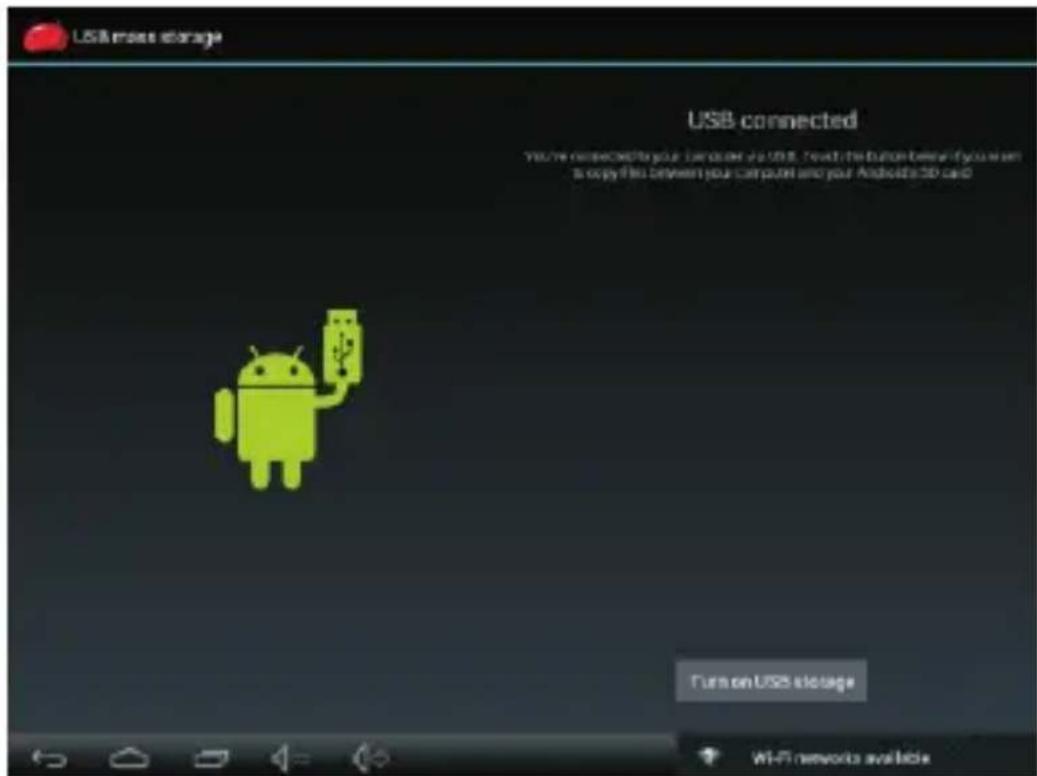
- Mount the storage.
Touch button Turn on USB storage to mount the tablet's built-in storage. When it is mounted, you can copy files to or from your tablet.
To connect the tablet to the TV:
- Plug the small end of the HDMI cable into the mini HDMI connector on the tablet.
- Plug the large end of the HDMI cable into the HDMI port on the TV.
- Turn on the TV, and set its display mode to the HDMI port that the tablet is connected to.

If you need help setting the display mode of the TV, please refer to the documentation provided by the TV manufacturer. If there is no sound from the tablet on your TV, you may need to set the HDMI switch sound settings.
Specifications
| Processor | ROCKCHIPS 1.5GHz dual-cove Cortex A9 |
| RAM | 1G DDR3 |
| Storage | 4~16GB(option) flash built-in; microSD card slot (max.32GB supported) |
| Display | 9.7" TFT LCD(1024x768), Capactive touch screen |
| Wi-Fi Networking | IEEE 802.11 b/g/n |
| Bluetooth | V4.0 |
| Video Output | Mini HDMI,type C(1080p and 720p supported) |
| Audio Output | 3.5mm headphone |
| PC Interface | USB 2.0 high speed |
| Additional Features | Built-in microphone Front facing camera(0.3MP), rear camera(2MP) 2x1W speaker |
| Operating System | Android^TM 4.1 |
| Power | Rechargeable Li-poly battery power Adapter(DC 9V,2A) |
POSTOVANI!
Zahvaluje mo na kupnji'Vivaxuređaja i nademo se da čele biti zadlovočni odabkom. Ako u jarmalverom periodu bude potrezen popravek proizvoda,
molim savistutle se se ovlastenim prodavabem koji Varnje protzvod prodes il nea kontaklinale na dotla navedene brojere i adrese.
MOLIMO VAS DA PRIJE UPOTREBE PROIZVODA PAŽLJNO PROČITATE TEHNICKU DOKUMENTACLU I UPUTE KOJI SUPRILOŽENI UZ PROIZVODI
JAMSTVENI LIST
VIVAX
HR
MODEL UREDAJA
SERIJSKI BROJ
DATUM PRODAJE
BROJ RAĆUNA
PRODAVATELJA
POTPIS | PEÇAT
PRODAVATELJA
- OAm jamshvom jamči
proizvođač proizroda, preko M SAN GRUPA d.d. kao uvoznika i davaloja jamatna u Republici
- brigade 18, (Mejaši)
HR-21000 Split
Tel. (021) 684 000,
Fax. (021) 684 001
Radno vrijeme: 9:00 do 17:00 sati, pon-pet
POSTOVANI
Zahvaljajemo na kupnji Vikavređaja i nadzemo se da čete biži zadovljni odatbiom, Ako u garanom roku bude potreban popravak proizvoda, molm savjejuje se sa svalačenim prodavačem koji Vamje proizvod pradao ili najot kontaktrajne na dojje ravedene brojeve i adrese, MOLIMO VAS DA PRIJE UPOTREBE PROIZVODA PAŽLJIVO PROĆITATE TEHNČKU DOKUMENTACIJU I PUTE KOJISU PRILOŽENI UZ PROIZVODI
GARANTNI LIST
VIVAX
BIH
MODEL UREDAJA
SERIJSKI BROJ
DATUM PRODAJE
BROJ RAČUNA PRODAVATELJA
POTPIS I PEČAT PRODAVATELJA
BROJ RAČUNA PRODAVAOCA
POTPIS I PEČAT PRODAVAOCA
- Dvam ganandjom
BROJ RAČUNA PRODAVAOCA
POTPIS I PEČAT PRODAVAOCA
- Dvam ganandjom
Kosova Electronic Service Center
Kosova Electronic Service Center
-VIVAX Air Conditions; White Goods and Small Home Appliances
TÊ NDERUARI
natural_image
Abstract geometric pattern with overlapping angular lines forming a stylized 'X' shape (no text or symbols)MMM.vivax.com
- O aplikacijama
- VIVAX
- SR BiH CG
- Korisničko uputstvo
- Tablet 9,7" TPC-97150
- Mogućnosti
- O aplikacijama Postavljene aplikacije
- Bluetooth veza
- Funkcije bluetootha:
- Podešavanje bluetootha
- Можности
- За апликацијата
- Mbi aplikacionet
- Features
- Unit at a Glance
- VOL-/VOL+
- HOME
- Headphone
- 4.USB OTG
- TF card slot
- 6.USB HOST
- HDMI
- DC IN 9V
- POWER
- Getting Started Turning the Tablet on or off
- Turning the Screen On or off (Standby)
- Getting Started Unlocking the Screen
- About Applications
- About Applications Preinstalled Applications
- Preinstalled Applications Installing Applications
- Connect to a Wi-Fi network
- Bluetooth Connection
- Functions of bluetooth:
- Application of bluetooth
- Optional Connections Connecting to a Computer
- POSTOVANI!
- JAMSTVENI LIST
- HR
- MODEL UREDAJA
- POSTOVANI
- GARANTNI LIST
- BIH
- SERIJSKI BROJ
- DATUM PRODAJE
- BROJ RAČUNA PRODAVATELJA
- POTPIS I PEČAT PRODAVATELJA
- BROJ RAČUNA PRODAVAOCA
- POTPIS I PEČAT PRODAVAOCA
- TÊ NDERUARI
Brand : Vivax
Model : TPC-97150
Category : Graphic tablet