
TZR06 - Heating TERMOZETA - Free user manual and instructions
Find the device manual for free TZR06 TERMOZETA in PDF.


| Product Type | Fan Heater |
| Model | TZR06 |
| Brand | Termozeta |
| Dimensions (H x W x D) | 28 x 22 x 18 cm |
| Weight | 1.5 kg |
| Power Supply | 220-240V ~ 50Hz |
| Power Consumption | 2000 W (max) |
| Heating Modes | 1000 W / 2000 W (two settings) |
| Thermostat | Adjustable, with temperature range |
| Oscillation | Yes, 70° wide angle |
| Overheat Protection | Yes, automatic shut-off |
| Tip-over Switch | Yes, cuts power if tilted |
| Noise Level | ~45 dB |
| Power Cord Length | 1.5 m |
| Material | ABS plastic |
| Color Options | White / Black |
| Control Type | Mechanical dials (power + thermostat) |
| Certifications | CE, RoHS |
| Warranty | 2 years |
| Maintenance | Clean air intake with soft dry cloth; do not use water |
| Spare Parts Available | Replacement dust filter |
| EAN Code | 8059039023456 |
Frequently Asked Questions - TZR06 TERMOZETA
User questions about TZR06 TERMOZETA
0 question about this device. Answer the ones you know or ask your own.
Ask a new question about this device
Download the instructions for your Heating in PDF format for free! Find your manual TZR06 - TERMOZETA and take your electronic device back in hand. On this page are published all the documents necessary for the use of your device. TZR06 by TERMOZETA.
USER MANUAL TZR06 TERMOZETA
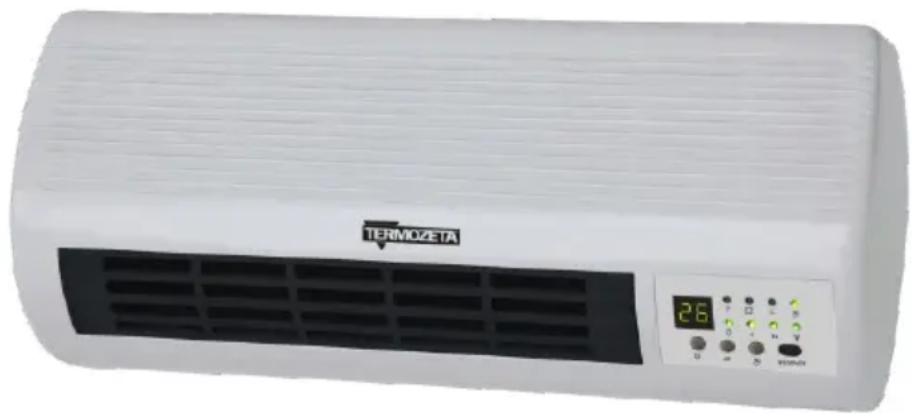
TERMOVENTILATORE MURALE CERAMICO 2000W
MODELLO: TZR06
natural_image
Exterior view of a Termozeta air conditioner unit with digital display and control buttons (no text or symbols on main body)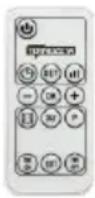
B
natural_image
Exterior view of a white Termozeta air conditioner unit with digital display and control buttons (no text or symbols on main body)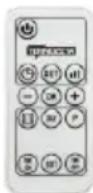
This product is only suitable for well insulated spaces or occasional use.
INSTRUCTION MANUAL
Read this instruction manual carefully. Keep it for future reference.
GENERAL WARNINGS
- Children of less than 3 years should be kept away unless continuously supervised.
- Children aged from 3 years and less than 8 years shall only switch on/off the appliance provided that it has been placed or installed in its intended normal operating position and they have been given supervision or instruction concerning use of the appliance in a safe way and understand the hazards involved. Children aged from 3 years and less than 8 years shall not plug in, regulate and clean the appliance or perform user maintenance.
- This appliance can be used by children aged from 8 years and above and persons with reduced physical, sensory or mental capabilities or lack of experience and knowledge if they have been given supervision or instruction concerning use of the appliance in a safe way and understand the hazards involved.
- CAUTION — Some parts of this product can become very hot and cause burns. Particular attention has to be given where children and vulnerable people are present.
- If the supply cord is damaged, it must be replaced by the manufacturer, its service agent or similarly qualified persons in order to avoid a hazard.
- CAUTION: In order to avoid a hazard due to inadvertent resetting of the thermal cutout, this appliance must not be supplied through an external switching device, such as a timer, or connected to a circuit that is regularly switched on and off by the utility.
-
This appliance must only be used for the purpose for which it has been manufactured, i.e. for additional electrical heating in rooms. Any other use is considered improper and therefore dangerous. The manufacturer is not responsible for any damage caused by improper, incorrect or unreasonable use.
-
Before cleaning or carrying out maintenance on the appliance, disconnect it from the electrical mains by removing the plug from the electrical outlet or by switching off the system switch.
-
WARNING: DO NOT COVER In order to avoid overheating,
do not cover the heater
- The heater must not be located immediately below a socket-outlet.
- Do not use this heater in the immediate surroundings of a bath, a shower or a swimming pool.
- The heater must be installed so that switches and other controls cannot be touched by a person in the bath or shower.
- Install the appliance on the wall above 1,8 m
- In order to avoid overheating, do not cover the heater.
- Avoid the use of an extension cord because the extension cord may overheat and cause a risk of fire.
- Do not plug or unplug the product from the electrical outlet with a wet hand.
- Keep the power cord and product away from heated surfaces.
- Do not operate the heater with a damaged cord or plug. been dropped or damaged in any manner.
- In case of abnormal situation turn off the appliance immediately and contact the dealer or the Service.
- It is absolutely forbidden to remove or repair the unit: risk of electrical shock; contact your dealer or Service Center.
- ATTENTION: Do not use this product near bathtubs, showers, pools.
- Do not insert anything inside the slots of the unit
- Before connecting the unit to the electricity distribution network ensure that the main voltage is correct as shown on the label of the product and that the unit is compliant with the current regulations,
- Do not use flying sockets or damaged cables.
-
Hold the plug firmly when disconnecting from the electric socket to prevent electric shock, short circuit or fire.
-
Before connecting the unit to the electricity distribution network ensure that the main voltage is correct as shown on label of the product and that the unit is compliant with the current regulations.
- Do not use the product for purposes other than those for which he 'was built Don't use improperly the appliance.
- Do not use flying sockets or damaged cables.
- The heater must not be located immediately below an electrical socket-outlet.
- Don't use this heater in the immediate surroundings of a bath, a shower or a swimming pool.
- Never locate the heater where it may fall into bathtub or other water container.
- Before performing maintenance and cleaning, disconnect the appliance from the main supply.
- Not use aerosols spray (for ex. Insecticides, hair spray, etc.), it may cause damage to the housing.
- In case the supply cord is damaged, it must be replaced by the manufacturer or its service agent or a similarly qualified person to avoid any hazard.
- Never use outdoors and never expose the appliance to atmospheric agents.
- Do not cover abnormal situations immediately switch off the appliance and contact your dealer or service center.
- Do not use outdoors or obstruct any of the heat outlet grilles or the air intake openings of the heater
- Keep the heater far from curtain or places where the air inlet can easily be blocked.
- Only use the appliance for domestic purposes and in the way indicated in these instructions.
- Never immerse the appliance in water or any other liquid for any reason whatsoever.
-
Switch off the appliance and remove the plug from the electrical outlet when not in use.
-
The use of any electrical appliance calls for the awareness of some basic rules, such as:
- Do not use the appliance near sources of water such as baths, showers or swimming pools.
- Do not touch the appliance with wet or damp hands or feet.
- Do not use the appliance in the presence of potentially flammable or explosive liquids or gases.
- Do not leave the appliance plugged in when not required. Unplug the appliance from the mains after having switched it off when not in use.
- Do not obstruct the ventilation or heat dispersion openings.
- Do not use the appliance in the presence of potentially flammable or explosive liquids or gases.
- Do not use the appliance in the presence of potentially flammable or explosive liquids or gases.
- It is absolutely forbidden to remove or repair the unit: risk of electric shock; contact your dealer or Service Center.
- Never leave the heater unattended while it is in use. Always turn the product to the OFF position and unplug it from the electrical outlet when not in use.
PRECAUTIONS FOR REMOTE CONTROLLER - BATTERIES
- If the appliance is not used for a long time, please remove batteries from remote controller.
- To remove batteries open the cover on the back side of the remote controller. Only use batteries and check correct battery polarity.
- Lithium batteries are recommended for a longer remote controller operation.
-
Please remove batteries if remote controller won't be used for a long period or if batteries get hot during operation.
-
Batteries must be correctly installed inside the proper compartment on backside of the remote controller
- When batteries need to be replaced because they're exhausted or damaged, Dispose of batteries according to national regulations written below.
- In case of loss of battery fluid, remove all batteries, preventing fluid leaking from coming into contact with skin or clothes.
- If the battery fluid comes into contact with skin or clothes, wash the skin with water immediately. Before inserting new batteries thoroughly clean the battery compartment with a cloth or paper towel and follow the manufacturer's recommendations for cleaning the battery.
- CAUTION: Risk of explosion if the battery is replaced by an incorrect type. Use and replace only with battery of the same size and type.
- Improper use of the batteries may cause leakage, overheating or explosion. Fluid is corrosive and may be toxic, can cause skin burns and hurt eyes and is harmful to ingest.
- To reduce the risk of injury:
Keep batteries out of the reach of children.
Do not heat, open, puncture, shred or dispose of batteries in fire.
Do not mix old and new batteries or different types (for example, the carbon-zinc and alkaline batteries)
Do not leave metal objects that can come into contact with the battery terminals and then may become hot and / or cause burns.
INSTALLATION
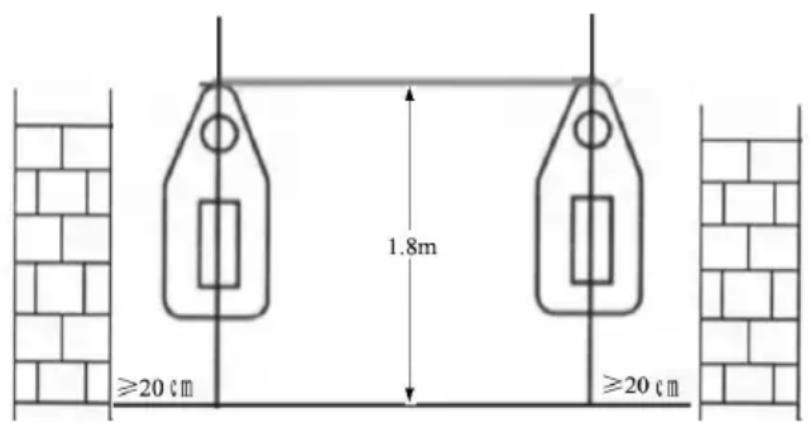
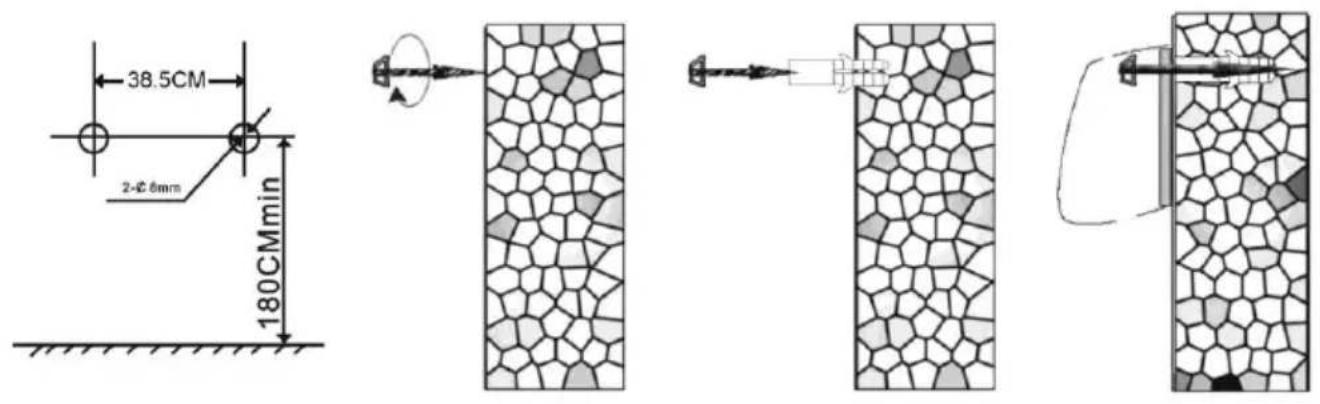
Drill two holes in wall and have a distance of 1.8m from the ground. The diameter of the hole just contained the inflated plastic pipe. After tucked the inflated plastic pipe, fixed pothook on the pipe with screw. Make sure pothook fastness and hang the heater. The clip under the pothook should be inserted rabbet of the heater bottom.
FUNCTION OPERATION (BOTH MACHINE & REMOTE CONTROL
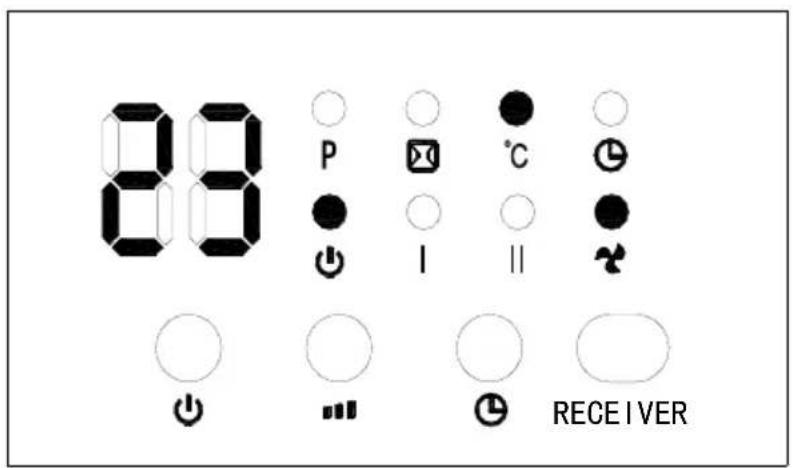
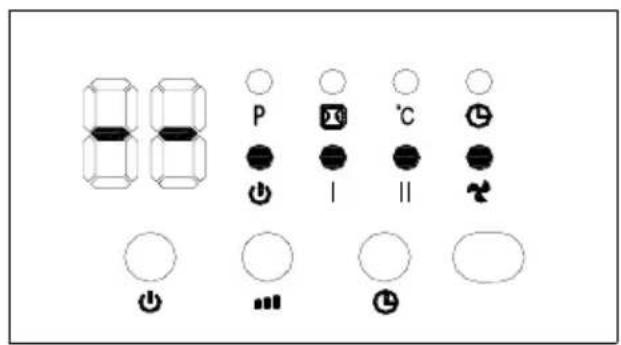
- Plug in and switch on by pressing the red switch 0/I, enter into standby mode and display shows“58”:
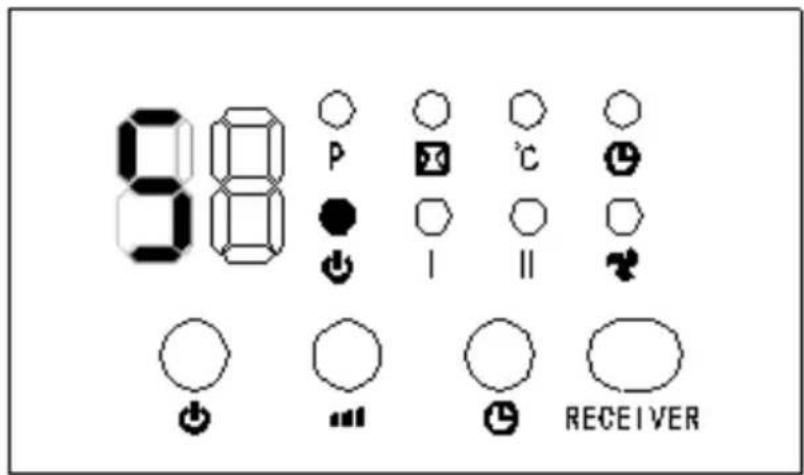
- Press " ⏻ "button, enter into fan mode and display shows "--"
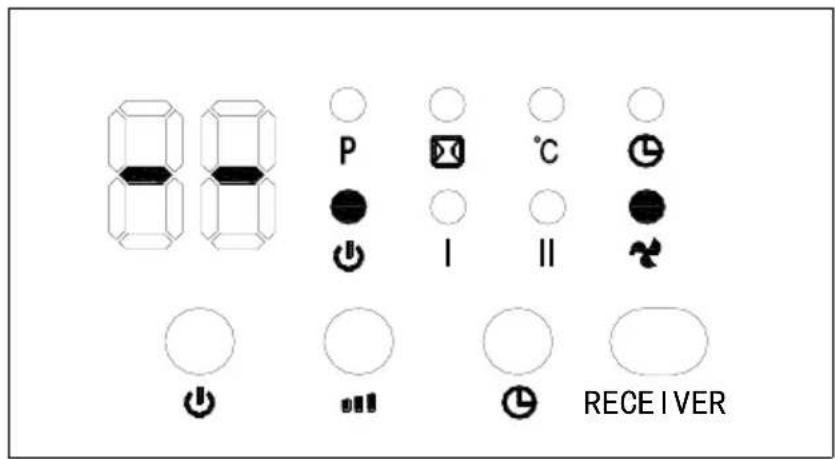
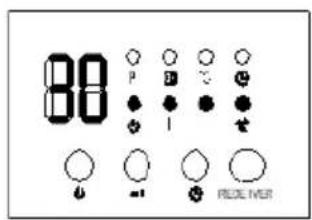
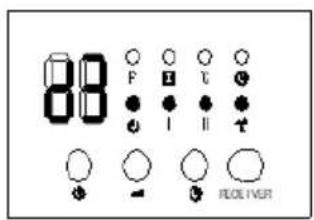
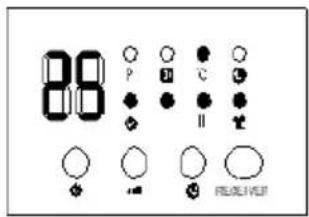
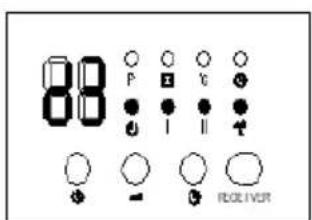
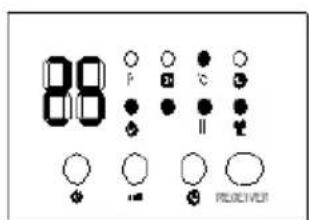
- Press “ ⏻ ” button for one time, the product works with low heating and display like photo A. Press again, changes to high heating and display like photo B.
A
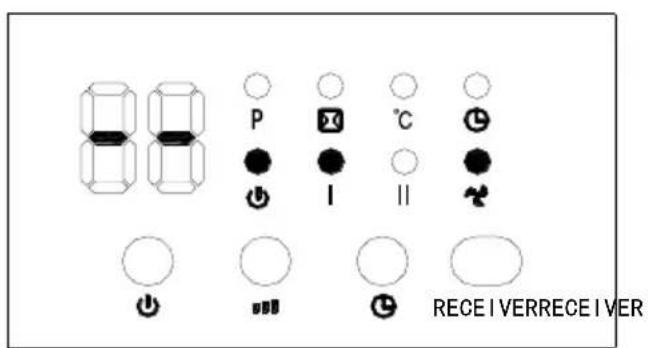
B
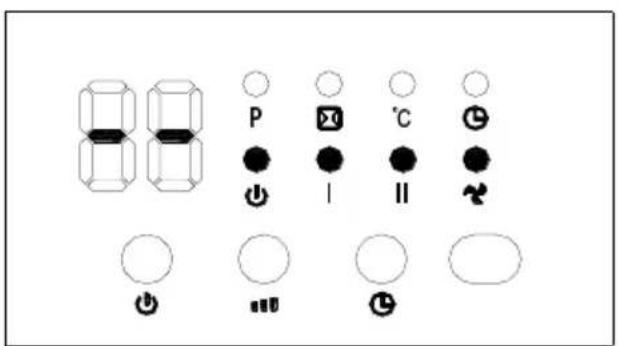
- Press “ ” button to set timer(00-12hours). Pressing the button one time increases one hour for timer. After setting time, the display will show current setting
time for 5 seconds, then resume to previous display, meanwhile the light of “ ” will on. Below photo is an example of setting 8h:
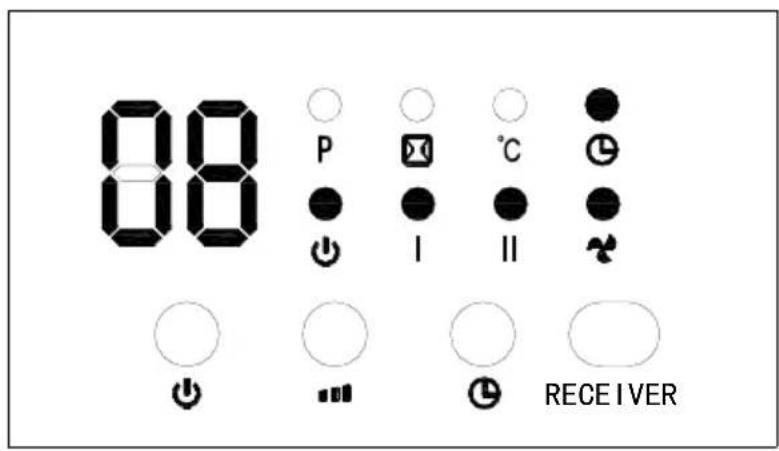
- Appointment “ON”: In standby mode, press timer button, you can set the appointment turn-on time in 1-12 hours. After complete setting, the display shows the appointment turn-on time and also the light “☐” is on. The display automatically decreases 1 hour for each hour passed. When the appointment power-on time arrived, the product will automatically turns on. The default setting temperature is 23^ C during appointment turn-on. Below photos is an example to set appointment turn-on time to 8 hours:
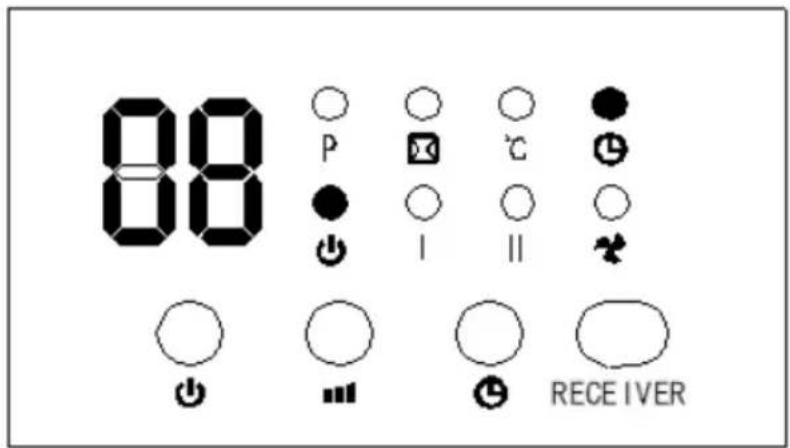
Note: If not setting the temperature and weekly program, the product will automatically turn-off after 12 hours of continuous work and enter into standby.
FUNCTION OPERATION (ONLY BY REMOTE CONTROL)
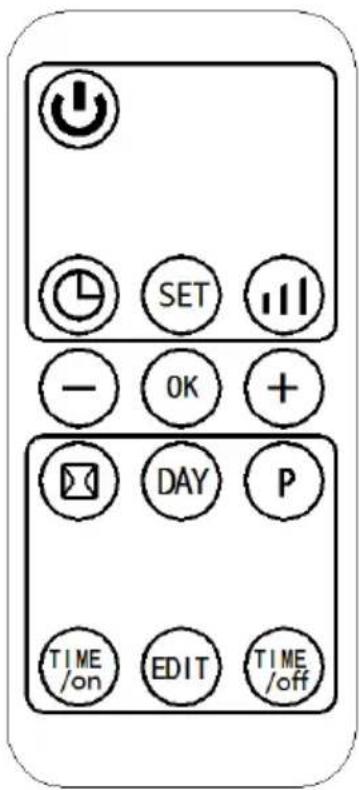
Note: Remote control, please use 1pcxCR2025(3V) lithium battery, is matched with the heater
- Set current TIME/DAY (can set both under standby mode & working status):
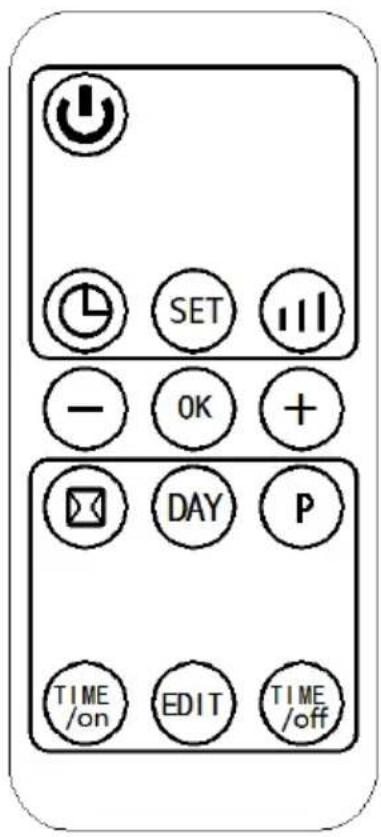
Press “SET” button for one time, the display shows “12” as default, press “+/-” to set current hour (in 24 hours); press “SET” again, the display shows minute “30”, press “+/-” to set current minute (00-59), then press “SET” for third time, the display shows the day “d7”, press “+/-” to set current day (Monday-Sunday: d1-d7). Then press “OK” to confirm the setting, the display will show previous settings.
For example: Setting to Wednesday, 9:30 AM under 25^ under II heating, pls. refer to the following photos:
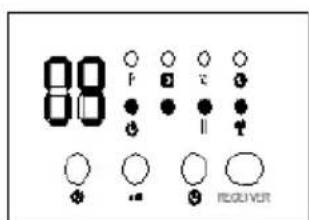
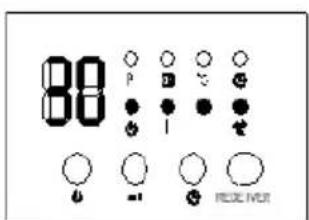
Note: Above setting Time/Day will keep as long as switch on or stand by. If main switch off or power cut off, or plug out, it need reset. You can press Ⓗ to check you set current Time / Day.
2. Set temperature
During working status, Press “⊕ / ⊖”, the display shows “23” as default.
Press “+ / −” to set desired temperature (temperature range 10-49°C), press “to confirm the setting.
For example: The current ambient temperature is 15^ C, when set temperature to 25^ C, the display shows as below:
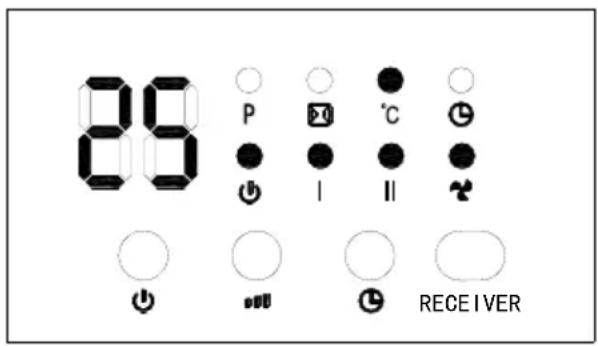
Note:
When setting temperature, it will use SMART working way:
1) Setting temperature – ambient temperature>2°C, working with high power;
2) 0^ C <Setting temperature – ambient temperature= <2^ C, working with low power;
3) Setting temperature – ambient temperature= 0^ C, the cool fan will work for 30 seconds to below out the heating left inside, then fan stop, the unit enter into standby mode. after enter into standby mode, if the machine cool down and:
4) Setting temperature – ambient temperature > = 2^ , the machine will wake up and resume to heating.
If you want to cancel the setting temperature, press “ 🚫 ”key to choose the heating I or II, the product will work without setting temperature. While the display “ ● C ”will go off, and will show “--”. After continuous heating for 12hours, the cool fan will work for 30seconds and enter into standby mode.
SET WEEKLY PROGRAM (ONLY BY REMOTE CONTROL)
After complete setting of current TIME/DAY, below is the steps to set weekly program:
1) Press “ ⏻”, the product enter into working status.
2) Press "P", the display shows "P", it enter into weekly program setting.
3) Press "DAY", the display shows d1\~d7, set to working day(Monday-Sunday: d1\~d7). Such as set Monday:
Note:
For both current day & set working day:
4) Press “EDIT”, the display shows P1\~P6(for each day, it can be set maximum 6 time periods). Such as setting P1:
5) Press “TIME/ON”, the display shows 00"as default. Press “TIME/ON”continuously to set the turn-on time. Such as set the turn-on time 7:00am (As figure);
6) Press “TIME /off”, the display shows the previous step turn-on time by default. Press “TIME /off” continuously to set the turn-off time. Such as set the shutdown time at 13:00pm:
7) Press “+ / -” to setting the target temperature(Temperature range 10-49°C);
8) Repeat steps 2-7 above, you can set the whole weekly program. Then press “OK” to confirmed;
9) To cancel the weekly function, press the “P” again, the light "P" will go off. The weekly program is off. The product will revert to the previous function working status.

Note:
- After the above setting are completed and P program is working, press “DAY / EDIT / TIME / on / TIME / off” to check the setting time of each day and time periods,
- Press “+ / -”, set working temperature under different time periods.
• The turn-on time periods 0\~24hours, cannot set to minutes;
• The "TIME/OFF" can not be less than "TIME/ON";
- When the “TIME/ON” is the same as “TIME/OFF”, the time period enter into standby mode;
Note: If main switch off, power cut off, or plug out, it need reset. You can press to check you set Time /Day.
SET OPEN-WINDOW DETECTION (ONLY BY REMOTE CONTROL)
1) Press “💡”, the product enter into working status. Heating for a moment until stable.
2). Press “☐” by remote control, light “☐/°C will on; The temperature display “23” by default. Press “+/-” to set target temperature. During open-window detection mode, once the ambient temperature drops 5-10°C within 10 minutes, then the product will stop working within 30 minutes and enter into standby mode. Then press “☐” to turn on the product.
3) Press "☐" again to turn off the open-window detection, the light "☐" will go off and the product will resume to previous working mode.
4) Below is an example (F) to set 23^ C during open-window detection
5) When turn on at the same time for both open-window detection and weekly program, during the OFF period of weekly program, the product doesn't work. During the working status of weekly program, the temperature is subject to the setting temperature of open-window detection. Below is a example (G):
F
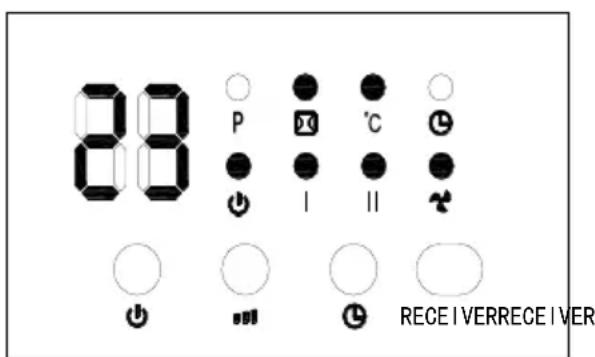
G
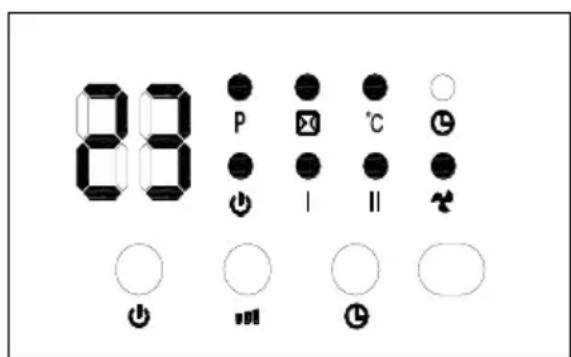
- Before turn on weekly program: it must set day and time period, otherwise the weekly default state is "00", which does not work.
CLEANING AND MAINTENANCE
- If you don't use the heater for a long time, please wipe the surface and put it into the box. Lay the carton on the ventilated and dry place. Humidity and force press was prohibited.
- Wait for the machine being cool and pull out the plug, then clean it. Wipe it clean with wet washcloth or cleaner. Never directly wash with water, do not drop the water into the machine. Never clean it with acids, chemical thinner, gasoline, benzene etc.
- Before use it again, please check it and make sure the outlet ventilation have no sundries.
INFORMATION REQUIREMENTS FOR LOCAL SPACE HEATERS
| Model identifier(s): | TZR06 | |||||
| Item | Symbol | Value U | Unit Item U | Unit | ||
| Heat output | Type of heat input, for electric storage local space heaters only (select one) | |||||
| Nominal heat output | P_nom | 2.0 kW | Manual heat charge control, with integrated thermostat | No | ||
| Minimum heat output (indicative) | P_min | 0 | kW | Manual heat charge control with room and/or outdoor temperature feedback | No | |
| Maximum continuous heat output | P_max,c | 2.0 kW | Electronic heat charge control with room and/or outdoor temperature feedback | No | ||
| Auxiliary electricity consumption | Fan assisted heat output | No | ||||
| At nominal heat output | eI_max | 0 | kW | Type of heat output/room temperature control (select one) | ||
| At minimum heat output | eI_min | 0 | kW | Single stage heat output and no room temperature control | No | |
| In standby mode | eI_SB | 0.000 kW | Two or more manual stages, no room temperature control | No | ||
| With mechanic thermostat room temperature control | No | |||||
| With electronic room temperature control | No | |||||
| Electronic room temperature control plus day timer | No | |||||
| Electronic room temperature control plus week timer | Yes | |||||
| Other control options (multiple selections possible) | ||||||
| Room temperature control, with presence detection | No | |||||
| Room temperature control, with open window detection | Yes | |||||
| With distance control option No | ||||||
| With adaptive start control No | ||||||
| With working time limitation Yes | ||||||
| With black bulb sensor No | ||||||
| Contact details | Lange Distribution S.r.l. Via Treviso, 35 - 20127, Milano - Italy mail: assistenza@termozeta.com www.termozeta.com Tel. +39 02.28506-1 | |||||
In accordance with European Directive 2012/19/UE on electric and electronic equipment waste disposal.
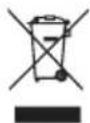
- The barred symbol of the rubbish bin shown on the equipment indicates that, at the end of its useful life, the product must be collected separately from waste.
- Therefore, any products that have reached the end of their useful life must be given to waste disposal centres specialising in separate collection of waste electrical and electronic equipment, or given back to the retailer at the time of purchasing new similar equipment, on a one for one basis.
- The adequate separate collection for the subsequent start-up of the equipment sent to be recycle, treated and disposal of in an environmentally compatible way contributes to preventing possible negative effects on the environment and health and optimises the recycling and reuse of components making up the apparatus.
- Abusive disposal of the product by the user involves application of the administrative sanctions according to the laws in force.
Lange Distribution S.r.l. reserves the right to introduce technical and/or aesthetic changes to its products intended to improve performances. Termozeta is an international trademark. Copyright © 1995. All rights reserved. Lange Distribution S.r.l. -Via Treviso,35-20127 Milano-Italy
- TERMOVENTILATORE MURALE CERAMICO 2000W
- GENERAL WARNINGS
- PRECAUTIONS FOR REMOTE CONTROLLER - BATTERIES
- FUNCTION OPERATION (ONLY BY REMOTE CONTROL)
- I
- # I
- Set temperature
- Note:
- SET WEEKLY PROGRAM (ONLY BY REMOTE CONTROL)
- SET OPEN-WINDOW DETECTION (ONLY BY REMOTE CONTROL)
- CLEANING AND MAINTENANCE
- INFORMATION REQUIREMENTS FOR LOCAL SPACE HEATERS
Brand : TERMOZETA
Model : TZR06
Category : Heating