702Q - Tablet UTOK - Free user manual and instructions
Find the device manual for free 702Q UTOK in PDF.


| Product Type | Tablet |
| Brand | UTOK |
| Model | 702Q |
| Display Size | 10.1 inches (typical) |
| Resolution | 1280 x 800 pixels (typical) |
| Processor | Quad-core, up to 1.5 GHz |
| RAM | 2 GB (typical) |
| Internal Storage | 16 GB (typical) |
| Expandable Storage | microSD card up to 128 GB |
| Operating System | Android (typical) |
| Wi-Fi | 802.11 b/g/n |
| Bluetooth | 4.0 (typical) |
| Rear Camera | 5 MP (typical) |
| Front Camera | 2 MP (typical) |
| Battery Capacity | 6000 mAh (typical) |
| Dimensions | Approx. 240 x 160 x 10 mm |
| Weight | Approx. 500 g |
| Power Input | DC 5V, 2A via micro USB |
| Charging Time | Approx. 4 hours |
| Usage Time | Up to 8 hours (typical) |
| Cleaning | Wipe with a soft, dry cloth. Do not use liquids or cleaners. |
| Safety | Keep away from water and extreme temperatures. Do not attempt to disassemble. |
| Spare Parts & Repairability | Battery replacement by authorized service only. No user-serviceable parts. |
| Manual Pages | 129 |
Frequently Asked Questions - 702Q UTOK
User questions about 702Q UTOK
0 question about this device. Answer the ones you know or ask your own.
Ask a new question about this device
Download the instructions for your Tablet in PDF format for free! Find your manual 702Q - UTOK and take your electronic device back in hand. On this page are published all the documents necessary for the use of your device. 702Q by UTOK.
USER MANUAL 702Q UTOK
4.9 Menu....15
4.10 Screen Capture....16
5. Home screen....16
5.1 Add apps & widgets to Home Screen.....16
5.2 Wallpaper....16
5.3 Notification Bar....16
5.4 Search....17
6. Connecting to networks....17
6.1 Connecting to Wi-Fi....17
6.2 Network access via 3G....18
6.3 Other Networks....18
7. USB Connection....19
8. Applications....19
8.1 Install New Apps....19
8.2 Applications uninstall....20
8.3 Applications management.....20
9. Video Play....20
10. Music play....21
11. Camera....21
12. System settings.....23
12.1 Wireless & Networks ......23
12.2 Sound 24
12.3 Display 24
12.4 Storage....24
12.5 Battery....24
12.6 Apps....24
12.7 Location services....24
12.8 Security....24
12.9 Language & input 25
12.10 Backup & reset....25
12.11 Accounts & sync....25
12.12 Date & time....25
12.13 Accessibility 25
12.14 Developer options....25
12.15 About Tablet....25
13. FAQ....26
14. About firmware....28
15. Technical specifications
28
MANUAL UTILIZARE ....30
CUPRINS....30
TOATE DREPTURILE REZERVATE 38
1.Masuri de siguranta....39
2.Aspectul tabletei....40
4. Functii de baza....41
4.1 Pornirca....41
4.2 Mod asteptare....42
4.3 Inchiderea....42
4.4 Reselarea....42
4.5 Reincarcarca....42
4.6 Ecranul de start....42
4.7 Butonul Inapoi....42
4.8 Aplicatii recent deschise....43
4.9 Meniul....43
4.10 Captura de ecran....43
5.Ecranul de start....43
5.1 Adaugarca aplicatiilor si widgetilor pc
ecran....44
5.2 Imaginea de fundal....44
5.3 Bara de notificari....44
5.4 Cautarea....45
6. Conectarea la retele....45
6.1 Conectarea la Wi-Fi....45
6.2 Acces la retca prin intermediul 3G.....46
6.3 Alte retele....46
7. Conectarea USB....46
8. Aplicatii....47
8.1 Instalarea de noi aplicatii....47
8.2 Dezinstalarea aplicatiilor....48
8.3 Managementul aplicatiilor....48
9. Redarea fisierelor video....48
10. Redarca fisierclor audio....49
11. Camera....50
12. Setarile sistemului....51
12.1 Wireless si Retele ....51
13. Intrebari frecvente....53
14. Despre firmware....56
15.Specificatii tehnice....56
16.Declaratie de conformitate....57
Sva prava zadržana....66
- Upozorenja....67
2.Rasporcd uredaja....68
- Osnovne operacije....69
4.1 Uključivanje uređaja....69
4.2 Standby....70
4.3 Isključivanje určaja....70
4.4 Resetovanje....70
4.5 Punjenje....70
4.6 Početni Ekran....70
4.7 Taster za povratak unazad....71
4.8 Prethodne radnje....71
4.9 Meni....71
4.10 Slikanje ekrana....71
- Početni Ekran....71
5.1 Dodavanja aplikacija & Dodataka
Početnom Ekranu....72
5.2 Pozadina....72
2.2013. All rights are reserved. For part of this document can be reproduced without permission. All trademarks and brand names mentioned in this publication are property of their respective owners. While all the efforts have been made to ensure the accuracy of contents in this manual, we presume no responsibility for errors or omissions or statements of any kind, whether such errors or omissions or statements resulting from negligence, accidents, or any other cause. We operate a policy of continuous development and reserve the right to make changes and improvements to the device, device features/specifications or any of its parts without prior notice. Your desire may have permitted bookmarks and links for third party internal sites and may allow you to access third party sites. These are not affiliated with us, and we do not endorse or assume liability for them. If you access such sites, take precautions for security or content. The warranty does not cover any third party software, settings,
content, data or lines, whether included disordered in the product, whether induced during installment, assembly, shipping or any other time in the delivery chain or otherwise and in any way acquired by you. To the extent permitted by applicable law(a), we do not warrant that any of our software will meet your requirements, will work in combination with any hardware or software applications provided by a third party, that the operations of the software will be uninterrupted or error free or that any defects in the software are correctable or will be corrected.
User's Manual is provided just to guide the user about the functionality of the device. The user manual is not a certificate of technology. Some functions may vary due to modifications and upgrades of software or due to printing mistake. We take the right to have updates on the manual without prior notification. For updated version of the user manual, please access www.utok.com.
1. Cautions
Read these notes carefully before using tablet, to ensure use tablet safely & correctly:
- Use only the battery and charger delivered by our company. Using other products may lead to different problems, such as overheating the product.
- In order to have a long lasting life for the battery, please charge it for 8 to 12 hours before the first use.
- Don't throw battery into the fire, it could cause explosion.
- Operating time is based on the ideal working environment. Working in extreme temperatures, the battery working time will
be shorter
- The recommended temperature of use for this device is 5-35°C.
- Do no use the product in areas with very low or very high temperatures or in wet or dusty areas. Do not leave the product under the direct sunlight.
- Prevent the machine fell to the ground or other strong shocks.
- If water and other liquids spilled on the unit, immediately turn it off and clean it with a dry and soft cloth.
- Do not touch the charger, the cable or the power supply with wet hands. This can lead to electrical shock.
- Do not disassemble the unit or it's accessories and do not try to repair the product. This will lead to warranty loss.
-
If your product is not running well, please send it to the nearest authorised service center.
-
Device Overview

- Headphone Jack; 2. Micro USB port; 3. Volume up, volume down; 4. Power/lock key; 5. Microphone; 6. Speaker; 7. Camera; 8. MicroSD card slot;
3. Main Functions
- Enjoy the multimedia library anywhere and anytime. This portable device can play music, video, or photo-album files.
- The device comes with an integrated microSD card slot. You can increase the memory storage upto 32GB by installing this card.
- Photo and video cameras. With the preinstalled photo and video cameras you can take pictures and make videos anytime
- Connect to the Internet wirelessly with the built-in WiFi.
- You can surf the Internet and visit your favorite websites.
-
You can access your e-mail account and stay in contact.
-
Social networks. By installing this type of application, you can be in contact all the time with all your friends.
- Youtube. Surf Youtube to have access to the most popular and biggest online video sharing community.
- Discover thousands of applications for Android. Games, utility applications and others, all available trough Google Play.
4. Basic operation
4.1 Power On
Press POWER button for around 2 seconds and the device will start up and display the lock screen. Slide the lock to the right to unlock. This will lead you to the Home Screen.

4.2 Standby
When the device is working, press POWER button shortly to shut the display and it goes into standby mode. Press POWER button again to awake the device, and slide the lock to continue. 4.3 Power Off
Press POWER button for around 2 second and choose OK in the
popup.
4.4 Reset
If the device is blocked or cannot start or and can not be turned off by POWER button, users can use RESET function.
4.5 Recharging
When the device can not be turned on normally or it is shutting down automatically, it may need to be recharged.
Please use the correct charger as the manufacturer guides.
4.6 Home Screen
From any applications, press to go to Home Screen.
4.7 Back Button
Press *to go to the previous page.
4.8 Recent Task
Press to view recent tasks. Tap the task frame to open it, or slide to close it. If the product is functioning slowly, you have to access this function in order to close the programs that are running and you do not use, as these are actually slowing down your system performance.

4.9 Menu
Tab ■or ■■ to access the main menu and to view all the
options.
4.10 Screen Capture
Tab capture screenshot.
5. Home screen
There are several pages, slide to the left and to the right in order to view all these main screens.

natural_image
Computer desktop with abstract color background and play controls (no readable text or symbols)5.1 Add apps & widgets to Home Screen
Launch apps list, press the icon and drag it to Home Screen if you want to add it on this main screen. At Home Screen, press icons to drag leftward or rightward to move it to other pages. Drag upwards and place it over the remove icon if you want to erase it from Home Screen.
5.2 Wallpaper
If you want to change the picture on the homescreen, long press blank space of the Home Screen, and choose different wallpapers in the popup.
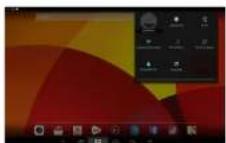
5.3 Notification Bar
Tab and slide down from the upper right corner of your screen
to view the notification bar, informing you about the WIFI status, battery, updates, downloads and others.
5.4 Search
Tab to search information at local or on the Internet. Voice Search is supported.

- Connecting to networks
6.1 Connecting to Wi-Fi
- Press the Settings icon
- Slide Wi-Fi icon 📄 (N) to turn
on WI-FI, the tablet will scan and offer a list of available WI-FI networks around. Tab the name of WI-FI to connect to it.
- If the Wi-Fi network doesn't have a password, the tablet will
connect to it automatically. If the WI-FI network has a password,
input it and tap connect.
![New Text 字体: New 字形: 字号: 1 位置: [ ] [ ] [ ] [ ] [ ] [ ] [ ] [ ] [ ] [ ] [ ] [ ] [ ] [ ] [ ] [ ] [ ] [ ] [ ] [ ] [ ] [ ] [ ] [ ] [ ] [ ] [ ] [ ] [ ] [ ] [ ] [ ] [ ] [ ] [ ] [ ] [ ] [ ] [ ] [ ] [ ] [ ] [ ] [ ] [ ] [ ] [ ] [ ] [ ] [ ] [ ]](/content/2026/05/924734/images/6476117dfb8539809a4466cb8acae3ff0475ac0477a33167f8f6ef5662f22718.jpg)
- Slide Wi-Fi icon
WI-HI
6.2 Network access via 3G
- Turn off WIFI, and access More -Mobile networks.
• Make sure Data enabled is ON.
- Connect 3G Dongle.
- Tab Network operators, and search networks.
- You can select mobile networks automatically
6.3 Other Networks
- Ethernet
• VPN
- Please notice: Availability and network speed depend on the
User's network, and 3G network fees apply.
7. USB Connection
The tablet can be connected to a Window computer via a USB cable and then you can transfer music, videos, pictures and other file in both directions. Operations are as follows:
- Use a USB cable to connect the tablet with the PC.
- Tab Turn on USB storage to read storage of the tablet from PC. Now you can copy files back and forth.
- Tab Turn off USB storage to disconnect from PC, and remove the USB cable.

If above interface does not pop up, tab the icon 📄It upper left corner of screen and choose USB connected In the popup.
8. Applications
8.1 Install New Apps
8.1.1 To download & install apps from Playstore Just follow the system instructions.
8.1.2 To install apps APK packages in tablet's storage, run File
Manager, find the location of apps' packages, and press its name to install.
Tips
- To install applications which are not from Ploystore, make sure Unknown source is ON. (you can find it in Setting – Security – DEVICE ADMINISTRATION)
- If the application already exists in the tablet, choose OK to replace it by latest version of package.
8.2 Applications uninstall
8.2.1 Press Setting - Apps - All.
8.2.2 Press the application you want to remove.
8.2.3 Press Uninstall.
8.3 Applications management.
8.3.1 Press Setting - Apps - All.
8.3.2 Press application and choose Force stop, Uninstall, Clear data or Move to SD.
9. Video Play
You can use the tablet's pre-installed video application to enjoy movies & videos, or install other video apps to enrich your video play.
9.1 Press the icon to enter the video player interface, or open the video files from File Manager directly.
9.2 The tablet supports many formats of video files including 1080P AVI, DIVX, DIVX, XVID, rm, rmvb, WMV, MOV, MP4, MPEG, DAT, VOB, MPG, FLV, ASF, TS, TP, 3GP.
9.3 Tab progress bar to go fast-forward or fast-rewind.
9.4 Tab access video player settings.
10. Music play
You can use the tablet's pre-installed Music Player to enjoy music, or install other audio apps.

10.1 Press the Music player icon to enter the music player interface, or open from File Manager directly.
10.2 The device supports the following formats of audio files: MP3, WMA, MP2, OGG, AAC, FLAC, APE, 3GP, WAV, and more.
10.3 Tab the progress bar to go fast-forward, fast-rewind.
10.4 If there is no audio in the play list, system will automatically load the audio files from the storage of tablet.
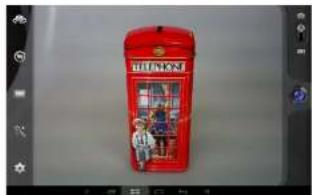
11. Camera
Press the icon to access camera function.
natural_image
Red double-decker box with figurines and a small figure, displayed in an image editing interface (no readable text or symbols)11.1 Photos Mode
11.1.1 Click Blue Circle take pictures.
11.1.2 Click to access photographing options.
11.1.3 Click the thumbnail picture to view saved pictures.
11.1.4 Click 📋 switch to video recording mode.
11.2 Video Recording Mode
11.2.1 Click Red Circle ● start video recording, click it again
to stop and save the video.
11.2.2 Click access photographing options.
11.2.3 Click the thumbnail picture to view saved videos.
11.2.4 Click to switch to photos mode.
- System settings
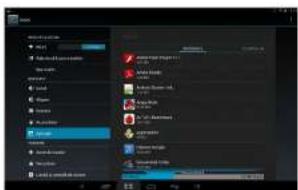
Tab Setting Icon 10 enter system settings, including Wireless & networks, Sound, Display, Storage, Battery, Apps, Location services, Security, Language/input, Backup/reset, Accounts & sync, Date/time, Accessibility, Developer options and About tablet.
12.1 Wireless & Networks
From Settings menu, select "Internet connects manager", press "Wi-Fi settings", enter in the Wi-Fi manu and select "Wi-Fi" to open the connectio. After the WiFi is active, an automatic search will be initiated. A list of all available networks will be displayed. Press on the name of the network that you want to connect to, enter the password and in a few seconds you will be connected to the internet.
In order to connect to the Internet with the 3G Dongle, connect the dingle to the USB port with the OTG cable supplied. The system will detect the dongle and will activate it. Enter the
menu Settings / WiFi and other networks, select "Mobile Networks" and the system will automatically connect to the Internet.
12.2 Sound
You can set volumes, ringtone & notification and system sounds.
12.3 Display
Options: Brightness, Wallpaper, Auto-rotate screen, Auto sleep time, Font size, Accelerometer coordinate system, Smart color, and Intelligent backlight.
12.4 Storage
A general view of internal storage and external SD card.
12.5 Battery
A general view of battery information
12.6 Apps
See item 8. Applications
12.7 Location services
In this menu you can activate the location services in order to give access to different applications to display different informations regarding your location or the distances to the nearest points of interest.
12.8 Security
Options: Screen security, Passwords, Device administration and Credential storage.
Tips: If you want to install applications beyond Piaystore, please turn on Unknown sources.
12.9 Language & input
You can change the language of system, and choose keyboard in-puts by default.
Tips: If you have installed an input, remember to turn on it in this setting.
12.10 Backup & reset
Options: Backup & Restore, Factory data reset and Recovery Mode. In order to ensure that you will not lose your private informations, we suggest that you periodically create a back-up copy of the data.
12.11 Accounts & sync
You can manage all accounts recorded in the tablet.
12.12 Date & time
Options: Time & Date settings, time zone and format settings.
12.13 Accessibility
Options: Large text, Auto-rotate screen, Speak passwords, Touch & hold delay and Install web scripts. You can personalise all these options in order to serve your needs and to have a best experience with your device.
12.14 Developer options
Options: Desktop backup password, Stay awake, HDCP checking, Protect SD card, USB debugging, Allow mock locations, Input and Drawing.
12.15 About Tablet
A view of tablet information (model, system, firmware version, etc)
13. FAQ
1. The device cannot connect to WiFi
- Check if the wireless network is working ok with another device.
- Make sure the device is inside the connection area of the WIFI. The walls or other obstacles can decrease the signal range.
• Make sure the password used is the correct one.
2. The device does not start
- The device will not start if the battery power is below the critical level. In this case, please recharge the battery.
- Press the RESET button and check if the product is starting.
- Check if the charger si correctly connected.
3. Heating problem
- If you are simultaneously working in more applications or when you use the display with the highest level of brightness or while charging, the device can get warm. This is normal and will not lead to other problems of functionality.
4. The system is not working correctly
- Installing third party applications can lead to system malfunctioning. Uninstall these third party applications or have a factory reset in order to have the device functioning in normal parameters again.
5. Problems with e-mail setup
- Make sure the device is connected to a WiFi network and that this network can connect to the Internet.
- Make sure all the data for the e-mail account were correctly inserted in the application.
• Make sure the date of the system is correct.
6. Recording problems
- Press the RESET button and after restart check if the recording works well.
7. Usage time too short
- Battery usage time can be influenced by the temperatures in the working environment. If the temperature is too high or too low, the working time will be affected. It is recommended to use the device in a normal temperature environment.
- Battery usage time depends on the way you use the device. High audio volume or WiFi make the battery life shorter.
- In order to have a long lasting life for the battery, please charge it for 8 to 12 hours before the first use.
8. Headphones without sound
- Make sure the audio file you are trying to listen to is not broken. Try listening to another audio file to confirm.
- Make sure you have a good wire connection between the headphones and the device.
9. Display color problems for photos or videos
- Press the RESET button to check this issue.
10. Errors while copying files
- Please check if the storage space is full.
- Please check if the USB cable is in good condition.
11. Other problems
- Most of the problems can be solved with restarting of the device, with the reset to factory settings from the main menu or by pressing the RESET button on the side of the case.
14. About firmware
Firmware contained in the tablets provides the control program for the device, and it is offered by the original manufacturer. Flashing firmware (refer to rebuilding firmware into the device) is the final solution to serious system problems. For common breakdown you can just restart the device, or run factory reset. If system crashes appear continuously even after you have run factory reset, you can flash firmware under professional guidance. The firmware preloaded in the device is a stable version for the tablet, please do not flash it with other versions of firmware unless absolute necessity. We DO NOT suggest any private firmware flashing without guidance of the original manufacturer, who is not responsible for any possible breakdown of the tablet caused by user's private firmware flashing.
15. Technical specifications
| OS Android 4.4 K1 Kat | |
| CPU Quad Core A3 3 1.5GHz | |
| Display 7", 1024 x 600 | |
| RAM Memory 512 MB | |
| Memory 8 GB | |
| Video Chipset Ma | 400 MP2 |
| Speaker 1 V | |
| Web Camera Front | 0.3 MP; Back 2MP |
| Ports | Micro USB, Micro SD (up to 32 GB), Headphone Jack |
| Dimensions 191 x | 116 x 11 mm |
| Weight 320 gr | |
| Wi-Fi 802.11 b/g/n | |
| 3G Via 3G dongle | |
| Battery 2,500 mAh | |
| Video Formats AW | DIVX, XVID, RM, RMVB, MKV, WMV, MOV, MP4, MPEG, MPG, FLY |
| Audio Formats MW | WMA, MP2, OSG, AAC, MAA, MAI, FLAC, APE, SGP, WAV |
| Photo formats | JPG, JPEG, GIF, BMP, PNG |
| Formate eBook | CFUB, PDF |
| Others | Accelerometer, Microphone. |
Declaration of conformity
Declaration of conformity for UTOK product, model 702Q is
available online at www.utok.com
MANUAL UTILIZARE
UTOK 702Q
CU PRINS
ALL RIGHTS RESERVED....10
1. Cautions....11
2.Device Overview....13
4. Basic operation....14
4.1 Power On....14
4.2 Standby....14
4.3 Power Off....14
4.4 Reset....15
4.5 Recharging....15
4.6 Home Screen....15
4.7 Back Button....15
4.8 Recent Task....15
4.9 Menu....15
4.10 Screen Capture....16
- Home screen....16
5.1 Add apps & widgets to Home Screen.....16
5.2 Wallpaper....16
5.3 Notification Bar....16
5.4 Search....17
- Connecting to networks....17
6.1 Connecting to Wi-Fi....17
6.2 Network access via 3G....18
6.3 Other Networks....18
7. USB Connection....19
8. Applications....19
8.1 Install New Apps....19
8.2 Applications uninstall....20
8.3 Applications management....20
-
Video Play....20
-
Music play....21
- Camera....21
- System settings....23
12.1 Wireless & Networks 23
12.2 Sound 24
12.3 Display 24
12.4 Storage....24
12.5 Battery....24
12.6 Apps....24
12.7 Location services....24
12.8 Security....24
12.9 Language & input 25
12.10 Backup & reset....25
12.11 Accounts & sync....25
12.12 Date & time....25
12.13 Accessibility 25
12.14 Developer options....25
12.15 About Tablet....25
13. FAQ....26
14. About firmware....28
15. Technical specifications
28
MANUAL UTILIZARE 30
CUPRINS....30
TOATE DREPTURILE REZERVATE 38
1.Masuri de siguranta....39
2. Aspectul tabletei....40
4. Functii de baza....41
4.1 Pornirea....41
4.2 Mod asteptare....42
4.3 Inchidcrea....42
4.4 Resetarea....42
4.5 Reincarcarea....42
4.6 Ecranul de start....42
4.7 Butonul Inapoi....43
4.8 Aplicatii recent deschise....43
4.9 Meniul....43
4.10 Captura de ecran....43
5.Ecranul de start....43
5.1 Adaugarea aplicatiilor si widgeturilor pe ceran....44
5.2 Imaginca de fundal....44
5.3 Bara de notificari....44
5.4 Cautarca....45
6. Conectarca la retele....45
6.1 Conectarea la Wi-Fi....45
6.2 Acces la retea prin intermediul 3G.....46
6.3 Alte retele....46
7. Concetarea USB....46
8. Aplicatii....47
8.1 Instalarea de noi aplicatii....47
8.2 Dezinstalarea aplicatiilor....48
8.3 Managementul aplicatiilor....48
9. Redarea fisierelor video....48
10. Redarea fisierelor audio....49
11. Camera....50
12. Sctarile sistemului....51
12.1 Wireless si Retele ....51
13. Intrebari frecvente....53
14. Despre firmware....56
15.Specificatii technice....56
16.Declaratie de conformitate....57
Sva prava zadržana....66
- Upozorenja....67
2.Raspored uređaja....68 - Osnovne operacije....69
4.1 Uključivanje uredaja....69
4.2 Standby....70
4.3 lsključivanje uređaja....70
4.4 Resetovanje....70
4.5 Punjenje....70
4.6 Početni Ekran....70
4.7 Taster za povratak unazad....71
4.8 Prethodne radnje....71
4.9 Meni....71
4.10 Slikanje ekrana....71 - Početni Ekran....71
5.1 Dodavanja aplikacija & Dodataka
Počctnom Ekranu....72
5.2 Pozadina....72
5.3 Panel za obaveštenja....72
5.4 Pretraga....73 - Povezivanje sa mrežama....73
6.1 Povezivanje sa Wi-Fi....73
6.2 Pristup 3G mreži....74
6.3 Druge mreže....74 - USB Konckcija....74
- Aplikacije....75
8.1 Instaliranje novih aplikacija....75
8.2 Deinstaliranje aplikacija....76
8.3 Upravljanje aplikacijama....76
-
Video zapis....76
-
Muzika....77
-
Kamera....78
-
Podešavanja sistema....79
12.1 Wi-fi & mreže 79
12.2 Zvuk 80
12.3 Ekran 80
12.4 Skladište....80
12.5 Baterija....80
12.6 Aplikacije....80
12.7 Pristup lokaciji....80
natural_image
Computer desktop wallpaper with abstract color blocks and a play button (no readable text or symbols)5.4 Cautarea
- Conectarea la retele
6.1 Conectarea la Wi-Fi

activa Wi-Fi. Dispositivul va cauta si va arisa o lista cu retelele Wi-Fi
sfaturi
DIVX, DIVX, XVID, RM, RMVB, WMV, MOV, MP4, MPEG, DAT, VOB, MPG.
FLV, ASF, TS, TP, 3GP.
8.1 Apasati pictograma Muzica pentru a accessa aplicatia de fisiere audio, sau deschideti direct File Manager (ro. Manager fisiere)
8.2 Dispositivul suporta urmatoarele formate audio: MP3, WMA, MP2, OGG, AAC, FLAC, APE, 3GP, WAV, si altele.
natural_image
Red double-decker telephone booth with cartoon character inside, displayed in a photo editing interface (no readable text or symbols)11.1 Modul fotografie
ALL RIGHTS RESERVED......10
1. Cautions....11
2.Device Overview....13
4. Basic operation....14
4.1 Power On....14
4.2 Standby....14
4.3 Power Off....14
4.4 Reset....15
4.5 Recharging....15
4.6 Home Screen....15
4.7 Back Button....15
4.8 Recent Task....15
4.9 Menu....15
4.10 Screen Capture....16
5. Home screen....16
5.1 Add apps & widgets to Home Screen.....16
5.2 Wallpaper....16
5.3 Notification Bar....16
5.4 Search....17
6. Connecting to networks....17
6.1 Connecting to Wi-Fi....17
6.2 Network access via 3G....18
6.3 Other Networks....18
7. USB Connection....19
8. Applications....19
8.1 Install New Apps....19
8.2 Applications uninstall....20
8.3 Applications management....20
9. Vidco Play....20
10. Music play....21
11. Camera....21
12. System settings.....23
12.1 Wireless & Networks 23
12.2 Sound 24
12.3 Display 24
12.4 Storage....24
12.5 Battery....24
12.6 Apps....24
12.7 Location services....24
12.8 Security....24
12.9 Language & input 25
12.10 Backup & reset....25
12.11 Accounts & sync....25
12.12 Date & time....25
12.13 Accessibility 25
12.14 Developer options....25
12.15 About Tablet....25
-
FAQ....26
-
About firmware....28
-
Technical specifications
28
MANUAL UTILIZARE 30
CUPRINS....30
TOATE DREPTURILE REZERVATE 38
1.Masuri de siguranta....39
2.Aspectul tabletei....40
- Functii de baza....41
4.1 Pornirea....41
4.2 Mod asteptarc....42
4.3 Inchiderea....42
4.4 Resetarea....42
4.5 Reincarcarea....42
4.6 Ecranul de start....42
natural_image
Colorful abstract design with red, yellow, and orange shapes (no text or symbols)5.1 Dodavanja aplikacija & Dodataka Početnom Ekranu
Pokrenite listu aplikacija, pričsnite ikonicu I prevučite je na početni ekran ako želite da je dodate na glavni ekran. Na početnom ekranu pričsnite ikonice I prevučite ih u levo ili u diesno da biste ih premestili na druge stranice. Prevučite ih nagore preko ikonice za uklanjanje, ako želite da ih uklonite sa početnog ekran.
5.2 Pozadina
Ako želite da promenite pozadinu početnog ekranu, dugo pritisnite space na početnom ekranu i izaberite različite pozadine u iskačućem meniju.
5.4 Pretraga
Izaberite za lokalni pretragu informacija ili pretragu
- Po vez i va n je sa mreža ma
- Prevucite wi-fi ikonu Wi-Fi off na levo da uključite wi-fi.
Ako se interfejs iznad ne pojavl, pritisnite ikonu u gornjem levom uglu ekrana i izaberite USB konekciju u iskačućem meniju.
8. Aplikacije
8.1 Instaliranje novih aplikacija
8.1.1 Da preuzmete I installrate aplikacije sa Playstore-đi, samo pratite instrukcije.
8.1.2 Da instalirate aplikacije APK paketa u memoriji tableta, pokrenite File Manager, pronadite lokaciju app paketa I pritisnite na njen naziv da je instalirate.

Saveti:
10.1 Pritisnite ikonu Muzički plejer 🚫 ušete u muzički plejer interfejs ili ga otvorite iz upravljača fajlova direktno.
10.2 Uređaj podržava sledeće formate audio datoteka: MP3, WMA, MP2, OGG, AAC, FLAC, APE, 3GP, WAV, I druge.
10.3 Pritisnite taster za progres da idete brzo unapred ili unazad. 10.4 Ako nema audio zapisa na listi za puštanje, sistem će automatski pustiti audio zapis iz memorije tableta.
- Kamera Pritisnite ikonu 06a pristupite funkcijama kamere

11.1 Foto režim
11.1.1 Pritisnite Plavi Krug 📄 bi ste napravili fotografiju.
11.1.2 Pritisnite da biste pristupili opcijama za
fotografisanje.
11.1.3 Kliknite na malu sliku da biste videli sačuvane slike.
11.1.4 Pritisnite 📋 se prebacite na snimanje video zapisa.
11.2 Režim za snimanje video zapisa
11.2.1 Pritisnite crveni krug 📄 počnete da snimate video, a
kliknite opet da prestanete I sacuvate snimljeni video.
11.2.2 Pritnisnite pristupite opcijama za fotografisanje.
11.2.3 Kliknite na malu sliku da biste videli sačuvane video
zapise.
11.2.4 Pritisnite 📄a se prebacite na režim za fotografisanje.
Pritisnite Ikonu za podešavanja da udete u podešavanja sistema, uključujući Wi-fi & mrete, zvuk, ekran, skladište, bateriju, aplikacije, usluge lokacije, bezbednost, jezik/unos, rezerva/reset, nalozi i sinhronizacija, datum/vreme, pristupačnost, opclje za razvoj, i lo tabletu.
12.1 Wi-fi & mreže
Iz menija podešavanja, odaberite "upravlja" internet konekcije", pritsnite wi-fi podešavanja, unesite wi-fi meni I izaberite wi-fi da otvorite konekciju. Nakon aktiviranja wi-fi, automatska pretraga će bitli pokrenuta. Sipsak svih dostupnih mreža će biti prikazan. Pritinite na ime mreže sa kojom želite da se povežete, unesite lozinku I za nekoliko sekundi cete biti povezani na internet. U cilju povezivanja na 3G dongje, povežite dongje na USB port sa vašim OTR kablom. Sistem će detektowati dongje I aktivirati ga. Udite u meni podešavanja/wi-fi I druge mreže, izaberite "mobiline mreže" I sistem će se automatski povezati na internet.
12.2 Žvuk
Možete podesiti jačinu zvuka, ton zvona I obaveštenja, I zvuke sistema.
12.3 Ekran
Opcije: osvetljenje, slika pozadine, auto-rotiranje ekrana, vreme za auto sleep, veličinu fonta, pametnu boju, I inteligentno pozadinsko osvetljenje.
12.4 Skladište
Opšti pogled na interno skladište I eksternu SD karticu.
12.5 Baterija
- Cautions....11
2.Device Overview....13 - Basic operation....14
- Home screen....16
- Connecting to networks....17
-
USB Connection....19
-
Applications....19
-
Video Play....20
-
Music play....21
-
Camera....21
-
System settings....23
-
FAQ....26
-
About firmware....28
-
Technical specifications
28
MANUAL UTILIZARE ....30
CUPRINS....30
TOATE DREPTURILE REZERVATE 38
1.Masuri de siguranta....39
2.Aspectul tabletei....40
- Functii de baza....41
5.Fcranul de start....43
-
Conectarea la retele....45
-
Conectarea USB....46
-
Aplicatii....47
-
Redarea fisierclor video....48
-
Redarea fisierelor audio....49
-
Camera....50
-
Setarile sistemului....51
-
Intrebari freevente....53
-
Despre firmware....56
15.Specificatii tehnice....56
16.Declaratie de conformitate....57
Sva prava zadržana....66
- Upozorenja....67
2.Rasporcd uredaja....68
-
Osnovne operacije....69
-
Početni Ekran....71
-
Povezivanje sa mrežama....73
-
USB Konckcija....74
-
Aplikacije....75
-
Video zapis....76
-
Muzika....77
-
Kamera....78
-
Podešavanja sistema....79
-
Pitanja I odgovori....81
-
O firmware-u....83
-
Technička sprecifikacija....84
-
Deklaracija o uskladenosti....85
SVA PRAVA ZADRŽANA....88
4.Upozorenja....89
5.Pregled uredaja....91
6.Glavne funkcije....91
7.Osnovne operacije....92
4.2 Standby
Dok je uređaj uključen, pritisnite na kratko tipku POWER da bi
ugasili ekran i da bi uredaj usao u standby stanje. Pritisnite ponovo tipku POWER da bi se ekran ponovo aktivirao, I prevucite lokot da nastavite dalje.
natural_image
Colorful abstract design with red, yellow, and orange shapes (no text or symbols)5.1 Dodavanja aplikacija i dodataka Početnom Ekranu
Pokrenite listu aplikacija, pritisnite ikonicu i prevucite je na
početni ekran ako želite da je dodate na glavni ekran. Na početnom ekranu pritisnite ikonice i prevucite ih u lijevo ili u desno da biste ih premjestili na druge stranice. Prevucite ih nagore preko ikonice za uklanjanje, ako želite da ih uklonite sa početnog ekrana.
5.2 Pozadina
Ako želite da promjenite pozadinu početnog ekranu, dugo pritisnite space na početnom ekranu i izaberite različite pozadine u skočnom izborniku.
5.4 Pretraga
Izaberite za loka inu pretragu informacija ili pretragu putem Interneta. Podržana je Pretraga Glasom.

Savjeti:
- Ukoliko želite installirati aplikacije koje nisu sa Playstore-a, uvjerite se da je nepoznat izvor uključen (ovo možete pronaći u podešavanja-sigurnost-administracija uređaja).
- Ako aplikacija već postoji na tabletu, izaberite ok da je zamjenite sa najnovijom verzijom paketa.
8.2 Deinstaliranje aplikacija
8.2.1 Pritisnite podešavanje-aplikacije-sve
8.2.2 Pritisnite aplikaciju koju želite ukloniti
8.2.3 Pritiniste deinstaliraj
8.3 Upravljanje aplikacijama
8.3.1 Pritisnite podešavanja-aplikacije-sve
8.3.2 Pritiniste aplikaciju i izaberite zaustavljanje, deinstalacija, obriši podatke, ili premjesti na SD karticu.
12. Video zapis
Možeta koristiti već installirane video aplikacije i uživate u filmovima i video zapisima, ili installrajte druge video aplikacije da obogatite vaše uživanje u video snimkama.
9.1 Pritisnite ikonu za ulazak u video player sučelje ili otvorite video datoteke iz upravljača datoteka direktno.
9.2 Tablet podržava mnoge formate video datoteka, uključujući
1080P AVI, DIVX, DIVX, XVID, rm, rmwb, WMV, MOV, MP4,
MPEG, DAT, VOB, MPG, FLV, ASF, TS, TP, 3GP.
9.3 Pritisnite gumb za prikaz progesa da idete brzo unapred ili u nazad
9.4 Pritisnite ■ pristup podešavanjima video player-a.
13. Audio zapis
natural_image
Red double-bone box with London 10 sign and cartoon figures inside (no readable text or symbols)11.1 Foto režim
11.1.1 Pritisnite Plavi Krug 6a bi ste napravili fotografiju,
11.1.2 Pritisnite o biste pristupili opcijama za
fotografiranje.
Pritisnite ikonu za postavke udete u postavke sistema, uključujući wi-fi & mreže, audio, prikaz, pohranjivanje, bateriju, aplikacije, usluge lokacije, sigurnost, jezik/ulaz, sigurnosna kopija/reset, e-pošta i sinkronizacija, datum/vrijeme, dostupnost, opcije za razvoj, i o tabletu.
12.1 Wi-fi & mreže
Iz menija postavke sustava pritsnite wi-fi postavke, unesite wi-fi meni i izaberite wi-fi da otvorite konektju. Nakon aktiviranja wifi, automatska pretraga će biti pokrenuta. Spisak svln dostupnih mreša će biti prikazan. Pritinite na ime mreže sa kojom želite da se povežete, unesite lozinku i za nekoliko sekundi ócte biti povezani na internet.
U cilju povezivanja na 3G dongle, povežite dongle na USB port sa vašim OTR kablom. Sistem će prepoznati dongle i aktivirati ga. Udite u meni postavke/wi-fi i druge mreže, izaberite "mobilne mreže" i sistem će se automatski povezati na internet.
12.2 Zvuk
natural_image
Computer desktop with colorful abstract background and application icons at bottom (no readable text or symbols)5.4 Keresés
natural_image
Red double-buck toy with a small figurine inside, displayed in a software interface (no visible text or symbols on the device itself)- Cautions
- Main Functions
- Basic operation
- Power On
- Standby
- popup.
- Reset
- Recharging
- Home Screen
- Back Button
- Recent Task
- Menu
- Home screen
- Search
- Network access via 3G
- Other Networks
- USB Connection
- Applications
- Tips
- Applications uninstall
- Applications management.
- Video Play
- Music play
- Camera
- Wireless & Networks
- Sound
- Display
- Storage
- Battery
- Apps
- Location services
- Security
- Language & input
- Backup & reset
- Accounts & sync
- Date & time
- Accessibility
- Developer options
- About Tablet
- FAQ
- The device cannot connect to WiFi
- The device does not start
- Heating problem
- The system is not working correctly
- Problems with e-mail setup
- Recording problems
- Usage time too short
- Headphones without sound
- Display color problems for photos or videos
- Errors while copying files
- Other problems
- About firmware
- Technical specifications
- Declaration of conformity
- MANUAL UTILIZARE
- UTOK 702Q
- CU PRINS
- sfaturi
- Dodavanja aplikacija & Dodataka Početnom Ekranu
- Pozadina
- Pretraga
- Aplikacije
- Instaliranje novih aplikacija
- Saveti:
- Wi-fi & mreže
- Žvuk
- Ekran
- Skladište
- Baterija
- Deinstaliranje aplikacija
- Upravljanje aplikacijama
- Video zapis
- Audio zapis
- Zvuk
- Keresés
Brand : UTOK
Model : 702Q
Category : Tablet