
ActiveCam Sky - Action Camera Overmax - Free user manual and instructions
Find the device manual for free ActiveCam Sky Overmax in PDF.


| Product Type | Action Camera |
| Brand | Overmax |
| Model | ActiveCam Sky |
| Dimensions | Approx. 6 x 4 x 2 cm |
| Weight | Approx. 60 g |
| Power Source | Rechargeable lithium-ion battery |
| Video Resolution | Up to 4K 30fps (estimated) |
| Photo Resolution | Up to 12 MP (estimated) |
| Waterproof | With included housing up to 30 m (estimated) |
| Connectivity | Wi-Fi, Micro USB, microSD card slot |
| Field of View | 170 degrees wide angle (estimated) |
| Stabilization | Electronic image stabilization (estimated) |
| Battery Life | Approx. 90 minutes recording at 1080p |
| Storage Support | microSD up to 64 GB (estimated) |
| Mounting | Standard tripod mount (1/4\") and adhesive mounts |
| Maintenance | Clean lens with soft cloth; keep dry after use |
| Safety | Use original charger; avoid exposing to extreme temperatures |
| Spare Parts & Repairability | Battery and cables replaceable; other parts may require professional service |
Frequently Asked Questions - ActiveCam Sky Overmax
User questions about ActiveCam Sky Overmax
0 question about this device. Answer the ones you know or ask your own.
Ask a new question about this device
Download the instructions for your Action Camera in PDF format for free! Find your manual ActiveCam Sky - Overmax and take your electronic device back in hand. On this page are published all the documents necessary for the use of your device. ActiveCam Sky by Overmax.
USER MANUAL ActiveCam Sky Overmax
Your electronic world
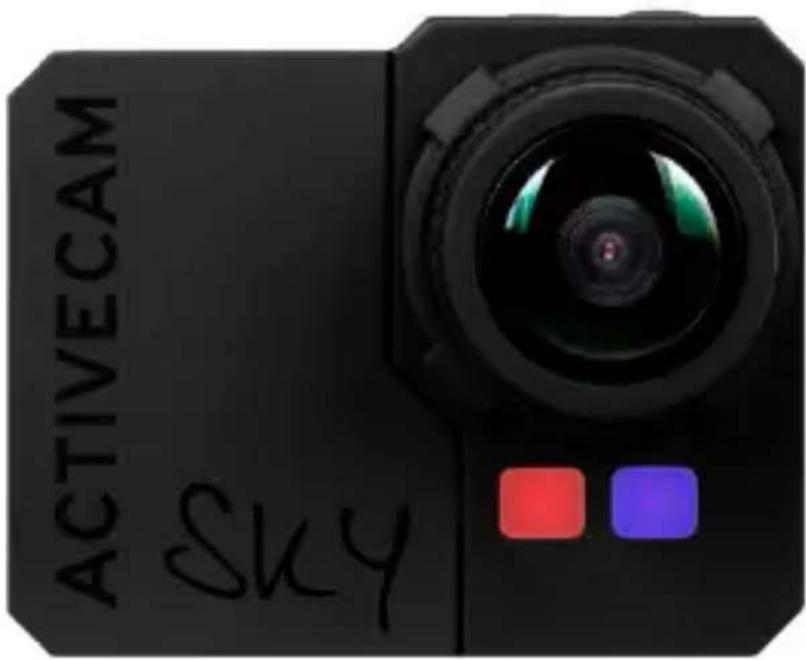
User Manual
natural_image
Technical line drawing of a mechanical device with mounting holes and a central gear-like component (no text or symbols)Wskaźnik LED
Mikrofon
Obiektyw
Wskaźnik pilota
Wskaźnik pracy
Pokrywa baterii
Przycisk zasilania
(Power) / OK
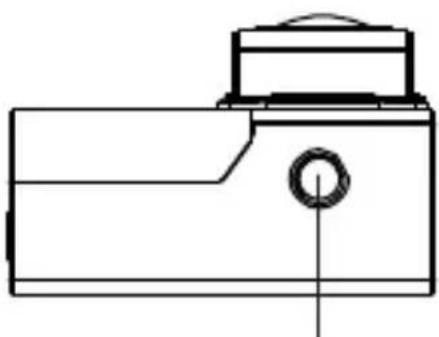
natural_image
Pure technical line drawing of a mechanical component without any text, numbers, or symbolsnatural_image
Line drawing of a device with three buttons and a connector (no text or symbols)Wskaźniki stanu
Przycisk zasilania kamery
Przycisk Nagrywania
Przycisk Aparatu
(Migawki)
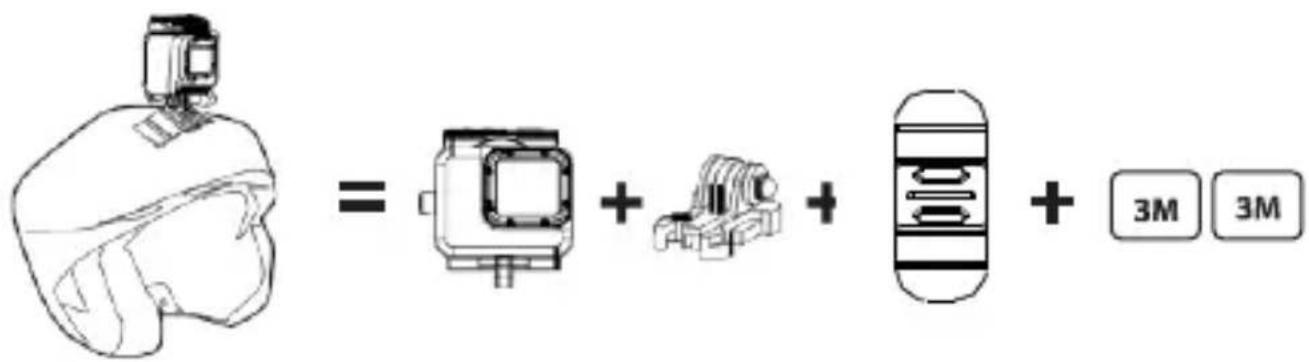
- Na kasku
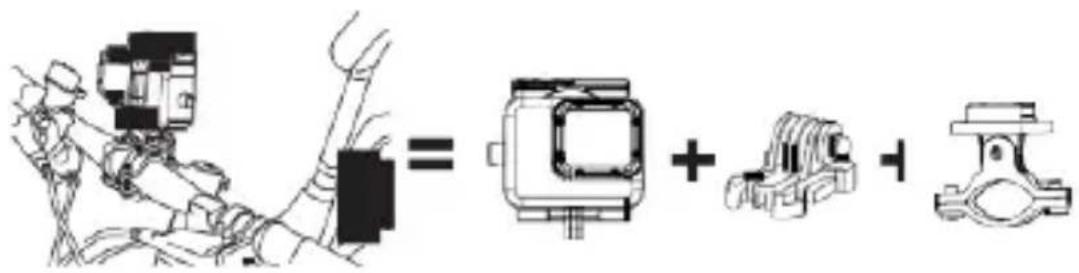
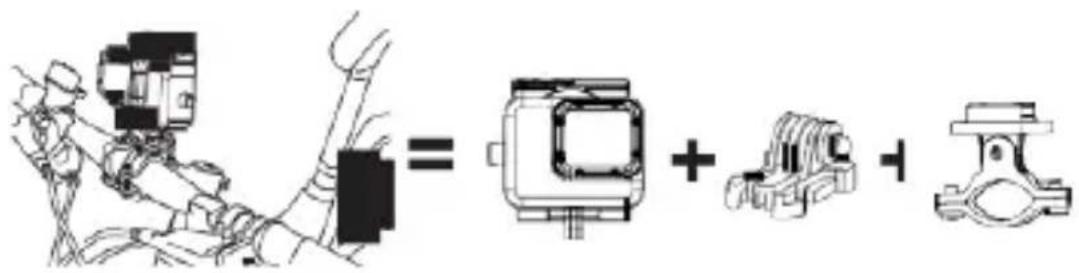
- Na kierownicy
Uwagi:
Left Button / Menu
Right Button
Photo Button / Upward Button
Video Button / Downward Button
LCD Screen
Mini HDMI Port (Cable not included)
Memory Card Slot (SD card not included)
Mini-USB Port
natural_image
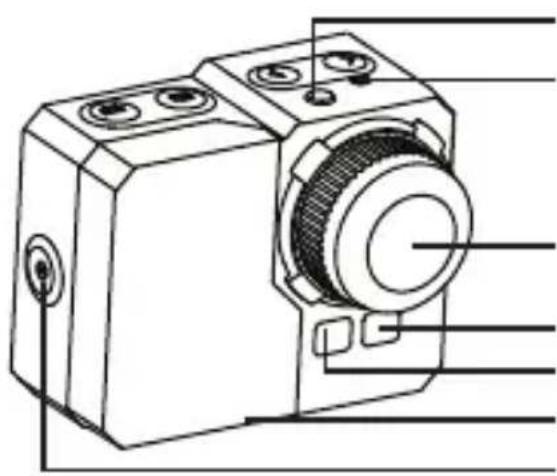
Technical line drawing of a mechanical device with mounting holes and a central gear (no text or symbols)Status Indicator Light
Microphone
Lens
Remote Indicator Light
Status Indicator Light
Battery Door
Power Button / OK
Button
natural_image
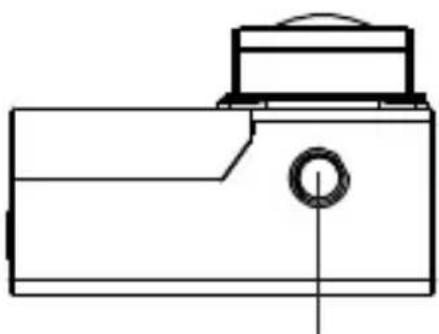
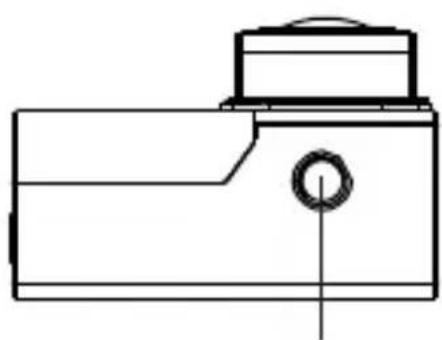
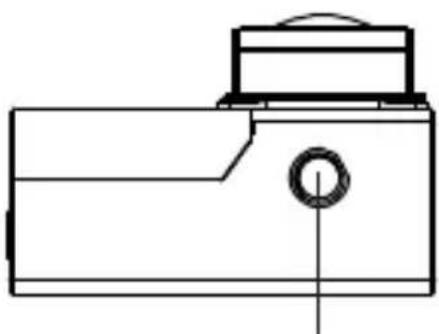
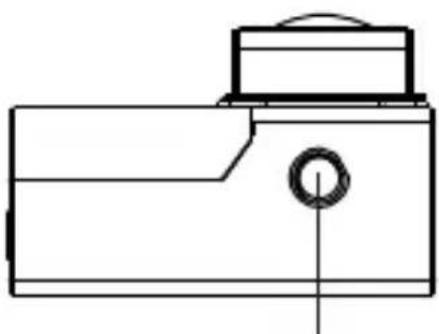
Pure technical line drawing of a mechanical component with no text or symbolsTripod Socket
natural_image
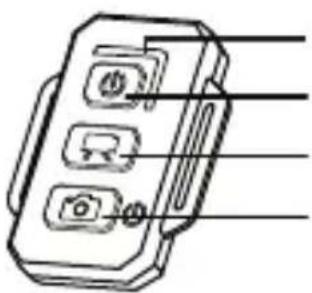
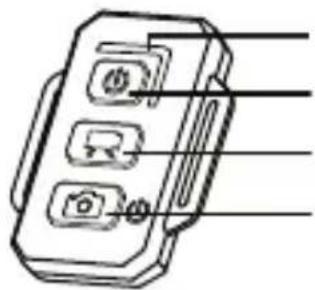
Line drawing of a device with three ports and connecting wires (no text or symbols)Status Indicator Lights
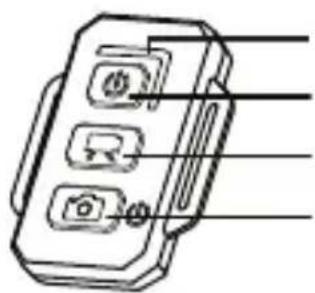
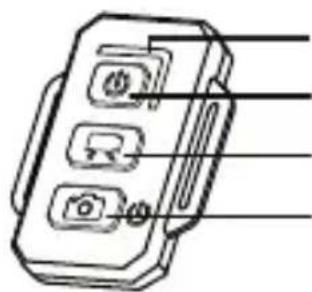
Camera ON /OFF
Video Button
Photo Button
Remote ON /OFF
How to use
- Camera on any flat surface / tripod

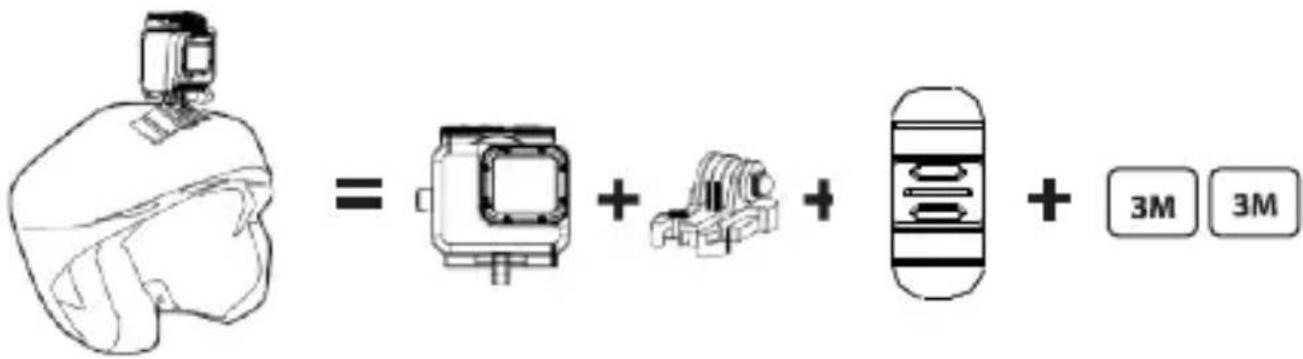
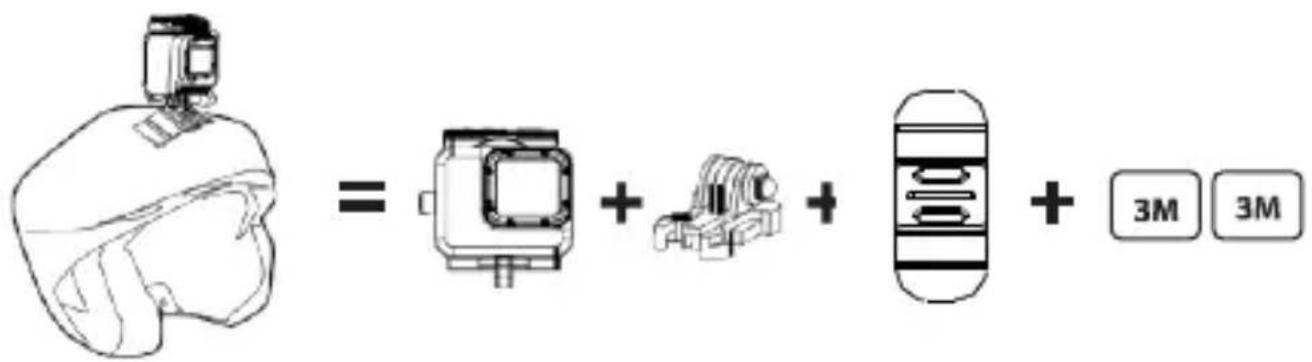
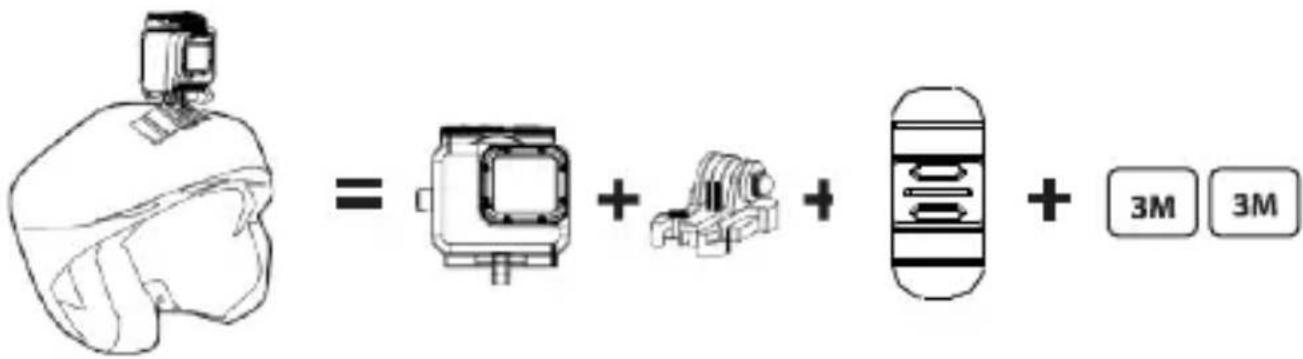
- Camera on top of helmet
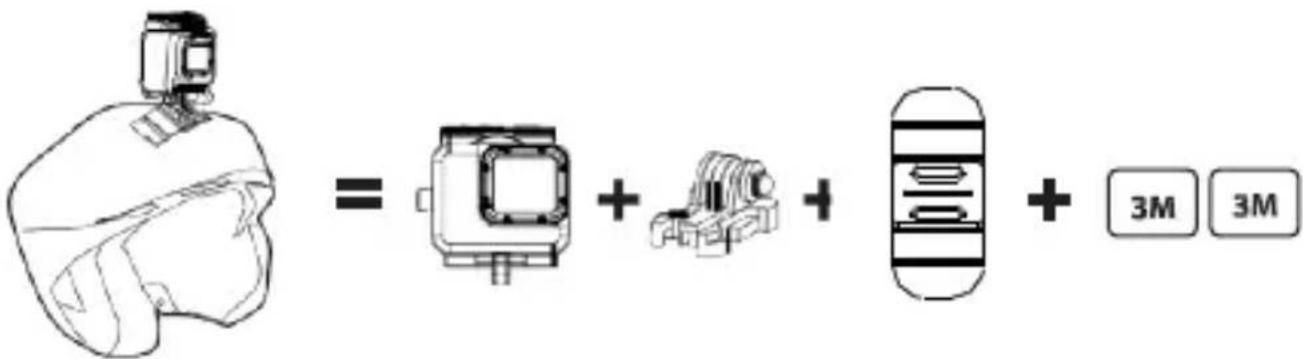
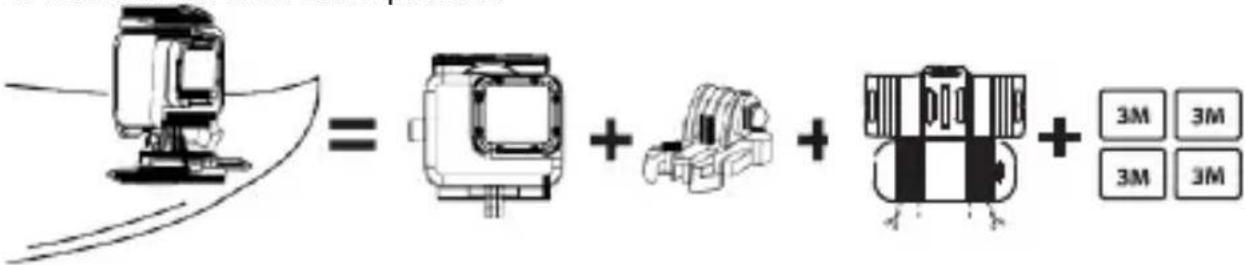
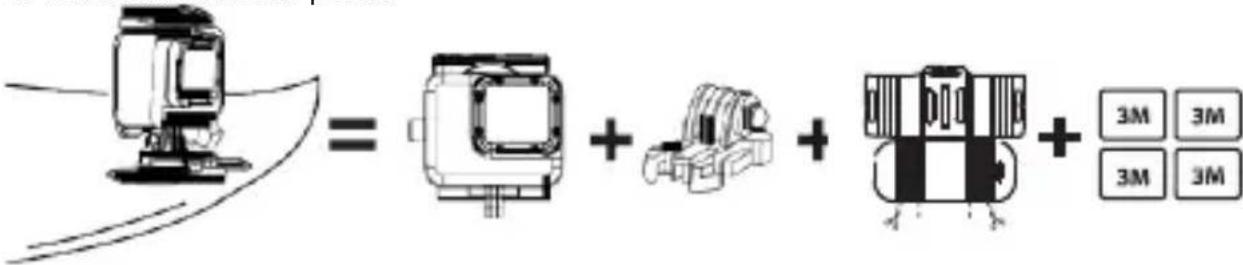
- Camera on any curved surface
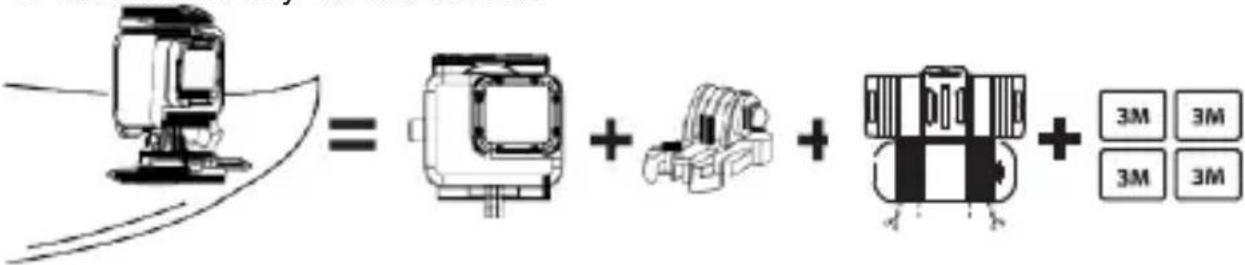
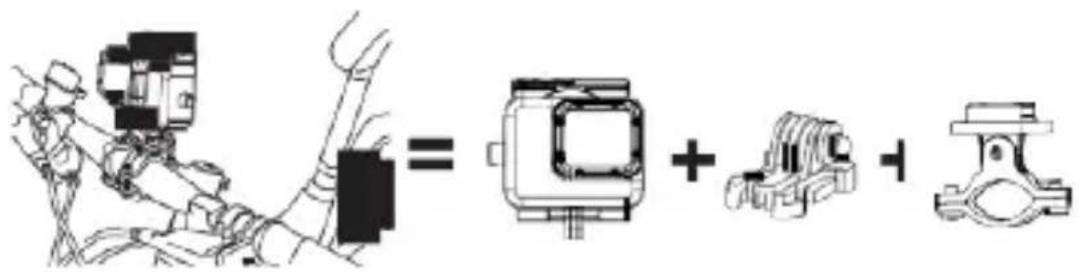
- Camera on handle bar
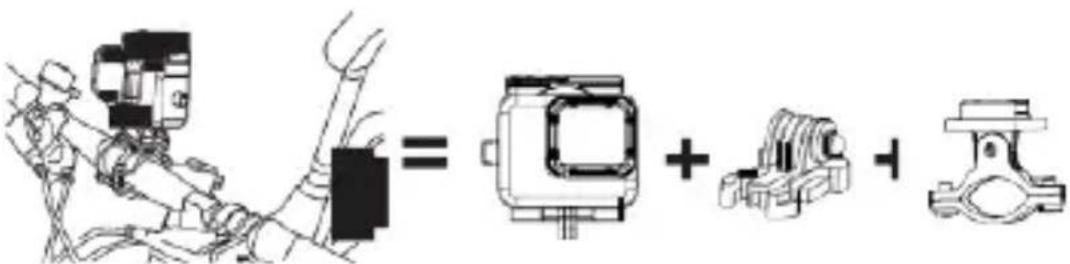
- Camera on telescopic boom
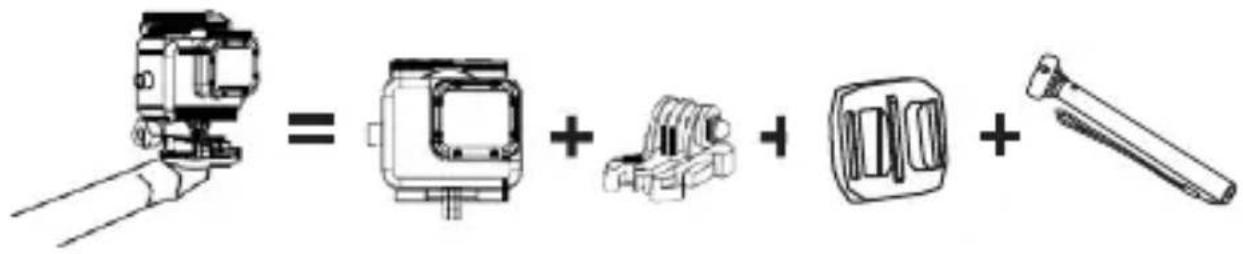
- Camera on chest mount
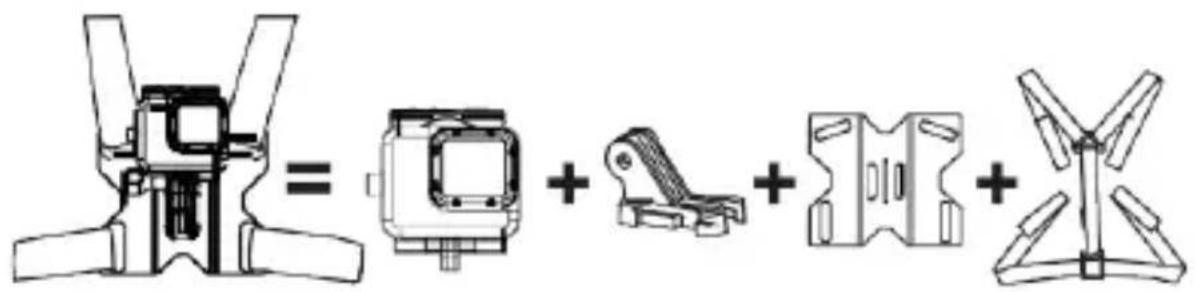
Remarks:
It is the user's responsibility to secure the camera securely to any sport equipment. The screws of the mounts have to be retightened from time to time. The warranty does not cover any damage that may occur during a sport activity.
INITIAL SETUP
- Install a micro SD memory card (max up to 32GB work with class 6 or above) into the camera. Use your fingernail to insert the micro SD card into the slot. The micro SD card will click into place once it is inserted past flush.
* When using a micro SD memory card, there should be no data from other devices. If you are using a micro SD memory card for the first time in the camera, first you should format the card in your computer.
- Place battery into the camera.
- Charging the battery
The lithium-Po battery comes partially charged. To charge it, connect the included USB cable to the camera and then connect the other end of the cable to a power source such as AC Charger. No damage will occur to the camera or battery if used prior to a full charge.
Power ON / OFF
| Turn ON | Turn on the camera by pressing the Power button ⏻ for at least 3 seconds until the red LED flashes.Then the LCD screen will be ON. |
| Turn OFF | Turn the camera off by pressing the Power button in standby mode for at least 3 seconds.* To save power, the camera will automatically turn off if no button is pressed for more than 3 minutes in standby mode. |
TakeaVideo
| To Start | Press the video button. 🎨The red status indicator light will flash while recording. |
| To Stop | Press the video button again to stop recording. 🎨 |
| Video Capture | You can also take pictures while video recording. To do so, press the photo button. 🎨* 1080i is not compatible with video capture function. |
| Image Rotation | The camera can be mounted Upside Down and the files appear upright when viewing or editing.Press and hold ⬇ , Menu > Setting > Image rotation > Select OFF OR 180 Degrees. |
The camera automatically stops recording when the memory card is full or the battery is out of power. Your video will be saved before the camera powers off.
Take a Picture
To Start Press the photo button. There will be a clicking sound.
Take Still Pictures
In photo mode the camera can capture image in burst rate at 3/1 sec, 5/1sec, 10/1sec, 10/2sec.
To Start Press the photo button The red status indicator light will flash and there will be clicking sound while photo shooting.
To Stop Press the photo button 📷 again to stop shooting.
The camera automatically stops taking photos when the memory card is
full or the battery is out of power. Your photos will be saved before the camera powers off.
Time Lapse
In time lapse mode the camera will take sequentially 1frame per second, 1 frame per 2 seconds, 1 frame per 5 seconds, 1 frame per 10 seconds, 1 frame per 30 seconds or 1 frame per 60 seconds.
| To Start | Press and holdMenu > Video Setting > Time LapsePress the video buttonThe red status indicator light will flash and there will be clicking sound while recording. Light flashes each time a photo is taken. |
| To Stop | Press the video button again to stop recording. |
When using the Time Lapse, a micro SD card with a Speed Class 10 Rating is required. To capture a time lapse series, check if the camera is in time lapse mode.
Self Timer
| To Start | Press and hold←, Menu > Photo Menu > Self timeSelect “OFF” / 3 / 5 / 10 / 30 / 60 second intervals |
The camera can be configured to automatically record or take pictures.
Default Settings
The camera powers up with the following default settings:
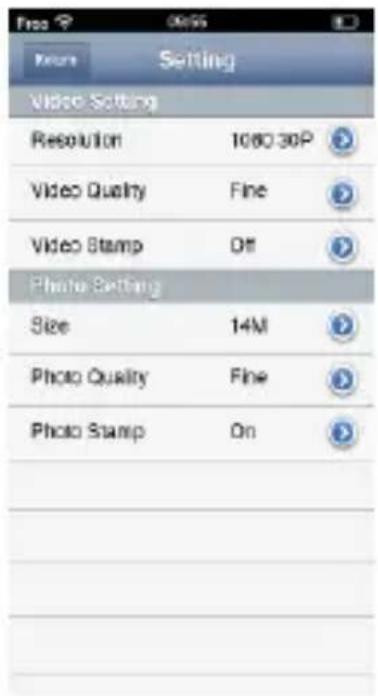
Video resolution: 1080p / 30fps
Photo resolution: 14.0 Megapixels
(MP) Photo Burst: SINGLE
Wi-Fi: ON
Display: ON
Date & time stamp: OFF
TV Playback
You can playback your photos and videos on the camera, with a HDTV. Playback appears as a camera mode when the camera is powered on and plugged into a HDTV. This HDMI port can transmit the images of this device to external HDTV display equipment for playback, display, etc.
- Plug the camera into a HDTV with the HDMI cable.
- Power ON.
- Previews of all videos and photos on HDTV display.
- Press upward button and downward button to select more media files.
Play
| To Play Videos | Press and hold the photo button 📞 to play. Select video icon, press 🔒 for OK.Press photo and video button to select more media files. |
| To Play Images | Press and hold the photo button 🔒 to play. Select image icon, press for OK.Press photo and video button to select more media files. |
| Logout Preview | Press and hold photo button 🔒 to back to standby mode. Press and hold the same button again to log out. |
USB Port
Connect the camera to the computer using included USB cable.
| Storage AC Charge |
Storage – Connect with PC to transfer video and photo files.
On a PC:
- Double click "My Computer" and locate "Removable Disk".
- If "Removable Disk" is not showing, close "My Computer" folder and reopen it. The "Removable Disk" icon should appear.
- Double click "Removable Disk" icon.
- Double click "DCIM" folder icon.
- Double click "100media" icon to view all video / photo files.
- Copy / move files to the computer or external hard drive.
On a MAC:
- Connect the camera to MAC using included USB cable.
- Power on, select the "Mass Storage".
- The MAC recognizes the camera as an external hard drive.
- Double click icon for external drive to access files.
- Copy / move files to computer or external hard drive.
* When deleting files from the memory card, empty the trash before removing the memory card or unplugging the camera.
Built in Wi-Fi
This Wi-Fi camera allows you to connect to a smartphone or a tablet via the App.
| Wi-FON | Automatically turn on within 30 seconds*, Wi-Fi icon in green to indicate it works fine. Now go to your smartphone / tablet setting, turn on the Wi-Fi network and select “activecamsky”. Password: 00000000 |
| Wi-FON/OFF | Press and hold ⚙, Menu > Setting > Wi-Fi > Select “ON” or “OFF”. Press ⚙ for OK. |
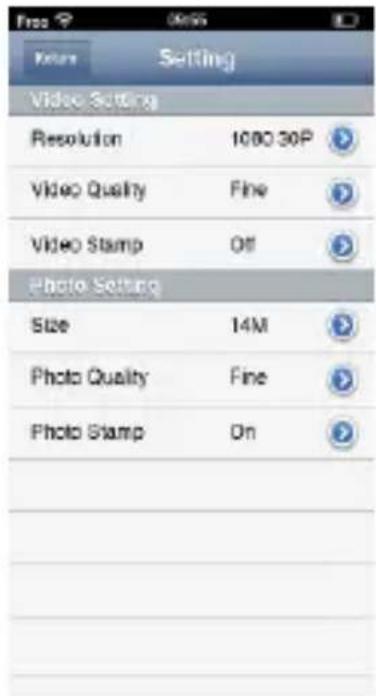
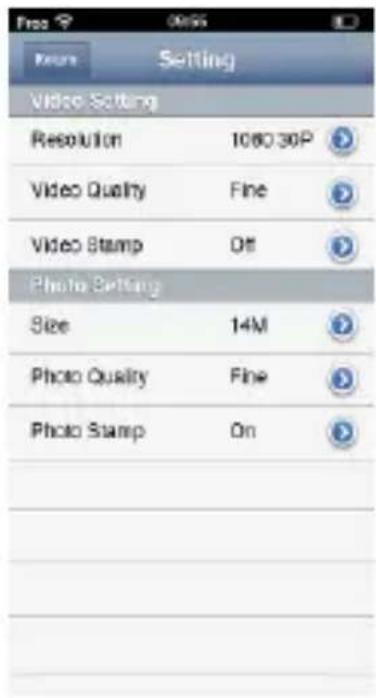
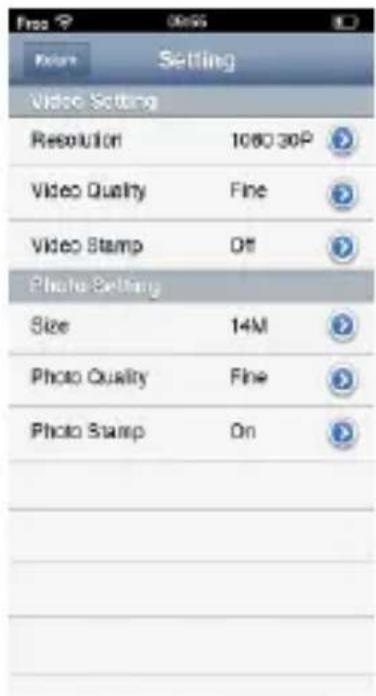
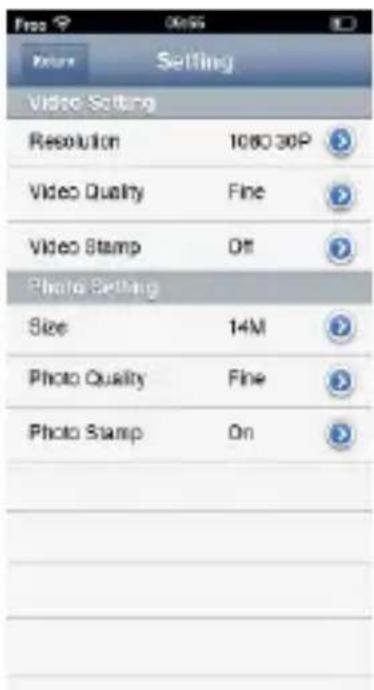
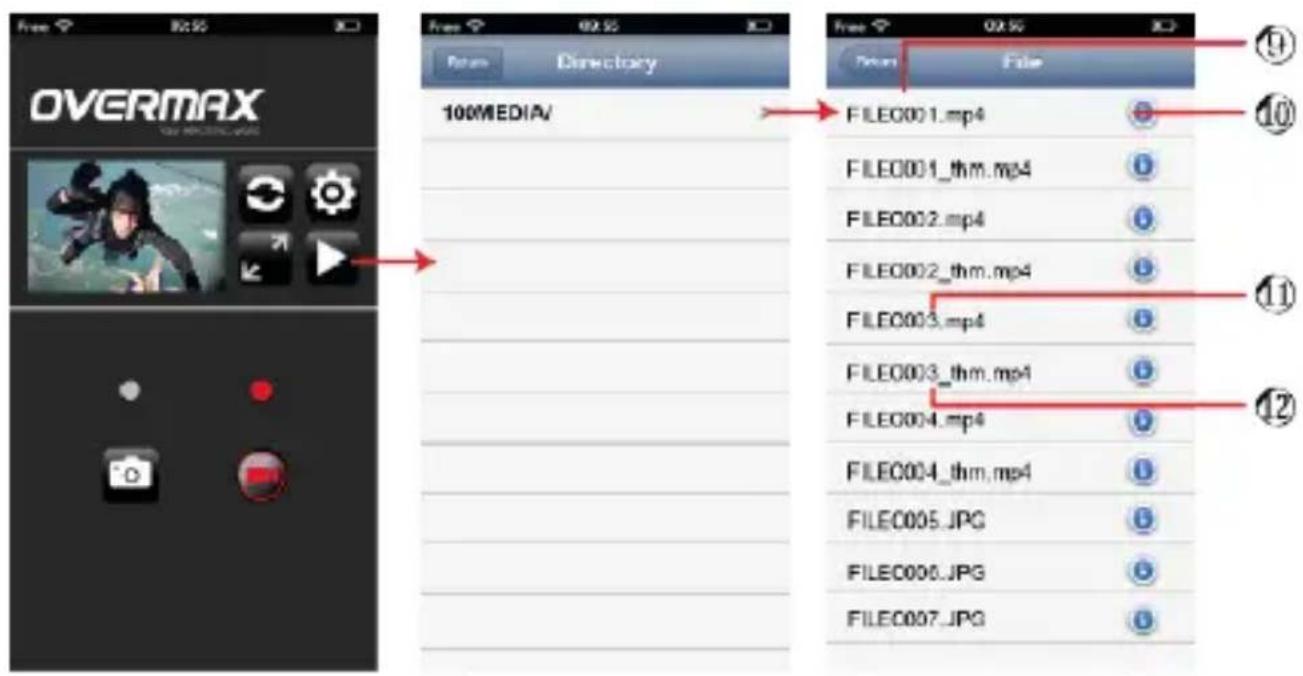
The App lets you control your camera remotely using a smartphone or a tablet. Features include full camera control of all settings, live video preview, streaming, download and playback. The App is available for free at the Apple App Store and Google Play. Before you hit, see what your camera sees by viewing it on your smartphone or tablet's screen.

Notice:
*BUSY icon on your camera's LCD screen is showing.
1080i video format and REC lapse mode is not available for Wi-fi function.

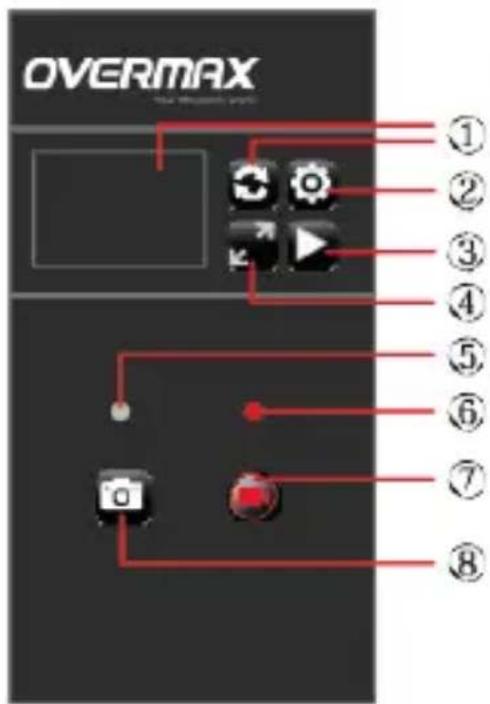
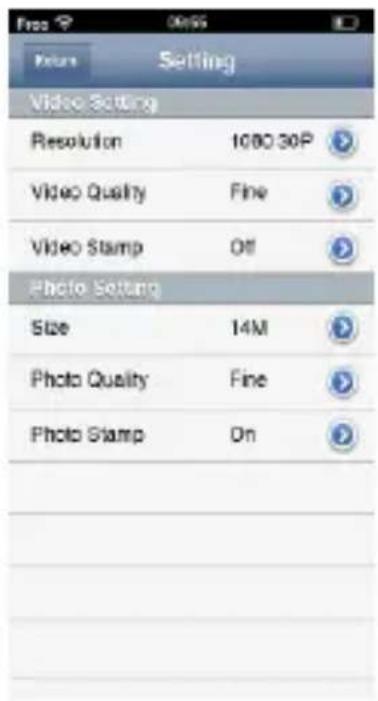
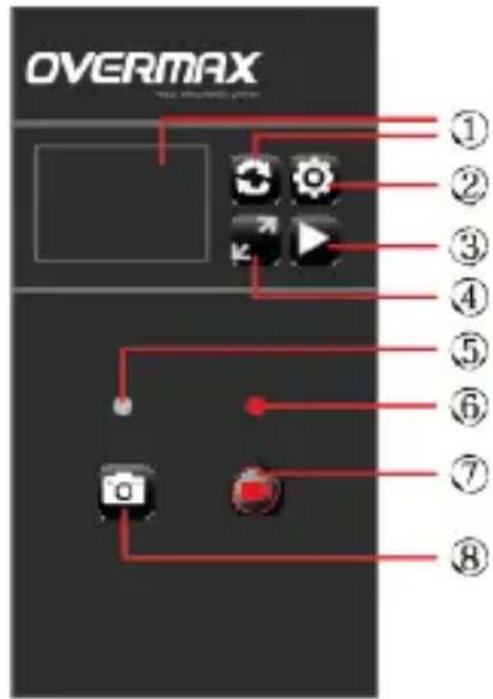
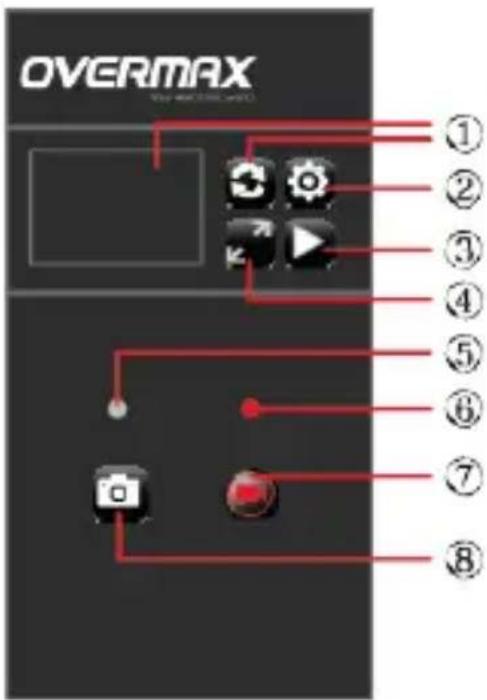
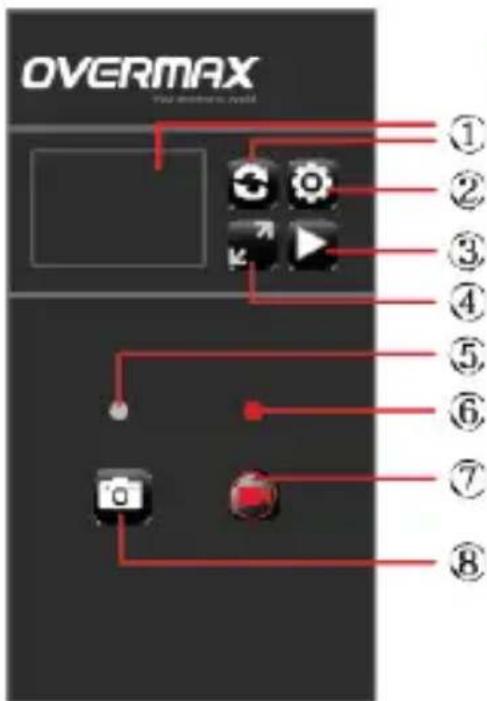
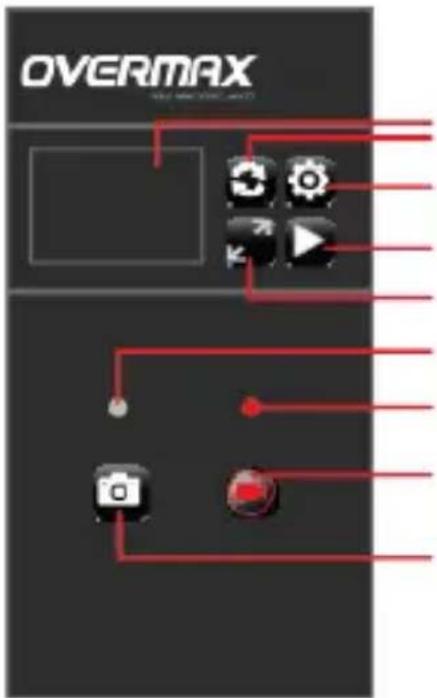
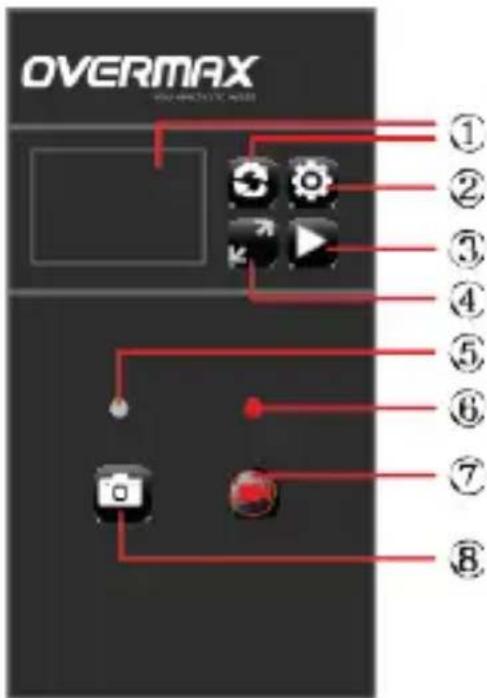
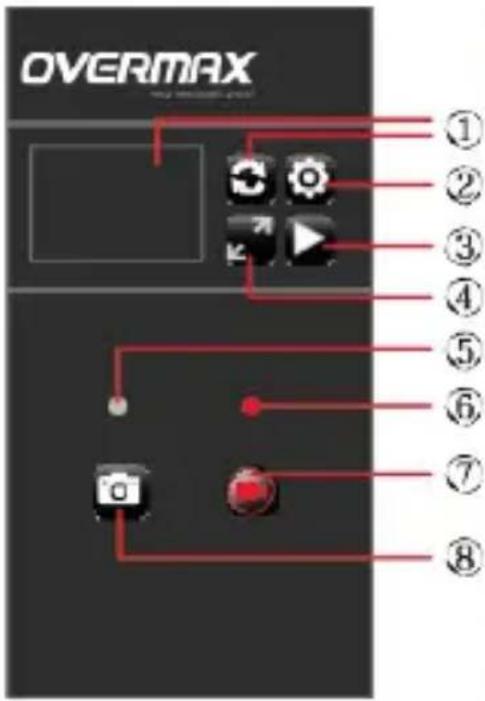
1.Refresh Button
2. Setting Button
3.Playback Button
4.Full Screen
- Photos Status Light
- Recording Status Light
- Start / Stop Recording
- Photos Button
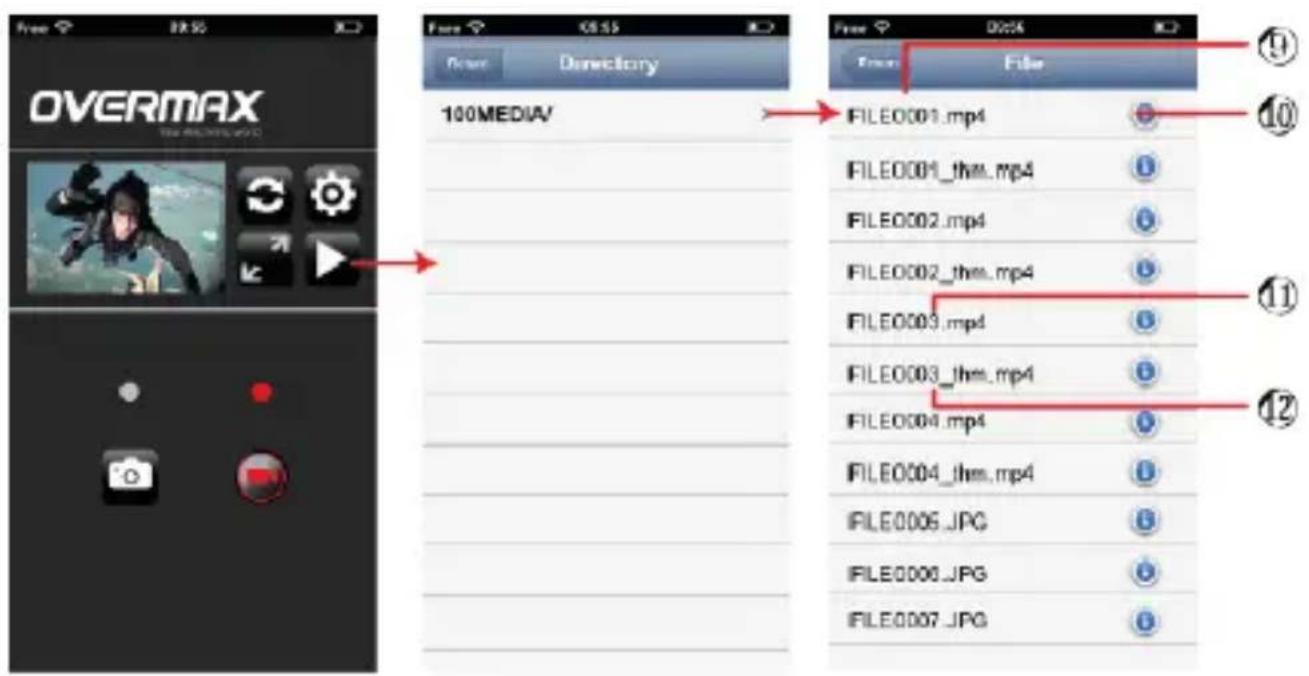
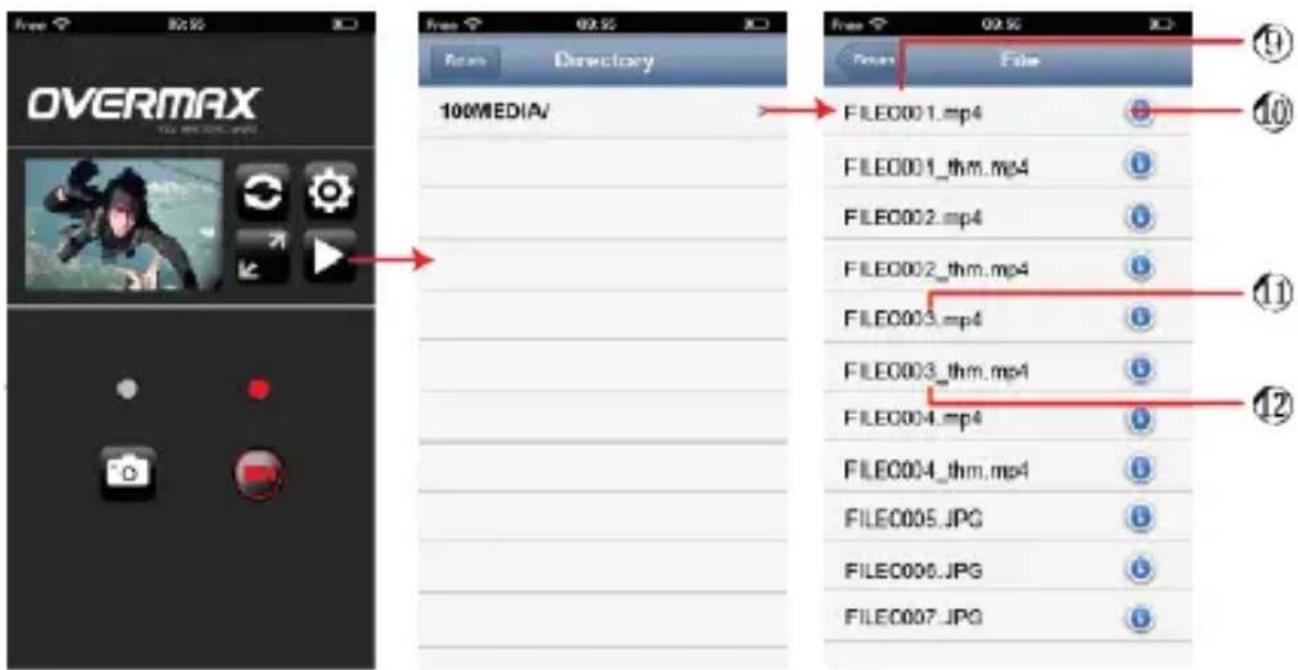
⑨ File Name
10 Download Button
⑪ Original Size Video File
⑫ Compressed Video File
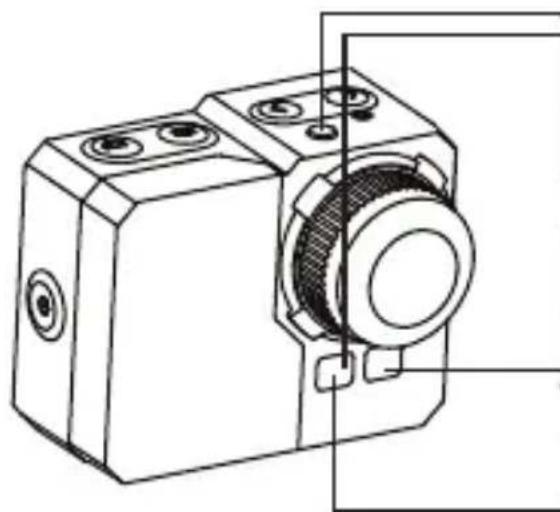
LED Status Chart
natural_image
Technical line drawing of a mechanical device with mounting holes and a central gear-like component (no text or symbols)| LED Status Red LED | |
| Standby | ON |
| Taking Video | Flashing |
| Taking Photo | Flashing |
| LED Status | Blue LED |
| Standby | OFF |
| Remote ON | ON |
| LED Status | Red LED |
| Charging | ON |
Camera Settings
| Photo Size | 20 MP (16:9)14 MP5 MP |
| Self-Timer | OFF / 3 /5 / 10 / 30 / 60 Seconds |
| Burst Rate OFF | 3 photos in 1 second5 photos in 1 second10 photos in 1 second10 photos in 2 seconds |
| Auto Shooting | OFF / 1 / 3 / 5 / 10 / 30 / 60 Seconds |
| Date Stamp | ON / OFF |
| Quality | High / Medium / Low |
Video Settings
| Video Size | NTSC 1080i 1920x1080 @60fpsNTSC 1080p 1920x1080 @30fpsNTSC 960p 1280x960 @30fpsNTSC 720p 1280x720 @60fpsNTSC 720p 1280x720 @30fpsNTSC 480p 848x480 @60fpsPAL1080i1920x1080@50fpsPAL1080p 1920x1080 @25fpsPAL960p1920x960@25fpsPAL720p1280x720@50fpsPAL720p1280x720@25fpsPAL480p848x480@50fps |
| Quality | High / Medium / Low |
| Video Duration | 5Min. /10 Min. /15 Min. /20 Min. /30 Min. |
| Date Stamp | ON / OFF |
| *Dual Streams | ON / OFF |
| Time Lapse | OFF1frame per second1frame per 2seconds1frame per 5Seconds1frame per 10 Seconds1frame per 30 Seconds1frame per 60 Seconds |
| Motion Detection | OFF / High / Medium / Low |
| Loop Recording | ON / OFF (10 minutes / video file) |
| Mic Volume | OFF / 100% / 90% / 80% / 70% / 60% / 50% (Default 80%) |
*The camera creates 2 video file while recording, first is the original file (FILE0001.mp4), the second is a small size VGA file (FILE0001.thm.mp4) which can be easier for streaming from camera to smartphones.
Settings
| Setting | Options |
| *Date | YYYY-MM-DD |
| Time | HH:MM |
| Video System | PAL/NTSC |
| Auto Screen | OFF/30 Seconds /1Min. /3Min. /5Min. |
| Auto Shutdown | OFF/3Min. /5Min. /10 Min. |
| Image Rotation | OFF/180° |
| Light Freq | 50Hz /60Hz |
| Metering | Multi /Center /Spot |
| ISO | Auto /100 /200 /400 /800 /1600 |
| White Balance | Auto /Incandescent /Daylight /Cloudy |
| #Color Setting | Rich (0~3 m) /Natural /Diving (3~15 m) / Deep Sea (15 meters and |
| EV | -2.0 -1.7 -1.3 -1.0 -0.7 -0.3 0.0 +0.3 +0.7 +1.0 +1.3 +1.7 |
| Buzzer | ON /OFF |
| #Wi-Fi | ON /OFF |
| Format | SD Card |
| Default Setting | |
*Ensure video and photo files are saved with the correct date and time.
# When selecting a new color setting and turning Wi-Fi on/off, the camera need to be reboot automatically.
Memory Card / Storage Chart
Compatible with 2GB, 4GB, 8GB, 16GB and 32GB capacity micro SD, micro SDHC and micro SDXC memory cards. While all speed class ratings are compatible, it requires using an SD card with Speed Class Rating 10 or higher speed when recording, or when using the 1fps time Lapse setting. We recommend using brand name memory cards for maximum reliability in high-vibration activities.
*Work with class 6 or above.
Preventing water damage to your Camera
- Keep the rubber seal clean with fresh water and dry after every use.
- After every use in salt water, please rinse the housing with fresh water.
- Clean the seal, rinse in fresh water and shake dry.
* Failure to follow these steps each time you use the camera can result in leaks that may damage or destroy it. Your warranty does not cover water damage resulting from user error.
TEMPERATURE WARNING
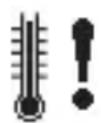
The camera has become too hot and needs to cool down after being used 2 hours (continuous recording). Simply let it sit and cool before attempting to use it again. Your camera will not allow itself to overheat — do not worry, no damage has occurred.
Battery life
Battery icon will alert for low battery status. When battery reaches 0% while recording, the camera will save the file and power OFF.
To charge the battery:
- Connect the camera to a power source.
- The red status indicator light remains on while the battery is being charged.
- The red status indicator light turns OFF when the battery is fully charged.
The battery will charge to 100% in 4 hours when using 500mAh USB-compatible A/ C wall charger. Other chargers may charge at only half this rate. No damage will occur to the camera or the battery if used together prior to full charge.
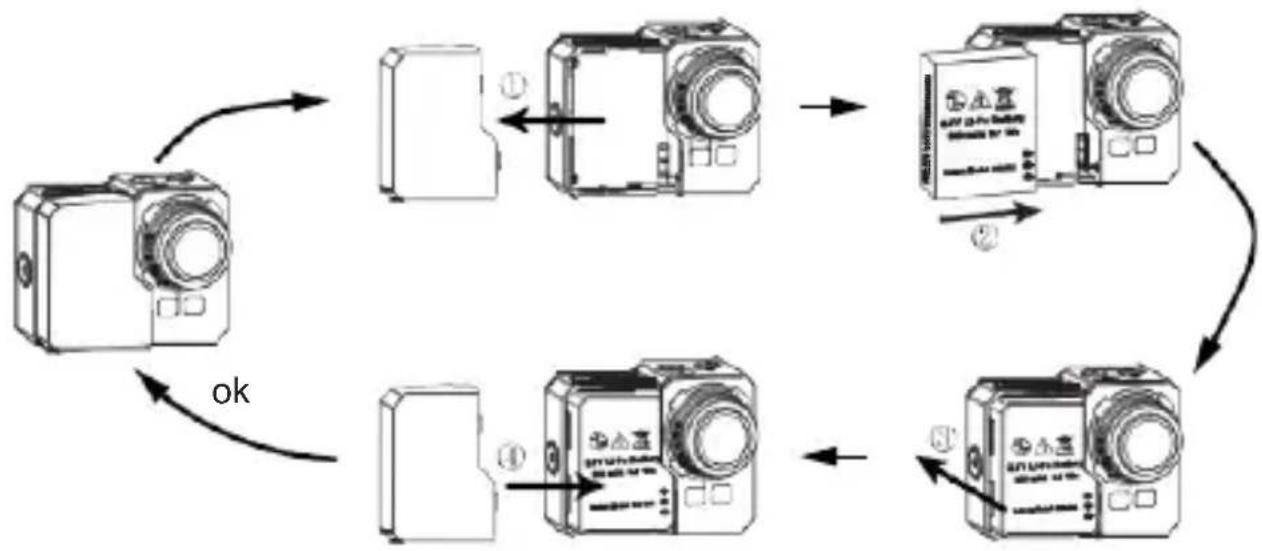
To remove the battery:
- Remove the battery door by placing your thumb in the indentation in the battery door (on the back of the camera) and sliding it to the left.
- Allow the door to pop out. Grasp the battery pull-tab and remove from the camera.
flowchart
graph TD
    A["Camera Module"] -->|①| B["Device ①"]
    B --> C["Device ②"]
    C --> D["Device ③"]
    D --> E["Device ④"]
    E --> F["Device ⑤"]
    F -->|ok| A
    style A fill:#f9f,stroke:#333
    style B fill:#ccf,stroke:#333
    style C fill:#cfc,stroke:#333
    style D fill:#fcc,stroke:#333
    style E fill:#cff,stroke:#333
    style F fill:#ffc,stroke:#333
CAUTION
RISK OF EXPLOSION OCCURS IF THE
BATTERY IS REPLACED BY AN
INCORRECT TYPE.
DISPOSE OF USED BATTERIES
ACCORDING TO THE INSTRUCTIONS.
Remote Control
- Power off the Camera,
Press and hold for 3 seconds the photo button ON/OFF.

. The blue light will turn
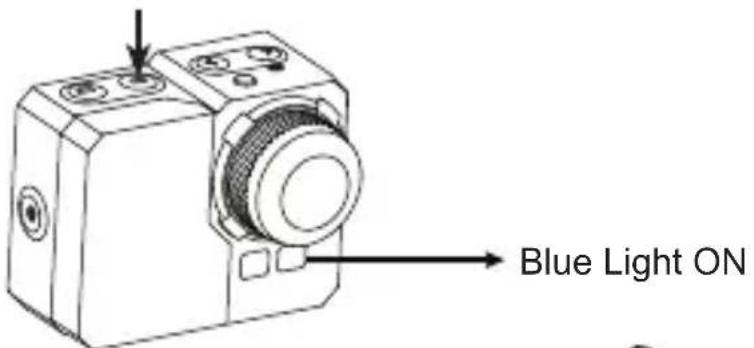
- Press and hold the photo button for 3 seconds, the green light will turn ON
Blue
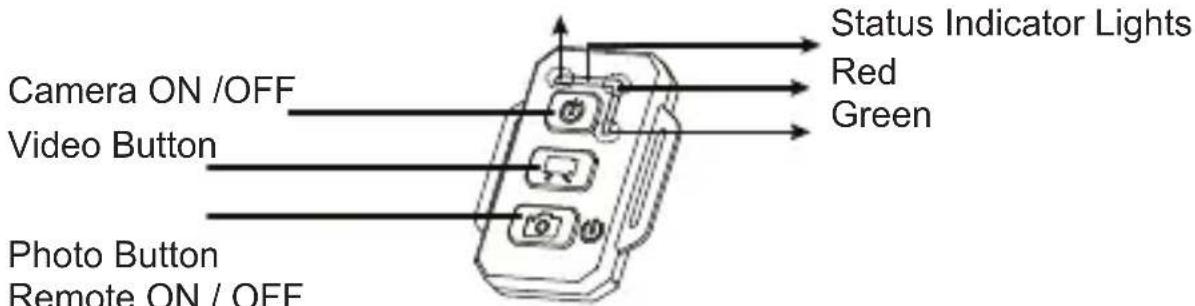
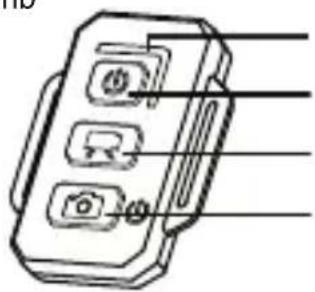
| Remote ON /OFF | Press and hold the photo button for 3 seconds [YSHH] |
| Camera ON /OFF | Press the power button |
| Take a Picture | Press the photo button |
| Take a Video | Press the video button |
*Turn OFF both the camera & remote to shut down this function.
Remote Status Indicator Lights
| Green Power ON | |
| Red Take a picture | |
| Blue Take a video | |
| Red Charging* |
*LED turns OFF when the battery is fully charge
natural_image
Technical line drawing of a mechanical device with mounting holes and a central gear-like component (no text or symbols)Kontrolka stavu
Mikrofon
Objektiv
Kontolka ovládání
Kontrolka stavu
Kryt baterie
Tlačítko napájení /
tlačítko OK
natural_image
Pure technical line drawing of a mechanical component without any text, numbers, or symbolsObjímka pro stativ
natural_image
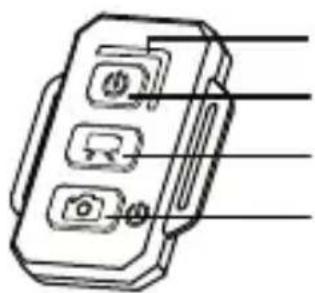
Diagram of a device with three labeled buttons and connecting lines (no text or symbols)Kontrolka stavu
Fotoaparát ZAP/VYP
tlačítko Video
Tlačítko foto
Ovládání ZAP / VYP
Návod k použití
- Kamera na řidítkách
Poznámky:
flowchart
graph TD
    A["①"] --> B["②"]
    B --> C["③"]
    C --> D["④"]
    D --> E["⑤"]
    E --> F["⑥"]
    F --> G["⑦"]
    G --> H["⑧"]
Tlačidlo Vl'avo / Menu
Tlačidlo Vpravo
Tlačidlo fotograf. / tlačidlo Nahor / tlačidlo Prehrat'
Tlačidlo Video / tlačidlo Nadol
LCD displej
natural_image
Technical line drawing of a mechanical device with mounting holes and a central gear-like component (no text or symbols)Kontrolka stavu
Mikrofón
Objektív
Kontrolka ovládania
Kontrolka stavu
Kryt batérie
natural_image
Pure technical line drawing of a mechanical component without any text, numbers, or symbolsObjímka na statív
natural_image
Line drawing of a device with three buttons and connecting wires (no text or symbols)Kontrolka stavu
Fotoaparát ZAP/VYP
tlačidlo Video
Tlačidlo foto
Ovládanie ZAP / VYP
Návod na použitie
- Kamera na l'ubovoľnom plochom povrchu / statíve

- Kamera umiestnená na prilbe
- Kamera na zakrivenom povrchu
Poznámky:

Tlačidlo obnovenia

Tlačidlo nastavenia

natural_image
Technical line drawing of a mechanical device with mounting holes and a central gear (no text or symbols)Modré svetlo svieti
Buton stanga / Meniu
Butondreapta
Buton foto / Buton in sus / Buton redare
Buton video / Buton in jos
Ecran LCD
natural_image
Technical line drawing of a mechanical device with mounting holes and a central gear-like component (no text or symbols)Indicator luminos
Microfon
Obiectiv
Indic. Luminos-distanta
Indicator luminos-stare
Capac baterie
Buton de alimentare /
Buton OK
natural_image
Pure technical line drawing of a mechanical component without any text, numbers, or symbolsLoc pentru trepied
natural_image
Line drawing of a device with three buttons and a handle, no text or symbols presentIndic.luminoase-stare
Camera ON / OFF
Buton video
Buton foto
La distanta ON / OFF
Folosinta
- Camera pe casca
- Camera pe ghidon
Remarci:
CONFIGURAREA INITIALA
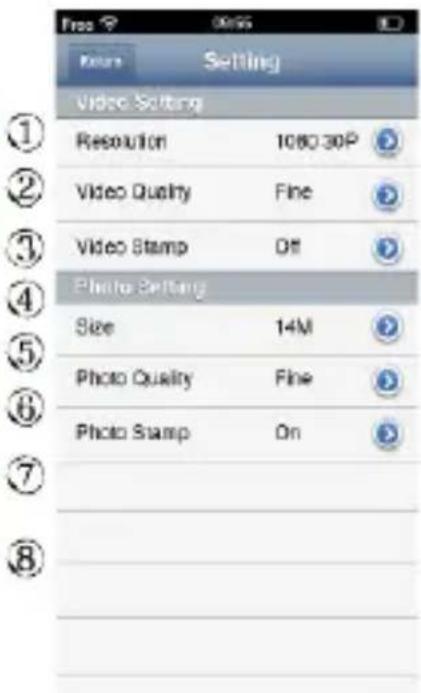
① Reimprospatare
② Setari
③ Redare
④ Ecran complet
⑤ Lumina stare foto
⑥ Lumina stare inregistrare
⑦ Start /Opriti inreg. (Buton inreg.) Buton
⑧ foto
natural_image
Technical line drawing of a mechanical device with mounting holes and a central gear-like component (no text or symbols)Állapotjelző fény
Mikrofon
Objektív
natural_image
Pure technical line drawing of a mechanical component with no text or symbolsÁllvány bemenet
natural_image
Line drawing of a device with three ports and connecting lines (no text or symbols)Állapotjelző fény
Kamera BE /KI
Videó gomb
Fotó gomb
Távvezérlő BE/KI
Hogyan használjuk?
Megjegyzés:
Vasakule nupp / Menüü
Paremale
nupp
Foto nupp / Üles nupp / Esitamise nupp
Video nupp / Alla nupp
LCD ekraan
natural_image
Technical line drawing of a mechanical device with mounting holes and a central gear-like component (no text or symbols)Oleku indikaatortuli
Mikrofon
Lääts
Kaugindikaatortuli
Oleku indikaatortuli
Aku kate
Toitenupp / OK nupp
natural_image
Pure technical line drawing of a mechanical component with no text or symbolsStatiivi pesa
natural_image
Line drawing of a device with three buttons and a handle, no text or symbols presentOleku indikaatortuli
Kaamera SEES /
VÄLJAS Video nupp
Foto nupp
Kauge SEES / VÄLJAS
Kuidas kasutada
- Kaamera tasasel pinnal / statiivil

- Kaamera kiivri peal
- Kaamera kaardus pinnal
Märkused:
① Värskendamise
② nupp Seadete
③ nupp Esitamise
④ nupp Täisekraan
⑤ Pildid Olek Tuli
⑥ Lindistamise indikaatortuli
⑦ Alusta / peata lindistamine (lindistamise
⑧ nupp) Foto nupp
Your electronic world
- User Manual
- Uwagi:
- How to use
- Remarks:
- INITIAL SETUP
- Take a Picture
- Take Still Pictures
- Time Lapse
- Self Timer
- Default Settings
- TV Playback
- USB Port
- Storage – Connect with PC to transfer video and photo files.
- On a PC:
- On a MAC:
- Built in Wi-Fi
- Notice:
- 1080i video format and REC lapse mode is not available for Wi-fi function.
- Memory Card / Storage Chart
- Preventing water damage to your Camera
- TEMPERATURE WARNING
- Battery life
- To remove the battery:
- CAUTION
- Remote Control
- Návod k použití
- Poznámky:
- Návod na použitie
- Folosinta
- Remarci:
- CONFIGURAREA INITIALA
- Hogyan használjuk?
- Megjegyzés:
- Kuidas kasutada
- Märkused:
Brand : Overmax
Model : ActiveCam Sky
Category : Action Camera