
KA ADH 1 - Air purifier KALORIK - Free user manual and instructions
Find the device manual for free KA ADH 1 KALORIK in PDF.


| Type | Air purifier |
| Brand | Kalorik |
| Model | KA ADH 1 |
| Dimensions | Approx. 20 x 20 x 30 cm |
| Weight | Approx. 2 kg |
| Power supply | AC 220-240V, 50/60Hz |
| Power consumption | 30 W |
| Coverage area | Up to 20 m² |
| Filter type | HEPA H13 + pre-filter + activated carbon |
| Fan speeds | 3 speeds |
| Noise level | 25 - 48 dB |
| Air flow (CADR) | Approx. 100 m³/h |
| Timer | 1-8 hours |
| Auto mode | Yes |
| Sleep mode | Yes |
| Night light | Yes, dimmable |
| Filter replacement indicator | Yes |
| Air quality sensor | Particulate matter sensor |
| Control type | Touch panel + remote control |
| Display | LED with air quality color ring |
| Maintenance | Clean pre-filter monthly, replace HEPA filter every 6-12 months |
| Safety features | Overheat protection, tip-over switch |
| Spare parts available | Replacement filters (HEPA + carbon) |
| Repairability | Not user-serviceable except filter replacement |
| Warranty | 2 years |
Frequently Asked Questions - KA ADH 1 KALORIK
User questions about KA ADH 1 KALORIK
0 question about this device. Answer the ones you know or ask your own.
Ask a new question about this device
Download the instructions for your Air purifier in PDF format for free! Find your manual KA ADH 1 - KALORIK and take your electronic device back in hand. On this page are published all the documents necessary for the use of your device. KA ADH 1 by KALORIK.
USER MANUAL KA ADH 1 KALORIK
☐ Please read these instructions carefully before using the appliance.
☐ Check that your mains voltage corresponds to that stated on the rating plate of the appliance.
□ Keep out of reach of children or incompetent persons.
From time to time check the cord for damages. Never use the appliance if cord or appliance shows any signs of damage. Should the cord be damaged, it must be replaced by a competent qualified service ^[1] . All repairs should be made by a competent qualified service ^[2] .
☐ Only use the appliance for domestic purposes and in the way indicated in these instructions.
☐ Never immerse the appliance in water or any other liquid for any reason whatsoever.
□ Never use the appliance near hot surfaces.
☐ Do not place the power cord under a carpet.
☐ Never lay the unit down when it is working, always keep the appliance in upright position.
☐ Never unplug the unit while it is working, this could damage the electronic circuit of the unit.
□ Never use an extension cord.
☐ Never use the plug to start and stop the unit. Always use switch on the control panel.
Before moving the unit, first switch off, empty the water tank and unplug.
Leave the unit to stand for one hour before connecting to the mains supply after transport or when it has been tilted (e.g. during cleaning).
Before cleaning and when you do not use the appliance, always unplug the appliance from the power supply. Do not attempt to remove the plug from the wall socket with wet hands.
☐ Never use the appliance outside and always place it in a dry environment.
☐ Never use accessories that are not recommended by the producer. They could constitute a danger to the user and risk to damage the appliance.
☐ Never move the appliance by pulling the cord. Make sure the cord cannot get caught in any way. Do not wind the cord around the appliance and do not bend it.
☐ Do not place the appliance under a power socket.
□ Always position the appliance in such a way that inflammable materials such as curtains cannot be ignited. Do not place the appliance against a wall.
☐ Make sure that the air inlet and outlet openings are not obstructed. To avoid any risk of fire, DO NOT COVER THE APPLIANCE (ex. With clothes).
☐ Warning: Do not operate the appliance near baths, showers, washbasins, swimming pools or any other water container. It must be impossible to reach the commands of your appliance when you are in contact with water.
☐ Do not insert any objects through the grille or into the interior of the appliance.
□ Never sit or place objects on the appliance.
☐ When cleaning the appliance, refer to the instructions in the paragraph "Maintenance" because the water penetration through the openings can be very dangerous for your appliance.
□ Never use the appliance without filter.
UK STYLE PLUG WIRING INSTRUCTIONS (IN THE UK ONLY)
This product must only be used from a 13-amp power socket. If a BS1363 approved 13 amp plug is used, it should be fitted with a 13 amp fuse. The wires on the power cord are colour coded:
blue = neutral, brown = live, green or green & yellow = earth.
The blue wire must be connected to the terminal marked N or coloured in black.
The brown wire must be connected to the terminal marked L or coloured in red.
The green (& yellow) wire must be connected to the terminal marked E or coloured in green (& yellow).
PART DESCRIPTION

CONTROL PANEL

- POWER: Press to turn the unit ON or OFF
- TANK FULL INDICATOR: Illuminates when water storage tank is full and needs to be drained
- DEHUMIDIFY INDICATOR: Illuminates when dehumidifying is in function.
- HUMIDITY CONTROL SWITCH: Control to set the approximate humidity setting. 1 - 90%, 2 - 80%, 3 - 70%, 4 - 60%, 5 - 50%, 6 - 55%, 7 - 40%, 8 - 30%, 9 - 20%
ADJUSTABLE LOUVER
Manually adjust the flow of air coming from the air outlet.
natural_image
Hand placing a component into a car grille (no text or symbols visible)MAINTENANCE
- Always turn the unit to the "OFF" position when not in use.
- Keep the front inlet and the top outlet grills free from air blocking materials such as clothing, plastic bags or papers.
- If the unit has been properly connected and no power is flowing, contact a competent qualified electrician.
- always keep the unit at an upright position to avoid water leakage.
- D not put the appliance in a small cabinet for use. Small spaces may cause fire hazards.
-
Do not use the unit whenever oil or gas are leakage prone.
-
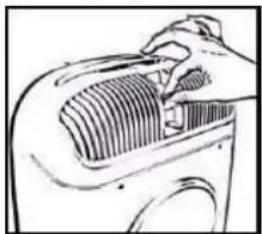
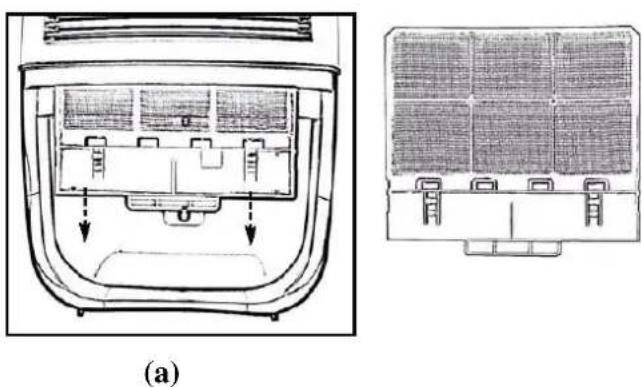
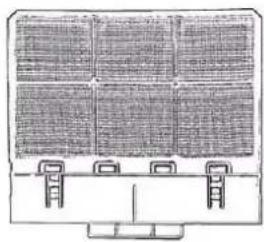
If the filter needs to be cleaned, pull the filter out (a) and clean it with a vacuum cleaner or damp cloth soaked in lukewarm water. Let the filter dry before inserting it back into the unit.
CLEANING AND STORAGE
- Turn the control to "OFF" and unplug the unit before cleaning.
- Use only a soft, damp cloth to clean the exterior. A vacuum cleaner can be used to clean the interior.
- Do not immerse the unit in water and never allow water to drip into the housing.
- Do not use chemicals to clean the unit.
- Store the unit in its original box in a cool, dry place.
NOTE: if a problem is experienced, please contact a competent qualified electrician. To avoid electric shock, do not open the unit housing. All repairs should be made by a competent qualified electrician.
TROUBLESHOOTING
| PROBLEM | CAUSE | POSSIBLE SOLUTION |
| The appliance does not operate at all. | The plug is not properly inserted into the socket | Plug the cord into the socket correctly |
| Alarm light illuminates when water tank full?Make sure the water tank is full. | Empty the water from the tank and insert into right position | |
| The floater of the water tank is not in its right position | Adjust the floater into its right position | |
| Strange noise in the motor | The air filter is dirty and is obstructing the ventilation | Clean the filter with a vacuum cleaner or wet damp cloth soaked in mild soapy water. |
| The unit is slanted on the ground | Place the unit on a dry level surface | |
| The unit leaks water | The unit is slanted on the ground | Place the unit on a dry level surface |
| The floater of the water tank is wedged by an object causing the tank light not to illuminate | Clear the obstruction from the floater | |
| Temperature varies in the air outlet | The unit is on "mute" or "standard" operation status | This is normal |
| After the unit stops operating, the motor fan is still running | After shutting off the unit the fan will continue to operate for 2 minutes to cool down the motor | This is normal |
| The tank full indicator light comes on | The water tank is full | Empty the water in the water tank |
| The floater of the water tank is not in its right position | Clear the obstruction from the floater | |
| Water tank is not inserted properly | Insert the tank all the way in |
- Never try to repair the appliance by yourself.

natural_image
Hand placing a component into a mechanical component (no text or symbols visible)MANTENIMIENTO
natural_image
Technical line drawing of a mechanical component with internal layout and mounting holes (no text or symbols)(a)
natural_image
Simple line drawing of a three-panel electronic component with connectors at the base (no text or symbols)LIMPIEZA
natural_image
Line drawing of a hand placing a textured object on a curved surface (no text or symbols)MANUTENÇÃO
natural_image
Technical line drawing of a mechanical component with internal layout and arrows indicating direction (no text or symbols)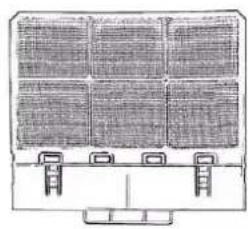
natural_image
Simple line drawing of a rectangular container with four vertical panels and two side handles (no text or symbols)(a)
Brand : KALORIK
Model : KA ADH 1
Category : Air purifier