40160 - Fan InLine - Free user manual and instructions
Find the device manual for free 40160 InLine in PDF.


| Product Type | Stand Fan |
| Model | InLine 40160 (black/white) |
| Dimensions | 265 x 430 x 1320 mm (WxDxH) |
| Weight | Approx. 4.8 kg |
| Power Consumption | 50 Watts |
| Airflow | < 3,200 m³/h |
| Fan Speeds | 3 levels (1, 2, 3) |
| Timer | 1h / 2h / 3h / 4h |
| Oscillation | Yes, automatic (approx. 60°) |
| Sleep Mode | Yes (auto-reduces speed after 30 min) |
| WiFi Standard | IEEE 802.11b/g/n, 2.4 GHz |
| WiFi Range | Up to 45 m (visual contact) |
| Security | WPA/WPA2 encryption |
| Compatible Apps | Smart Life (Android/iOS) |
| Voice Assistants | Amazon Alexa, Google Home |
| Control Methods | Manual buttons on device, app, voice |
| Material | Plastic (grilles, propeller, housing) |
| Power Supply | Mains plug (230V AC, 50Hz - typical) |
| Safety Features | Indoor use only, keep away from children and pets, do not insert objects |
| Maintenance | Unplug and clean with damp cloth |
| Spare Parts Included | Front/rear grille, propeller, motor with control unit, telescopic rod, foot with screw, union ring nut, handle screw, locking screw |
| Manufacturer | INTOS ELECTRONIC AG, Germany |
| Warranty | Standard manufacturer warranty (check retailer) |
Frequently Asked Questions - 40160 InLine
User questions about 40160 InLine
0 question about this device. Answer the ones you know or ask your own.
Ask a new question about this device
Download the instructions for your Fan in PDF format for free! Find your manual 40160 - InLine and take your electronic device back in hand. On this page are published all the documents necessary for the use of your device. 40160 by InLine.
USER MANUAL 40160 InLine
natural_image
Two outdoor electric fans with mesh blades, one black and one white, against a green and yellow background (no text or symbols visible)STAND-VENTILATOR
BEDIENUNGSANLEITUNG
inLine®
1. ALLGEMEINES
GÜLTIGKEIT
natural_image
Product photo of a fan with three blades and a power tool, no visible text or symbolswww.inline-info.com
natural_image
Two mechanical components: a black stand with a circular grid pattern and a gray circular component with a central hole (no text or symbols visible)natural_image
Hand holding a black handheld device with a vertical stick, no visible text or symbolsnatural_image
Close-up of a hand adjusting a black cylindrical component with a knob (no text or symbols visible)natural_image
Two views of a black plastic fan with internal components, one showing the blade and the other the handle (no text or symbols visible)natural_image
Close-up of a hand adjusting a black fan blade with a camera lens, no visible text or symbolsnatural_image
Close-up of a hand adjusting a black fan blade with a white plastic cover, mounted on a black stand (no text or symbols visible)natural_image
Simple circular diagram with a shaded region and a diagonal line, no text or symbols present.
natural_image
Cross-sectional diagram of a geological or material cross-section showing layered strata (no text or symbols)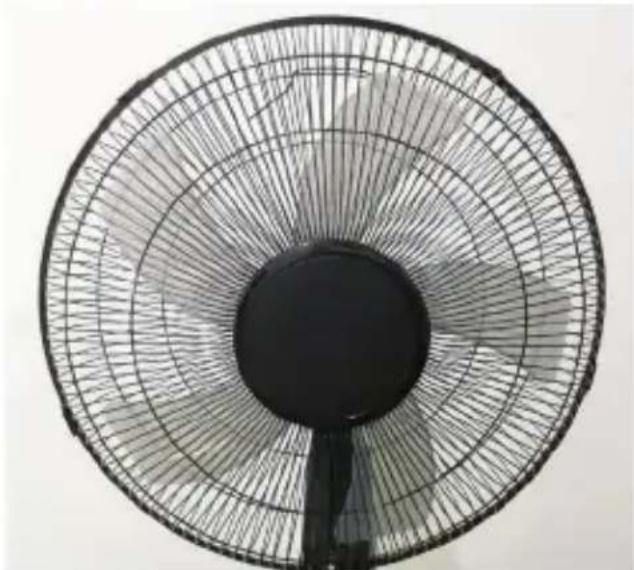
natural_image
Top-down view of a black circular fan with radial blades, no text or symbols visiblenatural_image
Close-up of a black industrial fan blade with a close-up inset showing internal components (no visible text or symbols)10.1.1 Android
GERÄTEDATEN (STIFT RECHTS OBEN)
www.inline-info.com/smarthome
https://www.inline-info.com/downloadcenter
INLINE SMARTHOME
DIE INLINE SMART HOME SERIE HEBT IHR ZUHAUSE IN DIE NEUE, SMARTE WELT.
natural_image
Product display featuring a white fan, power supply unit, and various electronic devices including a digital lamp and fan (no visible text or symbols)www.inline-info.com/smarthome
SIE HABEN FRAGEN
NUTZEN SIE UNSEREN LIVE-SUPPORT!

SMART
HOME
Art.-Nr.: 40160/B
2,4
GHz
50
Watt

ca. 60°
natural_image
Two outdoor electric fans with mesh blades, one black and one white, against a green and yellow background (no text or symbols visible)STAND-VENTILATOR
BEDIENUNGSANLEITUNG
inLine®
1. GENERAL INFORMATION
VALIDITY
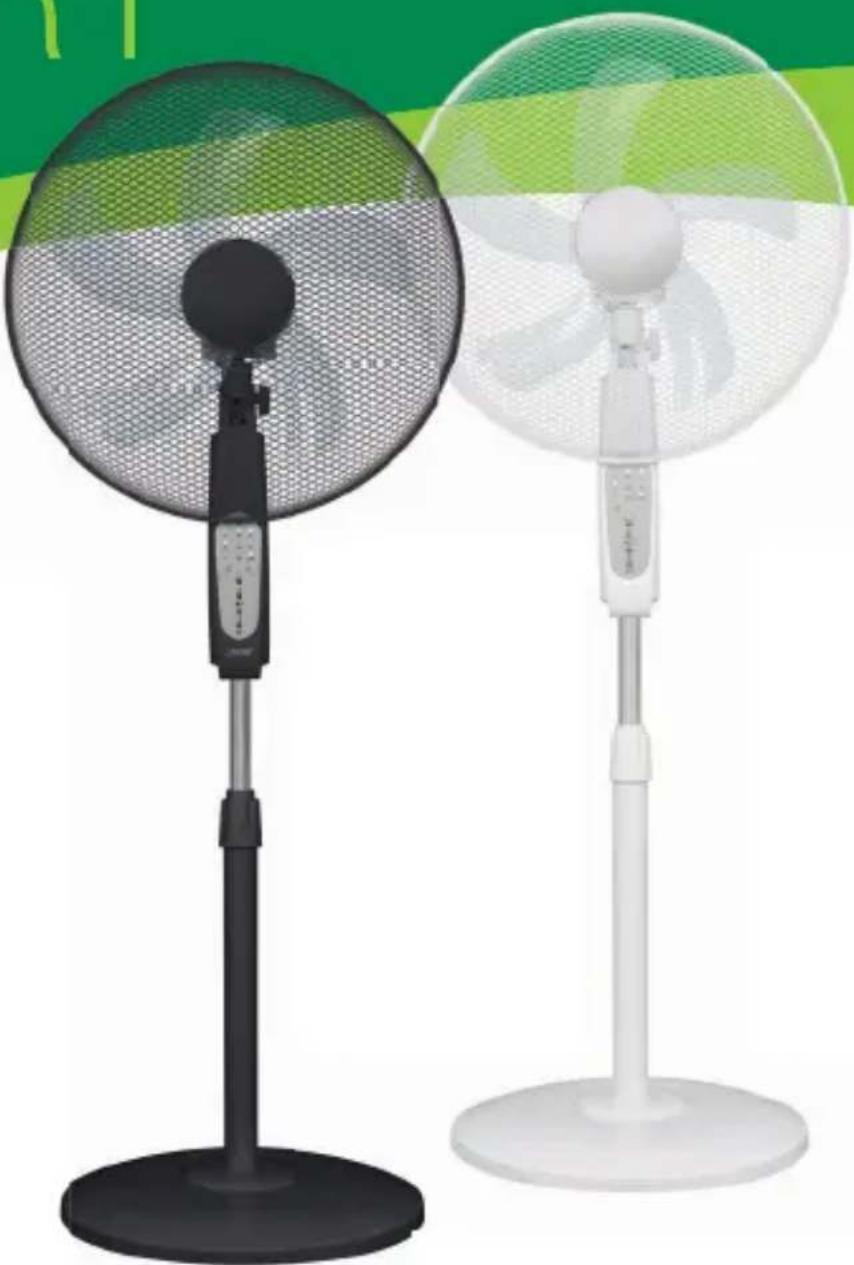
This user manual applies to the following product: 40160B/40160 InLine® SmartHome Stand Fan black resp. white
MANUFACTURER
INTOS ELECTRONIC AG
Siemensstraße 11
D-35394 Gießen
DATE
February 2022
2. CONTENT OF DELIVERY
1x InLine® SmartHome Stand Fan black resp. white
1x user manual DE+EN
Please check the content of delivery for completeness. If individual components are missing, please contact your dealer.
3. GENERAL WARNINGS
- Keep the device away from children and pets.
- Do not block the fan by placing objects in the immediate vicinity of the fan during operation.
- Do not use outdoors - for indoor use only.
- Only place the device on firm and level ground.
4. TECHNICAL CHARACTERISTICS
• Color: black or white depending on model
• Dimensions: 265x430x1320mm (WxDxH)
• Weight: approx. 4,8kg
• Airflow: < 3.200m³/h
• Power consumption: 50 watts
• WiFi signal: WiFi 2.4GHz
• WiFi standard: IEEE802.11b/g/n
• Range: up to 45m (in visual contact)
- Protocols: DHCP/IP/TCP/UDP
• WiFi security: WPA/WPA2 encryption
• Antenna: built-in omnidirectional antenna
• Adjustable timer: 1h / 2h / 3h / 4h
• LEDs: status and timer LEDs
• Temperature range: 0° - 40°C
• Humidity: 10%-90% non-condensing
- App: Smart Life
• Compatible with: Amazon Alexa, Google Home
5. RADIO FREQUENCY NOTES
General Allocation of Frequencies for Use in Local Networks;
Wireless Local Area Networks (WLAN Radio Applications) Based on § 55 of the German Telecommunications Act {Telekommunikations-gesetz - TKG) we herewith assign frequencies in the range 2400.0 - 2483.5 MHz for use of the general public in local networks, Wireless Local Area Networks (WLAN Radio Applications). With this General Allocation, we fulfil the compulsive implementation of the Decision by the European Commission on Harmonisation of the Radio Spectrum for Use by Short-Range Devices dated 2006/11/09 (2006/771/EG), as
amended by implementing the decision of the Commission dated 2011/12/08 (2011/829/ EU), published in the Offi cial Journal of the European Union L 329, page 10 ff. dated 2011/12/13 in Germany.
If you intend to use this product outside of Germany, please read up in advance on the respective regulations in your host country.
6. INTENDED USE
The InLine® SmartHome fan generates a cool air-flow through a fast rotating propeller.
The control is done either on the device itself or via APP, if a successful integration into the WiFi network has taken place.
7. IMPROPER USE
Improper use within the meaning of foreseeable misuse applies:
• Do not disassemble the device.
• Only use the device inside, not outside.
• Do not expose the device to excessive heat.
• Do not subject the device to vibrations.
- Do not place the device within the reach of children and/or pets.
• Do not place the device at an angle.
Do not insert any objects or put your fingers through the front and/or rear grille during operation, there is an acute risk of injury!
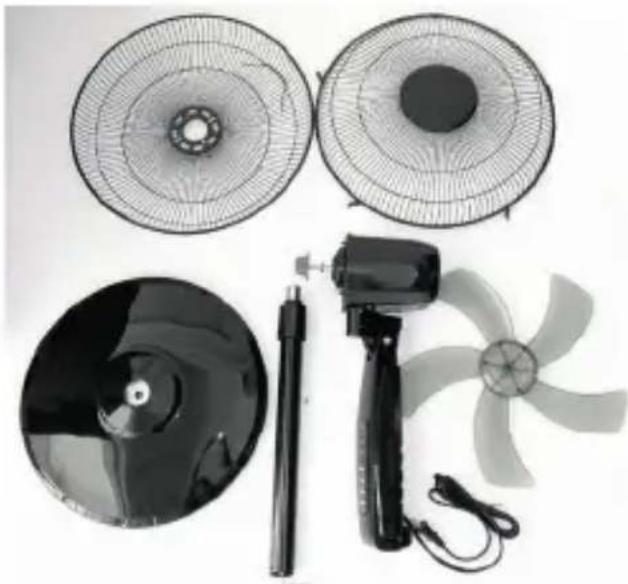
- Please check the contents for completeness:
1x Front protective grid
1x Rear protective grid
1x Transparent propeller
1x motor with control unit
1x telescopic rod
1x foot with screw
1x plastic union ring nut
1x Transparent handle screw
1x locking screw
natural_image
Product photo of a fan with three blades and a power tool, no visible text or symbolswww.inline-info.com
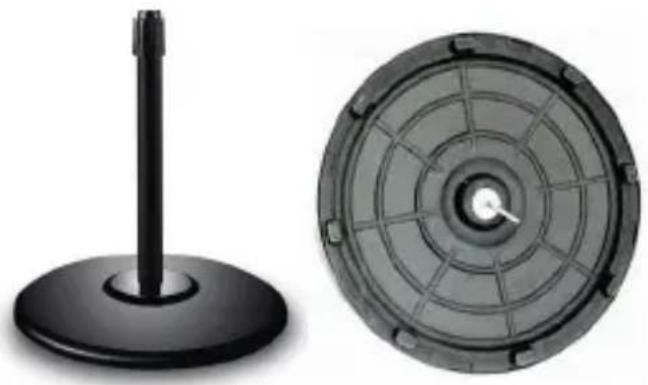
- Mount the telescopic rod to the foot using the supplied screw.
natural_image
Two black plastic components: a vertical pole and a circular fan with radial grid pattern (no text or symbols visible)- Place the drive with control unit on the telescopic handle.
natural_image
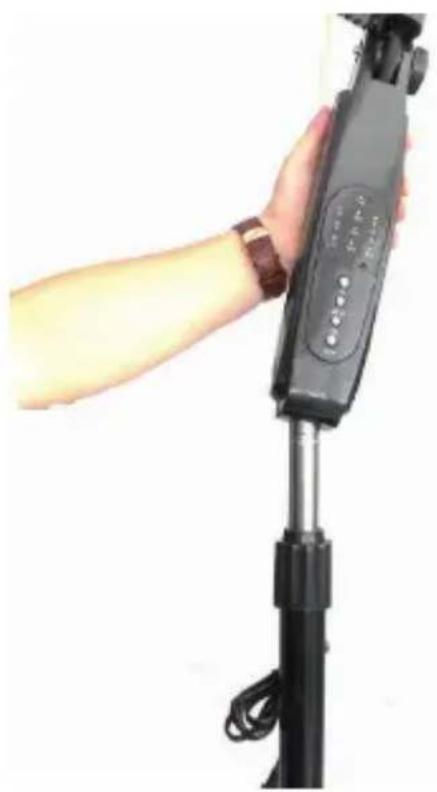
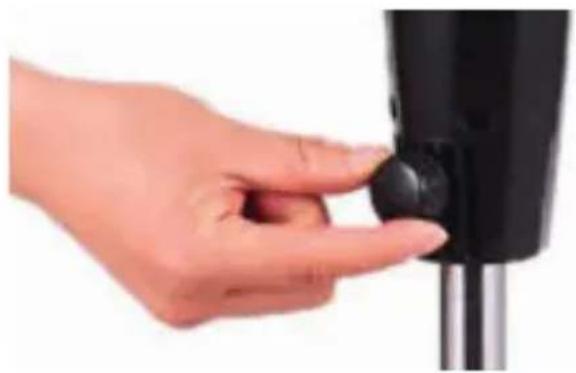
Hand holding a black handheld device with a digital display, mounted on a stand (no visible text or symbols)- Fasten the drive by tightening the screw on the back of the drive.
natural_image
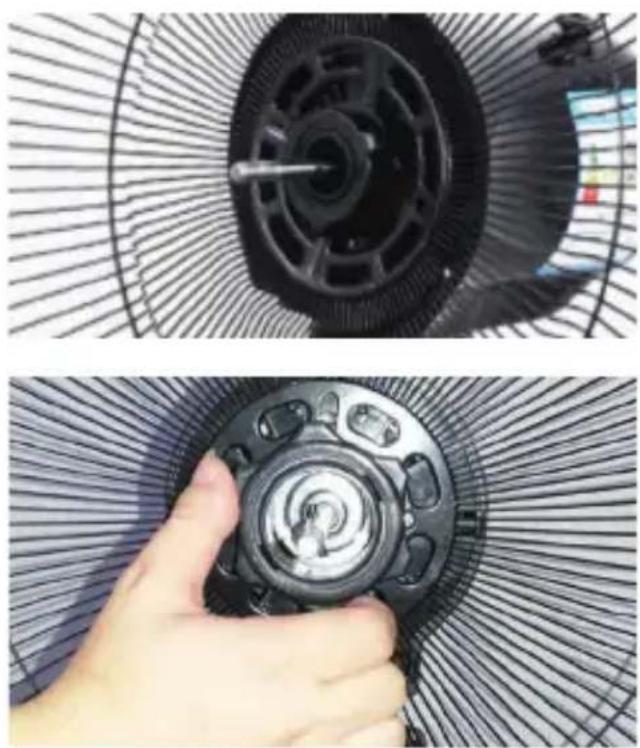
Close-up of a hand adjusting a black cylindrical component with a knob (no text or symbols visible)- Place the rear protective grille on the drive motor and fasten the grille with the plastic union nut.
natural_image
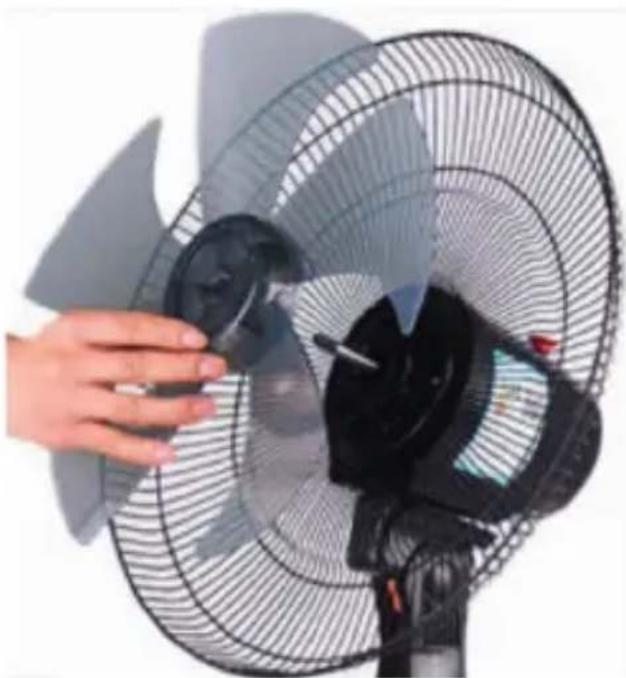
Two-panel image showing a black circular fan component and a hand holding a circular mechanical knob (no text or symbols visible)- Push the transparent propeller onto the drive axle. Please make sure that the pin on the drive axle fi ts into the recesses provided on the propeller.
natural_image
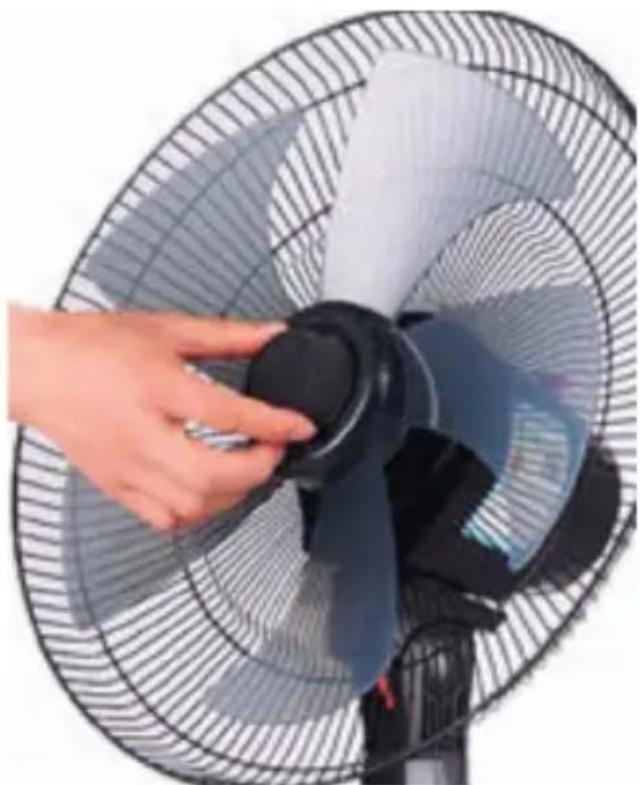
Close-up of a hand adjusting a black fan blade with a camera lens on a stand (no text or symbols visible)- Screw the propeller tight with the transparent grip screw.

The grip screw is screwed tight on left turn / unscrewed on right turn
natural_image
Close-up of a hand adjusting a black fan blade with a black plastic cover, next to a large fan (no text or symbols visible)- Now hang the front guard to the rear guard and close the 4 metal hinges.

natural_image
Simple circular diagram with a shaded region and a diagonal line, no text or symbols present.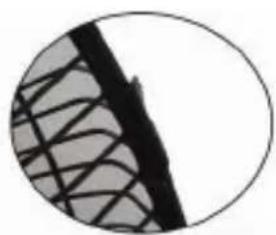
natural_image
Cross-sectional diagram of a geological or material cross-section showing layered strata (no text or symbols)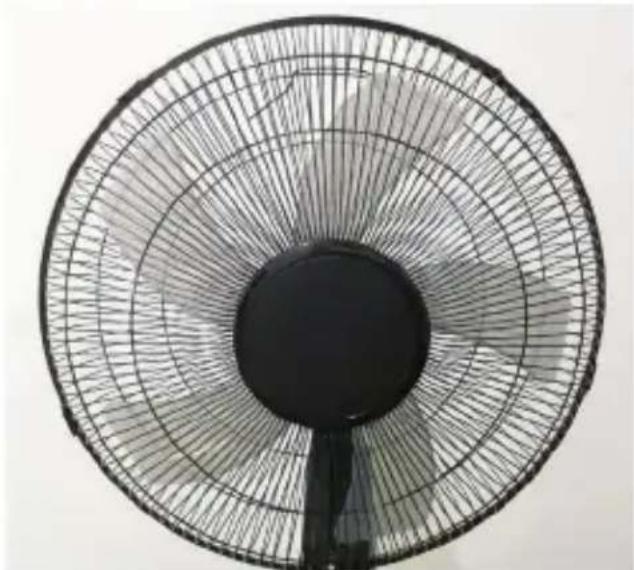
natural_image
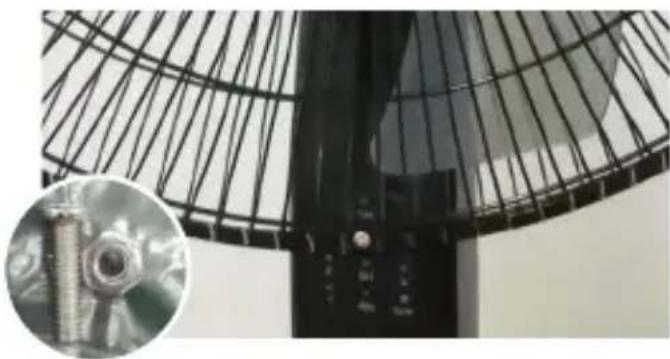
Top-down view of a black circular fan with radial blades, no text or symbols visible- For fi nal safety, use the supplied screw to screw the front protective grille to the rear protective grille..
natural_image
Close-up of a black industrial fan blade with a close-up inset showing internal components (no visible text or symbols)-
Place the device on a flat, stable surface.
-
Insert the plug of the power cable into the socket.
-
The standby LED lights up blue.
9. MANUAL OPERATION VIA KEYS
SPEED
Briefly press the power button to turn on the device. A short beep acknowledges that the device is switched-on. The fan now rotates to speed level 1, the status LED „1“ lights up blue.
To increase the speed to level 2, press the speed button briefl y, which is confirmed by a short beep. The status LED „2“ now lights up.
To increase the speed to level 3, briefly press the speed button again, which is confirmed by a short beep. The status LED „3“ now lights up.
When the speed button is pressed again, the speed decreases to level 1.
SLEEP MODE
If you press and hold the speed button for about 3 seconds, the fan switches to sleep mode, confirmed by a short beep and the sleep mode LED lights up. In this mode the speed is automatically reduced by one level after 30 minutes and then remains at level 1. To deactivate the sleep mode, press the speed button again for about 3 seconds until the beep sounds and the sleep mode LED goes out again.
TIMER FUNCTION
To activate or change the timer function, briefly press the timer button until the desired operating time (1 hour / 2 hours / 3 hours / 4 hours) is selected. Each time a change is made, the beep sounds and the respective LED lights up blue.
OSCILLATION
To switch on automatic oscillation, press the oscillation button. To switch off the oscillation, press the button again. Both are also confirmed acoustically.
10. OPERATION VIA APP
10.1 APP DOWNLOAD
10.1.1 Android
Download the „Smart Life“ APP from the Google Play store and launch the APP.
10.1.2 iOS
Download the „Smart Life“ APP from Apple APP store and launch the AP

10.2 REGISTER AND LOGIN THE APP
- Open the „Smart Life“ APP on your phone.
- Register with your mobile phone number or email address.
- Select the router and confirm the WiFi password if necessary.
- This connects the APP to your network.
10.3 ADD/CONNECT DEVICE
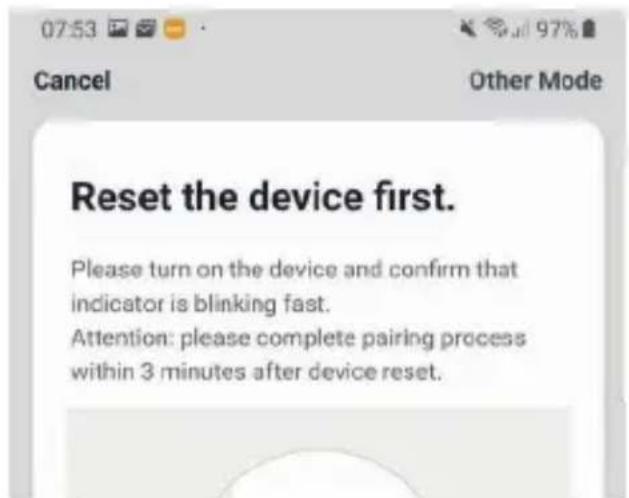
- Insert the plug of the power cable into the socket. The blue status LED fl ashes rapidly.
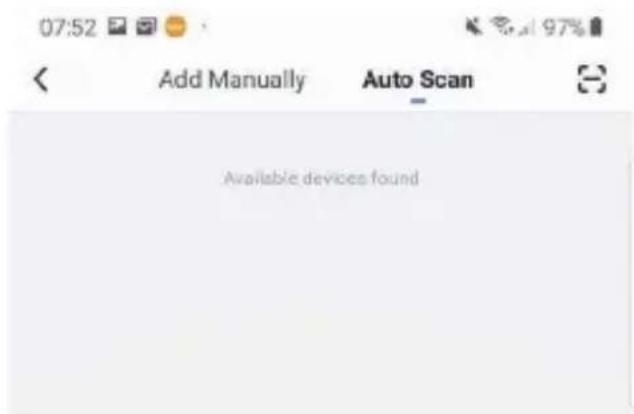
- Press the „+“ sign (top right) in the APP.
- Select „Automatic Scan“ above. After a few seconds „Wifi Fan“ should be found.
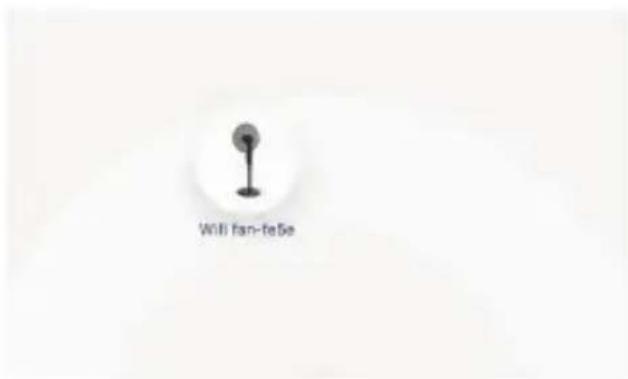
-
Please select to connect the device.
-
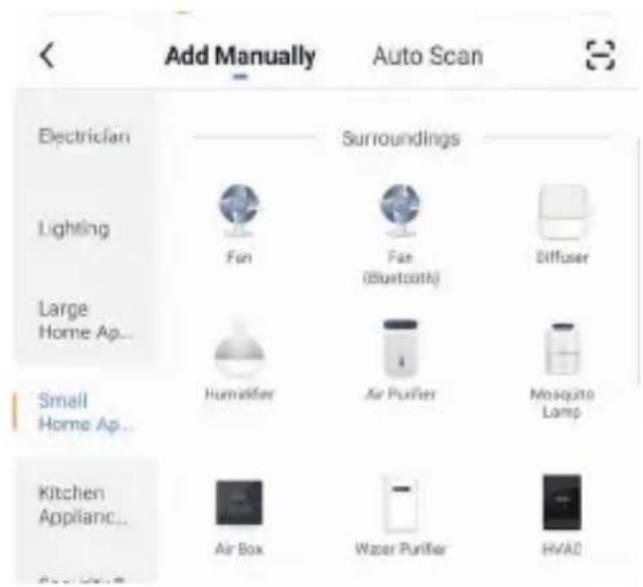
To add the appliance manually, please select „Fan“ from the „Small household appliances“ section.
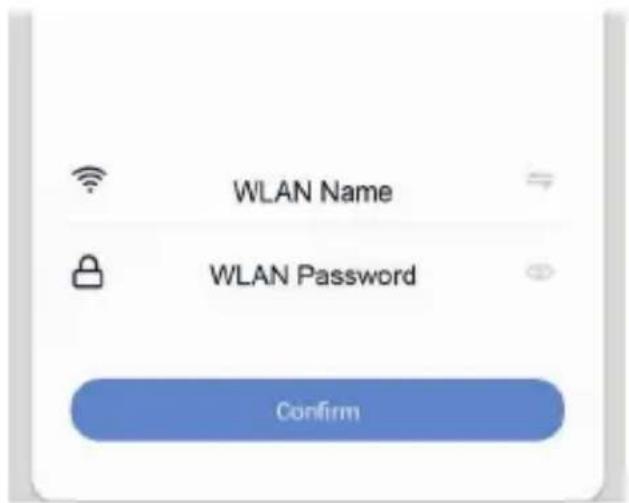
- Select your WLAN network and enter your WLAN password. „Confi rm“ to allow the device to connect to your network.
- The APP now connects to the device, wait until the display of your smartphone confi rms this.
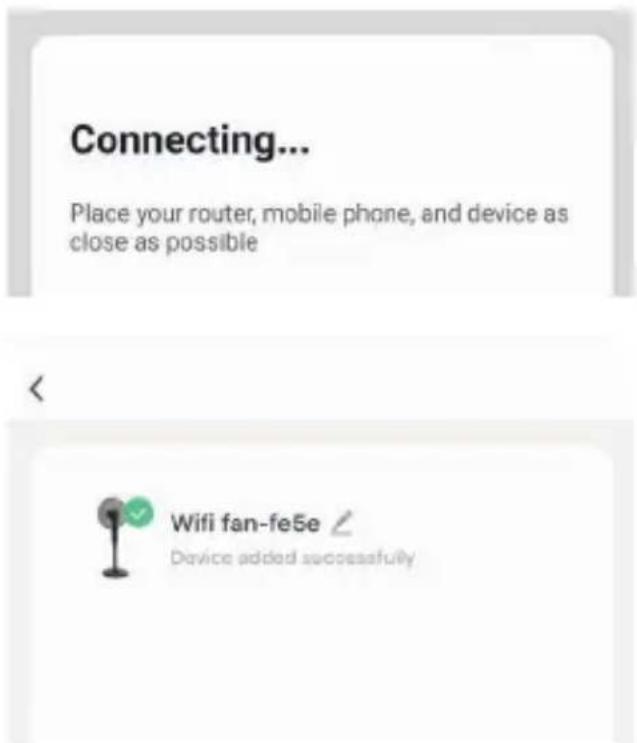
- After a successful connection the blue status LED stops blinking and now lights up.
- You can assign your connected device directly to a room, but you can also simply ignore it. The device then appears in the device overview under „All devices“.

During setup, the fan should be near your router to have a strong WLAN signal.
If the automatic or manual addition still does not work properly, please try the AccessPoint mode as described below.
- Press the power button for about 5 seconds until a second beep is heard and the blue status LED fl ashes rapidly.
- Press the power button again for about 5 seconds until a second beep is heard and the blue status LED now fl ashes slowly.
- In the APP press the „+“ sign (top right).
- To add the appliance manually, please select „Fan“ from the „Small household appliances“ section.
- Now select „Other methods“ in the upper right corner of the APP and then select „AP mode“.
- Confir rm the following step.
-
Select your WLAN network and enter your WLAN password. „Confi rm“ it.
-
The fan now acts as an access point and creates its own WLAN, to which you must connect your smartphone or tablet directly.
- So click on „Connect now“. In the next window the available WLAN will appear, name of the fan is e.g. „SmartLife-FE5E“, the letters and numbers will be different.
- Select it to establish a direct connection. You can ignore the message from your smartphone or tablet that there is no Internet connection.
- Now go back a few steps until the connection is displayed in the APP and the fan is successfully integrated into the existing WLAN.
- The APP now connects to the device, wait until the display of your smartphone confirms this.
- After a successful connection the blue status LED stops blinking and now lights up.
- You can assign your connected device directly to a room, but you can also simply ignore it. The device then appears in the device overview under „All devices“.

Basically, settings/scenarios/automations for several families can be stored in this APP.
The administrator has authorization to create families and access all families.
DEVICE CONFIGURATION
Select the device to be set from your connected devices by clicking on it in the list.
Power symbol switches the device on or off
Level 1/2/3 changes between the three speeds
Normal/sleep here you can switch between normal operation and sleep mode
Off/on here you can switch the oscillation on and off
Timer here you can program timer scenarios individually or in combination or set the operation with subsequent automatic switch-off 1 hour, 2 hours, 3 hours or 4 hours.
DEVICE DATA (PENCIL TOP RIGHT)
The following names and assignments make it easier for you to create automatisms and scenarios.
Name (of the device) Please assign a name which will appear later in the device list, automatisms and scenarios
Location (location of the device) Here you can optionally assign a room name in which the device is located
Name (of the device) Please assign a name which will appear later in the device list, automatisms and scenarios
Location (location of the device) Here you can optionally assign a room name in which the device is located
Check network This allows you to check the quality of your WiFi network
| Control over a third-party vendor | If you want to use the device via a language assistant, select it from the suggested options to initiate the connection |
| Share device Here you can share your set automatisms/scenarios with other Smart Life App users and grant them access | |
| Create group Create a group of products of the same type that can react simultaneously to actions | |
| Information of the device Information about the connection to the main server | |
| FAQ & Feedback This stands for help, here you get fi rst help with any problems that may arise during setup | |
| Check the fi rmware upgrade Click on it to search for the latest version | |
| Remove the device Removes the device from your Smart Home WiFi network | |
| Restore factory setting The device is set to the delivery status. All individual settings are deleted | |
11. TROUBLESHOOTING (FAQ)
The device cannot be switched on
Make sure that the power is supplied
No WiFi connection possible
- Make sure that the router and the device to be connected are turned on.
- Check the available WiFi standard of the device. The InLine® Smart Home product supports WiFi 2.4GHz / IEEE802.11b/g/n
Network is found, but no connection possible
- Make sure that you have entered your WiFi password correctly.
- Make sure that the encryption method of your WiFi network is WPA2-PSK and the authentication type is AES or both are set to automatic.
- Check that you have selected the correct device type from the selection list when adding manually (for the product, please select the „Fan“ in the list under the heading „Small Household Appliance“).
12. CONTACT / CURRENT PRODUCT INFORMATION
If you have any questions about the product or if you have any problems, you can contact the manufacturer directly via live.inline-info.com or via email at service@inline-info.de.
13. MAINTENANCE AND CLEANING
We recommend cleaning the InLine® SmartHome fan with a clamp cloth:
- Switch off the device and pull out the mains plug.
- Wipe the fan clean and then dry again.
14. DISPOSAL
Electrical and electronic equipment and batteries must not be disposed of with household waste. The consumer is obliged by law to return electrical and electronic equipment and batteries at the end of their service life to the designated public collection points or to the point of sale. Dispose of the packaging material sorted by type.
15. DISCLAIMER
2. EDITION ENGLISH 08/2022
Documentation © 2022 INTOS ELECTRONIC AG
All rights reserved.
No part of this manual may be reproduced in any form or duplicated or processed using electronic, mechanical or chemical processes without the publisher's written consent. It is possible that this manual may still contain typographical defects or printing errors. However, the information in this manual is reviewed regularly and corrections will be made in the next edition. We accept no liability for technical or typographical errors and their consequences. All trademarks and industrial property rights are acknowledged. Changes in the sense of technical progress can be made without prior notice. Our products, including packaging, are not toys; they may contain small parts and sharp objects.
Keep away from children, please.
INTOS ELECTRONIC AG
Siemensstrasse 11, D-35394 Giessen
www.inline-info.com
Detailed descriptions of InLine SmartHome can be found at:
www.inline-info.com/smarthome
16. SIMPLIFIED EC DECLARATION OF CONFORMITY
The Manufacturer / Importer:
INTOS ELECTRONIC AG
Siemensstrasse 11
35394 Giessen
Owner of the Trademark:

hereby declares that the wireless device InLine® SmartHome socket complies with Directive 2014/53/EU. The full part of the EU Declaration of Conformity is available at the following web address:

https://www.inline-info.com/en/downloadcenter
INLINE SMARTHOME
WELCOME TO THE SMART WORLD OF INLINE
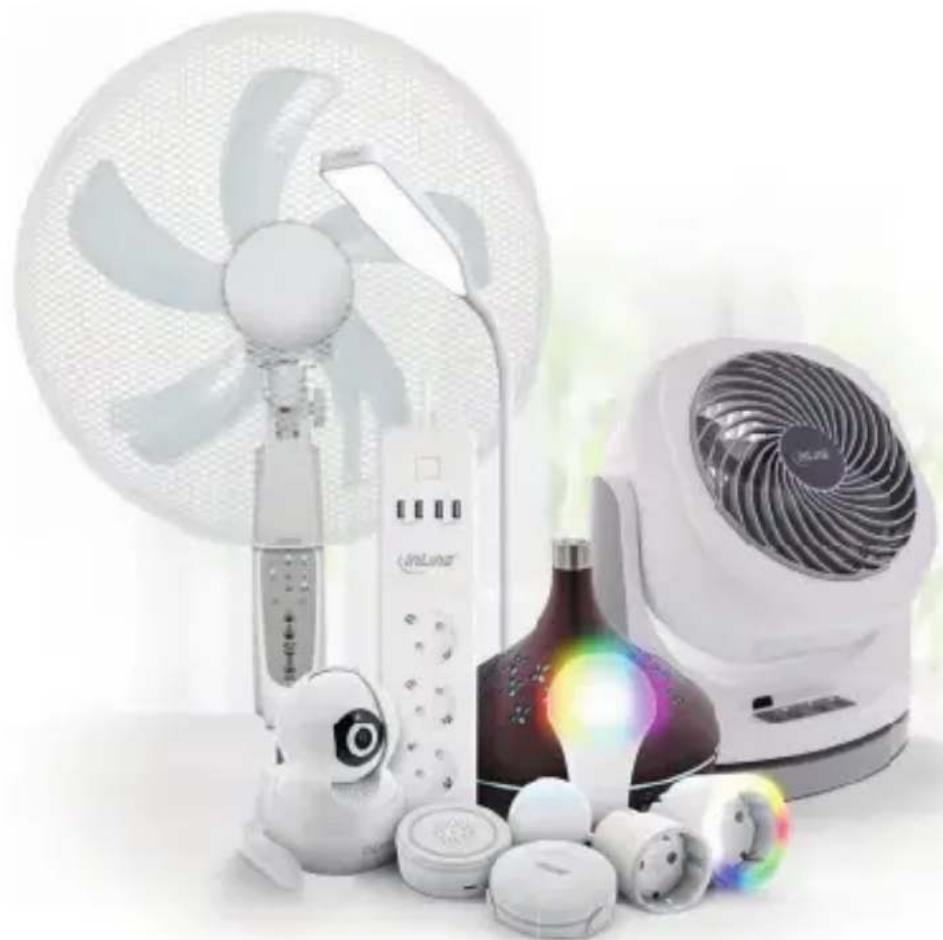
The InLine Smart Home series lifts your home into the new smart world, which allows you to enjoy your home environment comfortably, efficiently and safely in the future.
Control various devices via tablet, smartphone or voice command. Secure your house and property with a wide range of sensors from the InLine Smart Home series. Automations, timing settings allow you to use different applications efficiently. There are almost no limits to your creativity.
Detailed descriptions of InLine SmartHome can be found at:
natural_image
Product display featuring a white fan, power supply unit, and various electronic devices including a digital lamp and fan (no visible text or symbols)www.inline-info.com/smarthome
ANY QUESTIONS?
Get your purchase advice, support for all technical and installation issues directly from the manufacturer. Monday through Friday from 9 to 17 o'clock.
MO. - FR.: 9AM TO 5PM

- ALLGEMEINES
- GÜLTIGKEIT
- www.inline-info.com
- Android
- GERÄTEDATEN (STIFT RECHTS OBEN)
- INLINE SMARTHOME
- DIE INLINE SMART HOME SERIE HEBT IHR ZUHAUSE IN DIE NEUE, SMARTE WELT.
- SIE HABEN FRAGEN
- SMART
- HOME
- GENERAL INFORMATION
- VALIDITY
- MANUFACTURER
- DATE
- CONTENT OF DELIVERY
- GENERAL WARNINGS
- TECHNICAL CHARACTERISTICS
- RADIO FREQUENCY NOTES
- INTENDED USE
- IMPROPER USE
- MANUAL OPERATION VIA KEYS
- SPEED
- SLEEP MODE
- TIMER FUNCTION
- OSCILLATION
- OPERATION VIA APP
- APP DOWNLOAD
- iOS
- REGISTER AND LOGIN THE APP
- ADD/CONNECT DEVICE
- DEVICE CONFIGURATION
- DEVICE DATA (PENCIL TOP RIGHT)
- TROUBLESHOOTING (FAQ)
- The device cannot be switched on
- No WiFi connection possible
- Network is found, but no connection possible
- CONTACT / CURRENT PRODUCT INFORMATION
- MAINTENANCE AND CLEANING
- DISPOSAL
- DISCLAIMER
- EDITION ENGLISH 08/2022
- All rights reserved.
- Keep away from children, please.
- SIMPLIFIED EC DECLARATION OF CONFORMITY
- Owner of the Trademark:
- WELCOME TO THE SMART WORLD OF INLINE
- ANY QUESTIONS?
Brand : InLine
Model : 40160
Category : Fan