
KVCU 300.1 - Vacuum Cleaner Kernau - Free user manual and instructions
Find the device manual for free KVCU 300.1 Kernau in PDF.


| Product Type | Vacuum Cleaner |
| Brand | Kernau |
| Model | KVCU 300.1 |
| Power | 1000 W |
| Dust Capacity | 2.0 L |
| Cord Length | 5 m |
| Weight | 4.5 kg |
| Dimensions (HxWxD) | 300 x 250 x 150 mm |
| Noise Level | 75 dB |
| Filtration | HEPA filter |
| Functions | Dry vacuuming, floor brush, crevice tool, upholstery brush |
| Maintenance | Washable foam filter, replace dust bag when full |
| Safety Features | Thermal overload protection |
| Spare Parts | Dust bags, filters, brush rolls |
Frequently Asked Questions - KVCU 300.1 Kernau
User questions about KVCU 300.1 Kernau
0 question about this device. Answer the ones you know or ask your own.
Ask a new question about this device
Download the instructions for your Vacuum Cleaner in PDF format for free! Find your manual KVCU 300.1 - Kernau and take your electronic device back in hand. On this page are published all the documents necessary for the use of your device. KVCU 300.1 by Kernau.
USER MANUAL KVCU 300.1 Kernau
natural_image
Line drawing of a vacuum cleaner with attached handle and lever (no text or symbols)SZANOWNY KLIENCIE,
natural_image
Technical line drawing of a mechanical device showing assembly and transformation (no text or symbols)natural_image
Technical line drawings of two types of handheld devices (no text or symbols present)ROZDZIAŁ 5. CZYSZCZENIE I PIELEGNACJA
natural_image
Technical line drawing of a mechanical component with exploded and assembled views (no text or symbols)
UWAGA:
Przechowywanie
natural_image
Line drawing of a vacuum cleaner with attached handle and lever (no text or symbols)Thank you for choosing this product.
This User Manual contains important safety information and instructions on the operation and maintenance of your appliance. Please take the time to read this User Manual before using your appliance and keep this book for future reference.
| Icon Caption Description | ||
 | Warning Risk of serious injury or death | |
 | Risk of electric shock Dangerous voltage | |
 | Fire | Risk of fire / flammable materials |
 | Attention | Risk of injury or material damage |
 | Important/Note | Information on correct operation of the system |
 | Read the instructions | |
 | Hot surface | |
CONTENTS
CHAPTER 1. Safety&warnings....17
CHAPTER 2. Overview....18
CHAPTER 3. Assembly....19
CHAPTER 4. Operation ......21
CHAPTER 5. Cleaning&care....22
CHAPTER 6. Specifications ....24
CHAPTER 7. Troubleshooting....24
CHAPTER 8. Disposal of esed equipent....25
CHAPTER 1. SAFETY&WARNINGS
To reduce the risk of fire, electric shock or injury to persons or property, the following basic safety precautions should always be followed.
• Never use this appliance with a damaged card, plug or other damaged parts. Check if the voltage indicated on the label corresponds with the local mains voltage before you connect the appliance.
• Always ensure the charging connector, cord and plug are dry. Never immerse the appliance into the water or any other liquid. Do not rinse it under a tap except for the dust cup, the HEPA filter and the rolling brush parts.
- Always ensure that your hand are dry before removing the plug from the mains outlet. Never pull the plug out of the mains outlet by its cord.
- Children should always be supervised to ensure that they do not play with this appliance.
• The appliance should not be used by adults or children who lack experience, product knowledge or disability which might cause a hazard, unless they have been correctly instructed.
• Always keep the battery pack far from fire and flammable items.
- Never use this appliance to suck liquids, glass, metal fragments and burning things such as ashes, cigarette butts, matches and so on.
• Always ensure that the dust cup and the battery pack are installed before using.
- If the cord, plug and any other parts get damaged or the appliance fall into water, stop use and immediately unplug from the main power. Never disassemble the main body, repair or replace any parts by yourself.

ATTENTION
Do not use any non-original parts with the unit as they may cause damage.
CHAPTER 2. OVERVIEW
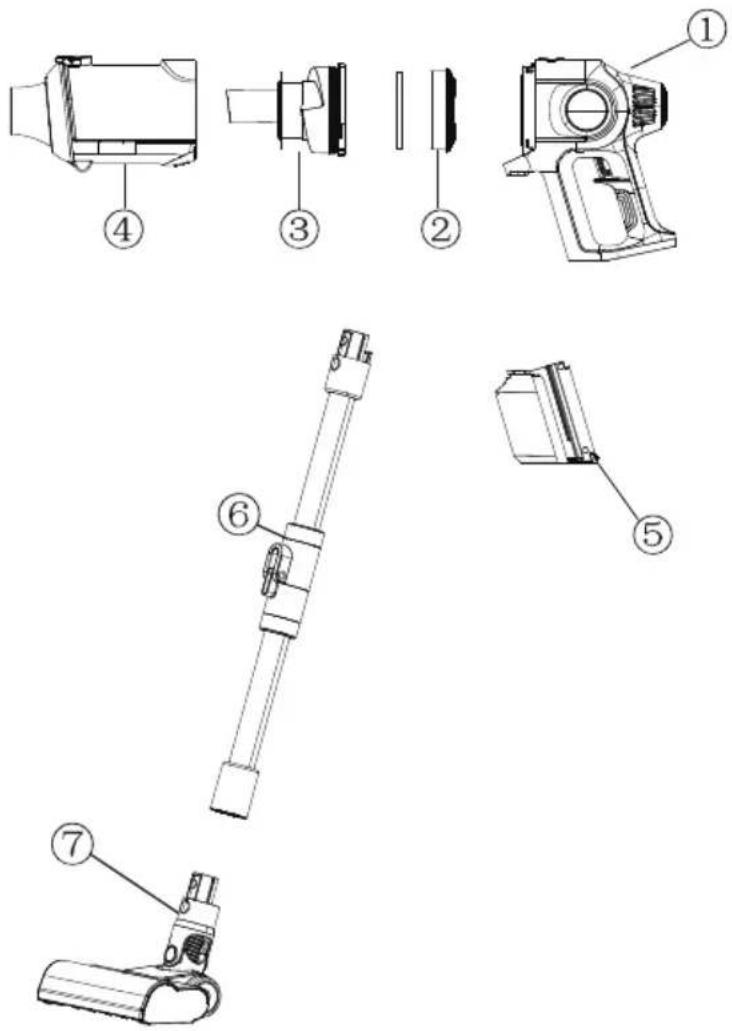
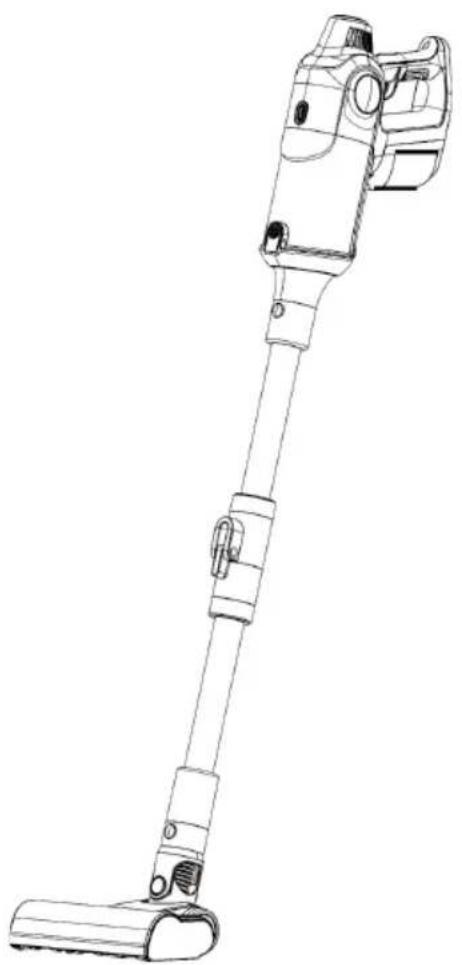
Parts
| 1 Main unit |
| 2 Dust cup |
| 3 Cyclone cone |
| 4 HEPA filter |
| 5 Battery pack |
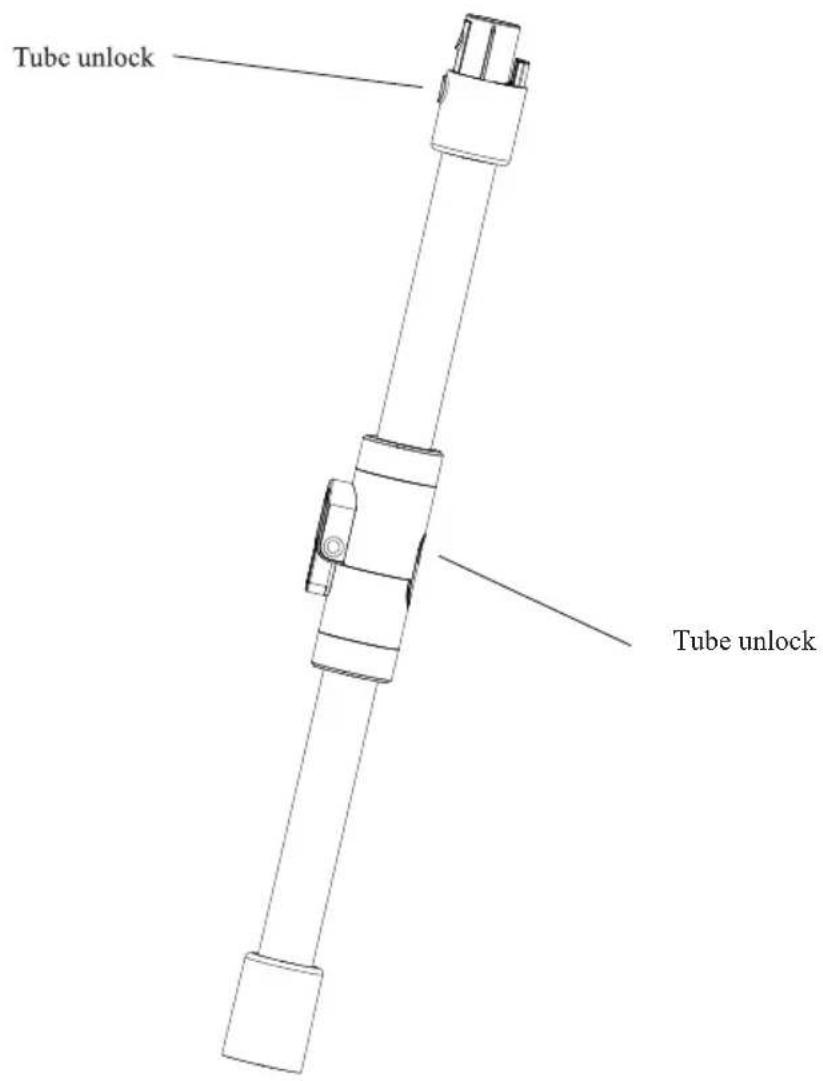
| 6 Electrical tube |
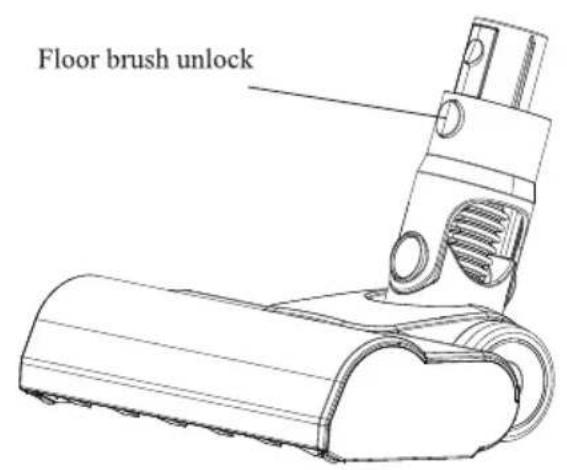
| 7 Floor brush |

NOTE:
Illustrations in this user guide are for reference only and may differ slightly.
CHAPTER 3. ASSEMBLY
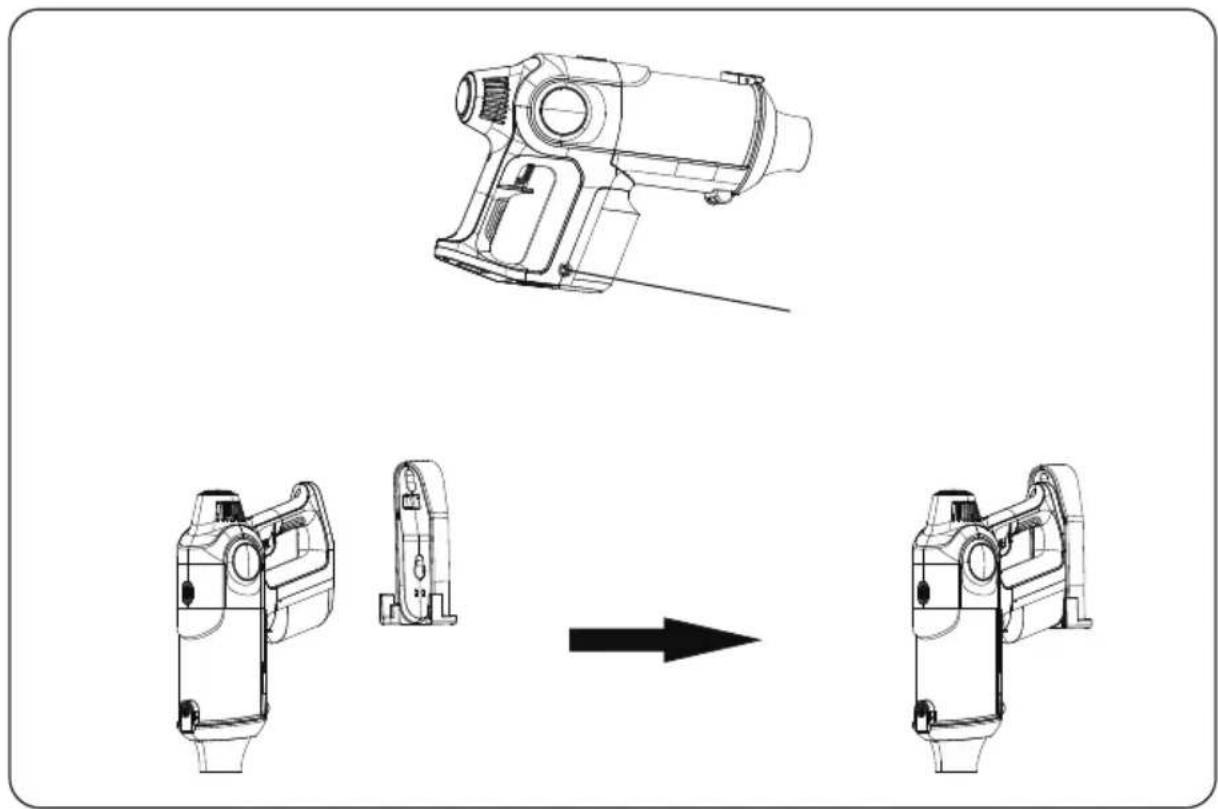
- Insert the battery pack into main body as picture shows. You will hear a click sound when fitted.
- Connect the tube to the main body.
- Connect the floor brush to the tube.

NOTE:
A new unit may become hot with a slight plastic odour after running the motor at high speed for several minutes. This is normal and not a cause for concern.
Functional buttons
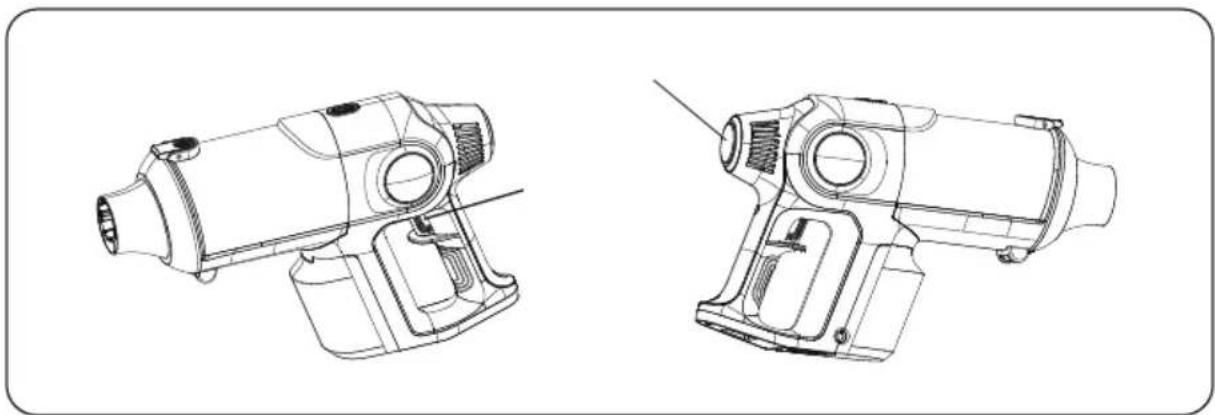
Speed Switch
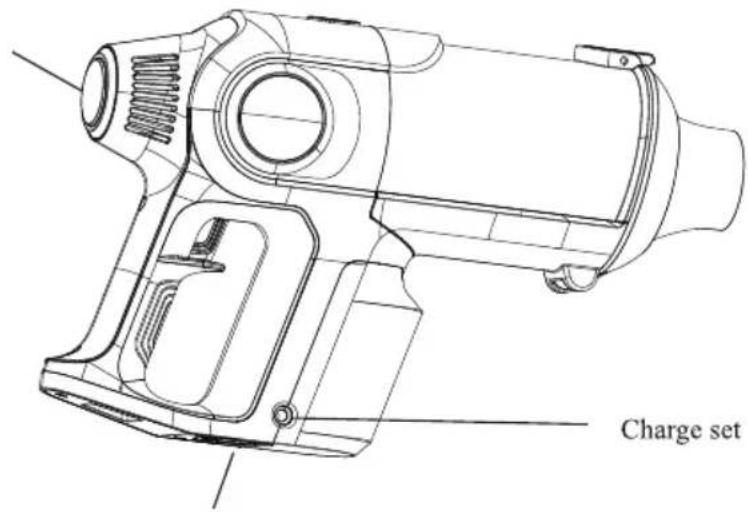
Battery detach button
Lithium Battery Charging

ATTENTION:
Use only the original charger or a replacement specified by Kogan.com; otherwise, the lithium battery can be damaged.
The battery needs to be charged when the indicator lights blink. The indicator lights will continue blinking while charging and turn green when fully charged
natural_image
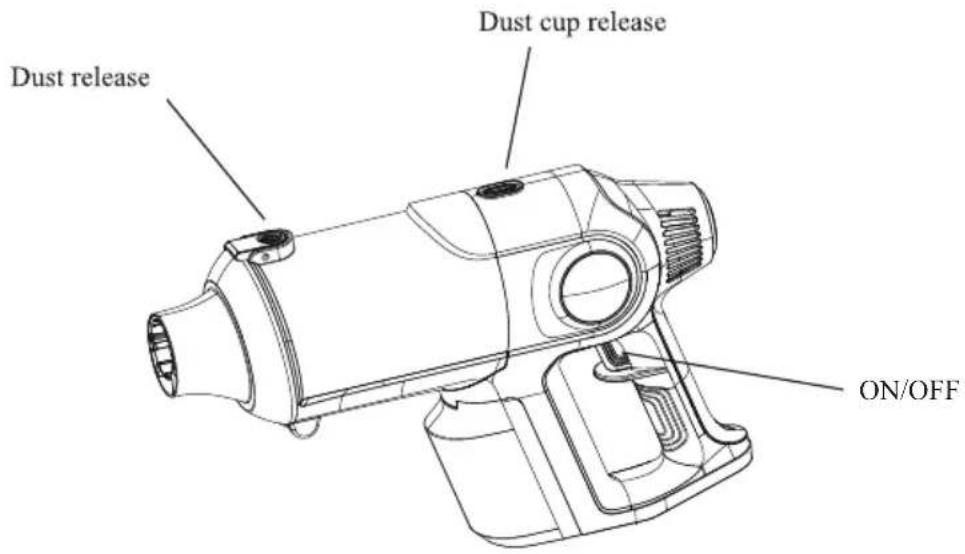
Technical line drawing of a mechanical device showing assembly and transformation (no text or symbols)Press the ON/OFF button to start and stop the machine.
Press the touch panel to switch speeds. The blue light means the highest speed is active and the green light shows the eco speed is active.
natural_image
Technical line drawings of two mechanical device components (no text or symbols)CHAPTER 5. CLEANING & CARE
Dust cup cleaning and maintenance
Method 1: Press the dust drop button and empty the dust into a rubbish bin.
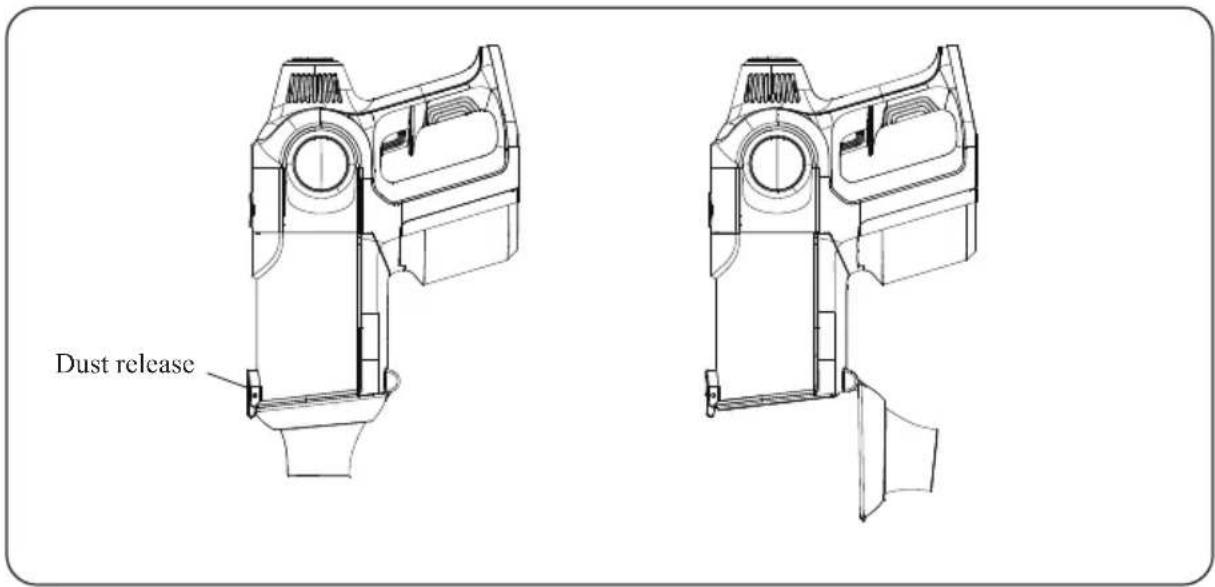
Method 2: Press the dust cup release button and take out the dust cup from the main body as the picture below.
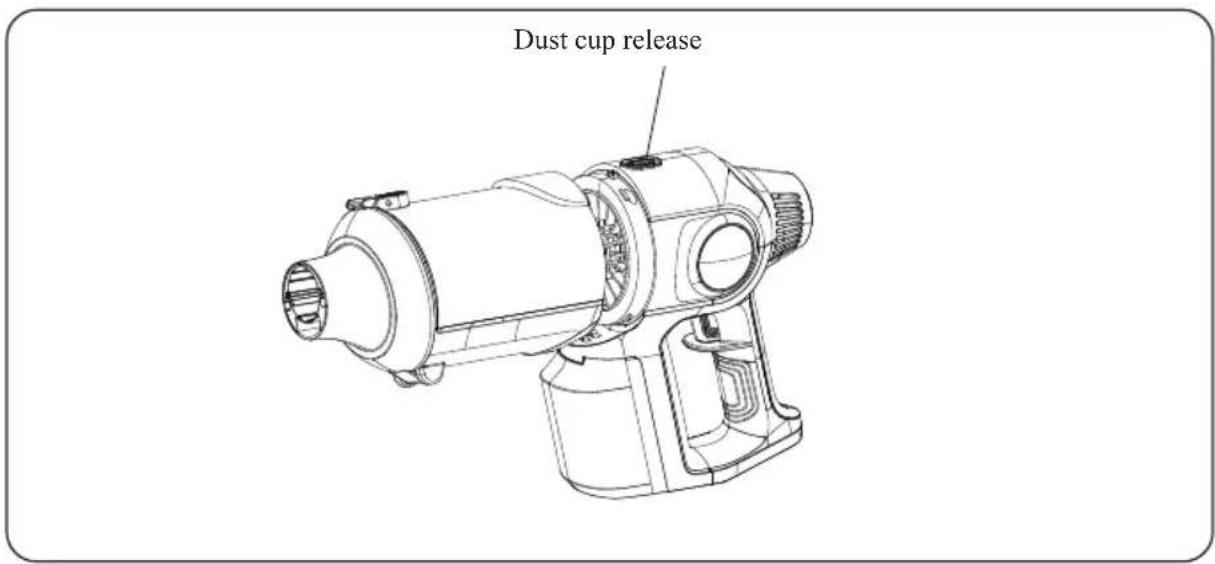
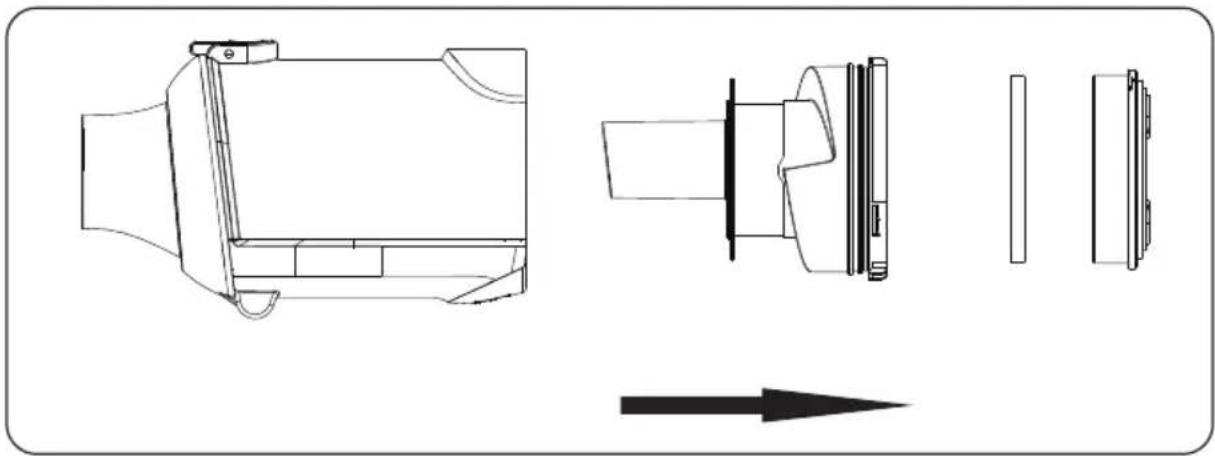
Take off the HEPA filter and cyclone cone, empty all the rubbish and clean it. Install them back as the picture below after the parts have air dried.
natural_image
Technical line drawing of a mechanical component with exploded and assembled views (no text or symbols)
ATTENTION:
Do not use the machine before reinstalling the HEPA fitler and cyclone cone or it may damage the unit.
Floor brush cleaning and maintenance
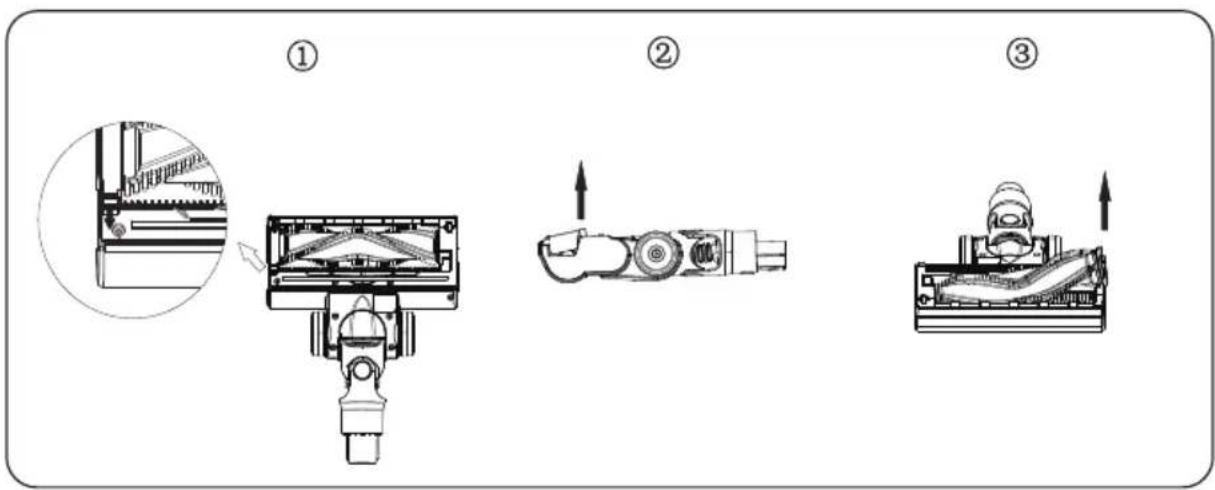
- Press the roll brush release button.
- Take the roll brush out.
- Wash the roll brush and dry it. Install as illustrated before.
Storage
Place the machine into the storage base when not in use.
CHAPTER 6. SPECIFICATIONS
| Motor rated voltage and rated power 29.6V 300W | |
| Floor brush rated voltage and rated power 29.6V 15W | |
| Lithium battery 29.6V 2500mAh | |
| Charger input ~100-240V50/60Hz | |
| Charger output ~35V 0.5A | |
| Charging time 4-5 hours | |
| Noise 70dB | |
| Rated Continuous Working Time | II Mode : 35 minIII Mode : 10 minI Mode : 70 min |
| Product size 390x227x108mm (main body) | |
| Product net weight 1.42 kg (main body) | |
CHAPTER 7. TROUBLESHOOTING
| Problem Possible causes Resolutions | ||
| Not working | No powerBrush protected or obstructed | Charge the machineRestart the machine |
| Weak suction | Dust cup is full of rubbishHEPA filter is full of dustFloor brush or electrical tube has been clogged by hair or large pieces of rubbish | Clean the dust cup's rubbishClean or change the HEPA filterClean the floor brush or electrical tube's inner rubbish |
| No LED light is shown when charging | Battery pack is not installed in right positionThe adaptor's connector is not inserted in the charging hole | Install the battery pack in right positionCorrectly insert the adaptor's into the power outlet |
| No full battery after charging | Charging time is not enoughBattery is aging | Charge for enough time as instructedReplace battery |
| Floor brush not working | Large particles or objects vacuumedBlanket resistant strength is too hard and protected itselfThe brush roll is entangled by hair or wire | Clean the floor brush and restart the machineTurn off the machine and take the floor brush a little high of the blankets leave some space between floor brush and blankets and restart the machineClean the brush from hair, wire or other things |
We hope that this user guide has given you the assistance needed for a simple set-up. For the most up-to-date guide for your product, as well as any additional assistance you may require, Please contact us.
CHAPTER 8. DISPOSAL OF ESED EQUIPENT
This device has been designed and manufactured of high-quality reusable materials and components.
The symbol of the crossed waste container placed on the product (Fig. A) means that the product is subject to selective collection in accordance with the provisions of Directive 2012/19/EU of the European Parliament and of the Council. a crossed-out wheelie bin symbol (Fig. B) placed on the product means that the product contains batteries that are subject to separate collection in accordance with the provisions of Directive 2006/66/EC of the European Parliament and of the Council. Such marking informs that electrical and electronic equipment and batteries (if any) must not be disposed of with other household waste after the period of use.
The user is obliged to return waste equipment and batteries (if any) to collection points for waste electrical and electronic equipment and batteries (if any). Collectors of such waste, including waste equipment collectors, treatment plants, distributors (shops), municipal waste separate collection points (municipal units), and other entities specified by law form an appropriate system to return this kind of equipment.
Correct disposal of waste equipment and batteries (if any) allows avoiding consequences that may be harmful to health and the environment, caused by the possible presence of hazardous components in the equipment and batteries, and inappropriate storage and processing of such equipment and batteries. Households play an important role in contributing to the reuse and recovery, including recycling, of waste equipment. At this stage, attitudes are formed, affecting the common good, which is a clean natural environment.
Moreover, households are one of the largest users of small equipment and the rational management thereof at this stage affects the recovery of secondary raw materials. Penalties may be imposed in accordance with national legislation for improper disposal of this product. If the device has a lock, please remove it for the safety of all persons who may later come into contact with the device. Some refrigerators and freezers contain insulation material and CFC refrigerant. Therefore, be careful not to pollute the environment when you dispose of your old refrigerator.
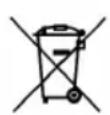
Fig. A
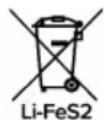
Fig. B
KERNAU
NÁVOD K OBSLUZE
VERTIKÁLNÍ VYSAVAČ
KVCU 300.1
natural_image
Line drawing of a vacuum cleaner with attached handle and lever (no text or symbols)natural_image
Technical line drawing of a mechanical device showing assembly and transformation (no text or symbols)natural_image
Technical line drawings of two types of handheld devices (no text or symbols present)KAPITOLA 5. ČIŠTĚNÍ A ÚDRŽBA
natural_image
Technical line drawing of a mechanical component with exploded and assembled views (no text or symbols)
POZOR:
Storage
natural_image
Line drawing of a vacuum cleaner with attached handle and lever (no text or symbols)natural_image
Technical line drawing of a mechanical device showing assembly and transformation (no text or symbols)natural_image
Technical line drawings of two types of handheld devices (no text or symbols present)natural_image
Technical line drawing of a mechanical component with exploded and assembled views (no text or symbols)
УВАГА:
Storage

- SZANOWNY KLIENCIE,
- ROZDZIAŁ 5. CZYSZCZENIE I PIELEGNACJA
- UWAGA:
- Przechowywanie
- Thank you for choosing this product.
- CONTENTS
- CHAPTER 1. SAFETY&WARNINGS
- ATTENTION
- CHAPTER 2. OVERVIEW
- NOTE:
- CHAPTER 3. ASSEMBLY
- Functional buttons
- Lithium Battery Charging
- ATTENTION:
- CHAPTER 5. CLEANING & CARE
- Dust cup cleaning and maintenance
- Floor brush cleaning and maintenance
- Storage
- CHAPTER 6. SPECIFICATIONS
- CHAPTER 7. TROUBLESHOOTING
- CHAPTER 8. DISPOSAL OF ESED EQUIPENT
- KERNAU
- NÁVOD K OBSLUZE
- KAPITOLA 5. ČIŠTĚNÍ A ÚDRŽBA
- POZOR:
- УВАГА:
Brand : Kernau
Model : KVCU 300.1
Category : Vacuum Cleaner