
KHC 3212 - Cooker Kernau - Free user manual and instructions
Find the device manual for free KHC 3212 Kernau in PDF.


| Product Type | Freestanding Cooker |
| Brand | Kernau |
| Model | KHC 3212 |
| Dimensions (H x W x D) | 85 x 60 x 60 cm |
| Weight | 55 kg |
| Energy Source | Gas hob (natural gas or LPG) / Electric oven |
| Number of Burners | 4 gas burners (varying sizes) |
| Oven Type | Electric fan-assisted (convection) |
| Oven Capacity | 65 L |
| Grill | Yes, integrated grill element |
| Control Type | Rotary knobs for hob and oven |
| Energy Efficiency Class | A |
| Safety Features | Flame failure device on burners, oven door safety lock |
| Cleaning | Easy-clean enamel interior, removable oven door |
| Accessories Included | 1 grill rack, 1 baking tray, gas hose & regulator (if applicable) |
| Installation | Professional installation recommended |
| Power Supply | 230 V / 50 Hz for oven; gas connection required for hob |
| Warranty | 2 years |
Frequently Asked Questions - KHC 3212 Kernau
User questions about KHC 3212 Kernau
0 question about this device. Answer the ones you know or ask your own.
Ask a new question about this device
Download the instructions for your Cooker in PDF format for free! Find your manual KHC 3212 - Kernau and take your electronic device back in hand. On this page are published all the documents necessary for the use of your device. KHC 3212 by Kernau.
USER MANUAL KHC 3212 Kernau
natural_image
Simple diagram with two circles above a rectangular box and four dots below (no text or symbols)SZANOWNY KLIENCIE,
natural_image
Two circular white outlines on a black background, resembling stylized ovens or gauges, with no visible text or symbols.[01] x 1
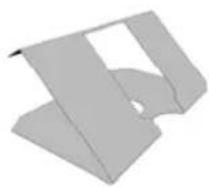
[02] x 4

UWAGA:
natural_image
Pure electrical circuit symbols without any text or labelsnatural_image
Simple electrical switch diagram with two components and mounting holes (no text or symbols)OBSŁUGA

natural_image
Black electrical circuitry with two circular cutouts and a 55mm dimension label (no text or symbols on the diagram itself)Co najmniej
150mm
DANE TECHNICZNE
natural_image
Simple diagram with two circles above a rectangular box and four small dots below (no text or symbols)Thank you for choosing this product.
This User Manual contains important safety information and instructions on the operation and maintenance of your appliance. Please take the time to read this User Manual before using your appliance and keep this book for future reference.
| Icon Caption Description | |||
 | Warning Risk of serious injury or death | ||
 | Risk of electric shock Dangerous voltage | ||
 | Fire | Risk of fire / flammable materials | |
 | Attention | Risk of injury or material damage | |
 | Important/Note | Information on correct operation of the system | |
 | Read the instructions | ||
 | Hot surface | ||
CONTENTS
CHAPTER 1. Safety ......25
CHAPTER 2. Before you start....26
Tools required....27
CHAPTER 3. Operation....27
Product functIons ....27
Special functions ......27
Operation....28
Operation....28
Touch sensitive keys....29
Preparation before use....29
Operating instructions 29
Heating zone operation....29
Safety mode (Child lock) 29
Using the timer ....30
CHAPTER 4. Care and maintenancea ....30
Care 30
Appliance cleanlines....31
CHAPTER 5. Troubleshooting....32
CHAPTER 6. Disposal of used equipment ....32
Information for dismantling ....33
CHAPTER 7. Technical and legal information....33
Direct Connection....33
Electrical Requirements....33
Electrical Connection 33
Appendix 35
CHAPTER 8. Installation ....35
Hob installation 35
Electrical connection 35
Clearance 35
Technical Specification ....37
Installation instructions ....37
Siting 37
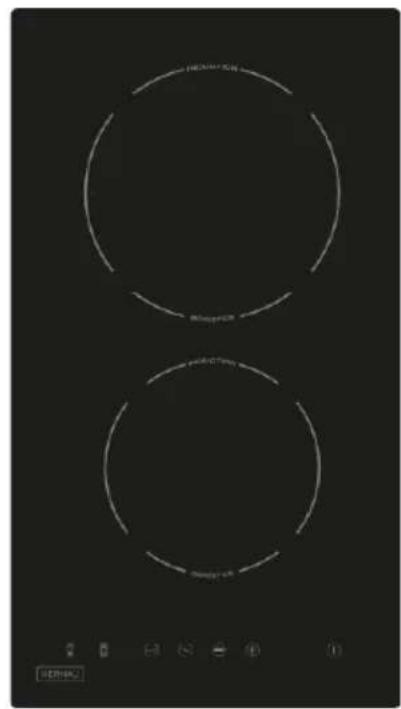
natural_image
Two circular white outlines on a black background, resembling stylized ovens or gauges, with no visible text or symbols.[01] x 1
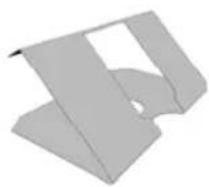
[02] x 4

NOTE:
Items 2 and 3 are pre-fitted in the factory there is no assembly of these components required.
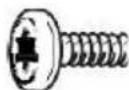

[03] x 4
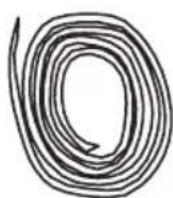
[04] x 1
CHAPTER 1. SAFETY
These instructions are for your safety. Please read through them thoroughly prior to installation and retain them for future reference.
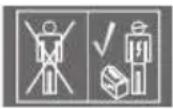
- All installation work must be carried out by a competent person or qualified electrician.
-
This appliance must be installed correctly by a suitably qualified person, strictly following the manufacturer's instructions.
-
This appliance complies with all current European safety legislation however, r, the Manufacturer must emphasise that this compliance does not prevent the surfaces of the appliance from heating up during use and remaining hot during its operation.
- Accessible parts may become hot during use. Young children should be kept away. Care should be taken to avoid touching the appliance (e g ho . b, cooker).
- The Manufacturer highly recommends that this appliance be kept out of the reach of babies and small children.
- Children should be supervised to ensure that they do not play with the appliance.
- Means for isolating the appliance must be incorporated in the fixed wiring in accordance with the current wiring t regulations. An all-pole disconnection he current wiring tregulations. An all-pole disconnection switch having a contact separation of at least 3 mm in all poles should be connected in fixed wiring.
- Damaged power cables should be replaced by a competent person or qualified electrician.
- Make sure that the power cord is not caught under or in the appliance and avoid damage to the power cable.
- Do not allow the electric cables to touch the hot parts of the appliance.
- Do not install the appliance outdoors in a damp place or in an area which may be prone to water leaks such as under or near a sink unit In th . e event of a water leak allow the machine to dry naturally.
- Please dispose of the packing material carefully.
- Do not use flammable sprays in close vicinity to the appliance.
- We also recommend that great care be taken during use and cleaning. Read the cleaning and maintenance sections for this appliance carefully.
- A steam cleaner is not to be used.
- The appliance is not intended to be operated by means of external tmer or separated remote-control system.
- The appliance is for domestic use only.
- When a cooking zone has been on for a long time the ,surface remains hot for some time afterwards so do not touch the ceramic surface.
- Do not store detergents or flammable materials beneath the hob.
- Do not leave hot oils or fats unattended as they may catch light.
- The Manufacturer declines all liability for personal or material damage as a result of misuse or incorrect installation of this appliance.
- This appliance can be used by children aged from 8 years and above and persons with reduced physical, sensory or mental capabilities or lack of experience and knowledge if they have been given supervision or instruction concerning use of the appliance in a safe way and understand the hazards involved. Children shall not play with the appliance. Cleaning and user maintenance shall not be made by children without supervision.

WARNING:
The appliance and its accessible parts become hot during use. Care should be taken to avoid touching heating elements. Children less than 8 years of age shall be kept away unless continuously supervised.

WARNING:
Unattended cooking on a hob with fat or oil can be dangerous and may result in fire. NEVER try to extinguish a fire with water, but switch off the appliance and then cover flame e.g. with a lid or a fire blanket

WARNING:
Danger of fire: do not store items on the cooking surfaces.

WARNING:
If the surface is cracked, switch off the appliance to avoid the possibility of electric shock.

WARNING:
Use only hob guards designed by the manufacturer of the cooking appliance or indicated by the manufacturer of the appliance in the instructions for use as suitable or hob guards incorporated in the appliance. The use of inappropriate guards can cause accidents.
This appliance is designed for domestic use only.
The manufacturer shall not in any way be held responsible for whatever injuries or damages are caused by incorrect installation or by unsuitable or incorrect use!
CHAPTER 2. BEFORE YOU START
- To avoid the risks that are always present when you use an electric that this appliance is installed correctly and that you read the avoid misuse and hazards. Please keep this instruction booklet on to any future owners. After unpacking the appliance please in doubt, do not use the appliance. and contact the after sales
- Check the package and make sure you have all of the parts listed.
- Decide on the appropriate location for your product.
• If this product contains glass please take care when fitting or handling to prevent personal injury or damage to the product. - The specifications plate is located on the base of this appliance.
- This plate displays all the necessary identification information for ordering replacement parts.
- If you sell the appliance, give it away, or leave it behind when you move house, make sure you also pass on this manual so that the new owner can become familiar with the appliance and its safety warnings.
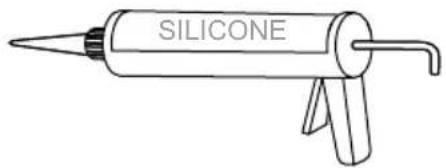
Tools required

natural_image
Simple line drawing of a screwdriver with a cross symbol on the head (no text or labels)

natural_image
Line drawing of a silicone spray gun (no text or symbols on the gun body)• The ceramic hob caters for all kind of cooking, with its radiant heat cooking zones and its electronic touch controls and multi-functions, making it the ideal choice for the modern family.
- The ceramic hob is extremely user-friendly, durable and safe.
SPECIAL FUNCTIONS
Protection from over-heating
A sensor monitors the temperature in the cooking zones. When the temperature exceeds a safe level, the cooking zone is automatically switched off.
Residual heat indicator
When the hob has been operating for some time, there will be some residual heat. The letter "H" appears to warn you that it is too hot to touch the surface.
Timer function
You can set the timer of each cooking zone for 1-120 minutes.
Auto shutdown
Another safety feature of the ceramic hob is auto shutdown. This occurs whenever you forget to switch off a cooking zone. The heating zone will shutdown automatically after 120 minutes.
Protection against unintended operation.
If the electronic control detects a button being held down for approx 10 seconds it will switches off automatically. The control sends out anaudible error signal to warn the sensors have of an object. The display will indicate an error code E6.
OPERATION
The following shows how to reduce total environmental impact (e.g. energy use) of the cooking process).
- Use suitable size of pan for cooking.
- Cover the pan with lid if possible during cooking.
- Choose pan which has better retaining heat capacity.
- If possible, defrost frozen food in a way which does not need any power consumption.
- It takes less time to cook food which has large surface area to volume ratio.
OPERATION

natural_image
Pure electrical circuit symbols without any text or labels| Reference Description | |
A Zone p  | |  | |
BPower reg 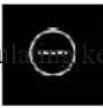 ey (reduce) ey (reduce) | |
C Power reg 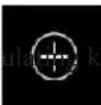 ey (increase) ey (increase) | |
D ON / OFF 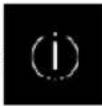 | |
E Child lock 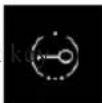 | |
FTimer key 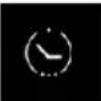 | |
| Heating Zone Total Power (220-240V~50/60Hz) | |
 | 1800 W |
 | 1200 W |
| Total Power 3000 W(230V~) | |
TOUCH SENSITIVE KEYS.
All operations can be performed using touch sensitive keys (capacitive sensors) located on the front of the ceramic glass (control panel). Each key has a corresponding display. All actions are confirmed by an audible beep
PREPARATION BEFORE USE
When the power is switched on, the buzzer will sound once and all the indicators will switch on for one second and then switch off. Place the pan in the centre of the cooking zone.
OPERATING INSTRUCTIONS

CAUTION
When the ON/OFF key (D) is pressed, the ceramic hob returns to off mode if no other operation is carried out within 20 seconds.
- Select the cooking zone you wish to use by pressing the “ ” or “ ” key (A).The .symbol selected will displayed “ n - 0 ” or “ u - 0 ”.
- Select the power level by pressing the „+” key(C), “+” or „-” key(B), “—”
- The power level will start at 0. Pressing the „+” will count up the power levels from 0 to 9 (max power) in numerical order. Pressing the „-” key will take the power straight from 0 to . Pressing the „-” key again will reduce the power level.
- To adjust the power level at a later stage select the desired cooking zone first.
- Select the cooking zone press . , „-” to reduce the power level to 0 the, cooking zone will be turned off.
SAFETY MODE (CHILD LOCK)
You can lock the controls to prevent unintended use (for example children accidentally turning the cooking zones on).
When the controls are locked, all the controls except the OFF control are disabled.
To lock the controls
Touch the key (E) , , " for 3 seconds The timer indicator will show . w ,,Loc".
To unlock the controls
-
Make sure the hob is turned on.
-
Touch the key E for 3 seconds
-
You can now start using your hob.

ATTENTION
When the hob is in the lock mode, all the controls are disable except OFF, you can always turn the hob off with the OFF control in an emergency, but you shall unlock the hob first in the next operation.
USING THE TIMER
You can set the timer to turn one cooking zone off after the set time is up. You can set the timer for up to 120 minutes.
- Select the relevant cooking zone which is working by touching the zone select key (A).
- Press the Timer key (F), ", the timing indicator flashes, and you can set the timer at this point.
- Press the „+” and „-” keys, you can set the timer from 1 to 120 minutes.
- When the time is set, it will begin to count down immediately. The display will show the remaining time and the timer indicator flash for 5 seconds.
- When cooking timer expires, the corresponding cooking zone will be Switch off automatically and buzzer 3 times.
- If 2 burners are at work, when one burner has the timing, it will always display the burner working level and time, if 2 burners both have timing, but just only display burner working level and time for the last action.
CHAPTER 4. CARE AND MAINTENANCE

WARNING
Always switch off the electricity supply before performing maintenance work. In the event of a fault, contact customer services.
natural_image
Simple diagram of a switch or lever with two blocks and two circular components (no text or symbols)CARE

Damaged power cables should be replaced by a competent person or qualified electrician.
For domestic use only.
Never place an empty pan on the hob as this will cause the over heat protection, then the appliance will switches off automatically.
When a cooking zone has been on for a long time, the surface remains hot for some time afterwards so do not touch the ceramic surface.
For sealed foods, please do not heat them before opening removing the lid so as to avoid any dangers of explosion due to heating expansion.

If the surface of the hob is cracked, disconnect from power supply to avoid any possibility of electric shocks.
Do not place rough or uneven pans on the hob, as they could damage the ceramic surface.
Avoid banging pots and pans down on the hob. The ceramic surface is tough but not unbreakable.
Do not detergents or flammable materials beneath the hob.
APPLIANCE CLEANLINES

CAUTION
- Avoid rubbing with any abrasive or with the base of the pans, etc, as this will wear the markings on the top of the ceramic hob over time.
- Clean the ceramic hob on a regular basis to prevent the build up of food residue.
• The appliance should be cleaned after use. - The surface of the ceramic hob may be easily cleaned in the following way
| Type of dirt Cleaning | method Cleaning materials | |
| Limescale | Apply white vinegar to the surface, then wipe it dry with soft cloth | Special ceramic cleaner |
| Burnt-on stains | Clean with damp cloth and dry it with a soft cloth | Special ceramic cleaner |
| Light stains | Clean with damp cloth and dry it with a soft cloth | Cleaning sponge |
| Melted plastics | Use a scraper suitable for ceramic glass to remove residue | Special ceramic cleaner |
CHAPTER 5. TROUBLESHOOTING
If an problem occurs, the induction hob will enter the protective state automatically and display corresponding protective codes:
| Error message Possible Cause What to do | ||
| E6 Press any key more than 10 seconds | Release the key and then the appliance reset automatically | |
| H1 | The temperature inside the appliance is too high | Stop and cooling the appliance |
Before calling the customer services, please check that the appliance is correctly connected, any of the following cases are not covered by the guarantee
- Damage caused by improper use, storage or maintenance
- Damage caused by unauthorised disassembly and repair.
• Damage caused by misuse.
• Using the ceramic hob for commercial purposes.
CHAPTER 6. DISPOSAL OF USED EQUIPMENT
This device has been designed and manufactured of high-quality reusable materials and components. The symbol of the crossed waste container placed on the product (Fig. A) means that the product is subject to selective collection in accordance with the provisions of Directive 2012/19/EU of the European Parliament and of the Council. a crossed-out wheelie bin symbol (Fig. B) placed on the product means that the product contains batteries that are subject to separate collection in accordance with the provisions of Directive 2006/66/EC of the European Parliament and of the Council. Such marking informs that electrical and electronic equipment and batteries (if any) must not be disposed of with other household waste after the period of use.
The user is obliged to return waste equipment and batteries (if any) to collection points for waste electrical and electronic equipment and batteries (if any). Collectors of such waste, including waste equipment collectors, treatment plants, distributors (shops), municipal waste separate collection points (municipal units), and other entities specified by law form an appropriate system to return this kind of equipment.
Correct disposal of waste equipment and batteries (if any) allows avoiding consequences that may be harmful to health and the environment, caused by the possible presence of hazardous components in the equipment and batteries, and inappropriate storage and processing of such equipment and batteries. Households play an important role in contributing to the reuse and recovery, including recycling, of waste equipment. At this stage, attitudes are formed, affecting the common good, which is a clean natural environment.
Moreover, households are one of the largest users of small equipment and the rational management thereof at this stage affects the recovery of secondary raw materials. Penalties may be imposed in accordance with national legislation for improper disposal of this product. If the device has a lock, please remove it for the safety of all persons who may later come into contact with the device. Some refrigerators and freezers contain insulation material and CFC refrigerant. Therefore, be careful not to pollute the environment when you dispose of your old refrigerator.
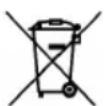
Fig. A
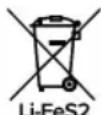
Fig. B
INFORMATION FOR DISMANTLING
Do not dismantle the appliance in a way which is not shown in the user manual. The appliance could not be dismantled by user. At the end of life, the appliance should not be disposed of with household waste. Check with you Local Authority or retainer for recycling advice.
CHAPTER 7. TECHNICAL AND LEGAL INFORMATION
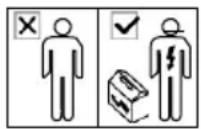
All installation work must be carried out by a competent person or qualified electrician.
Before connecting the mains supply ensure that the mains voltage corresponds to the voltage on the rating plate inside the cooker hood.

WARNING:
THIS APPLIANCE MUST BE EARTHED.
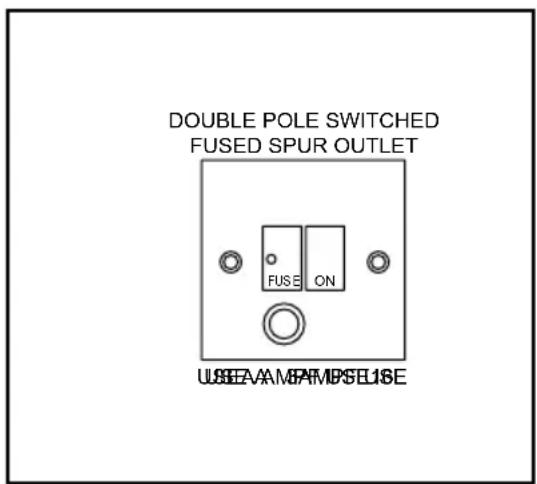
DIRECT CONNECTION
If the appliance is being connected directly to the mains an omnipolar circuit-breaker must be installed with a minimum opening of 3mm between contacts.
If the cable is damaged or to be replaced, the operation must be carried out the by a qualified electrician with dedicated tools to avoid any accidents.
The installer must ensure that the correct electrical connection has been made and that it complies with wiring diagram.
The cable must not be bent or compressed.
The cable must be checked regularly and replaced by authorized technicians only.
ELECTRICAL REQUIREMENTS
Any permanent electrical installation must comply with the latest I.E.E. Regulations and local electricity company regulations. For your own safety a qualified electrician or contractor who is on the roll of the National Inspection Council for Electrical Installation Contracting (NICEIC) should undertake the electrical installation.
ELECTRICAL CONNECTION
Before connecting the mains supply ensure that the mains voltage corresponds to the voltage on the rating plate inside the appliance.

WARNING:
THIS APPLIANCE MUST BE EARTHED
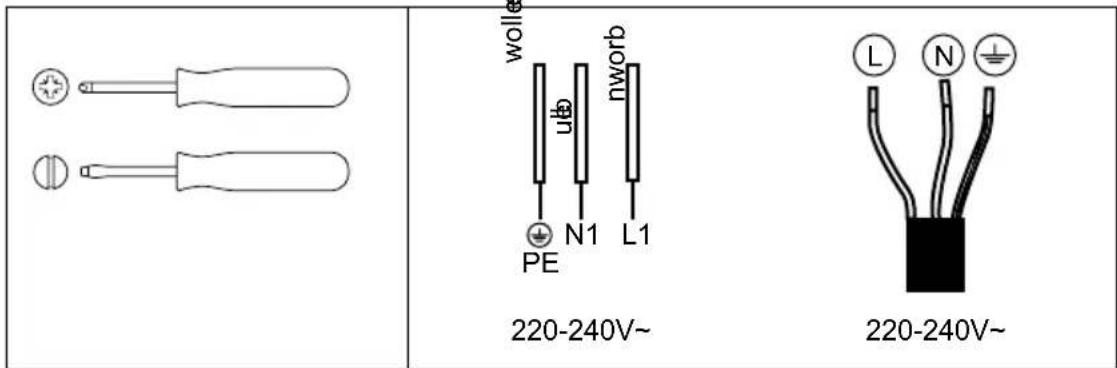
The appliance is supplied with a 3-core mains cable and must be connected to the electricity supply via a double pole switch having a 3mm minimum contact gap on each connector.
The wires in the mains lead are coloured in accordance with the following code:
Brown = L - Live
Blue = N - Neutral
Green/Yellow = Earth
The connection point must be placed in a position adjacent to the appliance so as to be readily accessible for an engineer in the event of a breakdown.
Disconnect the appliance from the mains supply before carrying out any kind of maintenance or cleaning.
APPENDIX
CHAPTER 8. INSTALLATION
HOB INSTALLATION

CAUTION
The ceramic hob must be installed by a suitably qualified person. Never try to install the appliance yourself. The ceramic hob must not be installed above refrigerators, freezers, washing machines or tumble dryers. The wall and the area above the hob should be able to withstand heat.
- Cut a hole in the worktop of the size shown in the diagram. The worktop should be at least 30 mm thick and made of a heat-resistant material. Seal cut edge of the worktop with silicone or PVA.
ELECTRICAL CONNECTION

CAUTION
- The cord should not be extended or folded into coil during operation.
- Adapters, multi-socket strips and extension leads must not be used.
• Overloading could result in a risk of fire.

CAUTION
Before connecting to the power supply, check:
• The voltage meets requirements.
- The appliance uses an individual socket and does not share one with another electric appliance.
A dedicated power protection switch must be incorporated in the fixed wiring in accordance with the wiring rules.
CLEARANCE

WARNING
Good ventilation is required around the appliance for easier dissipation of heat and low power consumption.
Sufficient clearance is required around the appliance.
The gap between the hob and any cupboard above it should be at least 750mm. If a cooker hood is to be installed above the hob please consult the hood instruction manual for this minimum distance.
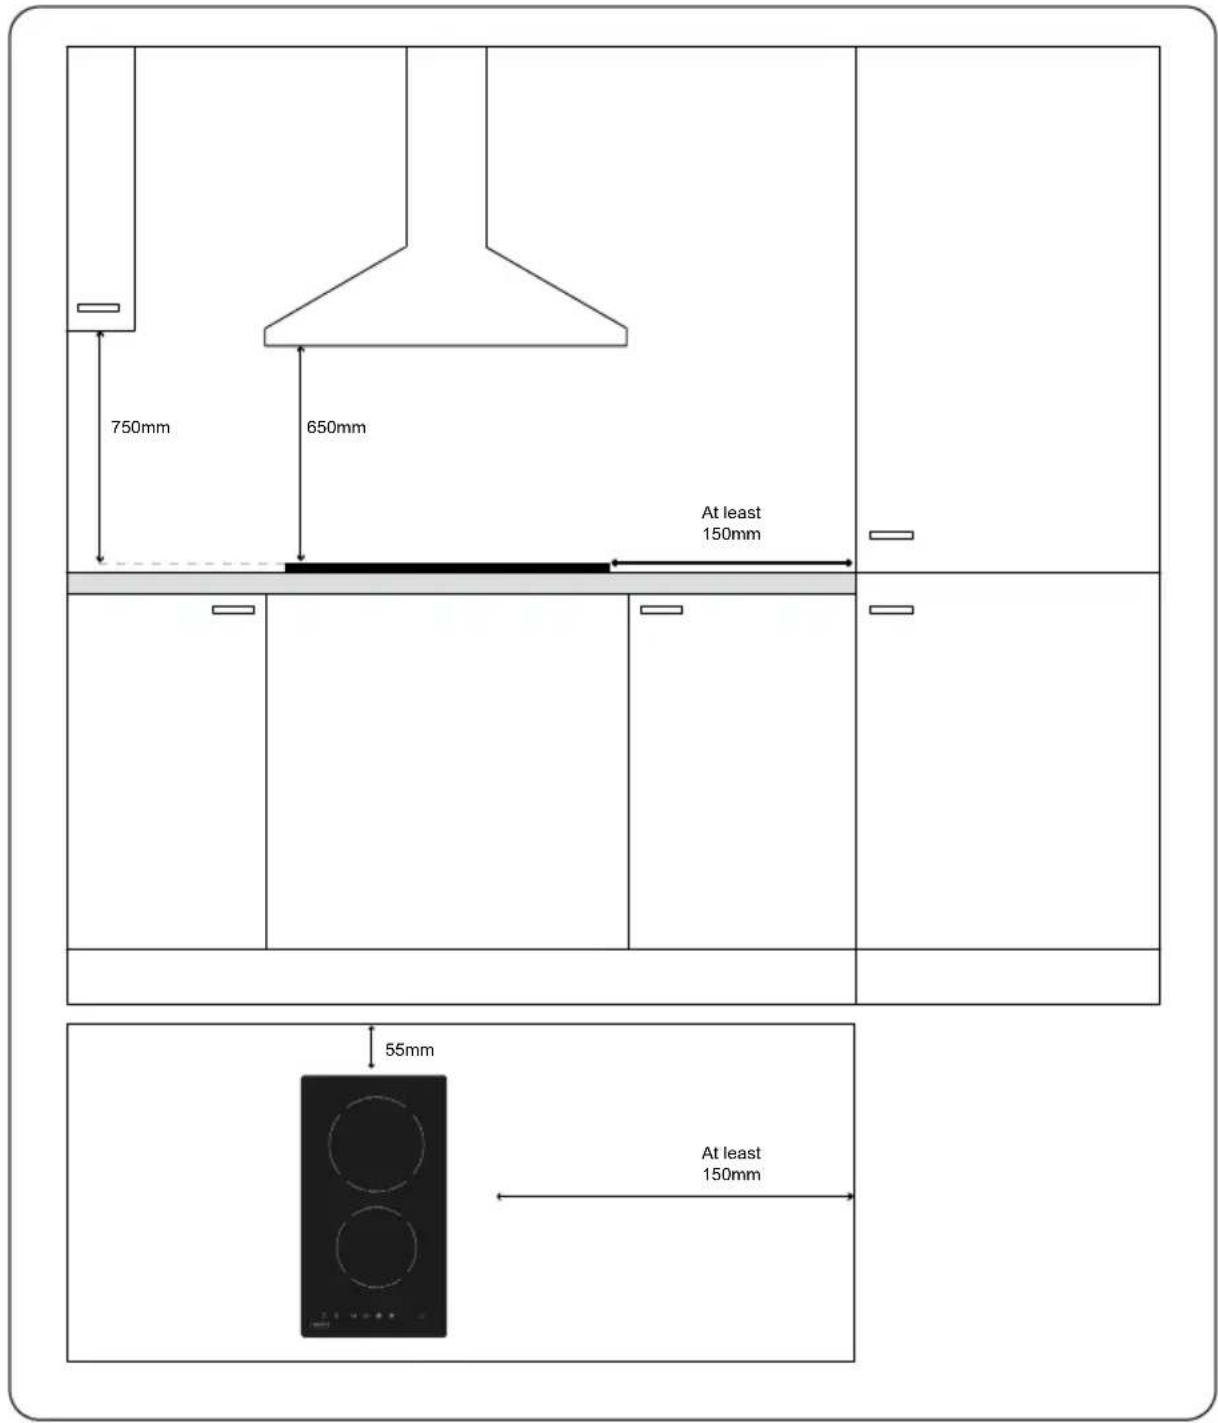
TECHNICAL SPECIFICATION
| Cooking zones 2 zones | |
| Supply voltage 220-240V~ | |
| Total power 3000W (230V~) | |
| Product size L×W×H (mm) 290×520×60 | |
| Build-in dimension A×B (mm) 260×490 |
Weight and Dimensions are approximate. Because we continually strive to improve our products we may change specifications and designs without prior notice.
INSTALLATION INSTRUCTIONS
Remove all the packing materials plus disposal statement.
SITING
(see fig.1)

CAUTION
Good ventilation is required around the appliance for easier dissipation of heat and low power consumption.
Sufficient clearance is required around the appliance.
The appliance should not be placed near anything that may echo.
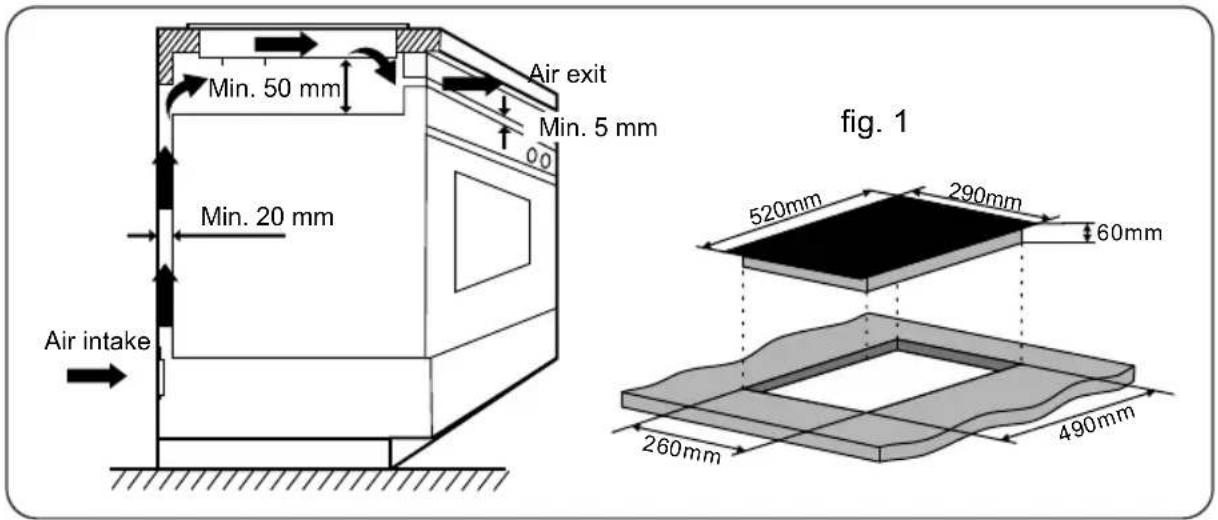
The ceramic hob must be well ventilated and the air inlet and outlet must not be blocked. Please select heat-resistant work surface material to avoid larger deformation caused by the heat radiation from the hotplate.

NOTE
The safety distance between the ceramic hob and the cupboard above the hotplate should be at least 750 mm.
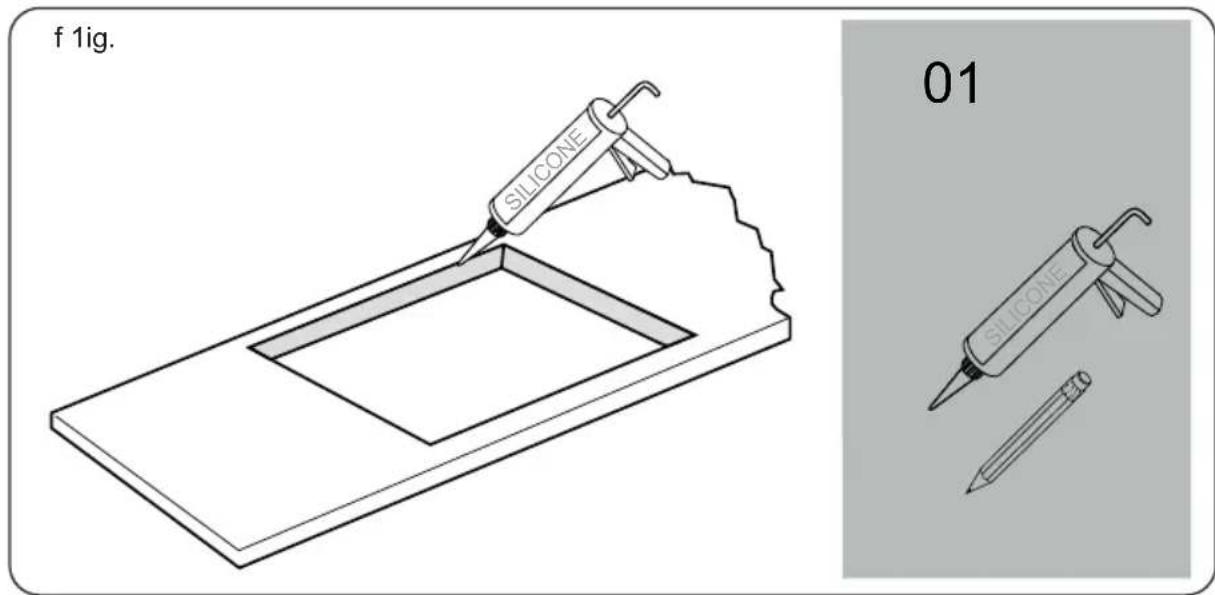
Cut out worktop to supplied dimensions shown (fig. 1) with suitable equipment. Seal the cut edge of the worktop using fig. 1 silicone or PTFE and allow to dry prior to fitting the hob.
![f 2ig. [02] 02 [0 ]4 x 1](/content/2026/05/913791/images/5d267019bf73dc595e06b99c68ecd5100a5bf7b4fd1077d54e64992834d508be.jpg)
Stretch out the supplied seal along the underside edge of the hob, ensuring the ends overlap.
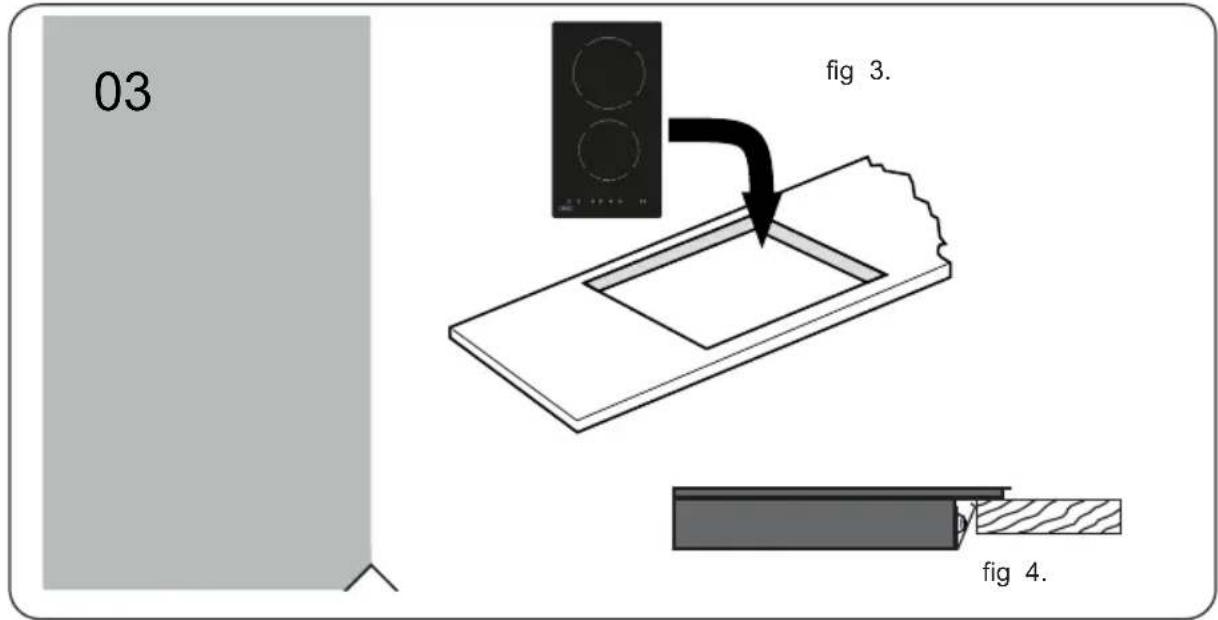
Do not use adhesive to fix the hob into the worktop.
Once the seal is fitted position the hob into the cutout in the worktop. Apply gentle downwards pressure onto the hob to push it into the worktop ensuring a good seal around the outer edge (fig. 4)
KERNAU
NÁVOD K OBSLUZE
DOTYKOVĚ OVLÁDANÁ
SKLOKERAMICKÁ VARNÁ DESKA
KHC 3212
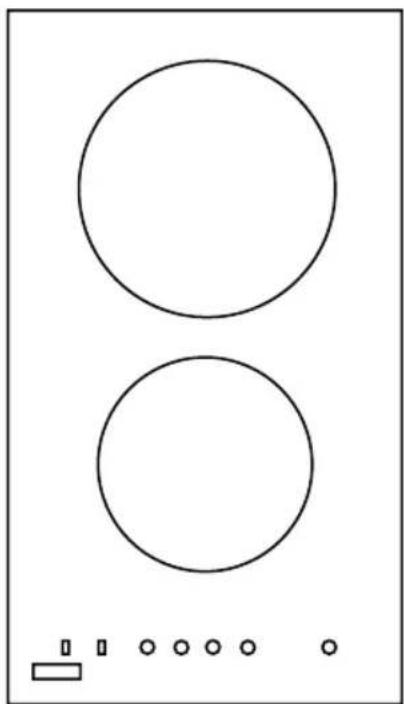
natural_image
Simple diagram with two circles and a row of dots below, no text or symbols presentnatural_image
Two circular white outlines on a black background, resembling stylized ovens or gauges, with no visible text or symbols.[01] x 1
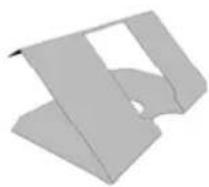
[02] x 4

POZOR:
natural_image
Pure electrical circuit symbols without any text or labelsnatural_image
Simple diagram with two circles above a rectangle and four dots below, no text or symbols present.natural_image
Two circular white outlines on a black background, resembling stylized ovens or gauges, with no visible text or symbols.[01] x 1
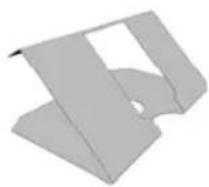
[02] x 4

УВАГА:
ОБСЛУГОВУВАННЯ

- SZANOWNY KLIENCIE,
- UWAGA:
- OBSŁUGA
- DANE TECHNICZNE
- Thank you for choosing this product.
- CONTENTS
- CHAPTER 1. Safety ......25
- CHAPTER 2. Before you start....26
- CHAPTER 3. Operation....27
- CHAPTER 4. Care and maintenancea ....30
- CHAPTER 5. Troubleshooting....32
- CHAPTER 6. Disposal of used equipment ....32
- CHAPTER 7. Technical and legal information....33
- Appendix 35
- CHAPTER 8. Installation ....35
- NOTE:
- CHAPTER 1. SAFETY
- WARNING:
- CHAPTER 2. BEFORE YOU START
- Tools required
- SPECIAL FUNCTIONS
- Protection from over-heating
- Residual heat indicator
- Timer function
- Auto shutdown
- Protection against unintended operation.
- OPERATION
- TOUCH SENSITIVE KEYS.
- PREPARATION BEFORE USE
- OPERATING INSTRUCTIONS
- CAUTION
- SAFETY MODE (CHILD LOCK)
- To lock the controls
- To unlock the controls
- ATTENTION
- USING THE TIMER
- CHAPTER 4. CARE AND MAINTENANCE
- WARNING
- CARE
- APPLIANCE CLEANLINES
- CHAPTER 5. TROUBLESHOOTING
- CHAPTER 6. DISPOSAL OF USED EQUIPMENT
- INFORMATION FOR DISMANTLING
- CHAPTER 7. TECHNICAL AND LEGAL INFORMATION
- DIRECT CONNECTION
- ELECTRICAL REQUIREMENTS
- ELECTRICAL CONNECTION
- THIS APPLIANCE MUST BE EARTHED
- APPENDIX
- CHAPTER 8. INSTALLATION
- HOB INSTALLATION
- CLEARANCE
- TECHNICAL SPECIFICATION
- INSTALLATION INSTRUCTIONS
- SITING
- NOTE
- KERNAU
- NÁVOD K OBSLUZE
- POZOR:
- УВАГА:
- ОБСЛУГОВУВАННЯ
Brand : Kernau
Model : KHC 3212
Category : Cooker