
KHC 6412 - Cooker Kernau - Free user manual and instructions
Find the device manual for free KHC 6412 Kernau in PDF.


| Product Type | Ceramic Hob |
| Brand | Kernau |
| Model | KHC 6412 |
| Cooking Zones | 4 |
| Heating Type | Radiant (ceramic) |
| Total Power | 6000W (230V~) |
| Power per Zone | 1200W, 1800W, 1200W, 1800W |
| Supply Voltage | 220-240V~ 50/60Hz |
| Product Dimensions (LxWxH) | 590 x 520 x 52 mm |
| Building-in Dimensions (WxD) | 560 x 490 mm |
| Min Worktop Thickness | 30 mm |
| Safety Distance Above Hob | 650 mm |
| Control Type | Touch controls |
| Timer | Yes, up to 99 minutes |
| Child Lock | Yes |
| Auto Shutdown | Yes |
| Residual Heat Indicator | Yes (displays 'H') |
| Overheat Protection | Yes |
| Power Cord | 3-core, must be earthed (220-240V) |
| Installation Type | Built-in, requires ventilation |
| Cleaning Recommendations | Use soft cloth and special ceramic cleaner; avoid abrasives |
| Accessories Included | Seal strip, installation manual |
Frequently Asked Questions - KHC 6412 Kernau
User questions about KHC 6412 Kernau
0 question about this device. Answer the ones you know or ask your own.
Ask a new question about this device
Download the instructions for your Cooker in PDF format for free! Find your manual KHC 6412 - Kernau and take your electronic device back in hand. On this page are published all the documents necessary for the use of your device. KHC 6412 by Kernau.
USER MANUAL KHC 6412 Kernau
natural_image
Simple diagram with four circles and a row of small symbols below (no text or labels)SZANOWNY KLIENCIE,
MOC STREFY GRZEWCZEJ
| Strefa grzewcza Moc całkowita (220-240V~ 50/60Hz) | |
 | 1200W |
 | 1800W |
 | 1200W |
 | 1800W |
| Moc całkowita 6000W (230V~) | |
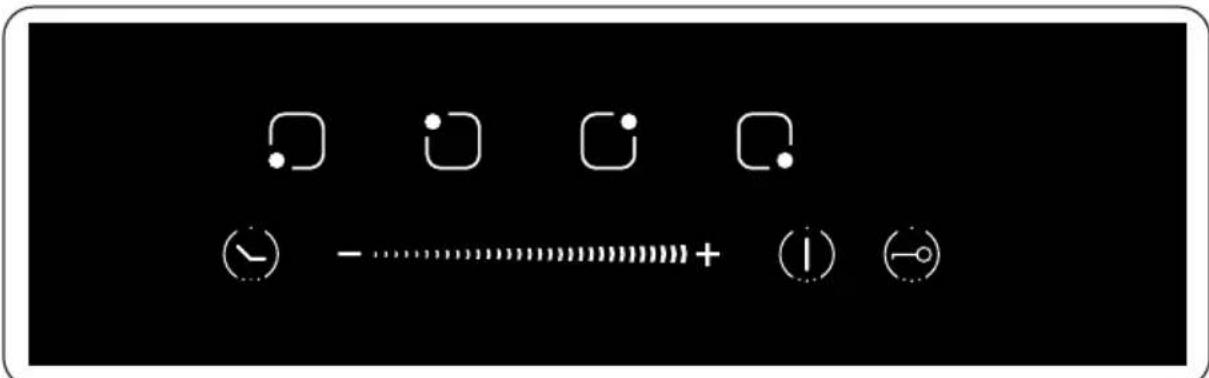
ROZDZIAŁ 3. INTERFEJS UŻYTKOWNIKA
ROZDZIAŁ 8. WYBÓR WŁAŚCIWYCH NACZYŃ KUCHENNYCH
natural_image
Three identical cooking pots with crossed-out X marks, no text or symbols presentnatural_image
Four identical cooking pots with crossed-out X marks, arranged horizontally (no text or symbols)ROZDZIAŁ 9. KORZYSTANIE Z PŁYTY CERAMICZNEJ
ABY ROZPOCZĄĆ GOTOWANIE
natural_image
Line drawing of a cooking pot on a stand (no text or symbols)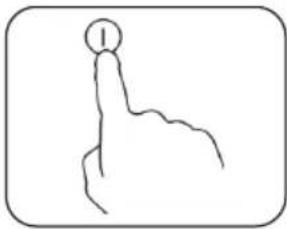
natural_image
Simple line drawing of a hand pointing upward with a numbered circle (no text or symbols)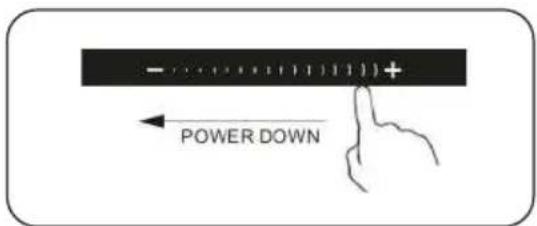
natural_image
Illustration of a hand using a paintbrush to brush residue in liquid (no text or symbols)ROZDZIAŁ 11. ROZWIĄZYWANIE PROBLEMÓW
| L(mm) W(mm) H(mm) D(mm) A(mm) B(mm) X(mm) | ||||||
| 590 520 | 52 48 560 | 490 | 50 mini | |||
natural_image
Diagram of a layered electronic component with a labeled part [02] (no text or symbols on the diagram itself)02
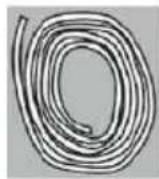
[04] × 1
INSTRUCTION MANUAL / INSTALLATION MANUAL
CERAMIC HOB
KHC 6412
natural_image
Simple diagram with four circles and a row of small symbols below (no text or labels)Thank you for choosing this product.
This User Manual contains important safety information and instructions on the operation and maintenance of your appliance. Please take the time to read this User Manual before using your appliance and keep this book for future reference.
| Icon Caption Description | ||
 | Warning Risk of serious injury or death | |
 | Risk of electric shock Dangerous voltage | |
 | Fire | Risk of fire / flammable materials |
 | Attention | Risk of injury or material damage |
 | Important/Note | Information on correct operation of the system |
 | Read the instructions | |
 | Hot surface | |
CONTENTS
CHAPTER 1. Safety warnings....23
CHAPTER 2. Product overview....24
Heating zone power....25
CHAPTER 3. User interface....25
CHAPTER 4. Product functions....26
CHAPTER 5. Special functions....26
Protection for over-heating....26
Residual heat indicator 26
Auto shutdown protection 26
Protection against unintended operation ....26
CHAPTER 6. Before using your hob....26
CHAPTER 7. Using the touch controls....27
CHAPTER 8. Choosing the right Cookware....27
CHAPTER 9. Using your ceramic hob....28
To start cooking....28
Using child lock function....28
Using the timer....29
CHAPTER 10. Care and maintenance ....29
Care 29
Appliance cleanliness....30
CHAPTER 11. Trouble shooting ....31
CHAPTER 12. Technical specification ....32
CHAPTER 11. Installation....32
Selection of installation equipment 32
Before you install the hob, make sure that....33
When you have installed the hob, make sure that....34
Installation....34
Connecting the hob to the mains power supply....35
CHAPTER 12. Disposal of used equipment ....37
CHAPTER 1. SAFETY WARNINGS
Your safety is important to us. Please read this information before using your cooktop.

WARNING
The appliance is not to be used by persons (including children) with reduced physical, sensory or mental capabilities, or lack of experience and knowledge, unless they have been given supervision or instruction. Children being supervised not to play with the appliance.

WARNING
If the surface is cracked, switch off the appliance to avoid the possibility of electric shock, for hob surfaces of glass-ceramic or similar material which protect live parts.

WARNING
A steam cleaner is not be used.

WARNING
That the appliance is not intended to be operated by means of external timer or separated remote-control system.

DANGER OF FIRE
Do not store items on the cooking surfaces

CAUTION
The cooking process has to be supervised. A short term cooking process has to be supervised continuously.

WARNING
Unattended cooking on a hob with fat or oil can be dangerous and may result in a fire.

WARNING
If the supply cord is damaged, it must be replaced by the manufacturer, its service agent or similar qualified persons in order to avoid a hazard.

WARNING
This appliance can be used by children aged from 8 years and above and persons with reduced physical, sensory or mental capabilities or lack of experience and knowledge if they have been given supervision or instruction concerning use of the appliance in a safe way and understand the hazards involved. Children shall not play with the appliance. Cleaning and user maintenance shall not be made by children without supervision.

WARNING
The appliance and its accessible parts become hot during use.

WARNING
Care should be taken to avoid touching heating elements.

WARNING
Children less than 8 years of age shall be kept away unless continuously supervised.

WARNING
Unattended cooking on a hob with fat or oil can be dangerous and may result in fire.

WARNING
NEVER try to extinguish a fire with water, but switch off the appliance and then cover flame e.g. with a lid or a fire blanket.

NOTE
The cooking process has to be supervised. A short term cooking process has to be supervised continuously.
WARNING / DANGER OF FIRE
Danger of fire: do not store items on the cooking surfaces.

WARNING
Use only hob guards designed by the manufacturer of the cooking appliance or indicated by the manufacturer of the appliance in the instructions for use as suitable or hob guards incorporated in the appliance. The use of inappropriate guards can cause accidents.

WARNING
Power cord can't accessible after installation.
Congratulations on the purchase of your new ceramic hob.
We recommend that you spend some time to read this Instruction / Installation Manual in order to fully understand how to install correctly and operate it. For installation, please read the installation section. Read all the safety instructions carefully before use and keep this Instruction / Installation Manual for future reference.
CHAPTER 2. PRODUCT OVERVIEW
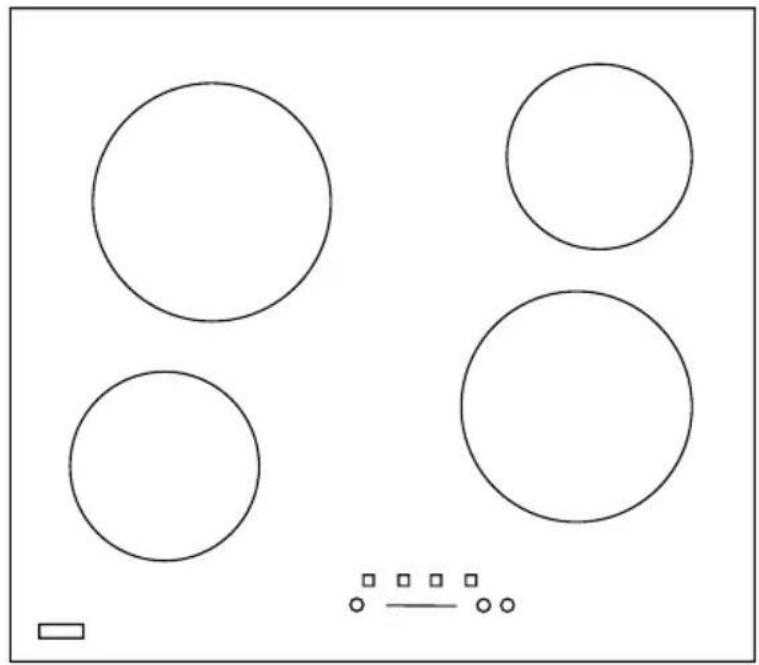
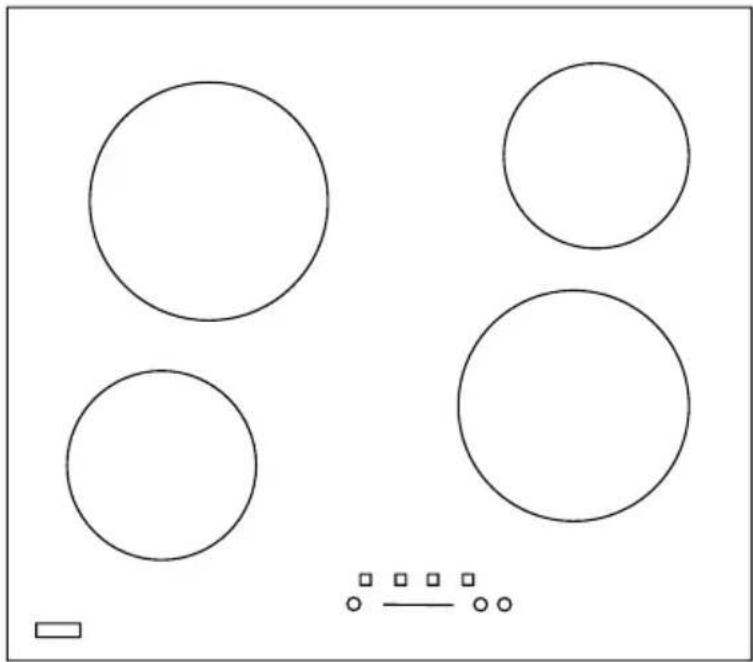
Top view
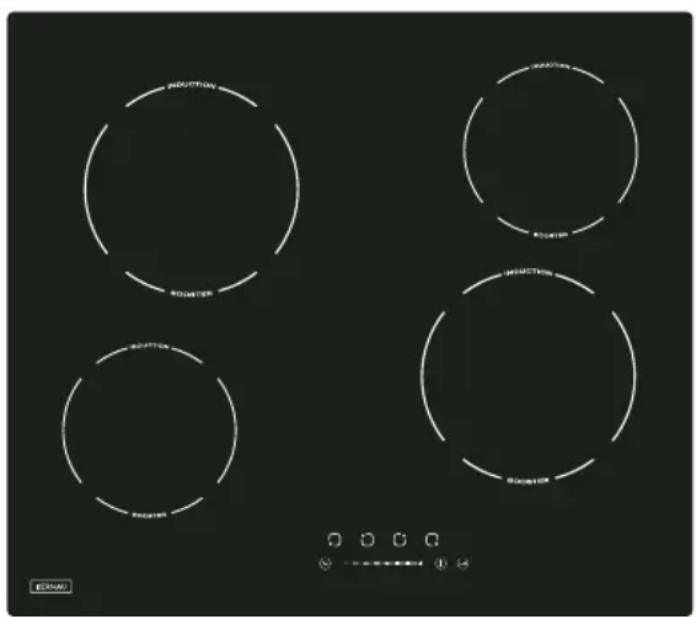
HEATING ZONE POWER
| Heating zone Total power (220-240V~ 50/60Hz) | |
 | 1200W |
 | 1800W |
 | 1200W |
 | 1800W |
| Total power 6000W (230V~) | |
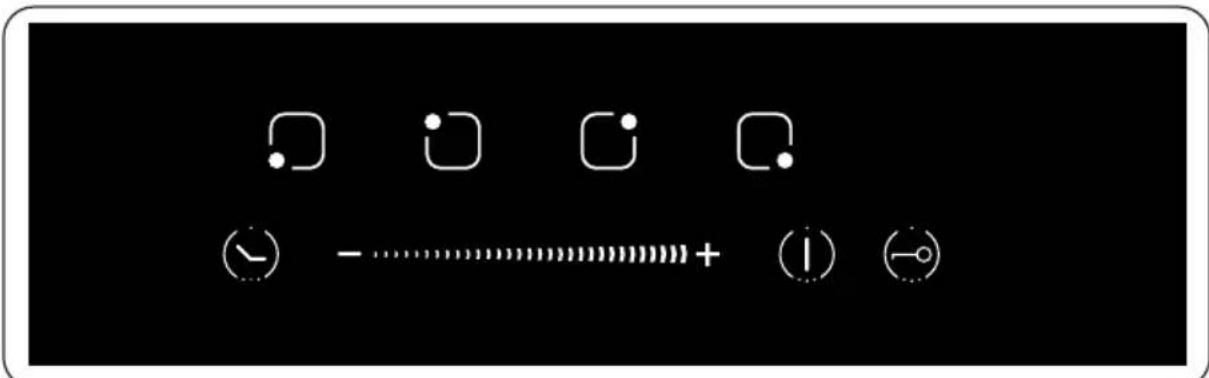
CHAPTER 3. USER INTERFACE
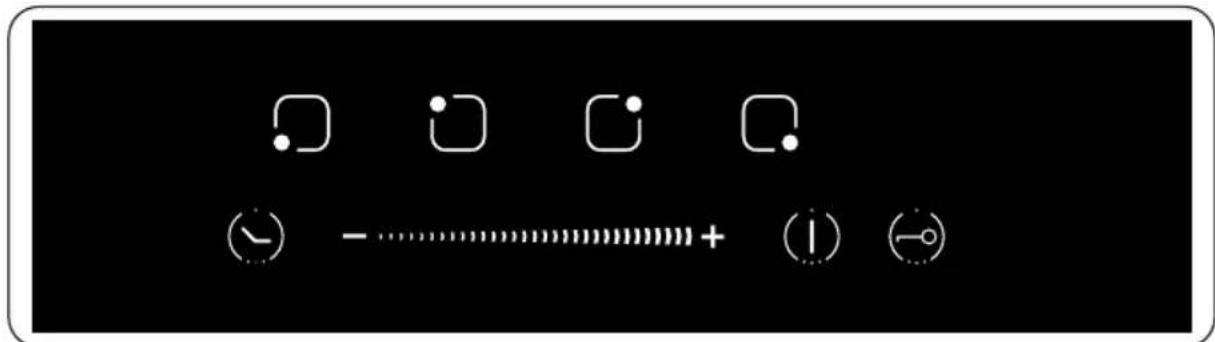
| Reference Description | |
A Zone sc     | |
BON / OFF key  | |
C P  | |
DTimer key  | |
E CHILD LO  |
CHAPTER 4. PRODUCT FUNCTIONS
• The ceramic hob caters for all kind of cooking, with its radiant heat cooking zones and its electronic touch controls and multi-functions, making it the ideal choice for the modern family.
- The ceramic hob is extremely user-friendly, durable and safe.
CHAPTER 5. SPECIAL FUNCTIONS
PROTECTION FOR OVER-HEATING
A sensor monitors the temperature in the cooking zones. When the temperature exceeds a sefe level, the cooking zone is automatically switched off.
RESIDUAL HEAT INDICATOR
When the hob has been operating for the same time, there will be some residual heat. The letter 'H' appears to warn tou that it is too hot to touch the surface.
AUTO SHUTDOWN PROTECTION
Auto shut down is a safety protection function for your ceramic hob. It shut down automatically if ever you forget to turn off your cooking. The default working times for various power levels are shown in the below table:
| Power level 1~2 | 3~4 5 9 | |||
| Default working timer (min) | 360 300 240 | 90 |
If the electronic control detects a button being held down for approx 10 seconds it will switch off automatically. The control sends out an audible error signal to warn the sensors have detected the presence of an object. The display will indicate an error code ER03 if the hob is still hot. The display 'H' and ER03 flash alternatively.
CHAPTER 6. BEFORE USING YOUR HOB
- Read this guide, taking special note of the ‘Safety Warnings’ section.
- Remove any protective film that may still be on your Ceramic hob.
CHAPTER 7. USING THE TOUCH CONTROLS
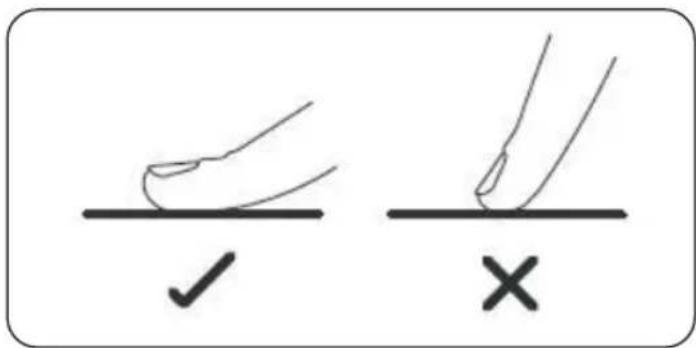
- The controls respond to touch, so you don't need to apply any pressure.
- Use the ball of your finger, not its tip.
- You will hear a beep each time a touch is registered.
• Make sure the controls are always clean, dry, and that there is no object (e.g. a utensil or a cloth) covering them. Even a thin film of water may make the controls difficult to operate.
CHAPTER 8. CHOOSING THE RIGHT COOKWARE
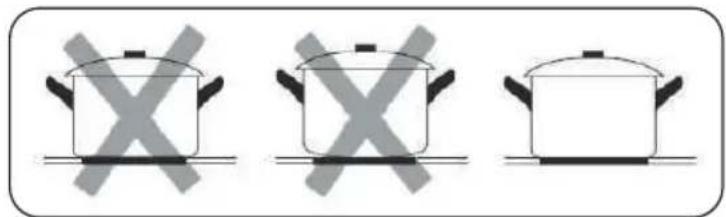
Do not use cookware with jagged edges or a curved base.
natural_image
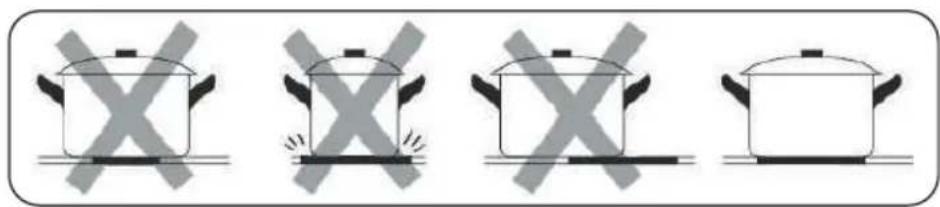
Three identical cooking pots with crossed-out X marks, no text or symbols presentMake sure that the base of your pan is smooth, sits flat against the glass, and is the same size as the cooking zone. Use pans whose diameter is as large as the graphic of the zone selected. Using a pot a slightly wider energy will be used at its maximum efficiency. If you use smaller pot efficiency could be less than expected. Pot less than 140 mm could be undetected by the hob. Always centre your pan on the cooking zone.
natural_image
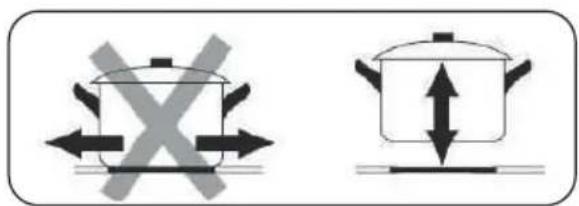
Four identical cooking pots with crossed-out X marks, arranged horizontally (no text or symbols)Always lift pans off the ceramic hob - do not slide, or they may scratch the glass.
CHAPTER 9. USING YOUR CERAMIC HOB
TO START COOKING
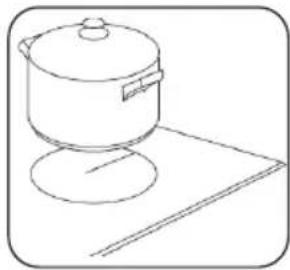
- Place a suitable pan on the cooking zone that you wish to use.
• Make sure the bottom of the pan and the surface of the cooking zone are clean and dry.
-
Touch the ON/OFF key for 1 seconds. After power on, the buzzer beeps once, all displays show „0“, indicating that the ceramic hob has entered the state of standby mode.
-
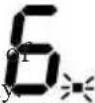
According to the heating zone where the pan is placed, select a relevant zone select key by pressing key (A). The symbol 0. selected will be flashing.
-
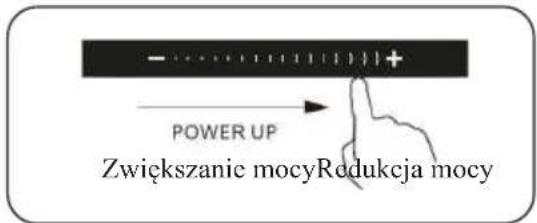
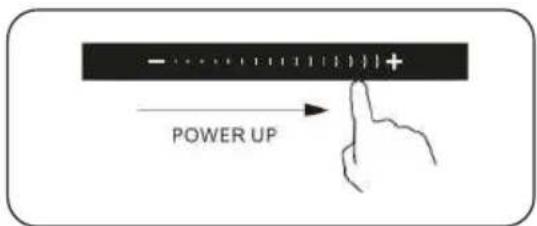
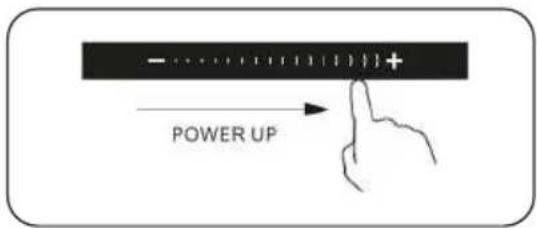
Adjust heat setting by touching the slider regulating key (C) control.
natural_image
Line drawing of a cooking pot on a stand (no text or symbols)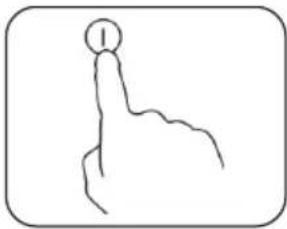
natural_image
Simple line drawing of a hand pointing upward with a circular mark on the index finger (no text or symbols)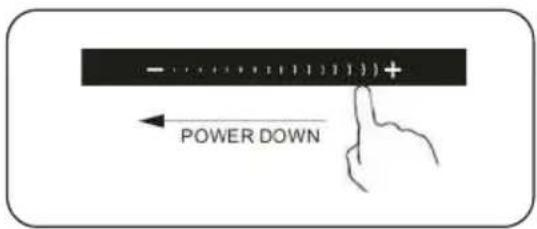
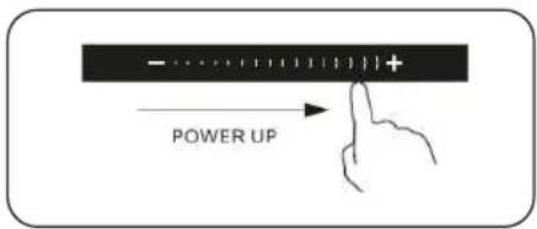
- If you don't choose a heat setting within 20 seconds, the ceramic hob will automatically switch off. You will need to start again at step 2.
- You can modify the heat setting at any time during cooking.
USING CHILD LOCK FUNCTION
- You can lock the controls to prevent unintended use (for example children accidentally turning the cooking zones on).
- When the controls are locked, all the controls except the OFF control are disabled.
To lock the controls
press the -○ key Start child lock
The hob emits a beep and the indicator will show „Lo”
To unlock the controls
- press the 🔍 key Relieving child lock
- You can now start using your hob.
USING THE TIMER
- You can set it to turn one the cooking zone off after the set time is up.
-
You can set the timer for up to 99 minutes.
-
Select the relevant cooking zone which is working by touching the zone select key (A).
-
Press the timer key , the timer indicators will show „00”.
-
Using the „+” or „—” buttons, you can realize the setting of timing from 1 to 99 minutes.
-
When the time is set, it will begin to count down immediately. The indicator will return to show power level after 5 seconds. The red dot next to power level indicator will illuminate indicating that zone has set timer.
-
If you need to check the remaining time, you can operate step 1 and step 2 again.
-
When cooking timer expires the corresponding cooking zone will be switch automatically. Other cooking zone will keep operating if they are turned on previously
- The timer function only work when at least one cooking is turned on.
- If you do not select any zone and touch the timer (F) directly to active the timer function, it only work as a Minute Minder. Buzzer will only bips for seconds and the timer indicator will turn off when the setting time finished, but cooking zones will not be switch off and still working.
CHAPTER 10. CARE AND MAINTENANCE

WARNING
Always switch off the electricity supply before performing maintenance work. In the event of a fault, contact customer services.
CARE

Damaged power cables should be replaced by a competent person or qualified electrician.
For domestic use only.
Never place an empty pan on the hob as this will cause an error message to appear on the control panel.
When a cooking zone has been on for a long time, the surface remains hot for some time afterwards so do not touch the ceramic surface.
For sealed foods, please do not heat them before opening removing the lid so as to avoid any dangers of explosion due to heating expansion.
If the surface of the hob is cracked, disconnect from power supply to avoid any possibility of electric shocks.

Do not place rough or uneven pans on the hob, as they could damage the ceramic surface.
Avoid banging pots and pans down on the hob. The ceramic surface is tough but not unbreakable.
Do not detergents or flammable materials beneath the hob.
APPLIANCE CLEANLINESS

CAUTION
- Avoid rubbing with any abrasive or with the base of the pans, etc, as this will wear the markings on the top of the ceramic hob over time.
- Clean the ceramic hob on a regular basis to prevent the build up of food residue
• The appliance should be cleaned after use.
- The surface of the ceramic hob may be easily cleaned in the following way:
| Type of dirt Cleaning | method Cleaning materials | |
| Lime scale | Apply white vinegar to the surface, then wipe it dry with soft cloth | Special ceramic cleaner |
| Burnt-on stains | Clean with damp cloth and dry it with a soft cloth | Special ceramic cleaner |
| Light stains | Clean with damp cloth and dry it with a soft cloth | Cleaning sponge |
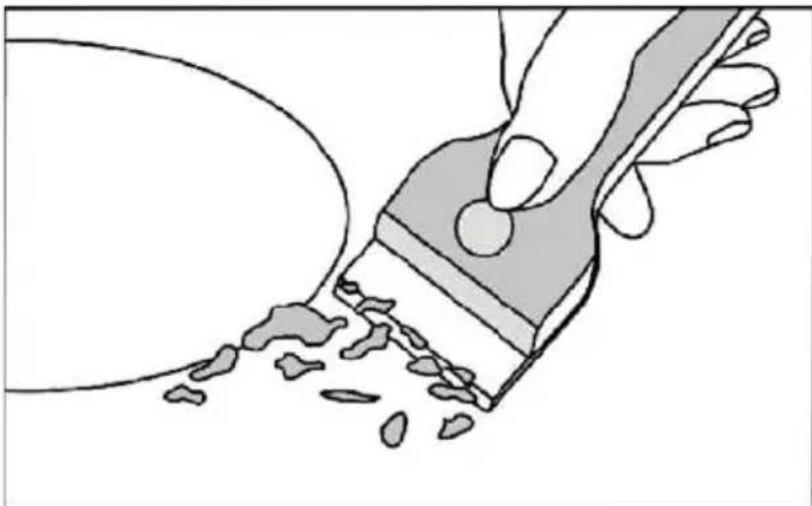
| Melted plastics | Use a scraper suitable for ceramic glass to remove residue | Special ceramic cleaner |
By means of scraper immediately remove any aluminum foil bits, food spills, grease splashes, suger marks and other high sugar content food from the surface in order to avoid damaging the hob. Subsequently clean the surface with some towel and appropriate product, rinse with water and dry by means of a clean cloth. Under no circumstance should sponges or abrasive cloths be used; also avoid using aggressive chemical detergents such as oven sprays and spot removers.
natural_image
Illustration of a paintbrush applying paint to a surface with scattered particles (no text or symbols)CHAPTER 11. TROUBLE SHOOTING
Before calling the customer services, please check that the appliance is correctly connected, any of the following cases are not covered by the guarantee.
- Damage caused by improper use, storage or maintenance
- Damage caused by unauthorised disassembly and repair
• Damage caused by misuse
• Using the ceramic hob for commercial purposes
If an abnormality comes up, the ceramic hob will enter the protective state automatically and display corresponding protective codes.
| Error messageER03 | Possible cause What to do | |
| Water or pot on the glass over the control | Clean the user interface | |
| E | The thermocouple was loose or broken | Please contact the supplier to reconnect the thermocouple |
| ER21 | The temperature inside the produce was too high | The produce must be stopped and cooling |
The above are the judgment and inspection of common failures. Please do not disassemble the unit by yourself to avoid any dangers and damages to the ceramic hob and please contact the supplier.
CHAPTER 12. TECHNICAL SPECIFICATION
| Cooking Hob Ceramic Hob | |
| Cooking Zones 4 zones | |
| Supply Voltage 220-240V~ | |
| Installed Electric Power 6000W(230V) | |
| Product size LxWxH(mm) 590x520x52 | |
| Building-in Dimensions AxB (mm) 560x490 |
Weight and Dimensions are approximate. Because we continually strive to improve our products we may change specifications and designs without prior notice.
CHAPTER 11. INSTALLATION
SELECTION OF INSTALLATION EQUIPMENT
Cut out the work surface according to the sizes shown in the drawing.
For the purpose of installation and use, a minimum of 5 cm space shall be preserved around the hole. Be sure the thickness of the work surface is at least 30 mm. Please select heat-resistant work surface material to avoid larger deformation caused by the heat radiation from the hotplate. As shown below:
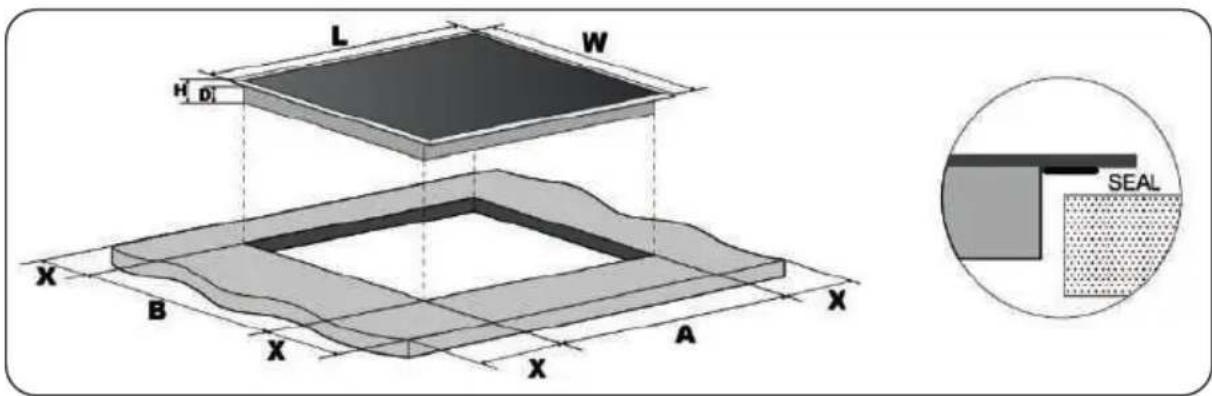
| L(mm) W(mm) H(mm) D(mm) A(mm) B(mm) X(mm) | ||||||
| 590 520 | 52 | 48 560 | 490 | 50 mini | ||
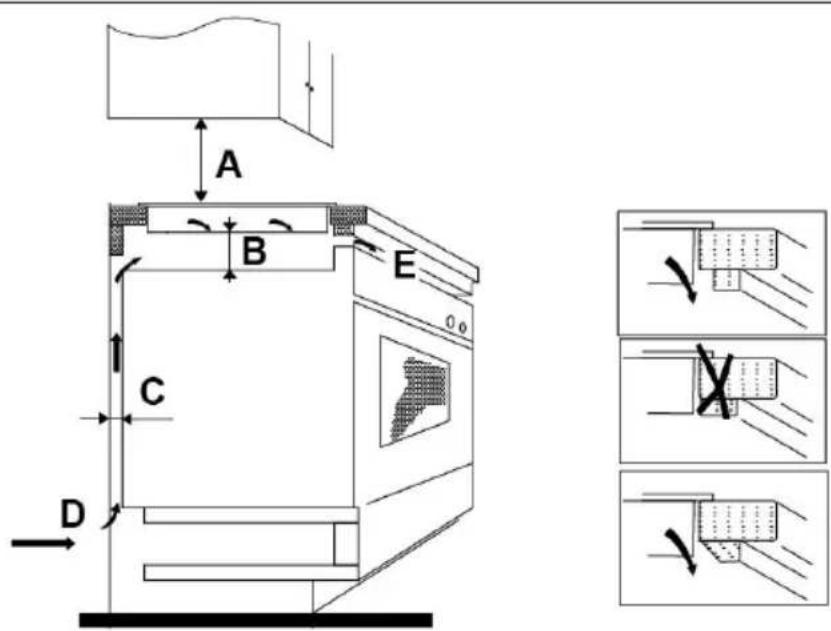
Under any circumstances, make sure the Ceramic cooker hob is well ventilated and the air inlet and outlet are not blocked. Ensure the ceramis cooker hob is in good work state. As shown below

NOTE
The safety distance between the hotplate and the cupboard above the hotplate should be at least 650 mm.
• the work surface is square and level, and no structural members interfere with space requirements
• the work surface is made of a heat-resistant material
- if the hob is installed above an oven, the oven has a built-in cooling fan
• the installation will comply with all clearance requirements and applicable standards and regulations
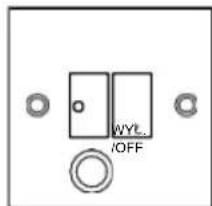
- a suitable isolating switch providing full disconnection from the mains power supply is incorporated in the permanent wiring, mounted and positioned to comply with the local wiring rules and regulations. The isolating switch must be of an approved type and provide a 3 mm air gap contact separation in all poles (or in all active [phase] conductors if the local wiring rules allow for this variation of the requirements)
- the isolating switch will be easily accessible to the customer with the hob installed
- you consult local building authorities and by-laws if in doubt regarding installation
- you use heat-resistant and easy-to-clean finishes (such as ceramic tiles) for the wall surfaces surrounding the hob.
WHEN YOU HAVE INSTALLED THE HOB, MAKE SURE THAT
- the power supply cable is not accessible through cupboard doors or drawers
- there is adequate flow of fresh air from outside the cabinetry to the base of the hob
- if the hob is installed above a drawer or cupboard space, a thermal protection barrier is installed below the base of the hob
- the isolating switch is easily accessible by the customer
INSTALLATION
fig. 2
natural_image
Diagram of a layered electronic component with a labeled part [02] (no text or symbols on the diagram itself)02
[04] × 1
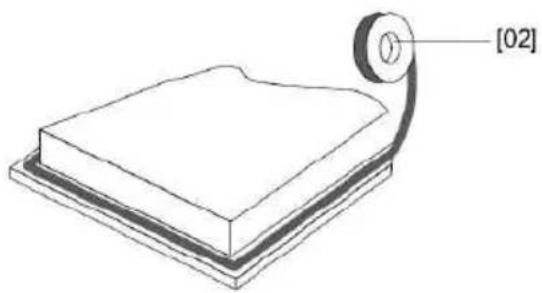
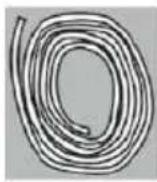
Stretch out the supplied seal along the underside edge of the hob, ensuring the ends overlap.
03
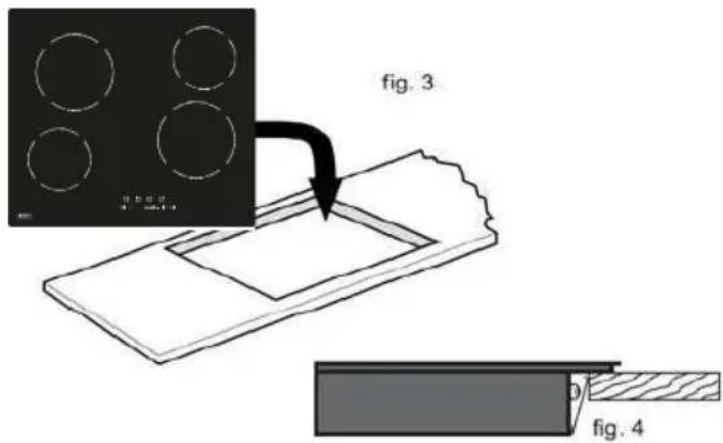
Do not use adhesive to fix the hob into the worktop. Once the seal is fitted position the hob into the cutout in the worktop. Apply gentle downwards pressure onto the hob to push it into the worktop ensuring a good seal around the outer edge (fig.4).

CAUTIONS
- The ceramic hotplate must be installed by qualified personnel or technicians. We have professionals at your service. Please never conduct the operation by yourself.
- The hob will not be installed directly above a dishwasher, fridge, freezer, washing machine or clothes dryer, as the humidity may damage the hob electronics
- The induction hotplate shall be installed such that better heat radiation can be ensured to enhance its reliability.
- The wall and induced heating zone above the table surface shall withstand heat.
- To avoid any damage, the sandwich layer and adhesive must be resistant to heat
CONNECTING THE HOB TO THE MAINS POWER SUPPLY
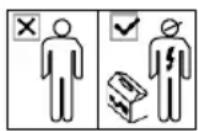
All installation work must be carried out by a competent person or qualified electrician. Before connecting the mains supply ensure that the mains voltage corresponds to the voltage on the rating plate inside the cooker hood.

WARNING:
THIS APPLIANCE MUST BE ARTHED.

This hob must be connected to the mains power supply only by a suitably qualified person.
Before connecting the hob to the mains power supply, check that:
- the domestic wiring system is suitable for the power drawn by the hob.
- the voltage corresponds to the value given in the rating plate.
- the power supply cable sections can withstand the load specified on the rating plate.
To connect the hob to the mains power supply, do not use adapters, reducers, or branching devices, as they can cause overheating and fire.
The power supply cable must not touch any hot parts and must be positioned so that its temperature will not exceed 75^ C at any point.

NOTE
Check with an electrician whether the domestic wiring system is suitable without alterations. Any alterations must only be made by a qualified electrician.
This appliance is supplied with a 3 core mains cable coloured as follows:
Brown = L or Live
Blue = N or Neutral
Green and Yellow = E or Earth
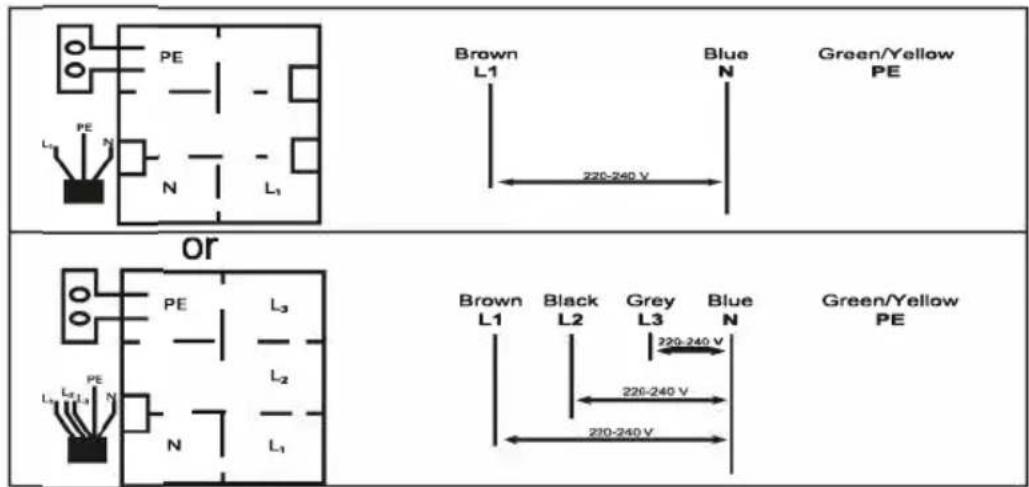
- If the cable is damaged or to be replaced, the operation must be carried out the by after-sale agent with dedicated tools to avoid any accidents.
- If the appliance is being connected directly to the mains an omnipolar circuit-breaker must be installed with a minimum opening of 3mm between contacts.
- The installer must ensure that the correct electrical connection has been made and that it is compliant with safety regulations.
• The cable must not be bent or compressed. - The cable must be checked regularly and replaced by authorised technicians only.
CHAPTER 12. DISPOSAL OF USED EQUIPMENT
This device has been designed and manufactured of high-quality reusable materials and components.
The symbol of the crossed waste container placed on the product (Fig. A) means that the product is subject to selective collection in accordance with the provisions of Directive 2012/19/EU of the European Parliament and of the Council. a crossed-out wheelie bin symbol (Fig. B) placed on the product means that the product contains batteries that are subject to separate collection in accordance with the provisions of Directive 2006/66/EC of the European Parliament and of the Council. Such marking informs that electrical and electronic equipment and batteries (if any) must not be disposed of with other household waste after the period of use.
The user is obliged to return waste equipment and batteries (if any) to collection points for waste electrical and electronic equipment and batteries (if any). Collectors of such waste, including waste equipment collectors, treatment plants, distributors (shops), municipal waste separate collection points (municipal units), and other entities specified by law form an appropriate system to return this kind of equipment.
Correct disposal of waste equipment and batteries (if any) allows avoiding consequences that may be harmful to health and the environment, caused by the possible presence of hazardous components in the equipment and batteries, and inappropriate storage and processing of such equipment and batteries. Households play an important role in contributing to the reuse and recovery, including recycling, of waste equipment. At this stage, attitudes are formed, affecting the common good, which is a clean natural environment.
Moreover, households are one of the largest users of small equipment and the rational management thereof at this stage affects the recovery of secondary raw materials. Penalties may be imposed in accordance with national legislation for improper disposal of this product. If the device has a lock, please remove it for the safety of all persons who may later come into contact with the device. Some refrigerators and freezers contain insulation material and CFC refrigerant. Therefore, be careful not to pollute the environment when you dispose of your old refrigerator.
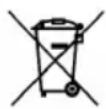
Fig. A
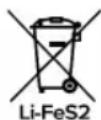
Fig. B
KERNAU
NÁVOD K OBSLUZE / INSTALACI
SKLOKERAMICKÁ DESKA
KHC 6412
natural_image
Simple diagram with four circles and a row of small symbols below (no text or labels)natural_image
Four circular white outlines on a black electrical stove burner, no text or symbols presentVÝKON VARNÉ ZÓNY
| Varné zóna Celkový výkon (220-240V~ 50/60Hz) | |
| 1200W |
 | 1800W |
| 1200W |
 | 1800W |
| Celkový výkon 6000W (230V~) | |
KAPITOLA 3. UŽIVATELSKÉ ROZHRANÍ
INDIKÁTOR ZBYTKOVÉHO TEPLA
KAPITOLA 8. VÝBĚR SPRÁVNÉHO KUCHYŇSKÉHO NÁDOBÍ
natural_image
Three identical cooking pots with crossed-out X marks, no text or symbols presentnatural_image
Four identical cooking pots with crossed-out X marks, arranged horizontally (no text or symbols)KAPITOLA 9. POUŽÍVÁNÍ SKLOKERAMICKÉ DESKY
PRO ZAHÁJENÍ VAŘENÍ
natural_image
Line drawing of a cooking pot on a stand (no text or symbols)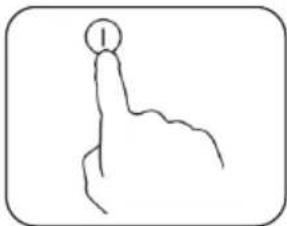
natural_image
Simple line drawing of a hand pointing upward with a numbered circle (no text or symbols)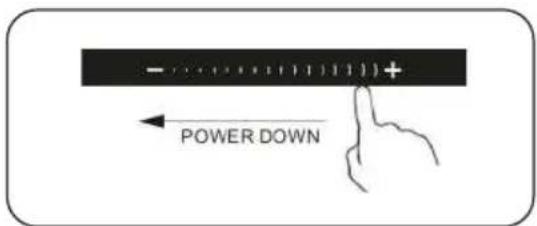
natural_image
Illustration of a hand using a paintbrush to brush residue in liquid (no text or symbols)KAPITOLA 11. ŘEŠENÍ PROBLÉMŮ
| L(mm) W(mm) H(mm) D(mm) A(mm) B(mm) X(mm) | ||||||
| 590 520 | 52 48 560 | 490 | 50 mini | |||
natural_image
Simple diagram with four circles and a row of small symbols below (no text or labels)natural_image
Four circular white outlines on a black electrical circuit board, no text or symbols presentnatural_image
Three identical cooking pots with crossed-out X marks, no text or symbols presentnatural_image
Four identical cooking pots with crossed-out X marks, shown in a row (no text or symbols)natural_image
Line drawing of a cooking pot on a stand (no text or symbols)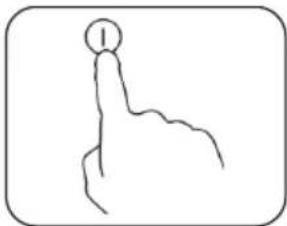
natural_image
Simple line drawing of a hand pointing upward with a numbered circle (no text or symbols)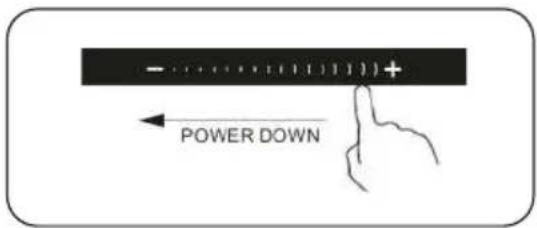
natural_image
Illustration of a hand using a paintbrush to brush the surface of food, with no visible text or symbols.| L(MM) | W(MM) | H(MM) | D(MM) | A(MM) | B(MM) | X(MM) |
| 590 | 520 | 52 | 48 | 560 | 490 | 50mihi |
natural_image
Diagram of a rectangular object with a curved arrow and label [02] pointing to its top surface (no text or symbols on the object itself)02
[04] × 1
- SZANOWNY KLIENCIE,
- ROZDZIAŁ 3. INTERFEJS UŻYTKOWNIKA
- ROZDZIAŁ 8. WYBÓR WŁAŚCIWYCH NACZYŃ KUCHENNYCH
- ROZDZIAŁ 9. KORZYSTANIE Z PŁYTY CERAMICZNEJ
- ABY ROZPOCZĄĆ GOTOWANIE
- ROZDZIAŁ 11. ROZWIĄZYWANIE PROBLEMÓW
- INSTRUCTION MANUAL / INSTALLATION MANUAL
- Thank you for choosing this product.
- CONTENTS
- CHAPTER 1. SAFETY WARNINGS
- WARNING
- DANGER OF FIRE
- CAUTION
- NOTE
- WARNING / DANGER OF FIRE
- Congratulations on the purchase of your new ceramic hob.
- CHAPTER 2. PRODUCT OVERVIEW
- Top view
- HEATING ZONE POWER
- CHAPTER 3. USER INTERFACE
- CHAPTER 4. PRODUCT FUNCTIONS
- CHAPTER 5. SPECIAL FUNCTIONS
- PROTECTION FOR OVER-HEATING
- RESIDUAL HEAT INDICATOR
- AUTO SHUTDOWN PROTECTION
- CHAPTER 6. BEFORE USING YOUR HOB
- CHAPTER 7. USING THE TOUCH CONTROLS
- CHAPTER 8. CHOOSING THE RIGHT COOKWARE
- CHAPTER 9. USING YOUR CERAMIC HOB
- TO START COOKING
- USING CHILD LOCK FUNCTION
- To lock the controls
- To unlock the controls
- USING THE TIMER
- CHAPTER 10. CARE AND MAINTENANCE
- CARE
- APPLIANCE CLEANLINESS
- CHAPTER 11. TROUBLE SHOOTING
- CHAPTER 12. TECHNICAL SPECIFICATION
- CHAPTER 11. INSTALLATION
- SELECTION OF INSTALLATION EQUIPMENT
- WHEN YOU HAVE INSTALLED THE HOB, MAKE SURE THAT
- INSTALLATION
- CAUTIONS
- CONNECTING THE HOB TO THE MAINS POWER SUPPLY
- WARNING:
- CHAPTER 12. DISPOSAL OF USED EQUIPMENT
- KERNAU
- NÁVOD K OBSLUZE / INSTALACI
- KAPITOLA 3. UŽIVATELSKÉ ROZHRANÍ
- INDIKÁTOR ZBYTKOVÉHO TEPLA
- KAPITOLA 8. VÝBĚR SPRÁVNÉHO KUCHYŇSKÉHO NÁDOBÍ
- KAPITOLA 9. POUŽÍVÁNÍ SKLOKERAMICKÉ DESKY
- PRO ZAHÁJENÍ VAŘENÍ
- KAPITOLA 11. ŘEŠENÍ PROBLÉMŮ
Brand : Kernau
Model : KHC 6412
Category : Cooker