BOB VYSILACKY - Walkie-talkie GoGen - Free user manual and instructions
Find the device manual for free BOB VYSILACKY GoGen in PDF.


| Brand | GoGen |
| Model | BOB VYSILACKY |
| Product Type | PMR446 Two-Way Radio |
| Category | Talkie-Walkie |
| Power Supply | 3 x AAA batteries (not included) |
| Frequency | 446.0 MHz |
| Transmit Power | ERP < 26.99 dBm |
| Number of Channels | 8 |
| Volume Levels | 8 |
| Display Type | LCD screen |
| Display Indications | Channel number, battery level, TX/RX, scan, key lock, volume icon |
| Belt Clip | Removable, included |
| Push-To-Talk (PTT) Button | Yes, press and hold to transmit |
| Call Tone | Yes, press Call button to send paging tone |
| Channel Scan | Yes, scans all 8 channels for activity |
| Monitor Function | Yes, listens for weaker signals on current channel |
| Key Lock | Yes, prevents accidental button presses |
| Roger Beep | Yes, automatically transmitted when PTT released |
| Power Saving Mode | Automatic after 4 seconds of inactivity |
| Low Battery Indicator | Yes, icon blinks and unit beeps before auto shut-off |
| Cleaning Instructions | Wipe with a soft, dry cloth. Do not use harsh chemicals. |
| Safety Warning | Keep plastic bag away from children to avoid suffocation. |
| Disposal | Do not dispose as household waste. Recycle according to local regulations (WEEE). |
| Repairability | No user-serviceable parts. Contact authorized service for repairs. |
Frequently Asked Questions - BOB VYSILACKY GoGen
User questions about BOB VYSILACKY GoGen
0 question about this device. Answer the ones you know or ask your own.
Ask a new question about this device
Download the instructions for your Walkie-talkie in PDF format for free! Find your manual BOB VYSILACKY - GoGen and take your electronic device back in hand. On this page are published all the documents necessary for the use of your device. BOB VYSILACKY by GoGen.
USER MANUAL BOB VYSILACKY GoGen
natural_image
Green GoGEN walkie-talkie device with digital display and control buttons (no readable text or symbols)
natural_image
Green and gray handheld device with white rabbit illustrations (no text or symbols)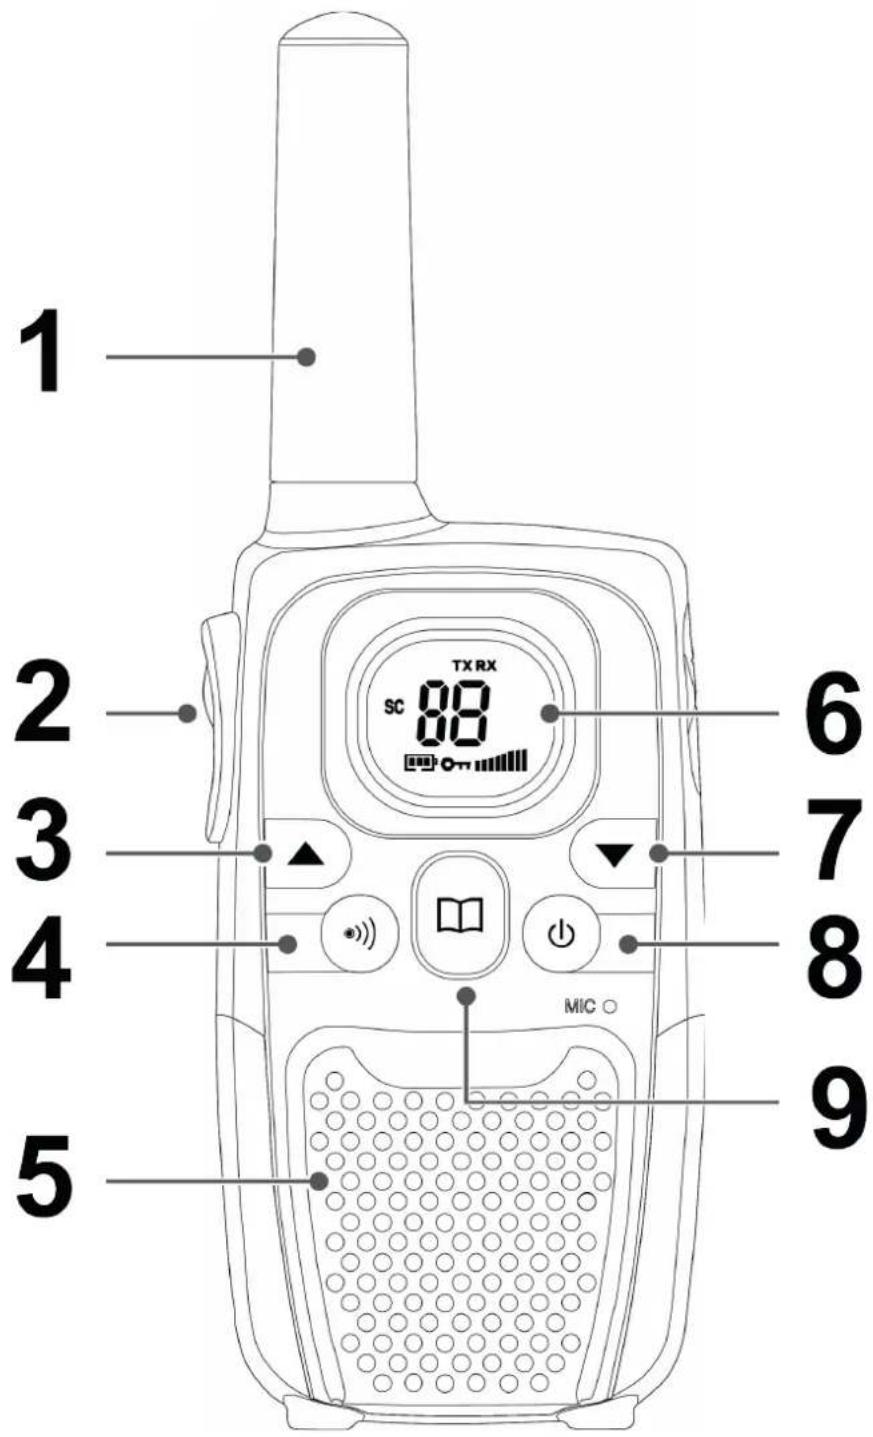
VYOBRAZENÍ VÝROBKU A OVLÁDACÍ TLAČÍTKA
1. Anténa
natural_image
Diagram of a device interior with an arrow indicating upward movement, no text or symbols present2. Komunikačné tlačidlo PTT (Push To Talk)
natural_image
Diagram of a vehicle's rearview and side profile showing a device with an upward arrow (no text or symbols)Merač kapacity batérií
2. Przycisk PTT (Push To Talk)
natural_image
Diagram of a mobile phone rear panel with an upward arrow indicating the direction (no text or symbols present)2. PTT (Push To Talk) gomb
natural_image
Diagram of a device's internal structure with battery pack and four cylindrical batteries, showing no text or symbols.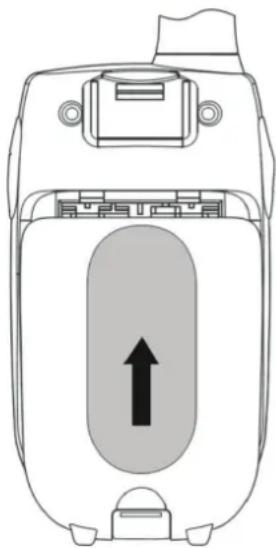
natural_image
Diagram of a device interior with an arrow indicating upward movement, no text or symbols presentElemek
2. PTT (Push To Talk) button
Press and hold to transmit.
3. Up button
Press to change channels, volume, and to select settings during programming.
4. Call button
Press to send a ringing tone to other PMR units.
5. Speaker
6. LCD screen
Displays the current Channel selection and other radio symbols.
7. Down button
Press to change channels, volume, and to select settings during programming.
8. Power button
Press and hold to turn the PMR unit ON or OFF.
9. Menu button
Press to program the PMR settings.
LCD SCREEN

Channel Number. Changes from 1 to 8 as selected by the user.

Displays when battery level goes low.

Displays when Scan function is activated.

Displayed when Key Lock function is activated.

Displayed when transmitting a signal..

Displayed when receiving a signal.

Displayed the full volume level.
INSTALLATION
Removing the Belt clip
✗ Pull the belt clip latch away from the PMR.
✗ While pulling the belt clip latch, push up the belt clip.
Installing the Belt clip
✗ Slide the belt clip into the slot.
✗ A “click” indicates the belt clip is locked into its position.

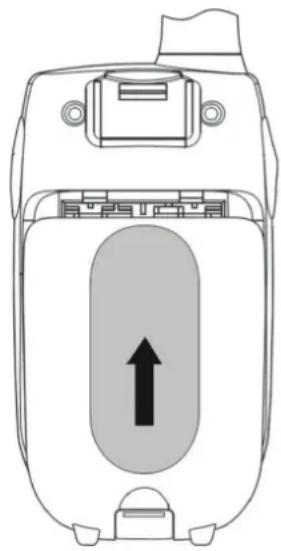
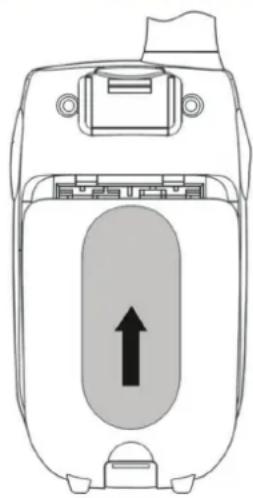
Installing the Batteries
✗ Slide down the battery compartment cover.
✗ Insert the 3xAAA batteries. Position the batteries according to the polarity marking on the battery compartment.
✗ Replace the battery cover.
Notes: Use only same type and make of batteries on the PMR units. The PMR units have a built-in Power Saver (PS) for maximum battery life, but when not in use, turn the units OFF to save battery power. Remove the batteries if the units will not be used for a long period of time.

natural_image
Diagram of a device's internal battery pack and four cylindrical batteries, showing no text or symbols on the main body.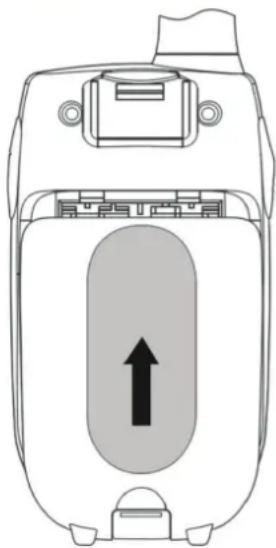
natural_image
Diagram of a device casing with an arrow indicating upward motion (no text or symbols present)Battery meter
The battery icon is located in the left corner of the LCD panel. This battery icon will displayed when low battery status. These indicate that the battery level reaches its minimum level, at this stage the handset will emit two beep tones and then it will automatically turn Off the power.
Battery life
The PMR has a built in power saver feature to make the batteries last longer. But when you are not using the handset, it's better to switch off to save the battery power.
OPERATION
Turning the Unit ON/OFF
✗ To Turn ON: Press and hold the 8 (Power) button. A special “beep” sound will be heard. The LCD screen will display the current channel.
✗ To switch OFF: Press and hold the 8 (Power) button. A special “beep” sound will be heard and the LCD screen will turn blank.
Adjusting the speaker volume
There are 8 volume levels, the current speaker volume level is displayed on the LCD screen. To adjust the speaker volume level, press the3 (Up) button to in-crease, or press 7 (Down) button to decrease. The LCD screen will display the speaker volume icon bars ascending, or descending respectively.
Receiving a Call
The unit is continuously in receive mode when the unit is turned ON and not transmitting. When a signal is received on the current channel, the receive signal icon "RX" will be displayed on the LCD screen.
Transmitting (sending)
✗ Press and hold the 2 (PTT) button to transmit your voice. The transmit signal icon "TX" will display on the LCD screen.
× Hold the unit in a vertical position with the Mic (Microphone) 5 cm away from the mouth. While holding the 2 (PTT) button, speak into the microphone in a normal tone of voice.
✗ Release the 2 (PTT) button when you have finished transmitting
Important: In order for other people to receive your transmission, they must also be on the same channel that you are currently using. Refer to the „Changing Channel“ section for more information. When the 2 (PTT) and/or 4 (Call) buttons are continuously pressed, your PMR cannot receive any transmissions.
Roger Beep
The Roger Beep is a tone which is automatically transmitted whenever the 2 (PTT) button is released. This alerts the receiving party that you have ended the transmission, and you are now in receive mode.
Changing Channels
The PMR has 8 available channels. To change channels, in normal mode:
× Press the 9 (Menu) button, the channel icon „1“ on the LCD screen will start blinking.
× While the Channel icon is blinking, press the 3 (Up) or 7 (Down) button to select the desired
× channel. The channel changes from 1 to 8, or vice versa.
✗ Press the 9 (Menu) button to confirm your setting and return to the standby mode.
Calling (Paging) Tone
You can use the 4 (Call) button to send a tone to other users on the same channel. To activate this feature: With the PMR in normal mode, press and release the 4 (Call). The unit will transmit a 2-second page tone to the other unit/s set with the same channel within transmitting range.
Channel Scan
Your radio can scan the 8 channels to any activity. This allows to find other radios without having to change the channel. To activate this feature:
✗ Press and hold the 9 (Menu) and 3 (Up) button at the same time and channel scanning will start immediately, with SC displayed on the screen and the channel number cycling through the channels. When a signal is detected, the unit will pause on that channel, while receiving the signal and for a further 3 seconds.
✗ Press the 2 (PTT) button to stop scanning and talk on that channel, or press the 3 (Up) or 7 (Down) button to manually start the scanning.
✗ To stop scanning, press the 9 (Menu) button and return to standby mode.
Monitor Feature
You can use the Monitor feature to check for weaker signals in the current channel. To activate this feature:
✗ Press and hold the 9 (Menu) and 7 (Down) button at the same time. The receiving icons “RX” appears on the display. Your handset will pick up any signals on the current channel.
✗ Press the 9 (Menu) button to stop the monitoring.
To lock button
With the buttons lock you can still transmit (TX), or call the current channel, but you can not change the volume. To activate this feature: In the standby mode, press and hold the 9 (Menu) until the On icon appears on the LCD screen.
To unlock the buttons
Press and hold again the 9 (Menu) button until the icon disappears on the LCD screen.
AUXILIARY FEATURES
Power Saving
Your PMR unit has special circuitry designed to extend the life of your battery. When the unit is not used for 4 seconds, it will automatically switch into a low power mode. The Power Saving feature does not affect the PMR ability to receive transmissions. When a signal is detected, it automatically returns to full power mode.
Low Battery Meter Indicator
The PMR can detect the low battery level when battery voltage goes low. The battery icon will display the low battery status as follows. When battery voltage at low battery level. The empty battery symbol will appear at this stage and continue to blink. The battery icon will continue to blink until it totally drain the battery voltage.
Note: To have good communication, once the battery reach in low battery level, replace the batteries into new ones.
SPECIFICATIONS
Transmitting frequency 446,0 MHz / ERP < 26,99 dBm
WE RESERVE THE RIGHT TO CHANGE TECHNICAL SPECIFICATIONS.


TO AVOID DANGER OF SUFFOCATION, KEEP THE PLASTIC BAG AWAY FROM BABIES AND CHILDREN. DO NOT USE THIS BAG IN CRIBS, BEDS, CARRIAGES OR PLAYPENS. THIS BAG IS NOT A TOY.
Disposal of old Electrical & Electronic Equipment (Applicable in the European Union and other European countries with separate collection systems).

This symbol on the product or on its packaging indicates that this product shall not be treated as household waste. Instead it shall be handed over to the applicable collection point for the recycling of electrical and electronic equipment. By ensuring this product is disposed of correctly, you will help prevent potential negative consequences for the environment and human health, which could otherwise be
caused by inappropriate waste handling of this product. The recycling of materials will help to conserve natural resources. For more detailed information about recycling of this product, please contact your local Civic Office, your household waste disposal service or the shop where you purchased the product.
Hereby, ETA a.s. declares that the radio equipment type BOBVYSILACKY is in compliance with Directive 2014/53/EU. The full text of the EU declaration of conformity is available at the following internet address: http://www.gogen.cz/declaration_of_conformity
2. Kommunikationstaste PTT(Push To Talk)
natural_image
Diagram of a mobile phone casing with an upward arrow indicating motion (no text or symbols)natural_image
Abstract black and white circular logo with stylized white lines inside (no text or symbols)
natural_image
Simple line drawing of two rabbits, one smiling and the other looking upward (no text or symbols)
- VYOBRAZENÍ VÝROBKU A OVLÁDACÍ TLAČÍTKA
- Anténa
- Komunikačné tlačidlo PTT (Push To Talk)
- Merač kapacity batérií
- Przycisk PTT (Push To Talk)
- PTT (Push To Talk) gomb
- Elemek
- PTT (Push To Talk) button
- Up button
- Call button
- Speaker
- LCD screen
- Down button
- Power button
- Menu button
- LCD SCREEN
- INSTALLATION
- Removing the Belt clip
- Installing the Belt clip
- Installing the Batteries
- Battery meter
- Battery life
- OPERATION
- Turning the Unit ON/OFF
- Adjusting the speaker volume
- Receiving a Call
- Transmitting (sending)
- Roger Beep
- Changing Channels
- Calling (Paging) Tone
- Channel Scan
- Monitor Feature
- To lock button
- To unlock the buttons
- AUXILIARY FEATURES
- Power Saving
- Low Battery Meter Indicator
- SPECIFICATIONS
- WE RESERVE THE RIGHT TO CHANGE TECHNICAL SPECIFICATIONS.
- Kommunikationstaste PTT(Push To Talk)
Brand : GoGen
Model : BOB VYSILACKY
Category : Walkie-talkie