GS2018PS2 - Switch Cudy - Free user manual and instructions
Find the device manual for free GS2018PS2 Cudy in PDF.


| Product Type | Managed Gigabit Ethernet Switch with PoE+ |
| Model | GS2018PS2 |
| Ports | 18 x 10/100/1000 Mbps PoE+ ports, 2 x Combo SFP slots |
| PoE Budget | Up to 250W |
| Switching Capacity | 40 Gbps |
| MAC Address Table | 8K entries |
| VLAN Features | 802.1Q, MAC-based, Protocol-based, Voice VLAN, Surveillance VLAN |
| Security Features | ACL (MAC, IPv4, IPv6), 802.1X, DHCP Snooping, IP Source Guard, ARP Inspection, Port Security |
| Quality of Service | 802.1p, DSCP, Queue scheduling, Rate Limiting |
| Management | CLI (Telnet/SSH), Web (HTTP/HTTPS), SNMP v1/v2c/v3, RMON |
| Spanning Tree | STP, RSTP, MSTP with BPDU Guard/Filter |
| Link Aggregation | LACP, up to 8 groups |
| IGMP/MLD Snooping | v1/v2/v3, querier, fast leave, static groups |
| Layer 3 Features | Static routing (IPv4 & IPv6), ARP, VLAN interfaces |
| Diagnostics | Ping, Traceroute, Cable Diagnostics, Fiber Transceiver Monitoring |
| Power Supply | AC 100-240V, 50-60Hz |
| Power Consumption | Max 30W (without PoE load) |
| Dimensions (W x D x H) | 17.5 x 8 x 1.75 inches (44.5 x 20.3 x 4.45 cm) |
| Weight | Approx. 5 lbs (2.27 kg) |
| Operating Temperature | 0°C to 50°C (32°F to 122°F) |
| Humidity | 10% to 90% non-condensing |
| Safety & Compliance | CE, FCC Class A, RoHS |
| Maintenance | Clean with dry cloth; no liquid cleaners |
| Spare Parts | Internal fan, power supply unit (replaceable by qualified personnel) |
| Warranty | 3 years limited hardware warranty |
Frequently Asked Questions - GS2018PS2 Cudy
User questions about GS2018PS2 Cudy
0 question about this device. Answer the ones you know or ask your own.
Ask a new question about this device
Download the instructions for your Switch in PDF format for free! Find your manual GS2018PS2 - Cudy and take your electronic device back in hand. On this page are published all the documents necessary for the use of your device. GS2018PS2 by Cudy.
USER MANUAL GS2018PS2 Cudy
Command Line Interface
Managed Switch Software
USER GUIDE
Rev. 1.1
USING THIS DOCUMENT
This document is intended for the software engineer's general information on the usage of switch source files for the chip development of the switch team.
Though every effort has been made to ensure that this document is current and accurate, more information may have become available subsequent to the production of this guide.
REVISION HISTORY
| Revision | Release Date | Summary |
| 1.0 | - | First Release |
| 1.1 | 2019-08-31 | Add Static routing and poe function. |
Table of Contents
Command Line Interface....1
Managed Switch Software 1
1. AAA....11
aaa authentication....11
login authentication 14
ip http login authentication ....16
enable authentication ....16
show aaa authentication....18
show line lists....18
tacacs default-config ....19
tacacs host 20
show tacacs default-config 20
show tacacs....20
show default-config....21
radius host....23
show radius default-config....25
show radius....25
2. ACL 24
mac acl....24
permit (MAC) 24
deny (MAC) 26
ip acl....30
permit (IP) 30
deny (IP)....35
ipv6 acl....40
permit (IPv6)....40
deny (IPv6)......44
bind acl 38
show acl....38
show acl utilization 39
3. Administration 39
configure....39
clear arp....39
clear service 39
enable 41
end 42
exit 42
history....44
hostname....43
interface......45
ip address....45
ip default-gateway 46
ip dhcp 48
ip dns 48
ip dns lookup....50
ipv6 autoconfig....50
ipv6 address....51
ipv6 default-gateway 49
ipv6 dhcp 49
ip service 50
ip session-timeout....52
ip ssh 52
line 54
reboot....53
enable password....53
exec-timeout....55
password-thresh 57
ping 59
traceroute 61
show arp....61
show cpu utilization....63
show history....63
show info 59
show ip 59
show ip dhcp....60
show ip dns 60
show ip http....61
show ipv6....61
Command Line Interface
User Guide
show ipv6 dhcp 62
show line....62
show memory statistics....63
show privilege 65
show username....65
show users 66
show version....66
silent-time....66
ssl....67
system name 67
system contact....69
system location....70
terminal length 70
username....70
4. Authentication Manager....72
authentication....72
authentication (Interface)....74
authentication mac radius....74
authentication mac local....76
authentication guest-vlan....77
authentication guest-vlan (Interface)....79
authentication host-mode....79
authentication max-hosts 81
authentication method 83
authentication order....85
authentication port-control....85
authentication radius-attributes vlan....79
authentication reauth....81
authentication timer inactive....83
authentication timer quiet....83
authentication timer reauth 82
authentication web local....84
authentication web max-login-attempts 86
clear authentication sessions 85
dot1x 85
dot1x guest-vlan....87
dot1x max-req....89
dot1x port-control 89
dot1x reauth 91
dot1x timeout reauth-period....89
dot1x timeout quiet-period 90
dot1x timeout server-timeout 90
dot1x timeout supp-timeout 92
dot1x timeout tx-period....92
show authentication....94
show authentication sessions....97
5. Diagnostic 98
show cable-diag 98
show fiber-transceiver 100
6. DHCP Snooping 102
ip dhcp snooping....102
ip dhcp snooping vlan....102
ip dhcp snooping trust....98
ip dhcp snooping verify 99
ip dhcp snooping rate-limit 100
clear ip dhcp snooping statistics....101
show ip dhcp snooping 103
show ip dhcp snooping interface....103
show ip dhcp snooping binding....104
ip dhcp snooping option....104
ip dhcp snooping option action....106
ip dhcp snooping option circuit-id....108
ip dhcp snooping option remote-id....108
show ip dhcp snooping option....109
ip dhcp snooping database 109
ip dhcp snooping database write-delay....110
ip dhcp snooping database timeout 112
clear ip dhcp snooping database statistics....114
renew ip dhcp snooping database....116
show ip dhcp snooping database....110
7. DoS....111
dos 111
Command Line Interface
User Guide
dos (interface) 114
show dos 114
8. Dynamic ARPInspection....115
ip arp inspection 115
ip arp inspection vlan 115
ip arp inspection trust....115
ip arp inspection validate 116
ip arp inspection rate-limit....117
clear ip arp inspection statistics....117
show ip arp inspection....118
show ip arp inspeciton interface....118
9. GVRP....119
gvrp (Global)....119
gvrp (Interface) 120
gvrp registration-mode 120
gvrp vlan-create-forbid 122
clear gvrp statistics....122
show gvrp statistics....123
show gvrp....124
show gvrp configuration....126
10. IGMP Snooping 128
ip igmp snooping 128
ip igmp snooping report-suppression 128
ip igmp snooping version....129
ip igmp snooping unknown-multicast action 129
ip igmp snooping querier 130
ip igmp snooping vlan 130
ip igmp snooping vlan fastleave 132
ip igmp snooping vlan last-member-query-count....134
ip igmp snooping vlan last-member-query-interval....134
ip igmp snooping vlan query-interval....130
ip igmp snooping vlan response-time 130
ip igmp snooping vlan robustness-variable 131
ip igmp snooping vlan router 131
ip igmp snooping vlan forbidden-port 132
ip igmp snooping vlan static-port 134
ip igmp snooping vlan forbidden-router-port....134
ip igmp snooping vlan static-router-port....134
ip igmp snooping vlan static-group....134
ip igmp snooping vlan group 136
profile range 136
ip igmp profile 136
ip igmp filter 137
ip igmp max-groups....137
ip igmp max-groups action....138
clear ip igmp snooping groups 139
clear ip igmp snooping statistics....139
show ip igmp snooping groups counters....140
show ip igmp snooping groups 141
show ip igmp snooping router 141
show ip igmp snooping querier ....142
show ip igmp snooping 143
show ip igmp snooping vlan 145
show ip igmp snooping forward-all ....145
show ip igmp profile 146
show ip igmp filter....146
show ip igmp max-group....146
show ip igmp max-group action....147
11. IP Source Guard....147
ip source verify....147
ip source binding 148
show ip source interface 149
show ip source binding 150
12. Link Aggregation ....150
lag 150
lag load-balance....151
lapp port-priority 153
lacp system-priority 153
lacp timeout....153
show lacp....153
show lag....155
Command Line Interface
User Guide
13. LLDP 156
clear lldp statistics....156
Ildp 156
lldp rx....157
lldp tx-interval....158
Ildp reinit-delay....160
lldp holdtime-multiplier....160
Ildp Ildpdu....161
lldp med 161
show lldp neighbor 176
show lldp statistics....178
show lldp tlv-overloading 181
14. Logging....183
clear logging....183
logging....183
logging host 183
logging severity....185
show logging....185
15. MAC Address Table....188
clear mac address-table....188
mac address-table aging-time....188
mac address-table static....189
show mac address-table....190
show mac address-table counters....192
show mac address-table aging-time....192
16. MAC VLAN....194
vlan mac-vlan group (Global)....194
vlan mac-vlan group (Interface) 194
show vlan mac-vlan groups....191
show vlan mac-vlan interfaces....192
17. Management ACL....192
management access-list....192
management access-class 193
deny 193
permit....195
no sequence....197
show management access-class 197
show management access-list....199
18. Mirror 199
mirror session destination interface....199
mirror session source interface....201
show mirror 198
19. MLD Snooping .... 199
ipv6 mld snooping....199
ipv6 mld snooping report-suppression 199
ipv6 mld snooping version....201
ipv6 mld snooping unknown-multicast action 201
ipv6 mld snooping vlan....202
ipv6 mld snooping vlan parameters....202
ipv6 mld snooping vlan fastleave....204
ipv6 mld snooping vlan last-member-query-count 206
ipv6 mld snooping vlan last-member-query-interval 206
ipv6 mld snooping vlan query-interval 208
ipv6 mld snooping vlan response-time....208
ipv6 mld snooping vlan robustness-variable 210
ipv6 mld snooping vlan router 210
Command Line Interface
User Guide
ipv6 mld snooping vlan static-port 207
ipv6 mld snooping vlan forbidden-router-port 208
ipv6 mld snooping vlan forbidden-router-port 208
ipv6 mld snooping vlan static router port 209
ipv6 mld snooping vlan static-group 209
ipv6 mld snooping vlan group....211
profile range 211
ipv6 mld profile....211
ipv6 mld filter....212
ipv6 mld max-groups 212
ip igmp max-groups action....213
clear ipv6 mld snooping groups 214
clear ipv6 mld snooping statistics....214
show ipv6 mld snooping groups counters....215
show ipv6 mld snooping groups....215
show ipv6 mld snooping router 216
show ipv6 mld snooping....217
show ipv6 mld snooping vlan....219
show ipv6 mld snooping forward-all....219
show ipv6 mld profile....221
show ipv6 mld filter 221
show ipv6 mld max-group 222
show ipv6 mld port max-group action 223
- MVR....223
mvr 223
mvr vlan....222
mvr group 224
mvr mode....225
mvr query-time 226
mvr port type 228
mvr port immediate 226
mvr static group 228
clear mvr members 228
show mvr members....229
show mvr interface....229
show mvr 230
- Port......230
back-pressure....231
clear interface....232
description....231
duplex 232
eee....232
flowcontrol....234
jumbo-frame 234
media-type 234
protected....235
show interface....237
speed 239
shutdown....238
- Port Error Disable 238
errdisable recovery cause 238
errdisable recovery interval....239
show errdisable recovery 240
- Port Security 242
port-security (Global) 242
port-security (Interface) 242
port-security address-limit 242
show port-security 244
show port-security interface....244
- Protocol VLAN 246
vlan protocol-vlan group (Global) 246
vlan protocol-vlan group (Interface) 245
show vlan protocol-vlan 247
show vlan protocol-vlan interfaces....247
- QoS 248
qos 248
qos cos 248
qos map 248
qos queue....251
qos remark....252
Command Line Interface
User Guide
qos trust....253
qos trust (Interface)......254
show qos 254
show qos interface....256
show qos map 256
show qos queueing....258
26. Rate Limit 259
rate limit egress....259
rate limit egress queue 260
rate limit ingress 261
27. RMON....263
rmon event....263
rmon alarm 260
rmon history 262
clear rmon interfaces statistics....262
show rmon interfaces statistics 263
show rmon event....265
show rmon event log 266
show rmon alarm 266
show rmon history 267
show rmon history statistic 268
show snmp community....270
show snmp engineid....271
show snmp group 271
show snmp host....272
show snmp trap....271
show snmp view....271
show snmp user....272
snmp 272
snmp community 274
snmp engineid....274
snmp engineid rmote 275
snmp group 276
snmp host....276
snmp trap....277
snmp user....277
snmp view....278
29. Spanning Tree....279
instance (MST)......279
name (MST)....279
revision (MST) 281
show spanning-tree 281
show spanning-tree interface....282
show spanning-tree mst 282
show spanning-tree mst configuration....284
show spanning-tree mst interface....286
spanning-tree 288
spanning-tree bpdu....286
spanning-tree bpdu-filter 286
spanning-tree bpdu-guard 287
spanning-tree cost 287
spanning-tree forward-time....288
spanning-tree hello-time....288
spanning-tree edge....290
spanning-tree link-type....290
spanning-tree max-hops....290
spanning-tree maximum-age 292
spanning-tree mcheck 292
spanning-tree mode....293
spanning-tree mst configuration....293
spanning-tree mst cost....295
spanning-tree mst port-priority 294
spanning-tree mst priority 294
spanning-tree pathcost method....296
spanning-tree port-priority 298
spanning-tree priority 298
spanning-tree tx-hold-count 300
30. Storm Control 300
show storm-control....301
storm-control....298
storm-control action 300
storm-control ifg 300
Command Line Interface
User Guide
storm-control level....302
storm-control unit 302
31. System File....302
boot system....302
copy 303
delete 304
restore-defaults....305
save....306
show bootvar....306
show config....308
show flash 310
32. Surveillance VLAN....311
surveillance-vlan (Global)......311
surveillance-vlan (Interface)....311
surveillance-vlan vlan....312
surveillance-vlan oui-table 311
surveillance-vlan cos (Global) 313
surveillance-vlan cos (Interface)......314
surveillance-vlan mode....313
surveillance-vlan aging-time 315
show surveillance-vlan 315
33. Time....316
clock set....316
clock timezone 317
clock source 319
clock summer-time....319
show clock....323
sntp 321
show sntp 321
34. UDLD....323
errdisable recovery cause udld 323
udld 323
udld aggressive....323
udld message time....325
udld reset....325
show udd 325
35. VLAN 326
vlan....326
Name (vlan)....327
switchport mode 327
switchport hybrid pvid 329
switchport hybrid ingress-filtering....331
switchport hybrid acceptable-frame-type....333
switchport hybrid allowed vlan 331
switchport access vlan 332
switchport tunnel vlan 333
switchport trunk native vlan....335
switchport trunk allowed vlan 337
switchport default-vlan tagged....339
switchport forbidden default-vlan 341
switchport forbidden vlan....341
switchport vlan tpid 338
management-vlan....339
show vlan....340
show vlan interface membership 340
show interface switchport 341
show management-vlan....341
36. Voice VLAN 343
voice-vlan (Global) 343
voice-vlan (Interface) 343
voice-vlan vlan ....344
voice-vlan oui-table....344
voice-vlan cos (Global) 346
voice-vlan cos (Interface) 346
voice-vlan mode....347
voice-vlan aging-time....349
show voice-vlan 350
37. Static Routing 352
IPv4 Interface....352
Command Line Interface User Guide
IPv4 Routes 354
IPv4 ARP 354
IPv6 Interface....355
IPv6 Address 356
IPv6 Routes 357
IPv6 Neighbors....357
- POE....358
POE Port Setting 358
POE Port Schedule Setting....359
1. AAA
aaa authentication
| Syntax | aaa authentication (login | enable) (default | LISTNAME)METHODLIST[METHODLIST] [METHODLIST] [METHODLIST]no aaa authentication (login | enable) LISTNAME |
| Parameter login | Add/Edit login authentication list |
| enable Add/Edit enable authentication list | |
| default Edit default authentication list | |
| LISTNAME Specify the list name for authentication type | |
| METHODLIST Specify the authenticate method, including none, local, enable, tacacs+, radius. | |
| Default | Default authentication list name for type login is “default” and default method is “local”.Default authentication list name for type enable is “default” and default method is “enable” |
| Mode | Global Configuration |
| Usage | Login authentication is used when user try to login into the switch.Such as CLI login dialog and WEBUI login web page.Enable authentication is used only on CLI for user trying to switch from User EXEC mode to Privileged EXEC mode.Both of them support following authenticate methods.Local: Use local user account database to authenticate. (This method is not supported for enable authentication)Enable: Use local enable password database to authenticate.Tacacs+: Use remote Tacas+ server to authenticate.Radius: Use remote Radius server to authenticate.None: Do nothing and just make user to be authenticated.Each list allows you to combine these methods with different orders. For example, we want to authenticate login user with remote Tacacs+ server, but server may be crashed. Therefore, we need a backup plan, such as another Radius server. So we can configure the list with Tacacs+ server as first authentication method and Radius server as second one.Use no form to delete the existing list. However, “default” list is not allowed to remove. |
| Example | This example shows how to add a login authentication list to authenticate with order tacacs+, radius, local.Switch(config)# aaa authentication login test1 tacacs+radius local |
| This example shows how to show existing login authentication lists Switch#show aaa authentication login lists Login List Name | Authentication Method List+----+----default | localtest1 | tacacs+ radius local | |
| This example shows how to add an enable authentication list to authenticate with order tacacs+, radius, enable.Switch(config)# aaa authentication enable test1 tacacs+radius enable | |
| This example shows how to show existing enable authentication lists Switch#show aaa authentication login lists Enable List Name | Authentication Method List+----+----default | enabletest2 | tacacs+ radius enable |
login authentication
| Syntax | login authenticationLISTNAMEno login authentication | |
| Parameter | LISTNAME | Specify the login authentication list name to use. |
| Default | Default login authentication list for each line is “default”. | |
| Mode | Line Configuration | |
| Usage | Different access methods are allowed to bind different login authentication lists. Use “login authentication” command to bind the list to specific line (console, telnet, ssh).Use no form to bind the “default” list back. | |
Example
This example shows how to create a new login authentication list and bind to telnet line.
Switch(config)# aaa authentication login test1
tacacs+ radius local
Switch(config)# line telnet
Switch(config-line)# login authentication test1
This example shows how to show line binding lists.
Switch# show line lists
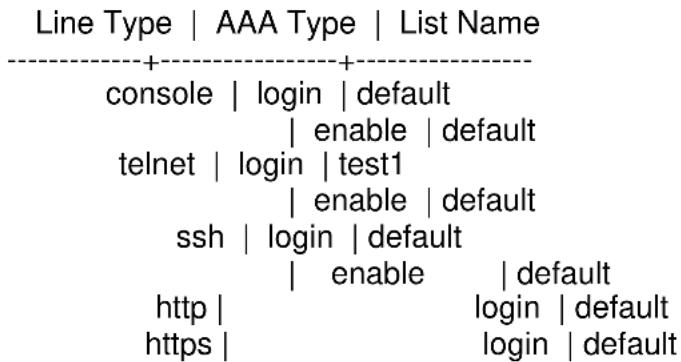
flowchart
graph TD
    A["Line Type | AAA Type | List Name"] --> B["console | login | default"]
    B --> C["enable | default"]
    C --> D["telnet | login | test1"]
    D --> E["enable | default"]
    E --> F["ssh | login | default"]
    F --> G["enable | default"]
    G --> H["http | login | default"]
    H --> I["https | login | default"]
ip http login authentication
| Syntax | ip (http | https) login authenticationLISTNAMEno ip (http | https) login authentication | |
| http | Bind login authentication list to user access WEBUI with http protocol | |
| https | Bind login authentication list to user access WEBUI with https protocol | |
| LISTNAME | Specify the login authentication list name to use. | |
| Default | Default login authentication list for each line is “default”. | |
| Mode | Global Configuration | |
| Usage | Different access methods are allowed to bind different login authentication lists. Use “ip (http | https) login authentication” command to bind the list to WEBUI access from http or https.Use no form to bind the “default” list back. | |
| Example | This example shows how to create two new login authentication lists and bind to http and https.Switch(config)# aaa authentication login test1 tacacs+radius localSwitch(config)# aaa authentication login test2 | |
radius local
Switch(config)# ip http login authentication test1
Switch(config)# ip https login authentication test2
This example shows how to show line binding lists.
Switch# show line lists
Line Type | AAA Type | List Name
| console | login | default | |
| enable | default | |
| telnet | login | default | |
| enable | default | |
| ssh | login | default | |
| enable | default | |
| http | login | test1 | |
| https | login | test2 |
enable authentication
Syntax
enable authentication
LISTNAME
no enable authentication
Parameter
LISTNAME
Specify the enable authentication list name to use.
Default
Default enable authentication list for each line is "default".
Mode
Line Configuration
Usage
Different access methods are allowed to bind different enable authentication lists. Use “enable authentication” command to bind the list to specific line (console, telnet, ssh).
Use no form to bind the "default" list back.
| Example | This example shows how to create a new enable authentication list and bind to telnet line.Switch(config)# aaa authentication enable test1 tacacs+radius enableSwitch(config)# line telnetSwitch(config-line)# enable authentication test1 |
| This example shows how to show line binding lists.Switch# show line listsLine Type | AAA Type | List Name |
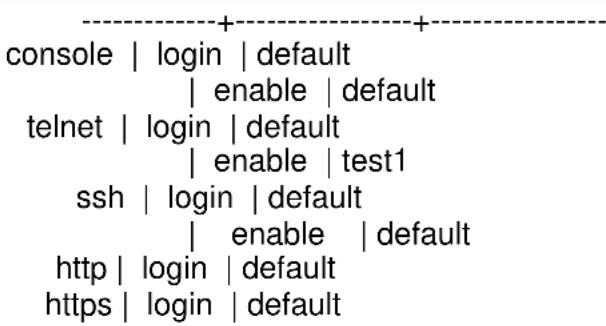
show aaa authentication
| Syntax | show aaa authentication (login | enable) lists | |
| Parameter | login | Show login authentication list |
| enable | Show enable authentication list | |
| Default | No default value for this command | |
| Mode | Privileged EXEC | |
| Usage | Use “show aaa authentication” command to show login authentication or enable authentication method lists. | |
| Example | This example shows how to show existing login authentication lists Switch# show aaa authentication login lists Login List Name | Authentication Method List+----+----default | localtest1 | tacacs+ radius localThis example shows how to show existing enable authentication lists Switch# show aaa authentication login lists Enable List Name | Authentication Method List+----+----default | enabletest2 | tacacs+ radius enable | |
| Syntax | show line lists | |
| Parameter | ||
| Default | No default value for this command | |
| Mode | Privileged EXEC | |
| Usage | Use “show line lists” command to show all lines’ binding list of all authentication, authorization, and accounting function. | |
| Example | This example shows how to show line binding lists.Switch# show line listsLine Type | AAA Type | List Name----+----+----console | login | default| enable | default| exec | default| commands | default| accounting-exec | defaulttelnet | login | default| enable | default| exec | default| commands | default| accounting-exec | default ssh |login | default| enable | default| exec | default| commands | default| accounting-exec | default http |login | defaulthttps | login | default | |
tacacs default-config
| Syntax | tacacs default-config [key TACACSKEY] [timeout <1-30>] | |
| Parameter | key TACACSKEY | Specify default tacacs+ server key string |
| timeout <1-30> | Specify default tacacs+ server timeout value | |
| Default | Default tacacs+ key is “”.Default tacacs+ timeout is 5 seconds. | |
| Mode | Global Configuration | |
| Usage | Use “tacacs default-config” command to modify default values of tacacs+ server. These default values will be used when user try to create a new tacacs+ server and not assigned these values. | |
| Example | This example shows how modify default tacacs+ configurationSwitch(config)# tacacs default-config timeout 20Switch(config)# tacacs default-config key tackey | |
| This example shows how to show default tacacs+ configurations.Switch# show tacacs default-configTimeout | Key----+----10 | tackey | ||
| This example shows how to create a new tacacs+ server with above default config and show results.Switch(config)# tacacs host 192.168.1.111Switch# show tacacsPrio | Timeout | IP Address | Port | Key----+----+----+----+----1 | 10 | 192.168.1.111 | 49 | tackey | ||
| tacacs host | ||
| Syntax | tacacs host HOSTNAME [port <0-65535>] [key TACPLUSKEY] [priority <0-65535>] [timeout <1-30>]no tacacs [host HOSTNAME] | |
| Parameter | host HOSTNAME | Specify tacacs+ server host name, both IP address and domain name are available. |
| port <0-65535> | Specify tacacs+ server udp port | |
| keyTACPLUSKEY | Specify tacacs+ server key string | |
| priority <0-65535> | Specify tacacs+ server priority | |
| timeout <1-30> | Specify tacacs+ server timeout value | |
| Default | Default tacacs+ key is “”.Default tacacs+ timeout is 5 seconds. | |
| Mode | Global Configuration | |
| Usage | Use “tacacs host” command to add or edit tacacs+ server for authentication, authorization or accounting.Use no form to delete one or all tacacs+ servers from database. | |
| Example | This example shows how to create a new tacacs+ serverSwitch(config)# tacacs host 192.168.1.111 port 12345key tacacs+ priority 100 timeout 10This example shows how to show existing tacacs+ server.Switch# show tacacsPrio | Timeout | IP Address | Port | Key----+----+----+----100 | 10 | 192.168.1.111 | 12345|tacacs+ | |
show tacacs default-config
| Syntax | show tacacs default-config |
| Parameter | |
| Default | No default value for this command |
| Mode | Privileged EXEC |
| Usage | Use “show tacacs default-config” command to show tacacs+defaultconfigurations. |
| Example | This example shows how to show default tacacs+ configurations.Switch# show tacacs default-configTimeout | Key----+----10 | tackey |
Syntax show tacacs
| Parameter | |
| Default | No default value for this command |
| Mode | Privileged EXEC |
| Usage | Use “show tacacs” command to show existing tacacs+ servers. |
| Example | This example shows how to show existing tacacs+ server.Switch# show tacacsPrio | Timeout | IP Address | Port | Key----+----+----+----+----100 | 10 | 192.168.1.111 | 12345 | tacacs+ |
show default-config
| Syntax | radius default-config [key RADIUSKEY] [retransmit <1-10>] [timeout <1-30>] | |
| Parameter | key RADIUSKEY | Specify default radius server key string |
| retransmit <1-10> | Specify default radius server retransmit value | |
| timeout <1-30> | Specify default radius server timeout value | |
| Default Default radius key is “”.Default radius retransmit is 3 times. Default radius timeout is 3 seconds. | ||
| Mode | Global Configuration | |
| Usage | Use “radius default-config” command to modify default values of radius server. These default values will be used when user try to create a new radius server and not assigned these values. | |
| Example | This example shows how modify default radius configuration Switch(config)#radius default-config timeout 20 Switch(config)#radius default-config key radiuskey Switch(config)#radius default-config retransmit 5This example shows how to show default radius configurations. Switch#show radius default-configRetries| Timeout| Key----+----+----5 | 20 | radiuskeyThis example shows how to create a new radius server with above default config and show results.Switch(config)#radius host 192.168.1.111Switch#show radiusPrio | IP Address | Auth-Port| Retries|Timeout| Usage-Type| Key----+----+----+----+----+----+----+----1 | 192.168.1.111 | 1812 | 5 |20 | All | radiuskey | |
| radius host | ||
| Syntax | radius host HOSTNAME [auth-port <0-65535>] [key RADIUSKEY][priority <0-65535>] [retransmit <1-10>] [timeout <1-30>] [type (login|802.1x|all)]no radius [host HOSTNAME] | |
| Parameter | host HOSTNAME Specify radius server host name, both IP address and domain name are available. | |
| auth-port <0-65535> Specify radius server udp port | ||
| key RADIUSKEY Specify radius server key string | ||
| priority <0-65535> Specify radius server priority | ||
| retransmit <1-10> Specify radius server retransmit times | ||
| timeout <1-30> Specify radius server timeout value | ||
| type Usage type of this login server Use for login802.1 Use for 802.1X authenticationX Use for both login and 802.1X authentication all | ||
| Default | Default radius key is “”.Default radius timeout is 3 seconds. | |
| Mode | Global Configuration | |
Usage
Use "radius host" command to add or edit an existing radius server.
Use no form to delete one or all radius servers from database.
| Example | This example shows how to create a new radius serverSwitch(config)#radius host 192.168.1.111 auth-port 12345 keyradiuskey priority 100 retransmit 5 timeout 10 type all |
| This example shows how to show existing radius server.Switch#show radiusPrio | IP Address | Auth-Port| Retries|Timeout| Usage-Type| Key+----+----+----+----+----+----+----+----+----+----+----+----+----+----+----+----+----+----+----+----+----+----+----+----+----+----+----+----+----+----+----+----+----+----+----+----+----+----+----+----+----+----+----+----+----+----+----+----+----+----+ |
show radius default-config
| Syntax | show radius default-config |
| Parameter | |
| Default | No default value for this command |
| Mode | Privileged EXEC |
| Usage | Use “show radius default-config” command to show radius default configurations. |
| Example | This example shows how to show default radius configurations. Switch# show radius default-configRetries|Timeout|Key----+----+----5 | 20 | radiuskey |
show radius
| Syntax | show radius |
| Parameter | |
| Default | No default value for this command |
| Mode | Privileged EXEC |
| Usage | Use “show radius” command to show existing radius servers. |
| Example | This example shows how to show existing radius server.Switch#show radiusPrio | IP Address | Auth-Port| Retries|Timeout| Usage-Type| Key----+----+----+----+----+----+----+----+----+----+----+----+----+----+----+----+----+----+----+----+----+----+----+----+----+----+----+----+----+----+----+----+----+----+----+----+----+----+----+----+----+----+----+----+----+----+----+----+----+----+---- + All |radiuskey |
| 2. ACL | |
| mac acl | |
| Syntax | mac aclNAME nomac aclNAME |
| Parameter | NAME Specify the name of MAC ACL |
| Default | No default is defined |
| Mode | Global Configuration |
| Usage | Use themac aclcommand to create a MAC access list and to enter mac-acl configuration mode. The name of ACL must be unique that can not have same name with other ACL or QoS policy.Once an ACL is created, an implicit “deny any” ACE created at the end of the ACL. That is, if there are no matches, the packets are denied. Use the no form of this command to delete. |
| Example | The example shows how to create a mac acl. You can verify settings by the followingshow aclcommandSwitch334455(config)#mac acl testSwitch334455(mac-al)#show aclMAC access list test |
permit (MAC)
Syntax
[sequence <1-2147483647>] permit
(A:B:C:D:E:F/A:B:C:D:E:F|any)
(A:B:C:D:E:F/A:B:C:D:E:F|any) [vlan <1-4094>] [cos <0-7> <0-7>]
[ethtype <0x0600-0xFFFF>]
| no sequence <1-2147483647> | ||
| Parameter | <1-2147483647> | (Optional) Specify sequence index of ACE, the sequence index represent the priority of an ACE in ACL. |
| (A:B:C:D:E:F/A:B:C:D:E:F|any) | Specify the source MAC address and mask of packet or any MAC address. | |
| (A:B:C:D:E:F/A:B:C:D:E:F|any) | Specify the destination MAC address and mask of packet or any MAC address | |
| [vlan <1-4094>] | (Optional) Specify the vlan ID of packet. | |
| [cos <0-7> <0-7>] | (Optional) Specify the Class of Service value and mask of packet. | |
| [ethtype <0x0600-0xFFFF>] | (Optional) Specify Ethernet protocol number of | |
| Default | No default is defined. | |
| Mode | MAC ACL Configuration | |
| Usage | Use the permit command to add permit conditions for a mac ACE that bypass those packets hit the ACE. The “sequence” also represents hit priority when ACL bind to an interface. An ACE not specifies “sequence” index would assign a sequence index which is the largest existed index plus 20. If packet content can match more than one ACE, the lowest sequence ACE is hit. An ACE can not be added if has the same conditions as existed ACE. | |
| Example | The example shows how to add an ACE that permit packets with source MAC address 22:33:44:55:66:77、VLAN 3 and Ethernet type 1999. You can verify settings by the following show acl command | |
| Switch334455(config)# mac acl testSwitch334455(mac-al)# sequence 999 permit22:33:44:55:66:77/FF:FF:FF:FF:FF any vlan 3 ethtype 0x2800Switch334455(mac-al)# show aclMAC access list testsequence 999 permit 22:33:44:55:66:77/FF:FF:FF:FF:FF any vlan 3 ethtype 0x2800 | ||
deny (MAC)
Syntax
(A:B:C:D:E:F/A:B:C:D:E:F|any)
(A:B:C:D:E:F/A:B:C:D:E:F|any) [vlan <1-4094>] [cos <0-7>
<0-7>]
[ethtype <0x0600-0xFFFF>]
[shutdown] no sequence <1-
2147483647>
Parameter
<1-2147483647>
(Optional) Specify sequence
| index of ACE, the sequence index represent the priority of an ACE in ACL. | ||
| (A:B:C:D:E:F/A:B:C:D:E:F|any) | Specify the source MAC address and mask of packet or any MAC address. | |
| (A:B:C:D:E:F/A:B:C:D:E:F|any) | Specify the destination MAC address and mask of packet or any MAC address. | |
| [vlan <1-4094>] | (Optional) Specify the vlan ID of packet. | |
| [cos <0-7> <0-7>] | (Optional) Specify the Class of Service value and mask of packet. | |
| [ethtype <0x0600-0xFFFF>] | (Optional) Specify Ethernet protocol number of packet | |
| [shutdown] | (Optional) Shutdown interface | |
| Default | No default is defined. | |
| Mode | MAC ACL Configuration | |
| Usage | Use the deny command to add deny conditions for a mac ACE that drop those packets hit the ACE. The “sequence” also represents hit priority when ACL bind to an interface. An ACE not specifies “sequence” index would assign a sequence index which is the largest existed index plus 20. If packet content can match more than one ACE, the lowest sequence ACE is hit. An ACE cannot be added if has the same conditions as existed ACE. Use “shutdown” to shutdown interface while ACE hit. | |
Command Line Interface
User Guide
Example
The example shows how to add an ACE that denies packets with
destination MAC address aa:bb:cc:xx:xx:xx and VLAN 9. You can
verify settings by the following show acl command
Switch334455(config)# mac acl test
Switch334455(mac-al)# sequence 30 permit any any
Switch334455(mac-al)# deny any
aa:bb:cc:00:0:00/FF:FF:FF:00:00:00 vlan 9 shutdown
Switch334455(mac-al)# show acl
MAC access list test
sequence 30 permit any any
sequence 50 deny any AA:BB:CC:00:00:00/FF:FF:FF:00:00:00 vlan
9 shutdown
ip acl
| Syntax | ip aclNAME noip aclNAME | |
| Parameter | NAME | Specify the name of IPv4 ACL |
| Default | No default is defined | |
| Mode | Global Configuration | |
| Usage | Use the ip acl command to create an IPv4 access list and to enter ip-acl configuration mode. The name of ACL must be unique that can not have same name with other ACL or QoS policy. Once an ACL is created, an implicit “deny any” ACE created at the end of the ACL. That is, if there are no matches, the packets are denied. Use the no form of this command to delete. | |
| Example | The example shows how to create an IP ACL. You can verify settings by the following show acl commandSwitch334455(config)#ip acl iptestSwitch334455(ip-al)#show aclIP access list iptest | |
permit (IP)
Syntax
[sequence <1-2147483647>] permit (<0-255>|ipinip|egp|igp|hmp|rdp|ipv6|
ipv6:ROUT|ipv6:frag|rsvp|ipv6:icmp|ospf|pim|l2tp|ip)
(A.B.C.D/A.B.C.D|any) (A.B.C.D/A.B.C.D|any)
[(dscp|precedence) VALUE]]
[sequence <1-2147483647>] permit icmp
(A.B.C.D/A.B.C.D|any) (A.B.C.D/A.B.C.D|any)
(<0-255>|echo-reply|destination-unreachable|source-quench|echo-request|
router-advertisement|router-solicitation|time-exceeded|timestamp|timestamp-reply|traceroute|any) (<0-255>|any)
[(dscp|precedence) VALUE]
[sequence <1-2147483647>] permit
tcp (A.B.C.D/A.B.C.D|any) (<0-65535>|echo|
discard|daytime|ftp-data|ftp|telnet|smtp|time|hostname|whois|tacacs-ds|domain|www|
pop2|pop3|syslog|talk|klogin|kshell|sunrpc|drip|PORT_RANG E|any) (A.B.C.D/A.B.C.D|any) (<0-
65535>|echo|discard|daytime|ftp-data|ftp|telnet|smtp|time|hostname|whois|tacacs-ds|domain|www|pop2|pop3|syslog|talk|klogin|kshell|sunrpc|drip|PORT_RANGE|any)[match-all TCP_FLAG] [(dscp|precedence) VALUE]
[sequence <1-2147483647>] permit udp (A.B.C.D/A.B.C.D|any) (<0-65535>|echo|discard| time|nameserver|tacacs- ds|domain|bootps|bootpc|tftp|sunrpc|ntp|netbios-ns|snmp| snmptrap|who|syslog|talk|rip|PORT_RANGE|any) (A.B.C.D/A.B.C.D|any) (<0-65535>|echo| discard|time|nameserver|tacacs- ds|domain|bootps|bootpc|tftp|sunrpc|ntp|netbios-ns| snmp|snmptrap|who|syslog|PORT_RANGE|any) [(dscp|precedence) VALUE]
no sequence <1-2147483647>
| Parameter | <1-2147483647> | (Optional) Specify sequence index of ACE, the sequence index represent the priority of an ACE in ACL. |
| (A.B.C.D/A.B.C.D|any) | Specify the source IPv4 address and mask of packet or any IPv4 address. | |
| (A.B.C.D/A.B.C.D|any) | Specify the destination IPv4 address and mask of packet or any IPv4 address. | |
| [dscp VALUE] | (Optional) Specify the DSCP of packet. | |
| [precedence VLAUE] | (Optional) Specify the IP precedence of packet. | |
| icmp-type | Specify ICMP message type for filtering ICMP packet. Enter a type name of list or a number of ICMP message type. | |
| icmp-code | Specify ICMP message code for filtering ICMP packet. | |
| I4-source-port | Specify TCP/UDP source port of for filtering TCP/UDP packet. Enter a port name of list or a number of TCP/UDP port. | |
| I4-destination-port | Specify TCP/UDP destination port of for filtering TCP/UDP packet. Enter a port name of list or a number of |
TCP/UDP port.
| match-all | Specify tcp flag for TCP packet. If a flag should be set it is prefixed by "+".If a flag should be unset it is ble options |
| are +urg, +ack, +psh, +rst, +syn, +fin,-urg, -ack, -psh, -rst, -syn and-fin.To define more than 1 flag- enter additional flags oneafter another without a space (example +syn-ack). | |
| Default | No default is defined. |
| Mode | IP ACL Configuration |
| Usage | Use the permit command to add permit conditions for an IP ACE that bypasses those packets hit the ACE. The “sequence” also represents hit priority when ACL bind to an interface. An ACE not specifies “sequence” index would assign a sequence index which is the largest existed index plus20. If packet content can match more than one ACE, the lowest sequence ACE is hit. An ACE can not be added if has the same conditions as existed ACE. |
| Example | The example shows how to add a set of ACEs. You can verify settings by the followingshow aclcommand.This command shows how to permit a source IP address subnet. Switch334455(ip-al)#permit ip192.168.1.0/255.255.255.0This command shows how to permit ICMP echo-request packet with any IP address.Switch334455(ip-al)#permit icmp any any echo-request anyThis command shows how to permit any IP address HTTP packets with DSCP 5.Switch334455(ip-al)#permit tcp any any www dscp 5This command shows how to permit any source IP address SNMP packet connect to destination IP address 192.168.1.1.Switch334455(ip-al)#permit udp any any192.168.1.1/255.255.255.255 snmpSwitch334455(ip-al)#show aclIP access list iptestsequence 1 permit ip192.168.1.0/255.255.255.0 any sequence 21permit icmp any any echo-request anysequence 41 permit tcp any any any www dscp5 |
Command Line Interface
User Guide
sequence 61 permit udp any any 192.168.1.1/255.255.255.255 snmp
deny (IP)
Syntax
[sequence <1-2147483647>] deny (<0-255>|ipinip|egp|igp|hmp|rdp|ipv6| ipv6: rout|ipv6:frag|rsvp|ipv6:icmp|ospf|pim|l2tp|ip) (A.B.C.D/A.B.C.D|any) (A.B.C.D/A.B.C.D|any) [(dscp|precedence) VALUE]] [shutdown]
[sequence <1-2147483647>] deny icmp (A.B.C.D/A.B.C.D|any) (A.B.C.D/A.B.C.D|any) (<0-255>|echo-reply|destination-unreachable|source-quench|echo-request|router-advertisement|router- solicitation|time-exceeded|timestamp| timestamp-reply|traceroute|any) (<0-255>|any)[(dscp|precedence) VALUE] [shutdown]
[sequence <1-2147483647>] deny tcp (A.B.C.D/A.B.C.D|any) (<0-65535>|echo| discard|daytime|ftp- data|ftp|telnet|smtp|time|hostname|whois|tacacs-ds| domain|www|pop2|pop3|syslog|talk|klogin|kshell|sunr pc|drip| PORT_RANGE|any) (A.B.C.D/A.B.C.D|any) (<0- 65535>|echo|discard|daytime|ftp- data|ftp|telnet| smtp|time|hostname|whois|tacacs- ds|domain|www|pop2|pop3|syslog|talk| klogin|kshell|sunrpc|drip|PORT_RANGE|any) [match-all TCP_FLAG] [(dscp|precedence) VALUE] [shutdown]
[sequence <1-2147483647>] deny udp (A.B.C.D/A.B.C.D|any) (<0- 65535>|echo|discard|time|nameserver|tacacs- ds|domain|bootps| bootpc|tftp|sunrpc|ntp|netbios- ns|snmp|snmptrap|who|syslog| talk|rip|PORT_RANGE|any) (A.B.C.D/A.B.C.D|any) (<0- 65535>|echo| discard|time|nameserver|tacacs- ds|domain|bootps|bootpc|tftp| sunrpc|ntp|netbios- ns|snmp|snmptrap|who|syslog|PORT_RANGE|any)
Parameter
[dsqprecedence] VALUE[fi]o[shutdown]sequence index of ACE, the sequence index represent the no sequence <1-2147483647
| (A.B.C.D/A.B.C.D|any) | Specify the source IPv4 address and mask of packet or any IPv4 address. |
| (A.B.C.D/A.B.C.D|any) | Specify the destination IPv4 address and mask of packet or any IPv4 address. |
| [dscp VALUE] | (Optional) Specify the DSCP of |
| packet. | ||
| [precedence VLAUE] | (Optional) Specify the IP precedence of packet. | |
| icmp-type | Specify ICMP message type for filtering ICMP packet. Enter a type name of list or a number of ICMP message type. | |
| icmp-code | Specify ICMP message code for filtering ICMP packet. | |
| I4-source-port | Specify TCP/UDP source port of for filtering TCP/UDP packet.Enter a port name of list or a number of TCP/UDP port. | |
| I4-destination-port | Specify TCP/UDP destination port of for filtering TCP/UDP packet.Enter a port name of list or a number of TCP/UDP port. | |
| match-all | Specify tcp flag for TCP packet. If a flag should be set it is prefixed by\"+\”.If a flag should be unset it is prefixed by\"-\”. Available options are +urg, +ack, +psh, +rst, +syn, +fin,-urg, -ack, -psh, -rst, -syn and -fin.To define more than 1 flag -enter additional flags one after another without a space (example +syn-ack). | |
| [shutdown] | (Optional) Shutdown interface while | |
| Default | No default is defined. | |
| Mode | IP ACL Configuration | |
| Usage | Use the deny command to add deny conditions for an IP ACE that drop those packets hit the ACE. The “sequence” also represents hit priority when ACL bind to an interface. An ACE not specifies “sequence” index would assign a sequence index which is the largest existed index plus 20. If packet content can match more than one ACE, the lowest sequence ACE is hit. An ACE can not be added if has the same conditions as existed ACE. Use “shutdown” to shutdown interface while ACE hit. | |
Example
The example shows how to add an ACE that denies packets with source IP address 192.168.1.80. You can verify settings by the following show acl command
Switch334455(config)# ip acl iptest
Switch334455(ip-al)# deny ip 192.168.1.80/255.255.255.255 any
| Switch334455(ip-al)# show acl | ||
| IP access list iptestsequence 1 deny ip 192.168.1.80/255.255.255.255 any | ||
| ipv6 acl | ||
| Syntax | ipv6 acl NAMEno ipv6 acl NAME | |
| Parameter | NAME | Specify the name of IPv6 ACL |
| Default | No default is defined | |
| Mode | Global Configuration | |
| Usage | Use the ipv6 acl command to create an IPv6 access list and to enter ipv6-acl configuration mode. The name of ACL must be unique that can not have same name with other ACL or QoS policy.Once an ACL is created, an implicit “deny any” ACE created at the end of the ACL. That is, if there are no matches, the packets are denied. Use the no form of this command to delete. | |
| Example | The example shows how to create an IPv6 ACL. You can verify settings by the following show acl command | |
| Switch334455(config)#ipv6 acl ipv6testSwitch334455(ipv6-al)# show aclIPv6 access list iptest | ||
| permit (IPv6) | ||
| Syntax | [sequence <1-2147483647>] permit (<0-255>|ipv6) (X:X::X:X/<0-128>|any)(X:X::X:X/<0-128>|any)[(dscp|precedence) VALUE] | |
| [sequence <1-2147483647>] permit icmp(X:X::X:X/<0-128>|any)(X:X::X:X/<0-128>|any) (<0-255>|destination- unreachable|packet-too-big|time-exceeded|parameter-problem|echo-request|echo-reply| mld-query|mld-report|mldv2-report|mld-done| router- solicitation|router-advertisement|nd-ns|nd-na|any) (<0-255>|any)[(dscp|precedence) VALUE] | ||
[sequence <1-2147483647>] permit tcp
(X:X::X:X/<0-128>|any) (<0-
65535>|echo|discard|daytime|ftp-
data|ftp|telnet|smtp|
time|hostname|whois|taca
CS-
no sequence <1-2147483647>
Parameter
| <1-2147483647> | (Optional) Specify sequence index of ACE, the sequence index represent the priority of an ACE in ACL. |
| (X:X::X:X/<0-128>|any) | Specify the source IPv6 address and prefix of packet or any IPv6 address. |
| (X:X::X:X/<0-128>|any) | Specify the destination IPv6 address and prefix of packet or any IPv6 address. |
| [dscp VALUE] | (Optional) Specify the DSCP of packet. |
| [precedence VLAUE] | (Optional) Specify the IP precedence of packet. |
| icmp-type | Specify ICMP message type for filtering ICMP packet. Enter a type name of list or a number of ICMP message type. |
| icmp-code | Specify ICMP message code for filtering ICMP packet. |
Command Line Interface
User Guide
| I4-source-port | Specify TCP/UDP source port of for filtering TCP/UDP packet.Enter a port name of list or a number ofTCP/UDP port. |
| I4-destination-port | Specify TCP/UDP destination port of for filtering TCP/UDP packet.Enter a port name of list or a number of |
| match-all | Specify tcp flag for TCP packet. If a flag should be set it is prefixed by\"+\\".If a flag should be unset it is prefixed by\"-\". Available options are +urg, +ack, +psh, +rst, +syn, +fin,-urg, -ack, -psh, -rst, -syn and -fin.To define more than 1 flag -enter additional flags one after another(example +syn-ack). | |
| Default | No default is defined. | |
| Mode | IPv6 ACL Configuration | |
| Usage | Use the permit command to add permit conditions for an IPv6 ACE that bypasses those packets hit the ACE. The “sequence” also represents hit priority when ACL bind to an interface. An ACE not specifies “sequence” index would assign a sequence index which is the largest existed index plus20. If packet content can match more than one ACE, the lowest sequence ACE is hit. An ACE can not be added if has the same conditions as existed ACE. | |
| Example | The example shows how to add a set of ACEs. You can verify settings by the followingshow aclcommand.This command shows how to permit a source IP address subnet.Switch334455(ipv6-al)#permit permit ipv6fe80:1122:3344:5566::1/64 anySwitch334455(ipv6-al)#show aclIPv6 access list ipv6testsequence 1 permit ipv6 fe80:1122:3344:5566::1/64 any | |
deny (IPv6)
Syntax
[sequence <1-2147483647>] deny (<0-255>|ipv6)
(X:X::X:X/<0-128>|any) (X:X::X:X/<0-128>|any)
[(dscp|precedence) VALUE] [shutdown]
[sequence <1-2147483647>] deny icmp (X:X::X:X/<0-
128>|any) (X:X::X:X/<0-128>|any) (<0-255>|destination-unreachable|packet-too-big|
time-exceeded|parameter-problem|echo-
request|echo-reply| mld-query|mld-report|mldv2-
report|mld-done| router- solicitation|router-
advertisement|nd-ns|nd-na|any) (<0-
255>|any][(dscp|precedence) VALUE] [shutdown]
[sequence <1-2147483647>] deny tcp (X:X::X:X/<0-
128>|any) (<0-65535>|echo|discard|daytime|ftp-
data|ftp|telnet|smtp|time|hostname|whois|tacacs-
[(dscp|precedence) VALUE] [shutdown]
no sequence <1-2147483647>
| Parameter | <1-2147483647> | (Optional) Specify sequence index of ACE, the sequence index represent the priority of an ACE in ACL. |
Command Line Interface
User Guide
(A.B.C.D/A.B.C.D|any) Specify the source IPv4 address and mask of packet or any IPv4 address.
(A.B.C.D/A.B.C.D|any) Specify the destination IPv4 address any IPv4
| address. | ||
| [dscp VALUE] | (Optional) Specify the DSCP of packet. | |
| [precedence VLAUE] | (Optional) Specify the IP precedence of packet. | |
| icmp-type | Specify ICMP message type for filtering ICMP packet. Enter a type name of list or a number of ICMP message type. | |
| icmp-code | Specify ICMP message code for filtering ICMP packet. | |
| I4-source-port | Specify TCP/UDP source port of for filtering TCP/UDP packet.Enter a port name of list or a number of TCP/UDP port. | |
| I4-destination-port | Specify TCP/UDP destination port of for filtering TCP/UDP packet.Enter a port name of list or a number of TCP/UDP port. | |
| match-all | Specify tcp flag for TCP packet. If a flag should be set it is prefixed by\ "+".If a flag should be unset it is prefixed by \"-". Available options are +urg, +ack, +psh, +rst, +syn, +fin,-urg, -ack, -psh, -rst, -syn and -fin.To define more than 1 flag -enter additional flags one after another without a space (example +syn-ack). | |
| [shutdown] | (Optional) Shutdown interface while | |
| Default | No default is defined. | |
| Mode | IP ACL Configuration | |
| Usage | Use the deny command to add deny conditions for an IPv6 ACE that drop those packets hit the ACE. The “sequence” also represents hit priority when ACL bind to an interface. An ACE not specifies “sequence” index would assign a sequence index which is the largest existed index plus 20. If packet content can match more than one ACE, the lowest sequence ACE is hit. An ACE can not be added if has the same conditions as existed ACE. Use | |
Command Line Interface
User Guide
"shutdown" to shutdown interface while ACE hit.
Example
The example shows how to add an ACE that denies packets with destination IP address fe80::abcd. You can verify settings by the following show acl command
| Switch334455(config)# ipv6 acl ipv6test Switch334455(ip-al)# deny ipv6 any fe80::abcd/128 Switch334455(ip-al)# show acl | ||
| IPv6 access list ipv6test sequence 1 deny ipv6 any fe80::abcd/128 | ||
| bind acl | ||
| Syntax | (mac|ip|ipv6) acl NAME [no] (mac|ip|ipv6) acl NAME | |
| Parameter | (mac|ip|ipv6) | Specify a type of ACL to binding to interface |
| NAME | Specify the name of ACL | |
| Default | No default is defined | |
| Mode | Interface Configuration | |
| Usage | Use the (mac|ip|ipv6) acl NAME command to bind an ACL to interfaces. An interface can bind only one ACL or QoS policy. Use the no form of this command to return to unbind an ACL from interface. | |
| Example | The example shows how to bind an existed ACL to interface. switch(config)# interface fa1 switch(config-if)# mac acl test switch(config-if)# do show running-config interfaces fa1 interface fa1 mac acl test | |
| show acl | ||
| Syntax | show acl show (mac|ip|ipv6) acl show (mac|ip|ipv6) acl NAME | |
| Parameter | (mac|ip|ipv6) | Specify a type of ACL to show |
| NAME | Specify the name of ACL | |
| Default | No default is defined | |
| Mode | GlobalConfigurationContextConfiguration | |
| Usage | Use theshow aclcommand to show created ACLs. You can specify mac、ip or ipv6 to show specific type ACL or specify unique name string to show ACL with the name. | |
| Example | The example shows how to show all IP ACL.Switch334455(config)#show ip aclIP access list iptestsequence 1 deny ip 192.168.1.80/255.255.255.255 any | |
show acl utilization
| Syntax | show acl utilization |
| Parameter | None |
| Default | No default is defined |
| Mode | Global Configuration |
| Usage | Use the show acl utilization command to show the usage of PIE of ASIC. When an ACL bind to interface, it needs ASIC resource to help to filter packet. An ASIC has limited resource. This command help user to know the PIE usage of AISC. |
| Example | The example shows how to show utilizationSwitch(config-if)# do show acl utilization Type: sys usage: 128Type: mac ACL usage: 128Type: IPv4 ACL usage: 128Type: IPv6 ACL usage: 128 |
3. Administration
configure
Syntax
configure
| Parameter | |
| Default | No default value for this command. |
| Mode | Privileged EXEC |
| Usage | Use “configure” command to enter global configuration mode. In global configuration mode, the prompt will show as “Switch(config)#”. |
| Example | This example shows how to enter global configuration mode.Switch# configureSwitch(config)# |
| clear arp | |
| Syntax | clear arp [A.B.C.D] |
| Parameter | A.B.C.D Specify specific arp entry to clear. |
| Default | No default value for this command. |
| Mode | User EXEC Privileged EXEC |
| Usage | Use “clear arp” command to clear all or specific one arp entry. |
| Example | This example shows how to clear all arp entries.Switch(config)# clear arp |
| clear service | |
| Syntax | clear (telnet | ssh) |
Command Line Interface
User Guide
| Parameter | telnet | Clear all telnet sessions. |
| ssh | Clear all ssh sessions. | |
| Default | No default value for this command. | |
| Mode | Privileged EXEC | |
| Usage | Use “clear service” command to kill all existing sessions for the select service. | |
| Example | This example shows how to enable telnet service and show current telnet service status.Switch# clear telnet |
enable
| Syntax | enable [<1-15>] | |
| disable [<1-14>] | ||
| Parameter | <1-15> | Specify privileged level to enable |
| <1-14> | Specify privileged level to disable | |
| Default | Default privilege level is 15 if no privilege level is specified on enable command.Default privilege level is 1 if no privilege level is specified on disable command. |
| Mode | User EXEC |
| Usage In User EXEC mode, user only allows to do a few actions. Most of commands are only available in privileged EXEC mode. Use “enable” command to enter the privileged mode to do more actions on switch. |
In privileged EXEC mode, use "exit" command is able to go back to user EXEC mode with original user privilege level. If you need to go back to user EXEC mode with different privilege level, use "disable" command to specify the privilege level you need.
In privileged EXEC mode, the prompt will show "Switch#
| Example | This example shows how to enter privileged EXEC mode and show current privilege level.Switch> enableSwitch# show privilegeCurrent CLI Username:Current CLI Privilege: 15This example show how to enter user EXEC mode with privilege 3.Switch# disable 3Switch> show privilegeCurrent CLI Username:Current CLI Privilege: 3 |
| end | |
| Syntax | end |
| Parameter | |
| Default | No default value for this command. |
| Mode Privileged EXEC | |
| GlobalConfigurationInterfaceConfigurationLineConfiguration...... | |
| Usage | Use “end” command to return to privileged EXEC mode directly. Every mode except User EXEC mode has the “end” command. |
| Example | This example shows how to enter Interface Configuration mode and use end command to go back to privileged EXEC modeSwitch# configure Switch(config)#interface fa1 Switch(config-if)# endSwitch# |
| exit | |
| Syntax | exit |
| Parameter | |
| Default | No default value for this command. |
Mode
User EXEC
Privileged EXEC
Global
Configuration
| InterfaceConfigurationLineConfiguration...... | |
| Usage | In User EXEC mode, “exit” command will close current CLI session. In other modes, “exit” command will go to the parent mode. And every mode has the “exit” command. |
| Example | This example shows how to enter privileged EXEC mode and use exit command to go back to user EXEC mode.Switch> enableSwitch# exitSwitch> |
| history | |
| Syntax | history <1-256>no history |
| Parameter | <1-256> Specify maximum CLI history entry number. |
| Default | Default maximum history entry number is 128. |
| Mode | Line Configuration |
| Usage Use “history” command to specify the maximum commands history number for CLI running on console, telnet or ssh service. Every command input by user will record in history buffer. If all history commands exceed configured history number, older ones will be deleted from buffer.Use “no history” to disable the history feature. And use “show history” to show all history commands. | |
| Example | This example shows how to change console history number to 100, telnet history number to 150 and ssh history number to 200.Switch(config)# line consoleSwitch(config-line)# history 100Switch(config-line)# exit Switch(config)#line telnet Switch(config-line)# history150 Switch(config-line)# exitSwitch(config)# line ssh Switch(config-line)# history 200 Switch(config-line)# exit |
| This example shows how show line information.Switch# show lineConsole ================= sessionsession Timeout : 10 (minutes) | |
History Count :
100 Password Retry : 3
Silent Time : 0 (seconds) Telnet
Telnet Server : disabled
Session Timeout: 10 (minutes)
History Count:150
Password Retry : 3
Silent Time : 0 (seconds)
SSH
SSH Server : disabled
Session Timeout: 10 (minutes)
History Count : 200
Password Retry : 3
Silent Time : 0 (seconds)
This example shows how show history commands.
Switch# show history
Maximun History Count: 100
-
enable
-
configure
-
line console
-
exit
-
show history
-
line
-
exit
-
show history
-
configure
-
line
-
line console
-
exit
-
line console
-
history 100
-
exit
-
show history
-
exit
-
show history
hostname
Syntax
hostname
WORD
Parameter
WORD
Specify the hostname of the switch.
Default
Default name string is "Switch".
Mode
Global Configuration
Usage
Use "hostname" command to modify hostname of the switch. The system name is also used to be CLI prompt.
| Example | This example shows how to modify contact information Switch(config)# hostname myname myname(config)# | |
| interface | ||
| Syntax interface IF_PORTS interface range IF_PORTS | ||
| Parameter | IF_PORTS | Specify the port to select. This parameter allows partial port name and ignore case. For Example: fa1 FastEthernet3 Gigabit4 ......If port range is specified, the list format is also available. For Example: fa1,3,5 fa2,gi1-3 |
| Default | No default value for this command. | |
| Mode | Global Configuration | |
| Usage Some configurations are port based. In order to configure these configurations, we need to enter Interface Configuration mode to configure them. Use “interface” command to enter the Interface Configuration mode and select the port to be configured.In Interface Configuration mode, the prompt will show as “Switch(config-if)#” | ||
| Example | This example shows how to enter Interface Configuration mode Switch# configure Switch(config)# interface fa1 Switch(config-if)# | |
| ip address | ||
| Syntax | ip address A.B.C.D [mask A.B.C.D] | |
| Parameter | address A.B.C.D | Specify IPv4 address for switch |
| mask A.B.C.D | Specify net mask address for switch | |
| Default | Default IP address is 192.168.1.1 and default net mask is 255.255.255.0. | |
| Mode | Global Configuration | |
| Usage | Use “ip address” command to modify administration ipv4 address. This address is very important. When we try to use telnet, ssh, http, https, snmp... to connect to the switch, we need to use this ip address to access it. | |
| Example | This example shows how to modify the ipv4 address of the switch. Switch(config)# ip address 192.168.1.200 mask 255.255.255.0 | |
| This example shows how to show current ipv4 address of the switch. Switch# show ipIP Address: 192.168.1.200Subnet Netmask: 255.255.255.0Default Gateway: 192.168.1.254 | ||
ip default-gateway
| Syntax | ip default-gatewayA.B.C.Dno ip default-gateway | |
| Parameter | A.B.C.D | Specify default gateway IPv4 address for switch |
| Default | Default IP address of default gateway is 192.168.1.254. | |
| Mode | Global Configuration | |
| Usage | Use “ip default-gateway” command to modify default gateway address. And use “no ip default-gateway” to restore default gateway address to factory default. | |
Command Line Interface
User Guide
Example
This example shows how to modify the ipv4 address of the switch.
Switch(config)# ip default-gateway 192.168.1.100
This example shows how to show current ipv4 default gateway of the switch.
Switch# show ip
IP Address: 192.168.1.1
Subnet Netmask: 255.255.255.0
Default Gateway: 192.168.1.100
ip dhcp
| Syntax | ip dhcp |
| no ip | |
| dhcp |
Parameter
| Default | Default DHCP client is disabled. |
| Mode | Global Configuration |
| Usage Use “ip dhcp” command to enabled dhcp client to get IP address from remote DHCP server.Use “no ip dhcp” command to disabled dhcp client and use static ip address. |
| Example | This example shows how to enable dhcp client. Switch(config)# ip dhcp |
| This example shows how to show current dhcp client state of the switch. Switch# show ip dhcp DHCP Status : enabled |
ip dns
| Syntax | ip dns A.B.C.D [A.B.C.D]no ip dns [A.B.C.D] |
| Parameter | A.B.C.D | Specify the DNS server ip address. |
| Default | Default IP address of DNS server is 168.95.1.1 and 168.95.192.1. |
| Mode | Global Configuration |
| Usage | Use “ip dns” command to modify DNS server address. And use “no ip dns”to delete existing DNS server. |
Example
This example shows how to modify the DNS server of the switch.
Switch(config)# ip dns 111.111.111.111 222.222.222.222
| This example shows current DNS server of the switch. Switch# show ip dns DNS lookup is enabled DNS Server 1:111.111.111.111 DNS Server 2:222.222.222.222 | |
| ip dns lookup | |
| Syntax | ip dns lookup no ip dns lookup |
| Parameter | |
| Default | Default DNS lookup is enabled |
| Mode | Global Configuration |
| Usage | Use “ip dns lookup” command to enable the Domain Name to IP address service. And use “no ip dns” to disable the DNS service. |
| Example | This example enables the DNS service on the system. Switch(config)# ip dns lookup |
| This example shows the DNS service status. Switch# show ip dns DNS Server 1:111.111.111.111 DNS Server 2:222.222.222.222 | |
ipv6 autoconfig
| Syntax | ipv6 autoconfigno ipv6autoconfig |
| Parameter | |
| Default | Default IPv6 auto config is enabled. |
| Mode | Global Configuration |
| Usage Use “ipv6 autoconfig” command to enabled IPv6 auto configuration feature. Use “no ipv6 autoconfig” command to disabled IPv6 auto configuration feature. | |
| Example | This example shows how to disable IPv6 auto config.Switch(config)# no ipv6 autoconfig |
| This example shows how to show current IPv6 auto config state.Switch# show ipv6IPv6 DHCP Configuration : DisabledIPv6 DHCP DUID :IPv6 Auto Configuration : DisabledIPv6 Link Local Address : fe80::dcad:beff:feef:102/64 IPv6 staticAddress : fe80::20e:2eff:fef1:4b3c/128 IPv6 staticGateway Address : ::IPv6 in use Address : fe80::dcad:beff:feef:102/64IPv6 in use Gateway Address : :: | |
| ipv6 address | |
| Syntax | ipv6 address X:X::X:X prefix <0-128> |
| Parameter | address X:X::X:X Specify IPv6 address for switchprefix <0-128> Specify IPv6 prefix length for switch |
| Default | No default ipv6 address on the switch. |
| Mode | Global Configuration |
| Usage | Use “ipv6 address” command to specify static IPv6 address. |
| Example | This example shows how to add static ipv6 address of the switch.Switch(config)# ipv6 address fe80::20e:2eff:fef1:4b3c prefix 128 |
| This example shows how to show current ipv6 address of the switch.Switch#show ipv6IPv6 DHCP Configuration : DisabledIPv6 DHCP DUID :IPv6 Auto Configuration : EnabledIPv6 Link Local Address : fe80::dcad:beff:feef:102/64 IPv6 staticAddress : fe80::20e:2eff:fef1:4b3c/128 IPv6 staticGateway Address ::IPv6 in use Address : fe80::dcad:beff:feef:102/64IPv6 in use Gateway Address : :: | |
ipv6 default-gateway
| Syntax | ipv6 default-gatewayX:X::X:X | |
| Parameter | X:X::X:X Specify default gateway IPv6 address for switch | |
| Default | No default ipv6 default gateway address on the switch. | |
| Mode | Global Configuration | |
| Usage | Use “ipv6 default-gateway” command to modify default gateway IPv6 address. | |
| Example | This example shows how to modify the ipv6 default gateway address of the switch.Switch(config)# ipv6 default-gateway fe80::dcad:beff:feef:103Switch# show ipv6IPv6 DHCP Configuration : DisabledIPv6 DHCP DUID :IPv6 Auto Configuration : EnabledIPv6 Link Local Address : fe80::dcad:beff:feef:102/64 IPv6 staticAddress : fe80::20e:2eff:fef1:4b3c/128 IPv6 staticGateway Address ::IPv6 in use Address : fe80::dcad:beff:feef:102/64IPv6 in use Gateway Address :: | |
| ipv6 dhcp | ||
| Syntax | ipv6 dhcpno ipv6 dhcp | |
| Parameter | ||
| Default | Default DHCPv6 client is disabled. | |
| Mode | Global Configuration | |
| Usage | Use “ipv6 dhcp” command to enabled dhcpv6 client to get IP address from remote DHCPv6 server.Use “no ipv6 dhcp” command to disabled dhcpv6 client and use static ipv6 | |
| address or ipv6 auto config address. | ||
| Example | This example shows how to enable dhcp client.Switch(config)# ipv6 dhcp | |
| This example shows how to show current dhcpv6 client state of the switch.Switch# show ipv6 dhcpDHCPv6 Status : enabled | ||
| ip service | ||
| Syntax | ip (telnet | ssh | http | https)no ip (telnet | ssh | http |https) | |
| Parameter | telnet | Enable/Disable telnet service |
| ssh | Enable/Disable ssh service | |
| http | Enable/Disable http service | |
| https | Enable/Disable https service | |
| Default Default telnet service is disabled.Default ssh service isdisabled. Default httpservice is enabled.Default https service isdisabled. | ||
| Mode | Global Configuration | |
| Usage | Use “ip service” command to enable all kinds of ip services. Such as telnet, ssh, http and https.Use no form to disable service. | |
Example
This example shows how to enable telnet service and show current telnet service status.
Switch(config)# ip telnet
Telnetd daemon enabled.
Switch(config)# exit Switch#
show line telnet
Telnet =
Telnet Server : enabled Session
Timeout:10(minutes) History Count
: 128
Password Retry : 3
Silent Time : 0 (seconds)
This example shows how to enable https service and show current https service status.
Switch(config)# ip https
| Switch(config)# exitSwitch# show ip httpsHTTPS daemon : enabledSession Timeout : 10 (minutes) | ||
| ip session-timeout | ||
| Syntax | ip (http | https) session-timeout <0-86400> | |
| Parameter http | Specify session timeout for http service. | |
| https Specify session timeout for https service.<0-86400> Specify session timeout minutes. 0 means never timeout. | ||
| Default | Default session timeout for http and https is 10 minutes. | |
| Mode | Global Configuration | |
| Usage | Use “ip session-timeout” command to specify the session timeout value for http or https service. When user login into WEBUI and do not do any action after session timeout will be logged out. | |
| Example | This example shows how to change http session timeout to 15min and https session timeout to 20minSwitch(config)# ip http session-timeout 15Switch(config)# ip https session-timeout 20This example shows how to enable https service and show current https service status.Switch# show ip httpHTTPS daemon : enabled SessionTimeout : 15 (minutes) Switch# show ip httpsHTTPS daemon : disabledSession Timeout : 20 (minutes) | |
| ip ssh | ||
| Syntax | ip ssh (v1|v2|all)no ip ssh(v1|v2|all) | |
| Parameter | v1 Generate/Delete version 1 key files | |
| v2 Generate/Delete version 2 key files | ||
all
Generate/Delete version 1 and 2 key files
| Default | Version 2 key files will be generated by default | |
| Mode | Global Configuration | |
| Usage | Use “ip ssh” command to generate the key files for ssh connection. Use no form to delete key files. SSH connection may not connect if no any v1 or v2 ssh key files exist. | |
| Example | This example shows how to delete and re-generate ssh version 2 key files.Switch(config)# no ip ssh v2Switch(config)# do show flashFile Name File Size Modified----startup-config 1913 2000-01-01 08:29:10rsa1 976 2000-01-05 23:28:38ssl_cert 875 2000-01-05 23:03:20image0 (active) 4856825 2014-04-02 15:17:34Switch(config)# ip ssh v2Generating a SSHv2 default RSA Key.This may take a few minutes, depending on the key size.Generating a SSHv2 default DSA Key.This may take a few minutes, depending on the key size.Switch(config)# do show flashFile Name File Size Modified----startup-config 1913 2000-01-01 08:29:10rsa1 976 2000-01-05 23:28:38rsa2 1675 2000-01-05 23:34:43dsa2 668 2000-01-05 23:34:58ssl_cert 875 2000-01-05 23:03:20image0 (active) 4856825 2014-04-02 15:17:34 | |
| line | ||
| Syntax | line (console | telnet |ssh ) | |
| Parameter | console Select console line to configure.telnet Select telnet line to configure.ssh Select ssh line to configure. | |
| Default | No default value for this command. | |
| Mode | Global Configuration | |
| Usage Some configurations are line based. In order to configure these configurations, we need to enter Line Configuration mode to configure them. Use "line" command to enter the Line Configuration mode and select the line to be configured.In Line Configuration mode, the prompt will show as “Switch(config-line)#” | ||
| Example | This example shows how to enter Interface Configuration modeSwitch#configureSwitch(config)#lineconsoleSwitch(config-line)# | |
| reboot | ||
| Syntax | reboot | |
| Parameter | ||
| Default | No default value for this command. | |
| Mode | Privileged EXEC | |
| Usage | Use "reboot" command to make system hot restart. | |
| Example | This example shows how to restart the systemSwitch#reboot | |
| enable password | ||
| Syntax | enable [privilege <1-15>] (password UNENCRYPY-PASSWORD | secretUNENCRYPY-PASSWORD | secret encrypted ENCRYPT-PASSWORD)no enable [privilege <0-15>] | |
| Parameter | privilege <0-15> | Specify the privilege level to configure. If no privilege level is specified, default is 15. |
| Managed Switch Software | 53 | |
password
UNENCRYPY-
Specify password string and make it not encrypted.
| PASSWORD | ||
| secretUNENCRYPY-PASSWORD | Specify password string and make it encrypted. | |
| secretencryptedENCRYPT-PASSWORD | Enter an encrypted password. Use this keyword to enter a password that is already encrypted (for instance, a password that you copied from another the of another device). | |
| Default | Default enable password for all privilege levels are “”. | |
| Mode | Global Configuration | |
| Usage | Use “enable password” command to edit password for each privilege level for enable authentication. And use “no enable” command to restore enable password to default empty value.The only way to show this configuration is using “show running-config” command. | |
| Example | This example shows how to edit enable password for privilege level 15 Switch(config)# enable secret enblpasswd | |
| exec-timeout | ||
| Syntax | exec-timeout <0-65535> | |
| Parameter | <0-65535>timeout | Specify session timeout minutes. 0 means never |
| Default | Default session timeout for all lines are 10 minutes. | |
| Mode | Line Configuration | |
| Usage | Use “exec-timeout” command to specify the session timeout value for CLI running on console, telnet or ssh service. When user login into CLI and do not do any action after session timeout will be logged | |
out from the CLI session.
Example
This example shows how to change console session timeout to 15min, telnet session timeout to 20min and ssh session timeout to 25min.
Switch(config)# line console
Switch(config-line)# exec-timeout 15
Switch(config-line)# exit Switch(config)# line
telnet Switch(config-line)# exec-timeout 20
Switch(config-line)# exit Switch(config)# line
ssh Switch(config-line)# exec-timeout 25
Switch(config-line)# exit
This example shows how show line information.
Switch# show line
Console =========
Session Timeout : 15 (minutes)
History Count : 128
Password Retry : 3
Silent Time : 0 (seconds) Telnet
Telnet Server : disabled
Session Timeout : 20 (minutes)
History Count : 128
Password Retry : 3
Silent Time : 0 (seconds)
SSH
SSH Server : disabled
Session Timeout : 25 (minutes)
History Count : 128
Password Retry : 3
Silent Time : 0 (seconds)
password-thresh
| Syntax | password-thresh <0-120> | |
| Parameter | <0-120> | Specify password fail retry number. 0 means no limit. |
| Default | Default password fail retry number is 3. | |
| Mode | Line Configuration | |
| Usage | Use “password-thresh” command to specify the password fail retry number for CLI running on console, telnet or ssh service. When user input password to login and authenticate failed, the fail retry number will increase one. After fail retry number exceed configured one, the CLI will block login for the period of silent time which configured by the command “silent-time”. | |
| Example | This example shows how to change console fail retry number to 4, telnet fail retry number to 5 and ssh fail retry number to 6.Switch(config)# line console Switch(config-line)#password-thresh 4 Switch(config-line)# exitSwitch(config)# line telnet | |
Switch(config-line)# password-thresh 5
Switch(config-line)# exit Switch(config)# line
ssh Switch(config-line)# password-thresh 6
Switch(config-line)# exit
This example shows how show line information.
Switch# show line
Console =
Session Timeout : 10 (minutes)
History Count : 128
Password Retry : 4
Silent Time : 0 (seconds) Telnet
Telnet Server : disabled
Session Timeout : 10 (minutes)
History Count : 128
Password Retry : 5
Silent Time : 0 (seconds)
SSH
SSH Server : disabled
Session Timeout : 10 (minutes)
History Count : 128
Password Retry : 6
Silent Time : 0 (seconds)
ping
| Syntax | ping HOSTNAME [count <1-999999999>] | |
| Parameter | HOSTNAME | Specify IPv4/IPv6 address or domain name to ping. |
| count <1-999999999> | Specify how many times to ping. | |
| Default | No default value for this command. | |
| Mode | User EXEC Privileged EXEC | |
| Usage | Use “ping” command to do network ping diagnostic. | |
Example
This example shows how to ping remote host 192.168.1.111.
Switch# ping 192.168.1.111
PING 192.168.1.111 (192.168.1.111): 56 data bytes
64 bytes from 192.168.1.111: icmp_seq=0 ttl=128 time=10.0 ms
64 bytes from 192.168.1.111: icmp_seq=1 ttl=128 time=0.0 ms
64 bytes from 192.168.1.111: icmp_seq=2 ttl=128 time=0.0 ms
64 bytes from 192.168.1.111: icmp_seq=3 ttl=128 time=0.0 ms
--- 192.168.1.111 ping statistics ---
4 packets transmitted, 4 packets received, 0% packet loss
round-trip min/avg/max = 0.0/2.5/10.0ms
traceroute
| Syntax | traceroute A.B.C.D [max_hop <2-255>] |
| Parameter A.B.C.D Specify IPv4 to trace. | |
| max_hop <2-255> Specify maximum hop to trace. | |
| Default | No default value for this command. |
| Mode | User EXECPrivileged EXEC |
| Usage | Use “traceroute” command to do network trace route diagnostic. |
| Example | This example shows how to trace route host 192.168.1.111.Switch# traceroute 192.168.1.111traceroute to 192.168.1.111 (192.168.1.111), 30 hops max, 40 byte packets1 192.168.1.111 (192.168.1.111) 0 ms 10 ms 0 ms |
| show arp | |
| Syntax | show arp |
| Parameter | |
| Default | No default value for this command. |
| Mode | User EXECPrivileged EXEC |
| Usage | Use “show arp” command to show all arp entries. |
| Example | This example shows how to show arp entries.Switch#show arpAddress HWtype HWaddress Flags Mask Iface192.168.1.111 ether 00:0E:2E:F1:4B:3C C eth0 |
show cpu utilization
| Syntax | show cpu utilization |
| Parameter | |
| Default | No default value for this command. |
| Mode | Privileged EXEC |
| Usage | Use “show cpu utilization” command to show current CPU utilization. |
| Example | This example shows how to show current CPU utilization.Switch# show cpu utilizationCPU utilization----Current: 30% |
show history
| Syntax | show history |
| Parameter | |
| Default | No default value for this command. |
Mode User EXEC
| Privileged EXEC Global Configuration |
| Usage | Use “show history” to show commands we input before. |
| Example | This example shows how show history commands.Switch#show historyMaximun History Count: 100 |
| 1. enable2. configure3. line console | |
| 4. exit | |
| 5. show history | |
| 6. line | |
| 7. exit | |
| 8. show history | |
| 9. configure | |
| 10. line | |
| 11. line console | |
| 12. exit | |
| 13. line console | |
| 14. history 100 | |
| 15. exit | |
| 16. show history | |
| 17. exit | |
| 18. show history |
show info
| Syntax | show info |
| Parameter | |
| Default | No default value for this command. |
| Mode | User EXECPrivileged EXEC |
| Usage | Use “show info” command to show system summary information. |
| Example | This example shows how to show system version.Switch# show infoSystem Name : SwitchSystem Location : Default Location SystemContact : Default Contact MACAddress : DE:AD:BE:EF:01:02 IPAddress : 192.168.1.1Subnet Mask : 255.255.255.0Loader Version : 1.3.0.26225Loader Date : Thu May 17 15:19:42 CST 2012Firmware Version : 2.5.0-beta.32811Firmware Date : Mon Sep 24 19:33:42 CST 2012System Object ID : 1.3.6.1.4.1.27282.3.2.10System Up Time : 0 days, 1 hours, 49 mins, 29 secs |
show ip
| Syntax | show ip |
| Parameter | |
| Default | No default value for this command. |
| Mode | User EXECPrivileged EXEC |
| Usage | Use “show ip” command to show system IPv4 address, net mask and default gateway. |
| Example | This example shows how to show current ipv4 address of the switch.Switch#show ipIP Address: 192.168.1.200Subnet Netmask: 255.255.255.0Default Gateway: 192.168.1.254 |
| show ip dhcp | |
| Syntax | show ip dhcp |
| Parameter | |
| Default | No default value for this command. |
| Mode | User EXECPrivileged EXEC |
| Usage | Use “show ip dhcp” command to show IPv4 dhcp client enable state. |
| Example | This example shows how to show current dhcp client state of the switch.Switch#show ip dhcpDHCP Status : enabled |
| show ip dns | |
| Syntax | show ip dns |
| Parameter | |
| Default | No default value for this command. |
| Mode | User EXECPrivileged EXEC |
| Usage | Use “show ip dns” command to show system IPv4 DNS addresses. |
| Example | This example shows how to show current ipv4 address of the switch.Switch# show ip dnsDNS lookup is enabledDNS Server 1 : 168.95.1.1DNS Server 2 : 168.95.192.1 |
| show ip http | |
| Syntax | show ip (http|https) |
| Parameter | |
| Default | No default value for this command. |
| Mode | Privileged EXEC |
| Usage | Use “show ip http” command to show HTTP/HTTPS information. |
| Example | This example shows how to show current ipv4 address of the switch.Switch# show ip httpHTTP daemon : enabledSession Timeout : 10 (minutes)Switch# show ip httpsHTTPS daemon : enabledSession Timeout : 10 (minutes) |
| show ipv6 | |
| Syntax | show ipv6 |
Parameter
| Default | No default value for this command. |
| Mode | User EXECPrivileged EXEC |
| Usage | Use “show ipv6” command to show system IPv6 address, net mask,defaultgateway and auto config state. |
| Example | This example shows how to show current ipv6 address of the switch.Switch#show ipv6IPv6 DHCP Configuration : DisabledIPv6 DHCP DUID :IPv6 Auto Configuration : EnabledIPv6 Link Local Address : fe80::dcad:beff:feef:102/64 IPv6 staticAddress : fe80::20e:2eff:fef1:4b3c/128 IPv6 staticGateway Address : ::IPv6 in use Address : fe80::dcad:beff:feef:102/64IPv6 in use Gateway Address : :: |
show ipv6 dhcp
| Syntax | show ipv6 dhcp |
| Parameter | |
| Default | No default value for this command. |
| Mode | User EXEC Privileged EXEC |
| Usage | Use “show ipv6 dhcp” command to show system IPv6 dhcp client enable state. |
| Example | This example shows how to show current dhcpv6 client state of the switch.Switch#show ipv6 dhcpDHCPv6 Status : enabled |
show line
| Syntax | show line [(console | telnet | ssh)] | |
| Parameter | consoletelnet | Select console line to show.Select telnet line to show. |
| ssh | Select ssh line to show. | |
| Default | No default value for this command. | |
| Mode | Privileged EXEC | |
| Usage | Use “show line” command to show all line configurations including session timeout, history count, password retry number and silent time. For telnet and ssh, it also shows the service enable/disable state. | |
| Example | This example shows how show all lines’ information. Switch# show line Console ==================== Session Timeout : 15 (minutes) History Count : 128 Password Retry : 3 Silent Time : 0 (seconds) Telnet ==================== Telnet Server : disabled Session Timeout : 20 (minutes) History Count : 128 Password Retry : 3 Silent Time : 0 (seconds) SSH ==================== SSH Server : disabled Session Timeout : 25 (minutes) History Count : 128 Password Retry : 3 Silent Time : 0 (seconds) | |
show memory statistics
| Syntax | show memory statistics |
| Parameter | |
| Default | No default value for this command. |
| Mode | Privileged EXEC |
| Usage | Use “show memory statistics” command to show current memory |
Command Line Interface User Guide
utilization.
| Example | This example show how to show current system memory statistics. |
| Switch# show memory statisticstotal(KB) used(KB) free(KB) shared(KB) buffer(KB) cache(KB)----+----+----+----+----Mem: 62408 56424 59840 1320 19328-/+ buffers/cache: 35776 26632Swap: 0 0 0 |
show privilege
| Syntax | show privilege |
| Parameter | |
| Default | No default value for this command. |
| Mode | User EXECPrivileged EXEC |
| Usage | Use “show privilege” command to show the privilege level of the current user. |
| Example | This example shows how to show arp entries.Switch#show privilegeCurrent CLI Username: adminCurrent CLI Privilege: 15 |
show username
| Syntax | showusername |
| Parameter | |
| Default | No default value for this command |
| Mode | Privileged EXEC |
| Usage | Use “show username” command show all user accounts in local database. |
| Example | This example shows how to show existing user accounts.Switch# show usernamePriv | Type | User Name | Password----+----+----01 | secret | | dnXencJRwfiV615 | secret | admin | FzjrGO6vfbERY15 | secret | test | 7p57T9yMkViSUS |
| show users | |
| Syntax | show users |
| Parameter | |
| Default | No default value for this command |
| Mode | Privileged EXEC |
| Usage | Use “show users” command show information of all active users. |
| Example | This example shows how to show existing user accounts.Switch# show usersUsername Protocol Location----admin console 0.0.0.0admin telnet 192.168.1.111admin ssh 192.168.1.111 |
| show version | |
| Syntax | show version |
| Parameter | |
| Default | No default value for this |
Command Line Interface User Guide
command.
| Mode | User EXECPrivileged EXEC |
| Usage | Use “show version” command to show loader and firmware version and build date. |
| Example | This example shows how to show system version.Switch#show versionLoader Version: 1.3.0.26225Loader Date: Thu May 17 15:19:42 CST 2012Firmware Version: 2.5.0-beta.32811Firmware Date: Mon Sep 24 19:33:42 CST 2012 |
| silent-time | |
| Syntax | silent-time <0-65535> |
| Parameter | <0-65535>Specify silent time with unit seconds. 0 means do not silent. |
| Default | Default silent time is 0. |
| Mode | Line Configuration |
| Usage | Use “silent time” command to specify the silent time for CLI running on console, telnet or ssh service. When user input password to login and authenticate failed, the fail retry number will increase one. After fail retry number exceed configured one, the CLI will block login for the period of silent time which configured by the command “silent-time”. |
Command Line Interface
User Guide
Example
This example shows how to change console silent time to 10, telnet silent time to 15 and ssh silent time to 20.
Switch(config)# line console Switch(config-
line)# silent-time 10 Switch(config-line)# exit
Switch(config)# line telnet Switch(config-line)#
silent-time 15 Switch(config-line)# exit
Switch(config)# line ssh Switch(config-line)#
silent-time 20 Switch(config-line)# exit
This example shows how show line information.
Switch# show line
Console =
Session Timeout : 10 (minutes)
| History Count :128 Password Retry :3Silent Time : 10 (seconds)Telnet | |||
| Telnet Server : disabledSession Timeout : 10 (minutes)History Count : 128Password Retry : 3Silent Time : 15 (seconds)SSH | |||
| SSH Server : disabledSession Timeout : 10 (minutes)History Count : 128Password Retry : 3Silent Time : 20 (seconds) | |||
| SSL | |||
| Syntax | ssl | ||
| Parameter | |||
| Default | No default value for this command. | ||
| Mode | Global Configuration | ||
| Usage | Use “ssl” command to generate security certificate files such as RSA, DSA. | ||
| Example | This example shows how to generate certificate files.Switch(config)# sslThis example shows how to show the certificate file lists.Switch# show flash | ||
| File Name | File Size | Modified | |
| startup-config | 1191 | 2000-01-01 00:00:23 | |
| backup-config | 1607 | 2000-01-01 08:36:23 | |
| rsa1 | 974 | 2000-01-01 00:00:18 | |
| rsa2 | 1675 | 2000-01-01 00:00:18 | |
| dsa2 | 668 | 2000-01-01 00:00:18 | |
| ssl_cert | 993 | 2000-01-01 00:00:18 | |
| image0 (active) | 4372401 | 2012-09-24 01:57:29 | |
| image1 (backup) | 0 | ||
system name
Syntax
system name
NAME
| Parameter | NAME | Specify system name string. |
| Default | Default name string is “Switch”. | |
| Mode | Global Configuration | |
| Usage | Use “system name” command to modify system name information of the switch. The system name is also used to be CLI prompt. | |
| Example | This example shows how to modify contact information Switch(config)# system name myname myname(config)#This example shows how to show system name information Switch# show infoSystem Name : mynameSystem Location : Default Location SystemContact : Default Contact MACAddress : DE:AD:BE:EF:01:02 IPAddress : 192.168.1.1Subnet Mask : 255.255.255.0Loader Version : 1.3.0.26225Loader Date : Thu May 17 15:19:42 CST 2012Firmware Version : 2.5.0-beta.32811Firmware Date : Mon Sep 24 19:33:42 CST 2012System Object ID : 1.3.6.1.4.1.27282.3.2.10System Up Time : 0 days, 0 hours, 2 mins, 37 secs | |
system contact
| Syntax | system contactCONTACT | |
| Parameter | CONTACT | Specify contact string. |
| Default | Default contact string is “Default Contact”. | |
| Mode | Global Configuration | |
| Usage | Use “system contact” command to modify contact information of the switch. | |
| Example | This example shows how to modify contact informationSwitch(config)#system contact callme | |
| This example shows how to show system contact informationSwitch#show infoSystem Name:SwitchSystem Location:Default LocationSystem Contact:callmeMAC Address:DE:AD:BE:EF:01:02 IPAddress:192.168.1.1Subnet Mask:255.255.255.0Loader Version:1.3.0.26225Loader Date:Thu May 17 15:19:42 CST 2012Firmware Version:2.5.0-beta.32811Firmware Date:Mon Sep 24 19:33:42 CST 2012System Object ID:1.3.6.1.4.1.27282.3.2.10System Up Time:0 days,0 hours,2 mins,37 secs | ||
system location
| Syntax | system locationLOCATION | |
| Parameter | CONTACT | Specify location string. |
| Default | Default location string is “Default Location”. | |
| Mode | Global Configuration | |
| Usage | Use “system location” command to modify location information of the switch. | |
| Example | This example shows how to modify contact informationSwitch(config)# system location home | |
| This example shows how to show system location informationSwitch# show infoSystem Name : SwitchEF0102System Location : homeSystem Contact : Default Contact MACAddress : DE:AD:BE:EF:01:02 IPAddress : 192.168.1.1Subnet Mask : 255.255.255.0Loader Version : 1.3.0.26225Loader Date : Thu May 17 15:19:42 CST 2012Firmware Version : 2.5.0-beta.32811Firmware Date : Mon Sep 24 19:33:42 CST 2012System Object ID : 1.3.6.1.4.1.27282.3.2.10System Up Time : 0 days, 0 hours, 2 mins, 37 secs | ||
terminal length
| Syntax | terminal length <0-24> | |
| Parameter | <0-24> | Specify terminal length value. 0 means no limit. |
| Default | Default terminal length is 24. | |
| Mode | User EXECPrivileged EXEC | |
| Usage | Use “terminal length” command to specify the maximum line number the terminal is able to print. | |
| Example | This example shows how to change terminal length.Switch# terminal length 3 Switch#show running-config SYSTEMCONFIG FILE ::= BEGIN! System Description: RTK RTL8380-24FE-4GEC Switch! System Version: v3.0.4.46766--More-- | |
| username | ||
| Syntax | username WORD<0-32>[privilege (admin|user|<0-15)](nopassword | password UNENCRYPY-PASSWORD | secret UNENCRYPY-PASSWORD | secret encrypted ENCRYPT-PASSWORD)no username WORD<0-32> | |
| Parameter | username WORD<0-32> | Specify user name to add/delete/edit. |
| privilege admin | Specify privilege level to be admin (privilege 15) | |
| privilege user | Specify privilege level to be user (privilege 1) | |
| privilege <0-15> | Specify custom privilege level | |
| password UNENCRYPY-PASSWORD | Specify password string and make it not encrypted. | |
| secret UNENCRYPY-PASSWORD | Specify password string and make it encrypted. | |
secret encrypted ENCRYPT- PASSWORD
Enter an encrypted password. Use this keyword to enter a password that is already encrypted (for instance, a password that you copied from another the
| configuration file of another device). | |
| Default | Default username “admin” has password “admin” with privilege 15. |
| Mode | Global Configuration |
| Usage | Use “username” command to add a new user account or edit an existing user account. And use “no username” to delete an existing user account. The user account is a local database for login authentication. |
| Example | This example shows how to add a new user account.Switch(config)# username test secret passwdThis example shows how to show existing user accounts.Switch#show usernamePriv | Type | User Name | Password----+----+----+----01 | secret | | dnXencJRwflV615 | secret | admin | FzjrGO6vfbERY15 | secret | test | 7p57T9yMkViSUS |
4. Authentication Manager
authentication
| Syntax | authentication (dot1x|mac|web)no authentication(dot1x|mac|web) |
| Parameter | |
| Default | Default is disabled for all type |
| Mode | Global Configuration |
| Usage | Use “authentication” command to enable the global setting of 802.1x/MAC/WEB authentication network access control.Use thenoform of this command to disable 802.1x/MAC/WEB authentication. |
Example
The following example shows how to enable
802.1x/MAC/WEB authentication.
Switch(config)# authentication dot1x
| Switch(config)# authentication macSwitch(config)# authentication web Switch#show authentication Autentication dot1x state:enabled Autentication mac state :enabled Autentication web state :enabledGuest VLAN : enabled (3)Mac-auth Radius User ID Format:XXXXXXXXXX |
authentication (Interface)
| Syntax | authentication (dot1x|mac|web)no authentication(dot1x|mac|web) |
| Parameter | |
| Default | Default is disabled for all type |
| Mode | Interface Configuration |
| Usage | Use “authentication” interface command to enable the port setting of 802.1x/MAC/WEB authentication network access control.Use the no form of this command to disable 802.1x/MAC/WEB authentication. |
| Example | The following example shows how to enable 802.1x/MAC/WEB authentication.Switch(config)#interface fa1Switch(config-if)#authentication dot1x Switch(config-if)#authentication mac Switch(config-if)# authentication web Switch# show authentication interface fa1Interface FastEthernet1Admin Control : disableHost Mode : multi-authType dot1x State : enabledType mac State : enabledType web State : enabled...... |
authentication mac radius
Syntax
authentication mac radius [mac-case (lower|upper)] [mac-delimiter
(colon|dot|hyphen|none) [gap (2|4|6)]]
| Parameter | mac-case(lower|upper) | Select radius user id to be upper case or lower case. |
| mac-delimiter (colon|dot|hyphen|no ne) | Select radius user id delimiter colon: XX:XX:XX:XX:XX:XX dot: XX.XX.XX.XX.XX.XX hyphen: XX-XX-XX-XX-XX-XX none:XXXXXXXXXXXX | |
| gap (2|4|6) | Select delimiter gap 2: XX-XX-XX-XX-XX-XX 4: XXXX-XXXX-XXXX 6:XXXXXXXX-XXXXXX |
Default Default radius id format is upper case with none delimiter.
Mode Global Configuration
Usage Use “authentication mac radius” command to configure the radius user id format used by MAC authentication Radius method.
Example The following example shows how to configure MAC authentication radius id format to be upper case with colon delimiter every 2 chars Switch(config)# authentication mac radius mac-case upper Switch(config)# authentication mac radius mac-delimiter colon gap 2 Switch# show authentication Autentication dot1x state : enabled Autentication mac state : disabled Autentication web state : disabled Guest VLAN : disabled Mac-auth Radius User ID Format: XX:XX:XX:XX:XX:XX
authentication mac local
| Syntax | authentication mac local mac-addr control auth [vlan <1-4094>][reauth-period <300-4294967294>] [inactive-timeout <60-65535>] authentication mac local mac-addr control unauth no authentication mac local mac- |
Parameter addr mac addr MAC Authentication local MAC address
Managed Switch Software control auth Host with this MAC address will be
Rev. 1.1
| control unauth | Host with this MAC address will be force-unauthorized | |
| vlan <1-4094> | MAC Authentication host assigned VLAN | |
| reauth-period<300-4294967294> | MAC Authentication host reauthentication period | |
| inactive-timeout<60-65535> | MAC authentication host inactive timeout | |
| Default | Default is no local MAC Authentication entry. | |
| Mode | Global Configuration | |
| Usage | Use “authentication mac local” command to add local MAC authentication hosts in database. This local host database is used when MAC authentication method is configured as “local”. The MAC authentication module will find host in this local database and authenticated it.Use the no form of this command to delete local host from database. | |
| Example | The following example shows how to add a new local mac authentication host.Switch(config)# authentication mac local 00:11:22:33:00:01 control auth vlan 3 reauth-period 500 inactive-timeout 300 Switch# show authenticationMac-auth Local Entry :Reauth InactiveMAC Address Control VLAN Period Timeout00:11:22:33:00:01Authorized 3 500 300 | |
authentication guest-vlan
| Syntax | authentication guest-vlan <1-4094>no authentication guest-vlan |
| Parameter | <1-4094> Guest VLAN ID |
| Default | Default guest VLAN isdisabled |
Mode
Global Configuration
| Usage | Use “authentication guest-vlan” command to enable the global setting of guest VLAN and specify guest VLAN ID.Use the no form of this command to disable guest VLAN. |
| Example | The following example shows how to create guest VLAN.Switch(config)# vlan 3Switch(config-vlan)# exitSwitch(config)# authentication guest-vlan 3 Switch# show authentication |
authentication guest-vlan (Interface)
| Syntax | authentication guest-vlanno authentication guest-vlan |
| Parameter | |
| Default | Default guest VLAN isdisabled |
| Mode | Interface Configuration |
| Usage | Use “authentication guest-vlan” command to enable the port setting of guest VLAN.Use thenoform of this command to disable guest VLAN. |
| Example | The following example shows how to enable guest VLAN.Switch(config)#interface fa1Switch(config-if)#authentication guest-vlan |
authentication host-mode
| Syntax | authentication host-mode (multi-auth|multi-host|single-host) no authentication host-mode |
Parameter
multi-auth
Multiple Authentication Mode. In this
| mode, every client need to pass authenticate procedure individually. | ||
| multi-host | Multiple Host Mode. In this mode, only one client need to be authenticated and other clients will get the same access accessibility. | |
| single-host | Single Host Mode. In this mode, only one host is allowed to be authenticated. It is the same as multi-auth mode with max hosts number configure to be 1. | |
| Default | Default is multi-auth mode. | |
| Mode | Interface Configuration | |
| Usage | Use “authentication host-mode” command to configure the port authentication host mode.Use the no form of this command to restore default value. | |
| Example | The following example shows how to modify port host mode to multi-host.Switch(config)# interface fa1Switch(config-if)# authentication host-mode multi-hostSwitch# show authentication interface fa1Interface FastEthernet1Admin Control : autoHost Mode : multi-hostType dot1x State : disabledType mac State : disabledType web State : disabled...... | |
authentication max-hosts
| Syntax | authentication max-hosts <1-256>no authentication max-hosts | |
| Parameter | <1-256> | Available max host number in multi-auth |
| Default | Default max host number is 256 | |
| Usage Use “authentication max-hosts” command to configure the portmax hosts number for multi-auth mode. The host exceed the maxhost number is not allowed to create authentication session anddo authenticating.Use no form of this command to restore default value. | |
| Example | The following example shows how to change port max hosts number.Switch(config)# interface fa1Switch(config-if)# authentication max-hosts 100Switch# show mac-auth interface fa1Interface FastEthernet1Admin Control : disableHost Mode : multi-authType dot1x State : disabledType mac State : disabledType web State : disabledType Order : dot1xMAC/WEB Method Order : radiusGuest VLAN : disabledReauthentication : disabledMax Hosts : 100...... |
authentication method
| Syntax | authentication method (local [radius] | radius [local])no authentication order | |
| Parameter | local | Use local account to authenticate |
| radius | Use remote RADIUS server to authenticate | |
| Default | Default is RADIUS method in first place and no other method. | |
| Mode | Interface Configuration | |
| Usage | Use “authentication method” command to configure the por authentication method order.Use the no form of this command to restore default value. | |
| Example | The following example shows how to modify port authentication order to local and then RADIUS.Switch(config)#interface fa1Switch(config-if)#authentication method local radiusSwitch#show authentication interface fa1Interface FastEthernet1Admin Control : autoHost Mode : multi-hostType dot1x State : disabledType mac State : disabledType web State : disabled |
Type Order : dot1x mac
web MAC/WEB Method Order : local radius
authentication order
| Syntax | authentication order (dot1x [mac] [web] | mac [dot1x] [web] | web) no authentication order | |
| Parameter | dot1x | Authenticating user by IEEE 802.1X |
| mac | Authenticating user by mac based authentication | |
| web | Authenticating user by web based on | |
| Default | Default is dot1x type in first place and no other types. | |
| Mode | Interface Configuration | |
| Usage Use “authentication order” command to configure the port authentication type order.Use the no form of this command to restore default value. |
| Example | The following example shows how to modify port authentication order to dot1x, mac and web.Switch(config)#interface fa1Switch(config-if)#authentication order dot1x mac webSwitch#show authentication interface fa1Interface FastEthernet1Admin Control : autoHost Mode : multi-hostType dot1x State : disabledType mac State : disabledType web State : disabledType Order : dot1x mac web |
authentication port-control
| Syntax | authentication port-control (auto|force-auth|force-unauth) no authentication port-control | |
| Parameter | auto | Need passing authentication procedure to get network accessibility |
| force-auth | Port is force authorized and all clients have network accessibility. | |
| force-unauth | Port is force unauthorized and all clients | |
| have no network accessibility. | ||
| Default | Default is disabled. | |
| Mode | Interface Configuration | |
| Usage Use “authentication port-control” command to enable the port authentication control mode.Use the no form of this command to disable authentication port control. | ||
| Example | The following example shows how to configure port control to auto mode.Switch(config)# interface fa1Switch(config-if)# authentication port-control autoSwitch# show authentication interface fa1Interface FastEthernet1Admin Control : autoHost Mode : multi-authType dot1x State : disabledType mac State : disabledType web State : disabled...... | |
authentication radius-attributes vlan
| Syntax | authentication radius-attributes vlan (reject | static) no authentication radius-attributes vlan | |
| Parameter | reject | If get VLAN authorized information, just use it. However, if there is no VLAN authorized information, reject the host and make it unauthorized. |
| static | If get VLAN authorized information, just use it. If there is no VLAN authorized information, keep original VLAN of host. | |
| Default | Default radius attributes VLAN assign mode is static. | |
| Mode | Interface Configuration | |
Usage
Use “authentication radius-attributes vlan” command to configure the port RADIUS VLAN assign mode.
Use the no form of this command to disable the port RADIUS VLAN assign.
| Example | The following example shows how to configure port VLAN assign to reject mode.Switch(config)#interface fa1Switch(config-if)#authentication radius-attributes vlan rejectSwitch#show authentication interface fa1Interface FastEthernet1Admin Control : disableHost Mode : multi-authType dot1x State : disabledType mac State : disabledType web State : disabledType Order : dot1xMAC/WEB Method Order : radiusGuest VLAN : disabledReauthentication : disabledMax Hosts : 256VLAN Assign Mode : reject...... |
authentication reauth
| Syntax | authentication reauthno authenticationreauth |
| Parameter | |
| Default | Default is disabled. |
| Mode | Interface Configuration |
| Usage | Use “authentication reauth” command to enable the port reauthentication.Use thenoform of this command to disable reauthentication. |
Example
The following example shows how to enable port reauthentication.
Switch(config)# interface fa1 Switch(config-if)#
authentication reauth Switch# show authentication
interface fa1 Interface FastEthernet1
Admin Control : disable
Host Mode : multi-auth
Type dot1x State : disabled
Type mac State : disabled
Type web State : disabled
Type Order : dot1x
MAC/WEB Method Order : radius
Guest VLAN : disabled
Reauthentication : enabled
authentication timer inactive
| Syntax | authentication timer inactive <60-65535>no authentication timer inactive | |
| Parameter | <60-65535> | Interval in seconds after which if there is no activity from the client then it will be |
| Default | Default inactive timeout is 60 seconds. | |
| Mode | Interface Configuration | |
| Usage Use “authentication timer inactive” command to configure the port inactive timeout value.Sometimes, we may assign a long aging time for a host, but in fact, it is not active. This inactive timeout will detect the host is active or not. If the host is inactive exceed this timeout, it should be removed.Use no form of this command to restore default value. | |
| Example | The following example shows how to configure port inactive period.Switch(config)# interface fa1Switch(config-if)# authentication timer inactive 300Switch# show authentication interface fa1Interface FastEthernet1......Common TimersReauthenticate Period: 300Inactive Timeout : 300 QuietPeriod : 60802.1x ParametersEAP Max Request : 2EAP TX Period : 30 SupplicantTimeout : 30 Server Timeout :30Web-auth ParametersLogin Attempt : 3 |
authentication timer quiet
| Syntax authentication timer quiet <0-65535> no authentication timer quiet | ||
| Parameter | <0-65535> | Interval in sec failed exchange |
| Default | Default quiet period is 60 seconds. |
| Mode | Interface Configuration |
| Usage | Use “authentication timer quiet” command to configure the port quiet period value.After authenticating fail many times and the port is guest VLAN disabled, the port/host will enter lock state until quiet period expired. In lock state, the port/host is not allowed to do authenticating.Use no form of this command to restore default value. |
| Example | The following example shows how to configure port quiet period.Switch(config)# interface fa1Switch(config-if)# authentication timer quiet 300 Switch# show authentication interface fa1 Interface FastEthernet1......Common TimersReauthenticate Period: 300Inactive Timeout : 300 QuietPeriod : 300802.1x ParametersEAP Max Request : 2EAP TX Period : 30 SupplicantTimeout : 30 Server Timeout : 30Web-auth ParametersLogin Attempt : 3 |
authentication timer reauth
Syntax authentication timer reauth <300-4294967294> no authentication timer reauth
| Parameter | <300-4294967294> | Time in seconds after which an automatic re-authentication should be initiated |
| Default | Default reauthentication period is 3600 seconds. | |
| Mode | Interface Configuration | |
Command Line Interface
User Guide
Usage
Use “authentication timer reauth” command to configure the port reauthentication period value with unit second if the reauthentication time is not assigned by local database or remote authentication server. On the other
| hand, if the reauthentication time is assigned by local database or remote server, this configured reauthentication time will be ignored.Use no form of this command to restore default value. | |
| Example | The following example shows how to configure port reauthentication period.Switch(config)# interface fa1Switch(config-if)# authentication timer reauth 300 Switch# show authentication interface fa1 Interface FastEthernet1......Common TimersReauthenticate Period: 300Inactive Timeout : 60Quiet Period : 60802.1x ParametersEAP Max Request : 2EAP TX Period : 30 SupplicantTimeout : 30 Server Timeout : 30Web-auth ParametersLogin Attempt : 3 |
authentication web local
| Syntax | authentication web local username USERNAME password (encrypted CRYPT-PASSWORD | PASSWORD) [vlan <1-4094>] [reauth-period <300-4294967294>] [inactive-timeout <60-65535>] no authentication web local username USERNAME | |
| Parameter | USERNAME | Local account user name |
| encrypted CRYPT-PASSWORD | Encrypted password. | |
| PASSWORD | Un-encrypted password. | |
| vlan <1-4094> | Assigned VLAN of this local account | |
| reauth-period <300-4294967294> | Reauthentication period of this local account | |
| inactive-timeout <60-65535> | Inactive timeout of this local account | |
| Default | Default is no local authentication entry. | |
| Mode | Global Configuration | |
Usage
Use “authentication web local” command to add local account in database. This local account database is used when web authentication method is configured as “local”. The web authentication module will find account in this local database and authenticated it.
Use the no form of this command to delete local account from database.
Example
The following example shows how to add/delete a new local account. Switch(config)# authentication web local username acct1 password acct1 vlan 3 reauth-period 301 inactive-timeout 61 Switch# show authentication
Web-auth Local Entry :
Reauth Inactive
User Name VLAN Period Timeout
acct1 3 301 61
authentication web max-login-attempts
| Syntax | authentication web max-login-attempts (infinite|<3-10>) no authentication web max-login-attempts | |
| Parameter | infinite | Do not care user login fail number |
| <3-10> | Allow user login fail number | |
| Default | Default max login attempt number is 3. | |
| Mode | Interface Configuration | |
Usage Use “authentication web max-login-attempts” command to configure the port WEB authentication max login attempt number. After login fail number exceed, the host will enter Lock state and is not able to authenticate until quiet period exceed. Use no form of this command to restore default value.
| Example | The following example shows how to configure port max login attempt number.Switch(config)#interface fa1Switch(config-if)#authentication web max-login-attempts 5Switch#show authentication interface fa1Interface FastEthernet1......Common TimersReauthenticate Period: 300Inactive Timeout : 300 QuietPeriod : 300802.1x ParametersEAP Max Request : 1EAP TX Period : 10Supplicant Timeout : 120Server Timeout : 150Web-auth Parameters |
Login Attempt : 5
clear authentication sessions
| Syntax | clear authentication sessions | |
| clear authentication sessions interfaces IF_PORTS | ||
| clear authentication sessions mac mac-addr | ||
| clear authentication sessions session-id WORD | ||
| clear authentication sessions type (dot1x|mac|web) | ||
| Parameter | interfacesIF_PORTS | Clear sessions on specific interface |
| mac mac-addr | Clear session with specific MAC address | |
| session-idWORD | Clear session with specific session ID | |
| type(dot1x|mac|web) | Clear session with specific authentication type | |
| Default | Default is no local authentication entry. |
| Mode | Privileged EXEC |
| Usage Use “clear authentication sessions” command to delete existing authentication sessions. If no parameter is specified, all sessions will be deleted.After authentication session is deleted, host need to do authentication procedure again. |
| Example | The following example shows how to clear all authentication sessions.Switch# clear authentication sessionsSwitch# show authentication sessionsNo Auth Manager sessions currently exist |
dot1x
| Syntax | dot1x |
| no dot1x |
Parameter
Default
Default 802.1x is disabled
| Mode | Global Configuration |
| Usage | Use “dot1x” command to enable the global setting of 802.1x. The “authentication dot1x” command has the same effect as this one. This command is a backward compatible command.Use the no form of this command to disable 802.1x authentication. |
| Example | The following example shows how to enable 802.1x authentication.Switch(config)# dot1xSwitch# show authentication Autentication dot1x state : enabledAutentication mac state : disabledAutentication web state : disabledGuest VLAN : enabled (3) Mac-auth Radius User ID Format:XXXXXXXXXX |
dot1x guest-vlan
| Syntax | dot1x guest-vlan <1-4094>no dot1x guest-vlan |
| Parameter | <1- Guest VLAN ID4094> |
| Default | Default guest VLAN isdisabled |
| Mode | Global Configuration |
| Usage | Use “dot1x guest-vlan” command to enable the global setting ofguest VLAN and specify guest VLAN ID.Use theno form of this command to disable guest VLAN. |
| Example | The following example shows how to create guest VLAN.Switch(config)#vlan 3Switch(config-vlan)#exit Switch(config)# dot1x guest-vlan 3Switch#show authenticationAutentication dot1x state : enabledAutentication mac state : disabledAutentication web state : disabled GuestVLAN : enabled (3) Mac-auth Radius User ID Format:XXXXXXXXXX |
dot1x max-req
Syntax dot1x max-req <1-10> no dot1x max-req
| Parameter | <1-10> | The maximum number of EAP requests that can be sent. If a response is not received after the defined period (supplicant timeout), >ation process is restarted. |
Default Default EAP max request number is 2.
Mode Interface Configuration
Usage Use "dot1x max-req" command to configure the port 802.1x max EAP request value. The max request is the maximum number of EAP requests that can be sent. If a response is not received after the defined period (supplicant timeout), the authentication process is restarted. Use no form of this command to restore default value.
| Example | The following example shows how to configure port 802.1x EAP TX period.Switch(config)#interface fa1Switch(config-if)#dot1xmax-req 1 Switch#show authentication interface fa1Interface FastEthernet1......Common TimersReauthenticate Period: 300Inactive Timeout : 300 QuietPeriod : 300802.1x ParametersEAP Max Request : 1EAP TX Period : 10Supplicant Timeout : 120Server Timeout : 150Web-auth ParametersLogin Attempt : 3 |
dot1x port-control
Syntax dot1x port-control (auto|force-auth|force-
unauth)
no dot1x port-control
| Parameter | auto | Need passing authentication procedure to get network accessibility |
| force-auth | Port is force authorized and all clients have network accessibility. | |
| force-unauth | Port is force unauthorized and all clients < accessibility. | |
| Default | Default is disabled. | |
| Mode | Interface Configuration | |
| Usage | Use “dot1x port-control” command to enable the port authentication control mode. The “authentication port-control” command has the same effect. Use the no form of this command to disable authentication port control. | |
| Example | The following example shows how to configure port control to auto mode.Switch(config)# interface fa1 Switch(config-if)# dot1x port-control auto Switch# show authenticationinterface fa1 Interface FastEthernet1Admin Control : autoHost Mode : multi-authType dot1x State : enabledType mac State : disabledType web State : disabled...... | |
| dot1x reauth | ||
| Syntax | dot1x reauthno dot1x reauth | |
| Parameter | ||
| Default | Default is disabled. | |
| Mode | Interface Configuration | |
| Usage | Use “dot1x reauth” command to enable the port reauthentication. The “authentication reauth” command has the same effect, it is a backward compatible commandUse the no form of this command to disable reauthentication. | |
| Example | The following example shows how to enable port reauthentication.Switch(config)#interface fa1Switch(config-if)#dot1x reauthSwitch#show authentication interface fa1Interface FastEthernet1Admin Control : disableHost Mode : multi-authType dot1x State : disabledType mac State : disabledType web State : disabledType Order : dot1xMAC/WEB Method Order : radiusGuest VLAN : disabledReauthentication : enabled...... | |
dot1x timeout reauth-period
| Syntax dot1x timeout reauth-period <300-4294967294>no dot1x timeout reauth-period | ||
| Parameter | <300-4294967294> | Time in seconds after which an automatic re-authentication should be initiated |
| Default | Default reauthentication period is 3600 seconds. | |
| Mode | Interface Configuration | |
| Usage Use “dot1xtimeout reauth” command to configure the port reauthentication period value with unit second if the reauthentication time is not assigned by local database or remote authentication server. On the other hand, if the reauthentication time is assigned by local database or remote server, this configured reauthentication time will be ignored.The “authentication timer reauth” command has the same effect and it is a backward compatible command.Use no form of this command to restore default value. | ||
Example
The following example shows how to configure port 802.1x reauthentication period.
Switch(config)# interface fa1
Switch(config-if)# dot1x timeout reauth-period 300 Switch# show authentication interface fa1 Interface FastEthernet1
Common Timers
Reauthenticate Period: 300
Inactive Timeout : 60
Quiet Period : 60
802.1x Parameters
EAP Max Request : 2
EAP TX Period : 30
Supplicant Timeout : 30
Server Timeout : 30
Web-auth Parameters
Login Attempt : 3
dot1x timeout quiet-period
Syntax dot1x timeout quiet-period <0-65535> no dot1x timeout quiet-period
| Parameter | <0-65535> | Interval in seconds to wait following a failed exchange |
Default Default quiet period is 60 seconds.
Mode Interface Configuration
Usage Use "dot1x timeout quiet-period" command to configure the port quiet period value. The "authentication timer quiet" command has the same effect and it is backward compatible command. After authenticating fail many times and the port is guest VLAN disabled, the port/host will enter lock state until quiet period expired. In lock state, the port/host is not allowed to do authenticating. Use no form of this command to restore default value.
| Example | The following example shows how to configure port 802.1x quiet period.Switch(config)#interface fa1Switch(config-if)#dot1x timeout quiet-period 300 Switch#showauthentication interface fa1 Interface FastEthernet1 |
| Common TimersReauthenticate Period: 300Inactive Timeout : 300 QuietPeriod : 300802.1x ParametersEAP Max Request : 2EAP TX Period : 30 SupplicantTimeout : 30 Server Timeout :30Web-auth ParametersLogin Attempt : 3 |
dot1x timeout server-timeout
Syntax
dot1x timeout server-timeout <1-
65535>
| no dot1x timeout server-timeout | ||
| Parameter | <1-65535> | Number of seconds that lapses before the device resends a request to the authentication |
| Default | Default server timeout is 30 seconds. | |
| Mode | Interface Configuration | |
| Usage | Use “dot1x timeout server-timeout” command to configure the port 802.1x server timeout value. The server timeout is the number of seconds that lapses before the device resends a request to the authentication server.Use no form of this command to restore default value. | |
| Example | The following example shows how to configure port 802.1x server timeout.Switch(config)# interface fa1Switch(config-if)# dot1x timeout supp-timeout 150 Switch#show authentication interface fa1 Interface FastEthernet1 | |
| Common TimersReauthenticate Period: 300Inactive Timeout : 300 QuietPeriod : 300802.1x ParametersEAP Max Request : 2EAP TX Period : 30Supplicant Timeout : 120Server Timeout : 150Web-auth ParametersLogin Attempt : 3 | ||
dot1x timeout supp-timeout
Syntax dot1x timeout supp-timeout <1-65535> no dot1x timeout supp-timeout
| Parameter | <1-65535> | Number of seconds that lapses before EAPesent to the supplicant |
Default Default supplicant timeout is 30 seconds.
Mode
Interface Configuration
Usage Use "dot1x timeout supp-timeout" command to configure the port supplicant timeout value. The supplicant timeout is the number of seconds that lapses before EAP requests are resent to the supplicant. Use no form of this command to restore default value.
| Example | The following example shows how to configure port 802.1x supplicant timeout.Switch(config)#interface fa1Switch(config-if)#dot1x timeout supp-timeout 120 Switch#show authentication interface fa1 Interface FastEthernet1 |
| Common TimersReauthenticate Period: 300Inactive Timeout : 300 QuietPeriod : 300802.1x ParametersEAP Max Request : 2EAP TX Period : 30Supplicant Timeout : 120Server Timeout : 30Web-auth ParametersLogin Attempt : 3 |
dot1x timeout tx-period
Syntax dot1x timeout tx-period <1-65535> no dot1x timeout tx-period
| Parameter | <1-65535> | Number of seconds that the device waits for a response to an Extensible Authentication Protocol (EAP) request/identity frame from the supplicant (client) before resending the |
| Default | Default EAP TX period is 30 seconds. |
| Mode | Interface Configuration |
Usage Use "dot1x timeout tx-period" command to configure the port 802.1x EAP TX period value. The TX period is the number of seconds that the device waits for a response to an Extensible Authentication Protocol (EAP) request/identity frame from the supplicant (client) before resending the request. Use no form of this command to restore default value.
| Example | The following example shows how to configure port 802.1x EAP TX period.Switch(config)#interface fa1Switch(config-if)#dot1x timeout tx-period 10 |
| Switch# show authentication interface fa1Interface FastEthernet1 |
| ...... |
| Common Timers |
| Reauthenticate Period: 300 |
| Inactive Timeout : 300 Quiet |
| Period : 300 |
| 802.1x Parameters |
| EAP Max Request : 2 |
| EAP TX Period : |
| 10 Supplicant Timeout : |
| 120 Server Timeout : |
| 150 |
| Web-auth Parameters |
| Login Attempt : 3 |
show authentication
| Syntax | show authentication show authentication interfaces IF_PORTS | |
| Parameter | interfaces IF_PORTS | Specify port list to show port configurations. |
| Default | No default value for this command. | |
| Mode | Privileged EXEC | |
| Usage Use “show authentication” command to show all authentication manager configurations.Use “show authentication interface” command to show authentication manager configuration of specific port. | ||
Example
This example shows how to show the mac authentication configurations of port fa1.
Switch# show authentication Autentication dot1x
state : enabled
Authentication mac state : disabled
Authentication web state : disabled
Guest VLAN : disabled
Mac-auth Radius User ID Format:XXXXXXXXXX
Mac-auth Local Entry :
Reauth Inactive
MAC Address Control VLAN Period Timeout
00:11:22:33:44:55
Authorized 3 30000 123
Web-auth Local Entry
:
Reauth
Inactive
User Name
VLAN Period Timeout
333
Interface Configurations
Interface FastEthernet1
Admin Control : disable
Host Mode : multi-auth
Type dot1x State : disabled
Type mac State : disabled
Type web State : disabled
Type Order : dot1x
MAC/WEB Method Order : radius
Guest VLAN
disabled
Reauthentication : disabled
Max Hosts : 256
VLAN Assign Mode :
static Common Timers
Reauthenticate Period: 3600
Inactive Timeout :
60
Quiet Period
: 60 802.1x Parameters
EAP Max Request : 2
EAP TX Period : 30
Supplicant Timeout : 30
Server Timeout : 30
Web-auth Parameters
Login Attempt : 3
Switch# show authentication interface fa7
Interface Configurations
Interface
FastEthernet7
Admin Control
: auto
Host Mode : multi-
auth Type dot1x State
enabled Type mac State
:disabled
Type web State
disabled Type Order :
dot1x MAC/WEB Method
Order : radius Guest VLAN
disabled Reauthentication
:
disabled Max Hosts
256
VLAN Assign Mode
:
static Common Timers
Reauthenticate Period:
3600 Inactive Timeout
60
Quiet Period 60
802.1x Parameters
EAP Max Request 2
EAP TX Period 30
Supplicant Timeout 30
Server Timeout :
65535 Web-auth
Parameters
Login Attempt : 3
show authentication sessions
| Syntax | show authentication sessions [detail] show authentication sessions interface IF_PORTS show authentication sessions session-id WORD show authentication session type (dot1x|mac|web) | |
| Parameter | detail | Show session detail information. |
| interface | Show session detail information of specific | |
| IF_PORTS | port | |
| session-id | Show session detail information of specific | |
| WORD | session id | |
| type (dot1x|mac|web) | Show session detail information of specific authentication type | |
| Default | No default value for this command. | |
| Mode | Privileged EXEC | |
| Usage | Use “show authentication sessions” command to show authentication detail session information. | |
| Example | This example shows how to show current authentication session brief and detail information.Switch#show authentication sessionsInterface MAC Address Type Status Session ID----fa7 00:01:6C:CB:29:4Adot1x Authorized 000000010000A028Switch#show authentication sessions detailInterface : FastEthernet7MAC Address : 00:01:6C:CB:29:4ASession ID : 000000010000A028Current Type : dot1xStatus : AuthorizedAuthorized InformationVLAN : 5 (from RADIUS)Reauthenticate Period: 301 (from RADIUS) InactiveTimeout : 600 (from RADIUS)Operational Information VLAN : 5Session Time : 1143Inactive Time : 168Quiet Time : N/A | |
5. Diagnostic
show cable-diag
Syntax show cable-diag interfaces IF_NMLPORTS
| Parameter | interfacesIF_NMLPORTS | Display the cable diagnostic information of the coppermedia for an interface ID or a list of interfaces IDs. |
Default N/A
| Mode | Privileged EXEC |
| Usage To show the estimated copper cable length attached to a specific interface, use the commandshow cable-diagin the Privilegeg EXEC mode. For the proper information of the cable length, the interface must be active and linked up. | |
| Example | The following example shows the result of cable diagnostic for the interface fa1 and fa2.Switch# show cable-diag interfaces fa1-2Port | Speed | Local pair | Pair length | Pair status----+----+----+----+----+----+----+----+----+----+----+----+----+----+----+----+----+----+----+----+----+----+----+----+----+----+----+----+----+----+----+----+----+----+----+----+----+----+----+----+----+----+----+----+----+----+----+----+----+----+----+ fa1 | auto | Pair A | 0.88 | OpenPair B | 0.82 | Open Pair C | 0.80| Open Pair D | 0.78 | Openfa2 | auto | Pair A | 0.81 | OpenPair B | 0.81 | Open Pair C | 0.77| OpenPair D | 0.81 | Open |
show fiber-transceiver
| Syntax | show fiber-transceiver interfacesIF_NMLPORTS | |
| Parameter | interfacesIF_NMLPORTS | Display the o diagnostic information of the fiber transceiver for an interface ID or a list of interface IDs. |
| Default | N/A | |
| Mode | Privileged EXEC | |
| Usage | To show the diagnostic information of the fiber transceiver use the commandshow fiber-transceiver in the Privilegeg EXEC mode. | |
Command Line Interface
User Guide
Example The following example shows the diagnostic information for the interface gi1 and gi2, wherer the int fiber media ports with the transceiver inserted.
Switch# show fiber-transceiver interfaces gi1-2 Port | Temperature | Voltage | Current | Output power | Input power | | [C] | [Volt] | [mA] | [mWatt] | [mWatt] |
| gi1 | N/S | N/S | N/S | N/S | N/S | Insert | |
| gi2 | N/S | N/S | N/S | N/S | N/S | Insert |
Temp - Internally measured transceiver temperature Voltage
- Internally measured supply voltage
Current - Measured TX bias current
Output Power - Measured TX output power in milliWatts Input Power
- Measured RX received power in milliWatts OE-
Present - SFP Presetn or Not Present
LOS - Loss of signal
N/A - Not Available, N/S - Not Supported, W - Warning, E -
Error
6. DHCP Snooping
ip dhcp snooping
| Syntax | ip dhcp snoopingno ip dhcp snooping |
| Parameter | None |
| Default | DHCP snooping isdisabled |
| Mode | Global Configuration |
| Usage | Use the ip dhcp snooping command to enable DHCP Snooping function. Usethe no form of this command to disable. |
| Example | The example shows how to enable DHCP Snooping on VLAN 1.You can verify settings by the following show ip dhcp snooping command.switch(config)# ip dhcp snoopingswitch(config)# ip dhcp snoopingvlan 1 switch(config)# show ip dhcp snooping DHCP Snooping: enabledEnable on following Vlans 1circuit-id default format : vlan-portremote-id : 00:11:22:33:44:55 (Switch Mac in Byte Order) |
ip dhcp snooping vlan
Syntax
ip dhcp snooping vlan VLAN-LIST
| Parameter | VLAN-LIST | Specify VLAN ID or a range of VLANs to enable or disable dynamic Arp inspection |
| Default | Default is disabled on all VLANs |
| Mode | Global Configuration |
| Usage | Use the ip dhcp snooping vlan command to enable VLANs on DHCP Snooping function. Use the no form of this command to disable VLANs on DHCP Snooping function. |
| Example | The example shows how to enable VLAN 1-100 on DHCP Snooping, and then disable VLAN 30-40 on DHCP Snooping. You can verify settings by the following show ip dhcp snooping command.switch(config)# vlan 1-100switch(config)# exitswitch(config)# ip dhcp snoopingswitch(config)# ip dhcp snooping vlan1-100 switch(config)# show ip dhcp snooping DHCP Snooping : enabledEnable on following Vlans : 1-100circuit-id default format : vlan-portremote-id: 00:11:22:33:44:55 (Switch Mac in Byte Order) |
| switch(config)# no ip dhcp snooping vlan 30-40switch(config)# show ip dhcp snoopingDHCP Snooping : enabledEnable on following Vlans : 1-29,41-100 circuit-id default format : vlan-portremote-id : 00:11:22:33:44:55 (Switch Mac in Byte Order) |
ip dhcp snooping trust
| Syntax | ip dhcp snooping trust no ip dhcp snooping trust |
| Parameter | None |
| Default | DHCP snooping trust is disabled |
| Mode | Interface Configuration |
| Usage | Use theip dhcp snooping trustcommand to set trusted interface. The switch does not check DHCP packets that are received on the trusted interface; it simply forwards it. Use theno form of this command to set untrusted interface. |
| Example | The example shows how to set interface gi1 to trust. You can verify settings by the followingshow ip dhcp snooping interfacecommand.switch(config)#interface gi1switch(config-if)#ip dhcp snooping trustswitch(config-if)#do show ip dhcp snooping interfacegi1Interfaces | Trust State | Rate (pps) | hwaddr Check | Insert Option82 |----+----+----+----+qi1 | Trusted | None | disabled | disabled | |
| ip dhcp snooping verify | |
| Syntax | ip dhcp snooping verify mac-address [no] ip dhcp snooping verify mac-address |
| Parameter | None |
| Default | DHCP snooping verify mac-address is disabled |
| Mode | Interface Configuration |
| Usage | Use theip dhcp snooping verifycommand to verify MAC address function on interface.The “mac-address” drop DHCP packets that chaddr and ethernet-source-mac is not match. |
| Example | The example shows how to set interface gi1 to validate “mac-address”. You can verify settings by the following show ip dhcp snooping interfacecommand.switch(config)#interface gi1switch(config-if)#ip dhcp snooping verify mac-address switch(config-if)#do show ip dhcp snooping interface gi1 Interfaces | Trust State | Rate (pps) | hwaddr Check | Insert Option82 |----+----+----+----+gi1 | Untrusted | None | disabled | disabled | |
ip dhcp snooping rate-limit
| Syntax | ip dhcp snooping rate-limit<1-300> [no] ip dhcpsnooping rate-limit | |
| Parameter | <1-300> | Set 1 to 300 PPS of DHCP packet rate limitation |
| Default | Default is un-limited of DHCPpacket | |
| Mode | Interface Configuration | |
| Usage | Use the ip dhcp snooping rate-limit command to set rate limitation on interface. The switch drop DHCP packets after receives more than configured rate of packets per second. Use the no form of this command to return to default settings. | |
| Example | The example shows how to set rate limit to 30 pps oninterface gi1. You can verify settings by the following show ip dhcp snooping interface command.switch(config)# interface gi1switch(config-if)# ip dhcp snooping rate-limit 30switch(config-if)# do show ip dhcp snooping interfaces gi1Interfaces|Trust State|Rate (pps)|hwaddr Check|Insert Option82|----+----+----+----+gi1 | Untrusted | 30 | disabled | disabled | | |
clear ip dhcp snooping statistics
| Syntax | clear ip dhcp snooping interfaces IF_PORTS statistics | |
| Parameter | IF_PORTS | specifies ports to clear statistics |
| Default | No default is defined | |
| Mode | Privileged EXEC | |
| Usage | Use the clear ip dhcp snooping interfaces statistics command to clear statistics that are recorded on interface. | |
Example
The example shows how to clear statistics on interface gi1.
You can verify settings by the following show ip dhcp snooping
interface statistics command.
| switch# clear ip dhcp snooping interfaces gi1 statisticsswitch# show ip dhcp snooping interfaces gi1 statisticsInterfaces | Forwarded | Chaddr Check Dropped | UntrustPort Dropped | Untrust Port With Option82 Dropped | InvalidDrop----+----+----+----+----+----+gi1 | 0 | 0 | 0 | 0 | 0 |
show ip dhcp snooping
| Syntax | show ip dhcp snooping |
| Parameter | None |
| Default | No default is defined |
| Mode | Privileged EXEC |
| Usage | Use the show ip dhcp snooping command to show settings of DHCP Snooping. |
| Example | The example shows how to show settings of DHCP Snooping switch(config)# show ip dhcp snooping DHCP Snooping : enabled Enable on following Vlans : 1 circuit-id default format: vlan-port remote-id: : 00:11:22:33:44:55 (Switch Mac in Byte Order) |
show ip dhcp snooping interface
| Syntax | show ip dhcp snooping interfaces IF_PORTS show ip dhcp snooping interfaces IF_PORTS statistics |
| Parameter | IF_PORTS specifies ports to show statistics |
| Default | No default is defined |
| Mode | Privileged EXEC |
| Usage | Use the show ip dhcp snooping interfaces command to show settings or statistics of interface. |
| Example | The example shows how to show settings of interface gi1.switch#show ip dhcp snooping interface gi1Interfaces | Trust State | Rate (pps) | hwaddr Check | Insert Option82 |----+----+----+----+gi1 | Untrusted | None | enabled | disabled |The example shows how to show statistics of interface gi1. switch#show ip dhcp snooping interfaces gi1statistics Interfaces | Forwarded | Chaddr Check Dropped | Untrust Port Dropped | Untrust Port With Option82 Dropped | Invalid Drop----+----+----+----+gi1 | 0 | 0 | 0 | 0 | 0 |
show ip dhcp snooping binding
| Syntax | show ip dhcp snooping binding |
| Parameter | None |
| Default | No default is defined |
| Mode | Privileged EXEC |
| Usage | Use the show ip dhcp snooping binding command to show binding entries that learned by DHCP Snooping. |
| Example | The example shows how to show binding entries that learned by DHCP Snooping. |
| switch# show ip dhcp snooping binding | |
| Bind Table: Maximun Binding Entry Number 192 | |
| Port | VID | MAC Address | IP | Type | Lease Time | |
| fa1 | 1 | 48:5B:39:C7:12:62 | 192.168.1.100(255.255.255.255)|DHCP Snooping | 86400 |
ip dhcp snooping option
| Syntax | ip dhcp snooping optionno ip dhcp snooping |
Command Line Interface User Guide
option
| Parameter | None | |
| Default | DHCP snooping option82 isdisabled | |
| Mode | Interface Configuration | |
| Usage | Use the ip dhcp snooping option command to enable that insertoption82content into packet. Use theno form of this command to disable. | |
| Example | The example shows how to enable option82 insertion.You can verify settings by the followingshow ip dhcpsnooping interface command.switch(config)#interface gi1switch(config-if)#ip dhcp snooping optionswitch(config-if)#do show ip dhcp snooping interfacesgi1Interfaces | Trust State | Rate (pps) | hwaddr Check | Insert Option82|----+----+----+----+----+gi1 | Untrusted | None | disabled | enabled | | |
| ip dhcp snooping option action | ||
| Syntax | ip dhcp snooping option action (drop|keep|replace)no ip dhcp snooping option action | |
| Parameter | Drop | Drop packets with option82 that arereceivedfrom un trusted port |
| Keep | Keep original option82 content in packet | |
| Replace | Replace option82 content by switchsetting | |
| Default | DHCP snooping option82 isdrop | |
| Mode | Interface Configuration | |
| Usage | Use the ip dhcp snooping option action command to set theaction when receive packets that with option82 content. Use theno form of this command to default setting. | |
Example
The example shows how to set action to replace option82 content.
You can verify settings by the following show running-config command.
| switch(config)# interface gi1switch(config-if)# ip dhcp snooping option action replace |
ip dhcp snooping option circuit-id
| Syntax | ip dhcp snooping [vlan <1-4094>] option circuit-idSTRINGno ip dhcp snooping [vlan <1-4094>] option circuit-id | |
| Parameter | Vlan <1-4094> | VLAN ID to set user defined circuit-id string |
| STRING | Circuit-id string, 1 to 63 ASCII characters, no spaces. | |
| Default | Default circuit-id is port id + vlan id in byte format. | |
| Mode | Interface Configuration | |
| Usage | Use the ip dhcp snooping option circuit-id command to set user-defined circuit-id string. Circuit-id is per port per VLAN setting. If a VLAN is not found user-defined circuit-id then use per port circuit-id string. Use the no form of this command to default setting. | |
| Example | The example shows how to set a user-defined circuit-id string on interface gi1 and VLAN 1. You can verify settings by the following show running-config commandswitch(config)# interface gi1switch(config-if)# ip dhcp snooping vlan 1 option circuit-id test | |
ip dhcp snooping option remote-id
| Syntax | ip dhcp snooping option remote-id STRING no ip dhcp snooping option remote-id | |
| Parameter | STRING | Remote-id string, 1 to 63 ASCII characters, no spaces. |
| Default | Default remote-id is the switch MAC address in byte order | |
| Mode | Global Configuration | |
| Usage | Use theip dhcp snooping option remote-idcommand to set user-defined remote-id string.Remote-id is a global and unique string. Use thenoform of this command to default setting. | |
| Example | The example shows how to set a user-defined remote-id string on switch. You can verify settings by the followingshow ip dhcp snooping option remote-idswitch(config)#ip dhcp snooping option remote-idtest_remote switch(config)#do show ip dhcp snooping option remote-id Remote ID: test_remote | |
show ip dhcp snooping option
| Syntax | show ip dhcp snooping option remote-id |
| Parameter | None |
| Default | No default is defined |
| Mode | Privileged EXEC |
| Usage | Use the show ip dhcp snooping option remote-id command to show remote-id string. |
| Example | The example shows how to show remote-id stringswitch(config)# do show ip dhcp snooping option remote-idRemote ID: test_remote |
ip dhcp snooping database
| Syntax | ip dhcp snooping database flaship dhcp snooping database tftp (A.B.C.D|HOSTNAME)NAME no ip dhcp snooping database | |
| Parameter | (A.B.C.D|HOSTNAME) | Specify the IP address or hostname of remote TFTP server |
| NAME | Input name of backup file | |
| Default | DHCP snooping database is disabled | |
| Mode | Global Configuration | |
| Usage | Use theip dhcp snooping databasecommand to enable DHCP Snooping database agent. The “flash” means that write backup file to switch local drive. The “tftp” means that write backup file to remote TFTP server. Use thenoform of this command to disable. | |
| Example | The example shows how to enable DHCP Snooping database agent and write backup file to remote TFTP server with file name “backup_file”. You can verify settings by the followingshow ip dhcp snooping databasecommand.switch(config)#ip dhcp snooping database tftp 192.168.1.50backup_fileswitch(config)#do show ip dhcp snooping databaseType : tftp:192.168.1.50FileName :backup_fileWrite delay Timer : 300 secondsAbort Timer : 300 secondsAgent Running : RunningDelay Timer Expiry : 300seconds Abort Timer Expiry :299Last Succeeded Time :None Last Failed Time :NoneLast Failed Reason : No failure recorded.Total Attempts : 1Successful Transfers : 0Failed Transfers : 0 Successful Reads :0 Failed Reads : 0Successful Writes : 0 Failed Writes : 0 | |
ip dhcp snooping database write-delay
Syntax
ip dhcp snooping database write-delay <15-86400> no ip dhcp snooping database write-delay
Command Line Interface
User Guide
Parameter <15-86400>
Specifies the seconds of timeout. Specify the duration for which the transfer should be delayed after these changes
| Default | DHCP snooping database write-delay is 300 seconds |
| Mode | Global Configuration |
| Usage | Use the ip dhcp snooping database write-delay command to modify the write-delay timer. Use the no form of this command to default setting. |
| Example | The example shows how to set write-delay timer to 60 seconds. You can verify settings by the following show ip dhcp snooping database command.switch(config)# ip dhcp snooping database write-delay 60 switch(config)# do show ip dhcp snooping database Type : tftp:192.168.1.50FileName : backup_fileWrite delay Timer : 60 seconds Abort Timer : 300 secondsAgent Running : RunningDelay Timer Expiry : 300 seconds Abort Timer Expiry : 299Last Succeeded Time : None Last Failed Time : NoneLast Failed Reason : No failure recorded.Total Attempts : 1Successful Transfers : 0Failed Transfers : 0 Successful Reads : 0 Failed Reads : 0Successful Writes : 0 Failed Writes : 0 |
ip dhcp snooping database timeout
Syntax
ip dhcp snooping database timeout <0-86400> no ip dhcp snooping database timeout
Command Line Interface
User Guide
Parameter
<15-86400>
Specifies the seconds of timeout. Specify (in seconds) how long to wait for the database transfer process to finish before stopping the process. Use 0 to define an infinite duration, which means to continue trying the itely
| Default | DHCP snooping database timeout is 300 seconds |
| Mode | Global Configuration |
| Usage | Use the ip dhcp snooping database timeout command to modify the timeout timer. Use the no form of this command to default setting. |
| Example | The example shows how to set timeout timer to 60 seconds. You can verify settings by the following show ip dhcp snooping database command.switch(config)# ip dhcp snooping database timeout 60 switch(config)# do show ip dhcp snooping database Type : tftp: 192.168.1.50FileName : backup_fileWrite delay Timer : 300seconds Abort Timer : 60secondsAgent Running : RunningDelay Timer Expiry : 300seconds Abort Timer Expiry : 299Last Succeeded Time : None Last Failed Time : NoneLast Failed Reason : No failure recorded.Total Attempts : 1Successful Transfers : 0Failed Transfers : 0 Successful Reads : 0 Failed Reads : 0Successful Writes : 0 Failed Writes : 0 |
clear ip dhcp snooping database statistics
| Syntax | clear ip dhcp snooping database statistics |
| Parameter | None |
| Default | No default is defined |
Mode
Privileged EXEC
| Usage | Use the clear ip dhcp snooping database statistics command to clearstatistics of DHCP Snooping databae. |
| Example | The example shows how to clear statistics of DHCP Snooping agent. You can verify settings by the following show ip dhcp snooping database command.switch# clear ip dhcp snooping database statistics switch# show ip dhcp snooping databaseType : tftp:192.168.1.50FileName : backup_fileWrite delay Timer : 300 seconds Abort Timer : 60 secondsAgent Running : RunningDelay Timer Expiry : 300 secondsAbort Timer Expiry : 299Last Succeeded Time : None Last Failed Time : NoneLast Failed Reason : No failure recorded.Total Attempts : 0Successful Transfers : 0Failed Transfers : 0 Successful Reads : 0 Failed Reads : 0Successful Writes : 0 Failed Writes : 0 |
renew ip dhcp snooping database
| Syntax | renew ip dhcp snooping database |
| Parameter | None |
| Default | No default is defined |
| Mode | Privileged EXEC |
Usage
Use the renew ip dhcp snooping database command to renew DHCP
Snooping database from backup file.
| Example | The example shows how to renew DHCP Snooping database. You can verify settings by the following show ip dhcp snooping database and show ip dhcp snooping binding command. |
| switch#show ip dhcp snooping databaseType : tftp: 192.168.1.50FileName : backup_fileWrite delay Timer : 300 secondsAbort Timer : 60 seconds | |
| Agent Running : RunningDelay Timer Expiry : 300 secondsAbort Timer Expiry : 299 | |
| Last Succeeded Time :None Last Failed Time :NoneLast Failed Reason : No failure recorded. | |
| Total Attempts : 1Successful Transfers : 1Failed Transfers : 0 Successful Reads :1 Failed Reads : 0Successful Writes : 0 Failed Writes : 0 | |
| switch#show ip dhcp snooping bindingBind Table: Maximun Binding Entry Number 192Port | VID | MAC Address | IP | Type | Lease Timefa1 | 1 | 48:5B:39:C7:12:62 | 192.168.1.100(255.255.255.255)|DHCP Snooping | 86400 |
show ip dhcp snooping database
| Syntax | show ip dhcp snooping database |
| Parameter | None |
| Default | No default is defined |
| Mode | Privileged EXEC |
| Usage | Use the show ip dhcp snooping database command to show settings of |
DHCP Snooping agent.
Example
The example shows how to show settings of DHCP Snooping agent.
switch(config)# show ip dhcp snooping database
Type : tftp:
192.168.1.50
FileName :
backup_file
Write delay Timer : 300
seconds Abort Timer : 60
seconds
Agent Running : Running
Delay Timer Expiry : 300
seconds Abort Timer Expiry :
299
Last Succeeded Time :
None Last Failed Time :
None
Last Failed Reason : No failure recorded.
Total Attempts : 1
Successful Transfers : 1
Failed Transfers : 0 Successful Reads :
1 Failed Reads : 0
Successful Writes : 0 Failed Writes : 0
7. DoS
dos
Syntax
dos (daeqsa-deny|icmp-frag-pkts-deny|icmpv4-ping-
max-check|icmpv6-ping-max-check|ipv6-min-frag-
size-check|land- deny|nullscan-deny|pod-deny|smurf-
deny|syn-sportl1024-
deny|synfin-deny|synrst-deny|tcp-frag-off-min-
check|tcpblat- deny|tcphdr-min-check|udpblat-
deny|xmas-deny)
dos icmp-ping-max-length MAX_LEN
dos ipv6-min-frag-size-length MIN_LEN
dos smurf-netmask MASK
Parameter
dos tcphdr-min-length HDR_MIN_LEN
naedsa-deny Drops the packets in the destination MAC address is no dos (tcp-frag-off-min-check/synrst-deny/synfin-equal to the source MAC address
deny | xma- deny nullscan-deny syn-sport1024-
deny|tcbhdr-min-check|smurf- deny|icmpv6-ping-max-
check icmpv4-ping-max-check icmp-frag-pkts-deny ipv6-
icmpv4-ping-max. Checks the maximum size of ICMP ping packets, and min-trad-size-check|pod-deny|tcpblat- ,deny|udpblat-
deny|land-deny|daeqsa-deny) drops the packets larger than the maximum packet size defined by the command dos icmp-ping-max-length
MAX_LEN.
| icmpv6-ping-max-check | Checks the maximum size of ICMPv6 ping packets, and drops the packets larger than the maximum packet size defined by the command dos icmp-ping-max-length MAX_LEN. |
| ipv6-min-frag-size-check | Checks the minimum size of IPv6 fragments, and drops the packets smaller than the minimum size defined by the command dos ipv6-min-frag-size-lengthMIN_LEN. |
| land-deny | Drops the packets if the source IP address is equal to the destination IP address. |
| nullscan-deny | Drops the packets with NULL scan. |
| pod-deny | Avoids ping of death attack. |
| smurf-deny | Avoids smurf attack. |
| syn-sportl1024-deny | Drops SYN packets with sport less than 1024. |
| synfin-deny | Drops the packets with SYN and FIN bits set. |
| synrst-deny | Drops the packets with SYN and RST bits set. |
| tcp-frag-off-min-check | Drops the TCP fragment packets with offset equals to one. |
| tcpblat-deny | Drops the packages if the TCP source port is equal to the TCP destination port. |
| tcphdr-min-check | Checks the minimum TCP header and drops the TCP packets with the header smaller than the minimum size defined by the command dos tcphdr-min-lengthHDR_MIN_LEN. |
| udpblat-deny | Drops the packets if the UDP source port equals to the UDP destination port. |
| xmas-deny | Drops the packets if the sequence number is zero, and the FIN, URG and PSH bits are set. |
| icmp-ping-max-lengthMAX_LEN | Specify the maximum size of the ICMPv4/ICMPv6 ping packets. The valid range is from 0 to 65535 bytes, and the default value is 512 bytes. |
| ipv6-min-frag-size-lengthMIN_LEN | Specify the minimum size of IPv6 fragments. The valid range is from 0 to 65535 bytes, and default value is 1240 bytes. |
| smurf-netmaskMASK | Specify the netmask of smurf attack. The length range is from 0 to 323 bytes, and default length is 0 bytes. |
| tcphdr-min-length | Specify the minimum TCP header length. The length range is from 0 to 31 bytes, and default length is 20 |
| HDR_MIN_LEN |
Default
All of DoS protections are enabled by default. The default parameter are:
- The maximum size of ICMP ping packages is 512 bytes
- The minimum size of IPv6 fragments is 1240 bytes.
- The Smurf netmask length is 0 bytes.
- The minimum TCP header length is 20 bytes.
| Mode | Global Configuration | |
| Usage To enable the specific Deniel of Service (DoS) protection, use the commanddos in the Global Configuration mode. Otherwise, use theno form of the command to disable the specific DoS protection. | ||
| Example | The following example sets the minimum fragment size to 1024 bytes, and enables the minimum size of IPv6 fragments validation.Switch(config)# dos ipv6-min-frag-size-length 1024Switch(config)# dos ipv6-min-frag-size-check | |
| dos (interface) | ||
| Syntax dos | no dos | |
| Parameter N/A | ||
| Default | DoS protection is disabled on each interface. | |
| Mode | Interface Configuration | |
| Usage To enable the DoS on the specific interface, use the commanddos in the Interface Configuration mode. Otherwise, use theno form of the command to disable the DoS on the interface. | ||
| Example | The following example enables the DoS on the interface fa1.Switch(config)# interface fa1Switch(config-if)# dos | |
| show dos | ||
| Syntax show dos | show dos interface IF_PORTS | |
| Parameter | interfaceIF PORTS | An interface ID or the list of interface IDs. |
| Default | N/A | |
| Mode | Privileged EXEC | |
| Usage | To show the DoS protection configuration, use the commandshow dosin the Privileged EXEC mode. For the status of DoS protection on each interface, use the commandshow dosinterfacein the Privileged EXEC mode. | |
| Example | The following example shows the global DoS protection configuration. | |
| Switch# show dosType | State (Length)----+----DMAC equal to SMAC | enabledLand (DIP = SIP) | enabled UDP Blat(DPORT = SPORT) | enabled TCP Blat (DPORT= SPORT) | enabled POD (Ping of Death) |enabledIPv6 Min Fragment Size | enabled (1024 Bytes)ICMP Fragment Packets | enabledIPv4 Ping Max Packet Size | enabled (512 Bytes)IPv6 Ping Max Packet Size | enabled (512 Bytes)Smurf Attack | enabled (Netmask Length: 0) TCPMin Header Length | enabled (20 Bytes)TCP Syn (SPORT < 1024) | enabledNull Scan Attack | enabledX-Mas Scan Attack | enabledTCP SYN-FIN Attack | enabledTCP SYN-RST Attack | enabledTCP Fragment (Offset = 1) | enabled | ||
| Switch# show dosThe following example shows the status of DoS protection on the interface fa1. | ||
| Switch# show dos interfaces fa1 Port |DoS Protection----+----fa1 | disabled | ||
8. Dynamic ARP Inspection
ip arp inspection
| Syntax | ip arpinspection no iparp inspection |
| Parameter | None |
| Default | Dynamic Arp inspection is disabled |
| Mode | Global Configuration |
| Usage | Use the ip arp inspection command to enable Dynamic Arp Inspection function. Use the no form of this command to disable. |
| Example | The example shows how to enable Dynamic Arp Inspection on VLAN 1. You can verify settings by the following show ip arp inspection command.switch(config)# ip arp inspectionswitch(config)# ip arp inspection vlan 1switch(config)# show ip arp inspectionDynamic ARP Inspection : enabledEnable on Vlans 1 |
ip arp inspection vlan
| Syntax | ip arp inspection vlan VLAN-LISTno ip arp inspection vlan VLAN-LIST | |
| Parameter | VLAN-LIST | Specify VLAN ID or a range of VLANs to enable or disable dynamic |
| Default | Default is disabled on all VLANs | |
| Mode | Global Configuration | |
| Usage | Use the ip arp inspection vlan command to enable VLANs on Dynamic Arp Inspection function. Use the no form of this command to disable VLANs on Dynamic Arp Inspection function. | |
| Example | The example shows how to enable VLAN 1-100 on Dynamic Arp Inspection, and then disable VLAN 30-40 on Dynamic Arp Inspection. You can verify settings by the following show ip arp inspection command.switch(config)# vlan 1-100switch(config)# exit switch(config)#ip arp inspectionswitch(config)# ip arp inspection vlan 1-100switch(config)# show ip arp inspectionDynamic ARP Inspection : enabledEnable on Vlans : 1-100switch(config)# no ip arp inspection vlan 30-40switch(config)# show ip arp inspectionDynamic ARP Inspection :enabled Enable on Vlans : 1-29,41-100 | |
ip arp inspection trust
Syntax
ip arp inspection trust
| no ip arp inspection trust | |
| Parameter | None |
| Default | Dynamic Arp inspection trust is disabled |
| Mode | Interface Configuration |
| Usage | Use the ip arp inspection trust command to set trusted interface. The switch does not check ARP packets that are received on the trusted interface; it simply forwards it. Use the no form of this command to set untrusted interface. |
| Example | The example shows how to set interface gi1 to trust. You can verify settings by the following show ip arp inspection interface command.switch(config)# interface gi1switch(config)# ip arp inspection trustswitch(config)# do show ip arp inspection interface gi1Interfaces | Trust State | Rate (pps) | SMAC Check | DMAC Check | IP Check/Allow Zero|----+----+----+----+----+gi1 | Trusted | None | disabled | disabled | disabled/disabled |
ip arp inspection validate
| Syntax | ip arp inspection validate src-mac ip arp inspection validatedst-macip arp inspection validate ip [allow-zeros] no ip arp inspection validate src-macno ip arp inspection validate dst-macno ip arp inspection validate ip [allow-zeros] |
| Parameter | None |
| Default | Default is disabled of all validation |
| Mode | Interface Configuration |
| Usage | Use the ip arp inspection validate command to enable validate function on interface. The "src-mac" drop ARP requests and reply packets that arp-sender-mac and ethernet- source-mac is not match. The "dst-mac" drops ARP reply packets that arp-target-mac and ethernet-dst-mac is not match. The "ip" drop ARP request and reply packets that sender-ip is invalid such as broadcast、multicast、all zero IP address and drop ARP reply packets that target-ip is invalid. The "allow-zeros" means won't drop all zero IP address. Use the no form of this command to disable validation. |
| Example | The example shows how to set interface gi1 to validate “src-mac”、“dst-mac” and “ip allow zeros”. You can verify settings by the following show ip arp inspection interface command.switch(config)# interface gi1switch(config-if)# ip arp inspection validate src-macswitch(config-if)# ip arp inspection validate dst-maswitch(config-if)# ip arp inspection validate ip allow-zerosswitch(config)# do show ip arp inspection interface gi1Interfaces | Trust State | Rate (pps) | SMAC Check | DMAC Check | IP Check/Allow Zero|----+----+----+----+----+gi1 | Untrusted | None | enabled | enabled | enabled/ enabled |
ip arp inspection rate-limit
| Syntax | ip arp inspection rate-limit <1-50> [no] ip arp inspection rate-limit | |
| Parameter | <1-50> | Set 1 to 50 PPS of DHCP packet rate limitation |
| Default | Default is un-limited of ARP packet | |
| Mode | Interface Configuration | |
| Usage | Use the ip arp inspection rate-limit command to set rate limitation on interface. The switch drop ARP packets after receives more than configured rate of packets per second. Use the no form of this command to return to default settings. | |
| Example | The example shows how to set rate limit to 30 pps on interface gi1. You can verify settings by the following show ip arp inspection interface command.switch(config)# interface gi1switch(config)# ip arp inspection rate-limit 30switch(config)# do show ip arp inspection interface gi1Interfaces | Trust State | Rate (pps) | SMAC Check | DMAC Check | IP Check/Allow Zero|......+......+......+......+......+gi1 | Untrusted | 30 | disabled | disabled | disabled/disabled | |
clear ip arp inspection statistics
| Syntax | clear ip arp inspection interfaces IF_PORTS statistics | |
| Parameter | IF_PORTS | specifies ports to clear statistics |
| Default | No default is defined | |
| Mode | Privileged EXEC | |
| Usage | Use theclear ip arp inspection interfaces statisticscommand to clear statistics that are recorded on interface. | |
| Example | The example shows how to clear statistics on interface gi1. You can verify settings by the followingshow ip arp inspection interface statisticscommand.switch#clear ip arp inspection interfaces gi1 statisticsswitch#show ip arp inspection interfaces gi1 statisticsPort| Forward |Source MAC Failures|Dest MAC Failures|SIP Validation Failures|DIP Validation Failures|IP-MAC Mismatch Failures----+----+----+----+----+----+----+----+----+----+----+----+----+----+----+----+----+----+----+----+----+----+----+----+----+----+----+----+----+----+----+----+----+----+----+----+----+----+----+----+----+----+----+----+----+----+----+----+----+----+---- +----+----+----+----+----+----+----+----+----+----+----+----+----+----+----+----+----+----+----+----+----+----+----+----+----+----+----+----+----+----+----+----+----+----+----+----+----+----+----+----+----+----+----+----+----+----+----+----+----+----+ gi1| 0 | 0 | 0 | 0 | 0 | 0 | 0 | 0 | 0 | 0 | 0 | 0 | 0 | 0 | 0 | 0 | 0 | 0 | 0 | 0 | 0 | 0 | 0 | 0 | 0 | 0 | 0 | 0 | 0 | 0 | 0 | 0 | 0 | 0 | | |
show ip arp inspection
| Syntax | show ip dhcp snooping |
| Parameter | None |
| Default | No default is defined |
| Mode | Privileged EXEC |
| Usage | Use the show ip arp inspection command to show settings of Dynamic Arp Inspection |
| Example | The example shows how to show settings of Dynamic Arp Inspectionswitch(config)# show ip arp inspectionDynamic ARP Inspection : enabledEnable on Vlans 1 |
show ip arp inspeciton interface
| Syntax | show ip arp inspection interfaces IF_PORTsshow ip arp inspection interfaces IF_PORTs statistics | |
| Parameter | IF_PORTS | specifies ports to show statistics |
| Default | No default is defined |
| Mode | Privileged EXEC |
| Usage | Use theshow ip arp inspection interfacescommand to show settings or statistics of interface. |
| Example | The example shows how to show settings of interface gi1.switch#show ip arp inspection interface gi1Interfaces | Trust State | Rate (pps) | SMAC Check | DMAC Check | IP Check/Allow Zero|----+----+----+----+----+gi1 | Trusted | None | disabled | disabled | disabled/disabledThe example shows how to show statistics of interface gi1.switch#show ip arp inspection interfaces gi1 statisticsPort| Forward |Source MAC Failures|Dest MAC Failures|SIP Validation Failures|DIP Validation Failures|IP-MAC Mismatch Failures----+----+----+----+----+----+gi1| 0 | 0 | 0 | 0 | 0 | 0 |
9. GVRP
gvrp (Global)
| Syntax | gvrpno gvrp |
| Parameter | None |
| Default | GVRP is disabled |
| Mode | Global Configuration |
| Usage | Disable gvrp will clear all learned dynamic vlan entry and do not learn dynamic vlan anymore.Use ‘show gvrp’ to show configuration. |
| Example | The following example specifies that set global gvrptest. Switch(config)# gvrpSwitch# show gvrp |
GVRP Status
GVRP : Enabled
Join time : 200 ms
Leave time : 600 ms
LeaveAll time : 10000 ms
gvrp (Interface)
| Syntax | gvrpno gvrp |
| Parameter | none |
| Default | GVRP is disabled oninterface |
| Mode | Interface mode |
| Usage | ‘no gvrp’ will remove dynamic port fromvlan.‘gvrp’ must work at port mode is trunk. |
| Example | The following example specifies that set port gvrptest. The port gvrp enable must set port modeistrunk firstly. Switch(config)#interface gi1Switch(config-if)# switchport mode trunkSwitch(config)#gvrpSwitch# show gvrp configuration interfaces gi1Port | GVRP-Status | Registration | Dynamic VLAN Creation----+----+----+----gi1 Enabled Normal Disabled |
gvrp registration-mode
| Syntax | gvrp registration-mode (normal | fixed | forbidden) |
| Parameter | (normal | fixed | forbidden) | normal: register dynamic vlan, and transmit all vlan attribute.fixed: do not register dynamic vlan, and only transmit static vlan attribute.forbidden: do not register dynamic vlan, and only transmit default vlan attribute. |
| Default | Default is Normal |
| Mode | Interface mode |
| Usage | When set registration-mode is fixed or forbidden, will remove the port fromvlan witch is dynamic port. And do not learning vlan. |
| Example | The following example specifies that set gvrp registration mode test. Switch(config)#interface gi1Switch(config-if)#gvrp registration-mode fixedSwitch#show gvrp configuration interfaces gi1Port | GVRP-Status | Registration | Dynamic VLAN Creation----+----+----+----gi1 Enabled Fixed Disabled |
gvrp vlan-create-forbid
| Syntax | gvrp vlan-creation-forbidno gvrp vlan-creation-forbid | |
| Parameter | none | |
| Default | Default is disabled. | |
| Mode | Interface mode | |
| Usage | ‘gvrp vlan-creation-forbid’ will not remove dynamic port from vlanimmediate. | |
| Example | The following example specifies that set port gvrp vlan-creation-forbid test. Switch(config)#interface gi1Switch(config-if)# gvrp vlan-creation-forbidSwitch(config-if)#exitSwitch# show gvrp configuration interfaces gi1Port | GVRP-Status | Registration | Dynamic VLAN Creation----+----+----+----gi1 Enabled Normal Enabled | |
| Syntax | clear gvrp (error-statistics | statistics) [interfaces IF_PORTS] | |
| Parameter (error-statistics| statistics) | Error-statistics: error gvrp packet statisticsStatistics: gvrp event message | |
| [interfaces | statistics Specifies posts to clear statistics | |
| IF PORTS] | ||
| Default | none | |
| Mode | Privileged EXEC | |
| Usage | This command will clear the ports error statistics or statistics info. | |
| Example | The following example specifies that clear gvrp error statistics and statistics test.Switch# clear gvrp statisticsSwitch# clear gvrp error-statistics | |
clear gvrp statistics
show gvrp statistics
| Syntax | show gvrp (statistics | error-statistics) [interfaces IF_PORTS] | |
| Parameter none | Display all ports | |
| (statistics|error- | statistics – GVRP statistics error-statistics GVRP error | |
| statistics)[interfaces | statistics Specifies posts | |
| IF_PORTS] | ||
| Default | Display all ports statistics info | |
| Mode | Privileged EXEC | |
| Usage | This command will display the ports error statistics or statistics info. | |
Example
The following example specifies that display gvrp error statistics and statistics test.
Switch# show gvrp statistics
Port id : fa1
Total RX : 0
JoinEmpty RX : 0
JoinIn RX : 0
Empty RX : 0
Leaveln RX : 0
LeaveEmpty RX : 0
LeaveAll RX : 0
Total TX : 0
JoinEmpty TX : 0
JoinIn TX : 0
Empty TX : 0
Leaveln TX : 0
LeaveEmpty TX : 0
LeaveAll TX : 0
Port id : fa2
Total RX : 0
JoinEmpty RX : 0
JoinIn RX : 0
Empty RX : 0
Leaveln RX : 0
LeaveEmpty RX : 0
LeaveAll RX : 0
Total TX : 0
...
Switch# show gvrp error-statistics
INVPROT : Invalid protocol Id
INVATYP : Invalid Attribute Type INVALEN : Invalid Attribute Length
INVAVAL : Invalid Attribute Value INVEVENT: Invalid Event
Port | INVPROT | INVATYP | INVALEN | INVAVAL | INVEVENT
| gi1 | 0 | 0 | 0 | 0 | 0 |
| gi2 | 0 | 0 | 0 | 0 | 0 |
| gi3 | 0 | 0 | 0 | 0 | 0 |
| gi4 | 0 | 0 | 0 | 0 | 0 |
| gi5 | 0 | 0 | 0 | 0 | 0 |
| gi6 | 0 | 0 | 0 | 0 | 0 |
Syntax show gvrp
Parameter none
| Default | None |
| Mode | Privileged EXEC |
| Usage | This command will display the gvrp global info. |
| Example | The following example specifies that display gvrp test. Switch# show gvrpGVRP Status----GVRP : DisabledJoin time : 200 msLeave time : 600 msLeaveAll time : 10000 ms |
show gvrp configuration
| Syntax | show gvrp configuration [interface IF_PORTS] |
| Parameter none | Display all ports configuration |
| [interfaces Display Specifies posts configuration IF PORTS] | |
| Default | Display all ports configuration info |
| Mode | Privileged EXEC |
| Usage | This command will display the ports configuration info. |
| Example | The following example specifies that display gvrp port configuration test. Switch# show gvrp configurationPort | GVRP-Status | Registration | Dynamic VLAN Creation |
| +----+----+----+----+----+----+----+----+----+----+----+----+----+----+----+----+----+----+----+----+----+----+----+----+----+----+----+----+----+----+----+----+----+----+----+----+----+----+----+----+----+----+----+----+----+----+----+----+----+----+ | |
| gi1 Disabled NormalEnabled gi 2 Disabled NormalEnabled |
| gi 3 | Disabled | Normal | Enabled |
| gi 4 | Disabled | Normal | Enabled |
| gi 5 | Disabled | Normal | Enabled |
| gi 6 | Disabled | Normal | Enabled |
| gi 7 | Disabled | Normal | Enabled |
| --More— | |||
10. IGMP Snooping
ip igmp snooping
| Syntax ip igmp | snooping no ip igmp snooping |
| Parameter | None |
| Default | Default is enabled |
| Mode | Global Configuration |
| Usage | Use the ip igmp snooping command to enable IGMP snooping function. Use the no form of this command to disable. You can verify settings by the show ip igmp snooping command. |
| Example | The following example specifies that set ip igmp snooping test. Switch(config)# no ip igmp snooping |
ip igmp snooping report-suppression
| Syntax ip igmp snooping report-suppressionno ip igmp snooping report-suppression | |
| Parameter | None |
| Default | Default is enabled |
| Mode | Global Configuration |
| Usage Use the ip igmp snooping report-suppression command to enable IGMP snooping report-suppression function.Use the no form of this command to disable. Disable report-suppression will forward all received reports to the vlan router ports.You can verify settings by the show ip igmp snooping command. | |
| Example | The following example specifies that disable ip igmp snooping report- suppression test. |
ip igmp snooping version
Syntax ip igmp snooping version (2|3)
| Parameter | (2|3) | IGMP version 2 or IGMP version 3 basic mode |
| Default | Default is version 2 | |
| Mode | Global Configuration | |
| Usage Use the ip igmp snooping version command to change IGMP support version. Only basic mode is supported in v3. When change version from v3 to v2, all querier version will update to version 2.You can verify settings by the show ip igmp snooping command. | ||
| Example | The following example specifies that set ip igmp snooping version 3. Switch(config)# ip igmp snooping version 3 | |
ip igmp snooping unknown-multicast action
Syntax ip igmp snooping unknown-multicast action (drop | flood |router-port) no ip igmp snooping unknown-multicast action
| Parameter | (drop | flood | router- port) | Drop、flood in vlan or forward to router port of unknown multicast packet |
| Default | Default is flood. | |
| Mode | Global Configuration |
| Usage | When igmp and mld snooping disabled, it can’t set action router-port.When disable igmp snooping & mld snooping, it set unknown multicast action flood. When action is router-port to flood or drop, it will delete the unknown multicast group entry.Use the ip igmp snooping unknown-multicast action command to change action.Use the no form of this command to restore to default.You can verify settings by the show ip igmp snooping command. |
| Example | The following example specifies that set ip igmp unknown multicast action router-port test.Switch(config)# ip igmp snoopingSwitch(config)# ip igmp snooping unknown-multicast action router-port |
ip igmp snooping querier
| Syntax | ip igmp snooping vlanquerier [version (2|3)]no ip igmp snooping [vlan] querier | |
| Parameter | VLAN-LIST | specifies VLAN ID list to set |
| (2|3) | Query version 2 or 3 | |
| Default | No ip igmp snooping querier by default | |
| Mode | Global Configuration | |
| Usage | When enable ip igmp vlan querier, there will process router select, the select successful will send general and specific query.Use the ip igmp snooping querier command to add querier. Use the no form of this command to delete querier.You can verify settings by the show ip igmp snooping querier command. | |
| Example | The following example specifies that set ip igmp snooping querier test. Switch(config)# ip igmp snooping vlan 2 querier version 3 | |
ip igmp snooping vlan
Syntax
ip igmp snooping vlan VLAN- LIST
| no ip igmp snooping vlan VLAN-LIST | |
| Parameter | VLAN-LIST specifies VLAN ID list to set |
| Default | Default is disabled for all VLANs |
| Mode | Global Configuration |
| Usage | Disable will clear all ip igmp snooping dynamic group and dynamic router port and make all static ip igmp group invalid of this vlan. Will not learn dynamic group and router port by igmp message any more.Use the ip igmp snooping vlan command to enable IGMP on VLAN. Use the no form of this command to disableYou can verify settings by the show ip igmp snooping vlan command. |
| Example | The following example specifies that set ip igmp snooping vlan test.Switch(config)# ip igmp snoopingSwitch(config)# ip igmp snooping vlan 2 |
ip igmp snooping vlan fastleave
Syntax ip igmp snooping vlan
| Parameter | VLAN-LIST | specifies VLAN ID list to set |
| Default | Default is disabled | |
| Mode | Global Configuration | |
Usage Use the ip igmp snooping vlan fastleave command to enable fastleave function. Group will remove port immediately when receive leave packet. Use the no form of this command to disable. You can verify settings by the show ip igmp snooping vlan command
| Example | The following example specifies that set ip igmp snooping vlan fastleave test. Switch(config)# ip igmp snooping vlan 1 fastleave |
ip igmp snooping vlan last-member-query-count
| Syntax | ip igmp snooping vlanlast-member-query-count <1-7>no ip igmp snooping vlanlast-member-query-count | |
| Parameter | VLAN-LIST | specifies VLAN ID list to set |
| last-member-query-count <1-7> | specifies last member query count to set. | |
| Default | Default is 2 | |
| Mode | Global Configuration | |
| Usage Use the ip igmp snooping vlan last-member-query-count command to change how many query packets will send.Use theno form of this command to restore to default.You can verify settings by theshow ip igmp snooping vlancommand | ||
| Example | The following example specifies that set ip igmp snoopingvlan last-member-query-count test.Switch(config)# ip igmp snooping vlan 1 last-member-query-count 5 | |
| ip igmp snooping vlan last-member-query-interval | ||
| Syntax | ip igmp snooping vlanlast-member-query-interval <1-60>no ip igmp snooping vlanlast-member-query-interval | |
| Parameter VLAN-LIST specifies VLAN ID list to setinterval <1-60> | last-member-query-specifies last member query interval to set | |
| Default | Default is 1 | |
| Mode | Global Configuration | |
| Usage | Use the ip igmp snooping vlan last-member-query-interval command to set interval between each query packet.Use the no form of this command to restore to defaultYou can verify settings by the show ip igmp snooping vlan command | |
| Example | The following example specifies that set ip igmp snoopingvlan last- member-query-interval test.Switch(config)# ip igmp snooping vlan 1 last-member-query-interval 3 | |
ip igmp snooping vlan query-interval
| Syntax | ip igmp snooping vlan |
| query-interval <30-18000> | |
| no ip igmp snooping vlan |
| Parameter | VLAN-LIST specifies VLAN ID list to set |
| query-interval <30- specifies query interval to set | |
| 18000> |
| Default | Default is 125 |
| Mode | Global Configuration |
| Usage Use the ip igmp snooping vlan query-interval command to set interval between each query.Use the no form of this command to restore to defaultYou can verify settings by the show ip igmp snooping vlan command |
| Example | The following example specifies that set ip igmp snooping vlan query- interval test.Switch(config)# ip igmp snooping vlan 1 query-interval 100 |
ip igmp snooping vlan response-time
| Syntax | ip igmp snooping vlanresponse-time <5-20>no ip igmp snooping vlanresponse-time |
| Parameter | VLAN-LIST | specifies VLAN ID list to set |
| response-time <5-20> | specifies a response time to set |
| Default | Default is 10 |
| Mode | Global Configuration |
| Usage | Use the ip igmp snooping vlan response-time command to set response timeUse the no form of this command to restore to default.You can verify settings by the show ip igmp snooping vlan command |
| Example | The following example specifies that set ip igmp snooping vlan response- time test.Switch(config)# ip igmp snooping vlan 1 response-time 12 |
ip igmp snooping vlan robustness-variable
| Syntax | ip igmp snooping vlanrobustness-variable <1-7>no ip igmp snooping vlanrobustness-variable |
| Parameter VLAN-LIST specifies VLAN ID list to set | |
| Default | Default is 2 |
| Mode | Global Configuration |
| Usage Use the ip igmp snooping vlan robustness-variablecommand to times to retry.Use thenoform of this command to restore to defaultYou can verify settings by theshow ip igmp snooping vlancommand | |
| Example | The following example specifies that set ip igmp snooping vlan parameters test.Switch(config)# ip igmp snooping vlan 1 robustness-variable |
ip igmp snooping vlan router
| Syntax | ip igmp snooping vlan VLAN-LIST router learn pim-dvmrpnooping vlan VLAN-LIST router learn pim- |
| Parameter | VLAN-LIST specifies VLAN ID list to set | |
| Default | Default is enabled | |
| Mode | Global Configuration | |
| Usage | Use the ip igmp snooping vlan router command to enable learning router port by routing protocol packets such as PIM/PIMv2, DVMRP, MOSPF. Use the no form of this command to disable.You can verify settings by the show ip igmp snooping vlan command | |
| Example | The following example specifies that set ip igmp snooping vlan router test. Switch(config)# ip igmp snooping vlan 99 router | |
| ip igmp snooping vlan forbidden-port | ||
| Syntax | ip igmp snooping vlanforbidden-port IF_PORTSno ip igmp snooping vlanforbidden-port IF_PORTS | |
| Parameter | VLAN-LIST specifies VLAN ID list to set | |
| IF_PORTS specifies a port list to set or remove | ||
| Default | No forbidden ports by default | |
| Mode | Global Configuration | |
| Usage | ‘ip igmp snooping vlan 1 static-port gi1-2’ will add static port gi1-2 for vlan 1.the all known vlan 1 ipv4 group will add the static ports.‘ip igmp snooping vlan 1 forbidden-port gi3-4’ will add forbidden port gi3-4 for vlan 1.the all known vlan 1 ipv4 group will remove the forbidden ports. The configure can use ‘show ip igmp snooping forward-all’. | |
| Use the ip igmp snooping vlan forbidden-port command to add static non-forwarding port, all known vlan 1 ipv4 group will remove the forbidden ports. Use the no form of this command to delete forbidden port.You can verify settings by the show ip igmp snooping forward-all | ||
command.
| Example | The following example specifies that set ip igmp snooping static/forbidden port test.Switch(config)# ip igmp snooping vlan 1 forbidden -port gi3-4 |
ip igmp snooping vlan static-port
| Syntax | ip igmp snooping vlanstatic-port IF_PORTSping vlanstatic-port | |
| Parameter | VLAN-LIST specifies VLAN ID list to set | |
| IF_PORTS specifies a port list to set or remove | ||
| Default | No static port by default | |
| Mode | Global Configuration | |
| Usage | Use the ip igmp snooping vlan static-port command to add static forwarding port, all known vlan 1 ipv4 group will add the static ports. Use the no form of this command to delete static port.You can verify settings by the show ip igmp snooping forward-all command. | |
| Example | The following example specifies that set ip igmp snooping static port test. Switch(config)# ip igmp snooping vlan 1 static -port gi1-2 | |
ip igmp snooping vlan forbidden-router-port
| Syntax | ip igmp snooping vlanforbidden-router-portIF_PORTSno ip igmp snooping vlanforbidden-router-port | |
| Parameter | VLAN-LIST | specifies VLAN ID list to set |
| IF_PORTS | specifies a port list to set or remove | |
| Default | No forbidden router ports by default | |
| Mode | Global Configuration | |
| Usage | Use the ip igmp snooping vlan forbidden-router-port command to add static forbidden router port. This will also remove port from static router port. The forbidden router port will not forward received query packet.Use the no form of this command to delete forbidden router port.You can verify settings by the show ip igmp snooping router command. | |
| Example | The following example specifies that set ip igmp snooping forbidden test. Switch(config)# ip igmp snooping vlan 1 forbidden-router-port gi2 | |
ip igmp snooping vlan static-router-port
| Syntax | ip igmp snooping vlanstatic-router-port IF_PORTSno ip igmp snooping vlanstatic-router-portIF_PORTS | |
| Parameter | VLAN-LIST | specifies VLAN ID list to set |
| IF_PORTS | specifies a port list to set or remove | |
| Default | No static router ports by default | |
| Mode | Global Configuration | |
| Usage | Use the ip igmp snooping vlan static-router-port command to add static router port. All query packets will forward to this port.Use theno form of this command to delete static router port.You can verify settings by theshow ip igmp snooping router command. | |
| Example | The following example specifies that set ip igmp snooping static test. Switch(config)# ip igmp snooping vlan 1 static-router-port gi1-2 | |
ip igmp snooping vlan static-group
| Syntax | ip igmp snooping vlanstatic-group [] interfaces IF_PORTSno ip igmp snooping vlanstatic-groupinterfaces IF_PORTS |
| Parameter | VLAN-LISTip-addr | specifies VLAN ID list to setspecifies multicast group ipv4 address |
| IF_PORTS | specifies port list to set or remove | |
| Default | No static group by default | |
| Mode | Global Configuration | |
| Usage | Use the ip igmp snooping vlan static-group command to add a static group. The static group will not learn other dynamic ports. If the dynamic group exists, then the static group will overlap the dynamic group. The static group set to valid unless igmp snooping global and vlan enable.Use the no form of this command to delete a port in static group. If remove the last member of static group, the static group will be delete.You can verify settings by the show ip igmp snooping group command. | |
| Example | The following example specifies that set ip igmp snooping static group test. Switch(config)# ip igmp snooping vlan 1 static-group 224.1.1.1 interfaces gi1-2 | |
ip igmp snooping vlan group
| Syntax | no ip igmp snooping vlangroup | |
| Parameter | VLAN-LIST | specifies VLAN ID list to set |
| ip-addr | specifies multicast group ipv4 address | |
| Default | None | |
| Mode | Global Configuration | |
Usage Use the no ip igmp snooping vlan group command to delete a group which could be static or dynamic. You can verify settings by the show ip igmp snooping group command.
Example
The following example specifies that set ip igmp snooping static group test. Switch(config)# no ip igmp snooping vlan 1 group 224.1.1.1
profile range
| Syntax | profile range ip <ip-addr> [ip-addr] action (permit | deny) | |
| <ip-addr> | Start ipv4 multicast address | |
| [ip-addr] | End ipv4 multicast address | |
| (permit | deny) | Permit: allow Multicast address range ip address learningdeny: do not allow Multicast address range ip address | |
| Default | None | |
| Mode | igmp profile configuration mode | |
| Usage | Use the profile command to generate IGMP profile.You can verify settings by the show ip igmp profile command | |
| Example | The following example specifies that set ip igmp profile test. Switch(config)# ip igmp profile 1Switch(config-igmp-profile)# profile range ip 224.1.1.1 224.1.1.8action permit | |
| ip igmp profile | ||
| Syntax | ip igmp profile <1-128>no ip igmp profile <1-128> | |
| Parameter | <1-128> | specifies profile ID |
| Default | No profie exist by default | |
| Mode | Global Configuration | |
| Usage Use the ip igmp profile command to enter profile configurationUse the no form of this command to delete profileYou can verify settings by the show ip igmp profile command | ||
| Example | The following example specifies that set ip igmp profile test. Switch(config)# ip igmp profile 1 | |
| ip igmp filter | ||
| Syntax | ip igmp filter <1-128>[no] ip igmp filter | |
| Parameter | <1-128> | specifies profile ID |
| Default | None | |
| Mode | Port Configuration | |
| Usage | Use the ip igmp filter command to bind a profile for port. When the port bind a profile. Then the port learning group will update, if the group is not match the profile rule it will remove the port from the group. Static group is excluded.Use the no form of this command to delete profileYou can verify settings by the show ip igmp filter command | |
| Example | The following example specifies that set ip igmp filter test.Switch(config)# interface gi1Switch(config-if)# ip igmp filter 1 | |
ip igmp max-groups
| Syntax | ip igmp max-groups <0-1024>no ip igmp max-groups |
| Parameterinterface can join. | <0-1024> | The maximum number of IGMP groups that an |
| Default | Default is 1024 | |
| Mode | Port Configuration | |
| Usage Use the ip igmp max-groups command to limit port learning max group number. When the port has reach limitation, new group will not add this port. Static group is excluded.Use the no form of this command to restore to defaultYou can verify settings by the show ip igmp max-groups command. | ||
| Example | The following example specifies that set ip igmp max-groups test. Switch(config-if)#ip igmp max-groups 10 | |
ip igmp max-groups action
| Syntax | ip igmp max-groups action (deny | replace) |
| Parameter (deny | replace) Deny: current port igmp group arrived max-groups, don't add group.Replace: current port igmp group arrived max-groups, remove port for rand group, and add port to new group. | |
| Default | Default action is deny |
| Mode | Port Configuration |
| Usage Use the ip igmp max-groups action command to set the action when the numbers of groups reach the limitation.Use the no form of this command to restore to defaultYou can verify settings by the show ip igmp max-groups command. | |
| Example | The following example specifies that set action replace test. Switch(config-if)#ip igmp max-groupsaction replace |
clear ip igmp snooping groups
| Syntax | clear ip igmp snooping groups [(dynamic | static)] | |
| Parameter | none | Clear ip igmp groups include dynamic and static |
| (dynamic | static) | Ip igmp group type is dynamic or static | |
| Default | None | |
| Mode | Privileged EXEC | |
| Usage | This command will clear the ip igmp groups for dynamic or static or all of type.You can verify settings by the show ip igmp snooping groups command. | |
| Example | The following example specifies that clear ip igmp snooping groups test.Switch# clear ip igmp snooping groupsSwitch# show ip igmp snooping groupsVLAN | Group IP Address | Type | Life(Sec) | Port----+----+----+----+----Total Number of Entry = 0 | |
clear ip igmp snooping statistics
Syntax clear ip igmp snooping statistics
| Parameter | none |
| Default | None |
| Mode | Privileged EXEC |
| Usage | This command will clear the igmp statistics.You can verify settings by the show ip igmp snooping command. |
| Example | The following example specifies that clear ip igmp snooping statistics test. Switch#clear ip igmp snooping statisticsSwitch#show ip igmp snoopingIGMP Snooping Status----Snooping : EnabledReport Suppression :EnabledOperation Version : v2Forward Method : macUnknown IP Multicast Action :FloodPacket StatisticsTotal RX : 0Valid RX : 0Invalid RX : 0Other RX : 0Leave RX : 0Report RX : 0General Query RX : 0Specail Group Query RX : 0Specail Group & Source Query RX :0 Leave TX : 0Report TX : 0General Query TX : 0Specail Group Query TX : 0Specail Group & Source Query TX : 0 |
show ip igmp snooping groups counters
| Syntax | show ip igmp snooping groups |
| Parameter | none |
| Default | none |
| Mode | Privileged EXEC |
| Usage | This command will display the ip igmp group counter include static group. |
Example
The following example specifies that display ip igmp snooping group counter test.
Switch# show ip igmp snooping group counters
| Total ip igmp snooping group number: 2Total ip igmp snooping static mac number: 0 |
show ip igmp snooping groups
| Syntax | show ip igmp snooping groups [(dynamic | static)] | |
| Parameter | none | Show ip igmp groups include dynamic and static |
| (dynamic | static) | Display Ip igmp group type is dynamic or static | |
| Default | None | |
| Mode | Privileged EXEC | |
| Usage | This command will display the ip igmp groups for dynamic or static or all of type. | |
| Example | The following example specifies that show ip igmp snooping groups.Switch# show ip igmp snooping groupsVLAN | Group IP Address | Type | Life(Sec) | Port----+----+----+----+----1 | 224.1.2.3 | Static| -- | fa91 | 224.1.2.4 | Static| -- | fa10Total Number of Entry = 2 | |
show ip igmp snooping router
| Syntax | show ip igmp snooping router [(dynamic | forbidden |static)] | |
| Parameter | none | Show ip igmp router include dynamic and static and forbidden |
| (dynamic | forbidden | static) | Display lp igmp router info for different type | |
| Default | None | |
| Mode | Privileged EXEC |
| Usage | This command will display the ip igmp router info. |
| Example | The following example specifies that show ip igmp snooping router.Switch#show ip igmp snooping routerDynamic Router TableVID | Port | Expiry Time(Sec)----+----+----Total Entry 0Static RouterTable VID | PortMask----+----1 | fa4Total Entry 1Forbidden RouterTable VID | PortMask----+----1 | fa8Total Entry 1 |
show ip igmp snooping querier
Syntax show ip igmp snooping querier
| Parameter | none | Show all vlan ip igmp querier info. |
| Default | None | |
| Mode | Privileged EXEC | |
| Usage | This command will display all of the static vlan ip igmp querier info. | |
| Example | The following example specifies that show ip igmp snoopingquerier test. Switch#show ip igmp snooping querierVID | State | Status | Version | Querier IP----+----+----+----+----1 | Disabled | Non-Querier | No | ----Total Entry 1 | |
show ip igmp snooping
Syntax show ip igmp snooping
| Parameter | None |
| Default | None |
| Mode | Privileged EXEC |
| Usage | This command will display ip igmp snooping global info. |
| Example | The following example specifies that show ip igmp snooping test. Switch#show ip igmp snoopingIGMP Snooping Status----Snooping : EnabledReport Suppression :EnabledOperation Version : v2Forward Method : macUnknown Multicast Action :FloodPacket StatisticsTotal RX : 0Valid RX : 0Invalid RX : 0Other RX : 0Leave RX : 0Report RX : 0General Query RX : 0Specail Group Query RX : 0 |
Specail Group & Source Query RX :
0 Leave TX : 0
Report TX : 0
General Query TX :
0 Specail Group Query TX : 0
Specail Group & Source Query TX : 0
show ip igmp snooping vlan
| Syntax | show ip igmp snooping vlan [VLAN-LIST] | |
| Parameter | none | Show all ip igmp snooping vlan info |
| [VLAN-LIST] | Show specifies vlan ip igmp snooping info | |
| Default | None | |
| Mode | Privileged EXEC | |
| Usage | This command will display ip igmp snooping vlan info. | |
| Example | The following example specifies that show ip igmp snooping vlan test. Switch# show ip igmp snooping vlan 1IGMP Snooping is globally enabledIGMP Snooping VLAN 1 admin:disabled IGMP Snooping operationmode: disabled IGMP Snoopingrobustness: admin 2 oper 2IGMP Snooping query interval: admin 125 sec oper 125sec IGMP Snooping query max response: admin 10 secoper 10 sec IGMP Snooping last member query counter:admin 2 oper 2IGMP Snooping last member query interval: admin 1 sec oper 1sec IGMP Snooping last immediate leave: disabledIGMP Snooping automatic learning of multicast router ports: enabled | |
show ip igmp snooping forward-all
| Syntax | show ip igmp snooping forward-all [vlan VLAN-LIST] | |
| Parameter | none | Show all ip igmp snooping vlan forward-all info |
| [vlan VLAN-LIST] | Show specifies vlan of ip igmp forward info. | |
| Default | None | |
| Mode | Privileged EXEC |
| Usage | This command will display ip igmp snooping forward all info. |
| Example | The following example specifies that show ip igmp snooping forward-all test. Switch# show ip igmp snooping forward-all 1IGMP Snooping VLAN 1IGMP Snooping static port : NoneIGMP Snooping forbidden port : None |
show ip igmp profile
| Syntax | show ip igmp profile [<1-128>] | |
| Parameter | none | Show all ip igmp snooping profile info |
| [<1-128>] | Show specifies index profile info | |
| Default | None | |
| Mode | Privileged EXEC | |
| Usage | This command will display ip igmp profile info. | |
| Example | The following example specifies that show ip igmp profile test. Switch# show ip igmp profileIP igmp profile index: 1IP igmp profile action:permit Range low ip:224.1.1.1 Range high ip:224.1.1.8IP igmp profile index: 2IP igmp profile action:deny Range low ip:225.1.1.0Range high ip: 225.1.2.1 | |
show ip igmp filter
Syntax show ip igmp filter [interfaces IF_PORTS]
| Parameter | none | Show all port filter |
| [interfacesIF PORTS] | Show specifies ports filter | |
| Default | None | |
| Mode | Privileged EXEC | |
| Usage | This command will display ip igmp port filter info. | |
| Example | The following example specifies that show ip igmp filter test. Switch#show ip igmp filterPort ID | Profile ID----+----gi1 : 1gi2 : Nonegi3 : Nonegi4 : Nonegi5 : None--More-- | |
show ip igmp max-group
| Syntax | show ip igmp max-group [interfaces IF_PORTS] | |
| Parameter | none | Show all port max-group |
| [interfaces IF_PORTS] | Show specifies ports max-group | |
| Default | None | |
| Mode | Privileged EXEC | |
| Usage | This command will display ip igmp port max-group. | |
| Example | The following example specifies that show ip igmp max-group test. | |
| Switch(config-if)#ip igmp max-groups 50Switch# show ip igmp max-group | ||
| Port ID | Max Group | ||
| ----+---- | ||
| gi1 : 50 | ||
| gi2 : 256 | ||
| gi3 : 256 | ||
| gi4 : 256 | ||
| gi5 : 256 | ||
| --More-- | ||
show ip igmp max-group action
| Syntax | show ip igmp max-group action [interfaces IF_PORTS] | |
| Parameter | none | Show all port max-group action |
| [interfacesIF PORTS] | Show specifies ports max-group action | |
| Default | None | |
| Mode | Privileged EXEC | |
| Usage | This command will display ip igmp port max-group action. | |
| Example | The following example specifies that show ip igmp max-group action test.Switch(config)#interface gi1Switch(config-if)#ip igmp max-groups action replaceSwitch# show ip igmp max-group actionPort ID | Max-groups Action----+----gi1 :replacegi2 :denygi3 :denygi4 :denygi5 :deny--More-- | |
11. IP Source Guard
| Syntax ip source verify [mac-and-ip] no ip source verify | ||
| Parameter | mac-and-ip | Verify by mac and ip address boundle |
| Default | IP Source Guard is disabled on interface. Default is that verifying ip address only | |
| Mode | Port Configuration | |
| Usage | Use the ip source verify command to enable IP Source Guard function. Default IP Source Guard filter source IP address. The “mac-and-ip” filters not only source IP address but also source MAC address.Use the no form of this command to disable.You can verify settings by the show ip source interfaces command. | |
| Example | The example shows how to enable IP Source Guard with source IP address filtering on interface gi1.Switch(config)# interface gi1switch(config-if)# ip source verifyThe example shows how to enable IP Source Guard with source IP and MAC address filtering on interface gi2.Switch(config)# interface gi2switch(config-if)# ip source verify mac-and-ipswitch(config-if)# do show ip source interfacesgi1-2 Port | Status | Max Entry | CurrentEntry+----+----+gi1 | Verify MAC+IP | No Limit | 0gi2 | disabled | No Limit | 0 | |
ip source binding
| Syntax | ip source binding A:B:C:D:E:F vlan <1-4094> A.B.C.D interfaceIF_PORTno ip source binding A:B:C:D:E:F vlan <1-4094> A.B.C.D interface IF_PORT | |
| Parameter | A:B:C:D:E:F | Specify a MAC address of a binding entry |
| VLAN <1-4094> | Specify a VLAN ID of a binding entry | |
| A.B.C.D | Specify IP address and MASK of a binding entry. | |
| IF_PORT | Specify interface of a binding entry. | |
| Managed Switch Software | 148 | Rev. 1.1 |
| Default | Default is no binding entry. |
| Mode | Global Configuration |
| Usage | Use the ip source binding command to create a static IP source binding entry has an IP address, its associated MAC address、VLAN ID、interface.Use the no form of this command to delete static entry.You can verify settings by the show ip source binding command. |
| Example | The example shows how to add a static IP source binding entry.Switch(config)# ip source binding 00:11:22:33:44:55 vlan 1192.168.1.55 interface fa1switch(config)# do show ip source bindingBind Table: Maximun Binding Entry Number 192Port | VID | MAC Address | IP | Type | Lease Time+----+----+----+----+----fa1 |1 | 00:11:22:33:44:55 |192.168.1.55(255.255.255.255)| Static | NA |
show ip source interface
| Syntax | show ip source interfacesIF_PORTS | |
| Parameter | IF_PORTS specifies ports to show | |
| Default | No default is defined | |
| Mode | Privileged EXEC | |
| Usage | Use the show ip source interface command to show settings of IP SourceGuard of interface | |
| Example | The example shows how to show settings of IP Source Guard of interface gi1switch# show ip source interfaces gi1Port | Status | Max Entry | Current Entry----+----+----+----gi1 | Verify MAC+IP | No Limit | 0 | |
show ip source binding
| Syntax | show ip source binding[(dynamic|static)] | |
| Parameter | dynamic | Show entries that added by DHCP snooping learn |
| static | Show entries that added by user | |
| Default | No default is defined | |
| Mode | Privileged EXEC | |
| Usage | Use the show ip source binding command to show binding entries of IP Source Guard. | |
| Example | The example shows how to show static binding entries of IP Source Guard. | |
| switch# show ip source binding | ||
| Bind Table: Maximum Binding Entry Number 192 | ||
| Port | VID | MAC Address | IP | Type | Lease Time | ||
| fa1 | 1 | 00:11:22:33:44:55 | 192.168.1.55(255.255.255.255) | Static | NA | ||
12. Link Aggregation
lag
| Syntax | lag <1-8> mode (static | active | passive) no lag | |
| Parameter | <1-8> | Specify the LAG id for the interface |
| static | Specify the LAG to be static mode and join the interface into this LAG. | |
| active | Specify the LAG to be dynamic mode and join the interface into this LAG with LACP active port. | |
| passive | Specify the LAG to be dynamic mode and join the interface into this LAG with LACP passive port. | |
| Default | There is no LAG in default. | |
Mode
Interface Configuration
Usage Link aggregation group function allows you to aggregate multiple physical ports into one logic port to increase bandwidth. This command makes normal port join into the specific LAG logic port with static or dynamic mode. And use “no lag” to leave the LAG logic port.
Example
This example shows how to create a dynamic LAG and join fa1-fa3 to this LAG. Switch(config)# interface range fa1-3 Switch(config-if)# lag 1 mode active
This example shows how to show current LAG status. Switch# show lag Load Balancing: src-dst-mac-ip.
Group ID | Type | Ports
1 | LACP | Inactive: fa1-3 2 |
---- |
3 | ---- |
4 | ---- |
5 | ---- |
6 | ---- |
7 | ---- |
8 | ---- |
lag load-balance
Syntax
lag load-balance (src-dst-mac | src-dst-mac-ip) no lag load-balance
Parameter src-dst-mac Specify algorithm to balance traffic by using source and destination MAC address for all packets.
src-dst-mac-ip Specify algorithm to balance traffic by using source and destination IP address for IP packets and using source and destination MAC address for non-IP packets.
Default
Default load balance algorithm is src-dst-mac
Mode
Global Configuration
Command Line Interface
User Guide
Usage
Link aggregation group port should transmit packets spread to all ports to balance traffic loading. There are two algorithm supported and this command
allow you to select the algorithm.
| Example | This example shows how to change load balance algorithm to src-dst-mac-ip.Switch(config)# lag load-balance src-dst-mac-ip |
| This example shows how to show current load balance algorithm.Switch# show lagLoad Balancing: src-dst-mac-ip. | |
| Group ID | Type | Ports----+----+----1 | ----| | |
| 2 | ----| | |
| 3 | ----| | |
| 4 | ----| | |
| 5 | ----| | |
| 6 | ----| | |
| 7 | ----| | |
| 8 | ----| |
Iacp port-priority
| Syntax lacp port-priority <1-65535>no lacp port-priority | ||
| Parameter | <1-65535> | Specify port priority value |
| Default | Default port priority is 1. | |
| Mode | Interface Configuration | |
| Usage LACP port priority is used for two connected DUT to select aggregation ports. Lower port priority value has higher priority. And the port with higher priority will be selected into LAG first.The only way to show this configuration is using “show running-config” command. | ||
| Example | This example shows how to configure interface fa1 lacp port priority to 100.Switch(config)# interface fa1Switch(config-if)# lacp port-priority 100 | |
Iacp system-priority
| Syntax | lapc system-priority <1-65535>no lacp system-priority | |
| Parameter | <1-65535> | Specify system priority value |
| Default | Default system priority is 32768. | |
| Mode | Global Configuration | |
| Usage LACP system priority is used for two connected DUT to select master switch. Lower system priority value has higher priority. And the DUT with higher priority can decide which ports are able to join the LAG. Use "no lacp system-priority" to restore to the default priority value. The only way to show this configuration is using "show running-config" command. | ||
| Example | This example shows how to configure lacp system priority to 1000. Switch(config)# lacp system-priority 1000 | |
| lacp timeout | ||
| Syntax | lacp timeout (long | short) no lacp timeout | |
| Parameter | long | Send LACP packet every 30 seconds. |
| short | Send LACP packet every 1 second. | |
| Default | Default LACP timeout is long. | |
| Mode | Interface Configuration | |
| Usage LACP need to send LACP packet to partner switch to check the link status. This command configure the interval of sending LACP packets. The only way to show this configuration is using "show running-config" command. | ||
| Example | This example shows how to configure interface fa1 lacp timeout to short. Switch(config)# interface fa1 Switch(config-if)# lacp timeout short | |
| show lacp | ||
| Syntax | show lacp sys-id | |
show lacp [<1-8>] counters
show lacp [<1-8>] (internal | neighbor) [detail]
Parameter
Default
No default values for this
command.
Mode
Privileged EXEC
Usage
Use "show lacp sys-id" command to displays the system identifier that is being used by LACP. The system identifier is made up of the LAPC system priority and the switch MAC address.
Use "show lacp counter" command to display LACP statistic
information. Use "show lacp internal" command to display local
information.
Use "show lacp neighbor" command to display remote information.
State of the specific port. These are the allowed values:
- —Port is in an unknown state.
- bndl—Port is attached to an aggregator and bundled with other ports.
- susp—Port is in a suspended state; it is not attached to any aggregator.
- hot-sby—Port is in a hot-standby state.
- 1indiv—Port is incapable of bundling with any other port.
- 1indep—Port is in an independent state (not bundled but able to switch data traffic. In this case, LACP is not running on the partner port).
- down—Port is down.
State variables for the port, encoded as individual bits within a single octet with these meanings:
- bit0—LACP_Activity
- bit1—LACP_Timeout
- bit2—Aggregation
- bit3—Synchronization
- bit4—Collecting
- bit5—Distributing
- bit6—Defaulted
- bit7—Expired
| Example | This example shows how to show LACP statistics. Switch# show lacp countersLACPDUs LACPDUsPort Sent Recv Pkts Err |
| Channel group 1 | |||
| fa1 | 0 | 0 | 0 |
| fa2 | 0 | 0 | 0 |
This example shows how to show LACP local information.
Switch# show lacp internal
Flags: S - Device is requesting Slow LACPDUs F - Device is requesting Fast LACPDUs A - Device is in Active mode P - Device is in
Passive mode
Channel group 1
Port Port
LACP port Admin Oper
Port Flags State Priority Key Key Number State
fa1 SA down 1 0x3e8 0x3e8 0x1 0x45
fa2 SA down 1 0x3e8 0x3e8 0x2 0x45
This example shows how to show LACP remote information.
Switch# show lacp neighbor
Flags: S - Device is sending Slow LACPDUs F - Device is sending Fast LACPDUs A - Device is in Active mode P - Device is in
Passive mode
Channel group 1 neighbors
Partner's information:
| LACP port | Admin | Oper | ||||
| Port | Port | |||||
| Port Number | Flags State | Priority | Dev ID | Age | key | Key |
| fa1 | FP | 32768 | 0000.0000.0000 | 0s | 0x3e8 | |
| 0x3e8 | 0x1 0x56 | |||||
| fa2 | FP | 32768 | 0000.0000.0000 | 0s | 0x3e8 | |
| 0x3e8 | 0x2 0x56 | |||||
show lag
Syntax show lag
Parameter
Default No default values for this command.
Mode Privileged EXEC
| Usage | Use “show lag” command to show current LAG load balance algorithm and members active/inactive status. |
| Example | This example shows how to show current LAG status.Switch# show lagLoad Balancing: src-dst-mac-ip.Group ID | Type | Ports----+----1 | LACP | Inactive: fa1-3 2 |----|3 |----|4 |----|5 |----|6 |----|7 |----|8 |----| |
13. LLDP
clear lldp statistics
| Syntax | clear lldpstatistics |
| Default | There is no default configuration for this command |
| Mode | Privileged EXEC |
| Usage | Use “clear lldp statistics” command to clear the LLDP RX/TX statistics. |
| Example | This example shows how to clear LLDP statistics.Switch# clear lldp statistics |
| Ildp | |
| Syntax lldp | no lldp |
| Default | Default is enabled |
| Mode | Global Configuration |
| Usage | Use “Ildp” command to enable LLDP RX/TX ability. The LLDP enable status is displayed by “show lldp” command.Use the no form of this command to disable the LLDP. When LLDP is disabled, the behavior of receiving LLDP PDU would be decided by “Ildp lldpdu” command. |
| Example | The following example sets LLDP enable/disable.Switch (config)# IldpSwitch# show lldpState: Enabled Timer:30 SecondsHold multiplier: 4 Reinit delay:2 Seconds Tx delay: 2SecondsLLDP packet handling: FloodingPort | State | Optional TLVs | Address----+----+----+----fa1 | RX,TX ||192.168.1.2fa2 | RX,TX | |192.168.1.2fa3 | RX,TX | |192.168.1.2fa4 | RX,TX | |192.168.1.2fa5 | RX,TX | |192.168.1.2 |
| Ildp rx | |
| Syntax | Ildp rxno lldp rx |
| Default | Default is enabled |
| Mode | Port Configuration |
| Usage Use “Ildp rx” command to enable the LLDP PDU RXability. The configuration could be shown by “show lldp” command.Use the no form of this command to disable the RX ability. | |
Command Line Interface
User Guide
Example
This example sets port gi1 to enable LLDP TX, port gi2 to disable RX but enable TX, port gi3 to enable RX but disable TX, port gi4 to disable RX and TX.
Switch(config)# interface gi1
Switch(config-if)# lldp rx
Switch(config-if)# lldp tx
Switch(config)# interface gi2
Switch(config-if)# no lldp rx
Switch(config-if)# lldp tx
Switch(config)# interface gi3
Switch(config-if)# lldp rx
Switch(config-if)# no lldp tx
Switch(config)# interface gi4
Switch(config-if)# no lldp rx
Switch(config-if)# no lldp tx
Switch(config-if)# end
Switch# show lldp interfaces gi1-4
State: Enabled
Timer: 30 Seconds
Hold multiplier: 4 Reinit
delay: 2 Seconds Tx delay:
2 Seconds
LLDP packet handling: Bridging
Port | State | Optional TLVs | Address
---- + ---- + ---- + ---- gi1 | RX,TX |
|192.168.1.254
gi2 | TX | 192.168.1.254
gi3 | RX | 192.168.1.254
gi4 | Disable | 192.168.1.254
Ildp tx-interval
Syntax lldp tx-interval <5-32768> no lldp tx-interval
| Parameter | <5-32768> | Specify the LLDP PDU TX interval in unit of second. |
| Default | Default TX interval is 30 seconds | |
| Mode | Global Configuration | |
| Usage | Use “lldp tx-interval” command to configure the LLDP TX interval. It should be noticed that both “lldp tx-interval” and “lldp tx-delay” affects the LLDP PDU TX time. The larger value of the two configurations decides the TX interval. The configuration could be shown by “show lldp” command.Use the no form of this command to restore the interval to default value. | |
Example
This example sets LLDP TX interval to 10 seconds.
Switch(config)# lldp tx-interval 10
Switch# show lldp
State: Disabled
Timer: 10 Seconds
Hold multiplier: 4 Reinit
delay: 2 Seconds Tx delay:
2 Seconds
LLDP packet handling: Flooding
Ildp reinit-delay
| Syntax Ildp reinit-delay <1-10>no Ildp reinit-delay | ||
| Parameter | <1-10> | Specify the LLDP re-initial delay time in unit of |
| Default | Default reinitial delay is 2 seconds | |
| Mode | Global Configuration | |
| Usage | Use “Ildp reinit-delay” to configure the LLDP re-initial delay.This delay avoids LLDP generate too many PDU if the port is up and down frequently. The delay starts to count when the port links down. The port would not generate LLDP PDU until the delay counts to zero. The configuration could be shown by “show Ildp” command.Use the no form of this command to restore the delay to default value. | |
| Example | This example sets LLDP re-initial delay to 5 seconds.Switch(config)# Ildp reinit-delay 5Switch# show IldpState: Disabled Timer:10 SecondsHold multiplier: 4 Reinit delay:5 Seconds Tx delay: 2SecondsLLDP packet handling: Flooding | |
Ildp holdtime-multiplier
| Syntax | Ildp holdtime-multiplier <2-10>no holdtime-multiplier | |
| Parameter | <2-10> | Specify the LLDP hold time multiplier. |
| Default | Ildp holdtime-multiplier 4 | |
| Mode | Global Configuration | |
| Usage | Use “Ildp holdtime-multiplier” command to configure the LLDP PDU hold multiplier that decides time-to-live (TTL) value sent in LLDP advertisements: TTL = (tx-interval * holdtime-multiplier). The configuration could be shown by “show lldp” command.Use the no form of this command to restore the multiplier to default value. | |
| Example | This example sets LLDP hold time multiplier to 3.Switch(config)# Ildp holdtime-multiplier 3Switch# show lldpState: Disabled Timer:10 SecondsHold multiplier: 3 Reinit delay:2 Seconds Tx delay: 2SecondsLLDP packet handling: Flooding | |
| Ildp lldpdu | ||
| Syntax | Ildp lldpdu(filtering|flooding|bridging) | |
| Parameter | bridging | When LLDP is globally disabled, LLDP packets are bridging (bridging LLDP PDU to VLAN member ports). |
| filtering | When LLDP is globally disabled, LLDP packets are filtered (deleted). | |
| flooding | When LLDP is globally disabled, LLDP packets are flooded (forwarded to all interfaces). | |
| Default | Default LLDP PDU handling behavior when LLDP disabled is flooding | |
| Mode | Global Configuration | |
Command Line Interface
User Guide
Usage
Use "Ildp lldpdu" command to configure the LLDP PDU handling behavior when LLDP is globally disabled. It should be noticed that if LLDP is globally enabled and per port LLDP RX status is configured to disabled, the received LLDP PDU would be dropped instead of taking the global disable behavior.
| The configuration could be shown by “show lldp” command.Use the no form of this command to restore the behavior to default. | |
| Example | This example sets LLDP disable action to bridging.Switch(config)# lldp lldpdu bridgingSwitch# show lldpState: Enabled Timer:30 SecondsHold multiplier: 4 Reinit delay:2 Seconds Tx delay: 2SecondsLLDP packet handling: Bridging |
| Ildp med | |
| Syntax | Ildp medno lldp med |
| Default | Ildp med |
| Mode | Port Configuration |
| Usage | Use “lldp med” to configure the LLDP MED enable status. If LLDP MED is enabled, LLDP MED capability TLV and other selected MED TLV would be attached. The configuration could be shown by “show lldp med” command.Use the no form of this command to disable the LLDP MED status. |
| Example | This example sets port gi1 to enable LLDP MED, port gi2 to disable LLDP MED.Switch(config)# interface gi1Switch(config-if)# lldp medSwitch(config)# interface gi2Switch(config-if)# no lldp medSwitch# show lldp interfaces gi1-2 medPort | Capabilities | Network Policy | Location | Inventory----+----+----+----+------gi1 | Yes | Yes | No |Nogi2 | No | Yes | No |No |
| Usage Use “lldp med fast-start-repeat-count” command to configure the LLDP PDU fast start TX repeat count. When port links up, it will send LLDP PDU immediately to notify link partner. The number of LLDP PDU sends when it links up depends on fast-start-repeat-count configuration. The LLDP PDU fast-start transmits in interval of one second. The fast start behavior works no matter LLDP MED is enabled or not. The configuration could be shown by “show lldp med” command. |
Use the no form of this command to restore count to default.
| Example | This example sets fast start repeat count to 10. |
Switch(config)# lldp med fast-start-repeat-count 10
Switch# show lldp med
Fast Start Repeat Count: 10
lldp med network-policy voice: auto
Ildp med location
| Syntax | lldp med location (coordination|civic-address|ecs-elin) ADDR no lldp med location (coordination|civic-address|ecs-elin) | |
| Parameter | coordination civic-addressecs-elin | Location type to be configured. “ecs-elin” is abbreviation of emergency call service – emergency location identifier number |
ADDR
Specify the location data. Input format is hexadecimal values without colon (for example: 1234AB). For coordination location type, the length of ADDR is 16 bytes. For civic-address, the length is 6 to 160 bytes. For ecs-elin, the length is 10 to 25 bytes.
| Default | Deafult is no location data. |
| Mode | Port Configuration |
| Usage | Use “Ildp med location” command to configure the LLDP MED location data. The “coordinate”, “civic-address”, “ecs-elin” locations are independent, so at most three location TLVs could be sent if their data are not empty. The configuration of location could be shown by “show lldp interface PORT med” command.Use the no form of this command to clear location data. |
| Example | This example sets location data for interface gi1.Switch(config)#interface gi1Switch(config-if)#Ildp med location coordinate112233445566778899AABBCCDDEEFF00Switch(config-if)#Ildp med location civic-address 112233445566Switch(config-if)#Ildp med location ecs-elin112233445566778899AASwitch#show Ildp interfaces gi1 medPort | Capabilities | Network Policy | Location | Inventory----+----+----+----+------gi1| Yes | Yes | Yes |YesPort ID: gi1Network policies: 1, 32Location:Coordinates: 112233445566778899AABBCCDDEEFF00Civic-address: 112233445566Ecs-elin: 112233445566778899AA |
| Syntax | Ildp med network-policy <1-32> app (voice|voice-signaling|guest-voice|guest-voice-signaling|softphone-voice|video-conferencing|streaming- video|video-signaling) vlan <1-4094>vlan-type (tag|untag) priority <0-7>dscp <0-63> | |
| no Ildp med network-policy <1-32> | ||
| Parameter | <1-32> | Specify the network policy index |
| voice | Specify the network policy application type. | |
| voice-signaling | ||
| guest-voice-signalingsoftphone-voice video-conferencingstreaming-video video-signaling | ||
| <1-4094> | Specify the VLAN ID | |
| tag untag | Specify the VLAN tag status | |
| <0-7> | Specify the L2 priority | |
| <0-63> | Specify the DSCP value | |
| Default | No network policy is defined | |
| Mode | Global Configuration | |
| Usage | Use “lldp med network-policy” command to configure the LLDP MED network policy table and add a network policy entry that can be bind to ports. If LLDP MED network policy voice auto mode is enabled, “voice” type network policy can not be created since it is in auto mode. The network policy table configuration could be shown by “show lldp med” command. | |
| Use the no form of this command to remove network policy entry of specific index. A network policy can be removed only when it is not bind to any port. | ||
Example
This example create 2 network policies.
Switch(config)# lldp med network-policy 1 app voice-signaling vlan 2 vlan-type tag priority 3 dscp 4
Switch(config)# lldp med network-policy 32 app video-conferencing vlan 5 vlan-type tag priority 1 dscp 63 Switch# show lldp med
Fast Start Repeat Count: 10
lldp med network-policy voice: auto
Network policy 1
Application type: Voice Signaling VLAN ID: 2
tagged
Layer 2 priority: 3
DSCP: 4
Network policy 32
Application type: Conferencing VLAN ID:
5 tagged
Layer 2 priority: 1
DSCP: 63
Ildp med network-policy (Interface)
| Syntax | Ildp med network-policy (add|remove) <1-32> | |
| Parameter | add | Add network policy binding for ports. |
| remove | Remove network policy binding for ports. | |
| <1-32> | Specify the network policy index | |
| Default | Default is no network policy binding to port. | |
| Mode | Port Configuration | |
| Usage | Use “Ildp med network-policy” command to bind the network policy to port interface. The binded network policy of one port should be with different types. If network policy TLV is selected over a port, the binded network policies would be attached in LLDP MED PDU. The configuration of network policy binding could be shown by “show lldp med” command. | |
Example
This example binds network policy for interface gi1 and gi2.
Switch# show lldp med
Fast Start Repeat Count: 10
Port | Capabilities | Network Policy | Location | Inventory
+ + + + +
--
gi1 | Yes | Yes | Yes |
Yes
gi2 | Yes | Yes | Yes |
Port ID: gi1
Network policies: 1, 32
Port ID: gi2
Network policies: 1, 32
| Usage Use “Ildp med network-policy voice auto” command to enable network policy voice auto mode. In voice auto mode, if network-policy TLV is selected, a voice type network policy would be attached to PDU that contents comes from voice VLAN configuration. This works for voice VLAN module to exchange voice VLAN information with link partner. If voice auto mode is enabled, user can not manually create an voice type network policy; if an voice type network policy is created, the voice auto mode can not be enabled. The configuration of network policy auto mode could be shown by “show Ildp med” command. |
Use the no form of this command to disable voice auto mode.
Example This example sets network policy auto mode to enable and then disable.
Switch (config)# lldp med network-policy auto Switch# show lldp med
Fast Start Repeat Count: 10
| Parameter | MEDTLV | MED optional TLV. Available optional TLVs are : |
| network-policy, location, poe-pse, inventory. | ||
| Default | network-policy TLV | |
| Mode | Port Configuration | |
| Usage | Use "lldp med tlv-select" command to configure the LLDP MED TLV selection. It should be noticed that even no MED TLV is selected, MED capability TLV would be attached if LLDP MED is enable. The configuration could be shown by "show lldp med" command.Use the no form of this command to remove all selected MED TLV over the dedicated ports. | |
| Example | This example sets port gi1-2 to select LLDP MED network policy, location, POE-PSE, inventory TLVs, and it sets port gi3-4 to un-select all LLDP MED TLVs.Switch(config)# interface gi1Switch(config-if)# lldp med tlv-select network-policy location inventorySwitch(config)# interface gi2 Switch(config-if)# no lldp med tlv-select Switch# show lldp interfaces gi1-2 medPort | Capabilities | Network Policy | Location | Inventory----+----+----+----+------gi1 | Yes | Yes | Yes |Yesgi2 | Yes | No | No |No | |
| Ildp tlv-select | ||
| Syntax | Ildp tlv-select TLV[TLV] [TLV] [TLV] [TLV] [TLV] [TLV] [TLV] no lldp tlv-select | |
| Parameter | TLV | Specify the selected optional TLV. Available optional TLVs are : sys-name (system name),sys-desc (system description), sys-cap (system capability), mac-phy (802.3 MAC-PHY), lag(802.3 link aggregation), max- frame-size (802.3 max frame size), and management-gement address). |
| Default | Default is no selected optional TLV. |
| Mode | Port Configuration |
| Usage | Use “lldp tlv-select” command to attach selected TLV in PDU. The configuration could be shown by “show lldp” command.Use the no form of this command to remove all selected TLV. |
| Example | This example selects system name, system description, system capability,802.3 MAC-PHY, 802.3 link aggregation, 802.3 max frame size, and management address TLVs for interface gi1 and gi3.Switch(config)# interface range gi 1,3Switch(config-if-range)# lldp tlv-select port-desc sys-name sys-desc sys-cap mac-phy lag max-frame-size management-addr Switch(config-if-range)# end Switch# show lldp interfaces gi1,3State: Disabled Timer:10 SecondsHold multiplier: 3 Reinit delay:2 Seconds Tx delay: 2SecondsLLDP packet handling: FloodingPort | State | Optional TLVs | Address----+----+----+----gi1 | RX,TX | PD, SN,SD, SC |192.168.1.254gi3 | RX,TX | PD, SN, SD, SC |192.168.1.254Port ID: gi1802.3 optional TLVs: 802.3-mac-phy, 802.3-lag, 802.3-max- frame-size,management-addr802.1 optional TLVsPVID: EnabledPort ID: gi3802.3 optional TLVs: 802.3-mac-phy, 802.3-lag, 802.3-max- frame-size,management-addr802.1 optional TLVsPVID: Enabled |
Ildp tlv-select pvid
| Syntax | lldp tlv-select pvid (disable|enable) no lldp tlv-select pvid | |
| Parameter | disable | Disable LLDP 802.1 PVID TLV attach state |
| enable | Enable LLDP 802.1 PVID TLV attach state | |
| Default | Default is enabled | |
| Mode | Port Configuration | |
| Usage | Use “lldp tlv-select pvid” command to configure the 802.1 PVID TLV attach enable status. The configuration could be shown by “show lldp”command. Use thenoform of this command to restore the pvidto default value. | |
| Example | This example sets port gi1 PVID TLV attaches status to disable and port gi2 to enable.Switch(config)#interface gi1Switch(config-if)#lldp tlv-select pvid disableSwitch(config-if)#interface gi2Switch(config-if)#lldp tlv-select pvid enableSwitch#show lldp interfaces gi1,gi2State: Disabled Timer:10 SecondsHold multiplier: 3 Reinit delay:2 Seconds Tx delay: 2SecondsLLDP packet handling: FloodingPort | State | Optional TLVs | Address----+----+----+----gi1 | RX,TX ||192.168.1.254gi2 | RX,TX | |192.168.1.254Port ID: gi1802.3 optional TLVs:802.1 optional TLVsPVID: DisabledPort ID: gi2802.3 optional TLVs:802.1 optional TLVsPVID: Enabled | |
Ildp tlv-select vlan-name
Syntax
Ildp tlv-select vlan-name (add|remove) VLAN-
LIST
Command Line Interface
User Guide
| Parameter | add VLAN-LIST | Add VLAN list for LLDP 802.1 VLAN-NAME TLV on the specific interface. The configured ports should be member of all the specified VLANs or the VLAN- |
| remove VLAN- LIST | Remove VLAN list of LLDP 802.1 VLAN-NAME TLV from interface. | |
| Default | Default is no VLAN added. | |
| Mode | Port Configuration | |
| Usage | Use “lldp tlv-select vlan-name” command to add or remove VLAN list for802.1 VLAN-NAME TLV. The configuration could be shown by “show lldp” command. | |
| Example | This example add VLAN 100 to VLAN-NAME TLV for port gi10.Switch(config)# vlan 100Switch(config-vlan)# exitSwitch(config)# interface gi1Switch(config-if)# switchport trunk allowed vlan add all Switch(config-if)# lldp tlv-select vlan-name add 100 Switch(config-if)# endSwitch# show lldp interfaces gi1State: Enabled Timer:30 SecondsHold multiplier: 4 Reinit delay:2 Seconds Tx delay: 2SecondsLLDP packet handling: FloodingPort | State | Optional TLVs | Address----+----+----+----gi1 | RX,TX ||192.168.1.2Port ID: gi1802.3 optional TLVs:802.1 optional TLVsPVID: EnabledVLANs: 100 | |
Ildp tx
Syntax
Default
Ildp tx
no lldp
tx
Default is enabled
| Mode | Port Configuration |
| Usage | Use “lldp tx” command to enable the LLDP PDU TX ability. The configuration could be shown by “show lldp”command. Use thenoform of this command to disable the TX ability. |
| Example | This example sets port gi1 to enable LLDP TX, port gi2 to disable RX but enable TX, port gi3 to enable RX but disable TX, port gi4 to disable RX and TX.Switch(config)#interface gi1Switch(config-if)#lldp rxSwitch(config-if)#lldp txSwitch(config)#interface gi2Switch(config-if)#no lldp rxSwitch(config-if)#lldp txSwitch(config)#interface gi3Switch(config-if)#lldp rxSwitch(config-if)#no lldp txSwitch(config)#interface gi4Switch(config-if)#no lldp rxSwitch(config-if)#no lldp txSwitch(config-if)#endSwitch#show lldp interfaces gi1-4State: Enabled Timer:30 SecondsHold multiplier: 4 Reinit delay:2 Seconds Tx delay: 2SecondsLLDP packet handling: BridgingPort | State | Optional TLVs | Address----+----+----+----gi1 | RX,TX ||192.168.1.254gi2 | TX | |192.168.1.254gi3 | RX | |192.168.1.254gi4 | Disable | |192.168.1.254 |
Ildp tx-delay
Syntax lldp tx-delay <1-8192> no lldp tx-delay
| Parameter | <1-8192> | Specify the LLDP tx delay in unit of seconds. |
| Default | Default TX delay is 2 seconds | |
| Mode | Global Configuration | |
| Usage | Use "lldp tx-delay" command to configure the delay in seconds between successive LLDP frame transmissions. The delay starts to count in any case LLDP PDU is sent such as by LLDP PDU advertise routine, LLDP PDU content change, port link up, etc. The configuration could be shown by "show lldp" command.Use the no form of this command to restore the delay to default value. | |
| Example | This example sets LLDP PDU TX delay to 10 seconds.Switch(config)# lldp tx-delay 10Switch# show lldpState: Disabled Timer:10 SecondsHold multiplier: 4 Reinit delay:2 Seconds Tx delay: 10SecondsLLDP packet handling: Flooding | |
| show lldp | ||
| Syntax | show lldpshow lldp interfaceIF_NMLPORTS | |
| Parameter | IF_NMLPORTS Specify the ports to display information | |
| Default | This command has no default value. | |
| Mode | Privileged EXEC | |
| Usage | Use "show lldp" and "show lldp interface" commands to display LLDP global information including LLDP enable status, LLDP PDU TX interval, hold time multiplier, re-initial delay, TX delay, and LLDP packet handling when LLDP is disabled. The per port information displayed includes port LLDP RX/TX enable status, selected TLV to TX and IP address. The abbreviations in optional TLVs are: port description (PD), system name (SN), system description (SD), and system capability (SC). | |
Example
This example displays lldp information of port gi1 and gi2 Switch# show lldp interfaces gi1, gi2
State: Disabled
Timer: 30 Seconds
Hold multiplier: 4 Reinit
delay: 2 Seconds Tx delay:
2 Seconds
LLDP packet handling: Flooding
Port | State | Optional TLVs | Address
SN, SD, SC |192.168.1.254 gi1 | RX,TX |
|192.168.1.254
Port ID: gi1
802.3 optional TLVs: 802.3-mac-phy, 802.3-lag, 802.3-max-frame-size,
management-addr
802.1 optional TLVs
PVID: Enabled
Port ID: gi2
802.3 optional TLVs:
802.1 optional TLVs
PVID: Enabled
show lldp local-device
| Syntax | show lldp local-deviceshow lldp interfaces IF_NMLPORTS local-device |
| Parameter | IF_NMLPORTS Specify the ports to display information |
| Default | There is no default configuration for this command |
| Mode | Privileged EXEC |
| Usage | Use “show lldp local-device” command to show the local configuration of LLDP PDU. By the commands, a user can view the contents of LLDP/ LLDP-MED TLVs that would be attached in LLDP PDU. |
| Example | This example displays the local device information. |
| Switch# show lldp local-device | |
| LLDP Local Device Information: ChassisType : Mac Address Chassis ID :00:12:12:12:12System Name : Switch121212System Description :System Capabilities Support : Bridge SystemCapabilities Enable : BridgeManagement Address : 192.168.1.254(IPv4) |
Switch121212(config)# show lldp interfaces gi1 local-device
Device ID: 00:12:12:12:12:12
Port ID: gi1
System Name: Switch121212
Capabilities: Bridge System
description:
Port description:
Management address: 192.168.1.254
Time To Live: 120
802.3 MAC/PHY Configur/Status
Auto-negotiation support: Supported Auto-
negotiation status: Enabled
Auto-negotiation Advertised Capabilities: 10BASE-T
half duplex, 10BASE-T
full duplex, 100BASE-TX half duplex,
100BASE-TX full duplex
Operational MAU type: Other or unknown
802.3 Link Aggregation
Aggregation capability: Capable of being aggregated
Aggregation status: Not currently in aggregation Aggregation port
ID: 0
802.3 Maximum Frame Size: 1522
802.1 PVID: 1
LLDP-MED capabilities: Capabilities, Network Policy, Location, Extended PSE, Inventory
LLDP-MED Device type: Network Connectivity
LLDP-MED Network policy
Application type: Voice Signaling Flags:
Unknown Policy
VLAN ID: 2
Layer 2 priority: 3
DSCP: 4
LLDP-MED Network policy
Application type: Conferencing
Flags: Unknown Policy
VLAN ID: 5
Layer 2 priority: 1
DSCP: 63
Hardware revision: 1123
Firmware revision: 2.5.0-beta.32801
Software revision: 2.5.0-beta.32801 Serial
number: abc
Manufacturer Name:
Model name: GS2018PS2
4GE Asset ID:
LLDP-MED Location
Coordinates: 11:22:33:44:55:66:77:88:99:AA:BB:CC:DD:EE:FF:00
Civic-address: 11:22:33:44:55:66
Ecs-elin: 11:22:33:44:55:66:77:88:99:AA
show lldp med
Syntax show lldp med
show lldp interfaces IF_NMLPORTS med
Parameter
IF_NMLPORTS
Specify the ports to display information
| Default | There is no default configuration for this command |
| Mode | Privileged EXEC |
| Usage | Use “show lldp med” command to display the LLDP MED configuration information. |
| Example | This example displays the LLDP MED information. |
| Switch# show lldp med | |
| Fast Start Repeat Count: 10 | |
| lldp med network-policy voice: manual | |
| Network policy 1 | |
| Application type: Voice Signaling VLAN ID: 2 tagged | |
| Layer 2 priority: 3 | |
| DSCP: 4 | |
| Network policy 32 | |
| Application type: Conferencing VLAN ID: 5 tagged | |
| Layer 2 priority: 1 | |
| DSCP: 63 | |
| Port | Capabilities | Network Policy | Location | Inventory | |
| + - + - + - + - + - - | |
| -- | |
| gi1 | Yes | Yes | Yes | | |
| Yes | gi2 | Yes | Yes | Yes | |
| Yes | gi3 | Yes | No | No | |
| No | gi4 | Yes | No | No | |
| No | gi5 | No | Yes | No | |
| No | gi6 | No | Yes | No | |
| No | gi7 | No | Yes | No | |
| No | gi8 | No | Yes | No | |
| No | gi9 | Yes | Yes | No | |
| No | gi10 | Yes | Yes | No | |
| No | gi11 | Yes | Yes | No | |
| No | |||||
| No | gi12 | | | Yes | | Yes | | No | |
| gi13 | | | Yes | | Yes | | No | | |
| No | gi14 | | | Yes | | Yes | | No | |
| No | gi15 | | | Yes | | Yes | | No | |
| No | gi16 | | | Yes | | Yes | | No | |
| No | gi17 | | | Yes | | Yes | | No | |
| No | gi18 | | | Yes | | Yes | | No | |
| No | gi19 | | | Yes | | Yes | | No | |
| No | gi20 | | | Yes | | Yes | | No | |
| No | gi21 | | | Yes | | Yes | | No | |
| No | gi22 | | | Yes | | Yes | | No | |
| No | gi23 | | | Yes | | Yes | | No | |
| No | gi24 | | | Yes | | Yes | | No | |
| No | gi25 | | | Yes | | Yes | | No | |
| No | gi26 | | | Yes | | Yes | | No | |
| No | gi27 | | | Yes | | Yes | | No | |
| No | gi28 | | | Yes | | Yes | | No | |
Switch# show lldp interfaces gi1 med
Port | Capabilities | Network Policy | Location | Inventory
--- + --- + --- + --- + ---
-- gi1 | Yes | Yes | Yes |
Yes
Port ID: gi1
Network policies: 1, 32
Location:
Coordinates: 112233445566778899AABBCCDDEEFF00
Civic-address: 112233445566 Ecs-
elin: 112233445566778899AA
Switch121212(config)#
show lldp neighbor
Syntax
show lldp neighbor
show lldp interfaces IF_NMLPORTS
neighbor
| Parameter | IF_NMLPORTS Specify the ports to display information |
| Default | There is no default configuration for this command |
| Mode | Privileged EXEC |
| Usage | Use “show lldp neighbor” command to display the received neighbor LLDP PDU information. When LLDP PDU is received on LLDP RX enable ports, system would store the PDU information in database until time to live of the PDU counts down to zero. |
| Example | This example displays the neighbor information.Switch# show lldp neighborPort | Device ID | Port ID | SysName | Capabilities | TTL--- + ----+ ----+ ----+ ----+ ----+ ----+ ----gi3 | 00:12:12:12:12:12 | gi1 |Switch121212 | Bridge | 111gi11 | TREEBASE |00:1A:4D:26:EB:E8 |TREEBASE | Station Only | 33Switch121212(config)# show lldp interfaces gi3 neighbor Device ID:00:12:12:12:12:12Port ID: gi1System Name: Switch121212Capabilities: Bridge System description:Port description:Management address: 192.168.1.254 TimeTo Live: 98802.3 MAC/PHY Configur/StatusAuto-negotiation support: Supported Auto-negotiation status: EnabledAuto-negotiation Advertised Capabilities: 10BASE-T half duplex, 10BASE-T full duplex, 100BASE-TX half duplex, 100BASE-TX full duplexOperational MAU type: 100BASE-TX full duplex mode802.3 Link AggregationAggregation capability: Capable of being aggregated Aggregation status: Not currently in aggregation Aggregation port ID: 0802.3 Maximum Frame Size: 1522802.1 PVID: 1LLDP-MED capabilities: Capabilities, Network Policy, Location, Extended PSE, InventoryLLDP-MED Device type: Network Connectivity LLDP-MED Network policyApplication type: Voice Signaling |
Flags: Unknown Policy
VLAN ID: 2
Layer 2 priority: 3
DSCP: 4
LLDP-MED Network policy
Application type: Conferencing
Flags: Unknown Policy
VLAN ID: 5
Layer 2 priority: 1
DSCP: 63
LLDP-MED Power over Ethernet Device
Type: Power Sourcing Entity Power
Source: Primary Power Source Power
priority: Low
Power value: 13.0 Watts
Hardware revision: 1123
Firmware revision: 2.5.0-beta.32801
Software revision: 2.5.0-beta.32801 Serial
number: abc
Manufacturer Name:
Model name: GS2018PS2
4GE Asset ID:
LLDP-MED Location
Coordinates: 11:22:33:44:55:66:77:88:99:AA:BB:CC:DD:EE:FF:00
Civic-address: 11:22:33:44:55:66
Ecs-elin: 11:22:33:44:55:66:77:88:99:AA
show lldp statistics
| Syntax | show lldp statisticsshow lldp interfaces IF_NMLPORTS statistics |
| Parameter | IF_NMLPORTS Specify the ports to display information |
| Default | There is no default configuration for this command |
| Mode | Privileged EXEC |
| Usage | Use “show lldp statistics” command to display the LLDP RX/TX statistics. |
| Example | This example display the LLDP statistics. |
| Switch# show lldp statistics | |
| LLDP Global Statistics:Insertions : 3Deletions : 0Drops : 0Age Outs : 1 | |
| | TX Frames | RX Frames | RX |
| TLVs | RX AgeoutsPort | Total | Total | Discarded | Errors | Discarded |Unrecognized | Total | |||||||
| +----+---- | +----+---- | +----+---- | |||||
| gi1 | | | 50 | | | 0 | | | 0 | | |
| 0 | | | 0 | |||||
| gi2 | | | 0 | | | 0 | | | 0 | | |
| 0 | | | 0 | |||||
| gi3 | | | 0 | | | 50 | | | 0 | | |
| 0 | | | 1 | |||||
| gi4 | | | 0 | | | 0 | | | 0 | | |
| 0 | | | 0 | |||||
| gi5 | | | 0 | | | 0 | | | 0 | | |
| 0 | | | 0 | |||||
| gi6 | | | 0 | | | 0 | | | 0 | | |
| 0 | | | 0 | |||||
| gi7 | | | 0 | | | 0 | | | 0 | | |
| 0 | | | 0 | |||||
| gi8 | | | 0 | | | 0 | | | 0 | | |
| 0 | | | 0 | |||||
| gi9 | | | 0 | | | 0 | | | 0 | | |
| 0 | | | 0 | |||||
| gi10 | | | 0 | | | 0 | | | 0 | | |
| 0 | | | 0 | |||||
| gi11 | | | 3377 | | | 10129 | | | 0 | | |
| 0 | | | 0 | |||||
| gi12 | | | 0 | | | 0 | | | 0 | | |
| 0 | | | 0 | |||||
| gi13 | | | 0 | | | 0 | | | 0 | | |
| 0 | | | 0 | |||||
| gi14 | | | 0 | | | 0 | | | 0 | | |
| 0 | | | 0 | |||||
| gi15 | | | 0 | | | 0 | | | 0 | | |
| 0 | | | 0 | |||||
| gi16 | | | 0 | | | 0 | | | 0 | | |
| 0 | | | 0 | |||||
| gi17 | | | 0 | | | 0 | | | 0 | | |
| 0 | | | 0 | |||||
| gi18 | | | 0 | | | 0 | | | 0 | | |
| 0 | | | 0 | |||||
| gi19 | | | 0 | | | 0 | | | 0 | | |
| 0 | | | 0 | |||||
| gi20 | | | 0 | | | 0 | | | 0 | | |
| 0 | | | 0 | |||||
| gi21 | | | 0 | | | 0 | | | 0 | | |
| 0 | | | 0 | |||||
| gi22 | | | 0 | | | 0 | | | 0 | | |
| 0 | | | 0 | |||||
| gi23 | | | 0 | | | 0 | | | 0 | | |
| 0 | | | 0 | |||||
| gi24 | | | 0 | | | 0 | | | 0 | | |
| 0 | | | 0 | |||||
| gi25 | | | 3377 | | | 0 | | | 0 | | |
| 0 | | | 0 | |||||
| gi26 | | | 3377 | | | 0 | | | 0 | | |
| 0 | | | 0 | |||||
| gi27 | | | 0 | | | 0 | | | 0 | | |
| 0 | | | 0 | |||||
| gi28 | | | 0 | | | 0 | | | 0 | | |
| 0 | | | 0 | |||||
Switch121212(config)# show lldp interfaces gi1 statistics
LLDP Port Statistics: | TX Frames | RX Frames | RX TLVs |
RX Ageouts
Port | Total | Total | Discarded | Errors | Discarded | Unrecognized | Total
+ + + + +
+----+---- gi1 | 51 | 0 | 0 | 0 | 0 | 0 | 0
show lldp tlv-overloading
| Syntax | show lldp interfaces IF_NMLPORTS tIvs-overloading | |
| Parameter | IF_NMLPORTS | Specify the ports to display information |
| Default | There is no default configuration for this command | |
| Mode | Privileged EXEC | |
| Usage | The LLDP PDU is composed by TLVs and selected number TLVs may compose a large PDU that the system can not handle. The maximum PDU length is to take the smaller number of jumbo frame size minus 30 bytes (30 bytes kept for header) or 1488 bytes.Use “show lldp tIv-overloading” command to display the length of LLDP TLVs and if the TLVs overload the PDU length. The TLVs with status marked “overload” would not be transmitted. | |
Example This example displays the LLDP TLVs overloading status of port gi1.
Switch# show lldp interfaces gi1 tlvs-overloading
gi1:
| TLVs Group | Bytes | Status |
| +----+---- | ||
| Mandatory | | 21 | | Transmitted LLDP- |
| MED Capabilities | | 9 | | Transmitted LLDP- |
| MED Location | | 53 | Transmitted | |
| LLDP-MED Network Policies | | 20 | | Transmitted |
| LLDP-MED POE | | 9 | | Transmitted |
| 802.3 | | 30 | | Transmitted |
| Optional | | 38 | | Transmitted |
| LLDP-MED Inventory | | 97 | | Transmitted |
| 802.1 | | 8 | | Transmitted |
Total: 285 bytes
Left: 1203 bytes
Example The following example shows the global logging configuration.
Switch# show logging Logging
service is enabled
TARGET | STATUS | Server (PORT) | FACILITY | LOG LEVEL

buffered | enabled |
|emerg, alert, crit, error, warning, notice
console | enabled |
|emerg, alert, crit, error, warning, notice
The following table describes the significant fields shown in the example:
| Field | Description |
| TARGET | The destinations where the logging messages are stored. |
| STATUS | The status of logging destinations. |
| Server (PORT) | Server address and port number for the remote logging. |
| FACILITY | The facility of the log messages. |
| LOG LEVEL | The severity level of the log messages. |
The following example shows the log messages stored in the RAM.
Switch# show logging buffered
Log messages in buffered
NO.| Timestamp | Category | Severity | Message
1|Jan 01 2000 08:14:47| AAA| notice|
New console connection for user admin, source async
ACCEPTED
2|Jan 01 2000 08:03:12| AAA| notice|
New console connection for user admin, source async
ACCEPTED
3|Jan 01 2000 08:01:13| System| notice| System
Startup!
4|Jan 01 2000 08:01:13| System| notice| Logging
is enabled
The following table describes the significant fields shown in the example:
| Field | Description |
| NO | The number of log entry. |
| Timestamp | Time when the message was generated. |
Command Line Interface
User Guide
| Category | The category of the message. |
| Severity | The severity level of the messages. |
| Message | The message content. |
14. Logging
clear logging
| Syntax | clear logging (buffered|file) | |
| Parameter | buffered | Clear the log messages stored in the RAM. |
| file | Clear the log messages stored in the Flash. | |
| Default | N/A | |
| Mode | Privileged EXEC | |
| Usage | To clear the log messages from the internal logging buffer and flash, use the commandclear loggingin the Privileged EXEC mode. | |
| Example | The following example clear the log messages stored in RAM and Flash.Switch#clear logging bufferedSwitch#clear logging file | |
| logging | ||
| Syntax logging | no logging | |
| Parameter N/A | ||
| Default | Logging service is enabled. | |
| Mode | Global Configuration | |
Usage
To enable logging service on the switch, use the command logging in the Global Configuration mode. Otherwise, use the no form of the command to disable the logging service on the switch.
The status of global logging server is available from the command show
| logging in the Privileged EXEC mode. When the logging service is enabled, logging on and off at each destination rule can be individually configured by the commandlogging console,logging buffered,logging file, andlogging hostin the Global Configuration mode. If the logging service is disabled, no messages will be sent to these destinations. | ||
| Example | The following example disables and enables the logging service on the switch.Switch(config)# no loggingSwitch(config)# logging | |
| logging host | ||
| Syntax | logging host(ip-addr|hostname)[facility facility][port port][severity sev]no logging host(ip-addr|hostname) | |
| Parameter | ipv4-addr | IPv4 address of the remote logging server. |
| hostname | Hostname of the remote logging server. | |
| facility facility | Specify the facility of the logging messages. It can be on of the following value: local0, local1, local2, local3, local4, local5, local6, and local7. The default value of facility is local7. | |
| port port | Specify the port number of the remote logging server.The valid range is from 0 to 65535, and the default value is 512. | |
| severity sev | Specify the minimum severity of the logging messages. The valid range is from 0 to 7, and the number 0 to 7 represents emerg, alert, critical, error, warning, notice, info, and debug individually. The default value of minimum severity level is 5 (emerg, alert, crit, error, | |
| Default | No remote logging destination is configured. | |
| Mode | Global Configuration | |
Usage To define the logging server, use the command logging host to add the remote logging server in the Global Configuration mode. Otherwise, use the command no logging host to remove the remote logging rules.
| For the host name configuration, logging service would try translating the host name to IP address directly. Add the logging host would be failed on the failure of host name translating. | |
| Example | The following example adds the remote logging rules by IP and Hostname. |
Switch(config)# logging host 1.2.3.4
Switch(config)# logging host SYSLOG
logging severity
| Syntax | logging (buffered|console|file) [severity sev]no logging (buffered|console|file) |
| Parameter buffered Log messages to RAM. | |
| console Log messages to console buffer. | |
| file Log messages to Flash. | |
| severity sev Specify the minimum severity of the logging messages.The valid range is from 0 to 7, and thenumber 0 to 7 represents emerg, alert,critical, error, warning, notice, info, and debugindividually. The default minimum severity ofthelogging severityconfiguration is 5(emerg, alert, crit, error, warning, notice). |
| Default | Logging to buffered and console is enabled, and the default minimum severity level is 5 (emerg, alert, crit, error, warning, notice). |
| Mode | Global Configuration |
| Usage To set the minimum severity for the messages that are logged to RAM, console, or Flash, use the command logging severity in the Global Configuration mode. Use the no form of the command to remove the mechanism of logging to RAM, console, or Flash individually. |
| Example | The following example sets the minimum severity level of logging to RAM and Flash as debugging. |
Switch(config)# logging buffered 7 Switch(config)# logging flash 7
show logging
| Syntax | show logging [buffered|file] |
| Parameter | buffered | Display the log messages stored in the RAM. |
| file | Display the log messages stored in the Flash. |
| Default | N/A |
Mode
Previledged EXEC
Usage
To display the global logging configuration, and the logging messages stored in the RAM and Flash, use the command show logging in the Privileged EXEC mode.
Example The following example shows the global logging configuration.
Switch# show logging Logging
service is enabled
TARGET | STATUS | Server (PORT) | FACILITY | LOG LEVEL
buffered | enabled | | |emerg, alert, crit, error, warning, notice console | enabled | | |emerg, alert, crit, error, warning, notice
The following table describes the significant fields shown in the example:
| Field | Description |
| TARGET | The destinations where the logging messages are stored. |
| STATUS | The status of logging destinations. |
| Server (PORT) | Server address and port number for the remote logging. |
| FACILITY | The facility of the log messages. |
| LOG LEVEL | The severity level of the log messages. |
The following example shows the log messages stored in the RAM.
Switch# show logging buffered
Log messages in buffered
NO.| Timestamp | Category | Severity | Message
1|Jan 01 2000 08:14:47| AAA| notice| New console connection for user admin, source async
2|Jan 01 2000 08:03:12| ACCEPTED AAA| notice|
New console connection for user admin, source async ACCEPTED
3|Jan 01 2000 08:01:13| System| notice| System
Startup! 4|Jan 01 2000 08:01:13| System| notice| Logging is enabled
The following table describes the significant fields shown in the example:
Command Line Interface
User Guide
| Field | Description |
| NO | The number of log entry. |
| Timestamp | Time when the message was generated. |
| Category | The category of the message. |
| Severity | The severity level of the messages. |
| Message | The message content. |
15. MAC Address Table
clear mac address-table
| Syntax | clear mac address-table dynamic [interfaces IF_PORTS|vlan vlan-id] | |
| Parameter interfaces | IF_PORTS | Delete all dynamic addresses learned on the specific interface. |
| VLAN. | vlan vlan-id Delete all source addresses learned on the specific | |
| Default | N/A | |
| Mode | Privileged EXEC | |
| Usage To clear the dynamic (learned) MAC entries from the MAC address table, the specific interface, or the specific VLAN, use the command clear mac address-table in the Privileged EXEC mode. | ||
| Example | The following example clears the learned MAC addresses on the interface gi1. | |
| Switch# clear mac address-table dynamic interfaces gi1 | ||
mac address-table aging-time
| Syntax | mac access-table aging-timeseconds | |
| Parameter | seconds | The time in seconds that an entry remains in the MAC address table. Its valid range is from 10 to 630 seconds, and the default value is 300 seconds. |
| Default | The default aging time is 300 seconds. | |
| Mode | Global Configuration | |
| Usage | To set the aging time of the MAC address table, use the command mac address-table aging-time in the Global Configuration mode. | |
| Example | The following example set the aging time to 500 seconds.Switch(config)# mac address-table aging-time 500 | |
| mac address-table static | ||
| Syntax | mac address-table static mac-addr vlan vlan-id interfaces IF_PORTS mac address-table static mac-addr vlan vlan-id drop no mac address-table static mac-addr vlan vlan-id | |
| Parameter | mac-addr | MAC address. |
| vlan vlan-id | Specify the VLAN ID for the interface. | |
| Interface IF_PORTS | Specify the interface ID or a list of interface IDs. | |
| drop | Drop the packets with the specified source or destination unicast MAC address. | |
| Default | No static addresses are configured | |
| Mode | Global Configuration | |
| Usage To add a static address to the MAC address table, use the command mac address-table static in the Global Configuration mode. For the unicast MAC address filtering, use the command mac address-table static with parameter drop to drop the packets with the specified source or destination unist MAC address. To delete the static entry from the MAC address table, use the no form of the command. | ||
| Example | The following example adds a static address into MAC address table.Switch# mac address-table static 00:11:22:33:44:55 vlan 1 interfaces fa5The following example adds a rule of unist address filtering into MAC address table.Switch# mac address-table static 00:11:22:33:44:55 vlan 1 drop | |
show mac address-table
| Syntax | show mac address-table [dynamic|static] [interface IF_PORTS] [vlan vlan-id] | |
| show mac address-table [mac-addr] [vlan vlan-id] | ||
| Parameter | dynamic | Display only dynamic MAC addresses |
| static | Display only static MAC addresses | |
| InterfaceIF_PORTS | Display the MAC addresses entries for a specific interface. | |
| vlan vlan-id | Display the MAC address entries for a specific VLAN. | |
| mac-addr | Display entries for a specific MAC address | |
| Default | N/A | |
| Mode | Privileged EXEC | |
| Usage | To show the entry in the MAC address table, use the command show mac address-table in the Privileged EXEC mode. | |
Example
The following example displays the entire MAC address table.
| Switch# show mac address-table VID | MAC Address | Type | Ports | ||
| - | +----+----+----+----+----+----+----+----+----+----+----+----+----+----+----+----+----+----+----+----+----+----+----+----+----+----+----+----+----+----+----+----+----+----+----+----+----+----+----+----+----+----+----+----+----+----+----+----+----+----+ | |
| 1 | DE:AD:BE:EF:01:02 | Management | CPU | ||
| 1 | 00:01:02:03:04:05 | Static | All | ||
| 00:11:22:33:44:55 | Static | gi1 | ||
| | 1C:E6:C7:8F:10:02 | Dynamic | fa3 | ||
| 1 | AA:BB:CC:DD:EE:FF | Static | All | ||
| 1 | DE:AD:BE:EF:01:0C | Dynamic | gi1 | ||
Total number of entries: 6 Switch#
The following example displays the static MAC address configuration for the interface fa1.
| Switch# show mac address-table static interfaces fa1 VID | MAC | |||
| Address | Type | Ports | |
| +----+----+---- | |||
| 1 | 00:01:02:03:04:05 | Filtering | All | |||
| 1 | AA:BB:CC:DD:EE:FF | Filtering | All | |||
Total number of entries: 2 Switch#
The following example displays address table entries containing the specified MAC address.
Switch# show mac address-table 00:11:22:33:44:55 vlan 100 VID |
MAC Address | Type | Ports
100 | 00:11:22:33:44:55 | Static | gi1
Total number of entries: 1
show mac address-table counters
| Syntax | show mac address-table counters |
| Parameter N/A | |
| Default | N/A |
| Mode | Privileged EXEC |
| Usage | To display the total entries in the MAC addrss table, use the command show mac address-table counters in the Privilieged EXEC mode. |
| Example | The following example display numbers of addresses in the address table.Switch# show mac address-table countersTotal number of entries: 5 |
show mac address-table aging-time
| Syntax | show mac address-table aging-time |
| Parameter N/A | |
| Default | N/A |
| Mode | Privileged EXEC |
Usage
To show MAC address aging time, use the command show mac
address-
table aging-time in the Privilieged EXEC mode.
| Example | The following example displays aging time for the MAC address table. |
| Switch# show mac address-table aging-timeMac Address Table aging time: 300 sec |
16. MAC VLAN
vlan mac-vlan group (Global)
| Syntax | vlan mac-vlan group <1-2147483647>mac-address mask<9-48>no vlan mac-vlan group mac-address mask <9-48> | |
| <1-2147483647> | Specify the group ID | |
| Mac-address | Specify the MAC address to be mapped. | |
| <9-48> | Specify the mask length of MAC address. | |
| Default | No MAC Groups are configured. | |
| Mode | Global Configuration | |
| Usage | Use the “vlan mac-vlan group” command to create MAC address group.Use the no form of this command to delete specify group. | |
| Example | The following example shows how to create a MAC group with group ID 3.Switch(config)#vlan mac-vlan group 333 22:33:44:55:66:77 mask 48 | |
vlan mac-vlan group (Interface)
| Syntax | vlan mac-vlan group <1- 2147483647> vlan <1- 4094> no vlan mac-vlan [group <1- 2147483647>] | |
| <1-2147483647> | Specify the group ID. (optional in no form) Delete all mapping group if not specify. | |
<1-4094>
Specify the VLAN ID to give to match
| Default | No mappings are configured. |
| Mode | Interface Configuration |
| Usage | Use the “vlan mac-vlan group” to create mapping of group and VLAN ID of an interface.Use thenoform of this command to delete mapping. |
| Example | The following example shows how to mapping group id 333 to VLAN 100 on interface fa1.Switch(config)# Interface fa1Switch(config-if)#vlan mac-vlan group 333 VLAN 100 |
show vlan mac-vlan groups
| Syntax | show vlan mac-vlan groups |
| Default | N/A |
| Mode | Privileged EXEC |
| Usage | Use the show vlan mac-vlan groups command to display mac groups configuration |
| Example | This following example shows how to display mac group. | |
| Switch# show vlan mac-vlan groupsMac Address Mask Group Id | ||
| 22:33:44:55:66:77 48 22244:55:66:77:88:99 48 33388:99:00:aa:bb:cc 40 44488:99:00:ab:bb:10 48 111 | ||
show vlan mac-vlan interfaces
| Syntax | show vlan mac-vlan [interfacesIF_PORTS] | |
| Parameter | IF_PORTS | (Optional) Specify interfaces mac vlan to display.Display all ports if not specify. |
| Default | N/A | |
| Mode | Privileged EXEC | |
| Usage | Use the show vlan mac-vlan interface command in EXEC mode to displaythe mac-vlan interfaces setting | |
| Example | The following example shows how to display the MAC-Based VLAN interfaces settingSwitch# show vlan mac-vlan interfaces fa1Port fa1 :Mac based VLANs:Group ID Vlan ID---- ----333 444444 1 | |
17. Management ACL
management access-list
| Syntax | management access-list NAMEno management access-listNAME | |
| Parameter | NAME | The name of management |
| Default | No management ACL is configured. | |
| Mode | Global Configuration | |
| Usage | Use the management access-list command to create a management access list and to enter management access-list configuration mode. The name of ACL must be unique that cannot have same name with other management ACL. Use the no form of this command to delete |
| Example | The following example shows how to add a management ACL with name “test”Switch(config)# management access-list test |
management access-class
| Syntax | management access-classNAMEno management access-class | |
| Parameter | NAME | The name of management |
| Default | Default is no management ACL restrictions | |
| Mode | Global Configuration | |
| Usage | Use the management access-class command to activate a management ACL. Use the no form of this command to delete | |
| Example | The following example shows how to add a management ACL with name “test”Switch(config)# management access-list test | |
deny
Syntax [sequence <1-65535>] deny interfaces
IF PORTS service
(all|http|https|snmp|ssh|telnet)
[sequence <1-65535>] deny ip A.B.C.D/A.B.C.D interfaces IF_PORTS
service (all|http|https|snmp|ssh|telnet)
[sequence <1-65535>] deny ipv6 X:X::X:X/<0-128> interfaces IF_PORTS
service (all|http|https|snmp|ssh|telnet)
Parameter <1-65535>
(Optional) Specify sequence index of ACL
| of an entry in ACL. If not specified, the switch assigns a number from 1 in ascending order. | ||
| interfaces IF_PORTS | Specify the interface ID or a list of interface IDs. | |
| ip A.B.C.D/A.B.C.D | Specify the source IP address and mask of packet. | |
| ipv6 X:X::X:X/<0-128> | Specify the source IPv6 address and prefix length of packet. | |
| (all|http|https|snmp|ssh|telnet) | Specify the type of services. | |
| Default | No rules are configured. | |
| Mode | Management Access-List Configuration | |
| Usage | Use the deny command to add deny rules that drop those packets hit the rule. | |
| Example | The following example shows how to add a deny rule to drop all types of services packets that source ip is 1.1.1.1 from interface gi1.Switch(config)# management access-list testSwitch(config-macl)# sequence 1 deny ip1.1.1.1/255.255.255.255 interfaces gi1 service all | |
| permit | ||
| Syntax | [sequence <1-65535>] permit interfaces IF_PORTS service (all|http|https|snmp|ssh|telnet)[sequence <1-65535>] permit ip A.B.C.D/A.B.C.D interfaces IF_PORTSService (all|http|https|snmp|ssh|telnet)[sequence <1-65535>] permit ipv6 X:X::X:X/<0-128> interfacesIF_PORTS service (all|http|https|snmp|ssh|telnet) | |
| Parameter | <1-65535> | (Optional) Specify sequence index of ACLentry, the sequence index represent the priority of an entry in ACL. If not specified, the switchassigns a number from 1 in ascending order. |
| interfaces IF_PORTS | Specify the interface ID or a list of interface IDs. | |
Command Line Interface
User Guide
| ip A.B.C.D/A.B.C.D | Specify the source IP address and mask of packet. |
| ipv6 X:X::X:X/<0-128> | Specify the source IPv6 address and prefix length of packet. |
| (all|http|https|snmp|ssh|telnet) | Specify the type of services. |
| Default | No rules are configured. | |
| Mode | Management Access-ListConfiguration | |
| Usage | Use the permit command to add permit rules that bypass those packets hit the rule. | |
| Example | The following example shows how to add a permit rule to bypass http service packets that source ip is 2.2.2.2 from interface gi1.Switch(config)# management access-list testSwitch(config-macl)# sequence 2 permit ip2.2.2.2/255.255.255.255 interfaces gi1 service http | |
| no sequence | ||
| Syntax | no sequence <1-65535> | |
| Parameter | <1-65535> | Specify sequence index of |
| Default | No rules are configured. | |
| Mode | Management Access-ListConfiguration | |
| Usage | Use the no sequence command to delete an entry in management ACL. | |
| Example | The following example shows how to delete an entry.Switch(config)# management access-list testSwitch(config-macl)# sequence 10 deny interfaces gi1 service allSwitch(config-macl)# no sequence 10 | |
show management access-class
Syntax
show management access-class
Parameter
| Default | No default is defined |
| Mode | Privileged EXEC |
| Usage | Use the show management access-class command to show the active management access-list. |
| Example | The example shows how to show management access-classSwitch# show management access-classManagement access-class is enabled, using access-list test |
show management access-list
| Syntax | show management access-list [NAME] | |
| Parameter | NAME | Specify the name of management ACL to displayed |
| Default | No default is defined | |
| Mode | Privileged EXEC | |
| Usage | Use the show management access-list command to show management ACL. | |
| Example | The example shows how to show management access-listSwitch#Switch# show managementaccess-list 1 management access-list iscreatedtest----sequence 1 deny ip 1.1.1.1/255.255.255.255 interfaces gi1 service all! (Note: all other access implicitly denied) | |
18. Mirror
mirror session destination interface
mirror session <1-4> destination interface IF_NMLPORT [allowingress]
Command Line Interface
User Guide
no mirror session <1-4> destination interface IF_NMLPORT no mirror session (<1-4> | all)
| <1-4> | Specify the mirror session to configure | |
| IF_NMLPORT | Specify the SPAN destination. A destination must be a physical port | |
| allow-ingress | Enable ingress traffic forwarding. | |
| Default | No monitor sessions are configured. | |
| Mode | Global Configuration | |
| Usage | Use the “mirror session destination interface” command to start a destination interface of a port mirror session. | |
| Use the no form of this command to stop a destination interface of a port mirroring session. | ||
| Use the “no mirror session” command to disable all mirror sessions or specific mirror session. | ||
| Example | The following example shows how to create a local session 1 to monitor both sent and received traffic on source port fa1. | |
| Switch(config)# mirror session 1 destination interface fa1Switch# show mirror session 1Session 1 Configuration Source RXPort : fa2-5 SourceTX Port : fa2-5Destination port : fa1 IngressState: disabled | ||
mirror session source interface
| Syntax | mirror session <1-4> source interfaces IF_PORTS (both | rx | tx) no mirror session <1-4> source interfaces IF_PORTS (both | rx | tx) no mirror session (<1-4> | all) | |
| <1-4> | Specify the mirror session to configure | |
| IF_PORTS | Specify the source interface, Valid interfaces include physical ports and port channels. | |
| both | Mirror tx and rx direction | |
| rx | Mirror rx direction only | |
| tx | Mirror tx direction only | |
| Default | No monitor sessions are configured. | |
| Mode | Global Configuration | |
| Usage | Use the “mirror session source interface” command to start a port mirror session.Use the no form of this command to stop a port mirroring session.Use the “no mirror session” command to disable all mirror sessions or specific mirror session. | |
| Example | The following example shows how to create a local SPAN session 1 to monitor both sent and received traffic on source port fa1.Switch(config)# mirror session 1 source interface fa2-5 both Switch(config)# mirror session 1 destination interface fa1 Switch(config)# show mirror session 1Session 1 Configuration SourceRX Port : fa2-5Source TX Port : fa2-5Destination port : fa1Ingress State: disabled | |
| show mirror | ||
| Syntax | show mirror [session <1-4>] | |
| Parameter | <1-4> Specify the mirror session to display | |
| Default | N/A | |
| Mode | Privileged EXEC | |
| Usage | Use the show mirror command to display mirror session configuration | |
| Example | This following example shows how to display mirror session configuration | |
| Switch(config)# show mirrorSession 1 Configuration Source RXPort : fa2-5Source TX Port : fa2-5Destination port : fa1 | ||
Ingress State: disabled
Session 2 Configuration Mirrored
source : Not Config
Destination port : Not Config
Session 3 Configuration Mirrored
source : Not Config
Destination port : Not Config
Session 4 Configuration Mirrored
source : Not Config
Destination port : Not Config
19. MLD Snooping
ipv6 mld snooping
| Syntax ipv6 mld | snooping noipv6 mldsnooping |
| Parameter | None |
| Default | Default is disabled |
| Mode | Global Configuration |
| Usage | Use the ipv6 mld snooping command to enable MLD snooping function. Use the no form of this command to disable. Disable will clear all ipv6 mld snooping dynamic group and dynamic router port, and make the static ipv6 mld group invalid. No more dynamic group and router port by mld message will be learned.You can verify settings by the show ipv6 mld snooping command. |
| Example | The following example specifies that set ipv6 mldsnooping test. Switch(config)# ipv6 mld snooping |
ipv6 mld snooping report-suppression
| Syntax | ipv6 mld snooping report-suppression |
Command Line Interface User Guide
no ipv6 mld snooping report-suppression
| Parameter | none |
| Default | Default is enabled |
| Mode | Global Configuration |
| Usage | Use the ipv6 mld snooping report-suppression command to enable MLD snooping report-suppression function.Use the no form of this command to disable. Disable report-suppression will forward all received reports to the vlan router ports.You can verify settings by the show ipv6 mld snooping command. |
| Example | The following example specifies that disable ipv6 mld snooping report- suppression test.Switch(config)# no ipv6 mld snooping report-suppression |
ipv6 mld snooping version
Syntax ipv6 mld snooping version (1|2)
| Parameter | (1|2) | Ipv6 mld snooping running version 1 or 2 |
| Default | Default is version 1 | |
| Mode | Global Configuration | |
| Usage Use the ipv6 mld snooping version command to changeMLD support version. Version 2 packet won't be processed if choose version 1.You can verify settings by the show ip igmp snooping command. | ||
| Example | The following example specifies that set ipv6 mld snooping version 2. Switch(config)# ipv6 mld snooping version 2 | |
ipv6 mld snooping unknown-multicast action
| Syntax | ipv6 mld snooping unknown-multicast action (drop | flood |router-port) |
| snooping unknown-multicast action |
| Parameter | (drop | flood | router- port) | Drop、flood in vlan or forward to router port of unknown multicast packet |
| Default | Default is flood. | |
| Mode | Global Configuration | |
| Usage | When igmp and mld snooping disabled, it can't set action router-port.When disable igmp snooping & mld snooping, it set unknown multicast action flood. When action is router-port to flood or drop, it will delete the unknown multicast group entry.Use the ipv6 mld snooping unknown-multicast action command to change action.Use the no form of this command to restore to default.You can verify settings by the show ipv6 mld snooping command. | |
| Example | The following example specifies that set ipv6 mld unknown multicast action router-port test.Switch(config)# ipv6 mld snooping unknown-multicast action router-port | |
ipv6 mld snooping vlan
Syntax ipv6 mld snooping vlan VLAN-LIST no ipv6 mld snooping vlan VLAN-LIST
| Parameter | VLAN-LIST specifies VLAN ID list to set |
| Default | Default is disabled for all VLANs |
| Mode | Global Configuration |
| Usage | Disable will clear all ipv6 mld snooping dynamic group and dynamic router port and make all static ip igmp group invalid of this vlan. Will not learn dynamic group and router port by igmp message any more. Use the ipv6 mld snooping vlan command to enable MLD on VLAN. Use the no form of this command to disable You can verify settings by the show ipv6 mld snooping vlan command. |
Example
The following example specifies that set ipv6 mld snooping vlan test. Switch(config)# ipv6 mld snooping vlan 1
ipv6 mld snooping vlan parameters
| Syntax | ipv6 mld snooping vlanlast-member-query-count <1-7>no ipv6 mld snooping vlanlast-member-query-count |
| ipv6 mld snooping vlanlast-member-query-interval <1- 60>no ipv6 mld snooping vlanlast-member-query-interval[no] ipv6 mld snooping vlanrouter learn pim-dvmrp[no] ipv6 mld snooping vlanfastleave ipv6 mld snooping vlanquery-interval <30-18000>no ipv6 mld snooping vlanquery-interval ipv6 mld snooping vlanresponse-time <5-20>no ipv6 mld snooping vlanresponse-time ipv6 mld snooping vlanrobustness-variable <1-7>no ipv6 mld snooping vlanrobustness-variable |
| Parameter | VLAN-LIST specifies VLAN ID list to set | |
| last-member-query- count <1-7> | specifies last member query count to set.Default is 2 specifies last member query | |
| last-member-query- interval <1-60> | interval to set. Default is 1 specifies query | |
| query-interval <30-18000> | interval to set. Default is 125specifies a response time to set. default is 10 | |
| response-time <5-20> | specifies a robustness value to set, default is 2 | |
| robustness-variable | ||
| <1-7> | ||
Default
no ipv6 mld snooping vlan 1-4094 last-member-query-count no ipv6 mld snooping vlan 1-4094 last-member-query-interval ipv6 mld snooping vlan 1-4094 router learn pim-dvmrp no ipv6 mld snooping vlan 1-4094 fastleave no ipv6 mld snooping vlan 1-4094 query-interval no ipv6 mld snooping vlan 1-4094
Command Line Interface
User Guide
response-time
no ipv6 mld snooping vlan 1-4094 robustness-variable
| Mode | Global Configuration |
| Usage | ‘no ipv6 mld snooping vlan 1 (last-member-query-count | last-member-query- interval | query-interval | response-time | robustness-variable)’ will set the vlan parameters to default. |
The cli setting will change the ipv6 mld vlan parameters admin settings. The configure can use 'show ipv6 mld snooping vlan 1'.
Example
The following example specifies that set ipv6 mld snooping vlan parameters test.
Switch(config)# ipv6 mld snooping vlan 1 fastleave Switch(config)# ipv6 mld snooping vlan 1 last-member-query-count 5 Switch(config)# ipv6 mld snooping vlan 1 last-member-query-interval 3 Switch(config)# ipv6 mld snooping vlan 1 query-interval 100 Switch(config)# ipv6 mld snooping vlan 1 response-time 12 Switch(config)# ipv6 mld snooping vlan 1 robustness-variable 4 Switch# show ipv6 mld snooping vlan 1
MLD Snooping is globally enabled
MLD Snooping VLAN 1 admin :
disabled MLD Snooping oper mode : disabled
MLD Snooping robustness: admin 4 oper 2
MLD Snooping query interval: admin 100 sec oper 125
sec MLD Snooping query max response : admin 12 sec oper 10 sec MLD Snooping last member query counter: admin 5 oper 2
MLD Snooping last member query interval: admin 3 sec oper 1 sec MLD Snooping last immediate leave: enabled
MLD Snooping automatic learning of multicast router ports: enabled
ipv6 mld snooping vlan fastleave
Syntax ipv6 mld snooping vlan
| Parameter | VLAN-LIST | specifies VLAN ID list to set |
| Default | Default is disabled | |
| Mode | Global Configuration |
Usage Use the ipv6 mld snooping vlan fastleave command to enable fastleave function. Group will remove port immediately when receive leave packet. Use the no form of this command to disable. You can verify settings by the show ipv6 mld snooping vlan command
| Example | The following example specifies that set ipv6 mld snooping vlan fastleave test.Switch(config)# ipv6 mld snooping vlan 1 fastleave |
ipv6 mld snooping vlan last-member-query-count
| Syntax | ipv6 mld snooping vlanlast-member-query-count <1-7>no ipv6 mld snooping vlanlast-member-query-count |
| Parameter | VLAN-LIST specifies VLAN ID list to setlast-member-query-count <1-7> specifies last member query count to set |
| Default | Default is 2 |
| Mode | Global Configuration |
| Usage Use the ipv6 mld snooping vlan last-member-query-count command to change how many query packets will send.Use theno form of this command to restore to default.You can verify settings by theshow ipv6 mld snooping vlancommand | |
| Example | The following example specifies that set ipv6 mld snoopingvlan last-member-query-count test.Switch(config)# ipv6 mld snooping vlan 1 last-member-query-count5 |
| ipv6 mld snooping vlan last-member-query-interval | |
| Syntax | ipv6 mld snooping vlanlast-member-query-interval <1-60>no ipv6 mld snooping vlanlast-member-query-interval |
| Parameter VLAN-LIST specifies VLAN ID list to setinterval <1-60> | last-member-query-specifies last member query interval to set |
| Default | Default is 1 |
| Mode | Global Configuration |
| Usage | Use the ipv6 mld snooping vlan last-member-query-interval command to set interval between each query packet.Use the no form of this command to restore to defaultYou can verify settings by the show ipv6 mld snooping vlan command |
| Example | The following example specifies that set ipv6 mld snoopingvlan last- member-query-interval test.Switch(config)# ipv6 mld snooping vlan 1 last-member-query-interval 3 |
ipv6 mld snooping vlan query-interval
| Syntax | ipv6 mld snooping vlan |
| query-interval <30-18000> | |
| no ipv6 mld snooping vlan |
| Parameter | VLAN-LIST specifies VLAN ID list to set |
| query-interval <30- specifies query interval to set | |
| 18000> |
| Default | Default is 125 |
| Mode | Global Configuration |
| Usage Use the ipv6 mld snooping vlan query-interval command to set interval between each query.Use the no form of this command to restore to defaultYou can verify settings by the show ipv6 mld snooping vlan command |
| Example | The following example specifies that set ipv6 mld snooping vlan query- interval test.Switch(config)# ipv6 mld snooping vlan 1 query-interval 100 |
ipv6 mld snooping vlan response-time
| Syntax | ipv6 mld snooping vlanresponse-time <5-20>no ipv6 mld snooping vlanresponse-time |
| Parameter | VLAN-LIST | specifies VLAN ID list to set |
| response-time <5-20> | specifies a response time to set |
| Default | Default is 10 |
| Mode | Global Configuration |
| Usage | Use the ipv6 mld snooping vlan response-time command to set response time.Use the no form of this command to restore to default.You can verify settings by the show ipv6 mld snooping vlan command |
| Example | The following example specifies that set ipv6 mld snooping vlan response-time test.Switch(config)# ipv6 mld snooping vlan 1 response-time 12 |
ipv6 mld snooping vlan robustness-variable
| Syntax | ipv6 mld snooping vlanrobustness-variable <1-7>no ipv6 mld snooping vlanrobustness-variable |
| Parameter VLAN-LIST specifies VLAN ID list to set | |
| Default | Default is 2 |
| Mode | Global Configuration |
| Usage Use the ipv6 mld snooping vlan robustness-variable | |
| Example | The following example specifies that set ipv6 mld snooping vlan parameters test.Switch(config)# ip igmp snooping vlan 1 robustness-variable |
ipv6 mld snooping vlan router
| Syntax | ipv6 mld snooping vlan VLAN-LIST router learn pim-dvmrp |
| no ipv6 mld snooping vlan VLAN-LIST router learn pim-dvmrp |
| Parameter | VLAN-LIST specifies VLAN ID list to set |
| Default | Default is enabled |
| Mode | Global Configuration |
| Usage | Use the ipv6 mld snooping vlan router command to enable learning router port by routing protocol packets such as PIM/PIMv2, DVMRP, MOSPF. Use the no form of this command to disable.You can verify settings by the show ipv6 mld snooping vlan command |
| Example | The following example specifies that set ipv6 mld snooping vlan router test. Switch(config)# ipv6 mld snooping vlan 99 router |
ipv6 mld snooping vlan static-port
| Syntax | ipv6 mld snooping vlanstatic-port IF_PORTSoping vlanstatic-port | |
| Parameter | VLAN-LIST specifies VLAN ID list to set | |
| IF_PORTS specifies a port list to set or remove | ||
| Default | No static port by default | |
| Mode | Global Configuration | |
| Usage | Use the ipv6 mld snooping vlan static-port command to add static forwarding port, all known vlan 1 ipv6 group will add the static ports. Use theno form of this command to delete static port.You can verify settings by theshow ipv6 mld snooping forward-allcommand. | |
| Example | The following example specifies that set ipv6 mld snooping static port test. Switch(config)# ipv6 mld snooping vlan 1 static -port gi1-2 | |
ipv6 mld snooping vlan forbidden-router-port
| Syntax | ipv6 mld snooping vlanforbidden-router-port IF_PORTSno ipv6 mld snooping vlanforbidden-router-port | |
| Parameter | VLAN-LIST | specifies VLAN ID list to set |
| IF_PORTS | specifies a port list to set or remove | |
| Default | No forbidden router ports by default | |
| Mode | Global Configuration | |
| Usage | Use the ipv6 mld snooping vlan forbidden-router-port command to add static forbidden router port. This will also remove port from static router port. The forbidden router port will not forward received query packet.Use the no form of this command to delete forbidden router port.You can verify settings by the show ipv6 mld snooping router command. | |
| Example | The following example specifies that set ipv6 mld snooping forbidden test. Switch(config)# ipv6 mld snooping vlan 1 forbidden-router-port gi2 | |
ipv6 mld snooping vlan forbidden-router-port
| Syntax | ipv6 mld snooping vlanforbidden-router-port IF_PORTSno ipv6 mld snooping vlanforbidden-router-port | |
| Parameter | VLAN-LIST | specifies VLAN ID list to set |
| IF_PORTS | specifies a port list to set or remove | |
| Default | No forbidden router ports by default | |
| Mode | Global Configuration | |
| Usage | Use the ipv6 mld snooping vlan forbidden-router-port command to add static forbidden router port. This will also remove port from static router port. The forbidden router port will not forward received query packet.Use the no form of this command to delete forbidden router port.You can verify settings by the show ipv6 mld snooping router command. | |
| Example | The following example specifies that set ipv6 mld snooping forbidden test. Switch(config)# ipv6 mld snooping vlan 1 forbidden-router-port gi2 | |
ipv6 mld snooping vlan static router port
| Syntax | ipv6 mld snooping vlanstatic-router-port IF_PORTS no ipv6 mld snooping vlanstatic-router-port IF_PORTS | |
| Parameter | VLAN-LIST | specifies VLAN ID list to set |
| IF_PORTS | specifies a port list to set or remove | |
| Default | None static router ports by default | |
| Mode | Global Configuration | |
| Usage | Use the ipv6 mld snooping vlan static-router-port command to add static router port. All query packets will forward to this port. Use the no form of this command to delete static router port. You can verify settings by the show ipv6 mld snooping router command.. | |
| Example | The following example specifies that set ipv6 mld snooping static test. Switch(config)# ipv6 mld snooping vlan 1 static-router-port gi1-2 | |
ipv6 mld snooping vlan static-group
| Syntax | ipv6 mld snooping vlanstatic-group [] interfaces IF_PORTSno ipv6 mld snooping vlanstatic-groupinterfaces IF_PORTS | |
| Parameter | VLAN-LIST | specifies VLAN ID list to set |
Ipv6-addr
specifies multicast group ipv4 address
| IF_PORTS specifies port list to set or remove | |
| Default | No static group by default |
| Mode | Global Configuration |
| Usage | Use the ipv6 mld snooping vlan static-group command to add a static group. The static group will not learn other dynamic ports. If the dynamic group exists, then the static group will overlap the dynamic group. The static group set to valid unless igmp snooping global and vlan enable.Use the no form of this command to delete a port in static group. If remove the last member of static group, the static group will be delete.You can verify settings by the show ipv6 mld snooping group command. |
| Example | The following example specifies that set ipv6 mld snooping static group test. Switch(config)# ipv6 mld snooping vlan 1 static-group ff13::1 interfaces gi1-2 |
ipv6 mld snooping vlan group
| Syntax | no ipv6 mld snooping vlan | group |
| Parameter | VLAN-LIST | specifies VLAN ID list to set |
| ipv6-addr | specifies multicast group ipv6 address |
| Default | None |
| Mode | Global Configuration |
Usage Use the no ipv6 mld snooping vlan group command to delete a group which could be static or dynamic. You can verify settings by the show ipv6 mld snooping group command.
Example
The following example specifies that set ip igmp snooping static group test. Switch(config)# no ip igmp snooping vlan 1 group ff13::1
profile range
| Syntax | profile range ipv6 <ipv6-addr> [ipv6-addr] action (permit | deny) | |
| <ipv6-addr> | Start ipv6 multicast address | |
| [ipv6-addr] | End ipv6 multicast address | |
| (permit | deny) | Permit: allow Multicast address range ip address learningdeny: do not allow Multicast address range ip address | |
| Default | None | |
| Mode | mld profile configuration mode | |
| Usage | Use the profile command to generate MLD profile.You can verify settings by the show ipv6 mld profile command | |
| Example | The following example specifies that set ipv6 mld profile test. Switch(config)# ipv6 mld profile 1Switch(config-mld-profile)# profile range ipv6 ff13::1 ff13::10action permit | |
ipv6 mld profile
| Syntax | ipv6 mld profile <1-128>no ipv6 mld profile <1-128> | |
| Parameter | <1-128> | specifies profile ID |
| Default | No profie exist by default | |
| Mode | Global Configuration | |
| Usage Use the ipv6 mld profile command to enter profile configuration Use the no form of this command to delete profile You can verify settings by the show ipv6 mld profile command | |
| Example | The following example specifies that set ipv6 mld profile test. Switch(config)# ipv6 mld profile 1Switch(config-mld-profile)# profile range ipv6 ff13::1 ff13::10 action permit |
ipv6 mld filter
| Syntax | ipv6 mld filter <1-128>no ipv6 mld filter |
| Parameter | <1-128> specifies profile ID |
| IF_PORTS] | [interfaces Specifies interfaces to display |
| Default | None |
| Mode | Port Configuration |
| Usage | Use the ipv6 mld filter command to bind a profile for port. When the port bind a profile. Then the port learning group will update, if the group is not match the profile rule it will remove the port from the group. Static group is excluded.Use the no form of this command to delete profileYou can verify settings by the show ipv6 mld filter command |
| Example | The following example specifies that set ipv6 mld filter test.Switch(config)# interface gi1Switch(config-if)# ipv6 mld filter 1 |
ipv6 mld max-groups
| Syntax | ipv6 mld max-groups <0-1024>no ipv6 mld max-groups |
| Parameter | <0-1024> | specifies profile ID |
| Default | Default is 1024 | |
| Mode | Port Configuration | |
| Usage | Use the ipv6 mld max-groups command to limit port learning max group number. When the port has reach limitation, new group will not add this port. Static group is excluded.Use the no form of this command to restore to defaultYou can verify settings by the show ipv6 mld max-groups command. | |
| Example | The following example specifies that set ipv6 mld max-groups test. Switch(config)# interface gi1Switch(config-if)# ipv6 mld max-groups 10 | |
ip igmp max-groups action
| Syntax | ipv6 mld max-groups action (deny | replace) |
| Parameter (deny | replace) Deny: current port igmp group arrived max-groups, don't add group.Replace: current port igmp group arrived max-groups, remove port for rand group, and add port to new group. | |
| Default | Default action is deny |
| Mode | Interface mode |
| Usage Use the ipv6 mld max-groups action command to set the action when the numbers of groups reach the limitation.Use the no form of this command to restore to defaultYou can verify settings by the show ipv6 mld max-groups command. | |
| Example | The following example specifies that set action replace test. Switch(config-if)#ipv6 mld max-groups action replace |
clear ipv6 mld snooping groups
| Syntax | clear ipv6 mld snooping groups [(dynamic | static)] | |
| Parameter | None | Clear ipv6 mld groups include dynamic and static |
| (dynamic | static) | ipv6 mld group type is dynamic or static | |
| Default | None | |
| Mode | Privileged EXEC | |
| Usage | This command will clear the ipv6 mld groups for dynamic or static or all of type.You can verify settings by the show ipv6 mld snooping groups command.. | |
| Example | The following example specifies that clear ipv6 mld snooping groups test. Switch# clear ipv6 mld snooping groups static | |
clear ipv6 mld snooping statistics
| Syntax clear ipv6 mld snooping statistics | |
| Parameter | none |
| Default | None |
| Mode | Privileged EXEC |
| Usage | This command will clear the igmp statistics.You can verify settings by the show ipv6 mld snooping command. |
| Example | The following example specifies that clear ipv6 mld snooping statistics test.Switch# clear ipv6 mld snooping statistics |
show ipv6 mld snooping groups counters
Syntax show ipv6 mld snooping groups counters
| Parameter | none |
| Default | None |
| Mode | Privileged EXEC |
| Usage | This command will display the ipv6 mld group counter include static group. |
| Example | The following example specifies that display ipv6 mld snooping group counter test.Switch# show ipv6 mld snooping group countersTotal ipv6 mld snooping group number: 2 |
show ipv6 mld snooping groups
| Syntax | show ipv6 mld snooping groups [(dynamic | static)] | |
| Parameter | none | Show ipv6 mld groups include dynamic and static |
| (dynamic | static) | Display ipv6 mld group type is dynamic or static | |
| Default | display all ipv6 mld groups | |
| Mode | Privileged EXEC | |
| Usage | This command will display the ipv6 mld groups for dynamic or static or all of type. | |
| Example | The following example specifies that show ipv6 mld snooping groups test. Switch# show ipv6 mld snooping groupsVLAN | Group IP Address | Type | Life(Sec) | Port----+----+----+----+----+----+----+----+----+----+----+----+----+----+----+----+----+----+----+----+----+----+----+----+----+----+----+----+----+----+----+----+----+----+----+----+----+----+----+----+----+----+----+----+----+----+----+----+----+----+---- +----+----+----+----+----+----+----+----+----+----+----+----+----+----+----+----+----+----+----+----+----+----+----+----+----+----+----+----+----+----+----+----+----+----+----+----+----+----+----+----+----+----+----+----+----+----+----+----+----+----+ 1 | ff13::1 | Static | -- | fa1 1 | ff13::2 | Static | -- | fa2 | |
Total Number of Entry = 2
show ipv6 mld snooping router
| Syntax | show ipv6 mld snooping router [(dynamic | forbidden |static)] | |
| Parameter | none | Show ipv6 mld router include dynamic and static and forbidden |
| (dynamic | forbidden | static) | Display ipv6 mld router info for different type | |
| Default | None | |
| Mode | Privileged EXEC | |
| Usage | This command will display the ipv6 mld router info. | |
| Example | The following example specifies that show ipv6 mld snooping router test. Switch# show ipv6 mld snooping routerDynamic Router TableVID | Port | Expiry Time(Sec)----+----+----Total Entry 0Static RouterTable VID | PortMask----+----1 | fa5Total Entry 1Forbidden RouterTable VID | PortMask----+---- | |
Total Entry 0
show ipv6 mld snooping
Syntax show ipv6 mld snooping
| Parameter | none |
| Default | None |
| Mode | Privileged EXEC |
| Usage | This command will display ipv6 mld snooping global info. |
| Example | The following example specifies that show ipv6 mld snooping test. Switch#show ipv6 mld snoopingMLD Snooping Status----Snooping : DisabledReport Suppression :EnabledOperation Version : v1Forward Method : macUnknown Multicast Action :FloodPacket StatisticsTotal RX : 0Valid RX : 0Invalid RX : 0Other RX : 0Leave RX : 0Report RX : 0General Query RX : 0Specail Group Query RX : 0Specail Group & Source Query RX :0 Leave TX : 0Report TX : 0General Query TX : 0Specail Group Query TX : 0 |
Specail Group & Source Query TX : 0
show ipv6 mld snooping vlan
| Syntax | show ipv6 mld snooping vlan [VLAN-LIST] | |
| Parameter | none | Show all ipv6 mld snooping vlan info |
| [VLAN-LIST] | Show specifies vlan ipv6 mld snooping info | |
| Default | Show all ipv6 mld snooping vlan info | |
| Mode | Privileged EXEC | |
| Usage | This command will display ipv6 mld snooping vlan info. | |
| Example | The following example specifies that show ipv6 mld snooping vlan test. Switch# show ipv6 mld snooping vlan 1MLD Snooping is globally disabledMLD Snooping VLAN 1 admin:disabled MLD Snooping oper mode:disabled MLD Snooping robustness:admin 2 oper 2MLD Snooping query interval: admin 125 sec oper 125sec MLD Snooping query max response: admin 10 secoper 10 sec MLD Snooping last member query counter:admin 2 oper 2MLD Snooping last member query interval: admin 1 sec oper 1sec MLD Snooping last immediate leave: disabledMLD Snooping automatic learning of multicast router ports: enabled | |
show ipv6 mld snooping forward-all
| Syntax | show ipv6 mld snooping forward-all [vlan VLAN-LIST] | |
| Parameter | none | Show all ipv6 mld snooping vlan forward-all info |
| [vlan VLAN-LIST] | Show specifies vlan of ipv6 mld forward info. | |
| Default | Show all vlan ipv6 mld forward all info | |
| Mode | Privileged EXEC | |
Usage
This command will display ipv6 mld snooping forward all info.
| Example | The following example specifies that show ipv6 mld snooping forward-all test.Switch#show ipv6 mld snooping forward-allMLD Snooping VLAN 1MLD Snooping static port : NoneMLD Snooping forbidden port : None |
show ipv6 mld profile
| Syntax | show ipv6 mld profile [<1-128>] | |
| Parameter | none | Show all ipv6 mld snooping profile info |
| [<1-128>] | Show specifies index profile info | |
| Default | Show all ipv6 mld profile info | |
| Mode | Privileged EXEC | |
| Usage | This command will display ipv6 mld profile info. | |
| Example | The following example specifies that show ipv6 mld profile test. Switch# show ipv6 mld profileIPv6 mld profile index: 1IPv6 mld profile action: permitRange low ip: ff13::1Range high ip: ff13::10 | |
show ipv6 mld filter
| Syntax | show ipv6 mld filter [interfaces IF_PORTS] | |
| Parameter | none | Show all port filter |
| [interfacesIF PORTS] | Show specifies ports filter | |
| Default | None | |
| Mode | Privileged EXEC | |
| Usage | This command will display ipv6 mld port filter info. |
| Example | The following example specifies that show ipv6 mld filter test. Switch#show ipv6 mld filterPort ID | Profile ID----+----gi1 : 1gi2 :Nonegi3 :Nonegi4 :Nonegi5 :None--More-- |
show ipv6 mld max-group
| Syntax | show ipv6 mld max-group [interfaces IF_PORTS] | |
| Parameter | none | Show all port max-group |
| [interfacesIF PORTS] | Show specifies ports max-group | |
| Default | None | |
| Mode | Privileged EXEC | |
| Usage | This command will display ipv6 mld port max-group. | |
| Example | The following example specifies that show ipv6 mld max-group test. Switch(config-if)# ipv6 mld max-groups 50Switch# show ipv6 mld max-groupPort ID | Max Group----+----gi1 : 50gi2 : 256gi3 : 256gi4 : 256gi5 : 256--More-- | |
show ipv6 mld port max-group action
| Syntax | show ipv6 mld max-group action [interfaces IF_PORTS] | |
| Parameter | none | Show all port max-group action |
| [interfaces IF_PORTS] | Show specifies ports max-group action | |
| Default | Show all ports ipv6 mld max-group action | |
| Mode | Privileged EXEC | |
| Usage | This command will display ipv6 mld port max-group action. | |
| Example | The following example specifies that show ipv6 mld max-group action test. Switch(config-if)# ipv6 mld max-groups action replaceSwitch# show ipv6 mld max-group actionPort ID | Max-groups Action----+----gi1 :replacegi2 :denygi3 :denygi4 :denygi5 :deny--More-- | |
- MVR
| mvr | |
| Syntax | mvrno mvr |
| Parameter | None |
| Default | Default is disabled |
| Mode | Global Configuration |
| Usage | Use themvrcommand to enable MVR function. The command will clear all mvr VLAN ID multicast snooping group.Use thenoform of this command to disable. Disable will clear all mvr group. You can verify settings by theshow mvrcommand. |
| Example | The following example specifies that setmvrtest. Switch(config)#mvrSwitch(config)#no mvrSwitch#show mvrMVR Running:DisabledMVR MulticastVLAN : 1 MVR GroupRange : NoneMVR Max Multicast Groups : 128MVR Current Multicast Groups : 0MVR Global query response time : 1secMVR Mode : compatible |
myr vlan
Syntax mvr vlan
| Parameter | The exist static vlan id | |
| Default | Default mvr vlan id is 1 | |
| Mode | Global Configuration | |
| Usage | Use the mvr vlan command to modify mvr vlan id when the mvr status is enabled.Change mvr vlan id will delete the old mvr vlan and new mvr vlan group. If there have configure source or receiver port, there will check the source must only in the mvr vlan , and receiver port must not in the mvr vlan member.You can verify settings by the show mvr command. | |
| Example | The following example specifies that configure mvr vlan 2test. Switch(config)#vlan 2Switch(config)#mvrThe operation will delete groups of VLAN ID is MVR VLAN include static groups. Continue? [yes/no]:ySwitch(config)#mvr vlan 2The operation will delete the old and new MVR VLAN groups includestatic MVR groups.Continue? [yes/no]:ySwitch# show mvrMVR Running :Enabled MVRMulticast VLAN : 2MVR Group Range :NoneMVR Max Multicast Groups : 128MVR Current Multicast Groups :0 MVR Global query responsetime : 1 secMVR Mode : compatible | |
| mvr group | ||
mvr group
| < ip-address> | Start MVR IP multicast address | |
| [<1-128>] | Contiguous series of IP addresses. |
Default None
Mode Global Configuration
Usage Use the mvr group command to configure mvr group address range when mvr is enabled. The command will delete all mvr vlan ipv4 group entry You can verify settings by the show mvr command
| Example | The following example specifies that set mvr group range is 224.1.1.1 ~224.1.1.8 test.Switch(config)#mvrSwitch(config)# mvr group 224.1.1.1 8The operation will delete the MVR VLAN groups include staticMVR groups.Continue? [yes/no]:ySwitch# show mvrMVR Running :Enabled MVR MulticastVLAN : 2MVR Group Range : 224.1.1.1 ~ 224.1.1.8MVR Max Multicast Groups : 128MVR Current Multicast Groups : 0MVR Global query response time : 1secMVR Mode : compatible |
mvr mode
Syntax mvr mode (dynamic | compatible)
Parameter (dynamic|compatible) dynamic: Allows dynamic MVR membership on
| on source ports. | source portscompatible: does not support IGMP dynamic joins |
| Default | Default is compatible. |
| Mode | Global Configuration |
| Usage | Use themvr modecommand to change mvr mode when mvr is enabled.You can verify settings by theshow mvrcommand. |
| Example | The following example specifies that set mvr mode dynamic test. Switch(config)#mvrSwitch(config)#mvr mode dynamicSwitch#show mvrMVR Running :Enabled MVR MulticastVLAN : 2MVR Group Range : 224.1.1.1 ~ 224.1.1.8MVR Max Multicast Groups : 128MVR Current Multicast Groups : 0MVR Global query response time : 1secMVR Mode : dynamic |
mvr query-time
| Syntax | mvr query-time <1-10>no mvr query-time | |
| Parameter | <1-10> | specifies query response time is 1~10 sec. |
| Default | Default is 1 sec | |
| Mode | Global Configuration | |
| Usage | Use the mvr query-time command to configure when mvr is enabled.Use the no form of this command to set query-time default value. You can verify settings by the show mvr command. | |
Example
The following example specifies that set mvr query-time 10 sec test. Switch(config)# mvr
| Switch(config)# mvr query-time 10Switch# show mvrMVR Running :Enabled MVRMulticast VLAN : 2MVR Group Range : 224.1.1.1 ~ 224.1.1.8MVR Max MulticastGroups : 128 MVR CurrentMulticast Groups : 0MVR Global query response time : 10 secMVR Mode : dynamic |
mvr port type
| Syntax | mvr type (source | receiver)no mvr type | |
| Parameter | (source | receiver) | Source: Configure uplink ports that receive and send multicast data as source ports.Subscribers cannot be directly connected to source ports. All source ports on a switch belong to the single multicast VLAN. Receiver: Configure a port as a receiver port if it is a subscriber port and should only receive multicast data. It does not receive data unless it becomes a member of the multicast group, either statically or by using IGMP leave and join messages. Receiver ports cannot belong to the |
| Default | None | |
| Mode | Port Configuration | |
| Usage | Use themvr typecommand to configure mvr port type when mvr is enabled.The source port must only belong to mvr vlan. The receiver port must not belong to mvr vlan, and port mode must be access mode.Use thenoform of this command to set mvr type noneYou can verify settings by theshow mvrinterfacecommand | |
| Example | The following example specifies that set gi1 fa1 is source port, fa2 is receiver port test.Switch(config)#vlan 2Switch(config-vlan)#exitSwitch(config)#mvrSwitch(config)#mvr vlan 2 | |
| Switch(config)#mvr group 224.1.1.1 8 |
| Switch(config)# interface gi1 |
| Switch(config-if)# switchport trunk allowed vlan 2 |
| Switch(config-if)# mvr type |
| source Switch(config-if)#exit |
| Switch(config)# interface gi2 |
| Switch(config-if)# switchport mode |
| access Switch(config-if)#mvr type |
| receiver Switch# show mvr |
| interface |
| Port | Type | Immediate Leave |
| ----+----+---- |
| gi1 | Source| Disabled |
| gi2 | Receiver| Disabled |
mvr port immediate
| Syntax | mvr immediateno mvr immediate |
| Parameter | None |
| Default | Default is disabled |
| Mode | Port Configuration |
| Usage Use themvr immediatecommand to configure mvr supportimmediate leave when mvr is enabled.Note This command applies to only receiver ports and should onlybe enabled on receiver ports to which a single receiver device isconnected.Use theno form of this command to disableimmediate leave. You can verify settings by theshow mvr interfacecommand | |
| Example | The following example specifies that set gi2 immediate enable test.The configure should configure mvr receiver port firstly.(eg. mvr port type) Switch(config)#interface gi2Switch(config-if)#mvrimmediate Switch(config-if)#exit Switch(config)# exitSwitch# show mvr interfacePort | Type | Immediate Leave----+----+----gi1 | Source| Disabledgi2 | Receiver| Enabled |
mvr static group
| Syntax | mvr vlan < VLAN-ID> group <ip-addr> interfaces IF_PORTS no mvr vlan < VLAN-ID> group <ip-addr> interfaces IF_PORTS | |
| Parameter | VLAN-ID | specifies MVR VLAN ID for static group |
| ip-addr | specifies multicast MVR group address | |
| IF_PORTS | specifies port list to set or remove | |
| Default | None | |
| Mode | Global Configuration | |
| Usage Use the mvr vlan group command to add a static group or configure static group member ports when mvr is enabled. This command applies to only receiver ports. In compatible mode, this command applies to only receiver ports. In dynamic mode, it applies to receiver ports and source ports. When remove static mvr group all ports, the static group will be delete. Or can use no ip igmp vlan VLAN-ID group to delete the mvr static group. Static group can't learn dynamic port by igmp memesage. Use the no form of this command to delete a port in static group. If remove the last member of static group, the static group will be delete. You can verify settings by the show mvr members command. | ||
| Example | The following example specifies that set mvr static group test. The configure must configure mvr receiver port firstly.(eg. mvr port type) Switch(config)# mvr vlan 2 group 224.1.1.1 interfaces gi2 Switch# show mvr members Gourp IP Address | Type | Life(Sec) | Port | |
| 224.1.1.1 | Static| -- | gi2 | ||
| Total Number of Entry = 1 | ||
clear mvr members
Syntax clear mvr members [dynamic|static]
Parameter
dynamic
specifies MVR dynamic group
| static | specifies MVR static group | |
| Default | Clear all of mvr group | |
| Mode | Privileged EXEC | |
| Usage | This command will clear the mvr groups for selected type. | |
| Example | The following example specifies that clear all mvr groups test. Switch# clear mvr members | |
show mvr members
Syntax show mvr members
| Parameter | None |
| Default | None |
| Mode | Privileged EXEC |
| Usage | This command will display the mvr groups for all of type. |
| Example | The following example specifies that show mvr groups test. Switch# show mvr members |
show mvr interface
Syntax show mvr interface [IF_PORTS]
| Parameter | IF_PORTS | Show specifies port list configurationt |
| Default | None |
| Mode | Privileged EXEC |
| Usage | This command will display mvr port type and port immediate status. |
| Example | The following example specifies that show mvr interface test. Switch# show mvr interface |
show mvr
Syntax show mvr
| Parameter | None |
| Default | None |
| Mode | Privileged EXEC |
| Usage | This command will display mvr global information. |
| Example | The following example specifies that show mvr test. Switch#show mvrMVR Running : EnabledMVR Multicast VLAN : 100MVR Group Range : 224.1.1.1 ~ 224.1.1.128MVR Max Multicast Groups : 128MVR Current Multicast Groups : 0MVR Global query response time : 1 secMVR Mode : compatible |
21. Port
Command Line Interface User Guide
back-pressure
| Syntax | back-pressureno back-pressure |
| Parameter | |
| Default | Default back pressure state is enabled. |
| Mode | Interface Configuration |
| Usage | Use “back-pressure” command to make port to enable back pressure feature.Use no form of this command to disable back pressure feature.The only way to show this configuration is using “show running-config” command. |
| Example | This example shows how to configure port fa1 and fa2 to be protected port.Switch(config)# interface fa1Switch(config-if)# no back-pressureThis example shows how to show current jumbo-frmae size Switch# show running-config interface fa1interface fa1no back-pressure |
clear interface
| Syntax | clear interfaces IF_PORTS counters | |
| Parameter | IF_PORTS | Specify port to clear counters. |
| Default | No default value for this command. | |
| Mode | Privileged EXEC | |
| Usage | Use “clear interface” command to clear statistic counters on specific | |
Command Line Interface User Guide
ports.
| Example | This example shows how to clear counters on port fa1. Switch(config)#clear interfaces fa1 counters | |||
| This example shows how to show current countersSwitch#show interfaces fa1Hardware is Fast EthernetAuto-duplex, Auto-speed, media type is Copper flow-control is off0 packets input, 0 bytes, 0 throttles Received 0 broadcasts (0 multicasts)0 runts, 0 giants, 0 throttles0 input errors, 0 CRC, 0 frame, 0 overrun, 0 ignored0 multicast, 0 pause input0 input packets with dribble condition detected0 packets output, 0 bytes, 0 underrun0 output errors, 0 collisions, 0 interface resets0 babbles, 0 late collision, 0 deferred0 PAUSE output | ||||
| description | ||||
| Syntax | description WORD<1-32>no description | |||
| Parameter | WORD<1-32> Specify port description string. | |||
| Default | Default port description is empty. | |||
| Mode | Interface Configuration | |||
| Usage | Use “description” command to give the port a name to identify it easily.If description includes space character, please use doublequoted to wrap it. Use no form to restore description to empty string. | |||
| Example | This example shows how to modify portdescriptions. Switch(config)#interface fa1Switch(config-if)#description userportSwitch(config-if)#exitSwitch(config)#interface fa2Switch(config-if)#description “uplink port” | |||
| This example shows how to show current port description on interface fa1 and fa2Switch#show interfaces fa1-2 statusPort Name Status Vlan Duplex Speed | ||||
| Type | ||||
| fa1 userport | notconnect 1 | auto | auto | |
| Copper | ||||
| fa2 uplink port | notconnect 1 | auto | auto | |
| Copper | ||||
| duplex | ||||
| Syntax | duplex (auto | full | half) | |||
| Parameter | auto | Specify port duplex to auto negotiation. | ||
| full | Specify port duplex to force full duplex. | |||
| half | Specify port duplex to force half duplex. | |||
| Default | Default port duplex is auto. | |||
| Mode | Interface Configuration | |||
| Usage | Use “duplex” command to change port duplex configuration. | |||
| Example | This example shows how to modify port duplex configuration. Switch(config)#interface fa1Switch(config-if)#duplex fullSwitch(config-if)#exitSwitch(config)#interface fa2Switch(config-if)#duplex half | |||
| This example shows how to show current speed configuration Switch#show running-config interfaces fa1-2 interface fa1duplex full interface fa2 duplex half | ||||
| This example shows how to show current interface link speed Switch#show interfaces fa1-2 statusPort Name Status Vlan Duplex Speed Type fa1 connected 1 full a-100M Copper fa2 connected 1 half a-100M Copper | ||||
| eee | ||||
| Syntax | eee | |||
no eee
Parameter
| Default | Default eee state isdisabled. | |
| Mode | Interface Configuration | |
| Usage | Use “eee” command to make port to enable the energy efficient Ethernetfeature.Use no form of this command to disable eee.The only way to show this configuration is using “show running-config” command. | |
| Example | This example shows how to configure port fa1 and fa2 to be protectedport.Switch(config)# interface fa1Switch(config-if)# eeeThis example shows how to show current jumbo- frmae size Switch# show running-config interface fa1interface fa1eee | |
| flowcontrol | ||
| Syntax | flowcontrol (auto | off |on)no flowcontrol | |
| Parameter | auto | Automatically enables or disables flow control ontheinterface. |
| off | Disable port flow control. | |
| on | Enable port flow control. | |
| Default | Default port flow control is off. | |
| Mode | Interface Configuration | |
| Usage | Use “flowcontrol” command to change port flow control configuration.Use no form to restore flow control to default (off) configuration. | |
| Example | This example shows how to modify port duplex configuration.Switch(config)#interface fa1Switch(config-if)#flowcontrol onThis example shows how to show current flow control configurationSwitch#show interfaces fa1Hardware is Fast EthernetFull-duplex, Auto-speed, media type is Copperflow-control is on0 packets input, 0 bytes, 0 throttles Received 0broadcasts (0 multicasts)0 runts, 0 giants, 0 throttles0 input errors, 0 CRC, 0 frame, 0 overrun, 0 ignored0 multicast, 0 pause input0 input packets with dribble condition detected379 packets output, 31981 bytes, 0 underrun0 output errors, 0 collisions, 0 interface resets0 babbles, 0 late collision, 0 deferred0 PAUSE output | |
| jumbo-frame | ||
| Syntax | jumbo-frame<1518-9216> | |
| Parameter | <1518-9216> Specify the maximum frame size. | |
| Default | Default maximum frame size is 1522. | |
| Mode | Global Configuration | |
| Usage | Use “jumbo-frame” command to modify maximum frame size.The only way to show this configuration is using “show running-config” command. | |
| Example | This example shows how to modify maximum frame size on fa1 to 9216 bytes.Switch(config)#jumbo-frame9216This example shows how to show current jumbo-frmae sizeSwitch#show running-configjumbo-frame 9216 | |
| media-type | ||
| Syntax | media-type (auto-select | rj45 | sfp)no media-type | |
| Parameter | auto-select | Select media automatically. |
| rj45 | Select copper media. | |
| sfp | Select fiber media. | |
| Default | Default media type is auto. | |
| Mode | Interface Configuration | |
| Usage | Use “media-type” command to change combo port media type.Use no form of this command to restore media type to default. | |
| Example | This example shows how to modify combo port media type to copper.Switch(config)# interface gi1Switch(config-if)# media-type rj45 | |
| protected | ||
| Syntax | protectedno protected | |
| Default | Default protected state is no protected. | |
| Mode | Interface Configuration | |
| Usage | Use “protected” command to make port to be protected. Protected port is only allowed to communicate with unprotected port. In other words, protected port is not allowed to communicate with another protected port.Use no form to make port unprotected. | |
| Example | This example shows how to configure port fa1 and fa2 to be protected port.Switch(config)#interface range fa1-2Switch(config-if-range)#protectedThis example shows how to show current protected port state.Switch#show interfaces fa1-2 protectedPort | Protected State----+----fa1|enabled | |
fa2 | enabled
show interface
| Syntax | show interfaces IF_PORTS show interfaces IF_PORTS status show interfaces IF_PORTS potected |
| Parameter | IF_PORTS | Specify port to show. |
| Default | No default value for this command. |
| Mode | Privileged EXEC |
Usage Use "show interface" command to show detail port counters, parameters and status.
Use "show interface status" command to show brief port
status. Use "show interface protected" command to
show protected status.
| Example | This example shows how to show current countersSwitch#show interfaces fa1Hardware is Fast EthernetAuto-duplex, Auto-speed, media type is Copper flow-controlis off0 packets input, 0 bytes, 0 throttles Received 0broadcasts (0 multicasts)0 runts, 0 giants, 0 throttles0 input errors, 0 CRC, 0 frame, 0 overrun, 0 ignored0 multicast, 0 pause input0 input packets with dribble condition detected0 packets output, 0 bytes, 0 underrun0 output errors, 0 collisions, 0 interface resets0 babbles, 0 late collision, 0 deferred0 PAUSE output |
| This example shows how to show current protected port state.Switch#show interfaces fa1-2 protectedPort | Protected State----+----fa1 |enabled fa2|enabled | |
| This example shows how to show current port statusSwitch#show interfaces fa1-2 statusPort Name Status Vlan Duplex Speed Typefa1 connected 1 full a-100M Copper |
speed
| Syntax | speed (10 | 100 | 1000) |
| speed auto [(10 | 100 | 1000 | 10/100)] |
speed nonegtiate no speed nonegtiate
| Parameter 10 | Specify port speed to force 10Mbits/s or auto with 10Mbits/s ability. | |
| 100 | Specify port speed to force 100Mbits/s or auto with 100Mbits/s ability. | |
| 1000 | Specify port speed to force 1000Mbits/s or auto with 1000Mbits/s ability. | |
| 10/100 | Specify port speed to auto with 10Mbits/s and 100Mbits/s | |
Default Default port speed is auto with all available abilities.
| Mode | Interface Configuration |
Usage Use “speed” command to change port speed configuration. The speed is only able to configure to the physical maximum speed. For example, in fast Ethernet port, speed 1000 is not available.
You cannot configure the speed on the SFP module ports, but you can configure the speed to not negotiate (nonegotiate) if it is connected to a device that does not support autonegotiation.
| Example | This example shows how to modify port speed configuration.Switch(config)#interface fa1Switch(config-if)#speed 100Switch(config-if)#exitSwitch(config)#interface fa2Switch(config-if)#speed auto 10/100 |
| This example shows how to show current speed configuration Switch#show running-config interfaces fa1-2interface fa1speed 100interface fa2speed auto 10/100 | |
| This example shows how to show current interface link speedSwitch#show interfaces fa1-2statusPort Name Status Vlan Duplex Speed Type | |
| fa1 connected 1 a-full a-100M Copperfa2 connected 1 a-full a-100M Copper | |
| shutdown | |
| Syntax | shutdownno shutdown |
| Parameter | |
| Default | Default port admin state is no shutdown. |
| Mode | Interface Configuration |
| Usage | Use “shutdown” command to disable port and use “no shutdown” to enable port. If port is error disabled by some reason, use “no shutdown” command can also recovery the port manually. |
| Example | This example shows how to modify port duplex configuration. Switch(config)# interface fa1Switch(config-if)# shutdownThis example shows how to show current admin state configuration Switch# show running-config interfaces fa1interface fa1shutdownThis example shows how to show current link statusPort Name Status Vlan Duplex Speed Typefa1 disable 1 full auto Copper |
22. Port Error Disable
errdisable recovery cause
Syntax
errdisable recovery cause (all|acl|arp-inspection|bpduguard|broadcast- flood|dhcp-rate-limit|psecure-violation|selfloop|unicast-flood|unknown-multicastflood) no errdisable recovery cause (all|acl|arp-inspection|bpduguard|broadcast- flood|dhcp-rate-limit|psecure-violation|selfloop|unicast-flood|unknown- multicastflood)
| Parameter | all | Enable the auto recovery for port error disabled from all causes. |
| acl | Enable the auto recovery for port error disabled from the ACL cause. | |
| arp-inspection | Enable the auto recovery for port error disabled from the ARP inspection cause. | |
| bpduguard | Enable the auto recovery for port error disabled from the STP BPDU Guard cause. | |
| broadcast-flood | Enable the auto recovery for port error disabled from the broadcast flooding cause. | |
| dhcp-rate-limit | Enable the auto recovery for port error disabled from the DHCP rate limit cause. | |
| psecure-violation | Enable the auto recovery for port error disabled from the port security cause. | |
| selfloop | Enable the auto recovery for port error disabled from the STP self-loop cause. | |
| unicast-flood | Enable the auto recovery for port error disabled from the unicast flooding cause. | |
| unknown-multicastflood | Enable the auto recovery for port error disabled from the unknown multicast flooding cause. |
Default
Error disable recovery is disabled for all cause.
Mode
Global Configuration
Usage Ports would be disabled because of the invalid actions detected by protocols.
To enable the port error disable recovery from the specific cause, use the command errdisable recovery cause in the Global Configuration mode.
Example
The following example enables the port error disable recovery for the STP BPDU Guard and self-loop cause.
Switch(config)# errdisable recovery cause bpduguard Switch(config)# errdisable recovery cause selfloop
errdisable recovery interval
| Syntax | errdisable recovery interval seconds | |
| Parameter | seconds | The time in seconds to recover from a specific error- disable state. The vaild range is 0 to 86400 seconds, and the default value is 300 seconds. |
| Default | The default recovery time is 300 seconds. |
| Mode | Global Configuration |
| Usage | To set the recovery time of the error disabled ports, use the commanderrdisable recover interval in the Global Configuration mode. |
| Example | The following example set the aging time to 500 seconds.Switch(config)# errdisable recovery interval 60 |
| show errdisable recovery | |
| Syntax | show errdisable recovery |
| Parameter N/A | |
| Default | N/A |
| Mode | Privileged EXEC |
| Usage To show the error disable configuration and the interfaces in the error disabled state, use the command show errdisable recovery in the Privileged EXEC mode. | |
| Example | The following example shows the error disable configuration, and the interfaces in the error disabled state.Switch# show errdisable recovery ErrDisable Reason | Timer Status----+----bpduguard | enabledselfloop | enabledbroadcast-flood | disabledunknown-multicast-flood | disabled unicast-flood | disabledacl | disabledpsecure-violation | disabled dhcp-rate-limit | disabled arp-inspection |disabledTimer Interval : 60 seconds |
Interfaces that will be enabled at the next timeout:
Port | Error Disable Reason | Time Left
23. Port Security
port-security (Global)
Syntax port-security no port-security
| Parameter | None |
Default Default is disabled
| Mode | Global Configuration |
Usage The "port-security" command enables the port security functionality globally. Use the no form of this command to disable. You can verify settings by the show port-security command.
| Example | The following example shows how to enable port security switch(config)# port-securityswitch# show port-securityport-security is: Enabled |
port-security (Interface)
Syntax port-security no port-security
| Parameter | None |
Default Default is disabled
| Mode | Port Configuration |
| Usage | The “port-security” command enables the port security functionality on this port.Use the no form of this command to disableYou can verify settings by the show port-security interface command. |
| Example | The following example shows how to enable port security on interface fa1switch(config)# interface fa1switch(config-if)# port-securityswitch(config)# show port-security interfaces fa1Port | Security | CurrentAddr | Action----+----+----+----fa1 | Enabled ( 1) | 0 | Discard |
port-security address-limit
| Syntax | port-security address-limit <1-256> action (forward|discard|shutdown) no port-security address-limit | |
| Parameter | <1-256> | The learning-limit number. It specifies how many MAC addresses this port can learn. |
| forward | Forward this packet whose SMAC is new to system and exceed the learning-limit number. | |
| discard | Discard this packet whose SMAC is new to system and exceed the learning-limit number. | |
| shutdown | Shutdown this port when receives a packet whose SMAC is new to system and exceed the learning limit | |
Default The address-limit default is 1 and action is "drop".
Mode Port Configuration
Usage Use the “port-security address-limit” command to set the learning-limit number and the violation action. Use the no form of this command to restore the default settings. You can verify settings by the show port-security interface command.
| Example | The following example shows how to enable port security on port 1 and set the learning limit number to 10.switch(config)#interface fa1switch(config-if)#port-security address-limit 10 action discardswitch(config-if)#port-securityswitch(config)#show port-security interfaces fa1Port | Mode | Security | CurrentAddr | Action |
| fa1 | Dynamic | Enabled ( 10) | 0 | Discard |
show port-security
| Syntax | show port-security |
| Parameter | None |
| Default | No default value for this command. |
| Mode | Privileged EXEC |
| Usage | Use “show port-security” command to show port-security global information. |
| Example | This example shows how to show port-security configurations.Switch# show port-securityport-security is: Enabled |
show port-security interface
| Syntax | show port-security interfaceIF_PORTS | |
| Parameter | IF_PORTS | Select port to show port-security configurations. |
| Default | No default value for this command. | |
| Mode | Privileged EXEC | |
| Usage | Use “show port-security interfaces” command to show port-securityinformation of the specified port. | |
| Example | This example shows how to show port-security configurations on interface fa1.Switch#show port-security interfaces fa1Port | Security | CurrentAddr | Action----+----+----+----fa1 | Enabled ( 10) | 0 | Discard | |
24. Protocol VLAN
vlan protocol-vlan group (Global)
| Syntax | vlan protocol-vlan group <1-8> frame-type(ethernet_i|llc_other|snap_1042) protocol-valueVALUEno vlan protocol-vlan group <1-8> | |
| Parameter | <1-8> | Specify protocol vlan group to configure |
| (ethernet_i|llc_other|snap_1042) | Specify protocol based frame type | |
| VALUE | Specify protocol value to configure | |
| Default | no protocol vlan group are configured | |
| Mode | Global Configuration | |
| Usage | Use the vlan protocol-vlan group Global Configuration mode command to add protocol vlan group with spefied proto type and value.Use the no form of this command to remove protocol vlan group setting. You can verify your setting by entering the show vlan proto-vlan Privileged EXEC command | |
Example
| The following example show how to configure protocol vlan group: Switch(config)# vlan protocol-vlan group 1 frame-type ethernet_ii protocol-value 0x806Switch(config)# vlan protocol-vlan group 2 frame-type llc_other protocol- value 0x800Switch# show vlan protocol-vlanGroup ID | Status | Type | value | |||
| 1 | Enabled | Ethernet | 0x0806 |
| 2 | Enabled | LLC other | 0x0800 |
| 3 | Disabled | -- | -- |
| 4 | Disabled | -- | -- |
| 5 | Disabled | -- | -- |
| 6 | Disabled | -- | -- |
| 7 | Disabled | -- | -- |
| 8 | Disabled | -- | -- |
vlan protocol-vlan group (Interface)
| Syntax | vlan protocol-vlan group <1-8> vlan <1-4094>no vlan protocol-vlan group <1-8> | |
| Parameter | <1-8> | Specify protocol vlan group to binding |
| <1-4094> | Specifies the Proto VLAN ID to configure. | |
| Default | In default all group are not binding to any interface. | |
| Mode | Interface configuration | |
| Usage | Use thevlan protocol-vlan binding Interface Configuration mode command to binding protocol VLAN Group on specified interfaces, Use theno form of this command to cancel protocol VLAN Group Binding. You can verify your setting by entering theshow vlan protocol-vlan interfaces IF_PORTS Privileged EXEC command | |
| Example | The following example how to configure Protocol VLAN function on specified interfaces..Switch(config)#interface fa1Switch(config-if)#vlan protocol-vlan group 1vlan 2 Switch(config-if)#vlan protocol-vlan group 2 vlan 3 Switch#show vlan protocol-vlan interfaces fa1Portfa1 :Group1Status :Enabled VLANID : 2Group 2Status :Enabled VLANID : 3Group 3Status :Disabled Group 4Status :Disabled Group 5Status :Disabled Group 6Status :Disabled Group 7Status :Disabled Group 8Status : Disabled | |
show vlan protocol-vlan
| Syntax | show vlan protocol-vlan [group <1-8>] | |
| Parameter | <1-8> | Specify protocol vlan group to display |
| Default | N/A | |
| Mode | Privileged EXEC | |
| Usage | Use the show vlan proto-vlan command in EXEC mode to displayProtoVLAN group configuration | |
| Example | The following example how to display Proto VLAN group configuration Switch# show vlan protocol-vlanGroup ID | Status | Type | value----+----+----+----+----+----+----+----+----+----+----+----+----+----+----+----+----+----+----+----+----+----+----+----+----+----+----+----+----+----+----+----+----+----+----+----+----+----+----+----+----+----+----+----+----+----+----+----+----+----+---- +----+----+----+----+----+----+----+----+----+----+----+----+----+----+----+----+----+----+----+----+----+----+----+----+----+----+----+----+----+----+----+----+----+----+----+----+----+----+----+----+----+----+----+----+----+----+----+----+----+----+ 1 | Enabled | Ethernet | 0x0806 2 | Enabled | LLC other | 0x0800 3 | Disabled | -- | -- 4 | Disabled | -- | -- 5 | Disabled | -- | -- 6 | Disabled | -- | -- 7 | Disabled | -- | -- 8 | Disabled | -- | -- | |
show vlan protocol-vlan interfaces
| Syntax | show vlan protocol-vlan interfacesIF_PORTS | |
| Parameter | IF_PORTS | Specify interfaces protocol vlan to display |
| Default | N/A | |
| Mode | Privileged EXEC | |
| Usage | Use the show vlan protocol-vlan interface command in EXEC mode to display the Protocol VLAN interfaces setting | |
| Example | The following example shows how to display the Protocol VLAN interfaces settingSwitch# show vlan protocol-vlan interfaces fa1Portfa1 :Group1Status :Enabled VLANID : 2Group 2Status :Enabled VLANID : 3Group 3Status :Disabled Group 4Status :Disabled Group 5Status :Disabled Group 6Status :Disabled Group 7Status :Disabled Group 8Status : Disabled | |
25. QoS
qos
Syntax qos
no qos
Default
Default qos is disabled.
Mode
Global Configuration
Usage
Use “qos” command to enable quality of service which according to basic trust type to assign queue for packets, and packets with higher priority are able to send first.
Use no form of this command to disable quality of service.
| Example | This example shows how to change qos to basic mode.Switch(config)# qos basic | |
| This example shows how to check current qos mode.Switch# show qosQoS Mode: basicBasic trust: cos | ||
| qos cos | ||
| Syntax | qos cos <0-7> | |
| Parameter | cos <0-7> Specify the CoS value for the interface. | |
| Default | Default CoS value for interface is 0. | |
| Mode | Interface Configuration | |
| Usage Sometimes, there is no qos information in the packets, such as CoS, DSCP, IP Precedence. But we still can give the priority for packets by configuring the interface default cos value. If there is no qos information in the packets, the device will use this default cos value and find the cos-queue map to get the final destination queue.Use “qos cos” command to assign port default cos value. | ||
| Example | This example shows how to configure default cos value 7 on interface fa1.Switch(config)# interface GigabitEthernet 1Switch(config-if)# qos cos 7Switch(config-if)# endSwitch# show qos interface GigabitEthernet 1Port | CoS | Trust State | Remark Cos | Remark DSCP | Remark IP Precgi1 | 7 enabled disabled disabled disabled | |
| qos map | ||
| Syntax | qos map (cos-queue | dscp-queue | precedence-queue)SEQUENCE to <1-8>qos map (queue-cos | queue-precedence) SEQUENCE to <0-7>qos map queue-dscp SEQUENCE to <0-63> | |
| Parameter | cos-queue Configure or show CoS to queue map | |
| Managed Switch Software | dscp-queue Configure or show DSCP to queue map | |
| precedence-queue Configure or show IP Precedence to queue map. | ||
| queue-cos Configure or show queue to CoS map | ||
| queue-dscp | Configure or show queue to DSCP map |
| queue-precedence | Configure or show queue to IP Precedence map |
| SEQUENCE | Specify the cos, dscp, precedence or queue with one or multiple values. |
| <1-8> | Specify th queue id |
| <0-7> | Specify the cos or precedence values |
| <0-63> | Specify the dscp values |
Default The default values of cos-queue are showing in the following table.
| CoS | Queue ID |
| 0 | 2 |
| 1 | 1 |
| 2 | 3 |
| 3 | 4 |
| 4 | 5 |
| 5 | 6 |
| 6 | 7 |
| 7 | 8 |
The default values of dscp-queue are showing in the following table.
| DSCP | Queue ID |
| 0~7 | 1 |
| 8~15 | 2 |
| 16~23 | 3 |
| 24~31 | 4 |
| 32~39 | 5 |
| 40~47 | 6 |
| 48~55 | 7 |
| 56~63 | 8 |
The default values of ip precedence are showing in the following table.
| IP Precedence | Queue ID |
| 0 | 1 |
| 1 | 2 |
| 2 | 3 |
| 3 | 4 |
| 4 | 5 |
| 5 | 6 |
| 6 | 7 |
| 7 | 8 |
The default values of queue-cos are showing in the following table.
| Queue ID | CoS |
| 1 | 1 |
| 2 | 0 |
| 3 | 2 |
| 4 | 3 |
Command Line Interface User Guide
| 5 | 4 |
| 6 | 5 |
| 7 | 6 |
| 8 | 7 |
The default values of queue-dscp are showing in the following table.
| Queue ID | DSCP |
| 1 | 0 |
| 2 | 8 |
| 3 | 16 |
| 4 | 24 |
| 5 | 32 |
| 6 | 40 |
| 7 | 48 |
| 8 | 56 |
The default values of queue-precedence are showing in the following table.
| Queue ID | IPPrecedence |
| 1 | 0 |
| 2 | 1 |
| 3 | 2 |
| 4 | 3 |
| 5 | 4 |
| 6 | 5 |
| 7 | 6 |
| 8 | 7 |
Mode
Global Configuration
Usage
According to different trust type, packets will be assigned to different queue based on the specific qos map. For example, if the trust type is trust cos, the device will get the cos value in packet and reference the cos-queue mapping to assign the correct queue.
The queue to cos, dscp or precedence maps are used by remarking function. If the port remarking feature is enabled, the remarking function will reference these 3 tables to remark packets.
Example
This example shows how to map cos 6 and 7 to queue
- Switch(config)# qos map cos-queue 6 7 to 1 Switch# show qos map cos-queue
CoS to Queue mappings
COS 0 1 2 3 4 5 6 7
Queue 2 1 3 4 5 6 1 1
This example shows how to map queue 4 and 5 to
cos 7. Switch(config)# qos map queue-cos 4 5 to 7
Switch# show qos map queue-cos
Queue to CoS mappings
| Queue 1 2 3 4 5 6 7 8---- CoS 1 0 2 7 7 5 6 7 | ||
| qos queue | ||
| Syntax | qos queue strict-priority-num <0-8>qos queue weight SEQUENCEShow qos queueing | |
| Parameter | strict-priority- num<0-8> | Specify the strict priority queue number |
| weightSEQUENCE | Specify the non-strict priority queue weight value.Thevalid queue weight value is from 1 to 127. | |
Default Default strict priority queue number is 8, it means all queues are strict priority queue.
The default queue weight for each queue is shown in following table.
| Queue ID | Queue Weight |
| 1 | 1 |
| 2 | 2 |
| 3 | 3 |
| 4 | 4 |
| 5 | 5 |
| 6 | 9 |
| 7 | 13 |
| 8 | 15 |
Mode
Global Configuration
Usage
The device support total 8 queues for QoS queueing. It is able to set the queue to be strict priority queue or weighted queue to prevent starvation. The queue with higher id value has higher priority. First, you need to decide how many strict priority queue you need. The strict priority queue will always occupy the higher priority queue. For example, if you specify the strict priority number to be 2, then the queue 7 and 8 will be the strict priority queues and the others are weighted queues.
After you setup the number of strict priority queue, you need to setup the weight for the weighted queues by using "qos queue weight" command. And the bandwidth will shared by the weight you configured between these weighted queues.
| Example | This example shows how to setup device with 3 strict priority queues and give other weighted queues with weight 5, 10, 15, 20, 25.Switch(config)# qos queue strict-priority-num 3Switch(config)# qos queue weight 5 10 15 20 25 Switch#show qos queueingqid-weights Ef - Priority1 - 5 dis- N/A2 - 10 dis- N/A3 - 15 dis- N/A4 - 20 dis- N/A5 - 25 dis- N/A6 - N/A ena- 67 - N/A ena- 78 - N/A ena- 8 |
qos remark
| Syntax | qos remark (cos | dscp | precedence) | |
| no qos remark (cos | dscp | precedence) | ||
| Parameter | cos | Enable/Disable cos remarking. |
| dscp | Enable/Disable dscp remarking. | |
| precedence | Enable/Disable precedence remarking. | |
Default Default CoS remarking is disabled. Default DSCP remarking is disabled. Default IP Precedence remarking is disabled.
| Mode | Interface Configuration | |||||
| Usage QoS remarking feature allow you to change priority information in packets based on egress queue. For example, you want all packets egress from interface fa1 queue 1 to remark the cos value to be 5 for next tier of device, you can enable the cos remarking feature on fa1 and configure the queue-cos map for queue 1 map to cos 5.Use “qos remark” command to enable remarking feature on specific type. And use “no qow remark” command to disable it. | ||||||
| Example | This example shows how to enable remarking features on interface fa1.Switch(config)#interface GigabitEthernet 1Switch(config-if)#qos remark cos Switch(config-if)#qos remark dscp Switch(config-if)#qos remark precedenceSwitch(config-if)#endSwitch#show qos interface GigabitEthernet 1Port | CoS | Trust State | Remark Cos | Remark DSCP | Remark IP Precgi1 | 0 | enabled | enabled | enabled | enabled | | |||||
qos trust
| Syntax | qos trust (cos | cos-dscp | dscp | precedence) | |
| Parameter | cos | Specify the device to trust CoS |
| cos-dscp | Specify the device to trust DSCP for IP packets, and trust CoS for non-IP packets. | |
| dscp | Specify the device to trust DSCP | |
| precedence | Specify the device to trust IP Precedence | |
| Default | Default QoS trust type is cos. | |
| Mode | Global Configuration | |
| Usage In QoS basic mode, there are 4 trust types for device to judge the appropriate queue of the packets. This command is able to switch between these trust types.CoS:IEEE 802.1p defined 3bits priority value in vlan tag. Trust this value in packets and assign queue according to cos-queue map.DSCP:IETF RFC2474 defined 6bits priority value in IP packet (highest 6bits in ToS field). Trust this value in packets and assign queue according to dscp-queue map.IP Precedence:The highest 3bits priority value in IP packet ToS field. Trust this value in packets and assign queue according to precedence-queue map.CoS-DSCP:Trust DSCP for IP packets and assign queue according to dscp-queue map. Trust CoS for non-IP packets and assign queue according to cos-queue map. | ||
| Example | This example shows how to change qos basic mode trust types.Switch(config)# qos trust cos Switch(config)#qos trust cos-dscp Switch(config)# qos trustdscp Switch(config)# qos trust precedenceThis example shows how to check current qos trust type.Switch# show qosQoS Mode: basicBasic trust: ip-precedence | |
qos trust (Interface)
| Syntax | qos trustno qos trust |
| Parameter | |
| Default | Default interface qos trust state is enabled. |
| Mode | Interface Configuration |
| Usage | After QoS function is enabled in basic mode, the device also support per interface enable/disable the qos function. If the trust state on interface is enabled, all ingress packets of this interface will remap according to the trust type and the qos maps. Otherwise, all ingress packets will assign to queue 1.Use “qos trust” to enable trust state on interface and use “no qos trust” to disable trust state on interface. |
| Example | This example shows how to disable qos trust state on interface fa1. Switch(config)#interface GigabitEthernet 1Switch(config-if)#no qos trustSwitch(config-if)#endSwitch#show qos interface GigabitEthernet 1Port | CoS | Trust State | Remark Cos | Remark DSCP | Remark IP Precgi1 | 0 | disabled | disabled | disabled | disabled | |
| show qos | |
| Syntax | show qos |
| Parameter | |
| Default | No default value for this command. |
| Mode | Privileged EXEC |
| Usage | Use “show qos” command to show qos state and trust type. |
| Example | This example shows how to check current qos mode.Switch# show qosQoS Mode: basicBasic trust: cos |
show qos interface
| Syntax | show qos interfaceIF_PORTS | |
| Parameter | IF_PORTS | Select port to show qos configurations. |
| Default | No default value for this command. | |
| Mode | Privileged EXEC | |
| Usage | Use “show qos interfaces” command to show port default cos ,remarking state and remarking type state informations. | |
| Example | This example shows how to show qos configurations on interface fa1.Switch# show qos interface GigabitEthernet 1Port | CoS | Trust State | Remark Cos | Remark DSCP | Remark IP Precgi1 | 7 | enabled | disabled | disabled | disabled | | |
show qos map
| Syntax | show qos map [(cos-queue | dscp-queue | precedence-queue | queue-cos | queue-dscp | queue-precedence)] |
| Parameter cos-queue | Show CoS to queue map. |
| dscp-queue Show DSCP to queue map. | |
| precedence-queue Show IP Precedence to queue map. queue-cos Show queue to CoS map. | |
| queue-dscp Show queue to DSCP map. | |
| queue-precedence Show queue to IP Precedence map. | |
| Default | No default value for this command. |
| Mode | Privileged EXEC |
Usage
Use "show qos map" command to show all kinds of mapping for
qos
remapping and remarking features.
Example
This example shows how to show all qos maps.
Switch(config)# show qos map
CoS to Queue mappings
COS 0 1 2 3 4 5 6 7
Queue 2 1 3 4 5 6 7 8
DSCP to Queue mappings
d1:d2 0 1 2 3 4 5 6 7 8 9
0: 1 1 1 1 1
1 1 1 2 2
1: 2 2 2 2 2 2 3 3 3 3
2: 3 3 3 3 4 4 4 4 4 4
3: 4 4 5 5 5 5 5 5 5 5
4: 6 6 6 6 6 6 6 6 7 7
5: 7 7 7 7 7 7 8 8 8 8
6: 8 8 8 8
IP Precedence to Queue mappings
IP Precedence 0 1 2 3 4 5 6 7
Queue 1 2 3 4 5 6 7 8
Queue to CoS mappings
Queue 1 2 3 4 5 6 7 8
CoS 1 0 2 3
4 5 6 7
Queue to DSCP mappings
Queue 1 2 3 4 5 6 7 8
DSCP 0 8
16 24 32 40 48 56
Queue to IP Precedence mappings
Queue 1 2 3 4 5 6 7 8
ipprec 0 1 2 3 4 5 6 7
show qos queueing
Syntax
show qos
queueing
Parameter
Default
No default value for this
command.
Mode
Privileged EXEC
Usage
Use "show qos queueing" command to show qos queueing
information.
| Example | This example shows how to check current qos queueing information. Switch# show qos queueingqid-weights Ef - Priority1 - 3 dis- N/A2 - 5 dis- N/A3 - N/A ena- 34 - N/A ena- 45 - N/A ena- 56 - N/A ena- 67 - N/A ena- 78 - N/A ena- 8 |
26. Rate Limit
rate limit egress
| Syntax | rate-limit egress <16-1000000>no rate-limit egress | |
| Parameter | <16-1000000> | Specify the committed information rate. |
| Default | Default rate limit is disabled. | |
| Mode | Interface configuration | |
| Usage | Use the “rate-limit egress” command to configure the egress port shaper. Use the no form of this command to disable the shaper.You can verify your setting by entering the show running-config interfaces command. | |
| Example | The following example show how to configure ingress port rate limit and egress port shaper.Switch(config)# interfaces gi1 Switch(config-if)# rate-limit egress 2048 Switch# show running-config interfaces gi1 interface gi1 rate-limit egress 2048 | |
rate limit egress queue
| Syntax | rate-limit egress queue <1-8> <16-1000000> no rate-limit egress queue <1-8> | |
| Parameter | <1-8> | Specify the egress shaper queue number |
| <16-1000000> | Specify the queue rate. | |
| Default | Default queue rate limit is disabled. | |
| Mode | Interface configuration | |
| Usage | Use the “rate-limit egress queue” command to configure the egress queue shaper.Use the no form of this command to disable the queue shaper.You can verify your setting by entering the show running-config interfaces command. | |
| Example | The following example show how to configure ingress port rate limit and egress port shaper.Switch(config)# interfaces gi1Switch(config-if)# rate-limit egress queue 3 2048 Switch# show running-config interfaces gi1 interface gi1 rate-limit egress queue 3 2048 | |
rate limit ingress
| Syntax | rate-limit ingress <16-1000000>no rate-limit ingress | |
| Parameter | <16-1000000> | Specify the ingress limit rate |
| <1-8> | Specify the egress shaper queue number | |
| Default | Rate limiting is disabled. | |
| Mode | Interface configuration | |
| Usage | Use the “rate-limit ingress” command to limit the incoming traffic rate on a | |
Command Line Interface User Guide
port.
| Use the no form of this command to disable the rate limit. | |
| You can verify your setting by entering the show running-config interfaces command | |
| Example | The following example show how to configure ingress port rate limit. |
| Switch(config)# interfaces gi1 Switch(config-if)# rate-limit ingress 128 Switch# show running-config interfaces gi1 interface gi1 rate-limit ingress 128 |
27. RMON
rmon event
| Syntax | rmon event <1-65535> [log] [trap COMMUNITY] [description DESCRIPTION] [owner NAME]no rmon event <1-65535> | |
| Parameter | <1-65535> | Specify event index to create or modify. |
| [log] | (Optional)Specify to show syslog. | |
| [trap COMMUNITY] | (Optional)Specify SNMP community to show SNMP trap. | |
| [description DESCRIPTION] | (Optional)Specify description of event | |
| [owner NAME] | (Optional)Specify owner of event. | |
| Default | No default is defined. | |
| Mode | Global Configuration | |
| Usage | Use the rmon event command to add or modify a RMON evnet entry. Use the no form of this command to delete.You can verify settings by the show rmon event command. | |
| Example | The example shows how to add RMON event entry with log and trap action and then modify it action to log only.switch(config)# rmon event 1 log trap public description test owner adminswitch(config)# show rmon event 1 | |
Rmon Event Index 1
Rmon Event Type : Log and
Trap Rmon Event Community :
public Rmon Event
Description : test
Rmon Event Last Sent :
Rmon Event Owner : admin
switch(config)# rmon event 1 log description test owner admin
switch(config)# show rmon event 1
Rmon Event Index 1
Rmon Event Type : Log
Rmon Event Community :
public Rmon Event
Description : test Rmon
Event Last Sent :
Rmon Event Owner : admin
rmon alarm
Syntax
rmon alarm <1-65535> interface IF_PORT (drop-events|octets|pkts|broadcast-pkts|multicast-pkts|crc-align-errors|undersize-pkts|oversize-pkts|fragments|jabbers|collisions|pkts64octets|pkts65to127octets|pkts128to255octets|pkts256to511octets|pkts512to1023octets|pkts1024to1518octets) <1-2147483647> (absolute|delta) rising <0-2147483647> <0-65535> falling <0-2147483647> <0-65535> startup (rising|rising-falling|falling) [owner NAME] no rmon alarm <1-65535>
| Parameter | <1-65535> | Specify alarm index to create or modify |
| IF_PORT | Specify the interface to sample | |
| (variable) | Specify a mib object to sample | |
| <1-2147483647> | Specify the time in seconds that the alarm monitors the MIB variable. | |
| (absolute|delta) | Specify absolute to compare sample counter absolutely. Specify delta to compare delta counter between samples | |
| <0-2147483647> | Specify a number which the alarm trigger rising event | |
| <0-65535> | Specify event index when the rising threshold exceeds. | |
| <0-2147483647> | Specify a number which the alarm trigger falling event | |
| <0-65535> | Specify event index when the falling threshold exceeds. | |
| (rising|rising -falling|fallin | Specify only to how rising or falling startup event. Or show either rising or falling startup event. |
g)
[owner NAME]
(Optional) Specify owner of alarm.
| Default | No default is defined. | |
| Mode | Global Configuration | |
| Usage | Use the rmon alarm command to add or modify a RMON alarm entry.Before add alarm entry, at least one event entry mustbe added. Use the no form of this command todelete.You can verify settings by the show rmon alarm command. | |
| Example | The example shows how to add RMON alarm entry that sampleinterface fa1 packets delta count every 300 seconds. Trigger eventindex 1 if over than rising threshold 10000, trigger event index 2 iflower than falling threshold.switch(config)# rmon event 1 logswitch(config)# rmon event 2 logSwitch(config)# rmon alarm 1 interface gi1 pkts 300 delta rising10000 1 falling 100 1 startup rising-falling owner adminRmon Alarm Index 1Rmon Alarm Sample Interval 300Rmon Alarm Sample Interface :gi1 Rmon Alarm SampleVariable : Pkts Rmon AlarmSample Type :deltaRmon Alarm Type : Rising orFalling Rmon Alarm Rising Threshold :10000 Rmon Alarm Rising Event 1Rmon Alarm Falling Threshold100Rmon Alarm Falling Event 1Rmon Alarm Owner : admin | |
| rmon history | ||
| Syntax | rmon history <1-65535> interface IF_PORT [buckets <1-65535>][interval <1-3600>] [owner NAME]no rmon history <1-65535> | |
| Parameter | <1-65535> | Specify history index to create or modify. |
| IF_PORT | Specify the interface to sample | |
| [bucket <1-65535>] | (Optional) Specify the maximum number of buckets. | |
| [interval <>1-3600] | (Optional) Specify time interval for each sample | |
[owner NAME] (Optional)Specify owner of history
| Default | No default is defined. |
| Mode | Global Configuration |
| Usage | Use the rmon history command to add or modify a RMON history entry. Use the no form of this command to delete.You can verify settings by the show rmon history command. |
| Example | The example shows how to add RMON history entry that monitor interface gi1 every 60 seconds and then modify it to monitor every 30 seconds.switch(config)# rmon history 1 interface gi1 interval 60 owner admin switch(config)# show rmon history 1Rmon History Index 1Rmon Collection Interface:gi1 Rmon History Bucket50Rmon history Interval 60Rmon History Owner : adminswitch(config)# rmon history 1 interface gi1 interval 30 owner admin switch(config)# show rmon history 1Rmon History Index 1Rmon Collection Interface:gi1 Rmon History Bucket50Rmon history Interval 30Rmon History Owner : admin |
clear rmon interfaces statistics
| Syntax | clear rmon interfaces IF_PORTS statistics |
| Parameter | IF_PORTS specifies ports to clear |
| Default | No default is defined |
| Mode | Privileged EXEC |
Usage
Use the clear rmon interfaces statistics command to clear RMON etherStat statistics those are recorded on interface.
You can verify results by the show rmon interface statistics command.
| Example | The example shows how to clear RMON etherStat statistics on interface gi1. |
| switch# clear rmon interfaces gi1 statistics | |
| switch# show rmon interfaces gi1 statistics | |
| === Port gi1 ====== | |
| etherStatsDropEvents 0 | |
| etherStatsOctets 0 | |
| etherStatsPkts 0 | |
| etherStatsBroadcastPkts 0 | |
| etherStatsMulticastPkts 0 | |
| etherStatsCRCAlignErrors 0 | |
| etherStatsUnderSizePkts 0 | |
| etherStatsOverSizePkts 0 | |
| etherStatsFragments 0 | |
| etherStatsJabbers 0 | |
| etherStatsCollisions 0 | |
| etherStatsPkts64Octets 0 | |
| etherStatsPkts65to127Octets 0 | |
| etherStatsPkts128to255Octets 0 | |
| etherStatsPkts256to511Octets 0 | |
| etherStatsPkts512to1023Octets 0 | |
| etherStatsPkts1024to1518Octets 0 |
show rmon interfaces statistics
| Syntax | show rmon interfaces IF_PORTs statistics | |
| Parameter | IF_PORTS specifies ports to show | |
| Default | No default is defined | |
| Mode | Privileged EXEC | |
| Usage | Use the show rmon interfaces statistics command to show RMON etherStat statistics of interface. | |
| Example | The example shows how to show RMON etherStat statistics of interface gi1.switch(config)# show rmon interfaces gi1 statistics====== Port gi1 ======etherStatsDropEvents 0 | |
etherStatsOctets : 81882
| etherStatsPkts 578etherStatsBroadcastPkts 10etherStatsMulticastPkts 0etherStatsCRCAignErrors 0etherStatsUnderSizePkts 0etherStatsOverSizePkts 0etherStatsFragments 0etherStatsJabbers 0etherStatsCollisions 0etherStatsPkts64Octets 355etherStatsPkts65to127Octets 126etherStatsPkts128to255Octets 0etherStatsPkts256to511Octets42etherStatsPkts512to1023Octets55etherStatsPkts1024to1518Octets 0 |
show rmon event
| Syntax | show rmon event (<1-65535> | all) | |
| Parameter | <1-65535> | specifies event index to show |
| all | Show all existed event | |
| Default | No default is defined | |
| Mode | Privileged EXEC | |
| Usage | Use the show rmon event command to show existed RMON event entry. | |
| Example | The example shows how to show rmon event entry. | |
| switch(config)# rmon event 1 log trap public description test owner admin | ||
| switch(config)# show rmon event 1 | ||
| Rmon Event Index 1 | ||
| Rmon Event Type : Log and Trap Rmon Event Community : public Rmon Event Description : test | ||
| Rmon Event Last Sent : | ||
| Rmon Event Owner : admin | ||
show rmon event log
| Syntax | show rmon event <1-65535>log | |
| Parameter | <1-65535> | specifies event index to show event log |
| Default | No entry and log is exist | |
| Mode | Privileged EXEC | |
| Usage | Use the show rmon event log command to show log triggered by RMON alarm. | |
| Example | The example shows how to show rmon event log.switch(config)# show rmon event 1 log=Index 1Alarm Index 1Action : Startup FallingTime : (32918334) 3 days, 19:26:23.34Description : fa1.Pkts=0 <= 100 | |
show rmon alarm
| Syntax | show rmon alarm (<1-65535> | all) | |
| Parameter | <1-65535> | specifies alarm index to show |
| all | Show all existed alarm | |
| Default | No alarm is defined | |
| Mode | Privileged EXEC | |
| Usage | Use the show rmon alarm command to show existed RMON alarm entry. | |
| Example | The example shows how to show rmon alarm entry. | |
| Switch(config)# rmon alarm 1 interface gi1 pkts 300 delta rising 10000 1 falling 100 1 startup rising-falling owner admin | ||
| Rmon Alarm Index 1 | ||
| Rmon Alarm Sample Interval 300 | ||
| Rmon Alarm Sample Interface :gi1 Rmon Alarm Sample | ||
| Variable : Pkts Rmon Alarm | ||
| Sample Type :delta | ||
| Rmon Alarm Type : Rising or | ||
| Falling Rmon Alarm Rising Threshold :10000 Rmon Alarm Rising Event 1 | ||
| Rmon Alarm Falling Threshold100 | ||
| Rmon Alarm Falling Event 1 | ||
| Rmon Alarm Owner : admin | ||
show rmon history
| Syntax | show rmon history (<1-65535> | all) | |
| Parameter | <1-65535> | specifies history index to show |
| all | Show all existed history | |
| Default | No history is defined | |
| Mode | Privileged EXEC | |
| Usage | Use the show rmon history command to show existed RMON history entry. | |
| Example | The example shows how to show RMON history entry. | |
| switch(config)# rmon history 1 interface gi1 interval 30 owner admin switch(config)# show rmon history 1Rmon History Index 1Rmon Collection Interface:gi1 Rmon History Bucket50Rmon history Interval 30Rmon History Owner : admin | ||
show rmon history statistic
| Syntax | show rmon history <1-65535> statistic |
| Parameter | <1-65535> specifies history index to show history statistic |
| Default | No history is defined |
| Mode | Privileged EXEC |
| Usage | Use the show rmon history statistic command to show statistics that are recorded by RMON history. |
| Example | The example shows how to show RMON history statistics switch(config)# show rmon history 1 statistics = Sample Index 2 Interval Start : (32940466) 3 days, 19:30:04.66 DropEvents 0 Octets : 117226 Pkts 763 BroadcastPkts 9 MulticastPkts 0 CRCAignErrors 0 UnderSizePkts 0 OverSizePkts 0 Fragments 0 Jabbers 0 Collisions 0 Utilization 1 = Sample Index 1 Interval Start : (32939462) 3 days, 19:29:54.62 DropEvents 0 Octets 220 Pkts 3 BroadcastPkts 1 MulticastPkts 0 CRCAignErrors 0 UnderSizePkts 0 |
OverSizePkts 0
Fragments 0
| Jabbers : 0Collisions : 0Utilization : 0 | |
| 28. SNMPshow snmp | |
| Syntax | show snmp |
| Parameter N/A | |
| Default | N/A |
| Mode | Privileged EXEC |
| Usage | To show the status of Simple Network Management Protocol (SNMP), use the command show snmp in the Privileged EXEC mode. |
| Example | The following example shows the SNMP status.Switch# show snmpSNMP is disabled. |
show snmp community
| Syntax | show snmp community |
| Parameter N/A | |
| Default | N/A |
| Mode | Privileged EXEC |
| Usage | To show the configuration of snmp communities, use the command show snmp community in the Privileged EXEC mode. |
| Example | The following example shows the SNMP communities configuration. |
| Switch# show snmp communityCommunity Name Group Name ViewAccess---- private allropublic allrwTotal Entries: 2 |
show snmp engineid
| Syntax | show snmp engineid |
| Parameter N/A | |
| Default | N/A |
| Mode | Privileged EXEC |
| Usage | To show the SNMPv3 engine IDs defined on the switch, use the commandshow snmp engineid in the Privileged EXEC mode. |
| Example | The following example shows the SNMP engind id information.Switch# show snmp engineidLocal SNMPV3 Engine id: 00036d001122IP address Remote SNMP engineID---- 192.168.1.11 00036D10000ATotal Entries: 1 |
show snmp group
| Syntax | show snmp group |
| Parameter | N/A |
| Default | N/A |
| Mode | Privileged EXEC |
| Usage | To show the SNMP group configuration on the switch, use the commandshow snmp group in the Privileged EXEC mode. |
| Example | The following example shows the SNMP group configuration.Switch# show snmp groupGroup Name Model Level ReadViewWriteView Not--------private v2c noauth allall ---v3 v3 auth allall allTotal Entries: 2 |
show snmp host
| Syntax | show snmp host | |||
| Parameter N/A | ||||
| Default | N/A | |||
| Mode | Privileged EXEC | |||
| Usage | To show the SNMP trap notification recipients defined on the switch, use the command show snmp host in the Privileged EXEC mode. | |||
| Example | The following example shows the configuration of SNMP notification recipients on the switch. | |||
| Switch# show snmp host | ||||
| Server | Community Name | Notification Version | Notification Type | |
| 192.168.1.11 | private | v1 | trap | |
| Total Entries: 1 | ||||
show snmp trap
| Syntax | show snmp trap |
| Parameter N/A | |
| Default | N/A |
| Mode | Privileged EXEC |
| Usage | To show the status of SNMP traps on the switch, use the command show snmp trap in the Privileged EXEC mode. |
| Example | The following example shows the status of SNMP traps.Switch# show snmp trapSNMP auth failed trap : Enable SNMPlinkUpDown trap : Enable SNMP cold-start trap : EnableSNMP warm-start trap : Enable |
show snmp view
| Syntax | show snmp view |
| Parameter N/A | |
| Default | N/A |
| Mode | Privileged EXEC |
| Usage | To show the SNMP view defined on the switch, use the command show snmp view in the Privileged EXEC mode. |
| Example | The following example shows the configuration of SNMP view. |
| Switch# s how snmp viewView Name Subtree OIDOID Mask View Type | |
| ---- ---- ---- | |
| all .1 | |
| all included | |
| private .1.3.3.1 | |
| all included | |
| Total Entries: 2 |
show snmp user
| Syntax | show snmp user |
| Parameter N/A | |
| Default | N/A |
| Mode | Privileged EXEC |
| Usage | To show the SNMP users defined on the switch, use the command show snmp user in the Privileged EXEC mode. |
| Example | The following example shows the configuration of SNMP user.Switch# show snmp userUsername: v3Password: *****Privilege Mode: rwAccess GroupName: v3Authentication Protocol: md5Encryption Protocol: noneAccess SecLevel: authTotal Entries: 1 |
| snmp | |
| Syntax | snmp |
| Parameter N/A | |
| Default | SNMP is disabled by default |
Mode
Global Configuration
| Usage To enable the SNMP on the switch, use the command snmp in the Global Configuration mode. Otherwise, use the no form of the command to disable to SNMP. | |
| Example | The following example enables the SNMP. |
| Switch(config)# snmp | |
| snmp community | |
| Syntax | snmp community community-name [view view-name] (ro|rw) snmp community community-name group group-name no snmp community community-name |
| Parameter | community-name The SNMP community name. Its maximum length is 20 characters. |
| view view-name Specify the SNMP view configured by the command snmp view to define the object available to the community. | |
| ro Read only access (default) | |
| rw Writable access | |
| group group-name Specify the SNMP group configured by the command snmp group to define the object available to the community. | |
| Default | No SNMP community is configured |
| Mode | Global Configuration |
| Usage | To define the SNMP community that permit access for SNMP v1 and v2, use the command snmp community in the Global Configuration mode. |
| Example | The following example defines the SNMP community named private with the default view all, and the access right is read-only. Switch(config)# snmp community private ro |
snmp engineid
| Syntax | snmp engineid(default|ENGINEID) |
| Parameter | default | Default engine ID generated on the basis of the switch MAC address. |
| ENGINEID | Specify SNMP engine ID. The engine ID is the 10 to 64 hexadecimal characters, and the hexadecimal number must be divided by 2. | |
| Default | The default SNMP engine ID on the switch is based on switch MAC address. | |
| Mode | Global Configuration | |
| Usage | To define the SNMP engine on the switch, use the command snmp engineid in the Global Configuration mode. | |
| Example | The following example configure the switch SNMP engine IDSwitch(config)# snmp engineid 00036D001122 | |
snmp engineid rmote
| Syntax | snmp engineid remote (ip-addr|ipv6-addr) ENGINEIDno snmp engineid remote (ip-addr|ipv6-addr) | |
| Parameter | ENGINEID | Specify SNMP engine ID. The engine ID is a 10 to 64 hexadecimal characters, and the hexadecimal number must be divided by 2. |
| ip-addr | IP address of the remote host | |
| ipv6-addr | IPv6 address of the remote host | |
| Default | N/A | |
| Mode | Global Configuration | |
Usage To define the remote host for SNMP engine, use the command snmp engineid remote in the Global Configuration mode; and use the no form of the command to delete the remote host from the SNMP engine.
Example The following example adds the remote 192.168.1.11 into SNMP engine Switch(config)# snmp engineid remote 192.168.1.11 00036D10000A
Command Line Interface User Guide
snmp group
| Syntax | snmp group group-name (1|2c|3) (noauth|auth|priv) read-view write-view write-view [notify-view notify-view] no snmp group group-name security-mode version (1|2c|3) | |
| Parameter | group-name | Specify SNMP group name, and the maximum length is 30 characters. |
| (1|2c|3) Specify the SNMP version. | ||
| noauth Specify that no packet authentication is performed. | ||
| auth Specify that no packet authentication without entryption is performed. It is applicable only to the SNMPv3 security mode. | ||
| priv Specify that no packet authentication with entryption is performed. It is applicable only to the SNMPv3 security mode. | ||
| read-view read- view | Set the view name that enables configuring the agent, and its maximum length is 30 | |
| write-view write- view | characters. Set the view name that enables viewing | |
| notify-view notify- view | only, and its maximum length is 30 characters. Sets the view name that sends only traps with contents that is included in SNMP view selected for notification. The maximum length is 30 characters. | |
| Default | No group entry is existed. | |
| Mode | Global Configuration | |
| Usage To define the SNMP group, use the command snmp group in the Glocal Configuration mode, and use the no form of the command to delete the configuration. | ||
| Example | The following example adds SNMPv3 group | |
| Switch(config)# snmp group v3 version 3 auth read-view all write-view all notify-view all | ||
snmp host
Syntax
snmp host (ip-addr|ipv6-addr|hostmane) [traps|informs] [version (1|2c)]
community-name [udp-port udp-port] [timeout timeout] [retries retries]
| snmp host (ip-addr|ipv6-addr|hostmane) [traps|informs] version 3[(auth|noauth|priv)] community-name [udp-port udp-port] [timeout timeout] [retries retries]no snmp host (ip-addr|ipv6-addr|hostmane)[traps|informs] [version (1|2c|3)] | ||
| ip-addr | The IP adderss of recipet. | |
| ipv6-addr | The IPv6 adderss of recipet. | |
| hostname | The host name of recipet. | |
| traps | Send SNMP traps to the host. It is the default action. | |
| informs | Send SNMP informs to the host. | |
| version (1|2c|3) | Specify the SNMP version. | |
| noauth | Specify that no packet authentication is performed. It is applicable only to the SNMPv3 security mode. | |
| auth | Specify that no packet authentication without entryption is performed. It is applicable only to the SNMPv3 security mode. | |
| priv | Specify that no packet authentication with entryption is performed. It is applicable only to the SNMPv3 security mode. | |
| community-name | The SNMP community sent with the notification. | |
| udp-port udp-port | Specify the UDP port number. | |
| timeout timeout | Specify the SNMP informs timeout | |
| retries retries | Specify the retry counter of the SNMP informs. | |
| Default | No SNMP host is configured.The default SNMP version for the command is SNMPv1. | |
| Mode | Global Configuration | |
| Usage | To configure the hosts to receive SNMP notifications, use the command snmp host in the Global Configuration mode; and use the no form of the command to delete the configuration. | |
| Example | The following example adds the recipet 192.168.1.11 for the SNMP traps notification. | |
| Switch(config)# snmp host 192.168.1.11 private | ||
| snmp trap | ||
| Syntax | snmp trap (auth|cold-start|linkUpDown|port-security|warm-start)no snmp trap (auth|cold-start|linkUpDown|port-security|warm-start) | |
| auth | Enable the SNMP authentication failure trap. | |
| cold-start | Enable the SNMP cold start-up failure trap. | |
linkUpDown
Enable the SNMP link up and down failure trap.
| port-security | Enable the SNMP port security trap. | |
| warm-start | Enable the SNMP warm start-up failure trap. | |
| Default | All the SNMP traps are enabled. | |
| Mode | Global Configuration | |
| Usage To send the SNMP traps, use the command snmp trap in the Global Configuration mode; and use the no form of the command to disable the SNMP traps. | ||
| Example | The following example disables and enables the SNMP link up and down traps individually. | |
| Switch(config)# no snmp trap linkUpDownSwitch(config)# snmp trap linkUpDown | ||
| snmp user | ||
| Syntax | snmp user username group-name [auth (md5|sha) AUTHPASSWD] snmp user username group-name auth (md5|sha) AUTHPASSWD priv PRIVPASSWD no snmp user username | |
| username | Specify the SNMP user name on the host that connects to the SNMP agent. The max character is 30 characters. For the SNMP v1 or v2c, the user name must match the community name by the command snmp host. | |
| group-name | Specify the SNMP group to which the SNMP user belongs. The SNMP group should be SNMPv3 and configured by the command snmp group. | |
| auth (md5|) | Specify the HMAC-MD5-96 authentication protocol as the user authentication. | |
| auth (sha|) | Specify the HMAC-SHA-96 authentication protocol as the user authentication. | |
| AUTHPASSWD | The password for authentication and the range of length is from 8 to 32 characters. | |
| Priv PRIVPASSWD | The private password for the privacy key, and the range of length is from 8 to 64 characters. | |
| Default | N/A | |
| Mode | Global Configuration | |
| Usage | To define a SNMP user, use the command snmp user in the GlobalConfiguration mode; and use the no form to delete the SNMP user. | |
| Example | The following example adds SNMP user v3 into the group v3 by the MD5 authentication.Switch(config)# snmp user v3 v3 auth md5 12345678 | |
| snmp view | ||
| Syntax | snmp view view-name subtree oid-tree oid-mask (all|oid-mask) viewtype(included|excluded)no snmp view view-name subtree (all|oid-tree) | |
| view-name | The SNMP view name. Its maximum length is 30 characters. | |
| subtree oid-tree | Specify the ASN.1 subtree object identifier (OID) to be included or excluded from the SNMP view. | |
| oid-mask (all|oid-mask) | Specify the OID family mask. It is used to define a family of view subtrees. For example, OID mask FA.80 is is 11111010.10000000. The length of the OID mask must be less than the length of subtree OID. | |
| iewtype(included|excluded) | Include or exclude the selected MIBs in the view. | |
| Default | N/A | |
| Mode | Global Configuration | |
| Usage To configure the SNMP view, use the command snmp view in the Global Configuration mode; and use the no form of the command to delete the SNMP view.The default SNMP view cannot be deleted and modified by users.By default, the maximum numbers of SNMP view is limited to 16. | ||
| Example | The following example defines the SNMP view.Switch(config)# snmp view private subtree 1.3.3.1 oid-mask all viewtype included | |
29. Spanning Tree
instance (MST)
| Syntax | instance instance-id vlan vlan-listno instance instance-id vlan vlan-list | |
| Parameter | instance-id | The MSTP instance ID from 0 to 15. |
| vlan vlan-list | Add the VLAN list to the MSTP instance. | |
| Default | All VLANs are mapped to the Common and Internal Spanning Tree (CIST)instance (instance 0). | |
| Mode | MST Configuration | |
| Usage To map the VLAN to the Multiple Spanning Tree (MSTP)instances, use the command instance in the MST Configuration mode; and use the no form of the command to restore its default configuration.All VLANs that are not explicitly configured to an MSTP instance are mapped to the CIST instance (instance 0).For two or more switches in the samp MSTP region, their VLAN mapping, name and revision number configuration, must be the same. | ||
| Example | The following example maps the vlan 10-20 to the MSTP instance 1, and VLAN 100 to instance 2.Switch(config)# spanning-tree mst configuration Switch(config-mst)# instance 1 vlan 10-20Switch(config-mst)# instance 2 vlan 100 | |
| name (MST) | ||
| Syntax name name-strno name | ||
| Parameter | name-str | The MSTP instance name. Its maximum length is 32 |
| Default | The default MSTP name is the switch MAC address. | |
Mode
MST Configuration
| Usage | To define the name for MSTP instance, use the commandnamein the MST Configuration mode; and use thenoform to restore the default name configuration. |
| Example | The following example configures the name of MST instance to Valkyrie.Switch(config)# spanning-tree mst configurationSwitch(config-mst)# name Valkyrie |
revision (MST)
| Syntax revision rev | ||
| no revision | ||
| Parameter | rev | The MSTP revision number. Its valid rage is from 0 to |
| Default | The default revision number is 0. | |
| Mode | MST Configuration | |
| Usage To define the revision for the MSTP configuration, use the command revision in the MST Configuration mode; and use the no form of the command to restore it default configuration. | ||
| Example | The following example defines the revision MSTP configuration to 1. | |
| Switch(config)# spanning-tree mst configurationSwitch(config-mst)# revision 1 | ||
show spanning-tree
| Syntax | show spanning-tree |
| Parameter N/A | |
| Default | N/A |
| Mode | Privileged EXEC |
| Usage | To display the spanning tree configuration, use the command spanning-tree inthe Privileged EXEC mode |
| Example | The following example shows the spanning tree configuration.Switch# show spanning-treeSpanning tree enabled mode RSTPDefault port cost method: shortRoot ID Priority 32768Address 00:11:22:33:44:55This switch is the rootHello Time 4 sec Max Age 10 sec Forward Delay25 secNumber of topology changes 2 last change occurred 20:34:30 agoTimes: hold 0, topology change 0, notification 0hello 4, max age 10, forward delay 25InterfacesName State Prio.Nbr Cost Sts Role EdgePort Type---- -- ---- -- ---- -- ----fa23 enabled 128.23 19 Blk Desg No P2P(RSTP) |
show spanning-tree interface
| Syntax | show spanning-tree interface IF_PORTS[statistic] | |
| Parameter | interfaceIF_PORTS | An interface ID or the list of interface IDs. |
| statistic | Display the STP statistic for an interface. | |
| Default | N/A | |
| Mode | Privileged EXEC | |
| Usage | To show the STP configuration and statistics for an interface, use the command show spanning-tree interface in the Privileged EXEC mode. | |
| Example | The following example shows the STP configuration for the interface fa23. | |
| Switch# show spanning-tree interfaces fa23 Port fa23 | ||
| enabledState: forwarding Role:designatedPort id: 128.23 Port cost: 19Type: P2P (RSTP) Edge Port: NoDesignated bridge Priority : 32768 Address:00:11:22:33:44:55Designated port id: 128.23 Designated pathcost: 0BPDU Filter: Disabled BPDU guard:DisabledBPDU: sent 21886, received 0 | ||
| The following example shows the STP statistic for the interface fa23. | ||
| Switch# show spanning-tree interfaces fa23 statistic STP Port Statistic================ | ||
| Port : fa23Configuration BDPUs Received : 0TCN BDPUs Received : 0MSTP BDPUs Received : 0Configuration BDPUs Transmitted : 0 TCNBDPUs Transmitted : 0MSTP BDPUs Transmitted : 21917================ | ||
show spanning-tree mst
| Syntax | show spanning-tree mst instace-id | |
| Parameter | instance-id | The MSTP instance ID. Its valid range is from 0 to 15. |
| Default | N/A | |
| Mode | Privileged EXEC | |
| Usage | To show the information for a specific MSTP instance, use the command show spanning-tree mst in the Privileged EXEC mode. | |
| Example | The following example displays the information for the MSTP instance 0 and 1 individually. | |
Switch# show spanning-tree mst 0
MST Instance Information
Designated Root Bridge : 32768/ 0/00:11:22:33:44:55
External Root Path Cost : 0
Regional Root Bridge : 32768/ 0/00:11:22:33:44:55
Internal Root Path Cost : 0
Designated Bridge : 32768/0/00:11:22:33:44:55
Root Port : 0/0
Max Age : 10
Forward Delay : 25
Topology changes : 3
Last Topology Change : 930
VLANs mapped: 1-99,111-
4094
Interface Role Sts Cost Prio.Nbr Type
fa23 Desg FWD 19 128.23 P2P (RSTP)
Switch# show spanning-tree mst 1
MST Instance Information
Instance Type : MSTI (1)
Bridge Identifier : 32768/0/00:11:22:33:44:55
Regional Root Bridge : 32768/ 0/00:11:22:33:44:55 Internal
Root Path Cost : 0
Remaining Hops : 10
Topology changes : 3
Last Topology Change : 933
VLANs mapped: 100-110
Interface Role Sts Cost Prio.Nbr Type
fa23 Desg FWD 19 128.23 P2P (RSTP)
show spanning-tree mst configuration
Syntax
show spanning-tree mst configuration
Parameter
N/A
| Default | N/A |
| Mode | Privileged EXEC |
| Usage | To show the global MST configuration, use the commandshow spanning-tree mst configurationin the Privileged EXEC mode. |
| Example | The following example shows the global MST configuration.Switch# show spanning-tree mst configuration Name[00:11:22:33:44:55]Revision 0 Instances configured 2Instance Vlans mapped---- 0 1-99,111-40941 100-110---- |
show spanning-tree mst interface
| Syntax | show spanning-tree mst instance-id interfaceIF_PORTS |
| Parameter | instance-id The MSTP instance ID. Its valid range is from 0 to 15.interface An interface ID or the list of interface IDs.IF PORTS |
| Default | N/A |
| Mode | Privileged EXEC |
| Usage | To show the MSTP instance information on the specific interface, use the command show spanning-tree mst interface in the Privileged EXEC mode. |
| Example | The following example shows the MSTP 0 and 1 information individually on the interface fa23. |
| Switch# show spanning-tree mst 0 interfaces fa23 MST Port | |
| Information | |
| Instance Type : CIST (0) |
Port Identifier : 128/23 External
Path-Cost : 0
/19
Internal Path-Cost : 0 /19
Designated Root Bridge : 32768/00:11:22:33:44:55 External
Root Cost : 0
Regional Root Bridge : 32768/00:11:22:33:44:55 Internal
Root Cost : 0
Designated Bridge : 32768/00:11:22:33:44:55 Internal
Port Path Cost : 19
Port Role : Designated
Port State : Forwarding
Switch# show spanning-tree mst 1 interfaces fa23 MST Port
Information
Instance Type : MSTI (1)
Port Identifier : 128/23 Internal Path-
Cost : 0
/19
Regional Root Bridge : 32768/00:11:22:33:44:55 Internal
Root Cost : 0
Designated Bridge : 32768/00:11:22:33:44:55 Internal
Port Path Cost : 19
Port Role : Designated
Port State : Forwarding
spanning-tree
Syntax spanning-tree
no spanning-tree
Parameter N/A
Default
Spanning-Tree is enabled by
default.
Mode
Global Configuration
Usage To enable the spanning tree, use the command spanning-tree in the Global Configuration mode; and use the no form of the command to disable the spanning tree on the switch.
Example
The following example disables and enables the spanning tree individually.
Switch(config)# no spanning-tree
Switch(config)# spanning-tree
spanning-tree bpdu
| Syntax | spanning-tree bpdu (filtering|flooding)no spanning-tree bpdu | |
| Parameter | filtering | Filter the BPDU when STP is disabled. |
| flooding | Flood the BPDU when the STP is disabled. | |
| Default | The default configuration is flooding. | |
| Mode | Global Configuration | |
| Usage To configure the action of Bridge Protocol Data Unit (BPDU) handling when STP is disabled, use the command spanning-tree bpdu in the Global Configuration mode. To restore the configuration to the default action, use the no form of the command. | ||
| Example | The following example configures the action of BPDU handling to filter when the STP is disabled. | |
| Switch(config)# spanning-tree bpdu filtering | ||
spanning-tree bpdu-filter
| Syntax spanning-tree bpdu-filterno spanning-tree bpdu-filter | |
| Parameter N/A | |
| Default | BPDU filter is disabled. |
| Mode | Interface Configuration |
| Usage | To enable the BPDU filter, use the command spanning-tree bpdu-filter in the Interface Configuration mode; and use no form of the command to disable the BPDU filter. |
| Example | The following example enables the BPDU filter for interface fa1. |
| Switch(config)# interface fa1Switch(config-if)# spanning-tree bpdu-filter | |
spanning-tree bpdu-guard
Syntax spanning-tree bpdu-guard
no spanning-tree bpdu-guard
Parameter N/A
| Default | BPDU guard is disabled |
| Mode | Interface Configuration |
Usage To enable the BPDU filter, use the command spanning-tree bpdu-guard in the Interface Configuration mode; and use no form of the command to disable the BPDU filter.
| Example | The following example enables the BPDU guard for interface gi1. |
Switch(config)# interface gi1 Switch(config-if)# spanning-tree bpdu-guard
spanning-tree cost
Syntax spanning-tree cost cost
no spanning-tree cost
| Parameter | cost | The port path cost. For the long path cost method, its valid range is from 0 to 200000000; and the valid range is from 0 to 65535 for the short path cost method. The value 0 indicates AUTO, which the port path cost is by the port speed and the path cost |
Default The default port path cost is 0, and it is determined by the port speed and the path cost method (long or short).
| Interface | Long | Short |
| Gigabit Ethernet (1000Mbps) | 20000 | 4 |
| Fast Ethernet (100Mbps) | 200000 | 19 |
| Ethernet (10Mbps) | 2000000 | 100 |
Mode Interface Configuration
Usage To configure the STP path cost for an interface, use the command spanning-tree cost in the Interface Configuration mode; and use the no form of the command to restore it to the default configuration.
Example The following example configures port path cost to 30000 for interface fa2.
Switch(config)# interface gi1 Switch(config-if)# spanning-tree cost 30000
spanning-tree forward-time
Syntax spanning-tree forward-time seconds
no spanning-tree forward-time
| Parameter | seconds | STP forward delay time. Its valid range is from 4 to 10 |
Default The default forward delay time is 15 seconds.
Mode Global Configuration
Usage To configure the STP bridge forward delay time, which is the amount of time that a port remains in the Listening and Learning states before it enters the Forwarding state, use the command spanning-tree forward-time in the Global Configuration mode. To restore it to the default configuration, use the no form of the command.
When the forward delay time is configured, the following relationship should be maintained:
2 * (forward-time - 1) >= Max-Age
Example The following example configures STP forward delay time to 25.
Switch(config)# spanning-tree forward-time 25
spanning-tree hello-time
Syntax spanning-tree hello-time seconds
no spanning-tree hello-time
| Parameter | seconds | STP hello time in second. Its valid range is from 1 to 10 |
| seconds. | |
| Default | The default STP hello time is 2 seconds. |
| Mode | Global Configuration |
| Usage STP hello time is the time interval to broadcast its hello message to other bridges. To configure the STP hello time, use the command spanning-tree hello-time in the Global Configuration mode; and use the no form of the command to restore the hello time to default configuration.When the hello time is configured, the following relationship should be maintained:Max-Age >= 2 * (hello-time + 1) | |
| Example | The following example configures BPDU hello time to 4.Switch(config)# spanning-tree hello-time 4 |
spanning-tree edge
Syntax spanning-tree edge no spanning-tree edge
Parameter N/A
Default The default configuration is disabled.
Mode Interface Configuration
Usage To enable the edge mode for an interface, use the command spanning-tree edge in the Interface Configuration mode; and use the no form of the command to restore it to the default configuration.
In the edge mode, the interface would be put into the Forwarding state immediately upon link up. If the edge mode is enabled for the interface and there are BPDUs received on the interface, the loop might be occurred in the short time.
Example
The following example enables the edge mode for the interface fa1.
Switch(config)# interface fa1
| Switch(config-if)# spanning-tree edge |
spanning-tree link-type
| Syntax | spanning-tree link-type (point-to-point|shared)no spanning-tree link-type | |
| Parameter | point-to-point | Specify the port link type is point to point. |
| shared | Specify the port link type is shared. | |
| Default | The default configuration link type is point-to-point for the ports with full duplex configuration, and shared for the ports with half duplex settings. | |
| Mode | Interface Configuration | |
| Usage To set the RSTP link-type for an interface, use the command spanning-tree link in the Interface Configuration mode. For the default configuration, use the no form of the command. | ||
| Example | The following example configures the link-type to point-to-point for the interface fa1. | |
| Switch(config)# interface fa1Switch(config-if)# spanning-tree link-type point-to-point | ||
spanning-tree max-hops
| Syntax spanning-tree max-hops countsno spanning-tree max-hops | ||
| Parameter | counts | Specify the number of hops in an MSTP regision beforethe BPDU is discarded. The valid range is 1 to 40. |
| Default | The default max-hops configuration is 20. | |
| Mode | Global Configuration | |
Usage
To specify the number of hops for a BPDU to be forwarded in the MSTP region, use the command spanning-tree max-hops in the Global Configuration mode; and restore the setting to default configuration by the no form of the command.
| Example | The following example specifies the max hops for BPDU to 10. |
| Switch(config)# spanning-tree max-hops 10 |
spanning-tree maximum-age
| Syntax spanning-tree maximum-age secondsno spanning-tree maximum-age | ||
| Parameter | seconds | The interval in seconds for a switch to wait the configuration messages, without attempting to redefineduration. |
| Default | The default maximum age is 20 seconds. | |
| Mode | Global Configuration | |
| Usage To set the interval in seconds that the switch can wait without receiving the configuration messages, before attempting to redefine its own configuration, use the command spanning-tree maximum-age in the Global Configuratio mode. For the default configuration, use the no form of the commands.When the maximum age is configured, the following relationship should be maintained:2 * (forward-time - 1)>= Max-Age >= 2 * (hello-time + 1) | ||
| Example | The following example configures STP maximum age to 10.Switch(config)# spanning-tree maximum-age 10 | |
spanning-tree mcheck
| Syntax | spanning-tree mechek |
| Parameter N/A | |
| Default | N/A |
| Mode | Interface Configuration |
| Usage To restart the Spanning Tree Protocol (STP) migration process(re-negotiate forcibly with its neighborhood) on the specific interface, use the command spanning-tree mcheck in the Interface Configuration mode | |
| Example | The following example restarts the STP negotiation on the interface fa1.Switch(config)# interface fa1Switch(config-if)# spanning-tree mecheck |
spanning-tree mode
| Syntax | spanning-tree mode (mstp|rstp|stp) no spanning-tree force-version | |
| Parameter | mstp | Enable the Multiple Spanning Tree (MSTP) operation. |
| rstp | Enable the Rapid Spanning Tree (RSTP) operation. | |
| stp | Enable the Spanning Tree (STP) operation. | |
| Default | The default mode is rstp. | |
| Mode | Global Configuration | |
| Usage To specify the spanning tree operation mode, use the command of spanning- tree mode in the Global Configuration mode. For the default configuration, use the command no spanning-tree force-version in the Global Configuration mode.When the switch is configured as MSTP mode, it can use STP and RSTP for the backward compatibility with switches working in STP and RSTP mode individually. For the RSTP configuration, the switch can also use STP for the switches working in the STP operation. |
| Example | The following example sets the STP operation to MSTP. |
| Switch(config)# spanning-tree mode mstp |
spanning-tree mst configuration
| Syntax | spanning-tree mst configuration |
Default N/A
Mode Global Configuration
Usage To enter the MST configuration mode for the MSTP configuration modification, use the command spanning-tree mst configuration in the Global Configuration mode.
Example The following example modifies the MSTP configuration in the MST Configuration mode.
Switch(config)# spanning-tree mst configuration Switch(config-mst)# instance 1 vlan 10-20 Switch(config-mst)# name Valkyrie Switch(config-mst)# revision 1
spanning-tree mst cost
| Syntax | spanning-tree mst instance-id cost costno spanning-tree mst instance-id cost cost | |
| Parameter | instance-id | Specify the instance ID. The valid range is from 0 to 15. |
| cost | Specify the path cost for the interfaces on the specific MSTP instance. For the long path cost method, its valid range is from 0 to 200000000; and the valid range is from 0 to 65535 for the short path cost method. The value 0 indicates AUTO, which the port path cost is the port speed and the path cost | |
Default The default port path cost is 0, and it is determined by the port speed and the path cost method (long or short).
| Interface | Long | Short |
| Gigabit Ethernet (1000Mbps) | 20000 | 4 |
| Fast Ethernet (100Mbps) | 200000 | 19 |
| Ethernet (10Mbps) | 2000000 | 100 |
Mode Interface Configuration
Usage
To configure the path cost for MSTP calculations, use the command spanning-tree mst cost in the Interface Configuration mode. If the loop occurs, the MSTP considers the path cost when selecting the interface into the Forwarding state. For the default configuration, use the no form of the command.
When configuring the path cost on the CIST (instance 0), it is equal to the
| command spanning-tree cost in the Interface Configuration mode. | |
| Example | The following example configures the path cost of interface fa1 on the instance 1 to 30000Switch(config)# interface gi1Switch(config-if)# spanning-tree mst 1 cost 30000 |
spanning-tree mst port-priority
| Syntax | spanning-tree mst instance-id port-priority priority no spanning-tree mst instance-id port-priority | |
| Parameter | instance-id | Specify the instance ID. The valid range is from 0 to 15. |
| priority | Specify the interface priority on the specific instance. | |
| Default | The default port priority on each instance is 128 |
| Mode | Interface Configuration |
| Usage To configure the interface priority on the specific instances, use the command spanning-tree mst port-priority in the Interface Configuration mode. For the default configuration, use the no form of the command. |
| The priority value must be the multiple of 16. When the port priority on the CIST (instance 0) is configured, it is equal to the command spanning-tree port-priority in the Interface Configuration mode. |
| Example | The following example sets the port priority of gi1 on the instance 1 to 144; and set the port priority of gi1 on the CIST (instance 0) to 96 |
| Switch(config)# interface gi1 |
| Switch(config-if)# spanning-tree mst 1 port-priority 144 |
| Switch(config-if)# spanning-tree mst 0 port-priority 96 |
spanning-tree mst priority
| Syntax | spanning-tree mst instance instance-id priority priorityno spanning-tree mst instance instance-id priority |
Command Line Interface
User Guide
| Parameter | instance-id | Specify the instance ID. The valid range is from 0 to 15. |
| priority | Specify the bridge priority on the specific instance. The | |
| valid range is from 0 to 61440. It nsures the probability that the switch is selected as the root bridge, and the lower values has the higher priority for the switch to be selected as the root bridge. | ||
| Default | The default priority on each instance is 32768. | |
| Mode | Global Configuration | |
| Usage To configure the bridge priority on the specific instance, use the command spanning-tree mst priority in the Global Configuration mode. To restore the default configuration, use the no form of the command.The value of bridge priority must be the multiple of 4096. A switch with the lowest priority is the root of the STP topology. For the configuration of bridge priority on the CIST (instance 0), it is equal to the command spanning-tree priority in the Global Configuration mode. | ||
| Example | The following example modifies the bridge priority to 4096 on instance 0 and instance 1 individually.Switch(config)# spanning-tree mst 0 priority 4096Switch(config)# spanning-tree mst 1 priority 4096 | |
spanning-tree pathcost method
| Syntax | spanning-tree pathcost method (long|short) | |
| Parameter | long | The range for the path cost is from 1 to 200000000. |
| short | The range for the path cost is from 1 to 65535. | |
| Default | The default path cost method is long. | |
| Mode | Global Configuration | |
| Usage | To set the spanning tree path cost method, use the command spanning-tree pathcost method in the Global Configuration mode. | |
| If the short method is specified, the switch calculates the path cost in the range 1 through 65535; Otherwise, it calculates the path cost in the range 1 to 200000000. | ||
| Example | The following example modifies path cost method to short. | |
| Switch(config)# spanning-tree pathcost method short | ||
spanning-tree port-priority
| Syntax | spanning-tree port-priority priorityno spanning-tree port-prioritypriority | |
| Parameter | priority from 0 to 240. | Specify the priority for an interface. The valid range is |
| Default | The default priority for each interface is 128. | |
| Mode | Interface Configuration | |
Usage To configure the STP priority for an interface, use the command spanning- tree port-priority in the Interface Configuration mode. For the default configuration, use the no form of the command.
The priority value must be the multiple of 16.
Example The following example modifies the port priority to 96 for the interface gi2.
Switch(config)# interface gi2 Switch(config-if)# spanning-tree port-priority 96
spanning-tree priority
| Syntax | spanning-tree prioritypriorityno spanning-tree priority | |
| Parameter | instance-id | Specify the instance ID. The valid range is from 0 to 15. |
| priority | Specify the bridge STP priority. The valid range is from 0 to 61440. It nsures the probability that the switch is selected as the root bridge, and the lower values has the higher priority for the switch to be selected | |
as the root
bridge of the STP topology.
Default
The default priority for the switch 32768.
Mode Global Configuration
Usage To configure the bridge priority, use the command spanning-tree mst
priority in the Global Configuration mode. To restore the default configuration, use the no form of the command.
The value of bridge priority must be the multiple of 4096. A switch with the lowest priority is the root of the STP topology. When switches with the same priority configuration in the environment, the switch with lowest MAC address would be selected as the root bridge.
Example The following example modifies the bridge priority to 4096.
Switch(config)# spanning-tree priority 4096
spanning-tree tx-hold-count
Syntax spanning-tree tx-hold-count
count
no spanning-tree tx-hold-count
Parameter count Specify the tx-hold-count used to limit the maximum
numbers of packets transmission per second. The valid range is from 1 to 10.
Default The default value is
6.
Mode Global Configuration
Usage To limit the maximum numbers of packets transmission per
second, use the command spanning-tree tx-hold-count in the Global Configuration mode. For the default configuration, use the no form of the command.
Example The following example sets the tx-hold-count to 4.
Switch(config)# spanning-tree tx-hold-count 4
30. Storm Control
show storm-control
Syntax
show storm-control
| show storm-control interface IF_PORTS | ||
| Parameter | IF_PORTS | Specify port to show. |
| Default | No default value for this command | |
| Mode | Privileged EXEC | |
| Usage | Use “show storm-control” command to show all storm control related configurations including global configuration and per port configurations.Use “show storm-control interface” command to show selected port storm control configurations. | |
| Example | This example shows how to show storm control global configuration.Switch#show storm-controlStorm control preamble and IFG: Excluded Storm control unit: pps......This example shows how to show current storm control configuration on interface gi1Switch#show storm-control interfaces gi1Port | State | Broadcast | Unknown-Multicast | Unknown-Unicast | Action| | pps | pps | pps|----+----+----+----+----+----+----+----+----+----+----+----+----+----+----+----+----+----+----+----+----+----+----+----+----+----+----+----+----+----+----+----+----+----+----+----+----+----+----+----+----+----+----+----+----+----+----+----+----+----+---- +----+----+----+----+----+----+----+----+----+----+----+----+----+----+----+----+----+----+----+----+----+----+----+----+----+----+----+----+----+----+----+----+----+----+----+----+----+----+----+----+----+----+----+----+----+----+----+----+----+----+ Shutdown | |
storm-control
| Syntax | storm-controlno storm-control |
| storm-control (broadcast | unknown-unicast | unknown-multicast) no storm-control (broadcast | unknown-unicast | unknown-multicast) |
| Parameter | broadcast | Select broadcast storm control type |
| unknown-unicast | Select unknown unicast storm control type | |
| unknown-multicast | Select unknown multicast storm control type |
Default
Default storm control is disabled.
Default broadcast storm control is disabled.
Default unknown multicast storm control is disabled Default unknown unicast storm control is disabled
Mode
Interface Configuration
Usage Storm control function is able to enable/disable on each single port. Use the "storm control" command to enable storm control feature on the selected ports. And use "no storm control" command to disable storm control feature. Not only port is able to enable/disable on the port. Each storm control type is also able to enable/disable on each single port.
Use the “storm-control (broadcast|unknown-unicast|unknown-multicast)” command to enable the storm control type you need and use no form to disable it.
Example
This example shows how to enable storm control on interface gi1. Switch(config)# interface gi1 Switch(config-if)# storm-control
This example shows how to enable broadcast storm control and configure broadcast storm control rate to 200. Switch(config)# interface gi1 Switch(config-if)# storm-control broadcast
This example shows how to show current storm control configuration on interface gi1
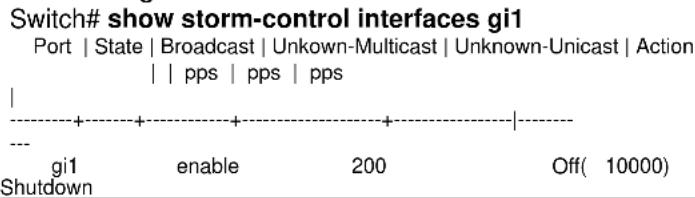
line
| Event | Value | |-------|-------| | gi1 | 0 | | enable| 200 | | Off | 10000 |storm-control action
Syntax
storm-control action (drop | shutdown) no storm-control action
Parameter
drop Storm control rate calculates by octet-based shutdown
Default
Default storm control action is drop.
| Mode | Interface Configuration |
| Usage | Use “storm-control action” command to set the action when the received storm control packets exceed the maximum rate on an interface. Use no form to restore to default action. |
| Example | This example shows how to configure storm control action to shutdown port on interface gi1.Switch(config)#interface gi1Switch(config-if)#storm-control action shutdownThis example shows how to show storm control action on interface gi1.Switch#show storm-control interfaces gi1Port | State | Broadcast | Unknown-Multicast | Unknown-Unicast | Action| | pps | pps | pps|----+----+----+----+----+----+----+----+----+----+----+----+----+----+----+----+----+----+----+----+----+----+----+----+----+----+----+----+----+----+----+----+----+----+----+----+----+----+----+----+----+----+----+----+----+----+----+----+----+----+---- +----+----+----+----+----+----+----+----+----+----+----+----+----+----+----+----+----+----+----+----+----+----+----+----+----+----+----+----+----+----+----+----+----+----+----+----+----+----+----+----+----+----+----+----+----+----+----+----+----+----+ gi1 disable Off( 10000) Off( 10000) Off( 10000) Shutdown |
storm-control ifg
| Syntax | storm-control ifg (include | exclude) | |
| Parameter | include | Include preamble & IFG (20 bytes) when count ingress storm control rate. |
| exclude | Exclude preamble & IFG (20 bytes) when count ingress storm control rate | |
| Default | Default storm control inter frame gap is excluded. | |
| Mode | Global Configuration | |
Usage Storm control mechanism will try to calculate ingress packets is exceed configured rate or not and do corresponding action. Use storm-control ifg command to include/exclude the preamble and inter frame gap into the calculating.
Example
This example shows how to configure storm inter frame gap to include. Switch(config)# storm-control ifg include
This example shows how to show storm control global configuration. Switch# show storm-control Storm control preamble and IFG: Included
Storm control unit: pps
storm-control level
| Syntax | storm-control (broadcast | unknown-unicast | unknown-multicast) level<1-1000000>no storm-control (broadcast | unknown-unicast | unknown-multicast)level |
| Parameter broadcast Select broadcast storm control type | |
| unknown-unicast | Select unknown unicast storm control type |
| unknown | Select unknown multicast storm control type |
| - | |
| multicast | |
| level <1-1000000> | Specify the storm control rate for selected type. For bps, range is 16-1000000 |
| For pps, range is 1-262143 | |
| Default | Default broadcast storm control rate is 10000. Default unknown multicast storm control rate is 10000. Default unknown unicast storm control rate is 10000. |
| Mode | Interface Configuration |
Usage Each control type is allowed to have different storm control rate.
Use “storm-control (broadcast|unknown-unicast|unknown-multicast) level” command to configure it
Use no form to restore to default rate.
Example
This example shows how to enable broadcast storm control and configure broadcast storm control rate to 200.
Switch(config)# interface gi1
Switch(config-if)# storm-control broadcast
Switch(config-if)# storm-control broadcast level 200
This example shows how to show current storm control configuration on interface gi1
Switch# show storm-control interfaces gi1
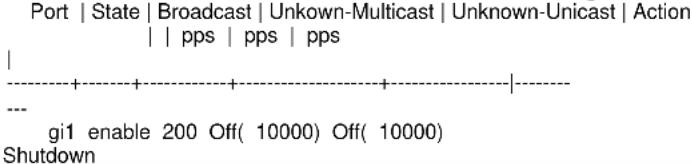
storm-control unit
| Syntax | storm-control unit (bps | pps) | |
| Parameter | bps | Storm control rate calculates by octet-based |
| pps | Storm control rate calculates by packet-based | |
| Default | Default storm control unit is bps. | |
| Mode | Global Configuration | |
| Usage Storm control mechanism will try to calculate ingress packets isexceed configured rate or not and do corresponding action. | |
| Use storm-control unit command to change the unit of calculating method. | |
| Example | This example shows how to configure storm control rate unit as pps.Switch(config)# storm-control unit ppsThis example shows how to show storm control global configuration.Switch# show storm-controlStorm control preamble and IFG: Excluded Stormcontrol unit: pps...... |
31. System File
boot system
| Syntax | boot system (image0 | image1) | |
| Parameter | image0 | Boot from flash image partition 0 |
| image1 | Boot from flash image partition 1 | |
| Default | Default boot image is image0. | |
| Mode | Global Configuration | |
Usage Dual image allow user to have a backup image in the flash partition. Use "boot system" command to select the active firmware image. And another firmware image will become a backup one.
Example This example shows how to select image1 as active image. Switch(config)# boot system image1 Select "image1" Success
This example shows how to show active image partition. Switch# show flash
File Name File Size Modified
startup-config 1191 2000-01-01 00:00:23
backup-config 1607 2000-01-01 08:36:23
rsa1 974 2000-01-01 00:00:18
rsa2 1675 2000-01-01 00:00:18
dsa2 668 2000-01-01 00:00:18
ssl cert 993 2000-01-01 00:00:18
image0 (backup) 4372401 2012-09-24 01:57:29
image1 (active) 5555970 2012-06-12 12:17:46
copy
Syntax
copy (flash:// | tftp://) (flash:// | tftp://)
copy tftp:// (backup-config | running-config | startup-config) copy (backup-config | running-config | startup-config) tftp://
copy (backup-config | startup-config) running-config copy (backup-config | running-config) startup-config copy (running-config | startup-config) backup-config
Parameter
flash:// Specify the file stored in flash to operation.
Available files are:
flash://startup-
config
flash://backup-
config flash://rsa1
flash://rsa2
flash://dsa2
flash://image0
flash://image1
flash://ram.log
flash://flash.log
tftp:// Specify remote tftp server and remote file name. The
format is "tftp://192.168.1.111/remote_file_name"
running-config Running configuration file
startup-config Startup configuration file
backup-config Backup configuration file
Default
No default value for this command.
| Mode | Privileged EXEC | |
| Usage | There are many types of files in system. These files are very important for administrator to manage the switch. The most common file operation is copy. By using these copy commands, we can upgrade, backup following type of files.Firmware ImageConfiguration FilesSyslog FilesLanguage FilesSecurity Certificate | |
| Example | This example shows how to copy running configuration to startup configuration.Switch#copy running-config startupst-configThis example shows how to backup running configuration to remote tftp server 192.168.111 with file name test1.cfg.Switch#copy running-config tftp://192.168.1.111/test1.cfgUploading file...Please Wait... Uploading DoneThis example shows how to upgrade startup configuration from remote tftp server 192.168.1.111 with file name test2.cfg.Switch#copy tftp://192.168.1.111/test2.cfg startup-configDownloading file...Please Wait... Downloading DoneUpgrade config success. Do you want to reboot now? (y/n)nThis example shows how to backup security file dsa2 to remote tftp server 192.168.1.111 with file name dsa2.Switch#copy flash://dsa2 tftp://192.168.1.111/dsa2Uploading file...Please Wait... Uploading Done | |
| delete | ||
| Syntax | delete (startrup-config | backup-config | flash://)delete system (image0 | image1) | |
| Parameter | flash:// | Specify the configuration file stored in flash to delete.Available files are:flash://startup-configflash://backup- |
config
startup-config
Delete startup configuration file
| backup-config | Delete backup configuration file | |
| image0 | Delete flash image0. | |
| image1 | Delete flash image1. | |
| Default | No default value for this command. | |
| Mode | Privileged EXEC | |
| Usage | Use “delete” command to delete configuration files or use “delete system” command to delete firmware image stored in flash.The “delete startup-config” command is using to restore factory default and it is equal to command “restore-defaults”. | |
| Example | This example shows how to delete backup configuration file.Switch# delete backup-configThis example shows how to delete backup firmware image from flash.Switch# delete system image1This example shows how to show file status in flash.Switch# show flashFile Name File Size Modified | |
| startup-config 1191 2000-01-01 00:00:23backup-config 1607 2000-01-01 08:36:23rsa1 974 2000-01-01 00:00:18rsa2 1675 2000-01-01 00:00:18dsa2 668 2000-01-01 00:00:18ssl_cert 993 2000-01-01 00:00:18image0 (active) 4372401 2012-09-24 01:57:29image1 (backup) 0 | ||
restore-defaults
| Syntax | restore-defaults [interfacesIF_PORTS] | |
| Parameter | interfacesIF PORTS | Specify port to restore its’ ruuning config |
| Default | No default value for this command. | |
| Mode | Privileged EXEC | |
| Usage | Use “restore-defaults” command to restore factory default of all system. The command is equal to “delete startup-config”, |
| Example | This example shows how to restore factory defaults.Switch# restore-defaultsRestore Default Success. Do you want to reboot now? (y/n)n |
| save | |
| Syntax | save |
| Parameter | |
| Default | No default value for this command. |
| Mode | Privileged EXEC |
| Usage | Use “save” command to save running configuration to startup configurationfile. This command is equal to “copy running-config startup-config”. |
| Example | This example shows how to save running configuration to startup configuration.Switch# saveSuccessThis example shows how to show startup configurationSwitch# show startup-config! System Description: RTK RTL8328-24FE-4GE Switch! System Version: v2.5.0-beta.32811! System Name: SwitchEF0102! System Up Time: 0 days, 4 hours, 31 mins, 43 secs! ! ! !username "" privilege user secret "dnXencJRwflV6" username "admin" secret "FzjrGO6vfbERY"voice-vlan vpt 0voice-vlan dscp 0...... |
show bootvar
Syntax
show bootvar
| Parameter | ||
| Default | No default value for this command. | |
| Mode | Privileged EXEC | |
| Usage | Use “show bootvar” command to show image information in both flash partitions. It also shows current active image and active image on next booting. | |
| Example | This example shows how to show dual image informationSwitch# show bootvarImage Version Date Status File Name0 3.0.5 2014-09-22 16:53:53 Active v3.0.5.bix1 3.1.0 2014-10-09 18:32:26 Not active* v3.1.0.bix | |
| show config | ||
| Syntax | show (running-config | startup-config | backup-config)show running-config interfaces IF_PORTS | |
| Parameter | running-config | Show running configuration on terminal |
| startup-config | Show startup configuration on terminal | |
| backup-config | Show backup configuration on terminal | |
| IF_PORTS | Specify port to show its’ ruuning config | |
| Default | No default value for this command. | |
| Mode | Privileged EXEC | |
| Usage | Our configuration file is text based. Therefore, we can show the configuration on terminal and read it by this command.Use “show config” command to show configuration files stored in system. Use “show config interfaces” command to show specific port | |
Command Line Interface User Guide
configurations.
| Example | This example shows how to show startup configurationSwitch#show startup-config! System Description: RTK RTL8328-24FE-4GE Switch! System Version: v2.5.0-beta.32811! System Name: SwitchEF0102! System Up Time: 0 days, 4 hours, 31 mins, 43 secs!!!!username "" privilege user secret "dnXencJRwflV6" username"admin" secret "FzjrGO6vfbERY"voice-vlan vpt 0voice-vlan dscp 0............This example shows how to show running configurationSwitch#show running-config! System Description: RTK RTL8328-24FE-4GE Switch! System Version: v2.5.0-beta.32811! System Name: SwitchEF0102! System Up Time: 0 days, 5 hours, 23 mins, 42 secs!!!!username "" privilege user secret "dnXencJRwflV6" username"admin" secret "FzjrGO6vfbERY"voice-vlan vpt 0voice-vlan dscp 0............This example shows how to display running configuraiton on specific port.Switch#show running-config interfaces gi1interface gi1rate-limit ingress 128 |
show flash
| Syntax | show flash |
| Parameter | |
| Default | No default value for this command. |
| Mode | Privileged EXEC |
| Usage | Use “show flash” command to show all files’ status which stored in flash. |
| Example | This example shows how to show all files status stored in flash.Switch#show flashFile Name File Size Modified |
| ----startup-config 1191 2000-01-01 00:00:23backup-config 1607 2000-01-01 08:36:23rsa1 974 2000-01-01 00:00:18rsa2 1675 2000-01-01 00:00:18dsa2 668 2000-01-01 00:00:18ssl_cert 993 2000-01-01 00:00:18image0 (active) 4372401 2012-09-24 01:57:29image1 (backup) 0 |
32. Surveillance VLAN
surveillance-vlan (Global)
| Syntax | surveillance-vlanno surveillance -vlan |
| Parameter | |
| Default | Surveillance VLAN is disabled |
| Mode | Global Configuration |
| Usage | Use thesurveillancevlanglobal configuration command to enable the functional Surveillance VLAN on the device.Use thenoform of this command to disable Surveillance VLAN function. You can verify your setting by entering theshow surveillance vlan Privileged EXECcommand. |
| Example | The following example shows how to enable Surveillance VLAN. Switch(config)#surveillance -vlanSwitch#show surveillance -vlanAdministrate Surveillance VLAN state :disabled Surveillance VLAN ID: none(disable) Surveillance VLAN Aging:1440 minutes Surveillance VLAN CoS6Surveillance VLAN 1p Remark: disabled |
surveillance-vlan (Interface)
| Syntax | surveillance-vlanno surveillance-vlan |
| Parameter | N/A |
| Default | Disable by default. |
| Mode | Interface Configuration |
| Usage | Use the surveillance vlan Interface configuration command to enable OUI surveillance VLAN configuration on an interfaceUse the no form of this command to disable Surveillance VLAN on an interfacesYou can verify your setting by entering the show surveillance vlan Privileged EXEC command |
| Example | The following example how to enable Surveillance VLAN function in oui mode on an interfaceSwitch(config)#interface range fa1-3Switch(config-if)#surveillance-vlanSwitch#show surveillance-vlan interfacesfa1-3Surveillance VLAN Aging : 1440minutes Surveillance VLAN CoS 7Surveillance VLAN 1p Remark: enabledOUI tableOUI MAC | Description----+----00:01:02 | TestPort | State | Port Mode | Cos Mode----+----+----+----fa1 | Disabled | Auto |Src fa2 | Disabled |Auto | Srcfa3 | Disabled | Auto | Src |
surveillance-vlan vlan
| Syntax | surveillance-vlan vlan <1-4094>no surveillance-vlan vlan | |
| Parameter | <1-4094> | Specify the Surveillance VLAN ID |
| Default | The default Surveillance VLAN ID is None. | |
| Mode | Global Configuration | |
| Usage | Use the surveillance vlan id global configuration command to configure the VLAN identifier of the surveillance VLAN statically.Use the no form of this command to restore surveillance VLAN id to default. You can verify your setting by entering the show surveillance vlan Privileged EXEC command | |
| Example | The following example shows how to set Surveillance VLAN id. The VLAN id must be created first.Switch(config)# surveillance-vlan vlan 128Switch# show surveillance-vlanAdministrate Surveillance VLAN state : enabled Surveillance VLAN ID 128Surveillance VLAN Aging : 1440minutes Surveillance VLAN CoS6Surveillance VLAN 1p Remark: disabled | |
This following example shows how to add OUI Mac.
Switch(config)# surveillance-vlan oui-table 00:01:02
"Test" Switch# show surveillance-vlan interfaces
fa1-3 Surveillance VLAN Aging : 1440 minutes
| Syntax | surveillance-vlan cos <0-7>[remark]no surveillance-vlan cos | |
| Parameter | <0-7> | Specify the surveillance VLAN Class of Service value in telephone OUI mode |
| remark | Specify that the L2 user priority is remarked with the CoS value | |
| Default | The default cos value is 6, remark is disabled. | |
Mode Global Configuration
| Usage | Use the surveillance vlan cos global configurations command to configure the surveillance VLAN cos value and 1p remark function. Use the “no” form to restore to default mode. You can verify your setting by entering the show surveillance vlan Privileged EXEC command |
| Example | The following example show how to set cos value and enable 1p remark functionSwitch(config)# surveillance-vlan cos 7 remarkSwitch# show surveillance-vlan Administrate Surveillance VLAN state :disabled Surveillance VLAN ID 128Surveillance VLAN Aging : 1440minutes Surveillance VLAN CoS7 |
Surveillance VLAN 1p Remark: enabled
surveillance-vlan cos (Interface)
| Syntax | surveillance-vlan cos (src | all)no surveillance-vlan cos |
| Parameter src | Specify QoS attributes are applied to packets with OUIsin the source MAC address. |
| All Specify QoS attributes are applied to packets that areclassified to the Surveillance VLAN. | |
| Default | The default all port in Srcmode. |
| Mode | Interface configuration |
| Usage Use the surveillance vlan cos mode Interface configurationcommand to configure OUI surveillance VLAN cos modeconfiguration on an interface. Use the “no” form to restore todefault mode.You can verify your setting by entering the show surveillance-vlan interfaces Privileged EXECcommand | |
| Example | The following example how to configure surveillance packet QoSattributes on an interfaceSwitch(config)#interface range fa1-3Switch(config-if)#surveillance-vlan cos allSwitch#show surveillance-vlan interfacesfa1-3Surveillance VLAN Aging : 1440minutes Surveillance VLAN CoS 7Surveillance VLAN 1p Remark: enabledOOUI tableOUI MAC | Description----+----00:01:02 | TestPort | State | Port Mode | Cos Mode----+----+----+----fa1 | Disabled | Auto | Allfa2 | Disabled | Auto | Allfa3 | Disabled | Auto | All |
surveillance-vlan mode
Syntax surveillance-vlan mode
Managed Switch Software
313
Rev. 1.1
(auto|manual) no surveillance-vlan mode
| Parameter | auto | Specifies that the port is identified as a candidate to join |
| the surveillance VLAN. When a packet with a source OUI MAC address that identifies the remote equipment as surveillance equipment is seen on the port, the port joins the surveillance VLAN as a tagged port. | ||
| manual | Specifies that the port is manually assigned to the VLAN. | |
| Default | The default is auto mode. | |
| Mode Interface Configuration | ||
| Usage | Use the surveillance-vlan mode global configuration command to configure the surveillance VLAN mode for interface. Use the “no” form to restore to default mode. You can verify your setting by entering the show surveillance-vlan interfaces Privileged EXEC command. | |
| Example | The following example how to configure surveillance mode to manual Switch(config)#interface range fa1-3Switch(config-if)#surveillance-vlan mode manaul Switch# show surveillance-vlan interfaces fa1-3 Surveillance VLAN Aging : 1440 minutesSurveillance VLAN CoS 7Surveillance VLAN 1p Remark: enabledOUI tableOUI MAC | Description----+----00:01:02 | TestPort | State | Port Mode | Cos Mode----+----+----fa1 | Disabled | Manual | Srcfa2 | Disabled | Manual | Srcfa3 | Disabled | Manual | Src | |
surveillance-vlan aging-time
Syntax surveillance-vlan aing-time <30-65536> no surveillance-vlan aing-time
| Default | The default aging-timeout value is 1440 minutes |
| Mode | Global Configuration |
| Usage | Use the surveillance vlan aging-time global configuration command to configure the surveillance VLAN aging timeout. Use the “no” form to restore to default time. You can verify your setting by entering the show surveillance vlan Privileged EXEC command |
| Example | The following example shows how to set aging time. Switch(config)# surveillance-vlan aging-time 720 Switch# show surveillance-vlan Administrate Surveillance VLAN state: disabled Surveillance VLAN ID 1 Surveillance VLAN Aging: 720 minutes Surveillance VLAN CoS 5 Surveillance VLAN 1p Remark: enabled |
show surveillance-vlan
| Syntax show surveillance-vlanshow surveillance-vlan interfaces [IF_PORTS] | ||
| Parameter | IF_PORTS | Specifies interfaces to display surveillance VLAN I mode |
| Default | N/A | |
| Mode | Privileged EXEC | |
| Usage | Use the show surveillance vlan command in EXEC mode to display the surveillance VLAN status for all interfaces or for a specific interface if the surveillance VLAN type is OUI | |
| Example | The following example show how to display surveillance vlan OUI mode settingsSwitch# show surveillance-vlanAdministrate Surveillance VLAN state :disabled Surveillance VLAN ID : none(disable) Surveillance VLAN Aging: 720 minutesSurveillance VLAN CoS 6Surveillance VLAN 1p Remark: disabled |
| Switch# show surveillance-vlan interfacesfa1-4 Surveillance VLAN Aging : 720minutes Surveillance VLAN CoS 5Surveillance VLAN 1p Remark: enabled | |
| OOUI tableOUI MAC | Description----+----00:01:02 | Test | |
| Port | State | Port Mode | Cos Mode----+----+----+----fa1 | Disabled | Auto |Src fa2 | Disabled |Auto | Srcfa3 | Disabled | Auto | Src |
33. Time
clock set
Syntax
clock set HH:MM:SS
(jan|feb|mar|apr|may|jun|jul|aug|sep|oct|nov|dec)
<1-31> <2000-2035>
Parameter
HH:MM:SS
(jan|feb|mar|ap
r
|may|jun|jul|au
g|
sep|oct|nov|de
c)
<1-31> <2000-
2035>
Default
No default is defined.
The clock set to 2000/01/01 08:00:00 by default at
Command Line Interface User Guide
startup.
Mode
Privileged EXEC
| Usage Use the clock set command to set static time. The static timewon't save to configuration file.You can verify your setting by entering the show clock Privileged EXECcommand. | |
| Example | The example shows how to set static time of switch.switch# clock set 11:03:00 sep 21 201211:03:00 DFL(UTC+8) Sep 21 2012switch# show clock11:03:21 DFL(UTC+8) Sep 21 2012No time source |
clock timezone
| Syntax | clock timezone ACRONYM HOUR-OFFSET [minutes <0-59>] | |
| Parameter | ACRONYM | Specify acronym name of time zone |
| HOUR-OFFSET | Specify hour offset of time zone | |
| Minutes <1-59> | Specify minute offset of time zone | |
| Default | Default time zone is UTC+8. | |
| Mode | Global Configuration | |
| Usage Use the clock timezone command to set timezone setting. Use the no form of this command to restore to default setting. You can verify your setting by entering the show clock detail Privileged EXEC command. |
| Example | The example shows how to set time zone of switch and then restore to default time zone. |
| switch(config)# clock timezonetest +5 switch(config)# show clockdetail 10:13:27 test(UTC+5) Sep 212012No time source | |
| Time zone:Acronym is testOffset is UTC+5 | |
| switch(config)# no clock timezone |
switch(config)# show clock detail
| 13:14:50 DFL(UTC+8) Sep 21 2012No time sourceTime zone:Acronym isDFL Offsetis UTC+8 |
clock source
| Syntax | clock source(local|sntp) | |
| Parameter | local | Specify to use static time |
| sntp | Specify to use sntp time | |
| Default | Default is using local time. | |
| Mode | Global Configuration | |
Usage Use the clock source command to set the source of time.
Use the no form of this command to restore to default setting.
You can verify your setting by entering the show clock detail
Privileged EXEC command.
Example The example shows how to set clock source of switch.
switch(config)# clock source
sntp switch(config)# show
clock detail 08:32:12
test(UTC+5) Sep 21 2012
Time source is sntp
Time zone: Acronym is DFL Offset is UTC+8
clock summer-time
| Syntax | clock summer-time ACRONYM date(jan|feb|mar|apr|may|jun|jul|aug|sep|oct|nov|dec) <1-31><2000-2037>HH:MM (jan|feb|mar|apr|may|jun|jul|aug|sep|oct|nov|dec) <1-31><2000-2037> HH:MM [<1-1440>]clock summer-time ACRONYM recurring (usa|eu) [<1-1440>] clock summer-time ACRONYM recurring (<1-5>|first|last) | |
| (sun|mon|tue|wed|thu|fri|sat)(jan|feb|mar|apr|may|jun|jul|aug|sep|oct|nov|dec) HH:MM (<1-5>|first|last) (sun|mon|tue|wed|thu|fri|sat)(jan|feb|mar|apr|may|jun|jul|aug|sep|oct|nov|dec) HH:MM [<1-1440>] no clock summer-time | ||
| Parameter | ACRONYM | Specify acronym name of time zone |
| (jan|feb|mar|apr|may|jun|jul|aug|sep|oct|nov|dec)<1-31><2000-2037> HH:MM(jan|feb|mar|apr|may|jun|jul|aug|sep|oct|nov|dec) <1-31><2000-2037> HH:MM | Specify non-recurring daylight saving time duration. | |
| <1-1440> | Specify adjust offset of daylight saving time | |
| usa | Using daylight saving time in the United States that starts on the second Sunday of March and ends on the first Sunday of November | |
| eu | Using daylight saving time in the Europe that starts on the last Sunday in March and ending on the last Sunday in October | |
| (<1-5>|first|last)(sun|mon|tue|wed|thu|fri|sat) (jan|feb|mar|apr|may|jun|jul|aug|sep|oct|nov|dec)HH:MM (<1-5>|first|last)(sun|mon|tue|wed|thu|fri|sat) (jan|feb|mar|apr|may|jun|jul|aug|sep|oct|nov|dec)HH:MM | Specify ecurring daylight saving time duration. | |
| Default | No default daylight saving time is defined. | |
| Mode | Global Configuration | |
Command Line Interface
User Guide
Usage
Use the clock summer-time command to set daylight saving time for system time. The “usa” or “eu” means that use the global daylight saving policy which defined by international organization. In both the “date” and “recurring”, the first part of the command specifies when summer time begins, and the second part specifies when it ends. All times are relative to the local time zone. The “recurring” means that adjust time every year within the month.
Use the no form of this command to default setting.
You can verify your setting by entering the show clock detail
Privileged EXEC command.
| Example | The example shows how to set clock summer time of switch. You can verify settings by the following show show clock command. | |
| switch(config)#clocksummer-time test recurring usa switch(config)#showclockdetail08:32:12 test(UTC+5) Sep 21 2012No time source | ||
| Time zone:Acronym isDFL Offset isUTC+8 | ||
| Summertime:Acronym is testRecurring every year. Begins at 2 03 2:0Ends at 1 0 11 2:0Offset is 60 minutes. | ||
| show clock | ||
| Syntax | show clock[detail] | |
| Parameter | detail | Show more detail information of clock |
| Default | No default is defined | |
| Mode | Privileged EXEC | |
| Usage | Use theshow clockcommand to show clock of switch. The“detail” means that show more information of clock such as time zone and daylight saving time. | |
| Example | The example shows how to show clock of switch and detail information. | |
| Switch334455(config)# clock source sntpSwitch334455(config)# clock summer-time DLSrecurring usa Switch334455(config)# sntp host192.168.1.100 Switch334455(config)# show clock14:34:43 DLS(UTC+9) Sep 25 2012Time source is sntp | ||
| Switch334455(config)# show clock detail14:35:39 DLS(UTC+9) Sep 25 2012 | ||
| Time source is sntp | ||
| Time zone:Acronym isDFL Offsetis UTC+8 | ||
| Summertime:Acronym is DLSRecurring every year. Begins at2 0 3 2:0Ends at 1 0 112:0 Offset is 60 minutes. | ||
| sntp | ||
| Syntax | sntp host HOSTNAME [port <1-65535>]no sntp | |
| Parameter | HOSTNAME | Specify ip address or hostname of sntp server |
| sntp | Specify server port of sntp server | |
| Default | No default SNTP server defined. Default server port is 123 when server created. | |
| Mode | Global Configuration | |
| Usage Use the sntp command to set remoteSNTP server. Use the no form of this command to default setting.You can verify your setting by entering the show sntp Privileged EXEC command. | ||
| Example | The example shows how to set remote SNTP server of switch. switch(config)# clock source sntpswitch(config)# sntp host 192.168.1.100switch(config)# show sntpSNTP is EnabledSNTP Server address:192.168.1.100 SNTP Server port:123 | |
show sntp
| Syntax | show sntp |
| Parameter | None |
| Default | No default is defined |
| Mode | Privileged EXEC |
| Usage | Use theshow sntpcommand to remote SNTP server information. |
| Example | The example shows how to show remote SNTP server.Switch334455(config)#show sntpSNTP is EnabledSNTP Server address:192.168.1.100 SNTP Server port:123 |
34. UDLD
errdisable recovery cause udd
| Syntax | errdisable recovery cause udldno errdisable recovery cause udld |
| Parameter N/A | |
| Default | Error disable auto recovery is disabled by default. |
| Mode | Global EXEC |
Usage Use the errdisable recovery cause udld to enable auto recovery of UniDirectional Link Detection (UDLD). Use the "no" to disable it.
| Example | The example shows how to enable auto recovery of UniDirectional Link Detection (UDLD). |
| switch(config)# errdisable recovery cause udd switch# show errdisable recovery ErrDisable Reason Timer Status | |
| + | |
| bpduguard | disabled | |
| udld | enabled... | |
| udld | |
| Syntax udld | no udld |
| Parameter | N/A |
| Default | UDLD is disabled by default. |
| Mode | Interface Configuration |
| Usage Use the udld command to enable UniDirectional Link Detection (UDLD) normal mode of interface.Use the no form of this command to restore to default setting.You can verify your setting by entering the show udld interface Privileged EXEC command. | |
| Example | The example shows how to enable UniDirectional Link Detection (UDLD) normal mode in interface gi1.switch(config)#interface gi1switch(config-if)#udldswitch#show udld interfaces gi1Port enable administrative configuration setting:Enabled Port enable operational state: EnabledCurrent bidirectional state: BidirectionalCurrent operational state: Advertisement - SINGLE NEIGHBOR DETECTED |
| udld aggressive | |
| Syntax udld | aggressiveno udldaggressive |
| Parameter | N/A |
| Default | UDLD aggressive mode is disabled by |
default.
| Mode | Interface Configuration |
| Usage | Use the udld aggressive command to enable UniDirectional Link Detection (UDLD) aggressive mode of interface.Use the no form of this command to restore to default setting.You can verify your setting by entering the show udld interface Privileged EXEC command. |
| Example | The example shows how to enable udld aggressive mode in interface gi1.switch(config)#interface gi1switch(config-if)#udldswitch#show udld interfaces gi1Port enable administrative configuration setting: Enabled / in aggressive mode Port enable operational state: Enabled / in aggressive modeCurrent bidirectional state: BidirectionalCurrent operational state: Advertisement - SINGLE NEIGHBOR DETECTED |
udld message time
Syntax udd message time message-time-interval
| Parameter | message-time-interval Specify the interval for sending message. |
| Default | Default interval is 15 seconds. |
| Mode | Global Configuration |
| Usage | Use the uddl d message time to set interval of UniDirectional Link Detection (UDLD) sent message. |
| Example | The example shows how to set interval of UniDirectional Link Detection (UDLD) message. |
| switch(config)# uddl d message time 30 |
udld reset
| Syntax | udld reset |
| Parameter N/A | |
| Default | No default is defined |
| Mode | Privileged EXEC |
| Usage Use the udld reset command to reset all interfaces disabled by the UniDirectional Link Detection (UDLD) and permit traffic to begin passing through them again.If the interface configuration is still enabled for UDLD, these ports begin to run UDLD again and are disabled for the same reason if the problem has not been corrected. | |
| Example | The example shows how to reset all interfaces disabled by UDLDSwitch# udld reset1 ports shutdown by UDLD were reset. |
show uld
| Syntax show udldshow udld interfaces IF_NMLPORTS | ||
| Parameter | IF_NMLPORTS | Specify the normal interfaces to display udld |
| Default | No default is defined | |
| Mode | Privileged EXEC | |
| Usage Use the show udld command to to display UniDirectional Link Detection (UDLD) administrative and operational status for all ports or the specified port. | ||
| Example | The example shows how to show UniDirectional Link Detection (UDLD) settings and operational status of interface gi1. | |
Switch334455(config)# show udld interfaces gi1
Interface gi1
Port enable administrative configuration setting: Enabled / in aggressive mode Port enable operational state: Enabled / in aggressive mode
Current bidirectional state: Bidirectional
Current operational state: Advertisement - SINGLE
NEIGHBOR DETECTED
Message
interval: 15
Time out
interval: 5
Entry 1
Expiration time: 20
Current neighbor state:
Bidirectional Device ID :
COM4
Device name:
com4 Port ID:
gi3 Message
interval: 7
Time out
interval: 5
Neighbor echo 1 device:
COM3 Neighbor echo 1
port: gi11
35. VLAN
vlan
Syntax vlan
no vlan
Default
VLAN 1 created by default
Mode
Global Configuration
Usage Use the vlan global configuration command to
create VLAN. Use the no form of this command to
remove exist VLAN.
You can verify your setting by entering the show vlan Privileged EXEC
| command. | ||
| Example | The following example creates and removes a VLAN entry (100). | |
| Switch# configureSwitch (config)# vlan 100Switch# show vlan | ||
| Name (vlan) | VID | VLAN Name | Untagged Ports | Tagged Ports | Type----+----+----+----+----+----+----+----+----+----+----+----+----+----+----+----+----+----+----+----+----+----+----+----+----+----+----+----+----+----+----+----+----+----+----+----+----+----+----+----+----+----+----+----+----+----+----+----+----+----+---- +----+----+----+----+----+----+----+----+----+----+----+----+----+----+----+----+----+----+----+----+----+----+----+----+----+----+----+----+----+----+----+----+----+----+----+----+----+----+----+----+----+----+----+----+----+----+----+----+----+----+ 1 | default | fa1-48,gi1-4,lag1-8 | --- | Default 100 | VLAN0100 | --- | --- | Static | |
| Syntax | name NAME | |
| Parameter | NAME | Specify the name of the VLAN (Max. 32 chars). |
| Default | Default name of new vlan is VLANxxxx. Xxxx is 4-digit vlan number. | |
| Mode | VLAN Configuration | |
| Usage | Use the name vlan configuration command to set name of vlan You can verify your setting by entering the show vlan Privileged EXEC command. | |
| Example | This example sets the VLAN name of VLAN 100 to be 'VLAN- one-hundred'.SwitchEF0101(config)# vlan 100SwitchEF0101(config-vlan)# name VLAN-one-hundred Switch# show vlanVID | VLAN Name | Untagged Ports | Tagged Ports | Type----+----+----+----+----+----+----+----+----+----+----+----+----+----+----+----+----+----+----+----+----+----+----+----+----+----+----+----+----+----+----+----+----+----+----+----+----+----+----+----+----+----+---- +----+----+----+----+----+----+---- +----+----+----+----+----+----+----+----+----+----+----+----+----+----+----+----+----+----+----+----+----+----+----+----+----+----+----+----+----+----+----+----+----+----+----+----+----+----+----+----+----+----+---- +----+----+----+----+----+----+----+\n1 | default | fa1-48,gi1-4,lag1-8 | --- | Default 100 | VLAN-one-hundred | ---- |--- |--- |Static | |
| switchport mode | ||
| Syntax | switchport mode (access | hybrid | trunk [uplink] | tunnel) | |
| Parameter | access | Specify the VLAN mode to Access port. |
| hybrid | Specify the VLAN mode to Hybrid port. | |
| trunk | Specify the VLAN mode to Trunk port. | |
| uplink | Specify the Uplink property on this Trunk port. | |
| tunnel | Specify the VLAN mode to Dot1Q Tunnel port. | |
| Default | Default is trunk mode of all | |
interfaces
Mode
Port Configuration
Usage The VLAN mode is used to configure the port for different port role.
Access port: Accepts only untagged frames and join an untagged VLAN. Hybrid port: Support all functions as defined in IEEE 802.1Q specification. Trunk port: An untagged member of one VLAN at most, and is a tagged member of zero or more VLANs. If it is an uplink port, it can recognize double tagging on this port.
Tunnel port: Port-based Q-in-Q mode.
Use the switch mode port configuration command to set mode of interface You can verify your setting by entering the show interfaces switchport Privileged EXEC command.
Example
This example sets VLAN mode to Access port.
SwitchEF0101(config)# interface fa12
SwitchEF0101(config-if)# switchport mode
access SwitchEF0101# show interfaces
switchport fa12 Port : fa12
Port Mode : Access
Ingress Filtering :
enabled
Acceptable Frame Type : untagged-only
Ingress UnTagged VLAN (NATIVE) : 1
Trunking VLANs Enabled:
Port is member in:
Vlan Name Egress rule
1 default Untagged
Forbidden
VLANs: Vlan
Name
SwitchEF0101#
switchport hybrid pvid
Syntax
switchport hybrid pvid <1-4094>
Parameter
<1-4094>
Specify the port-based VLAN ID on the Hybrid port.
Default
Default pivd is 1.
| Mode | Port Configuration |
| Usage | Use the switch hybrid pivd port configuration command to set pvid of interface.You can verify your setting by entering the show interfaces switchport Privileged EXEC command. |
| Example | This example sets PVID to 100.SwitchEF0101(config)# interface fa10SwitchEF0101(config-if)# switchport mode hybrid SwitchEF0101(config-if)# switchport hybrid pvid 100 SwitchEF0101# show interfaces switchport fa10Port : fa10Port Mode : HybridIngress Filtering : enabledAcceptable Frame Type : allIngress UnTagged VLAN (NATIVE) : 100 Trunking VLANs Enabled:Port is member in:Vlan Name Egress rule----1 default UntaggedForbiddenVLANs:Vlan NameSwitchEF0101# |
switchport hybrid ingress-filtering
| Syntax switchport bybrid ingress-filtering no switchport hybrid ingress-filtering | |
| Default | Default is enabled |
| Mode | Port Configuration |
Usage
Use the switchport hybrid ingress-filtering port configuration
command to enable vlan ingress filter.
Use the no form of this command to disable.
You can verify your setting by entering the s show interfaces switchport Privileged EXEC command.
Example
This example sets ingress-filtering to disable.
SwitchEF0101(config)# interface fa10
SwitchEF0101(config-if)# switchport mode
hybrid
SwitchEF0101(config-if)#no switchport hybrid ingress-filtering
SwitchEF0101# show interfaces switchport fa10
Port : fa10
Port Mode : Hybrid
Ingress Filtering :
disabled
Acceptable Frame Type : all
Ingress UnTagged VLAN (NATIVE) : 100
Trunking VLANs Enabled:
Port is member in:
Vlan Name Egress rule
1 default Untagged
Forbidden
VLANs:
Vlan Name
SwitchEF0101#
switchport hybrid acceptable-frame-type
| Syntax | switchport hybrid acceptable-frame-type ( all | tagged-only | untagged- only ) | |
| Parameter | all | Specify to accept all frames. |
| tagged-only | Specify to only accept tagged frames. | |
| untagged-only | Specify to only accept untagged frames. | |
| Default | Default is accept all frames | |
Mode Port Configuration
Usage
Use the switchport hybrid accept-frame-type port configuration command to choose which type of frame can be accepted.
You can verify your setting by entering the s show interfaces switchport Privileged EXEC command
| Example | This example sets acceptable-frame-type to tagged-only. SwitchEF0101(config)# interface fa10SwitchEF0101(config-if)# switchport mode hybridSwitchEF0101(config-if)# switchport hybrid acceptable-frame-type tagged-onlySwitchEF0101# show interfaces switchportfa10 Port : fa10Port Mode : NybridIngress Filtering :disabledAcceptable Frame Type : tagged-onlyIngress UnTagged VLAN ( NATIVE ) :100 Trunking VLANs Enabled: |
| Port is member in:Vlan Name Egress rule----1 default Untagged | |
| ForbiddenVLANs:Vlan Name | |
| SwitchEF0101# |
switchport hybrid allowed vlan
| Syntax | switchport hybrid allowed vlan add VLAN-LIST [(tagged|untagged)] switchport hybrid allowed vlan remove VLAN-LIST | |
| Parameter | VLAN-LIST | Specifies the VLAN list to be added or remove. |
| ( tagged | untagged ) | Specifies the member type is tagged or untagged. | |
| Default | Only vlan 1 is untagged member by default. Default is tagged member when added. | |
| Mode | Port Configuration | |
| Usage | Use the switchport hybrid allow vlan add port configuration command to allow vlan on interface.Use the switchport hybrid allow vlan remove port configuration command to remove vlan on interface.You can verify your setting by entering the s show interfaces switchport Privileged EXEC command. | |
| Example | This example sets port fa10 VLAN to join the VLAN 100 as tagged member. SwitchEF0101(config)# interface fa10SwitchEF0101(config-if)# switchport hybrid allowed vlan add 100-105 SwitchEF0101(config-if)# switchport hybrid allowed vlan remove 105 SwitchEF0101# show interfaces switchport fa10Port : fa10Port Mode : HybridIngress Filtering :disabledAcceptable Frame Type : tagged-onlyIngress UnTagged VLAN ( NATIVE ) :100 Trunking VLANs Enabled: | |
| Port is member in:Vlan Name Egress rule | ||
| 1 default Untagged100 VLAN-one-hundred Tagged101 VLAN0101 Tagged102 VLAN0102 Tagged103 VLAN0103 Tagged104 VLAN0104 Tagged | ||
| ForbiddenVLANs:Vlan Name | ||
| SwitchEF0101# | ||
switchport access vlan
| Syntax switchport access vlan | ||
| <1-4094> No switchport access vlan | ||
| Parameter | <1-4094> | Specifies the access VLAN ID. |
| Default | Default is vlan 1 | |
| Mode | Port Configuration | |
Command Line Interface
User Guide
Usage
Use the switchport access vlan port configuration command to set native vlan on interface. The vlan will be pvid on interface as well.
Use the no form of this command to restore to default vlan You can verify your setting by entering the s show interfaces switchport Privileged EXEC command.
| Example | This example sets Access port fa10 native VLAN ID to 100. |
| SwitchEF0101(config)# interface fa10SwitchEF0101(config-if)# switchport modeaccess SwitchEF0101(config-if)# switchportaccess vlan 100 SwitchEF0101# showinterfaces switchport fa10Port : fa10Port Mode : AccessIngress Filtering :enabledAcceptable Frame Type : untagged-onlyIngress UnTagged VLAN ( NATIVE ) :100 Trunking VLANs Enabled: | |
| Port is member in:Vlan Name Egress rule----100 VLAN-one-hundred Untagged | |
| ForbiddenVLANs:Vlan Name---- |
switchport tunnel vlan
| Syntax switchport tunnel vlan <1-4094> no switchport tunnel vlan | ||
| Parameter | <1-4094> | Specifies the tunnel VLAN ID. |
| Default | Default is vlan 1 | |
| Mode | Port Configuration | |
| Usage Use the switchport tunnel vlan port configuration command to set dot1q tunnel vlan on interface. The vlan will be pvid on interface as well.Use the no form of this command to remove vlan on interface.The tunnel vlan id will set to reserve vlan 4095.You can verify your setting by entering the s show interfaces switchport Privileged EXEC command. | ||
Example
This example sets Tunnel port fa10 native VLAN to 100.
SwitchEF0101(config)# interface fa10
SwitchEF0101(config-if)# switchport mode
tunnel
SwitchEF0101(config-if)# switchport tunnel vlan 100
| SwitchEF0101# show interfaces switchport fa10 Port : fa10Port Mode : TunnelIngress Filtering : enabledAcceptable Frame Type : allIngress UnTagged VLAN( NATIVE ) : 100 Trunking VLANsEnabled: | |
| Port is member in:Vlan Name Egress rule----100 VLAN-one-hundred Untagged | |
| ForbiddenVLANs:Vlan Name---- |
switchport trunk native vlan
| Syntax | switchport trunk native vlan <1-4094> no switchport trunk native vlan | |
| Parameter | <1-4094> | Specifies the native VLAN ID. |
| Default | Default is vlan 1 | |
| Mode | Port Configuration | |
| Usage | Use the switchport trunk native vlan port configuration command to set native vlan on interface.Use the no form of this command to restore to default vlan.You can verify your setting by entering the s show interfaces switchport Privileged EXEC command. | |
| Example | This example sets Trunk port fa10 native VLAN to 100. | |
| SwitchEF0101(config)# interface fa10SwitchEF0101(config-if)# switchport mode trunkSwitchEF0101(config-if)# switchport trunk native vlan100 SwitchEF0101# show interfaces switchport fa10Port : fa10Port Mode : TrunkIngress Filtering :enabledAcceptable Frame Type : all | ||
Ingress UnTagged VLAN
( NATIVE ) : 100 Trunking VLANs
Enabled:
Port is member in:
Vlan Name Egress rule
100 VLAN-one-hundred Untagged
Forbidden
VLANs:
Vlan Name
switchport trunk allowed vlan
| Syntax | switchport trunk allowed vlan ( add | remove ) ( VLAN-LIST | all ) |
| Parameter ( add | | remove ) Specify the action to add or remove the allowed VLAN list. |
| ( VLAN-LIST | all ) Specify the VLAN list or all VLANs to be added or removed. | |
| Mode | Port Configuration |
| Usage | Use the switchport trunk allow vlan add port configuration command to allow vlan on interface.Use the switchport trunk allow vlan remove port configuration command to remove vlan on interface.You can verify your setting by entering the s show interfaces switchport Privileged EXEC command. |
| Example | This example sets Trunk port fa10 to add the allowed VLAN 100. |
| SwitchEF0101(config)# interface fa10SwitchEF0101(config-if)# switchport trunk allowed vlan add 100SwitchEF0101# show interfaces switchport fa10Port : fa10Port Mode : TrunkIngress Filtering :enabledAcceptable Frame Type : allIngress UnTagged VLAN ( NATIVE ) : 1Trunking VLANs Enabled: 100 | |
| Port is member in:Vlan Name Egress rule----1 default Untagged |
100 VLAN-one-hundred Tagged
Forbidden
VLANs:
Vlan Name
switchport default-vlan tagged
Syntax switchport default-vlan tagged no switchport default-vlan tagged
| Parameter | None |
| Default | Default is untagged |
| Mode | Port Configuration |
| Usage Use the switchport default vlan tagged port configuration command to become default vlan tagged member. Use the no switchport default vlan tagged port configuration command to restore to default You can verify your setting by entering the s show interfaces switchport Privileged EXEC command |
| Example | This example sets Trunk port fa10 membership with the default VLAN to tag. |
| SwitchEF0101(config)# interface fa10SwitchEF0101(config-if)# switchport default-vlantagged SwitchEF0101# show interfaces switchport fa10Port : fa10Port Mode : HybridIngress Filtering :enabledAcceptable Frame Type : allIngress UnTagged VLAN ( NATIVE ) : 1Trunking VLANs Enabled: | |
| Port is member in:Vlan Name Egress rule----1 default Tagged | |
| ForbiddenVLANs:Vlan Name---- |
switchport forbidden default-vlan
| Syntax switchport forbidden default-vlan no switchport forbidden default-vlan | |
| Parameter | None |
| Default | Default is allowed |
| Mode | Port Configuration |
| Usage | Use theswitchport forbidden default-vlan port configuration command to forbid default-vlan on interface.Use theno switchport forbidden default-vlan port configuration command to restore to defaultYou can verify your setting by entering thesshow interfaces switchport Privileged EXEC command |
| Example | This example sets the membership of the default VLAN with port fa10 to forbidden.SwitchEF0101(config)# interface fa10SwitchEF0101(config-if)# switchport forbidden default-vlan SwitchEF0101# show interfaces switchport fa10Port : fa10Port Mode : TrunkIngress Filtering : enabledAcceptable Frame Type : allIngress UnTagged VLAN (NATIVE) : 4095Trunking VLANs Enabled:Port is member in:Vlan Name Egress rule---- ----ForbiddenVLANs:Vlan Name---- 1 default |
Syntax
switchport forbidden vlan ( add | remove ) VLAN-LIST
| Parameter | (add | remove) | Add or remove forbidden membership. |
| VLAN-LIST | Specify the VLAN list. | |
| Default | No vlan is forbidden by default | |
| Mode | Port Configuration | |
| Usage | Use the switchport forbidden vlan add port configuration command to forbid vlan on interface.Use the switchport forbidden vlan remove port configuration command to accept vlan on interface.You can verify your setting by entering the s show interfaces switchport Privileged EXEC command | |
| Example | This example sets the membership of the VLAN 100 with port fa10 to forbidden.SwitchEF0101(config)# interface fa10SwitchEF0101(config-if)# switchport forbidden vlan add100 SwitchEF0101# show interfaces switchport fa10Port : fa10Port Mode : TrunkIngress Filtering : enabledAcceptable Frame Type : allIngress UnTagged VLAN ( NATIVE ) : 1Trunking VLANs Enabled: 100Port is member in:Vlan Name Egress rule---- 1 default UntaggedForbidden VLANs:Vlan Name---- 100 VLAN-one-hundred | |
switchport vlan tpid
| Syntax | switchport vlan tpid(0x8100|0x88a8|0x9100|0x9200) |
| Parameter | (0x8100|0x88a8|0x9100|0x92 Select TPID to set. 00) |
| Default | Default TPID is 0x8100 |
| Mode | Port Configuration |
| Usage | Use the switchport vlan tpid port configuration command to set TPID on interface.You can verify your setting by entering the s show running-config Privileged EXEC command |
| Example | This example sets the TPID to 0x9100 on interface fa10.SwitchEF0101(config)# interface fa10SwitchEF0101(config-if)# switchport vlan tpid 0x9100 |
management-vlan
| Syntax management-vlan vlan<1-4094> nomanagement-vlan | ||
| Parameter | <1-4094> | Specify the VLAN ID of management-vlan. |
| Default | Default management vlan is 1. | |
Mode Global Configuration
| Usage | Use the management vlan Global Configuration mode command to set management vlan id. Vlan id must be created first.Use the no form of this command to restore to default setting.You can verify your setting by entering the showmanagement-vlan Privileged EXEC command |
| Example | (1) The following example specifies that management vlan 2 is created Switch(config)#vlan 2Switch(config)# management-vlan vlan 2(2) The following example specifies that management-vlan is restored to be default VLAN.Switch(config)# no management-vlan |
show vlan
Syntax show vlan [(VLAN-LIST|dynamic|static)]
| Parameter | (VLAN-LIST|dynamic|static) | Specify vlan id to show information or show all static or dynamic vlan entries. |
| Default | Nones | |
| Mode | Privileged EXEC | |
| Usage | Display information about vlan entry | |
| Example | The following example specifies that show vlan Switch# show vlanVID | VLAN Name | Untagged Port | Tagged Port | Type----+----+----+----+----+----+----+----+----+----+----+----+----+----+----+----+----+----+----+----+----+----+----+----+----+----+----+----+----+----+----+----+----+----+----+----+----+----+----+----+----+----+----+----+----+----+----+----+----+----+---- +----+----+----+----+----+----+----+----+----+----+----+----+----+----+----+----+----+----+----+----+----+----+----+----+----+----+----+----+----+----+----+----+----+----+----+----+----+----+----+----+----+----+----+----+----+----+----+----+----+----+ 1 default fa1-8,fa10-48,lag1-8 --- |Default 100 | VLAN-one-hundred |--- |--- | Static 101 | VLAN0101 |--- |--- | Static102 | VLAN0102 |--- |--- | Static | |
show vlan interface membership
| Syntax | show vlan VLAN-LIST interfaces IF_PORTS membership | |
| Parameter | Specify vlan to show | |
| IF_PORTS | Specify interface is to show | |
| Default | Nones | |
| Mode | Privileged EXEC | |
| Usage | Display information about vlan membership on interfaces. | |
| Example | The following example specifies that show vlan interface membership Switch# show vlan 100 interfaces fa10 membership | |
| VLAN ID : 100VLAN Type : Static | ||
| Port | Membership | |
| fa10 | Excluded |
show interface switchport
Syntax show interface switchport interfaces IF_PORTS
| Parameter | IF_PORTS | Specify interfaces protocol vlan to display |
| Default | None | |
| Mode | Privileged EXEC | |
| Usage | Display information about default vlan | |
| Example | The following example specifies that show interfacce switchport.SwitchEF0101(config)# interface fa10SwitchEF0101(config-if)# switchport trunk allowed vlan add 100SwitchEF0101# show interfaces switchport fa10Port : fa10Port Mode : TrunkIngress Filtering : enabledAcceptable Frame Type : allIngress UnTagged VLAN (NATIVE) : 1Trunking VLANs Enabled: 100Port is member in:Vlan Name Egress rule----1 default Untagged100 VLAN-one-hundred TaggedForbiddenVLANs:Vlan Name | |
show management-vlan
Syntax
show management-vlan
| Parameter None | |
| Default | Nones |
| Mode | Privileged EXEC |
| Usage | Display information about management vlan |
| Example | The following example specifies that show management vlan Switch(config)# show management-vlanManagement VLAN-ID : default(1) |
36. Voice VLAN
voice-vlan (Global)
| Syntax | voice-vlanno voice-vlan |
| Parameter |
Default Voice VLAN is disabled
| Mode | Global Configuration |
| Usage | Use the voice vlan global configuration command to enable the functional Voice VLAN on the device.Use the no form of this command to disable voice vlan function.You can verify your setting by entering the show voice vlan Privileged EXEC command. |
| Example | The following example shows how to enable voice vlan. Switch(config)#voice-vlanSwitch#show voice-vlanAdministrate Voice VLAN state :disabled Voice VLAN ID : none(disable)Voice VLAN Aging : 1440minutes Voice VLAN CoS6Voice VLAN 1p Remark: disabled |
voice-vlan (Interface)
Syntax voice-vlan
no voice-vlan
| Parameter | N/A |
| Default | The default all port admin-staus is disabled. |
| Mode | Interface Configuration |
| Usage | Use thevoice vlan Interface configuration command to enable OUI voice VLAN configuration on an interfaceUse theno form of this command to disable voice vlan on an interfaces You can verify your setting by entering theshow voice vlan Privileged EXECcommand |
| Example | The following example how to enable voice VLAN function in ouimode on an interfaceSwitch(config)#interface range fa1-3Switch(config-if)#voice-vlanSwitch# show voice-vlan interfacesfa1-8 Voice VLAN Aging : 1440minutes Voice VLAN CoS 7Voice VLAN 1p Remark: enabled |
| OUI tableOUI MAC | Description----+----00:E0:BB | 3COM00:03:6B | Cisco00:E0:75 | Veritel00:D0:1E | Pingtel00:01:E3 | Siemens00:60:B9 |NEC/Philips 00:0F:E2| H3C00:09:6E | Avaya | |
| Port | State | Port Mode | Cos Mode----+----+----+----fa1 | Disabled | Auto | Srcfa2 | Disabled | Auto| Src fa3 |Disabled | Auto |Srcfa4 | Disabled | Auto | Src |
| fa5 | Disabled | Auto | Src |
| fa6 | Disabled | Auto | Src |
| fa7 | Disabled | Auto | Src |
| fa8 | Disabled | Auto | Src |
voice-vlan vlan
| Syntax voice-vlan vlan <1-4094>no voice-vlan vlan | |
| Parameter | <1-4094> Specify the voice VLAN ID |
| Default | The default Voice VLAN ID is None. |
| Mode | Global Configuration |
| Usage | Use thevoice vlan idglobal configuration command to configure the VLAN identifier of the voice VLAN statically.Use thenoform of this command to restore voice vlan id to default. You can verify your setting by entering theshowvoice vlan Privileged EXECcommand |
| Example | The following example shows how to set Voice vlan id. The vlan id must be created first.Switch(config)#voice-vlan vlan 128Switch#show voice-vlanAdministrate Voice VLAN state :enabled Voice VLAN ID128Voice VLAN Aging : 1440minutes Voice VLAN CoS6Voice VLAN 1p Remark: disabled |
voice-vlan oui-table
| Syntax | voice-vlan oui-table A:B:C [DESCRIPTION] no voice-vlan oui-table [A:B:C] | |
| Parameter | A:B:C | Specify OUI Mac address to add or remove |
| DESCRIPTION | Specify description of the specified MAC address to the table | |
Default
The system default has 8 oui addresses.
| Mode | Global Configuration |
| Usage | Use thevoice vlan oui-tableglobal configuration command to addoui mac address to OUI TableUse thenoform of this command to remove all or specified oui macaddress.. You can verify your setting by entering theshow voice vlanPrivileged EXECcommand |
| Example | This following example shows how to add OUIMac. Switch(config)#voice-vlan oui-table00:01:02 “Test” Switch# show voice-vlaninterfaces allVoice VLAN Aging : 1440minutes Voice VLAN CoS 6Voice VLAN 1p Remark: disabledOUI tableOUI MAC | Description----+----00:E0:BB | 3COM00:03:6B | Cisco00:E0:75 | Veritel00:D0:1E | Pingtel00:01:E3 | Siemens00:60:B9 |NEC/Philips 00:0F:E2| H3C00:09:6E | Avaya00:01:02 | TestPort | State | Port Mode | Cos Mode----+----+----+----fa1 | Disabled | Auto | Srcfa2 | Disabled | Auto | Srcfa3 | Disabled | Auto | Src...... |
voice-vlan cos (Global)
| Syntax | voice-vlan cos <0-7> [remark] no voice-vlan cos | |
| Parameter | <0-7> | Specify the voice VLAN Class of Service value in telephone oui mode |
| remark | Specify that the L2 user priority is remarked with the | |
| Default | The default cos value is 6, remark is disabled. | |
| Mode Global Configuration | ||
| Usage | Use thevoice vlan cosglobal configuration command to configure the voice VLAN cos value and 1p remark functionUse the “no” form to restore to default mode.You can verify your setting by entering theshow voice vlanPrivileged EXECcommand | |
| Example | The following example show how to set cos value and enable 1p remark functionSwitch(config)#voice-vlan cos 7 remarkSwitch#show voice-vlanAdministrate Voice VLAN state :disabled Voice VLAN ID 128Voice VLAN Aging : 1440minutes Voice VLAN CoS 7Voice VLAN 1p Remark: enabled | |
voice-vlan cos (Interface)
| Syntax | voice-vlan cos (src | all) no voice-vlan cos | |
| Parameter | src | Specify QoS attributes are applied to packets with OUIs in the source MAC address. |
| All | Specify QoS attributes are applied to packets that are classified to the Voice VLAN. | |
| Default | The default all port in Src mode. | |
| Mode | Interface configuration | |
| Usage Use the voice vlan cos Interface configuration command toconfigure OUI voice VLAN cos mode configuration on aninterfaceUse the “no” form to restore to default mode.You can verify your setting by entering the show voice-vlaninterfaces Privileged EXEC command |
Command Line Interface
User Guide
Example
The following example how to configure voice packet QoS attributes on an interface
Switch(config)#interface range fa1-3
Switch(config-if)#voice-vlan cos all
Switch# show voice-vlan interfaces fa1-8
Voice VLAN Aging : 1440
minutes Voice VLAN CoS
7
Voice VLAN 1p Remark: enabled
OUI table
OUI MAC | Description

---- 00:E0:BB | 3COM
00:03:6B | Cisco
00:E0:75 | Veritel
00:D0:1E | Pingtel
00:01:E3 |
Siemens 00:60:B9
| NEC/Philips
00:0F:E2 | H3C
00:09:6E | Avaya
Port | State | Port Mode | Cos Mode

fa1 | Disabled | Auto |
All fa2 | Disabled | Auto
| All fa3 | Disabled | Auto
| All fa4 | Disabled | Auto
| Src fa5 | Disabled | Auto
| Src fa6 | Disabled | Auto
Src fa7 | Disabled |
Auto | Src
fa8 | Disabled | Auto | Src
voice-vlan mode
| Syntax | voice-vlan mode (auto|manual) no voice-vlan mode | |
| Parameter | auto | Specifies that the port is identified as a candidate to join the voice VLAN. When a packet with a source OUI MAC address that identifies the remote equipment as voice equipment is seen on the port, the port joins the voice VLAN as a tagged port. |
| manual | Specifies that the port is manually assigned to the voice | |
| Default | The default is auto mode. | |
Mode
Interface Configuration
| Usage | Use thevoice-vlan modeglobal configuration command toconfigure the voice VLAN mode for interface.Use the “no” form to restore to default mode.You can verify your setting by entering theshow voice-vlaninterfaces Privileged EXECcommand. |
| Example | The following example how to configure voice mode tomanual Switch(config)#interface range fa1-3Switch(config-if)#voice-vlan modemanaul Switch#show voice-vlaninterfaces fa1-8Voice VLAN Aging :1440 minutesVoice VLAN CoS 7Voice VLAN 1p Remark: enabledOUI tableOUI MAC | Description----+----00:E0:BB | 3COM00:03:6B | Cisco00:E0:75 | Veritel00:D0:1E | Pingtel00:01:E3 | Siemens00:60:B9 |NEC/Philips 00:0F:E2| H3C00:09:6E | AvayaPort | State | Port Mode | Cos Mode----+----+----+----fa1 | Disabled | Manual | Srcfa2 | Disabled | Manual | Srcfa3 | Disabled | Manual | Srcfa4 | Disabled | Auto | Srcfa5 | Disabled | Auto | Srcfa6 | Disabled | Auto | Srcfa7 | Disabled | Auto | Srcfa8 | Disabled | Auto | Src |
voice-vlan aging-time
Syntax voice-vlan aing-time <30-65536> no voice-vlan aing-time
| Parameter | <30-65536> | Specify the voice VLAN aging timeout interval in |
| Default | The default aging-timeout value is 1440 minutes |
| Mode | Global Configuration |
| Usage | Use thevoice vlan aging-timeglobal configuration command to configure the voice VLAN aging timeout.Use the “no” form to restore to default time.You can verify your setting by entering theshow voice vlanPrivileged EXECcommand |
| Example | The following example shows how to set aging time. Switch(config)#voice-vlan aging-time720Switch#show voice-vlanAdministrate Voice VLAN state :disabled Voice VLAN ID 1Voice VLAN Aging : 720minutes Voice VLAN CoS5Voice VLAN 1p Remark: enabled |
show voice-vlan
| Syntax show voice-vlanshow voice-vlan interfaces [IF_PORTS] | ||
| Parameter | IF_PORTS | Specifies interfaces to display voice VLAN settings in |
| Default | N/A | |
| Mode | Privileged EXEC | |
| Usage | Use the show voice vlan command in EXEC mode to display the voice VLAN status for all interfaces or for a specific interface if the voice VLAN type is OUI | |
| Example | The following example show how to display voice vlan oui mode settings Switch# show voice-vlan |
Administrate Voice VLAN state : disabled
Voice VLAN ID : none (disable)
Voice VLAN Aging : 720
minutes Voice VLAN CoS 6
Voice VLAN 1p Remark: disabled
Switch# show voice-vlan
interfaces fa1-4 Voice VLAN
Aging : 720
minutes Voice VLAN CoS
5
Voice VLAN 1p Remark: enabled
OUI table
OUI MAC | Description
---- 00:E0:BB | 3COM
00:03:6B | Cisco
00:E0:75 | Veritel
00:D0:1E | Pingtel
00:01:E3 |
Siemens 00:60:B9
| NEC/Philips
00:0F:E2 | H3C
00:09:6E | Avaya
Port | State | Port Mode | Cos Mode
fa1 | Disabled | Auto |
Src fa2 | Disabled | Auto
| Src fa3 | Disabled | Auto
| Src
fa4 | Disabled | Auto | Src
37. Static Routing
IPv4 Interface
| Syntax | interface vlanip address ipaddr maskno interface vlanno ip address | |
| Parameter | ipaddr | Specify IPv4 address for switch |
| mask | Specify net mask address for switch | |
Command Line Interface
User Guide
Default The vlan interface and ip address are not configured by default.
Mode Global configuration and vlan interface configuration.
| Usage Use theinterface vlan global configuration command to configip interface on the device.Use theip addresscommand in vlan interface mode toconfigure the device's ip address.Use theno ip addresscommand to delete the configured ipaddress.Use theno interface vlancommand to delete ip interface on the device.You can verify your setting by entering theshow ip interfacevlan Privileged EXEC command. | |||||
| Example | The following example shows how to config ipinterface.Switch(config)#interface vlan 2Switch(config-if)#ip address 192.168.3.1255.255.255.0Switch#show ip interface vlan 2 | ||||
| IP Address Status | I/F | I/F Status admin/oper Type | |||
| 192.168.3.1/24 | VLAN 2 | UP/DOWN | Static | Valid | |
IPv4 Routes
Syntax ip route dest-ipaddr mask router-ipaddr
no ip route dest-ipaddr mask router-ipaddr
| Parameter | dest-ipaddr | Destination ip address prefix |
| mask | Destination ip address prefix mask | |
| router-ipaddr | Forwarding router's ip address | |
| Default | Static route is not configured by default. | |
| Mode | Global Configuration mode. | |
| Usage | Use the ip route command in global mode to configure a static route rule.Use the no ip route command to delete a static routing rule.You can verify your setting by entering the show ip routePrivileged EXEC command | |
| Example | The following example shows how to configure a static route.Switch(config)# vlan 2Switch(config)# interface GigabitEthernet 4Switch(config-if)# switchport trunk allowed vlan add 2Switch(config)# interface vlan 2Switch(config-if)# ip address 192.168.3.1 255.255.255.0Switch(config)# ip route 1.1.1.1 255.0.0.0 192.168.3.11Switch# show ip routeCodes: > - best, C - connected, S - staticS> 1.0.0.0/8 [1/1] via 192.168.3.11, VLAN 2C> 192.168.0.0/24 is directly connected, MGMT VLANC> 192.168.3.0/24 is directly connected, VLAN 2 | |
IPv4 ARP
Syntax arp ip-addr mac-addr vlan vlanid no arp ip-addr mac-addr vlan vlanid
| Parameter | ip-addr | IP address of ARP entry |
| mac-addr | MAC address of ARP entry | |
| vlanid | Vlan ID of this arp entry |
Default The device contains ARP entries of the vlan interface.
| Mode | Global Configuration mode. | |||
| Usage | Use the arp command to add a static arp entry.Use the no arp command to delete a static arp entry.You can verify your setting by entering the show arp Privileged EXEC command | |||
| Example | The following example shows how to configure and view a static arp entry.Switch(config)# arp 192.168.3.22 00:00:11:11:11 vlan 2Switch# show arpVLAN Interface IP address HW address Status---- ---- ---- ---- ----vlan 1 192.168.0.112 00:D0:00:00:00:01 Dynamicvlan 2 192.168.3.22 00:00:11:11:11:11 Static | |||
IPv6 Interface
| Syntax | interface vlan vlanid | |
| ipv6 enable | ||
| no interface vlan vlanid | ||
| no ipv6 enable | ||
| Parameter | vlanid | Vlan id for vlan interface |
Default The vlan interface are not configured by default.Ipv6 is disabled.
Mode Global configuration and vlan interface configuration.
Usage Use the interface vlan global configuration command to config ip interface on the device. Use the ipv6 enable command in vlan interface mode to enable ipv6 function. Use the no ipv6 enable command to disable ipv6 function. Use the no interface vlan command to delete ip interface on the device. You can verify your setting by entering the show ipv6 interface vlan Privileged EXEC command.
Command Line Interface
User Guide
Example
The following example shows how to config ip interface.
Switch(config)# interface vlan 2
Switch(config-if)# ipv6 enable
Switch# show ipv6 interface vlan 2
VLAN 2 is up/up
IPv6 is enabled, link-local address is fe80::2e0:4cff:fe00:0
IPv6 Forwarding is enabled
No global unicast address is configured
Joined group address(es):
ff02::1:ff00:0
ff02::1
ff01::1
ND DAD is enabled, number of DAD attempts: 1
Stateless autoconfiguration is enabled
IPv6 Address
Syntax
ipv6 address ipv6-addr
no ipv6 address
Parameter
ipv6-addr
Manually configured ipv6 address
Default The vlan interface are not configured by default.Ipv6 is disabled.
Mode Global configuration and vlan interface configuration.
Usage Use the ipv6 address command in vlan interface mode to config a manual ipv6 address.
Use the no ipv6 address command in vlan interface mode to delete all manual ipv6 addresses on this vlan interface.
You can verify your setting by entering the show ipv6 interface vlan Privileged EXEC command.
Example
The following example shows how to config ip interface.
Switch(config)# interface vlan 2
Switch(config-if)# ipv6 address 2001:01::01:01/64
Switch# show ipv6 interface vlan 2
VLAN 2 is up/up
IPv6 is enabled, link-local address is fe80::2e0:4cff:fe00:0
IPv6 Forwarding is enabled
Global unicast address(es):
IPv6 Global Address
2001:1::1:1/64
Joined group address(es):
ff02::1:ff01:1
Type
Manual
ff02::1:ff00:0
ff02::1
ff01::1
ND DAD is enabled, number of DAD attempts: 1
Stateless autoconfiguration is enabled Stateless
autoconfiguration is enabled
IPv6 Routes
| Syntax | ipv6 route ipv6-addr/length route-ipv6-addr no ipv6 address ipv6-addr/length | |
| Parameter | ipv6-addr/length | Destination ipv6 prefix and length |
| route-ipv6-addr | Forwarding router's ipv6 address | |
Default The ipv6 routing entry is not configured by default.
Mode Global configuration and vlan interface configuration.
| Usage Use the ipv6 route command to configure a static ipv6 routing entry. Use the no ipv6 address command to delete a static ipv6 routing entry. You can verify your setting by entering the show ipv6 route static Privileged EXEC command. |
| Example | The following example shows how to configure an ipv6 routing entry.Switch(config)# ipv6 route 2002:01::01:01/96 2001:01::01:02Switch# show ipv6 route staticCodes: A - active, I - inactive |
I 2002:1::/96 [1/1] via 2001:1::1:2, inactive
IPv6 Neighbors
| Syntax | ipv6 neighbor ipv6-addr vlan vlanid macaddr no ipv6 neighbor | |
| Parameter | ipv6-addr | Neighbor ipv6 address |
| vlanid | Vlan interface number | |
| macaddr | MAC address of ipv6 neighbor entry | |
Default No ipv6 neighbor address by default.
Mode Global configuration.
Usage Use the ipv6 neighbor command to configure a static ipv6 neighbor entry.
Use the no ipv6 neighbor command to delete ipv6 neighbor entry.
You can verify your setting by entering the show ipv6 neighbors Privileged EXEC command.
Example The following example shows how to configure an ipv6 neighbor entry.
Switch(config)# ipv6 neighbor 2001:01::01:11 vlan 2 00:00:00:11:11:12
Switch# show ipv6 neighbors
VLAN Interface IPv6 address HW address Status Router State
vlan 2 2001:1::1:11 00:00:00:11:11:12
Static No
Total number of entries: 1
38. POE
POE Port Setting
| Syntax | poe |
| no poe | |
| Parameter |
Default All ports are enabled for poe power supply by default. (Poe-enabled device)
Mode interface configuration.
Usage Use the poe command in interface mode to enable port poe power supply. Use the no poe command in interface mode to disable port poe power supply. You can check the port poe working status by using the show poe Privileged EXEC command.
Command Line Interface
User Guide
Example
The following example shows how to config poe.
Switch(config)# interface GigabitEthernet 1
Switch(config-if)# poe
Switch# show poe
Get poe power:
Port | Enable | State | type | level | actual- | volatge(V) | current(mA)
| | | | | | | |power(mW) | | | | ||||
| + | + | + | + | + | + | + | + | |
| gi1 | enable | on | AT | 4 | 676 | 52 | 13 | |
| gi2 | enable | off | AF | 0 | N/A | N/A | N/A | |
| gi3 | enable | off | AF | 0 | N/A | N/A | N/A | |
| gi4 | enable | off | AF | 0 | N/A | N/A | N/A | |
| gi5 | enable | off | AF | 0 | N/A | N/A | N/A | |
| gi6 | enable | off | AF | 0 | N/A | N/A | N/A | |
| gi7 | enable | off | AF | 0 | N/A | N/A | N/A | |
| gi8 | enable | off | AF | 0 | N/A | N/A | N/A | |
Total used power: 676 (mW)
Current Temperature: 65 (C)
POE Port Schedule Setting
| Syntax | poe schedule week days hour hours | |
| no poe schedule week days hour hours | ||
| Parameter | days | Port poe power supply days |
| hours | Port poe power supply hours | |
Default All ports open POE function all day by default.
( Poe-enabled device)
Mode interface configuration.
Usage Use the poe schedule command in interface mode to set port poe power supply time.
Use the no poe schedule command in interface mode to clear port poe power supply time..
You can check the port poe work time setting view through the web.
Example
The following example shows how to config poe schedule.
Switch(config)# interface GigabitEthernet 1
Switch(config-if)# poe schedule week mon hour 1
Note: The configured time has a deviation of about 0\~10
minutes.

- Command Line Interface
- Managed Switch Software
- USER GUIDE
- USING THIS DOCUMENT
- Table of Contents
- Command Line Interface....1
- AAA....11
- ACL 24
- Administration 39
- Authentication Manager....72
- Diagnostic 98
- DHCP Snooping 102
- DoS....111
- Dynamic ARPInspection....115
- GVRP....119
- IGMP Snooping 128
- IP Source Guard....147
- Link Aggregation ....150
- LLDP 156
- Logging....183
- MAC Address Table....188
- MAC VLAN....194
- Management ACL....192
- Mirror 199
- MLD Snooping .... 199
- Rate Limit 259
- RMON....263
- Spanning Tree....279
- Storm Control 300
- System File....302
- Surveillance VLAN....311
- Time....316
- UDLD....323
- VLAN 326
- Voice VLAN 343
- Static Routing 352
- Command Line Interface User Guide
- AAA
- Example
- radius local
- Switch# show line lists
- enable authentication
- Syntax
- Parameter
- Default
- Mode
- Usage
- Administration
- configure
- hostname
- WORD
- Specify the hostname of the switch.
- Default name string is "Switch".
- Global Configuration
- show line
- system name
- Authentication Manager
- authentication mac radius
- authentication timer reauth
- dot1x max-req
- dot1x port-control
- dot1x timeout quiet-period
- dot1x timeout server-timeout
- dot1x timeout supp-timeout
- Diagnostic
- DHCP Snooping
- ip dhcp snooping vlan
- ip dhcp snooping database write-delay
- ip dhcp snooping database timeout
- DoS
- dos
- Dynamic ARP Inspection
- ip arp inspection trust
- ip arp inspection validate
- GVRP
- Syntax show gvrp
- IGMP Snooping
- ip igmp snooping vlan
- ip igmp snooping vlan fastleave
- show ip igmp snooping querier
- show ip igmp filter
- IP Source Guard
- Link Aggregation
- lag load-balance
- show lag
- Syntax show lag
- LLDP
- Ildp tx-interval
- Ildp tlv-select vlan-name
- Ildp tx
- no lldp
- Ildp tx-delay
- show lldp med
- show lldp neighbor
- Logging
- MAC Address Table
- MAC VLAN
- Management ACL
- deny
- Mirror
- mirror session destination interface
- MLD Snooping
- ipv6 mld snooping vlan
- ipv6 mld snooping vlan fastleave
- show ipv6 mld snooping groups counters
- myr vlan
- Default None
- Mode Global Configuration
- mvr mode
- Syntax mvr mode (dynamic | compatible)
- clear mvr members
- Syntax clear mvr members [dynamic|static]
- show mvr members
- show mvr interface
- show mvr
- Port
- Port Error Disable
- errdisable recovery cause
- Port Security
- port-security (Global)
- port-security (Interface)
- Protocol VLAN
- QoS
- show qos queueing
- Rate Limit
- RMON
- rmon alarm
- snmp host
- Spanning Tree
- show spanning-tree mst configuration
- spanning-tree
- spanning-tree hello-time
- spanning-tree edge
- Syntax spanning-tree edge no spanning-tree edge
- Parameter N/A
- Mode Interface Configuration
- spanning-tree tx-hold-count
- Storm Control
- show storm-control
- storm-control action
- System File
- copy
- Surveillance VLAN
- surveillance-vlan aging-time
- Time
- clock set
- clock summer-time
- show sntp
- UDLD
- udld message time
- VLAN
- switchport hybrid pvid
- switchport default-vlan tagged
- show vlan
- Voice VLAN
- voice-vlan (Interface)
- voice-vlan aging-time
- Static Routing
- IPv4 Routes
- IPv4 ARP
- IPv6 Address
- POE
Brand : Cudy
Model : GS2018PS2
Category : Switch