
Steakonom - Meat Grinder ADE - Free user manual and instructions
Find the device manual for free Steakonom ADE in PDF.


| Product Type | Meat Tenderizer and Strip Cutter |
| Models | Steakonom (tenderizing rollers) and Schneidfix (knife roller and pressure roller) |
| Dimensions (H x W x D) | 440 x 220 x 465 mm |
| Footprint | 385 x 160 mm |
| Weight | 16.5 kg |
| Power Supply | 230 V AC, 50-60 Hz |
| Power Consumption | 0.18 kW |
| Sound Level | 55 dB(A) at 1 m |
| Housing Material | Anodized aluminum |
| Blade Material | Stainless steel |
| Max. Meat Thickness | 20 mm |
| Max. Meat Width | 150 mm |
| Cutting Width (Schneidfix) | 4 mm |
| Duty Cycle | 40% (max 24 minutes per hour) |
| Cooling Time | Minimum 36 minutes after full duty cycle |
| Safety Features | Automatic shut-off if lid opened, power failure, motor overheating; thermal overload protection; micro switch |
| Cleaning | Disassemble and clean daily; use damp cloth/brush with warm water; do not immerse in water; do not use dishwasher |
| Maintenance | Self-lubricating moving parts; occasional lubrication of hinge and gears |
| Spare Parts | Tenderizer tools available separately (Steakonom item no. E3402-0071, Schneidfix item no. 3501) |
| Warranty | 1 year from date of purchase (defects in material/workmanship) |
| Certifications | CE marking; compliant with Machinery Directive 2006/42/EC, EMC 2014/30/EU, LVD 2014/35/EU, RoHS 2011/65/EU |
| Package Size | 520 x 340 x 620 mm |
Frequently Asked Questions - Steakonom ADE
User questions about Steakonom ADE
0 question about this device. Answer the ones you know or ask your own.
Ask a new question about this device
Download the instructions for your Meat Grinder in PDF format for free! Find your manual Steakonom - ADE and take your electronic device back in hand. On this page are published all the documents necessary for the use of your device. Steakonom by ADE.
USER MANUAL Steakonom ADE
OPERATING INSTRUCTIONS
ADE
Meat Processing Machines
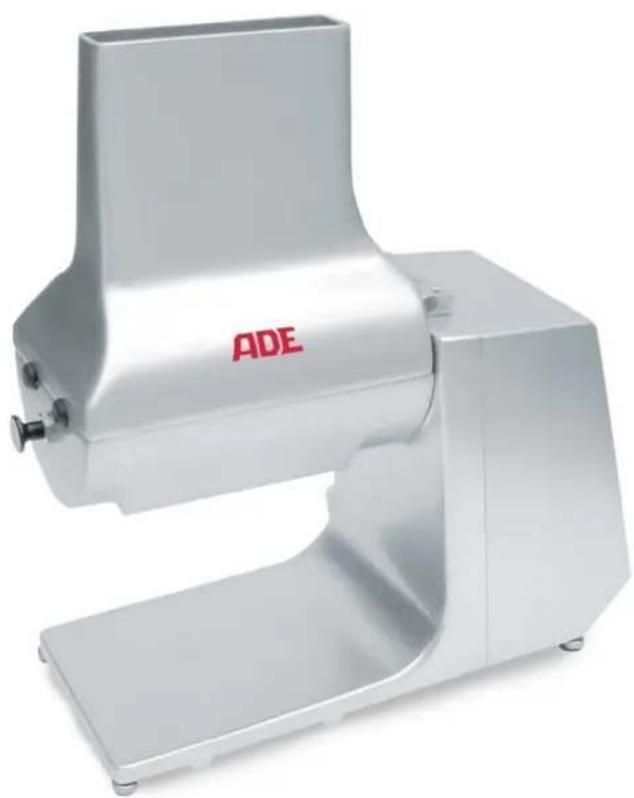
natural_image
Exterior view of a silver ADE-branded kitchen grater (no text or symbols visible on body)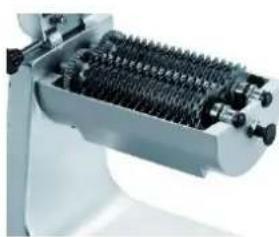
natural_image
Close-up of a mechanical device with threaded components and mounting holes (no visible text or symbols)Steakonom tenderizer tool: Two tenderizing rollers
natural_image
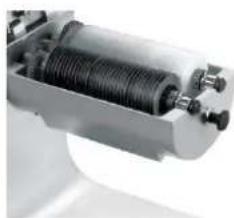
Close-up of a mechanical component with cylindrical and threaded parts (no visible text or symbols)Schneidfix tenderizer tool: Knife roller with pressure roller
Meat Tenderizer - STEAKONOM Series Strip Cutter - SCHNEIDFIX Series
Steakonom_Schneidfix-210614-Rev007-UM-en
Contents
1 Foreword....2
1.1 Introduction ...... 2
1.2 Use....2
1.3 Residual risks....3
2 Setting up the machine ....3
2.1 Checking the Box Contents 3
2.2 Installation....3
2.3 Wiring....4
2.4 Mechanical safety devices....4
2.5 Electrical safety devices 4
2.6 Acceptance testing 5
2.7 Safety precautions....5
2.8 Operation 5
3 Start-Up 6
3.1 Tenderizer Tools of the Steakonom Meat Tenderizer 6
3.2 Tenderizer Tools of the Schneidfix Strip Cutter 6
3.3 Converting from Schneidfix to Steakonom....6
3.4 Operating the Machine 6
4 Cleaning and Care 7
4.1 Cleaning 7
4.2 Maintenance....7
5 Training....8
6 Warranty 8
7 Technical Data....9
8 CE Marking and Declaration of Conformity 10
9 Circuit diagram, Drawings and Spare Parts....11
9.1 Wiring....11
9.2 Exploded view 12
9.3 Spare parts list 12
1 Foreword

This symbol means: "Observe operating instructions." Read these operating instructions carefully and observe the information contained therein. Keep these operating instructions handy for future reference.
This manual has been written to comply with the Machinery Directive as amended.
With it, the manufacturer intends to furnish the customer with clear and concise instructions for the use and maintenance of the machine, as well as information regarding the safety devices with which it is fitted to assure maximum efficiency throughout its service life.
We reserve the right to continuously improve our meat tenderizers/strip cutters, which shall in no way affect the instructions and information contained in this manual.
Before using the meat tenderizer/strip cutter for the first time, you must read this manual carefully.
Should this manual be damaged or lost, apply for a copy from the manufacturer immediately.
Many accidents and injuries that occur when using the machine result from insufficient familiarity with its functions and safety devices. Before starting work with this machine, please read the instructions herein carefully and follow them to the letter.
1.1 Introduction
The meat tenderizers/strip cutters have been designed to comply with applicable safety standards. Consequently, all our machines bear the “CE” marking as an affirmation of their conformity with said standards.
The housing is made of anodized aluminum. The housing design enables easy cleaning.
The Steakonom series has two stainless steel tenderizing rollers, while the Schneidfix series has a stainless steel knife roller and a plastic pressure roller.
1.2 Use
The machine can serve two different purposes, depending on the application. It is suitable for tenderizing raw or cooked meat cuts up to 20 mm thick or cutting them into strips. The machine must never be used to process frozen meat or meat with bones. Normally, it takes around five seconds to process one piece of meat, depending on its size.
A STEAKONOM machine is fitted with two tenderizing rollers for processing boneless meat cuts. The tenderizing rollers are not suitable for processing other foods. The machine can only process meat cuts up to 150 x 20 mm. Separating the tendons and fibers makes the meat more tender.
A SCHNEIDFIX machine is fitted with a knife roller and a pressure roller for cutting meat, sausage, and cheese. It can only be used to process pieces measuring up to 150 x 20 mm. The strip of the finished product has a fixed width of 4 mm.
The machine may only be used in its original condition and with original parts. If you notice any defects or malfunctions, shut down the machine immediately and contact ADE or your service provider for repair or replacement.

Never use the machine to tenderize or cut frozen products, meat, or sausage products with bones.

Any attempt to slice such products or similar foods may cause severe damage to the machine and render the warranty null and void.
The machine's duty cycle is sufficient for preparing food for more than 250 people. Basically, the machine is not designed for continuous operation. The maximum duty cycle is 40% of one hour, or 24 minutes (see nameplate ED 40% ). After a full duty cycle, the machine must be allowed to cool down for at least 36 minutes. Operating the machine continuously for shorter periods also shortens the cooling intervals. The machine is equipped with thermal overload protection. When the machine's electric motor gets overheated, it switches off automatically. If this occurs, switch the machine off immediately. Allow sufficient time for the motor to cool down before switching the machine back on. Thermal overload protection merely serves as another safety measure and should never be thought of as a time limit for the duty cycle in the daily operation.
The machine may only be used in its original condition and with original parts. It is strictly forbidden to dismantle the safety devices. If you notice any signs of damage to the safety devices or if any safety devices are not in place, shut down the machine immediately and contact ADE for repair or replacement.
1.3 Residual risks
Even though extensive safety precautions have been taken on the machine, there are still residual risks for the operator in his daily work with the machine. They occur, in particular, when the operator attempts to reach into the appliance from above or below or put any objects into the machine while it is running. Meat cuts must be drawn into the machine rollers and end up in free fall. The operator must always keep their hands clear of the rollers while the machine is running. If the meat jams, switch the machine off and unplug it from the power supply. Do not open the hopper until then.

Keep a safe distance from the appliance and its working area. There is a risk of injury!
2 Setting up the machine
The machine is supplied fully assembled and ready for use. Remove the packaging material, take the machine out of the box, and check it for any possible damage that may have occurred during transportation.
Any damage to the machine must be reported to the transport company in writing within three days of the date of issue of the accompanying documents, specifying in detail the damages found.

Keep the original packaging that can help protect the appliance from transportation damage during potential return shipment.

Packaging materials are recyclable and must never be disposed of with household waste. Check with the local authorities for the appropriate ways to dispose of waste properly.
The machine must be disposed of under local regulations. Packaging material must never be disposed of out in the open!
Carefully read and understand all instructions in this manual before plugging in and operating the machine.
We accept no liability for personal injury or material damage resulting from failure to comply with these instructions.
2.1 Checking the Box Contents
Steakonom series meat tenderizer with two tenderizing rollers or Schneidfix series strip cutter with knife roller and pressure roller
➢ 1x handle brush for cleaning
➢ 1x Operating instructions
2.2 Installation
Place the meat mixer on a flat, smooth, and vibration-free surface that is stable and sturdy enough to ensure adequate safety, considering the weight of the machine.
Ideally, the machine should be positioned transversely so that the operator can clearly see the start and stop buttons.
It is recommended that the table height be about 70 cm and may vary depending on the operator's height. Leave adequate free space around the machine to ensure effortless operation, cleaning, and maintenance. Allow at least 300 mm of free space around the machine. The machine works properly in places with a relative humidity level of up to 80% and near heat sources at temperatures up to 30 °C.

Before plugging the machine into the power supply, check that the machine's power rating specified on its nameplate corresponds to the supply voltage and frequency of your local power grid.
In the event of a mismatch, never connect the machine to the power supply, as this may cause damage to the machine and lead to fire!
2.3 Wiring
The meat tenderizer/strip cutter must be connected to the 230 V AC power supply.
Before plugging the burger former into the outlet, ensure the power grid features an electrical overload cutout.

Always ensure that the machine's power rating specified on its nameplate matches the specifications of your local power grid!
230 V AC current:
The power plug must be plugged into a suitable earthed socket. The machine is now ready for use.
The power plug must only be replaced by a qualified electrician!
Check that the rollers' direction of rotation is correct. When switched on, the two tenderizing rollers (Steakonom series) and the knife roller and pressure roller (Schneidfix series) must run against each other, drawing the meat cuts into the machine.
2.4 Mechanical safety devices
The sturdy housing made of aluminum alloy reliably protects the machine from mechanical impact. The tenderizer tools can be easily removed by lifting the feed hopper. The motor pinion is protected against the risk of getting pulled in. All safety devices have been factory-tested for their functionality.

All safety devices are rigidly fixed to the machine and must not be removed. Dismantling or tampering with them or any unauthorized modifications would make the machine unsafe. Doing so would also exempt the manufacturer from liability for accidents or injuries.

Use the appliance as it was designed to be used. Improper or unintended use of the machine may pose a risk to the health and safety of persons and result in property damage.

The manufacturer shall not be held liable for any damage caused by improper use of the machine, failure to comply with the safety information in this manual, and tampering with or modifications to the machine without official approval from the manufacturer.
2.5 Electrical safety devices
The machine stops automatically
- when the lid is not closed correctly
- in the event of a power failure
- when the motor gets overheated.
After the fault has been eliminated, restart the machine.
2.6 Acceptance testing
- Make sure all the slicer components are correctly assembled.
- Check that the hopper lid is correctly locked in place.
- Press the green start button and red stop button and check that the machine starts and stops properly.
- Switch the machine on and check that the rollers run smoothly against each other and in the correct direction.

If you find any malfunctions, immediately shut down the machine, tag it clearly as "DEFECTIVE," and contact customer service!
2.7 Safety precautions
- The meat tenderizer/strip cutter must be operated by trained personnel only.
- Children, disabled persons, and untrained personnel must not be allowed to operate the machine.
- Never operate the machine while under the influence of alcohol or drugs.
- Never reach into the feed hopper from above or the tenderizer tools from below while they are running.
- Never leave the machine unattended while it is running.
- Before carrying out any maintenance work, unplug the machine from the power outlet.
- Never clean the machine under running water or in a water basin.
- Should you notice any unusual noises or unpleasant odors coming from the machine, shut it down immediately, disconnect it from the power supply, and contact customer service.
- The power cord may only be replaced by authorized and trained personnel.
2.8 Operation
Use the meat tenderizer/strip cutter exclusively as it was designed to be used.
3 Start-Up
The machine normally comes with the tenderizer tools already in place.
The rollers should be cleaned or replaced while inside the housing.
3.1 Tenderizer Tools of the Steakonom Meat Tenderizer
Place the two tenderizing rollers inside the housing.
The rollers must be fitted such that their color markings match those on the inside of the machine.
The two tenderizing rollers are offset relative to each other.

3.2 Tenderizer Tools of the Schneidfix Strip Cutter
Position the appliance transversely in front of you so that you can clearly see the start and stop buttons.
Then remove the rear crest from the inside of the housing by undoing the slotted screws.
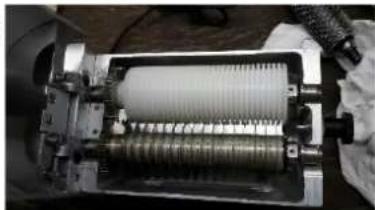
Next, fit the knife roller into the front compartment inside the housing facing the operator and the pressure roller into the rear compartment. The blades run within the gaps of the pressure roller.
natural_image
Close-up of a mechanical device with a coiled spring or coil assembly (no visible text or symbols)Finally, close the lid (both series) until its snap mechanism engages.
3.3 Converting from Schneidfix to Steakonom
The first step to converting your "Schneidfix" strip cutter to the "Steakonom" meat tenderizer is to fit the crest back in place and secure it lightly with the slotted screws.
Then, fit both tenderizing rollers into the appliance and, if necessary, change the position of the rear crest by moving it slightly to the left or right.
Next, secure the crest by tightening the slotted screws.
3.4 Operating the Machine
Switch the appliance on by pressing the start button on the housing and watch the rollers begin to rotate towards each other at a constant speed.
Feed the meat chunks into the feed hopper from above. While running, the two tenderizing rollers (Steakonom series) or the knife roller and pressure roller (Schneidfix series) draw the meat into the machine.
The numerous small blades of the Steakonom machine's tenderizing rollers tenderize the meat finely in a matter of seconds. Very tough meat chunks, especially those with no clearly recognizable tendons and fibers, should be passed through the rollers transversely a second time.
The strip cutter cuts the food into 4 mm wide strips.
Always keep your hands away from the danger zone and allow the food to fall by itself as it gets processed.
We recommend using a wooden board or collecting tray to collect the processed food.
Always switch the machine off when you have finished working with it.
4.1 Cleaning

Always switch the machine off and unplug it from the power supply before attempting any cleaning, maintenance, or servicing.
For the sake of hygiene, the machine must be kept clean at all times. Regularly clean the machine depending on how often it is used and how much food is processed. The machine must be disassembled and cleaned at the end of each day on which it was used and whenever the type of food being processed is changed.
Before doing so, switch the machine off and unplug it.
Thoroughly clean all parts and cavities that come into contact with food and where food residues can accumulate, such as the blades and knife rollers, crests, inner surfaces and recesses of the feed hopper, and inner surfaces of the lower housing. The area between the guard and housing can be easily cleaned by unscrewing the guard with the two semicircular recesses on the inside of the feed hopper in the rotating zone. The guard must be refitted correctly before resuming machine operation, as it ensures that the knife rollers are held firmly in place.
Use a damp cloth or brush and warm water (approx. 60 °C) for cleaning. Only food-grade cleaning agents and disinfectants of approved quality must be used to clean the machine. Follow the relevant instructions when using cleaning products. After cleaning, wipe the machine with a cloth moistened with clear water.
For easier cleaning, you can fold up the feed hopper and remove the tenderizing rollers. Simply pull the knob on the front of the roller housing all the way out, and then fold open the hopper towards the motor. With the hopper folded up, you can remove it completely by unscrewing the retaining bar in the hinge area and pulling it out. Do this whenever food residues have accumulated in the hinge area that cannot be removed with the hopper in place.
The feed hopper can be reassembled when unfolded, i.e., in a vertical position.
If you forget to switch the machine off, the running tenderizing roller will disengage at the slightest touch and cease to operate. Another safety feature is an integrated micro switch that automatically interrupts the power supply when attempting to lift the meat tenderizer's feed hopper.
The knife rollers can be removed by hand. To do this, you should grip the left and right ends of the rollers. Caution must be exercised when gripping the rollers with blades!
Never place the rollers on a hard surface (metal or similar) to protect the knives from damage.
All meat tenderizers come complete with a special cleaning brush.
After cleaning, we recommend lightly brushing the tenderizing rollers with cooking oil or immersing them in cooking oil. This prevents dried meat residues from sticking to the cutting disks and facilitates their removal during subsequent cleaning in water or with the brush provided. Please note that cleaning the knife rollers in the dishwasher causes them to wear out much more quickly.
When refitting the knife rollers, ensure the roller end with the red marking matches the red dot at the front and that the roller end with the black marking matches the black dot at the rear of the machine. The two gears must not be offset laterally, as this would prevent the blades from engaging properly.

Never use a water jet or high-pressure cleaner to clean the machine! Never spray water directly into the drive! The electrical elements must not be exposed to moisture!

The loose hopper and any other removable parts must never be cleaned in the dishwasher to prevent damage to the surface finish.
4.2 Maintenance
The machine is made entirely from stainless materials. All moving parts of the machine are self-lubricating and require no additional lubrication. Nevertheless, when the machine is idle for a long time, we recommend lubricating the hinge of the feed hopper, the gears of the tenderizer tools, and the tip of the lid snap mechanism.
5 Training
The adult operator performing the meat tenderizer/strip cutter installation must be adequately trained in the use, cleaning, and servicing and be aware of potential hazards resulting from improper use of the machine.
Training must be provided by qualified personnel authorized to install the machine and familiar with the European Community machine standards and applicable occupational health and safety regulations of the respective public agencies.
6 Warranty
If the product is proven to have failed within 1 year from the date of purchase (receipt required) due to defects in material and workmanship, ADE will repair or replace the product. The warranty does not cover all moving parts, such as batteries, cables, power adapters, rechargeable batteries, etc. This warranty does not extend to external normal wear and tear or damage caused by accident or misuse. This warranty does not cover the products tampered with by unauthorized personnel. The warranty agreement shall not affect the customer's statutory rights.
Complaints shall be addressed to the dealer from whom the machine and spare parts have been purchased or who provides the after-sales service.
7 Technical Data
Available models:
Steakonom: With two stainless steel tenderizing rollers
Schneidfix: With knife roller and pressure roller
Dimensions: 440 x 220 x 465 mm
Footprint: 385 x 160 mm
Power rating: 0.18 kW
Weight: 16.5 kg
Type of current: 230 V AC current / 50-60 Hz
Sound power level: 55 dB(A) (measured at 1 m distance and 1.70 m height)
Package size: 520 x 340 x 620 mm
Robust anodized aluminum housing
Stainless steel blades
Handle brush for easy cleaning
For meat cuts up to 150 x 20 mm, cutting width 4 mm (Schneidfix strip cutter)
Optional:
Tenderizer tools available separately for easy replacement
8 CE Marking and Declaration of Conformity
CE
Manufacturer's declaration of conformity
This product was manufactured according to the harmonized European standards. It complies with the provisions of the EC directives listed below:
– Machinery Directive 2006/42/EC
- EMC Directive 2014/30/EU
– Low Voltage Directive 2014/35/EU
– RoHS Directive 2011/65/EU, as amended.
This declaration becomes invalid if the machine is modified in any way that has not been approved by us.
Hamburg, June 2021
ADE Germany GmbH
Neuer Höltigbaum 15
22143 Hamburg
Manufacturer:
ADE Germany GmbH
Neuer Höltigbaum 15
22143 Hamburg
+49 40 432 776 - 0
+49 40 432 776 - 10
info@ade-germany.de
www.ade-germany.de
9 Circuit diagram, Drawings and Spare Parts
9.1 Wiring

230 V AC current
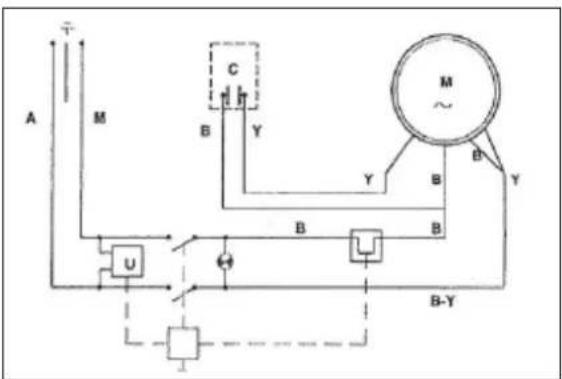
Cable legend:
B = Black
Y = Yellow
R = Red
M = Brown
G-Y = Green-Yellow
A = Blue
B-Y = Black-Yellow
9.2 Exploded view

9.3 Spare parts list
| No. | Item description | Quantity |
| 100 | Support plate with housing | 1 |
| 101 | Lower housing | 1 |
| 102 | Washer | 2 |
| 103 | Screw | 2 |
| 104 | Gearbox flange | 1 |
| 105 | Gearbox flange fixing screw | 4 |
| 106 | Gearbox flange threaded rod | 4 |
| 107 | Drive gear | 1 |
| 108 | Gear washer | 1 |
| 109 | Gear fixing screw | 1 |
| 110 | Gear corner protector | 1 |
| 111 | Corner protector fixing screw | 1 |
| 112 | Crest | 2 |
| 113 | Washer | 4 |
| 114 | Crest fixing screw | 4 |
| 115 | Latch spring | 1 |
| 116 | Indexing plunger | 1 |
| 117 | Latch knob | 1 |
| 118 | Latch threaded pin | 1 |
| 119 | Hinge holder | 1 |
| 120 | Hinge fixing screw | 2 |
| 121 | Hinge | 1 |
| 122 | Hinge threaded rod | 1 |
| 123 | Threaded rod star knob | 1 |
| 124 | Feed hopper | 1 |
| 125 | Gear guard | 1 |
| 126 | Gear guard fixing screw | 2 |
| 127 | Hinge fixing screw | 2 |
| 128 | Locking pin | 1 |
| 129 | M8 nut | 1 |
| 130 | M6 x 20 hexagon head screw | 2 |
| 131 | M6 nut | 2 |
| 132 | Motor cover | 1 |
| 133 | Motor cover upper fixing screw | 1 |
| 134 | Washer | 2 |
| 135 | Motor cover lower fixing screw | 2 |
| 136 | Base plate | 1 |
| 137 | Base plate fixing screw | 2 |
| 138 | M8 foot screw | 4 |
| 139 | Rubber foot | 4 |
| 0101 | Foot assembly | |
| 200 | Knife shaft | 2 |
| 201 | Gear | 2 |
| 202 | Gear washer | 3 + 3 |
| 203 | Blade | 32 + 32 |
| 204 | Knife washer | 32 + 32 |
| 205 | "Black" washer | 1 |
| 206 | "Red" washer | 1 |
| 207 | Ring nut | 1 |
| 208 | Clamping sleeve | 1 |
| 209 | Bearing bush | 2 |
| 210 | Retaining ring 12A | 2 |
| 211 | Dummy plug | 1 |
| 0201 | "Red" knife roller assembly | |
| 0202 | "Black" knife roller assembly | |
| Steakonom tenderizer tool assembly consisting of two 57 mm tenderizing rollers | ADE item no. E3402-0071 (from 09/17) | |
| ID52911 | Schneidfix tenderizer tool assembly consisting of blade roller and pressure roller | ADE item no. 3501 (from 09/17) |
| 600 | 230 V AC motor 230/50/1 | 1 |
| 601 | 400 V three-phase motor 400/50/3 | 1 |
| 602 | Gearbox | 1 |
| 603 | Gearbox fixing screw | 1 |
| 604 | Washer | 1 |
| 605 | Threaded rod washer | 1 |
| 606 | Gearbox fixing nut | 1 |
| 607 | Transmission shaft | 1 |
| 608 | Transmission wedge | 1 |
| No. | Item description | Quantity |
| 609 | Drive gear wedge | 1 |
| 610/1 | Switch, 1-phase | 1 |
| 610/3 | Switch, 3-phase | 1 |
| 611 | Strain relief | 1 |
| 612 | Power cord with plug, 1-phase | 1 |
| 613 | Power cord with plug, 3-phase | 1 |
| 614 | Capacitor connection cables | 1 |
| 615 | Capacitor (for 230 V) | 1 |
| 616 | Capacitor mounting plate | 1 |
| 617 | Capacitor fixing nut | 1 |
| 618 | Washer | 1 |
| 619 | Capacitor fixing screw | 1 |
| 622 | Gearbox washer | 1 |
| 623 | Gearbox fixing nut | 1 |
Distributor:
- OPERATING INSTRUCTIONS
- ADE
- Meat Tenderizer - STEAKONOM Series Strip Cutter - SCHNEIDFIX Series
- Contents
- Foreword....2
- Setting up the machine ....3
- Start-Up 6
- Cleaning and Care 7
- Training....8
- Foreword
- Introduction
- Use
- Residual risks
- Setting up the machine
- Checking the Box Contents
- Installation
- Wiring
- V AC current:
- Mechanical safety devices
- Electrical safety devices
- Acceptance testing
- Safety precautions
- Operation
- Start-Up
- Tenderizer Tools of the Steakonom Meat Tenderizer
- Tenderizer Tools of the Schneidfix Strip Cutter
- Converting from Schneidfix to Steakonom
- Operating the Machine
- Cleaning
- Maintenance
- Training
- Warranty
- Technical Data
- CE Marking and Declaration of Conformity
- CE
- Manufacturer's declaration of conformity
- ADE Germany GmbH
- Manufacturer:
- Circuit diagram, Drawings and Spare Parts
- Wiring
- V AC current
- Exploded view
- Spare parts list
Brand : ADE
Model : Steakonom
Category : Meat Grinder