
CP092 - Air conditioner Bimar - Free user manual and instructions
Find the device manual for free CP092 Bimar in PDF.


| Product Type | Portable Air Conditioner |
| Model | CP092 (mod. JHS-A016-09KR2/E) |
| Cooling Capacity | 9000 BTU (approx. 2.6 kW) |
| Refrigerant Type | R290 (flammable, GWP 3) |
| Refrigerant Amount | 210 g |
| Power Supply | 220-240 V ~ 50 Hz (requires earthed socket) |
| Functions | Cool, Dry, Fan |
| Fan Speeds | Hi / Low |
| Temperature Range (Cool) | 16 °C - 31 °C |
| Timer | 1 - 24 hours (start-up or shutdown) |
| Sleep Mode | Yes (reduces fan speed, energy saving) |
| Remote Control | Yes (requires 2 x AAA batteries, not included) |
| Air Filter | Washable (clean every 2 weeks) |
| Drainage | Continuous (in Dry mode) or manual (water tank) |
| Water Full Indicator | Yes (auto shutdown when tank full) |
| Flexible Exhaust Hose | Length 40 - 145 cm (adjustable) |
| Window Adapter | Adjustable 91 - 124 cm |
| Minimum Room Area | 11 m² |
| Operating Temperature | 7 °C - 35 °C |
| Warranty | 24 months (upon registration) |
| Dimensions (approx.) | 350 x 350 x 700 mm (H x W x D) |
| Weight (approx.) | 25 kg |
Frequently Asked Questions - CP092 Bimar
User questions about CP092 Bimar
0 question about this device. Answer the ones you know or ask your own.
Ask a new question about this device
Download the instructions for your Air conditioner in PDF format for free! Find your manual CP092 - Bimar and take your electronic device back in hand. On this page are published all the documents necessary for the use of your device. CP092 by Bimar.
USER MANUAL CP092 Bimar
natural_image
Line drawing of a portable air conditioner unit with ventilation slots and wheels (no text or symbols)CONDIZIONATORE PORTATILE 9000BTU 9000BTU PORTABLE AIR CONDITIONER
Type CP092 (mod. JHS-A016-09KR2/E)


natural_image
Line drawing of a remote control with eight function buttons (no text or symbols on the device itself)

DESCRIZIONE
natural_image
Close-up of a gray surface with a white arrow pointing right and a small white button on the right side (no text or symbols visible)
natural_image
Plain surface with two small circular objects and a metallic ring, no text or symbols visible
natural_image
Simple dark object on a plain gray background, no visible text or symbolsnatural_image
Close-up of a metallic door handle securing a wall corner (no text or symbols visible)
natural_image
Close-up of a door with a black oval and white arrow pointing to the left side (no text or symbols visible)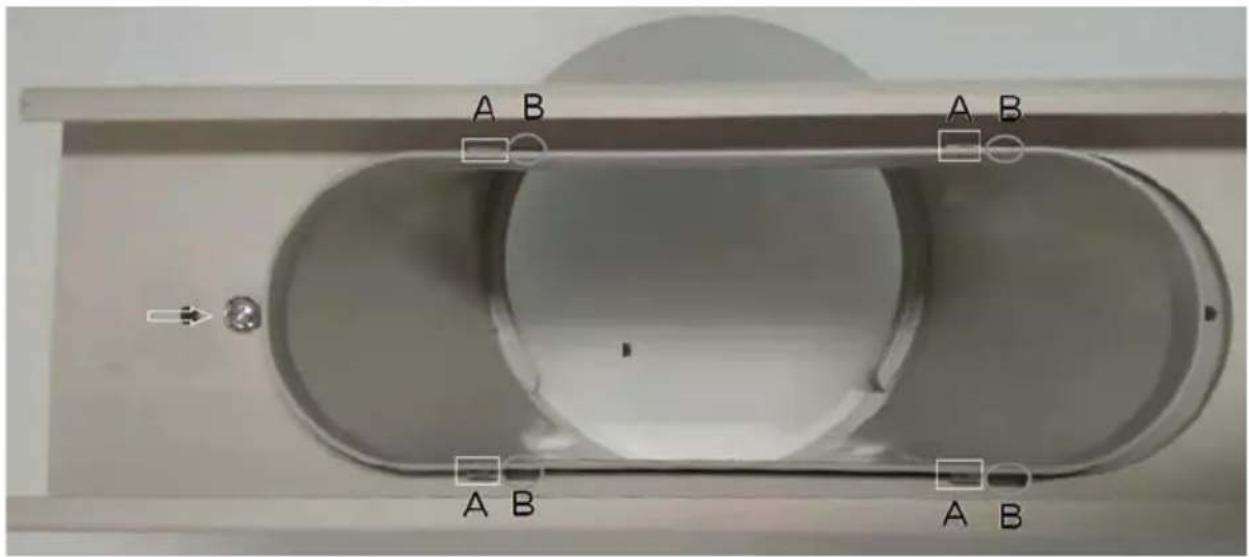

Modalità
natural_image
Line drawing of a portable air conditioner with a hose extending from its side (no text or symbols)Deumidificazione
natural_image
Line drawing of a portable air purifier with ventilation grilles and control panel (no text or symbols)- Freddo (COOL)
natural_image
Line drawing of a multi-tiered air purifier with cooling fins and a cup pouring liquid (no text or symbols)Unità principale
This symbol tells you to read these instructions carefully before using the appliance, and to inform any third parties if necessary. Keep the instruction booklet for further reference throughout the lifetime of the appliance. If when reading these instructions you find any parts difficult to understand or have any doubts, contact the manufacturer at the address provided on the back page before using the product.

This symbol indicates: Additional information in the manual.

This symbol indicates: Service instruction: read the technical manual

This symbol highlights instructions and precautions for safe use. Warnings and appliance installation, use, cleaning and maintenance procedures may be updated slightly from those described in this manual; for further details, please consult the updated on-line manual at www.bimaritaly.it.
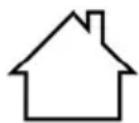
This symbol indicates: : Only use the appliance indoors.
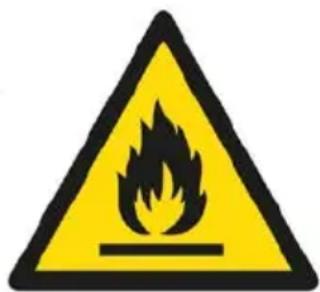
This symbol indicates: Caution: Fire hazard. The appliance uses a flammable refrigerant. If the refrigerant escapes and is exposed to an external source of ignition, there is a risk of fire.
GENERAL WARNINGS
- This appliance is for air conditioning the local space in domestic environments, it is intended for domestic use only (therefore not professional/commercial) use, for cooling, drying and ventilating the air inside rooms, as described in this manual. Do not use the appliance in particularly dusty rooms, or in the presence of extremely volatile materials, which might foul the filters or damage the motor, or outdoors.
- Examples of household appliances are appliances for typical household functions, those used in the home, or those which may be used for typical household functions even by untrained persons:
- in shops, offices and other similar workplaces;
- on farms and in similar locations;
- by the customers of hotels, motels and other residential environments;
- in bed and breakfast establishments.
- The appliance is suitable for operation at a temperature between 7^ and 35^ .
- Do not use the appliance unless all its components are correctly fitted.
- The appliance must only be used in the vertical position; do not sit or stand on the unit.
- Warning: when using electrical appliances, always comply with the basic safety precautions to avoid the risks of fire, electric shock and physical injury.
- This appliance can be used by children aged from 8 years and above and persons with reduced physical, sensory or mental capabilities or lack of experience and the necessary knowledge providing they are supervised or have been instructed on the safe use of the appliance and understand the hazards involved. Children must not play with the appliance. Cleaning and maintenance intended to be carried out by the user should not be done by children unless they are supervised.
• Take suitable precautions to prevent children from playing with the appliance. The appliance and all its accessories and batteries of the remote control should be kept out of the reach of children.
- Do not obstruct the air inlet or air outlet grille.
- Do not insert fingers or objects into the ducts of the air inlet and outlet grilles.
- Do not place heavy or hot objects on top of the appliance.
- Do not touch the appliance or the plug with wet hands or feet.
- Avoid exposing body parts to the air flowing out of the appliance to avoid damages to your health.
- Unplug the appliance from the socket when not in use.
- Do not move the appliance while in operation.
- Do not pull on the power cable or the appliance itself to remove the plug from the power socket.
- Do not move the appliance by pulling the cable.
- Always disconnect the appliance from the power socket before assembling, dismantling and cleaning the filters and the appliance.
- If the power cable is damaged, it must be replaced by the manufacturer or its technical support service, or by a person with similar qualifications, to prevent all risks.
- Never leave the device exposed to the weather (sun, rain, etc.).
- To guard against all risk of electric shock, do not immerse the plug, the mains cable or the appliance in water or any other liquid.
- Any other use constitutes misuse and is hazardous. The manufacturer cannot be held liable for any damage arising from misuse or incorrect or irresponsible use, and/or from repairs carried out by unqualified persons.
- In case of operating anomalies (e.g. abnormal noise, unpleasant smell, smoke, overheating, electrical discharges, etc.), switch off the appliance immediately and disconnect the plug from the power socket. All repairs must only be performed by qualified staff,
using genuine spare parts. Failure to comply with the above may impair the appliance's safety.
This product contains fluorinated greenhouse gases, which are hermetically sealed. The refrigerant used is R290 and its relative global warming potential (GWP) is 3.
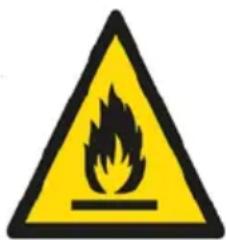
Additional warning for appliances with refrigerant gas R290 (refer to the data plate for the type of gas used).
Caution: Fire hazard.
Please read these instructions carefully before using the appliance. R290 is a refrigerant gas that conforms to EU environmental directives.
This appliance contains approximately 210g of R290 refrigerant gas.
The appliance must be installed, used and stored in a place with a surface area greater than 11 m ^2 .
- WARNINGS FOR REFRIGERANT GAS R290
1.1 The equipment contains gas R290 (flammability class A3). The amount expressed in weight and in CO2 of fluorinated greenhouse gas for which the device is designed and the global warming potential of this gas is 210 g.
The equipment must be stored in a well ventilated location with a minimum room size of 11 m2.
The equipment must be installed, used and kept in a room with a floor surface area greater than 11 m2.
- WARNING FOR R290 REFRIGERANT GAS
1.1 The appliance contains R290 gas (flammability classification A3).
The appliance shall be stored in a room Without continuously operating ignition sources (for example: open flames, an operating gas appliance or an operating electric heater).
Be aware that the refrigerants may not contain an odour.
R290 is a refrigerant gas in compliance with the European directives on environment. do not pierce any part of the refrigerant circuit.
Do not use means to accelerate the defrosting process or to clean, other than those recommended by the manufacturer.
Do not use tools different from those recommended by the manufacturer
when defrosting and cleaning the appliance.
If the appliance is installed, used or stored in a non-ventilated area, the room must be designed to prevent the accumulation of refrigerant leaks with the consequent fire or explosion hazard due to the refrigerant combustion caused by electrical heaters, stoves or others sources of ignition.
Compliance with national gas regulations shall be observed.
Keep ventilation openings clear of obstruction.
The appliance shall be stored so as to prevent mechanical damage from occurring.
Any person who is involved with working on or breaking into a refrigerant circuit should hold a current valid certificate from an industry-accredited assessment authority, which authorises their competence to handle refrigerants safely in accordance with an industry recognised assessment specification.
Servicing shall only be performed as recommended by the equipment manufacturer. Maintenance and repair requiring the assistance of other skilled personnel shall be carried out under the supervision of the person competent in the use of flammable refrigerants.
Transport of equipment containing flammable refrigerants.
See transport regulations.
Marking of equipment using signs.
See local regulations.
Disposal of equipment using flammable refrigerant.
See national regulations.
Storage of equipment/appliances.
The storage of equipment should be in accordance with the manufacturer's instructions.
Storage of packed (unsold) equipment.
Storage package protection should be constructed such that mechanical damage to the equipment inside the package will not cause a leak of the refrigerant charge. The maximum number of pieces of equipment permitted to be stored together will be determined by local regulations.
Information on servicing
Checks to the area. Prior to beginning work on systems containing flammable refrigerants, safety checks are necessary to ensure that the risk of ignition is minimised.
For repair to the refrigerating system, the following precautions shall be complied with prior to conducting work on the system.
Work procedure. Work shall be undertaken under a controlled procedure so as to minimise the risk of a flammable gas or vapour being present while the work is being performed.
General work area. All maintenance staff and others working in the local area shall be instructed
on the nature of work being carried out. Work in confined spaces shall be avoided. The area around the workspace shall be sectioned off. Ensure that the conditions within the area have been made safe by control of
flammable material.
1.1.5 Checking for presence of refrigerant. The area shall be checked with an appropriate refrigerant detector prior to and during work, to ensure the technician is aware of potentially flammable atmospheres. ensure that the leak detection equipment being used is suitable for use with flammable refrigerants, i.e. non-sparking, adequately sealed or intrinsically safe.
1.1.6 Presence of fire extinguisher. if any hot work is to be conducted on the refrigeration equipment or any associated parts, appropriate fire extinguishing equipment shall be available at hand.
Have a dry powder or CO2 fire extinguisher adjacent to the charging area.
1.1.7 No ignition sources. No person carrying out work in relation to a refrigeration system which involves exposing any pipe work that contains or has contained flammable refrigerant shall use any sources of ignition in such a manner that it may lead to the risk of fire or explosion.
all possible ignition sources, including cigarette smoking, should be kept sufficiently far away from the site of installation, repairing, removing and disposal, during which flammable refrigerant can possibly be released to the surrounding space.
Prior to work taking place, the area around the equipment is to be surveyed to make sure that there are no flammable hazards or ignition risks. No Smoking signs shall be displayed.
1.1.8 Ventilated area. Ensure that the area is in the open or that it is adequately ventilated before breaking into the system or conducting any hot work.
a degree of ventilation shall continue during the period that the work is carried out. The ventilation should safely disperse any released refrigerant and preferably expel it externally into the atmosphere.
1.1.9 Checks to the refrigeration equipment. Where electrical components are being changed, they shall be fit for the purpose and
to the correct specification. At all times the manufacturer's maintenance and service guidelines shall be followed. If in doubt consult the manufacturer's technical department for assistance. The following checks shall be applied to installations using flammable refrigerants. The charge size is in accordance with the room size within which the refrigerant containing parts are installed; the ventilation machinery and outlets are operating adequately and are not obstructed; if an indirect refrigerating circuit is being used, the secondary circuit shall be checked for the presence of refrigerant; marking to the equipment continues to be visible and legible. markings and signs that are illegible shall be corrected; refrigeration pipe or components are installed in a position where they are unlikely to be exposed to any substance which may corrode refrigerant containing components, unless the components are constructed of materials which are inherently resistant to being corroded or are suitably protected against being so corroded.
Checks to electrical devices. Repair and maintenance to electrical components shall include initial safety checks and component inspection procedures. if a fault exists that could compromise safety, then no electrical supply shall be connected to the circuit until it is satisfactorily dealt with. if the fault cannot be corrected immediately but it is necessary to continue operation, an adequate temporary solution shall be used. This shall be reported to the owner of the equipment so all parties are advised. initial safety checks shall include: that capacitors are discharged: this shall be done in a safe manner to avoid possibility of sparking; that there no live electrical components and wiring are exposed while charging, recovering or purging the system; that there is continuity of earth bonding.
Repairs to sealed components. During repairs to sealed components, all electrical supplies shall be disconnected from the equipment being worked upon prior to any removal of sealed covers, etc. if it is
absolutely necessary to have an electrical supply to equipment during servicing, then a permanently operating form of leak detection shall be located at the most critical point to warn of a potentially hazardous situation. Particular attention shall be paid to the following to ensure that by working on electrical components, the casing is not altered in such a way that the level of protection is affected. This shall include damage to cables, excessive number of connections, terminals not made to original specification, damage to seals, incorrect fitting of glands, etc. Ensure that apparatus is mounted securely. Ensure that seals or sealing materials have not degraded such that they no longer serve the purpose of preventing the ingress of flammable atmospheres. replacement parts shall be in accordance with the manufacturer's specifications.
Repair to intrinsically safe components. Do not apply any permanent inductive or capacitance loads to the circuit without ensuring that this will not exceed the permissible voltage and current permitted for the equipment in use. Intrinsically safe components are the only types that can be worked on while live in the presence of a flammable atmosphere. The test apparatus shall be at the correct rating. Replace components only with parts specified by the manufacturer. Other parts may result in the ignition of refrigerant in the atmosphere from a leak.
Cabling. Check that cabling will not be subject to wear, corrosion, excessive pressure, vibration, sharp edges or any other adverse environmental effects. The check shall also take into account the effects of aging or continual vibration from sources such as compressors or fans.
Detection of flammable refrigerants. Under no circumstances shall potential sources of ignition be used in the searching for or detection of refrigerant leaks. A halide torch (or any other detector using a naked flame) shall not be used.
Leak detection methods. The following leak detection methods are deemed acceptable for systems containing flammable refrigerants. Electronic leak detectors shall be used to detect flammable refrigerants, but the sensitivity may not be adequate, or may need recalibration. (detection equipment shall be calibrated in a refrigerant-free area). Ensure that the detector is not a potential source of ignition and is suitable for the refrigerant used. Leak detection equipment shall be set at a percentage of the if of the refrigerant and shall be calibrated to the refrigerant employed and the appropriate percentage of gas (25 % maximum) is confirmed. Leak detection fluids are suitable for use with most refrigerants but the use of detergents containing chlorine shall be avoided as the chlorine may react with the refrigerant and corrode the copper pipe-work. If a leak is suspected, all naked flames shall be removed/ extinguished. If a leakage of refrigerant is found which requires brazing, all of the refrigerant shall be recovered from the system, or isolated (by means of shut off valves) in a part of the system remote from the leak. Oxygen free nitrogen (ofn) shall then be purged through the system both before and during the brazing process.
Removal and evavuation. When breaking into the refrigerant circuit to make repairs or for any other purpose conventional procedures shall be used. However, it is important that best practice is followed since flammability is a consideration. The following procedure shall be adhered to:
Remove refrigerant;
Purge the circuit with inert gas;
Evacuate;
Purge again with inert gas;
Open the circuit by cutting or brazing.
The refrigerant charge shall be recovered into the correct recovery cylinders.
The system shall be flushed with OFN to render the unit safe.
This process may need to be repeated several times. Compressed air or oxygen shall not be used for this task.
Flushing shall be achieved by breaking the vacuum in the system with ofn and continuing to fill until the working pressure is achieved, then venting to atmosphere, and finally pulling down to a vacuum. T his process shall be repeated until no refrigerant is within the system. When the final OFN charge is used, the system shall be vented down to atmospheric pressure to enable work to take place. This operation is absolutely vital if brazing operations on the pipe-work are to take place. Ensure that the outlet for the vacuum pump is not close to any ignition sources and there is ventilation available.
Charging Procedures. In addition to conventional charging procedures, the following requirements shall be followed. Ensure that contamination of different refrigerants does not occur when using charging equipment. Hoses or lines shall be as short as possible to minimise the amount of refrigerant contained in them. Cylinders shall be kept upright. Ensure that the refrigeration system is earthed prior to charging the system with refrigerant. L abel the system when charging is complete (if not already). Extreme care shall be taken not to overfill the refrigeration system. Prior to recharging the system it shall be pressure tested with ofn. The system shall be leak tested on completion of charging but prior to commissioning. a follow up leak test shall be carried out prior to leaving the site.
Decommissioning. Before carrying out this procedure, it is essential that the technician is completely familiar with the equipment and all its detail. it is recommended good practice that all refrigerants are recovered safely. Prior to the task being carried out, an oil and refrigerant sample shall be taken in case analysis is required prior to re-use of reclaimed refrigerant. it is essential that electrical power is available before the task is commenced.
-Become familiar with the equipment and its operation. Isolate system electrically. Before attempting the procedure ensure that:
- Mechanical handling equipment is available, if required, for handling refrigerant cylinders;
All personal protective equipment is available and being used correctly.
- The recovery process is supervised at all times by a competent person;
- Recovery equipment and cylinders conform to the appropriate standards.
- Pump down refrigerant system, if possible.
- If a vacuum is not possible, make a manifold so that refrigerant can be removed from various parts of the system.
- Make sure that cylinder is situated on the scales before recovery takes place.
- Start the recovery machine and operate in accordance with manufacturer's instructions.
-Do not overfill cylinders. (No more than 80 % volume liquid charge).
- Do not exceed the maximum working pressure of the cylinder, even temporarily.
- When the cylinders have been filled correctly and the process completed, make sure that the cylinders and the equipment are removed from site promptly and all isolation valves on the equipment are closed off.
- Recovered refrigerant shall not be charged into another refrigeration system unless it has been cleaned and checked.
1.1.19 Labelling. Equipment shall be labelled stating that it has been de-commissioned and emptied of refrigerant. The label shall be dated and signed. Ensure that there are labels on the equipment stating the equipment contains flammable refrigerant.
1.1.20 Recovery. When removing refrigerant from a system, either for servicing or decommissioning, it is recommended good practice that all refrigerants are removed safely.
When transferring refrigerant into cylinders, ensure that only appropriate refrigerant recovery cylinders are employed. Ensure that the correct number of cylinders for holding the total system charge is available. All cylinders to be used are designated for the recovered refrigerant and labelled for that refrigerant (i.e. special cylinders for the recovery of refrigerant). Cylinders shall be complete with pressure relief valve and associated shut-off valves in good working order. Empty recovery cylinders are evacuated and, if possible, cooled before recovery occurs. The recovery equipment shall be in good working order with a set of instructions concerning the equipment that is at hand and shall be suitable for the recovery of flammable refrigerants. In addition, a set of calibrated weighing scales shall be available and in good working order. Hoses shall be complete with leak-free disconnect couplings and in good condition. Before using the recovery machine, check that it is in satisfactory working order, has been properly maintained and that any associated electrical components are sealed to prevent ignition in the event of a refrigerant release. Consult manufacturer if in doubt. The recovered refrigerant shall be returned to the refrigerant supplier in the correct recovery cylinder, and the relevant Waste transfer note arranged. do not mix refrigerants in recovery units and especially not in cylinders. if compressors or compressor oils are to be removed, ensure that they have been evacuated to an acceptable level to make certain that flammable refrigerant does not remain within the lubricant. The evacuation process shall be carried out prior to returning the compressor to the suppliers. Only electric heating to the compressor body shall be employed to accelerate this process. When oil is drained from a system, it shall be carried out safely.
INSTALLATION
- After removing the packaging, check that the appliance is intact; if in doubt, do not use it and contact a qualified professional. The packaging elements (plastic bags, polystyrene, metal tacks, etc.) must not be left in reach of children or irresponsible people, as they can be dangerous. They must be disposed of according to current regulations.
All packaging elements must be disposed of according to their raw material (see the symbol stamped on each one) and according to the provisions of their municipality. The bag containing the set of the fixing screws or remote control, which is unmarked due to its small size, therefore you have to follow the procedures for the disposal of their municipality. - Before connecting the equipment, make certain that the plate information (voltage, etc.) correspond to the characteristics of the electricity distribution network. This appliance must be connected to a socket that has an effective earthing device (the manufacturer declines any liability that may arise from failure to comply with this rule). Check that no other appliances with a high energy consumption are connected to the power supply, to avoid overloading and the risk of fire. In general, the use of adapters, multiple sockets and/or extension leads is not recommended. If their use is unavoidable, they must comply with current safety regulations and their current capacity (amperes) must be no lower than the maximum current draw of the appliance.
- The appliance must be installed by skilled staff with the necessary technical qualifications, who certify compliance with current installation standards.
- No responsibility is accepted for failure to comply with this requirement, or in case of connection to a substandard electrical system. Incorrect installation may cause personal injury, harm to pets or damage to property, for which the manufacturer cannot be held responsible.
- The appliance must be installed and/or placed in a room at least 11m^2 in area.
- Do not use the appliance in:
- bathrooms, laundries, locations where there are flammable products (spray cans or cans containing gases, liquids or solids, or sulphur) or dusty locations, or close to heat sources.
- premises containing other machinery which emits large amounts of heat
- near to a source of brine or sulphurous water
- locations with high humidity and with open doors or windows
- The appliance must be placed vertical, with all wheels resting firmly on the floor, and also well away from heat sources, fabrics (curtains, drying laundry, etc.) or anything else which may come into contact with and/or obstruct the inlet and outlet grilles, and well away from tanks, sinks, or similar installations so that it cannot be splashed with or fall into water. Ensure there is a space of at least 50 cm around the appliance.

- The appliance must be placed on a wide, strong, stable surface (do not place on a shelf), not on an incline (the water may overflow and escape), smooth (not rough) or in a place where it might be knocked.
- The appliance must not be placed just below a power socket.
- The power socket must be easily accessible so that the plug can be removed easily in an emergency.
- Do not expose the air-conditioner to direct sunlight as the colours of the materials might fade and any overheating of the appliance might trip its safety mechanism and cause it to shut down.
- Make sure that the mains cable is correctly positioned and is not in contact with hot parts or sharp edges, or wound around the appliance or twisted and does not become entangled, to
prevent the appliance from falling. Place the mains cable so that people do not pass over it, to prevent tripping.
- The appliance must be transported and handled vertical. If it is transported horizontal, wait at least two hours before restarting it.
- Before moving or transporting the appliance, drain off all the condensate, as described below.
DESCRIPTION

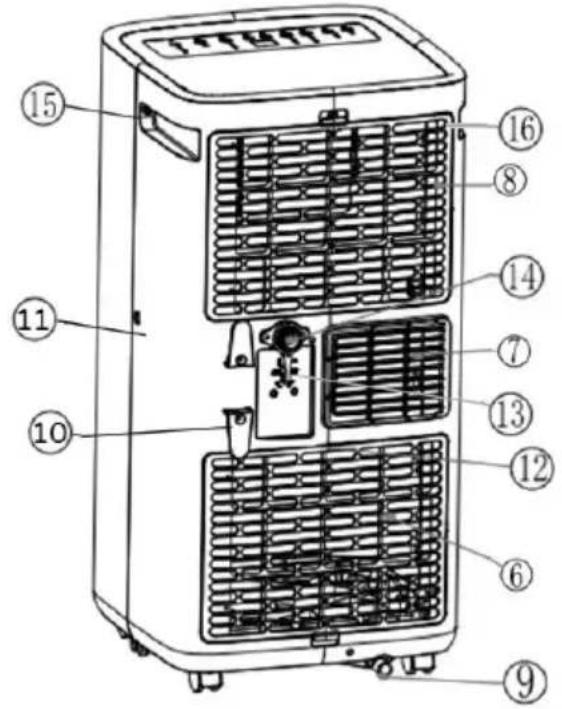
-
Display
-
Louver
-
Front display
-
Front panel
-
Wheels
-
Air inlet
-
Flexible pipe connection
-
Air filter
-
Drainage hole
-
Cord Winder
-
Rear panel
-
Bottom air inlet
-
Cable plug socket
-
Continuous drainage hole
-
Transport handle
-
Air filter
-
Remote control
-
Flexible pipe
-
Window adapter


natural_image
Technical line drawing of a coiled spring assembly with mounting flanges (no text or symbols)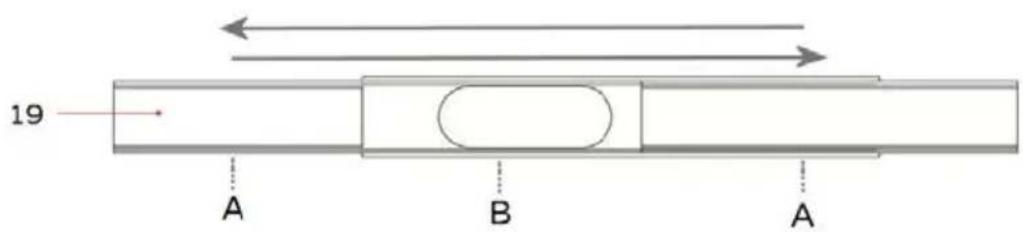
DESCRIPTION
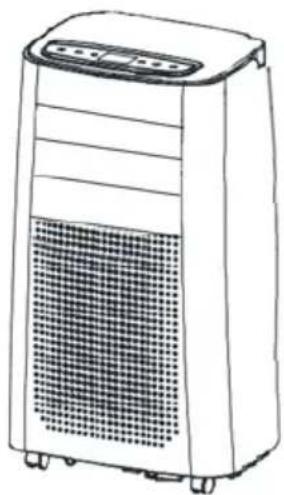
The appliance has the following control and adjustment devices and components:
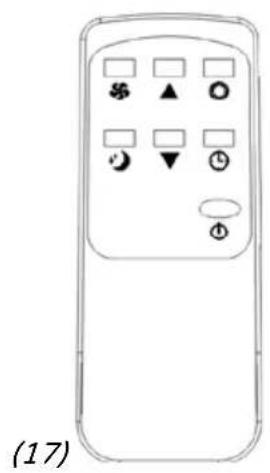
Remote control
The appliance's functions are operated using the control panel keypad and the remote control, which must be pointed straight at the display from a distance of no more than 6 metres, fitting the batteries before use (open the hatch in the rear and fit two "AAA" batteries (not included), ensuring that the polarity is correct, then close the hatch). It is important to change all the batteries simultaneously. Do not mix new batteries with batteries that have already been used. If the remote control is unused for lengthy periods of time, remove the batteries. The batteries not must be replace from children.

WARNING: Do Not Ingest Battery. Chemical Burn Hazard.
Keep new and used batteries away from children. If the battery compartment does not close securely, stop using the product and keep it away from children. If you think batteries might have been swallowed or placed inside any part of the body, seek immediate medical attention. The batteries contain materials, which are hazardous to the environment; they must be removed from the appliance before it is scrapped and that they are disposed of safely.
Details of each function are provided below:
Control Panel
| A (POWER) ) | On/Off Button | Turns on the appliance and puts on standby. |
| B (MODE) | Mode button | Selects: cool/dry/fan: only active if the appliance is already on. |
| C (DOWN) | Decrease button | Adjusts the room temperature (16-31)℃ for the cool program, and sets the time; press button "D" to increase and button "C" to decrease, varying the time by 1 for each pressure. |
| D (UP) | Increase button | |
| E (FAN) | Fan button | Selects operation of the fan: Hi/Low, switching the speed between Hi and Low at each pressure on the button. |
| F (TIMER) | Timer Button | Times operation or start-up of the appliance: to increase and decrease by 1 hour, up to a maximum of 24 hours, press the respective buttons "D" and "C"; press the button again to cancel the time. Start-up timer: with the appliance in stand-by, press the button to obtain the time required (1-24h). The time flashes for a few seconds, and then after the set time the timer will start up the appliance in the mode set previously. Operation timer: start the appliance in stand-by, set the programs and then select the timer and set the time required (1-24h). The time flashes for a few seconds, and then after the set time the timer will switch off the appliance. |
| G | Display | |
| H | Button Front display | Only activated via the control panel: switches the front display which shows the room temperature on and off |
| L | Sleep button | Reduces the fan speed (if med/hi speed is set); this function is available in Cool mode. In this function the appliance will operate in quiet, energy saving mode. |
- Front grille: the horizontal flaps can be adjusted up or down manually.
Window kit, comprising:
- extending flexible pipe (15x145)cm, (18): fit the rectangular fitting on the end and turn it clockwise and do the same with the duct on the other end; when done, check that the parts are rigidly fixed in place.
• adjustable window adapter (91-124)cm, (19):
- Use the Adjustable (sliding) Kit to close the space left open by the windows. Composed of: 1 plate with a hole (B), and 2 sliding plates (A). To assemble the kit, proceed as described (see the pictures opposite); the plate with a hole: insert the screw with the "plate" head from the inside into the hole, insert the washer and wing nut from the outside (opposite). Insert a sliding plate so that the screw head fits into the central guide; after adjusting the plates to the most suitable size, then lock them by tightening the nut. If necessary, also assemble the other sliding plate at the opposite end as indicated above.
- Place the appliance as close as possible to a window or glass door, keeping it at least 50 cm from walls or other nearby obstacles. It is important to reduce exposure to direct sunlight using rolling shutters, curtains or Venetian blinds, and to keep doors and windows closed. The pipe can be adjusted from 40 cm up to a maximum of about 145cm; keep the pipe as short as possible, and do not curve the flexible pipe too tightly or create kinks in it. Do not use extension or replacement pipes, as this might cause a malfunction. The outlet must be unobstructed; otherwise, overheating may occur.
- Fit the rectangular end of the extending pipe on the air outlet (7), and move it inward until it locks (you will hear a "click"); reverse the procedure to remove the pipe. Extend the flexible pipe as much as necessary to reach the outside fitting (window or glass door).
- Fit the flexible pipe duct into the slot in the external plate so that the 4 pins "A" mate with their respective slots "B" in the plate, move it to the left and fix it, and secure it by tightening the screw on the inside. When

natural_image
Close-up of a gray surface with a white arrow pointing right and a small circular button on the right (no text or symbols visible)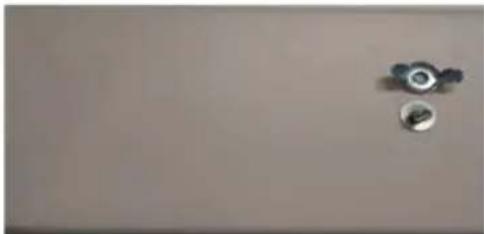
natural_image
Simple line drawing of a wall with two circular objects and a small sphere on the left (no text or symbols)
natural_image
Simple illustration of a small object on a plain background (no text or symbols)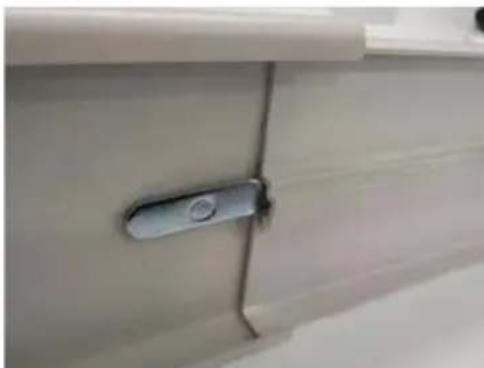
natural_image
Close-up of a white door handle with a metallic clip and metal bracket, no visible text or symbolsdone, check that the parts are rigidly fixed together.
- Open the window slightly and set the adapter in the horizontal or vertical position, as appropriate, and semi-close the blinds or shutters.

natural_image
Close-up of a door with a white arrow pointing to the left side (no text or symbols visible)
natural_image
Line drawing of an air conditioner unit and door with a door handle (no text or symbols)
natural_image
Line drawing of a door with a portable air conditioner unit connected to a wall-mounted device (no text or symbols)
Modes
Cool/dry/fan: each pressure of the “Mode” button selects the modes and the LED of the selected function illuminates. During the switch between modes, the fan keeps operating but the compressor stops and will restart after about 3 minutes. This delayed start protects the compressor from potential damage. The extending pipe must always be connected to the appliance, except when it is used in dry mode; in this case, the appliance should be allowed to discharge straight into the room, for the maximum efficiency.
Cool/Fan

natural_image
Line drawing of a portable air conditioner with a hose extending from its side (no text or symbols)Dry

natural_image
Line drawing of a portable air conditioner unit with control panel and mesh grille (no text or symbols)- Cool
The "Cool" light on the control panel comes on; select:
- the temperature: 16^ C - 31^ C
- the fan speed (low/hi)
- Timer and Sleep function
If the On/Off button is pressed, the unit remains in stand-by and the appliance saves the temperature and speed; when it is switched back on, it will maintain the settings made earlier.
- Dry
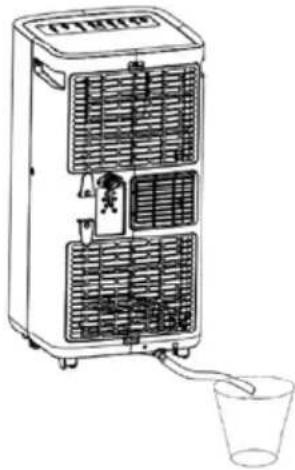
When this function is set, the "Dry" light on the control panel illuminates; the fan speed is fixed at the minimum level and cannot be modified. The appliance does not cool the room when the dry function is activated. When this function is used, continuous drainage must always be provided to ensure the maximum drying efficiency. Make sure that the rubber plug of the bottom drainage hole (9) is positioned correctly. Undo the ring-nut of the continuous drainage hole by turning it anticlockwise, and remove the plug of the top drainage hole.
Connect the hose with internal diameter 10 mm and length 30 cm max. (supplied with some models) to the continuous drainage hole (14); make sure that the connection is watertight.
natural_image
Line drawing of a portable air conditioner unit with cooling fins and a cup, no text or symbols presentCheck that the drain is at a lower level than the spout and that the hose is placed with a constant gradient, lower than the spout at all times. If continuous drainage is not being used, remove the drain hose and fit the plug with its nut.
- Fan
When this function is set, the "Fan" light on the control panel illuminates; the selected speed (low/hi) is changed at every press on the button.
DRAINAGE
In “Cool” mode, the appliance vaporises the condensate automatically. When the unit is operating in cool mode, make sure that the rubber plugs that seal the drainage holes (bottom & top) on the rear are fitted correctly.
When the appliance is operating in “Cool” mode, there is no need to connect the continuous condensate drainage; water will not build up inside the unit except in particular weather conditions with a very high humidity level.
When the container is full, the "Water full" light comes on to indicate this and the appliance cuts out.
To empty the container, switch off the appliance and remove the plug from the socket. Place the end of the drain over a container to collect the condensate, undo the nut, and remove the plug of the bottom drainage hole.
USE
- Do not leave the air-conditioner in operation for long periods with high humidity and open doors or windows. The humidity might condense, wetting or damaging furnishings.
- For optimal air-conditioning and efficiency, doors and windows must always be closed.
- In: Cool or Fan modes, check that the drainage plugs are fitted correctly.
- If continuous drainage is in use, make sure that the drainage hose is properly connected to the spout, that the opposite end is lower than the spout, and that the incline is even, so that the water flows internally without any obstructions.
- Caution: do not cover the appliance to avoid overheating.
Before each use, make sure that:
-the appliance is in good condition
-that the power cable and flexible pipe are not damaged
- Open the horizontal flaps manually in the desired direction.
- Connect the plug to the power socket; you will hear a beep.
- Turn on the appliance, press the "POWER" button and activate the functions required, proceeding as described above.
- Press the "POWER" button to deactivate the appliance: it switches to stand-by mode. To switch it off completely, the plug must be removed from the power socket.
Energy saving advice
• Always keep the filters clean, inspecting them regularly
- Keep doors and windows firmly closed except when the room needs airing
- Do not allow sunlight to shine straight into the room (use curtains, lower the roller blinds or close the shutters)
- Do not obstruct the appliance's air inlet and outlet grilles
During long periods of inactivity, remove the plug from the electric socket.
CLEANING AND MAINTENANCE
Warning: disconnect the plug from the power socket before routine cleaning; the appliance must remain vertical during cleaning.
- Air inlet filter
These should be cleaned regularly (at least about once a fortnight, or more often if the appliance is in continual operation every day).
Remove the grilles using the handles provided and extract the filters outwards.
Remove dust with a brush or vacuum cleaner, taking care not to damage any part. If the filter is very dirty, wash it in warm water and rinse it a few times. The water temperature must not exceed 40 °C.
After washing, leave it to dry fully before returning it to its proper seat. Never wash in the dishwasher.
Dry it thoroughly (do not use hot air) then fit it correctly back in place.

Main Unit
Wash only with a soft cloth dampened with water.
- For long periods out of use, drain the water from the tank, wind up the power cable and fit the plug in its seat, and stow the appliance vertical, protected from dust and damp, adopting the precautions detailed in the safety warnings section. Always keep the appliance vertical.
- If you decide not to use the appliance any more, it must be rendered unusable by cutting off the power supply cord (first making sure that the plug has been removed from the power socket), and any parts which are hazardous if used as children's playthings must be rendered harmless.
- Do not attempt to replace or repair any components on your own. Contact the service company if needed.
- Gas R290
Please be reminded to follow the instructions in the warnings section.
BATTERIES - Remove the batteries from the remote control before its disposal. Do not dispose the batteries with domestic waste. The batteries must be disposed of in the appropriate containers or in the specific collecting centre. Suitable segregated collection helps prevent damage to the environment and to human health.
To remove batteries, refer to Instructions for use.

Information for correct disposal of the product under the European Directive 2011/65/EU.
At the end of its lifetime, the product must not be disposed of with ordinary urban waste.
It can be consigned to the special waste recycling centres provided by local government, or by the retailers who provide this service.
To avoid possible damages to the environment or human health due to the uncontrolled disposal of waste, recycle the equipment in a responsible manner, promoting the sustainable reuse of material resources, refrigerants and flammable insulating gases.
Proper disposal of a household appliance prevents possible detrimental effects on the environment or health arising from its incorrect disposal and allows the recovery of its constituent materials, generating major savings of energy and resources. The product bears the crossed-out symbol of a wheeled rubbish bin to indicate that it must be disposed of separately. Illegal dumping of the product by the user will be subject to prosecution under the relevant law.

TROUBLESHOOTING
| FAULT | CAUSE | SOLUTION |
| Appliance does not switch on | The appliance is not on. | Turn on the appliance. |
| The electrical socket is defective. | Seek advice from a qualified professional. | |
| The plug is not connected to the socket. | Connect the plug to the power socket. | |
| The appliance only works for a short time | Restriction in the drain hose. | Position the drain hose correctly. |
| Drain hose obstructed. | Check for obstacles obstructing the discharge of air outdoors. | |
| Kinks in drain hose. | Remove the kinks. | |
| The air-conditioner works but does not cool the room. | Window open | Close the window |
| There is a heat source (fan heater, lamp, etc.) operating in the room | Eliminate the heat source | |
| The air discharge pipe has become disconnected. | Fit the pipe in place. | |
| Unpleasant smell in room | Air filters fouled. | Clean and replace filters. |
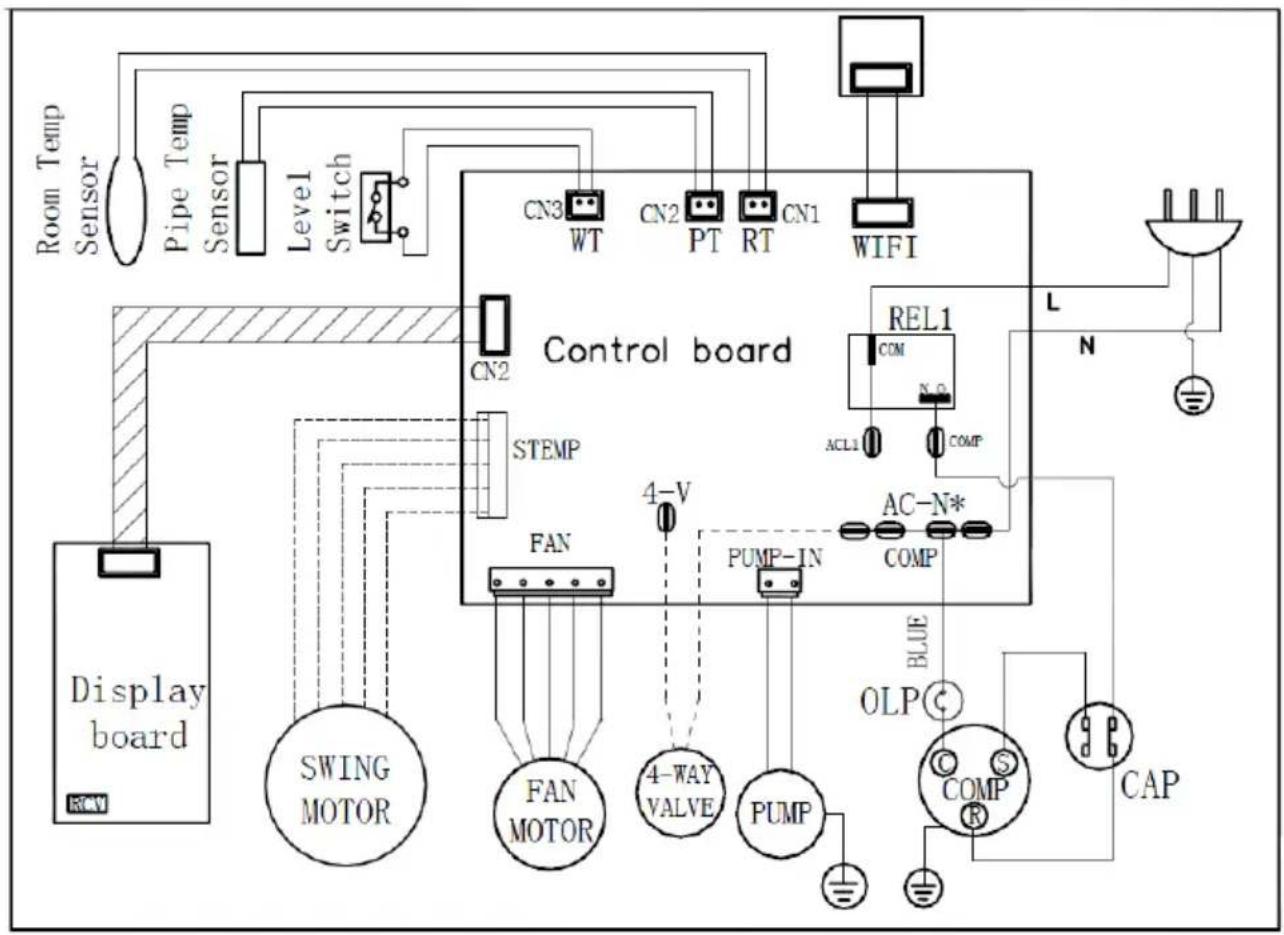
| The symbol 'E1' appears on the display. | Room temperature sensor anomalies. | Check the room temperature sensor and the relative circuits. |
| The symbol 'E2' appears on the display. | Pipe sensor temperature anomalies. | Check the pipe temperature sensor and the relative circuits. |
flowchart
graph TD
    A["Control board"] --> B["Display board"]
    A --> C["SWING MOTOR"]
    A --> D["FAN MOTOR"]
    A --> E["PUMP"]
    A --> F["PUMP-IN"]
    A --> G["4-WAY VALVE"]
    A --> H["REL1 COM N-2 COMP"]
    A --> I["ACL1"]
    A --> J["AC-N* COMP"]
    A --> K["BLUE OLP"]
    A --> L["COMP R"]
    A --> M["CAP"]
    A --> N["CN1"]
    A --> O["CN2"]
    A --> P["CN3 WT"]
    A --> Q["CN2 PT"]
    A --> R["CN1 WIFI"]
    A --> S["CN2"]
GARANZIA:
it is advised to register the appliance on the website https://www.bimaritaly.it/it/garanzia or to scan the QR code on the side to properly register the warranty (fill out the form to acivate the warranty on the product you purchased).

GB General guarantee terms
Guarantee coverage starts from the moment of purchase of the appliance as indicated by a fiscally mandatory delivery document (bill or tax receipt or shipping document). Guarantee coverage lasts 24 months and terminates after the prescribed term. Guarantee coverage covers all replacements or repairs that become necessary due to defects in material or manufacture. Guarantee coverage does not cover all those parts which become defective due to failure to comply with installation, operating or maintenance instructions, shipping damage, operating neglect or negligence, improper use or any circumstances which are not due to manufacturing defects of the appliance. Guarantee coverage is also excluded for replacement or repair of all parts subject to fair wear and tear or to expiry, as well as removable parts, light bulbs, glass components, ceramic parts, external tubes, batteries and disposable (throw-away) accessories. Replacements or repairs that come under guarantee coverage are performed free of charge for goods delivered free the Manufacturer's factory or to one of our Technical Service Centres. The Customer must only pay for shipping costs. Guarantee coverage is not granted if repairs are performed by personnel not belonging to authorized Technical Service Centres or when non-genuine spare parts are used. This warranty is governed by and construed in accordance with applicable laws in force in the country where the product is purchased. For details, contact the Customer Support in your country or the Bimar website. (www.bimaritaly.it). The Manufacturer declines all responsibility for any direct or indirect harm to persons, pets or property consequent to failure to comply with all the provisions specified in the appliance instruction booklet and especially those regarding appliance maintenance, operation, installation or warnings.

Via G.Amendola, 16/18 25019 Sirmione (BS) – ITALY www.bimaritaly.it
Assistenza:

- CONDIZIONATORE PORTATILE 9000BTU 9000BTU PORTABLE AIR CONDITIONER
- DESCRIZIONE
- Modalità
- - Freddo (COOL)
- Unità principale
- GENERAL WARNINGS
- INSTALLATION
- DESCRIPTION
- Remote control
- Modes
- - Cool
- - Dry
- - Fan
- DRAINAGE
- USE
- Energy saving advice
- CLEANING AND MAINTENANCE
- - Air inlet filter
- Main Unit
- - Gas R290
- GARANZIA:
- GB General guarantee terms
Brand : Bimar
Model : CP092
Category : Air conditioner