
MB-X4U31 - External hard drive Fantec - Free user manual and instructions
Find the device manual for free MB-X4U31 Fantec in PDF.


| Product Type | External Hard Drive Enclosure |
| Model | Fantec MB-X4U31 |
| Number of Bays | 4 |
| Connectivity | USB 3.1 Type-C (Gen II, up to 10 Gbps), compatible with USB 2.0/3.0 |
| Power Supply | 12V DC input, central power switch |
| Cooling | Smart fan controlled by built-in thermal sensor |
| LED Indicators | Blue (active), Purple (data access), Off (off/inactive) |
| Drive Control | Individual power button and lock per bay |
| Supported Hard Drives | 3.5" SATA I/II/III |
| Initialization | MBR (<2TB) or GPT (>2TB) partition style |
| Compatible OS | Windows, macOS 10.13 or later, Linux Kernel 2.4 or later |
| Safety Lock | Key lock on front door |
| Dimensions (Approx.) | 200 x 150 x 150 mm |
| Weight (Approx.) | 2.0 kg |
| Cleaning | Soft, dry cloth |
| Environmental | Do not use near water or heat sources |
| Data Protection | Perform "Safely Remove Hardware" before disconnecting |
Frequently Asked Questions - MB-X4U31 Fantec
User questions about MB-X4U31 Fantec
0 question about this device. Answer the ones you know or ask your own.
Ask a new question about this device
Download the instructions for your External hard drive in PDF format for free! Find your manual MB-X4U31 - Fantec and take your electronic device back in hand. On this page are published all the documents necessary for the use of your device. MB-X4U31 by Fantec.
USER MANUAL MB-X4U31 Fantec
Beschreibung
natural_image
Close-up of a black key with metal ring and metallic handle (no text or symbols visible)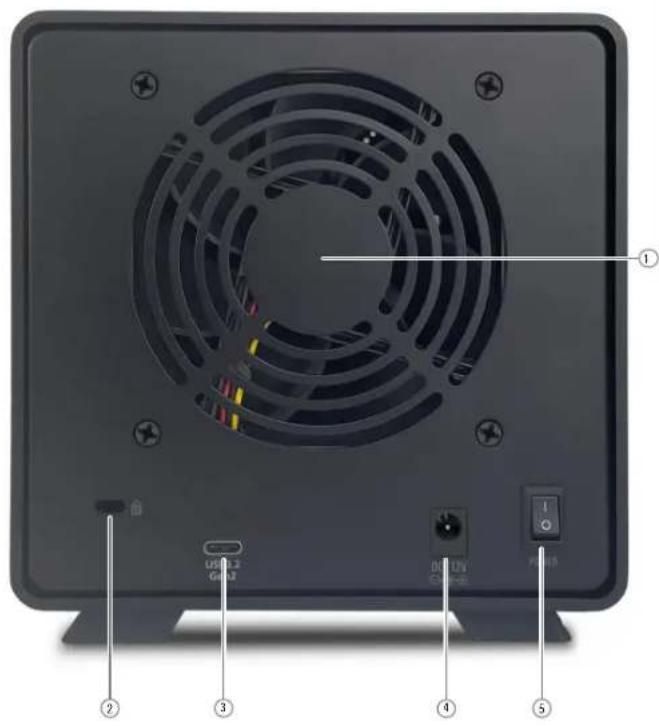
Beschreibung
natural_image
Exterior view of a black server rack with multiple ports and a magnified inset showing a close-up of the internal components (no text or symbols visible)- Öffnen Sie die Tür.
natural_image
Exterior view of a black Atlas 3D server with multiple drive bays and external ports (no visible text or symbols)MBR oder GPT Modus
Mac OS 10.5 or later
Linux Kernel 2.4 or later
- Eviroment
- USB 3.1 Type-C connection
USB 3.1 Typ-C connection, Gen II up to 10Gbps
- USB 2.0/3.0 compatible
Additional cable required, cable converter adapters not recommended
- Fan
Smart fan controlled by the built-in thermal sensor
Step
2
Hints
Follow all instructions.
- Do not use the device in the immediate vicinity of water.
- Clean the device with a soft, dry cloth.
- Do not block ventilation holes.
- Perform the installation according to these instructions.
- Do not operate the device in the immediate vicinity of heat sources such as heaters, or other devices that give off heat.
- Lay the power cord so that nobody can trip over it. Make sure that the cables are not pinched and that no heavy objects are parked on them.
- Use only accessories recommended by the manufacturer.
- Disconnect the power plug during a thunderstorm or if you do not use the device for a long time.
- Always contact our service team for repairs. Maintenance is required if device, power cord or plug damaged, liquids or foreign objects in the device have penetrated, or the device is not working normally or was dropped.
- Do not shake the device, do not drop it.
- Do not use the device during operation.
- Do not pull the power plug by the cable from the socket.
- Before you turn off the power or turn off a hard drive or unplug the USB cable, make sure partitions in use are no longer actively used by your operating system. Lead a so-called "unmounting" or "hanging out" ("eject").
Please visit our website for more information :

fantec
www.fantec.de
service@fantec.de
Step
3
Front Panel
● LED Indication / Button
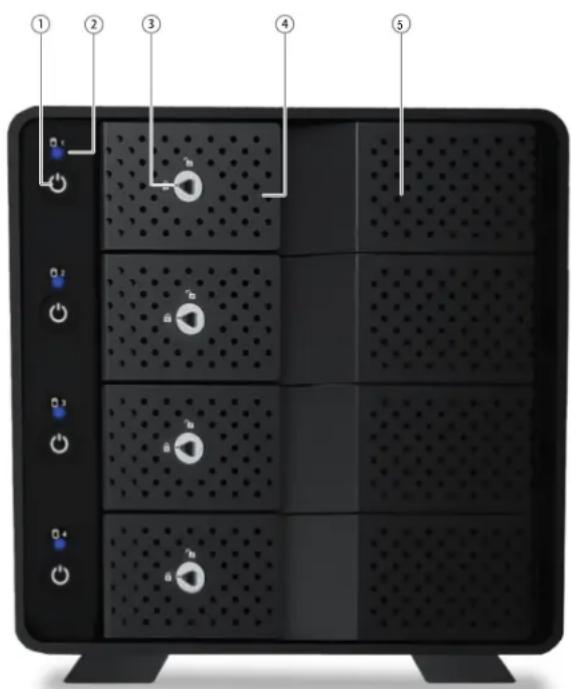
Description
- Power button for each hard drive.
- Status LED for each hard drive:
Lights up blue: hard disk is switched on and active.
Flashes purple: the hard disk is being accessed.
LED is off: the hard disk is switched off or the USB cable is disconnected. The hard drive is switched on but inactive:
e.g. in standby or after a "safely remove hardware", or when the hard drive is parked in a power saving mode/"sleep mode".
- Ability to lock for each disk.
- Door handle on each front door for each hard drive.
- Slot for each hard drive.
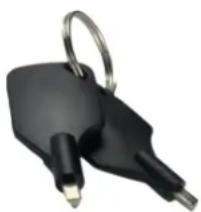
Door keys
natural_image
Close-up of a black key with metal ring and two metallic clips (no text or symbols visible)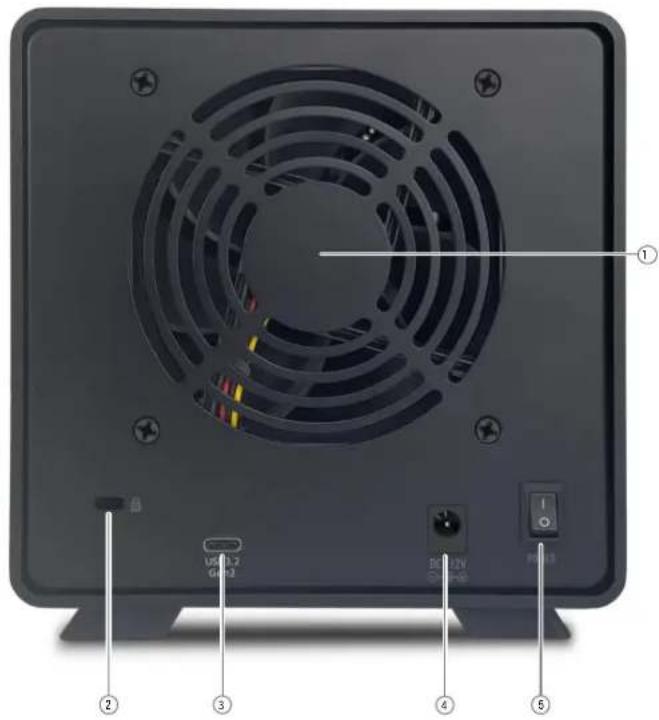
Description
- Fan
- Security lock
- USB-C port
- 12V DC Input
-
Central power switch
-
Connect the power cord and turn on the device. Plug in the USB cable and connect the other end of the cable to your PC.
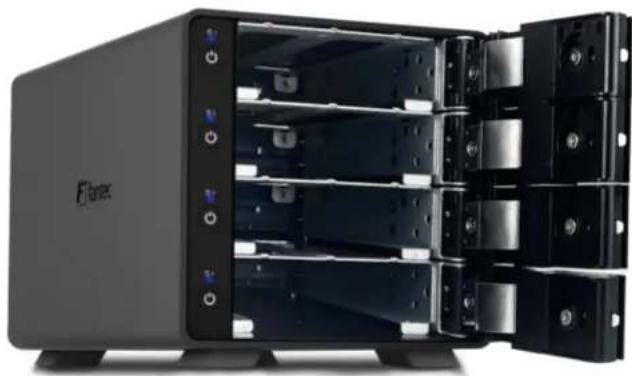
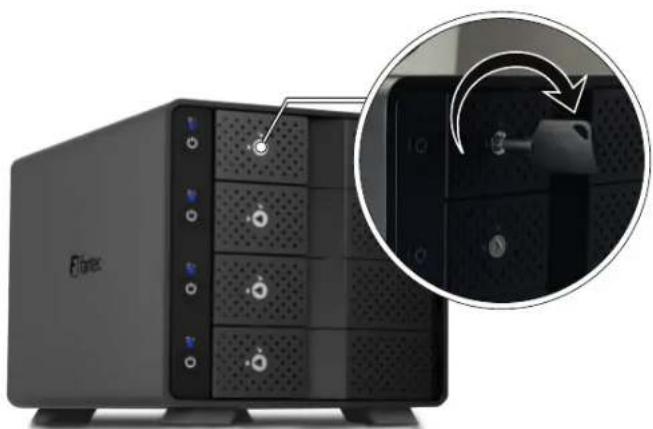
- Unlock the door and pull the door handle to open the slot.
natural_image
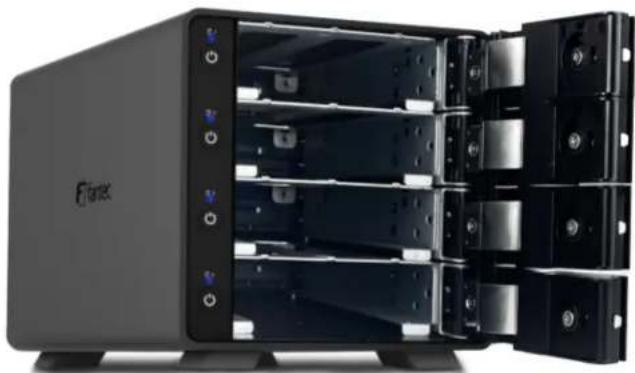
Black server rack with ventilation slots and a magnified inset showing a device's internal structure (no text or symbols visible)- Open the door.
natural_image
Exterior view of a black Fintex 3D server with multiple drive bays and external ports (no visible text or symbols)- Slide the hard drives into the case.
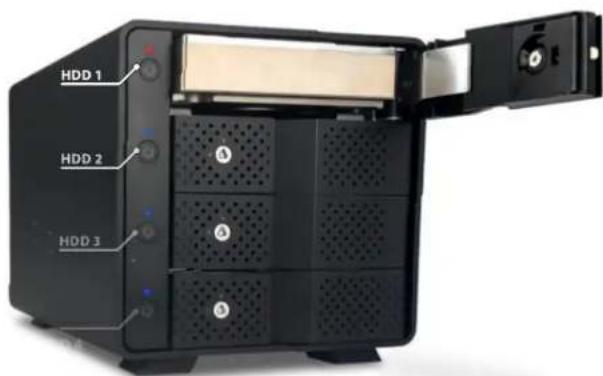
- Close the door and turn on the hard drive by briefly pressing the respective power button.

- To remove the hard drive, run in your operating system "Safely remove hardware", turn off the hard drive by briefly pressing the switch, open the door and remove the hard drive again.
Microsoft Windows
If you are using unformatted disks, they must first be initialized. To do this tap the Windows key on your keyboard and enter
"diskmgmt.msc" (without quotation marks). Then press the "ENTER" key.
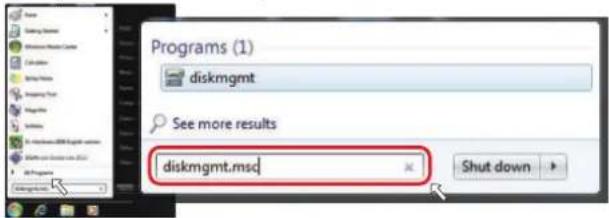
- Start disk initialization
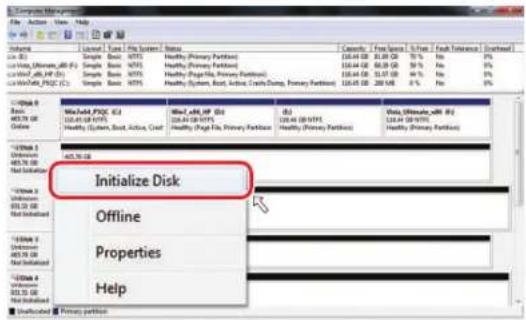
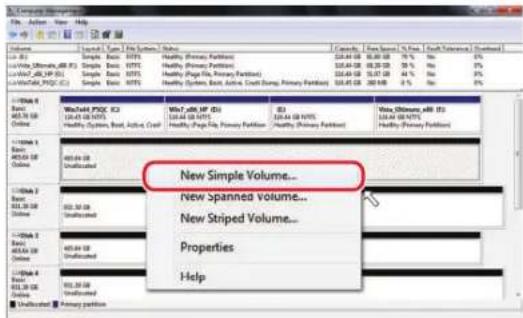
- Create new partition and format disk
- HDD format completed
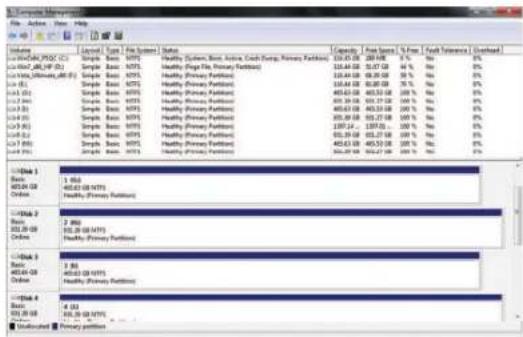
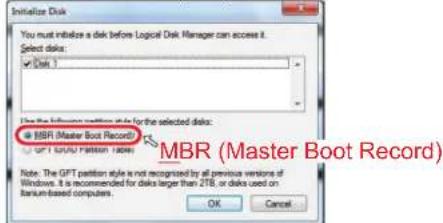
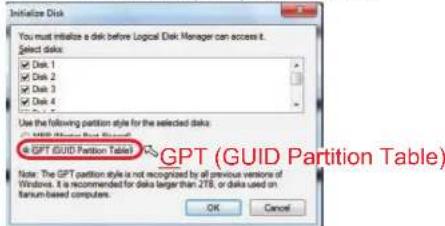
MBR or GPT Modus
Important: Please enable the GPT mode when the total capacity exceeds 2TB, otherwise choose the MBR mode.
Enable MBR if the total capacity does not exceed 2TB
Enable GPT if the total capacity exceeds 2TB
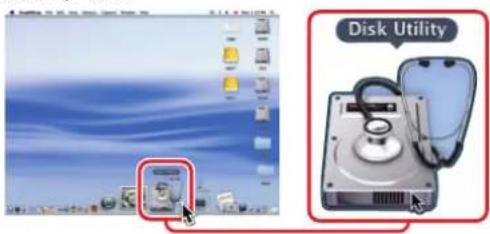
MAC OS X 10.13 or later
- Click "Disk Utility" icon.
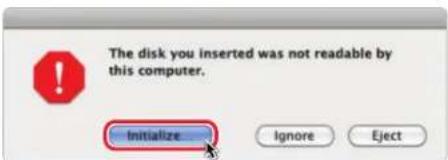
2.HDD initialize..
- Click "Erase"
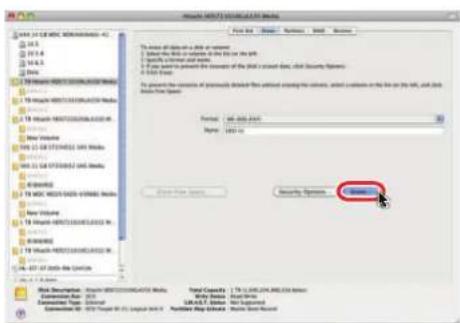
- HDD format in process.
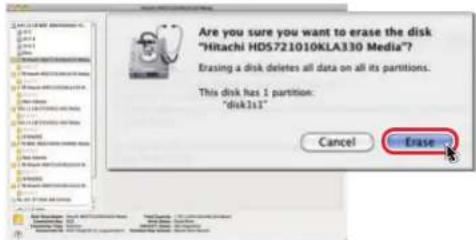
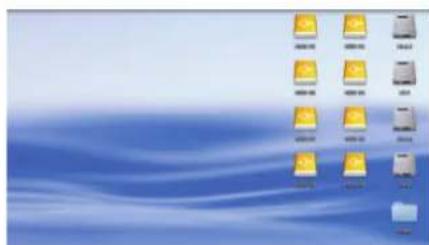
- Format completed
- If the inserted hard drive does not turn on, check whether the power cable is properly plugged in and the central power switch is switched on.
- If the USB connection is not established, check whether the USB cable is plugged in.
- If your USB is causing problems, check this:
a. USB3 drivers that are supplied with the installation of an operating system are often not optimally matched to your mainboard. If a USB connection does not work to your satisfaction, install the correct USB3 drivers. You can usually find them on the homepage of the manufacturer of your mainboard, suitable for your operating system. If you do not find the USB3 drivers listed, install all drivers that the manufacturer provides for your mainboard, suitable for your operating system.
b. If you are using a PC card for your USB: please use the driver from the manufacturer of the PC card that is suitable for the operating system you are using.
c. The standby behavior of hard disks is usually controlled by the operating system. Often in the advanced power saving options. If your hard drives shut down unusually quickly, check the settings there. PCs that use an SSD switch it off for a very short time to save energy. With many operating systems, this switching off of data carriers affects all connected hard drives and can have a disruptive effect. Turn off these techniques to find sources of error and correct the settings at a reasonable time.
d. Some PCs use energy saving techniques on the USB interface. Devices with rechargeable batteries in particular like to save energy, but this can have a disruptive effect. You can often find information about this in the energy saving options. Switch off these techniques first to find sources of error. Then switch on the techniques one by one. Or please inquire with the service department of your PC manufacturer if a USB interface shuts down unusually often and thus disrupts the operation of a USB multiple hard disk housing. -
To prevent data loss, please pay attention to these instructions:
-
Do not unplug a USB cable until you have performed a so-called "Unmounting", "Remove hardware safely", "Eject", "Eject" or "Unmount the partition".
- Back up important data regularly so that there are at least two copies of important data.
-
Only use the hard drives if everything works to your satisfaction. Drivers can be changed by software updates and unstable USB connections can lead to data loss. Respond to changes in your operating system in good time.
-
The power button switches the hard disk on with a short press and off again with a long press (approx. 3 seconds). When you supply power to the device, e.g. by turning on the main switch on the back, all hard drives are initially switched off. Once the enclosure is powered on and powered, a single bay can be powered on at any time with a short press. Even if no hard drive is inserted. You cannot see the status of a bay if no hard drive is inserted. If the bay has been powered on and you then insert a hard drive, the hard drive will be activated immediately. If you want to prevent this, as a precaution, press the switch for about three seconds and switch off the shaft that may be switched on directly.
As soon as you have performed the "Safely remove hardware" action, the hard disk is removed from the file system by your
- operating system and switched to inactive. The LED then goes out. However, from the perspective of the case, the slot is still switched on. If you want to use the hard disk again, it is not enough to press the button briefly, because the hard disk is still switched on from the case's point of view. You have to turn off the slot by long pressing the switch and then turn it on again by short pressing the switch.

Brand : Fantec
Model : MB-X4U31
Category : External hard drive