
QB-X2U31R - External hard drive Fantec - Free user manual and instructions
Find the device manual for free QB-X2U31R Fantec in PDF.


| Product Type | 2-Bay External Hard Drive Enclosure |
| Brand | Fantec |
| Model | QB-X2U31R |
| Device Support | 3.5" SATA I/II/III Hard Drives |
| Internal Interface | SATA 6 Gbit/s |
| External Interface | USB 3.1 Gen-II (10 Gbit/s) and Gen I (5 Gbit/s), Type-C |
| RAID Modes | RAID 0, RAID 1, BIG (Spanning), SINGLE (Independent) |
| Data Transfer Protocol | UASP (USB Attached SCSI Protocol) |
| Power Supply | AC Adapter, 12V / 3A |
| Cooling | 60mm fan with automatic (thermal sensor) and manual modes, 3 speed levels |
| Material | High quality metal case |
| Dimensions (W/D/H) | 92.6 mm x 208.8 mm x 160 mm |
| Operating System Support | Windows 7, 10; Mac OS X 10.13 or later |
| Operating Temperature | 0°C to 40°C |
| Humidity | 90% RH |
| LED Indicators | Power (blue/orange), HDD status (blue/purple/red), RAID mode, fan speed |
| Smart Power Sync | Turns off device when PC shuts down (with compatible motherboard) |
| Package Contents | QB-X2U31R, USB 3.1 Type-C to Type-C cable, power adapter, user manual, HDD handles and screws |
| Safety Warnings | Do not expose to water, use dry cloth, do not block vents, unplug during storms, etc. |
| Maintenance | Clean with dry cloth, ensure ventilation, do not drop |
| Spare Parts Availability | Contact support via service@fantec.de for replacement parts |
Frequently Asked Questions - QB-X2U31R Fantec
User questions about QB-X2U31R Fantec
0 question about this device. Answer the ones you know or ask your own.
Ask a new question about this device
Download the instructions for your External hard drive in PDF format for free! Find your manual QB-X2U31R - Fantec and take your electronic device back in hand. On this page are published all the documents necessary for the use of your device. QB-X2U31R by Fantec.
USER MANUAL QB-X2U31R Fantec
natural_image
Exterior view of a black COMTEC 2300 USB3.1 server unit (no signage or text on body)MODEL: FANTEC QB-X2U31R
2 BAY 3.5" SATA I/II/III RAID
HDD CASE with USB 3.1
INHALT:
1) EINLEITUNG....3
2) SPEZIFIKATIONEN....3
3) LIEFERUMFANG....4
4) ÜBERSICHT LED-ANZEIGEN / TASTEN....4
5) ÜBERSICHT RÜCKSEITE....6
6) BEMERKUNGEN....7
7) ÜBER RAID....8
8) WARNUNGEN....10
9) SCHNELLINSTALLATIONSANLEITUNG....10
10) FESTPLATTEN INITIALISIEREN UND FORMATIEREN....14
11) FEHLERBEHEBUNG....18
12) FAQ....20
13) KONTAKT & TECHNISCHER SUPPORT......23
1) EINLEITUNG
natural_image
Black metal bracket with multiple holes and a rectangular cutout (no text or symbols visible)Smart Power SYNC Schalter
BIG MODUS

MBR oder GPT Modus
MAC OS X ab 10.6
Energiesparmodus
13) KONTAKT & TECHNISCHER SUPPORT
Secure your data on the FANTEC QB-X2U31R with space for two SATA hard drives in one housing. With various RAID Level (0, 1, SINGLE, and BIG) the QB-X2U31R provides various settings for data security and data redundancy. All drives can be displayed separately and hence controlled separately, easily switched, replaced and independently from manufacturer or capacity expanded. The SUPERSPEED USB 3.1 interface provides high data transfer up to 10Gbps. With full SATA III 6G support and the new UASP transfer Protocol, the device can reach a speed up to 70% higher than conventional USB 3.1 enclosures. The 60mm fan can
be used in automatic mode with built-in thermal sensor or by manual mode with 3 levels of speed. The energy saving feature turns off the FANTEC QB-X2U31R automatically when the PC is shut down.
2) SPECIFICATIONS
| Device Support: 3.5" SATA I/II/III Hard Drives | |
| Internal Interface: SATA 6 Gibt/s | |
| External Interface: | USB 3.1 Gen-II 10Gbits/s and Gen I 5Gbit/s, Typ-C |
| Power Supply: AC Adapter, 12V / 3A | |
| Material: High quality metal case | |
| Dimensions (W/D/H): 92.6mm x 208.8mm x 160mm | |
| OS Support: | Windows® 7, 10Mac OS X 10.13 or later |
| Operation Environment: | Temperature 0 ~ 40°CHumidity 90 % RH |
| Smart fan with 2 modes (auto / manual) and 3 levels of speed: | Level 1: < 45°C 1,000 ~ 1,400rpmLevel 2: 45 ~ 55°C 1,500 ~ 1,900rpmLevel 3: > 55°C 2,400 ~ 2,800rpm |
3) PACKAGE CONTENTS
• FANTEC QB-X2U31R
• USB 3.1 Cable Type-C to Type-C
- Power Adapter
- User Manual
• 2x HDD handle and screws
(Screws for HDD fixation)
4) OVERVIEW LED INDICATIONS / BUTTONS

Description
1 Power button
It needs to be pressed and held for 3 seconds to power off.
This design prevents accidental power off.
2 Mode button
RAID Mode button needs to be pressed and held for 3 seconds to switch the device's RAID mode.
This design will prevent accidental execution of this function.
3 Smart fan button
Auto, manual and fan speed from level 1 to 3.
4 Power LED
Blue - Power on Orange - Sleep mode on
5 USB link
USB port is in use
6 HDD1/HDD2
blue - HDD connected purple - HDD access red - HDD error
7 SINGLE Mode
8 BIG Mode
9Raid 0 Mode
10Raid 1 Mode
11 AUTO
Smart Fan on
12 FAN 1
FAN speed out level 1 (low)
13 FAN 2
FAN speed out level 2 (middle)
14 FAN 3
FAN speed out level 3 (high)
HDD Handle

natural_image
Black metal mechanical bracket with multiple holes and a square cutout (no text or symbols visible)Smart Power SYNC switch
| SYNC switch | 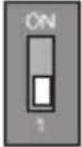   | 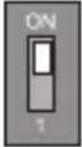   |
| Synchronization is off. | When the PC is off, the device goes to sleep mode. |
6) REMINDERS
- Follow all instructions.
- Do not place this device near water.
- Clean only with dry cloth.
- Do not block any ventilation openings.
- Install in accordance with the manufacturer's instructions.
- Do not place near any heat sources such as radiators, heat registers, stoves, or the devices (including amplifiers) that produce heat.
- Protect the power cord from being walked on or pinched particularly at plugs, convenience receptacles, and the point where they exit from the devices.
- Power supply cords should be routed so that they are not likely to be walked on or pinched by items placed upon them or against them.
- Only use attachments/accessories specified by the manufacturer.
- Unplug this during lightning storms or when unused for long periods of time.
- Refer all servicing to qualified service personnel. Servicing is required when the devices has been damaged in any way, such as power-supply cord or plug is damaged, liquid has been spilled or objects have fallen into the devices, the devices has been exposed to rain or moisture, does not operate normally, or has been dropped.
- Carefully read and follow the Quick Install Guide and User Manual.
- Do not drop or shake the device.
- Do not move the device when it is powered on.
- Do not overload wall outlets.
7) ABOUT RAID
SINGLE MODE

Non-RAID: (Single Mode) Computer will show up as two independent drives. This function can be used if RAID is not required, if one HDD is installed or two different brands or capacities of HDD are installed.

flowchart
graph LR
    A["Monitor"] --> B["+"]
    B --> C["Device"]
    C --> D["HDD 1"]
    C --> E["HDD 2"]
    D --> F["2 DRIVES"]
    E --> F
    style A fill:#f9f,stroke:#333
    style B fill:#ccf,stroke:#333
    style C fill:#cfc,stroke:#333
    style D fill:#fcc,stroke:#333
    style E fill:#cff,stroke:#333
BIG MODE

RAID 0 - Spanning: Two HDDs will show up as one large single drive. Spanning is an array which writes data sequentially over two drives.

flowchart
graph TD
    A["Computer monitor icon"] + B["Server with HDD 1 and HDD 2"] --> C["Data Transfer"]
    C --> D["4TB / HDD 1"]
    C --> E["4TB / HDD 2"]
    D --> F["DATA TRANSFER"]
    E --> F
    G["8TB 1 DRIVES"] --> H["Output"]
× Same capacity / Brand HDD
RAID O MODE

RAID 0 - Striping: Connects two hard drives to one big virtual drive as a logical unit. Data will be written parallel on all hard drives. This brings to an increase in the data transfer speed. If a hard drive fails or gets damaged, however, all data are lost. The available storage space is given by the smaller hard drive.

flowchart
graph LR
    A["Same capacity / Brand HDD"] --> B["HDD 1"]
    A --> C["HDD 2"]
    B --> D["DATA TRANSFER"]
    C --> D
    D --> E["HDD 1"]
    D --> F["HDD 2"]
    E --> G["4TB"]
    F --> H["4TB"]
    I["8TB 1 DRIVES"] --> J["Data Transfer"]
RAID 1 MIRRORING MODE

RAID 1 – Mirroring: In this mode we recommend to use identical disks (same capacity brand and model number). Mirroring is the automatic mirroring of the data on multiple hard drives. This will provide a high level of data security. If one hard drive fails, it is still possible to access to the other drive and after the replacement of the defective hard disk the data mirroring can be restored. The available storage space is given by the smallest hard disk

flowchart
graph LR
    A["Computer"] --> B["+"]
    B --> C["Hardware"]
    C --> D["DATA TRANSFER"]
    D --> E["Mirror"]
    E --> F["HDD 1 4TB"]
    F --> G["HDD 2"]
✗ Same capacity / Brand HDD
8) CAUTIONS
Before using RAID enclosure
-
Changing RAID modes causes data lost, backup your data before making changes.
-
Do not cover or block the ventilation hole.
-
Check for visible damage on unit, accessories and cables before using the device.
-
Do not expose the enclosure to water and humid condition.
-
Changing the RAID mode and initializing with the confirm button will cause the partition table to be changed. Your data will be lost.
-
When using "RAID function", HDD of the same capacity, model name and brand is recommended.
HDD format recommended
- Windows NTFS or exFAT
• Mac OS → HFS+ (Mac OS Extended)
- Both Windows and Macintosh OS → FAT32 or exFAT
9) Quick INSTALLATION GUIDE
- Please use the provided screws to secure the handles to the HDDs.

- Press down the lock to open the cover.

- Slide 2 HDDs into the chassis and make sure they are securely installed in order from left to right.
Make sure the HDD1 is securely installed first at all times. Otherwise the PC may not recognize the device.
-
Close and secure the cover.
-
Plug in power adapter and USB cable.
-
Make sure the PC is ON and ready to go, then power on the device.


- There are 4 mode options for QB-X2U31R, SINGLE, BIG, RAID 0 and RAID 1.
The enclosure is NOT default to any of the above. So If you just put hard drives in without setting a mode to use, the enclosure will just turn off after a few seconds of turning it ON. The confirmation button is hidden in the back, so please find it first before you start.
The setup procedures are as follows,
Make sure the enclosure is connected to a computer that is ON.
Power on the enclosure and press and hold MODE button on the front until mode option LED flashes. Press it again to select the RAID mode you want then press the Confirmation button on the back panel until the device shuts down.
©Power on the device again and the RAID mode set-up is completed. Now you just need to partition and format the drives.

Changing RAID mode causes data lost, backup your data before making changes.


- FAN mode setup, users need to press the „FAN“ button to change mode.

10) HDD INITIALIZING AND FORMATTING
MS Windows (32/64 bit)
If the HDD is uninitialized, you may have to initialize it by doing steps as followed: At first click “Start” at your PC and key in “diskmgmt.msc”. After that please press “ENTER key”.

- Start disk initialization.

2. Create new partition and format disk.

3. HDD format completed.

Start disk initialization.
NOTE: Please enable GPT (7/8/8.1/10) if the total capacity is more than 2TB and enable MBR if the total capacity is less than 2TB.
Activate MBR if total volume is less than 2TB

Activate GPT if total volume is more than 2TB

MAC OS X 10.6 or later
1. Click on Programs > Utility > Disk Utility icon.

2. HDD initialize...

3. Click Erase

4. Click Erase

5. HDD format in process

6. Format completed

11) TROUBLESHOOTING
- If the noise is present, change the device with another fan of size 60x60x10mm 2 pins. Otherwise return the device to the retail store.

- If the transfer rate is not normal, please check if the SATA HDD jumper is set up in 1.5 or 3.0Gbps.
- If there is noise with the fan, unscrew and take out the fan cover, pull out the power cord, clean the fan and assemble it back.
- If the fan stops working, do not dismantle it. Please return to the retail store immediately.
- The heated air would flow out from the fan based on forced convection process and cool down the chassis' internal temperature.
- To take the HDD out of the device, slightly press down the handle and, then pull it out.

- USB port of your PC must support power-off function so that the device would go into sleeping mode. Setting up motherboard's (power management) in S3 is strongly recommended. For more details, please refer to user guide of motherboard BIOS setting.
12) FAQ
- Under RAID 1 mode, if one of disk is crashed, can the device rebuild the data when I connect another new HDD?
Answer: Yes, the device would start RAID 1 rebuilding automatically when you connect another new HDD. No extra setup or configuration is needed. In order to start RAID 1 rebuild procedure, please execute following points step by step:
- Turn off the device and remove the crashed/faulty disk.
- Please turn on your PC, connect the USB3.1 cable at first to the PC and then connect the FANTEC QB-X2U31R to the USB3.1 cable. Now power on the device.
- Put a brand new HDD into the empty rack.
- Within a few seconds both Status LED of the device start blinking to indicate the rebuild process has been started.
- The speed of rebuilding is about 250GB/h, which means rebuilding a disk of a size of 500GB will last about 2h minimum, maybe more.
- If both status LED shine steady blue, the rebuild procedure is finished successfully.
IMPORTANT NOTE:
- To rebuild your data securely, we recommend a new HDD that has same brand and model no. or a brand new HDD which is bigger than the crashed HDD.
- Don't disconnect the USB Cable during rebuilding or Power off the PC.
- Can I copy data to the disk during RAID 1 rebuilding?
Answer: Yes, you can but it is not suggested doing that, and it would extend the time of rebuilding.
- Under RAID 1 mode, if one disk crashes, can my PC read the other disk correctly?
Answer: Yes, the PC still can access to the healthy disk. If you want to be sure your data are safe, you make a backup before starting RAID 1 rebuild procedure.
- How can I protect my data if the FANTEC QB-X2U31R crashes?
Answer: If your device is running in SINGLE or RAID 1 mode, you simply can remove the disks out of the device and connect them to some other external or internal interface in order to access you data. E.g. you can put the disks into an USB docking station to backup your data.
If your device is running in RAID 0 mode, you have to replace the crashed FANTEC QB-X2U31R either by a new or repaired one. Take out both HDD and make sure to put the HDD 1 or HDD 2 labels on corresponding disks. In this way you avoid to mix them up at upcoming re-installation.
After your device is replaced, please connect the new (repaired) FANTEC QB-X2U31R without any disks inside by USB 3.1 cable to a running PC. Then set the QB-X2U31R to RAID 0 mode and press the RAID mode confirm button until the device power off.
Now please, put the HDD 1 and HDD 2 into corresponding slots and power on the device once again. Now you should be able to access to your data without any data loss.
- What is the possible reason that my PC can't recognize the FANTEC QB-X2U31R?
Answer: Please check if your USB 3.1 Host driver or firmware is up to date; otherwise please try to upgrade it to the newest one if available.

13) CONTACT & TECHNICAL SUPPORT
Dear customer,
thank you for choosing our product. Our products are developed and produced with the greatest diligence in order to provide the highest level of quality.
- Please read the manual:
www.fantec.com
- If the problem persists, please contact our services department via E-Mail:
service@fantec.de
Address for warranty return shipments:
FANTEC GmbH
Abteilung RMA/Service
Declaration of conformity:

- MODEL: FANTEC QB-X2U31R
- BAY 3.5" SATA I/II/III RAID
- HDD CASE with USB 3.1
- INHALT:
- 1) EINLEITUNG
- BIG MODUS
- MBR oder GPT Modus
- MAC OS X ab 10.6
- Energiesparmodus
- 13) KONTAKT & TECHNISCHER SUPPORT
- 2) SPECIFICATIONS
- 3) PACKAGE CONTENTS
- 4) OVERVIEW LED INDICATIONS / BUTTONS
- Description
- HDD Handle
- Smart Power SYNC switch
- 6) REMINDERS
- 7) ABOUT RAID
- SINGLE MODE
- BIG MODE
- RAID O MODE
- RAID 1 MIRRORING MODE
- 8) CAUTIONS
- Before using RAID enclosure
- HDD format recommended
- 9) Quick INSTALLATION GUIDE
- 10) HDD INITIALIZING AND FORMATTING
- MS Windows (32/64 bit)
- Create new partition and format disk.
- HDD format completed.
- Start disk initialization.
- Activate MBR if total volume is less than 2TB
- Activate GPT if total volume is more than 2TB
- MAC OS X 10.6 or later
- Click on Programs > Utility > Disk Utility icon.
- HDD initialize...
- Click Erase
- Click Erase
- HDD format in process
- Format completed
- 11) TROUBLESHOOTING
- 12) FAQ
- IMPORTANT NOTE:
- 13) CONTACT & TECHNICAL SUPPORT
Brand : Fantec
Model : QB-X2U31R
Category : External hard drive