LMW-100 - Rangefinder Sonel - Free user manual and instructions
Find the device manual for free LMW-100 Sonel in PDF.


| Product Type | Laser Distance Meter (Rangefinder) |
| Model | LMW-100 |
| Brand | Sonel |
| Measurement Range | 0.05 - 100 m (0.16 - 328 ft) |
| Measurement Accuracy (≤10 m) | ±1.5 mm (±0.06 in) |
| Laser Type | Class 2, 630-670 nm, <1 mW |
| Units | Meters, inches, feet |
| Memory | 20 records |
| IP Rating | IP54 |
| Display | Backlit LCD |
| Power Supply | 2 × AAA 1.5 V batteries |
| Auto Power Off | Laser: 0.5 min, Device: 3 min |
| Operating Temperature | -10 to 50°C (14 to 122°F) |
| Storage Temperature | -20 to 60°C (-4 to 140°F) |
| Dimensions | 110 × 46 × 28 mm |
| Weight | 100 g |
| Functions | Single/continuous measurement, area/volume calculation, indirect (Pythagorean) measurement with 2 or 3 points, addition/subtraction of results, min/max tracking, sound signals, laser pointer |
| Measurement Reference | Front or base of instrument |
| Cleaning | Wipe with dry cloth; use cotton bud with 70% alcohol for lens |
| Repairs | Only by authorized service workshop |
Frequently Asked Questions - LMW-100 Sonel
User questions about LMW-100 Sonel
0 question about this device. Answer the ones you know or ask your own.
Ask a new question about this device
Download the instructions for your Rangefinder in PDF format for free! Find your manual LMW-100 - Sonel and take your electronic device back in hand. On this page are published all the documents necessary for the use of your device. LMW-100 by Sonel.
USER MANUAL LMW-100 Sonel
natural_image
Illustration of a mobile phone with orange and black casing, keypad, and screen (no text or symbols)
INSTRUKCJA OBSŁUGI 1
USER MANUAL 22
MANUAL DE USO 43
natural_image
Line drawing of a computer case with attached cable and socket (no text or symbols)4 Pomiary
natural_image
Diagram showing a mobile phone receiving signals from a building to a target, with no visible text or symbols.Main features of the device are the following:
• area and volume calculations,
- indirect measurement using the Pythagorean theorem,
- adding and subtracting results,
• continuous measurements,
- identification of the minimum and maximum distance,
- sound signals,
- selection of distance units: meters, inches, feet,
- laser pointer,
• IP54,
- backlit LCD display,
- auto power off.
CONTENTS
1 Introduction.... 25
2 Safety 26
3 Functional description 27
3.1 Display 27
3.2 Buttons....29
3.3 Attaching the strap 30
4 Measurements.... 31
4.1 Single mode measurements....32
4.2 Continuous measurements....32
5 Special features 33
5.1 Display backlight 33
5.2 Changing the measurement unit....33
5.3 Continuous measurement and extreme values....33
5.4 Summing up the results....34
5.5 Surface measurement....34
5.6 Volume measurement 35
5.7 Determining the distance with 2 measurements ∠......36
5.8 Determining the distance with 3 measurements ←......37
5.9 Memory of measurement results ....38
6 Troubleshooting 38
7 Battery replacement 39
8 Cleaning and maintenance 39
9 Storage 39
10 Dismantling and utilization 40
11 Technical data.... 41
12 Manufacturer 42
1 Introduction
Thank you for purchasing the LMW-100 distance meter. The device allows user to measure distances with one push of a button. The backlight LCD and handy buttons combine for convenient, ergonomic operation.
Proper use and care of this meter will provide years of reliable service.
This manual contains three types of warnings. They are presented as a framed text describing the possible risks for the user and the device. Text ⚠ WARNING describes situations, which may endanger user's life or health, when instructions are not followed. Text ⚠ CAUTION! begins a description of a situation, which may result in device damage, when instructions are not followed. Indication of possible problems is preceded by symbol 🧿️
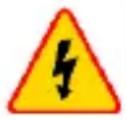
WARNING
Before operating the device, read thoroughly this manual and observe the safety regulations and guidelines provided by the producer.
2 Safety
In order to guarantee proper operation and correctness of the obtained results it is necessary to observe the following recommendations:
- The device must be used only for purposes described in this manual.
- Do not expose the device to electric shocks.
- Do not use the device near large electromagnetic fields such as fields that occur near cordless or cell phones.
- Keep the device away from water and heat, including direct sunlight.
- Do not drop or hit the device.
- It is prohibited to operate the meter:
⇒ If it is damaged and completely or partially out of order.
⇒ If it has been stored for an excessive period of time in inadequate conditions (e.g. if it is humid). - Before commencing a measurement make sure the correct measurement function has been selected.
- Repairs must be realised solely by an authorised service workshop.
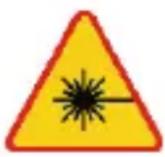
WARNING
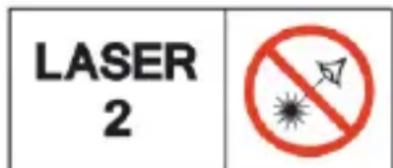
LASER RADIATION DO NOT STARE INTO THE BEAM OF THE LASER DIODE
Wavelength 630-670 nm Max. output power <1 mW Class 2 laser product
3 Functional description
3.1 Display
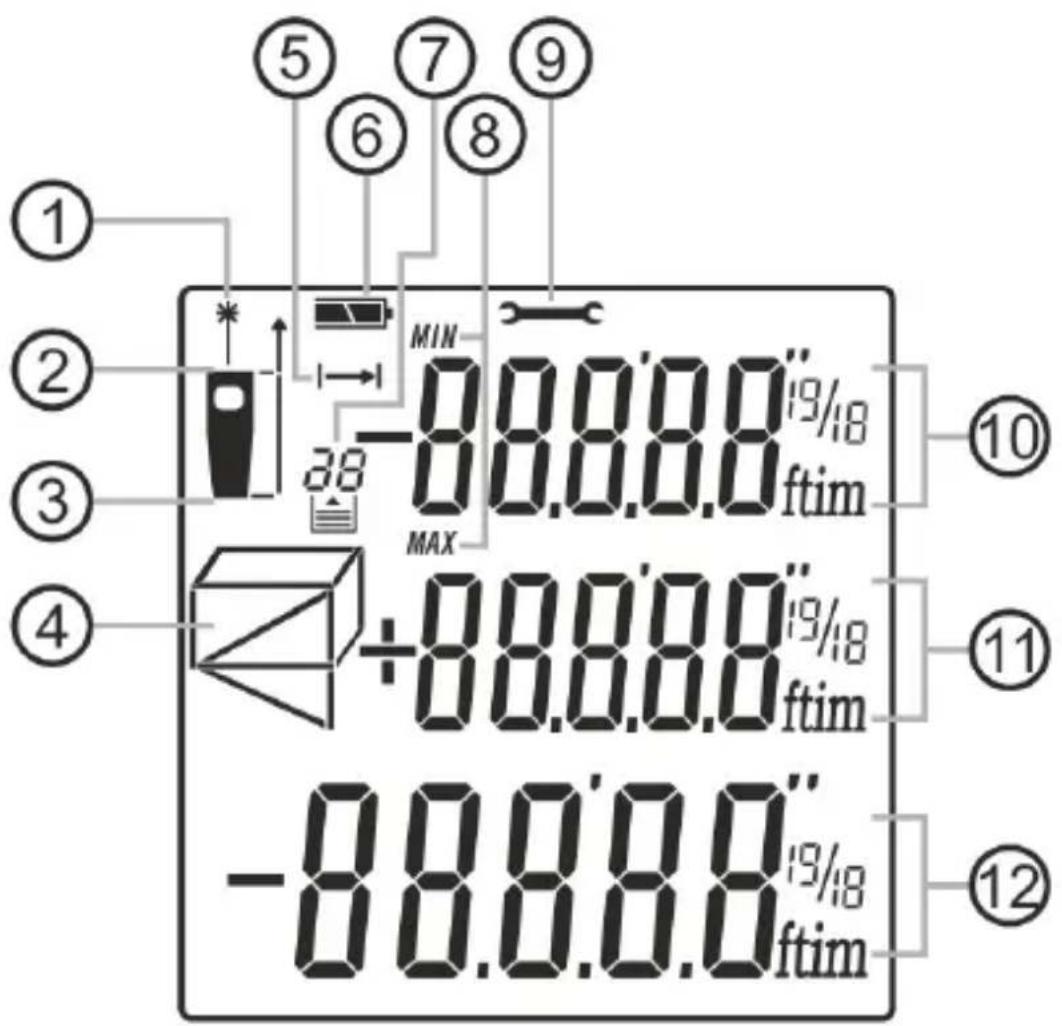
① Active laser
② Measurement reference point – front of the instrument
③ Measurement reference point – base of the instrument
④ Measurement Functions
Surface measurement
Volume measurement
Determining the distance with 2 measurements
Determining the distance with 3 measurements
⑤ Single mode measurements
⑥ Battery status
⑦ Memory cell number
⑧ Continuous measurements
MIN – minimum distance
MAX – maximum distance
⑨ Error indicator
⑩ Additional value reading field
⑪ Additional value reading field
⑫ Main value reading field
3.2 Buttons
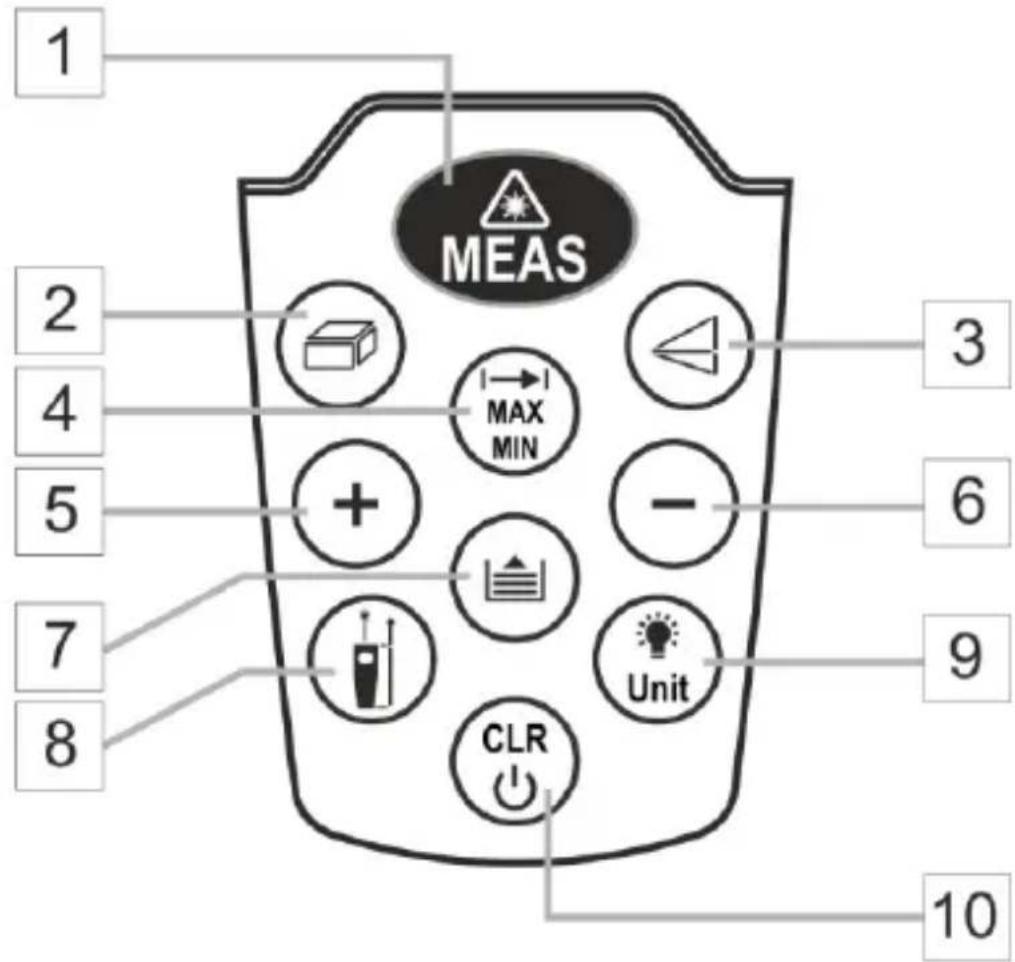
1 Switching on the device / triggering the measurement
2 Surface / volume measurement
3 Indirect measurement 1 / indirect measurement 2
4 Measurement mode: single / continuous / extreme values
5 "+" button: add another result to the current one
6 "-" button: subtract another result from the current one
7 Entering the memory
8 Changing the measurement reference point
9 Display backlight (press briefly) Changing the measurement unit (press and hold)
10 Delete measurement result (press briefly)
Disable the function (press and hold)
3.3 Attaching the strap
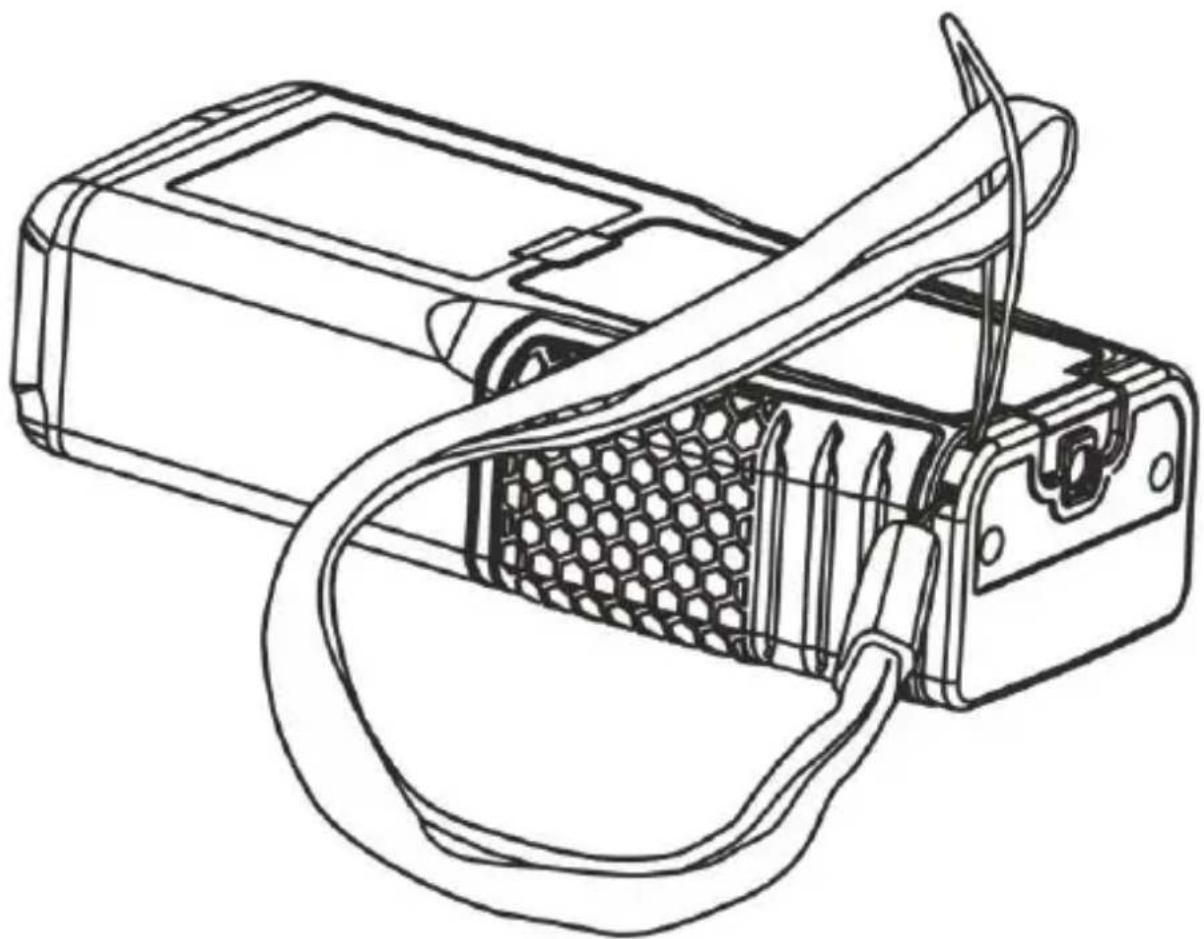
natural_image
Line drawing of a computer case with attached cable and socket (no text or symbols)4 Measurements
- Turn on the meter with button .

- Use button to select the measurement reference point.
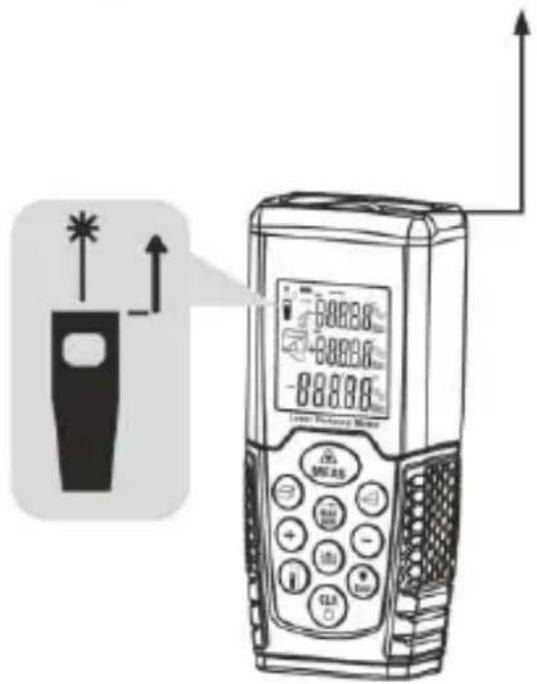
The distance is measured from the front of the instrument
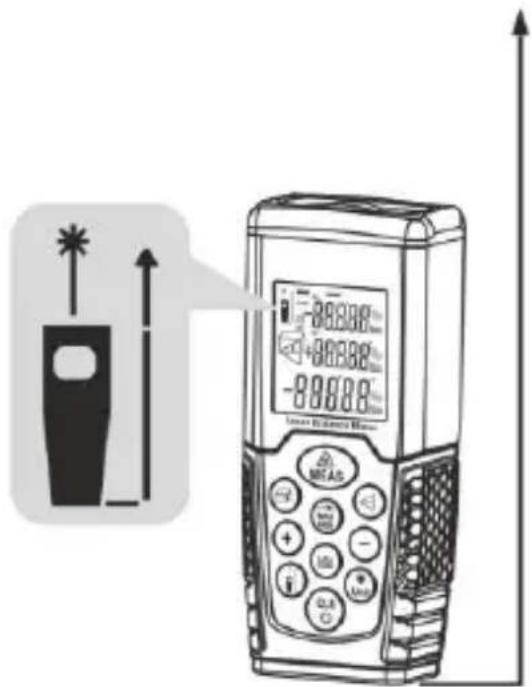
The distance is measured from the base of the instrument
• Perform measurements.
- To turn off the instrument, press and hold button. Alternatively, the instrument will turn itself off after 3 minutes of inactivity.

- In twilight or at night, the range of the distance meter is greater than in daylight. If you are operating in daylight or the target poorly reflects the light, place a reflective shield at the target.
- If the target is a colourless liquid (e.g. water) or a dust-free, transparent object (e.g. glass), the measurement result may be inaccurate due to scattering or deflection of the laser beam.
- If the target is a non-reflective object or an object with a dark surface, the measuring time may be extended.
4.1 Single mode measurements
- Aim the meter at the surface to which the distance is to be measured.
- Press briefly to trigger the measurement.
- The display shows up to the last 3 measurement results. To remove them from the display, press briefly. Each press deletes the most recent result.

When the device is idle for 30 seconds or more, the display backlight and laser pointer turn off.
4.2 Continuous measurements
- Aim the meter at the surface to which the distance is to be measured.
- Press and hold to enable continuous measurements.
- To stop continuous mode, briefly press or MEAS CLR
5 Special features
5.1 Display backlight
To enable/disable the display backlight, press briefly

5.2 Changing the measurement unit
To change the measurement unit, press and hold. The units switch in a loop.
5.3 Continuous measurement and extreme values
- Use button to select the measurement reference point.
- Press and hold .
- Aim the meter at the target objects to which the distance is to be measured.
- In the continuous measurement mode, the meter records the values every 0.5 s. The minimum (MIN) and maximum (MAX) values are shown in the upper and middle part of the display. The current reading appears at the bottom of the display.
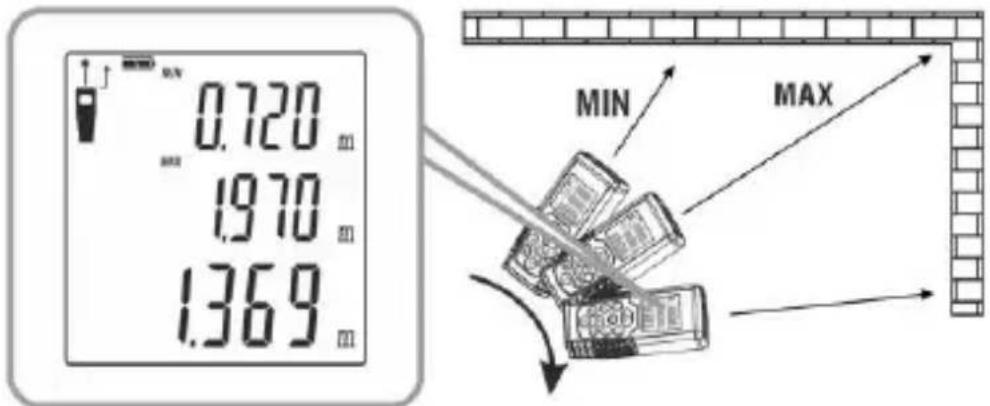
- To end the measurement, briefly press or Alternatively, the measurements will be stopped when the instrument records 500 measurements.
• To switch to single measurement mode, briefly press MEAS or CLR
5.4 Summing up the results
While in the single measurement mode, you can turn on the mode of summing up the measurement results.

Press briefly. The next measurement result will be added to the current total.

Press briefly. The next measurement result will be subtracted from the current total.

Undo the last operation.

Disabling the mode of summing up the results.
5.5 Surface measurement
- Shortly press button. The display will show the symbol of surface measurement, where the segment of the first measured dimension flashes.
- Press button to trigger the measurement of the first dimension in the area. The result will be displayed at the top of the screen. Now the segment of the second measured dimension flashes.
- Press button to trigger the measurement of the second dimension of the area. The result will be displayed in the centre of the screen. The main result will be displayed at the bottom of the screen.
- To clear the last displayed result, press briefly CLR. To disable the function, clear all results and press briefly CLR.

flowchart
graph LR
    A[" "] --> B["MEAS"]
    B --> C[" "]
    C --> D["MEAS"]
    D --> E["S"]
5.6 Volume measurement
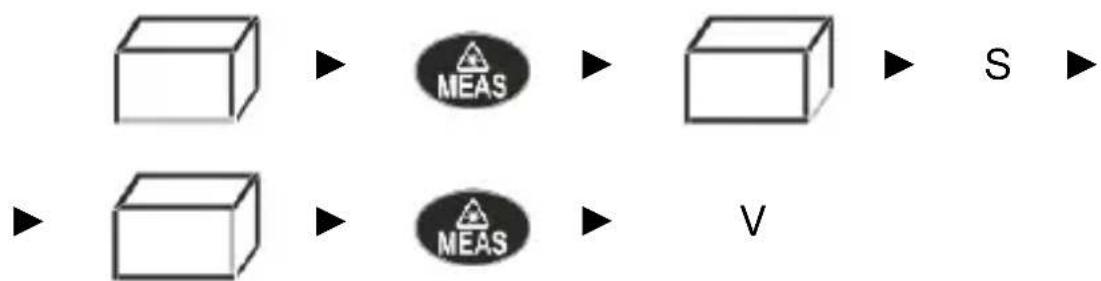
- Press push-button twice. The display will show the symbol of volume measurement, where the segment of the first measured dimension flashes.
- Press button to trigger the measurement of the first dimension in the area. The result will be displayed at the top of the screen. Now the segment of the second measured dimension flashes.
- Press button to trigger the measurement of the second dimension of the area. The result will be displayed in the centre of the screen. The intermediate result – surface area – will be shown at the bottom of the screen. The segment with height value is now flashing.
- Press button to trigger the height measurement. The last horizontal dimension will be shown at the top of the screen and the height will be displayed in the centre of the screen. The main result will be displayed at the bottom of the screen.
- To clear the last displayed result, press briefly (CLR). To disable the function, clear all results and press briefly (CLR).
flowchart
graph LR
    A[" "] --> B["MEAS"]
    C[" "] --> D["MEAS"]
    B --> E[" "]
    D --> F["V"]
    E --> G["S"]
5.7 Determining the distance with 2 measurements
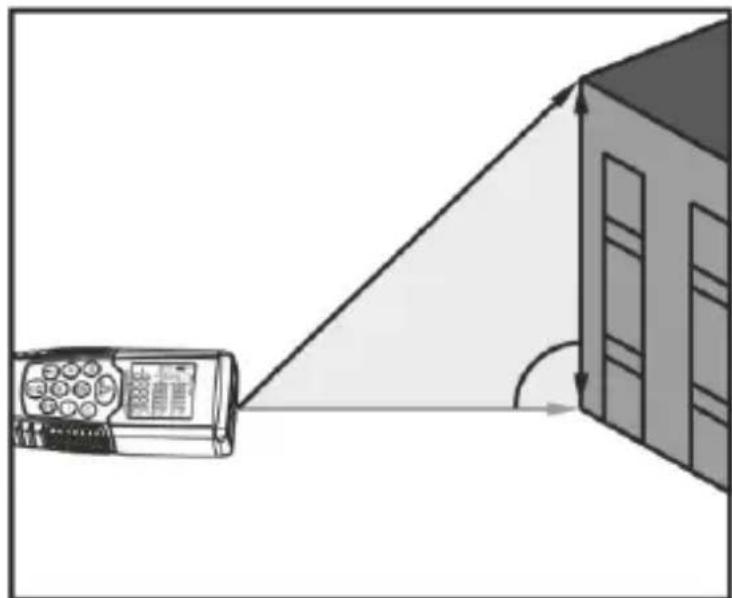
This mode allows you to calculate the searched dimension based on 2 measured auxiliary dimensions using the Pythagorean theorem.
- Shortly press button. The display will show the symbol of indirect measurement, where the segment of the first measured dimension flashes.
- Press button to trigger the measurement of the first dimension. The result will be displayed at the top of the screen. Now the segment of the second measured dimension flashes.
- Press button to trigger the measurement of the second dimension – perpendicular to the object. The result will be displayed in the centre of the screen. The main result will be displayed at the bottom of the screen.
- To clear the last displayed result, press briefly CLR. To disable the function, clear all results and press briefly CLR.
flowchart
graph TD
    A["Start"] --> B["MEAS"]
    B --> C["End"]
natural_image
Diagram showing a mobile phone emitting a beam to a building, with no visible text or symbols5.8 Determining the distance with 3 meas-
urements
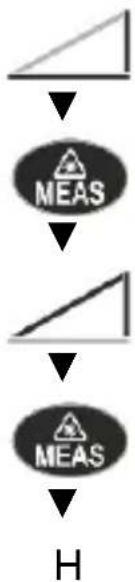
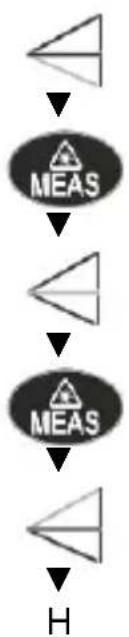
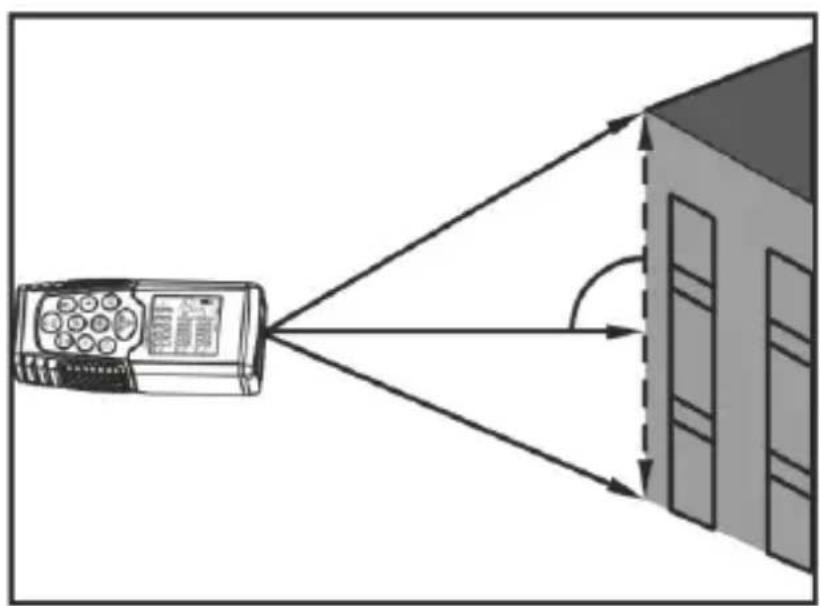
This mode allows you to calculate the searched dimension based on 3 measured auxiliary dimensions using the Pythagorean theorem.
- Press push-button twice. The display will show the symbol of volume measurement, where the segment of the first measured dimension flashes.
- Press button to trigger the measurement of the first dimension. The result will be displayed at the top of the screen. Now the segment of the second measured dimension flashes.
- Press button to trigger the measurement of the second dimension – perpendicular to the object. The result will be displayed in the centre of the screen. Now the segment of the third measured dimension flashes.
- Press button to trigger the height measurement. Dimension no. 2 will be shown at the top of the screen and dimension no. 3 in the centre of the screen. The main result will be displayed at the bottom of the screen.
- To clear the last displayed result, press briefly CLR (U). To disable the function, clear all results and press briefly CLR (U).
flowchart
graph TD
    A["Start"] --> B["MEAS"]
    B --> C["End"]
    B --> D["MEAS"]
    D --> E["End"]
    E --> F["H"]
natural_image
Diagram showing a mobile phone projecting an image onto a building, with no text or symbols present.5.9 Memory of measurement results
The device remembers the results of the last 20 performed measurements. The device automatically saves the results in the memory:
- in single mode - always,
- in continuous mode - the last result before switching off the function,
- in the area and volume measurement – final result,
- in indirect measurement – final result.
The recording is not performed in the mode of summing up the results.
- To enter the memory browsing mode, press .
- The results can be scrolled using the buttons.
- To clear the memory, in memory browsing mode, press and


hold and . CLR
6 Troubleshooting
| Error code | Cause | Solution |
| 204 | Calculation error. | Repeat the procedure |
| 208 | The beam reflected to the meter is too weak.The return time of the beam to the meter is too long.Distance to target is >50 m. | Place a shield reflecting the laser beam on the target. |
| 209 | The reflected beam is too strong. | The target is reflecting the beam too hard.Place a shield reflecting the beam on the target. |
| 252 | Meter temperature is too high. | Cool the meter. |
| 253 | Meter temperature is too low. | Warm up the meter. |
| 255 | Hardware error. | Switch the meter off and on several times.If the error persists, contact the service center. |
7 Battery replacement
As battery power is not sufficient, symbol displays. It means that battery replacement is required.

NOTE!
When making measurements with a battery's symbol on, one must take into account additional indefinite measurement uncertainty or unstable working of the meter.
Remove battery cover screw, open battery cover, then take out the batteries from instrument and replace them with 2 new AAA 1.5 V batteries. Place the battery cover back.
8 Cleaning and maintenance
- Repairs or service are not covered in this manual and should only be carried out by qualified trained technician.
- Periodically, wipe the body with a dry cloth. Do not use abrasives or solvents on this instrument.
- For service, use only manufacturer's specified parts.
- Clean the device with a cotton bud moistened with 70% alcohol.
9 Storage
In the case of storage of the device, the following recommendations must be observed:
- Make sure the meter and its accessories are dry.
- In the case the meter is to be stored for a prolonged period of time, the batteries must be removed from the device.
10 Dismantling and utilization
Worn-out electric and electronic equipment should be gathered selectively, i.e. it must not be placed with waste of another kind.
Worn-out electronic equipment should be sent to a collection point in accordance with the law of worn-out electric and electronic equipment.
Before the equipment is sent to a collection point, do not dismantle any elements.
Observe the local regulations concerning disposal of packages, worn-out batteries and accumulators.
11 Technical data
a) degree of housing protection acc. to EN 60529....IP54
b) range* 0.05...100 m
.... 0.16...328 ft
c) measurement accuracy at a distance of ≤10 m** ....±1.5 mm
.... ±0.06"
d) unit of measurement..... meters / inches / feet
e) diode laser:
f) memory of measurement results....20 records
g) operating temperature....-10...50°C (14...122°F)
h) storage temperature....-20...60°C (-4...140°F)
i) operating humidity .... <95%
j) storage humidity.... 30...50%
k) power supply 2x AAA 1.5 V battery
I) inactivity time for triggering Auto-Off function:
- laser 0.5 min
- device.... 3 min
m) weight 100 g
n) dimensions 110 x 46 x 28 mm
* If the target poorly reflects the light and the conditions are sunny, the measuring range may be increased by placing a shield reflecting the laser beam on the target.
** In favourable conditions (good target surface properties, room temperature) up to 10 m (33 ft). In unfavourable conditions, such as intense sunlight, a poorly reflecting surface, or significant temperature fluctuations, the deviation in accuracy over a distance of more than 10 m (33 ft) may increase by ± 0.15 mm/m (± 0.0018"/ft).
12 Manufacturer
The provider of guarantee and post-guarantee services is:
SONEL S.A.
Wokulskiego 11
58-100 Świdnica
Poland
tel. +48 74 884 10 53 (Customer Service)
e-mail: customerservice@sonel.com
web page: www.sonel.com

MANUAL DE USO
TELÉMETRO
MEDIDOR DE DIMENSIONES LÁSER
LMW-100

natural_image
Line drawing of a computer case with attached cable and socket (no text or symbols)4 Mediciones
natural_image
Diagram showing a device emitting a beam to a building, with no visible text or symbolsnatural_image
Diagram showing a mobile phone projecting to a building with directional arrows (no text or symbols)natural_image
Line drawing of a computer case with attached cable and socket (no text or symbols)4 Messungen
natural_image
Illustration of a mobile phone emitting a beam to a building, showing light refraction and angle measurement (no text or symbols)natural_image
Diagram showing a mobile phone projecting an image onto a building, with arrows indicating light or direction (no text or symbols present)- Pomiary
- CONTENTS
- Introduction
- WARNING
- Safety
- LASER RADIATION DO NOT STARE INTO THE BEAM OF THE LASER DIODE
- Functional description
- Display
- Buttons
- Attaching the strap
- Measurements
- Single mode measurements
- Continuous measurements
- Special features
- Display backlight
- Changing the measurement unit
- Continuous measurement and extreme values
- Summing up the results
- Surface measurement
- Volume measurement
- Determining the distance with 2 measurements
- Determining the distance with 3 meas-
- urements
- Memory of measurement results
- Troubleshooting
- Battery replacement
- NOTE!
- Cleaning and maintenance
- Storage
- Dismantling and utilization
- Technical data
- Manufacturer
- MANUAL DE USO
- TELÉMETRO
- MEDIDOR DE DIMENSIONES LÁSER
- Mediciones
- Messungen
Brand : Sonel
Model : LMW-100
Category : Rangefinder