
Grand Gourmet KM-1500VS - Food processor WILFA - Free user manual and instructions
Find the device manual for free Grand Gourmet KM-1500VS WILFA in PDF.


| Product Type | Multifunctional Kitchen Machine |
| Brand | Wilfa |
| Model | Grand Gourmet KM-1500VS (also KM-1500A) |
| Power Supply | 220-240 V ~ 50/60 Hz, 1500 W |
| Bowl Capacity | Up to 2.0 kg dough (stainless steel bowl) |
| Blender Jug Capacity | 1.4 L (glass jug) |
| Maximum Continuous Operation | 10 minutes, then 30 minutes rest |
| Speed Control | Variable speed switch (positions 0-Max) |
| Included Attachments | Whisk, dough hook, mixer blade, blender assembly, mincer with 3 grinding discs, sausage horn, kebbe maker, slicers (various discs), tomato strainer |
| Material | Die-cast metal body, stainless steel bowl and covers, glass blender jar, plastic housings for attachments |
| Safety Features | Earthed plug, release buttons for head and cutter housing, automatic shut-off (if overloaded) |
| Dishwasher Safe Parts | Bowl, blender jug, whisk, dough hook, mixer blade, plastic parts (except metal mincer components) |
| Not Dishwasher Safe Parts | Metal parts of mincer: fine, medium, coarse grinding discs, worm shaft, cutter blade, screw rings |
| Weight | Approx. 7 kg |
| Dimensions (approx.) | 40 x 25 x 35 cm |
Frequently Asked Questions - Grand Gourmet KM-1500VS WILFA
User questions about Grand Gourmet KM-1500VS WILFA
0 question about this device. Answer the ones you know or ask your own.
Ask a new question about this device
Download the instructions for your Food processor in PDF format for free! Find your manual Grand Gourmet KM-1500VS - WILFA and take your electronic device back in hand. On this page are published all the documents necessary for the use of your device. Grand Gourmet KM-1500VS by WILFA.
USER MANUAL Grand Gourmet KM-1500VS WILFA
natural_image
Modern kitchen stand mixer with whisk and bowl, no visible text or symbolsGrand Gourmet
Kitchen machine
Bruksanvisning
Bruksanvisning
Brugsanvisning
Käyttöohje
Instruction manual KM-1500A
natural_image
Exterior view of a modern kitchen mixer with a clear glass bowl (no text or symbols visible)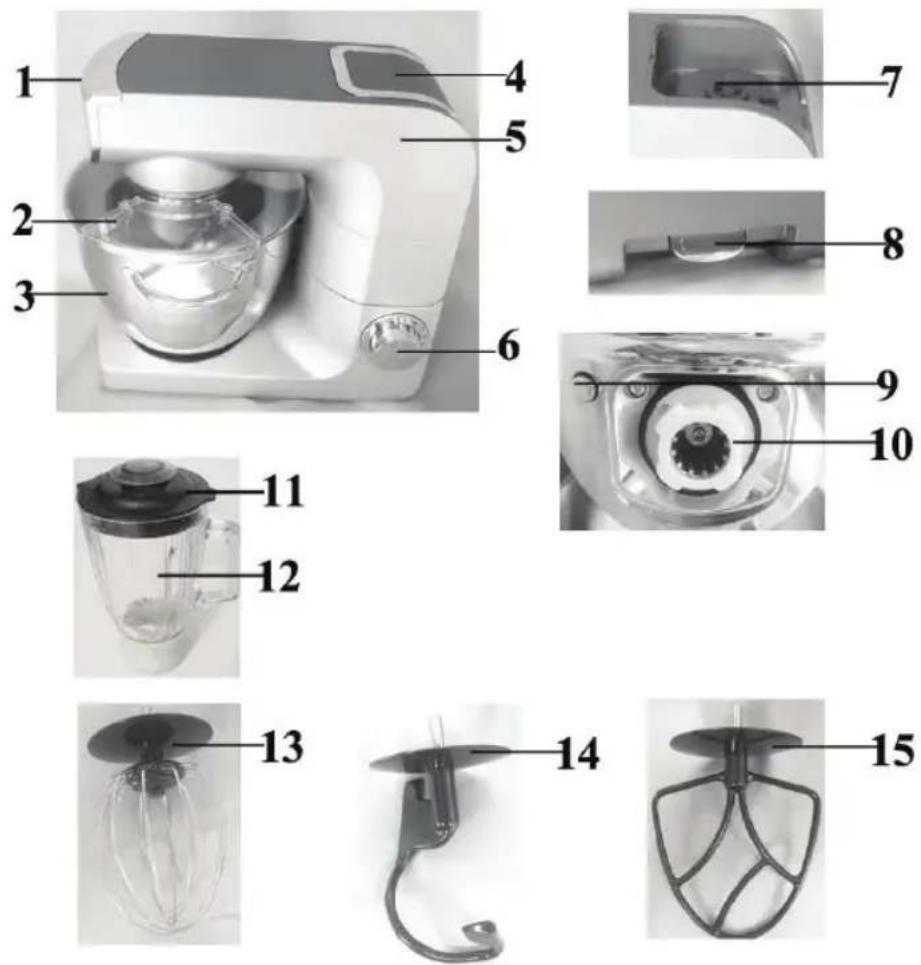
Beskrivelse
natural_image
Close-up of a white laboratory instrument with a circular dial and control panel (no visible text or symbols)②
natural_image
White kitchen blender with a clear lid and side sink, no visible text or symbolsnatural_image
Exploded view diagram of a mechanical assembly showing gears, shafts, and housing (no text or labels)②
natural_image
Close-up of a metallic mechanical component with a cylindrical port and flange (no visible text or symbols)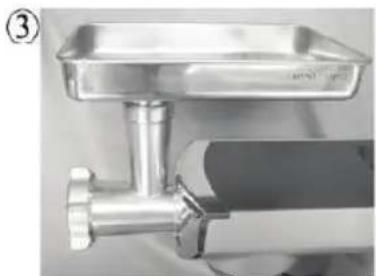
natural_image
Close-up of a stainless steel kitchen tool with a flat plate and handle (no visible text or symbols)④
natural_image
Close-up of a stainless steel manual laboring tool with a metal bracket (no visible text or symbols)natural_image
Exploded view diagram of a mechanical assembly showing internal components and motion arrows (no text or labels)②
natural_image
Close-up of a metallic mechanical component with a cylindrical shaft and flange (no visible text or symbols)③
natural_image
Close-up of a metallic mechanical component with a cylindrical shaft and flange (no visible text or symbols)④
natural_image
Close-up of a stainless steel mechanical device with a cylindrical base and flange (no visible text or symbols)natural_image
Exploded view diagram of a pipe fitting and mechanical components (no text or labels)②
natural_image
Close-up of a stainless steel kitchen tool with a cylindrical component (no visible text or symbols)③
natural_image
Close-up of a stainless steel kitchen tool with a flat plate and metal fittings (no visible text or symbols)④
natural_image
Close-up of a stainless steel manual labor brush (no visible text or symbols)natural_image
Two views of a pipe fitting with arrows indicating assembly or transformation (no text or symbols)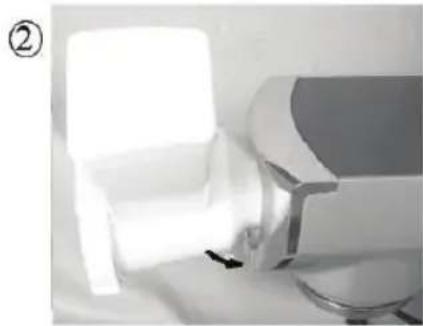
natural_image
Close-up of a white mechanical component with a metallic base and a small protrusion, no visible text or symbols.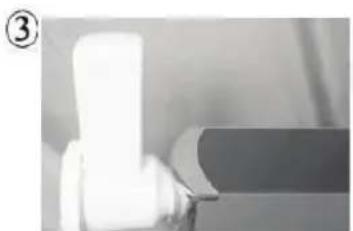
natural_image
Close-up of a white mechanical component with a dark rectangular body, possibly a tool or bracket (no visible text or symbols)natural_image
Exterior view of a modern kitchen mixer with a clear glass bowl (no text or symbols visible)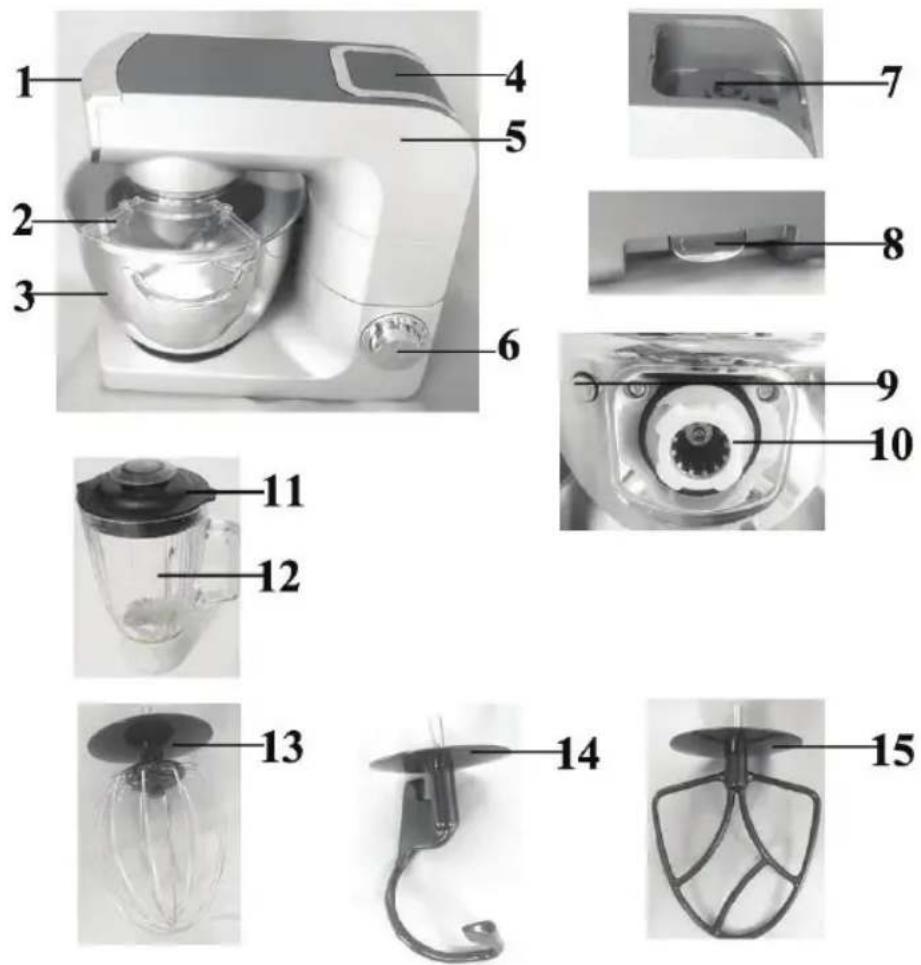
P.5
Beskrivning
natural_image
Close-up of a metallic kitchen mixer with a bowl and handle (no visible text or symbols)②
natural_image
Close-up of a stainless steel kitchen mixer with a bowl on a tiled floor (no visible text or symbols)
natural_image
Close-up of a mechanical component with a curved surface and an arrow indicating direction (no text or symbols)③
natural_image
Close-up of a kitchen mixer with a hand mixer and fan (no visible text or symbols)④
natural_image
White kitchen mixer with a clear glass bowl and control knob (no visible text or symbols)natural_image
Close-up of a white electronic device with dual circular ports and a central lens (no visible text or symbols)②
natural_image
White kitchen blender with a clear lid and side sink, no visible text or symbolsnatural_image
Exploded view diagram of a mechanical assembly showing components like gears, parts, and a pipe fitting (no text or labels)②
natural_image
Close-up of a metallic mechanical component with a cylindrical port and flange (no visible text or symbols)③
natural_image
Close-up of a stainless steel kitchen grater with a flat plate and handle (no visible text or symbols)④
natural_image
Close-up of a stainless steel mechanical component with a rectangular tray and lever mechanism (no visible text or symbols)natural_image
Exploded view diagram of a mechanical assembly showing parts like a valve, shaft, and housing (no text or labels)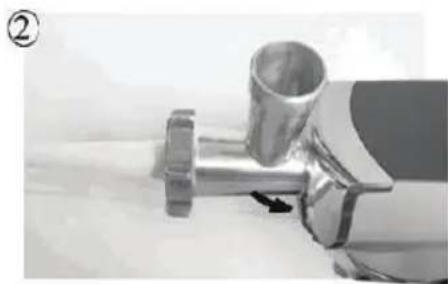
natural_image
Close-up of a metallic mechanical component with a bolt and shaft, showing a directional arrow (no text or symbols visible)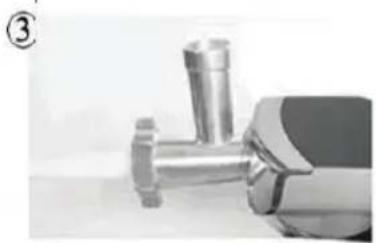
natural_image
Close-up of a metallic mechanical component with a cylindrical shaft and flange (no visible text or symbols)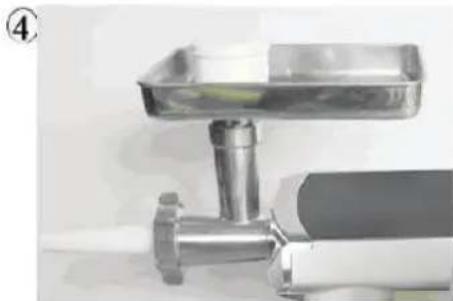
natural_image
Close-up of a stainless steel kitchen utensil with a cylindrical component (no visible text or symbols)natural_image
Exploded view diagram of a mechanical assembly showing gear, housing, and pipe fitting (no text or labels)②
natural_image
Close-up of a metallic mechanical component with a cylindrical port and flange (no visible text or symbols)③
natural_image
Close-up of a stainless steel kitchen tool with a flat plate and handle (no visible text or symbols)④
natural_image
Close-up of a stainless steel kitchen tool with a handle and base, no visible text or symbolsnatural_image
Two views of a pipe fitting with arrows indicating assembly or transformation (no text or symbols present)②
natural_image
Close-up of a white cylindrical device with a light beam and metallic base, possibly a lamp or optical component (no visible text or symbols)③
natural_image
Close-up of a white cylindrical object with a dark rectangular base, possibly a mechanical component or tool (no visible text or symbols)natural_image
Exterior view of a modern kitchen mixer with a clear glass bowl (no text or symbols visible)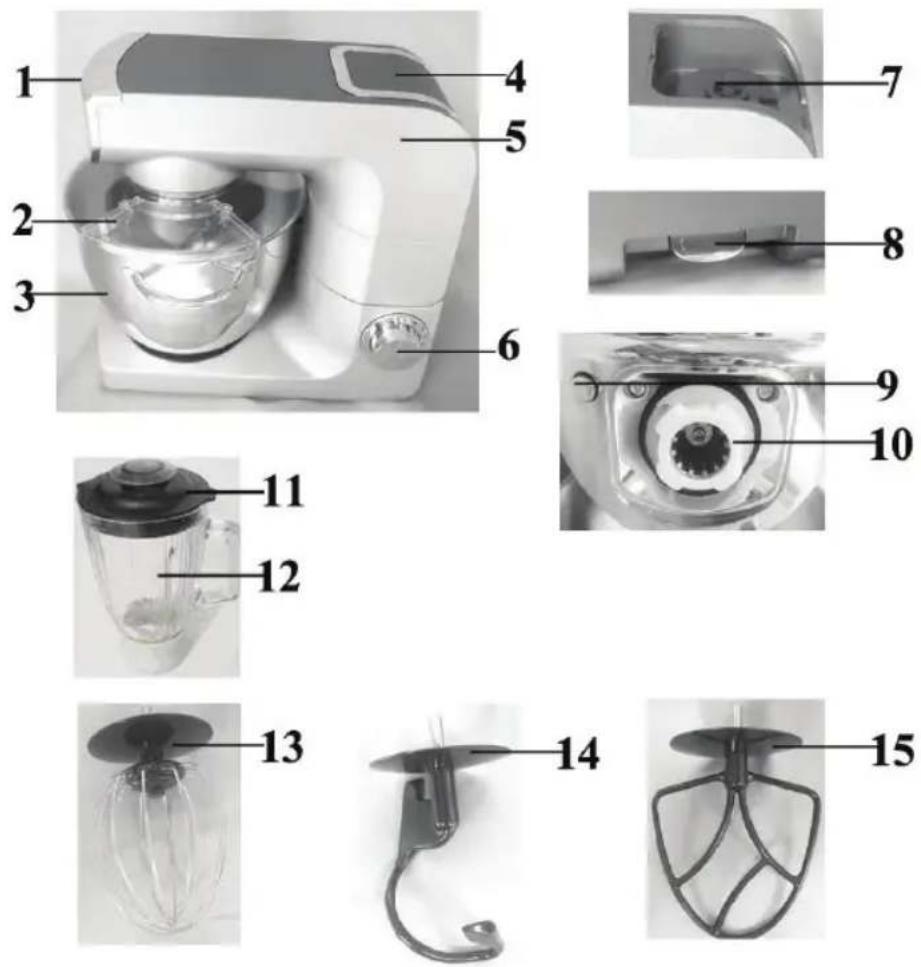
S 55
Beskrivelse
natural_image
Close-up of a modern kitchen mixer with a metallic bowl and metal stand (no visible text or symbols)②
natural_image
Close-up of a stainless steel kitchen mixer with a bowl (no visible text or symbols)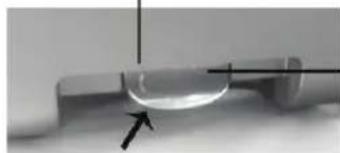
natural_image
Close-up of a metallic mechanical component with a curved surface and an arrow indicating direction (no text or symbols)③
natural_image
Close-up of a kitchen mixer with a hand valve and metal bowl (no visible text or symbols)④
natural_image
Exterior view of a modern kitchen mixer with control knob (no visible text or symbols)natural_image
Close-up of a white laboratory instrument with a circular dial and control knobs (no visible text or symbols)②
natural_image
White kitchen blender with a clear plastic lid and control panel (no visible text or symbols)natural_image
Exploded view diagram of a mechanical assembly showing components like gears, shafts, and parts (no text or labels)②
natural_image
Close-up of a metallic mechanical component with a cylindrical port and flange (no visible text or symbols)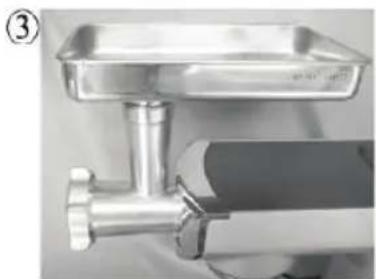
natural_image
Close-up of a stainless steel kitchen utensil with a flat plate and handle (no visible text or symbols)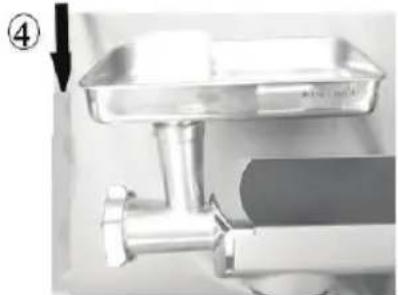
natural_image
Close-up of a stainless steel kitchen tool with a rectangular plate and metal handle (no visible text or symbols)natural_image
Exploded view diagram of a mechanical assembly showing parts like a valve, shaft, and housing (no text or labels)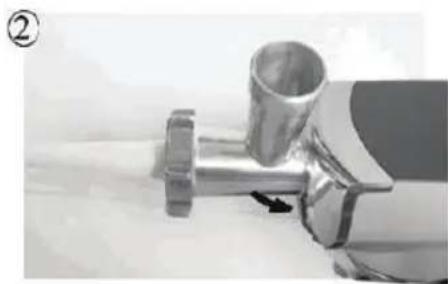
natural_image
Close-up of a metallic mechanical component with a bolt and shaft, showing a directional arrow (no text or symbols visible)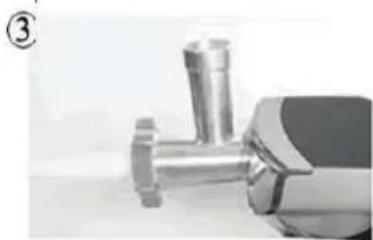
natural_image
Close-up of a metallic mechanical component with a cylindrical shaft and flange (no visible text or symbols)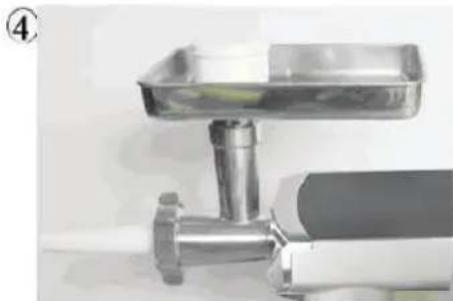
natural_image
Close-up of a stainless steel kitchen utensil with a cylindrical component and a base (no visible text or symbols)natural_image
Exploded view diagram of a mechanical component showing parts arranged in a sequence (no text or symbols)②
natural_image
Close-up of a metallic mechanical component with a cylindrical port and flange (no visible text or symbols)③
natural_image
Close-up of a stainless steel kitchen spatula with a flat plate and metal handle (no visible text or symbols)④
natural_image
Close-up of a stainless steel kitchen grater with a handle and base, no visible text or symbolsnatural_image
Two views of a mechanical pipe fitting with arrows indicating assembly or transformation (no text or symbols)②
natural_image
Close-up of a white cylindrical device with a transparent lens and metallic base, no visible text or symbols③
natural_image
Close-up of a white cylindrical object with a dark horizontal bar extending from it, against a blurred background (no text or symbols visible)natural_image
Exterior view of a modern kitchen mixer with a clear glass bowl (no text or symbols visible)
S. 55
Kuvaus
natural_image
Close-up of a white laboratory instrument with a circular dial and control knob (no visible text or symbols)②
natural_image
White kitchen blender with a clear glass lid and control panel, no visible text or symbolsnatural_image
Exploded view diagram of a mechanical assembly showing gears, shafts, and housing (no text or labels)②
natural_image
Close-up of a metallic mechanical component with a cylindrical port and flange (no visible text or symbols)③
natural_image
Close-up of a stainless steel kitchen sink with a flat plate and handle (no visible text or symbols)④
natural_image
Close-up of a stainless steel kitchen tool with a tray and handle (no visible text or symbols)natural_image
Exploded view diagram of a mechanical assembly showing parts like a valve, shaft, and gear (no text or labels)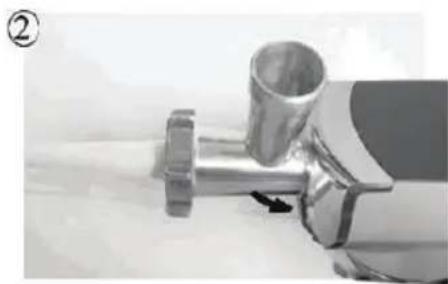
natural_image
Close-up of a metallic mechanical component with a bolt and shaft, showing a directional arrow (no text or symbols visible)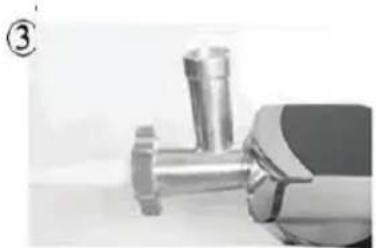
natural_image
Close-up of a metallic mechanical component with a cylindrical shaft and flange (no visible text or symbols)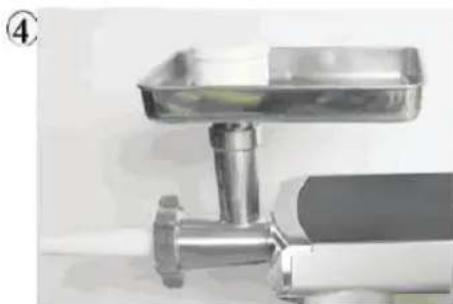
natural_image
Close-up of a stainless steel kitchen utensil with a cylindrical stand (no visible text or symbols)natural_image
Exploded view diagram of a mechanical component showing parts arranged in a sequence from raw gear to final pipe fitting (no text or labels)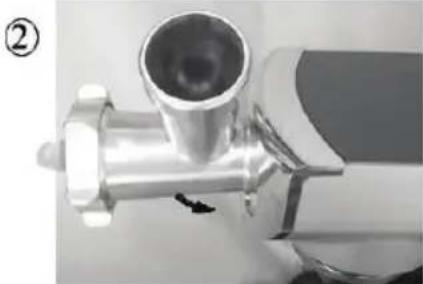
natural_image
Close-up of a metallic mechanical component with a cylindrical port and flanged base (no visible text or symbols)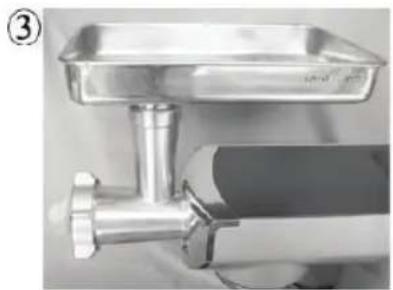
natural_image
Close-up of a stainless steel kitchen utensil with a flat plate and metal fittings (no visible text or symbols)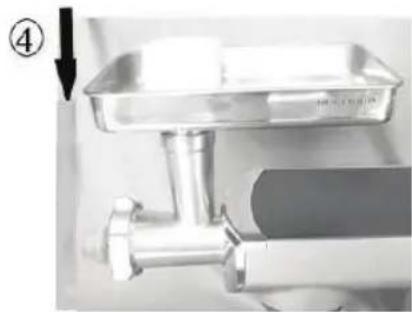
natural_image
Close-up of a stainless steel kitchen tool with a tray and handle (no visible text or symbols)natural_image
Two views of a pipe fitting showing internal components and directional arrows (no text or symbols)②
natural_image
Close-up of a white cylindrical device with a transparent lens and metallic base, no visible text or symbols③
natural_image
Close-up of a white cylindrical object with a dark horizontal bar extending from it, against a blurred background (no text or symbols visible)Multifunctional kitchen machine
Description 5
Safety instructions 6
Using your appliance 8
Mixer blade/ Wisk/ Dough hook 8
Making blender 9
Making mincer 10
Making sausages 11
Making kebbe 12
Making slicer 13
Making Tomato 14
Cleaning 15
Processing Guide 16
MULTIFUNCTIONAL KITCHEN MACHINE
MODEL: KM-1500A
220-240V\~50/60Hz 1500W
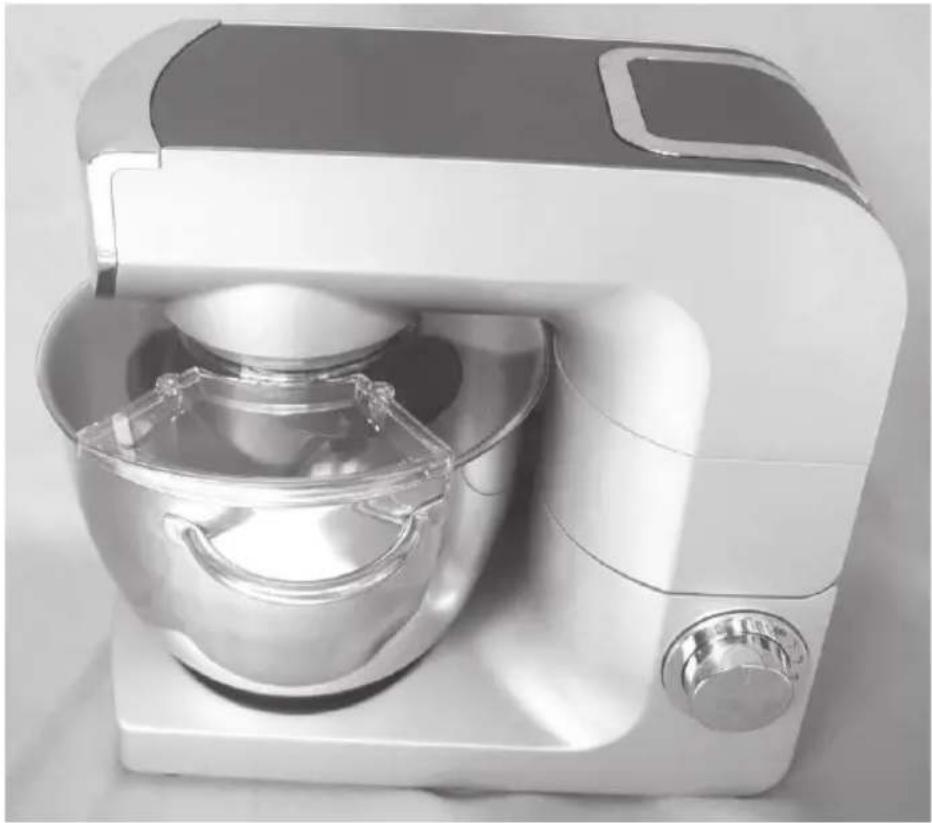
natural_image
Exterior view of a modern kitchen mixer with a clear glass bowl (no text or symbols visible)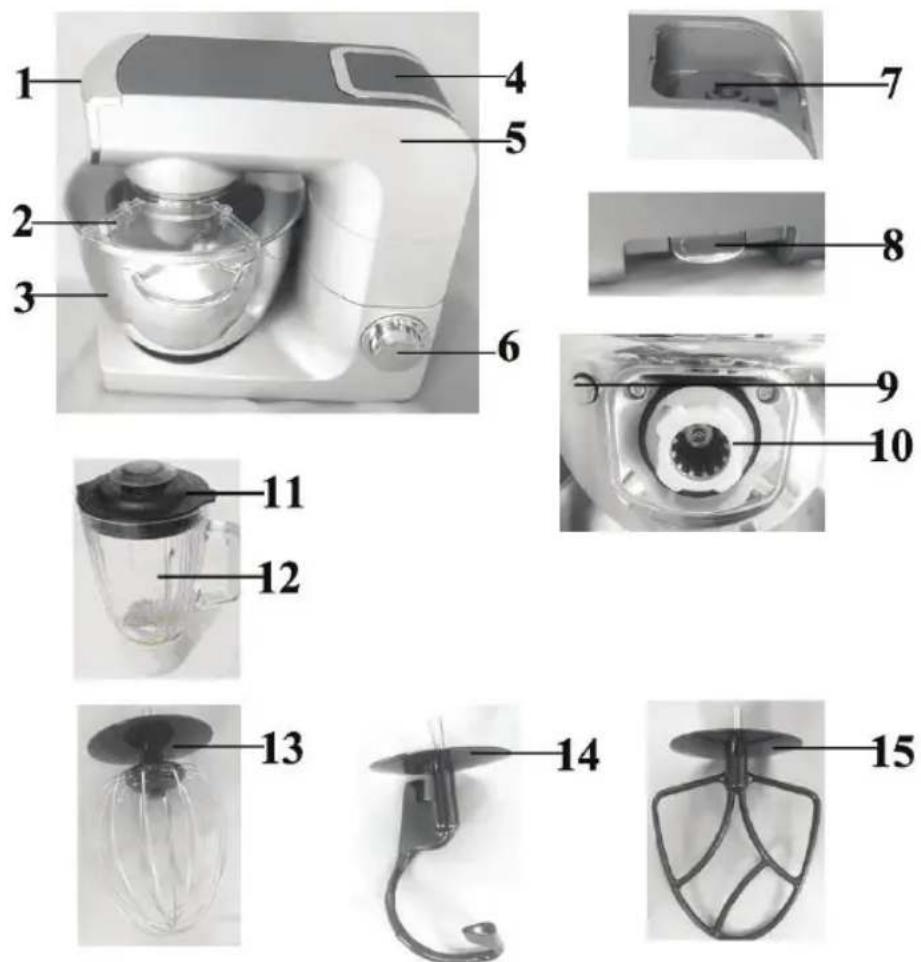
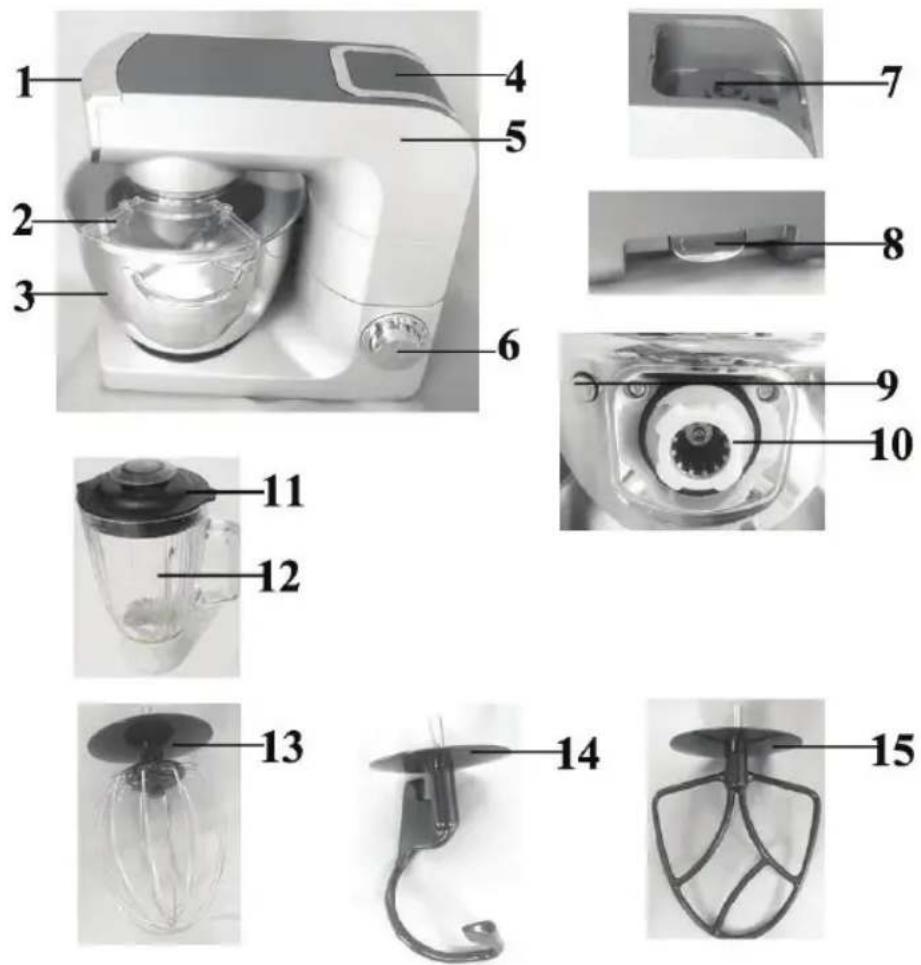
Description
-
Removable cover for mincer power outlet
-
Stainless steel bowl cover
-
Stainless steel bowl cover
-
Cover
-
Multifunction head
-
Speed control switch
-
Power outlet for blender
-
Release button for multifunction head
-
Release button for Cutter housing
-
Power outlet for mincer
-
Cover for glass jug
-
Glass jug
-
Whisk
-
Dough hook
-
Mixer blade
-
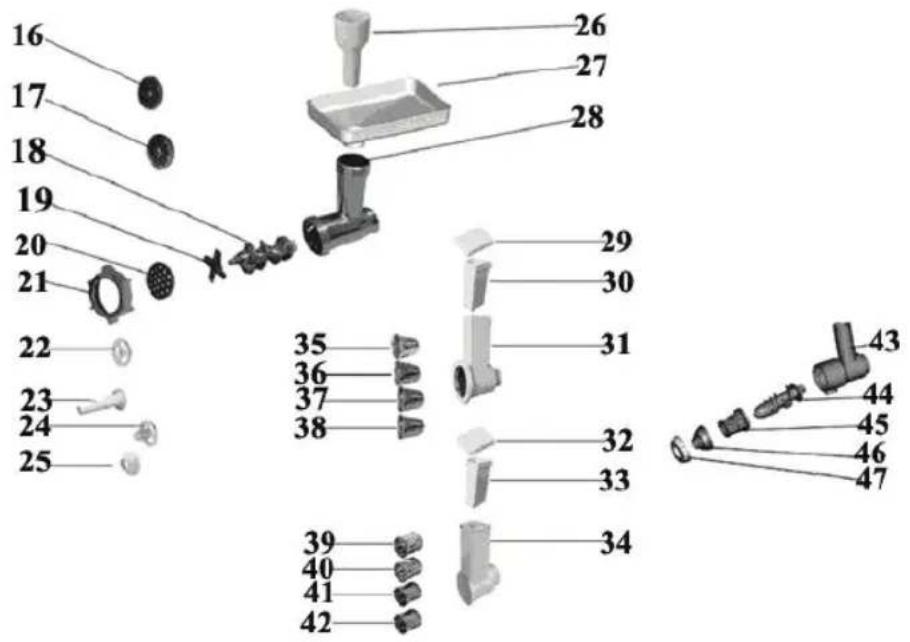
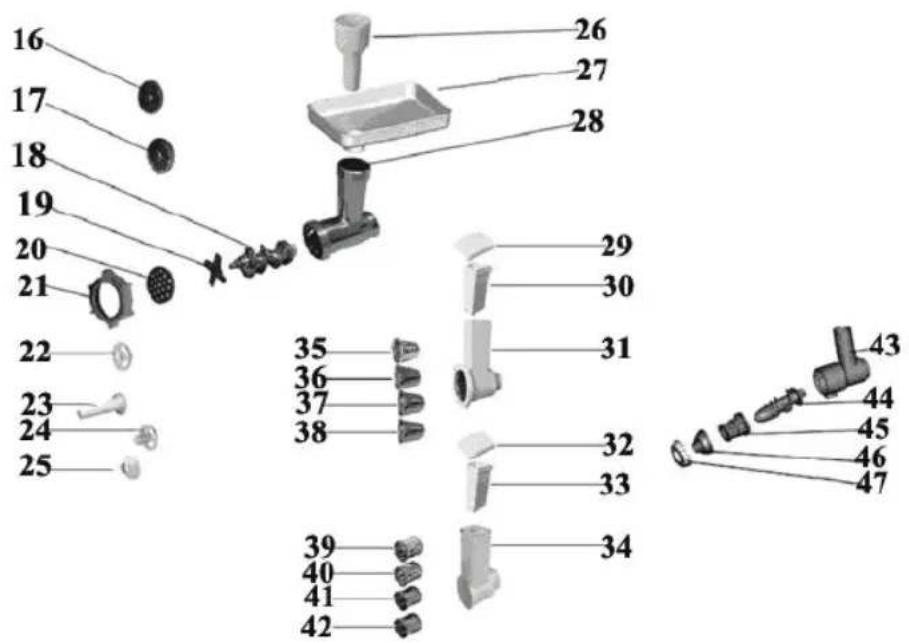
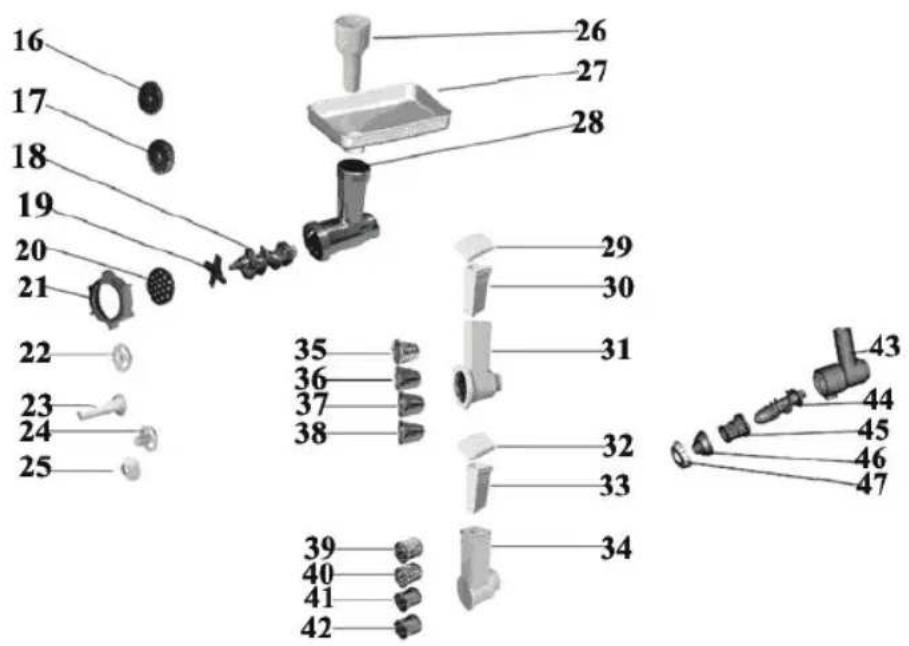
Fine grinding disc
-
Medium grinding disc
-
Worm shaft A
-
Cutter blade
-
Coarse grinding disc
-
Screw ring A
-
Separator
-
Sausage horn
Not all parts are available for the Nordic market. The color may differ from picture in the manual.
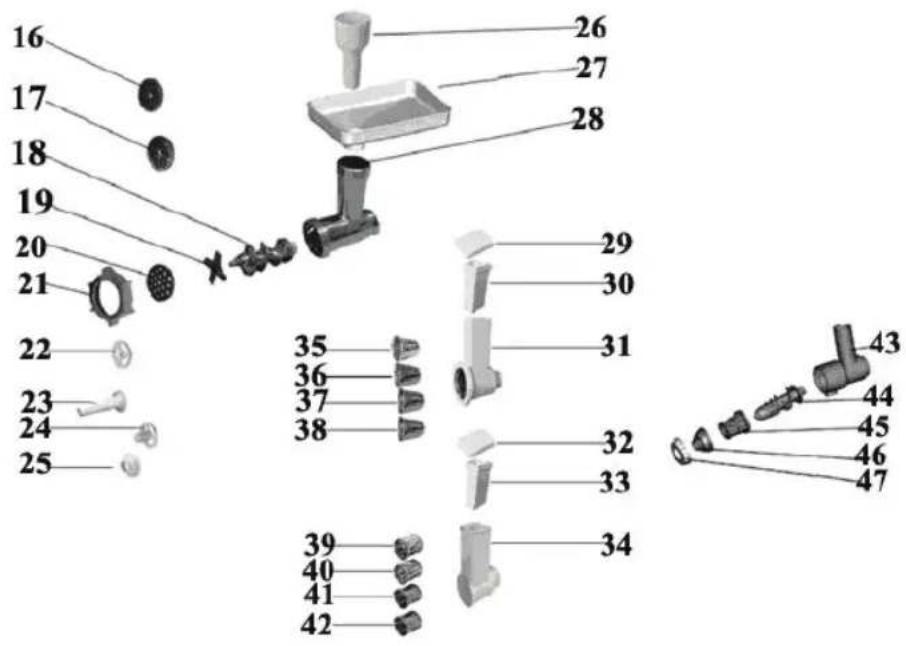
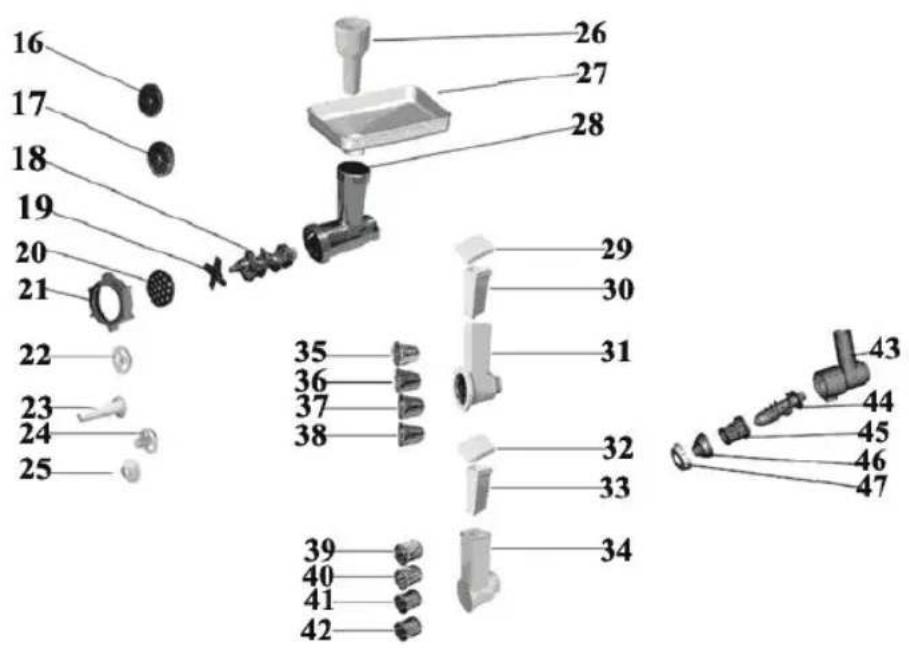
- Former
- Cone A
- Pusher A
- Tray
- Cutter housing A
- Cover for pusher B
- Pusher B
- Cutter housing B
- Cover for pusher C
- Pusher C
- Cutter housing C
- Big slice cutter
- Big coarse bar cutter
- Big fine bar cutter
- Big mill mashed potatoes cutter
- Slice cutter
- Coarse bar cutter
- Fine bar cutter
- Mill mashed potatoes cutter
- Cutter housing D
- Worm shaft B
- Cone B
- Shaper B
- Screw ring B
Safety instructions
④ Carefully read the instructions before using your appliance.
④ Switch off the appliance before fitting and removing the attachment.
④ Keep your fingers away from moving parts and the opening on the attachment.
④ Only use the appliance for its intended domestic use, the manufacture will not accept any liability if the appliance is subject to improper use or failure to comply with these instructions.
④ Never leave the appliance to run unsupervised, especially when young children are present.
④ Check that the voltage rating of the appliance does in fact match that of your electrical system.
④ Any connection error will nullify the guarantee.
④ The appliance must be plugged into an earthed electrical socket.
If you have to use an electrical extension lead, it must be earthed and you should make sure that no-one can trip over it.
■ Unplug the appliance as soon as you have finished using it and when you clean it.
- Don't use your attachment and/or appliance if it has been damaged. You should contact an approved service centre.
■ Any work on the appliance other than normal care and cleaning by the customer must be carried out by an approved service centre.
- Do not immerse the appliance, the power cord or the plug in water or in any other liquid.
- Do not allow the power cord to hang within the reach of children, to come close to or into contact with the hot parts of your appliance, any other source of heat or any sharp edge.
If the power cord or the plug are damaged, don't use your appliance. To avoid any risk, these must be replaced by an approved service centre.
■ Do not put any accessories containing metal in a microwave oven.
■ Switch off the appliance and disconnected from supply before changing accessories or approaching parts which move in use.
- Do not touch the whisk, mixer blade or kneading hook while the appliance is in operation.
■ Only use one attachment at a time.
■ Do not operate the appliance for more than 10 minutes at one time. Allow 30 minutes rest before next use.
This appliance is not intended for use by persons (including children) with reduced physical, sensory or mental capabilities, or lack of experience and knowledge, unless they have been given supervision or instruction concerning use of the appliance by a person responsible for their safety.
■ Children should be supervised to ensure that they do not play with the appliance.
If the supply cord is damaged, it must be replaced by the manufacturer, its service agent or similarly qualified persons in order to avoid a hazard.
Using your appliance
Mixer.blade/.Wisk/.Dough.hook
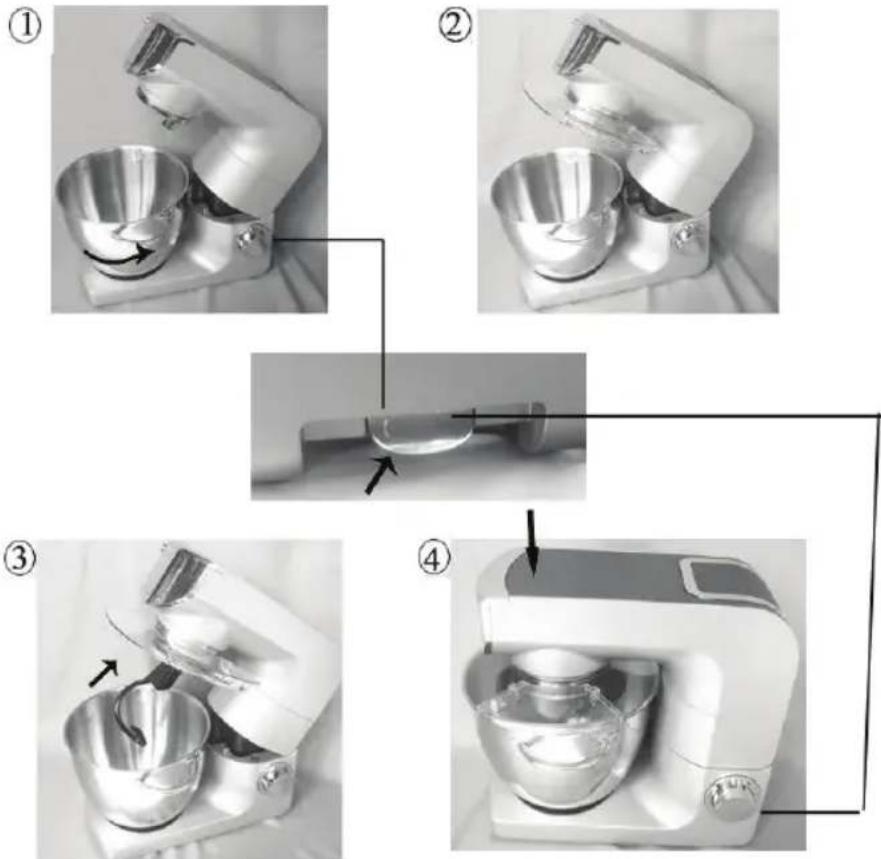
Your accessories are equipped with a system for adjusting the height above the bottom of the bowl for optimum results. Depending on the nature of the ingredients, the bowl (3) with its cover can be used to prepare up to 2.0 kg of dough.
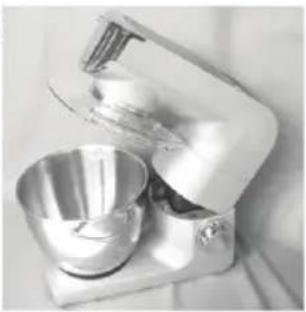
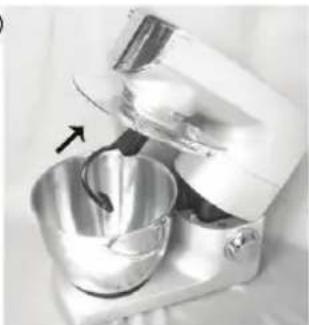
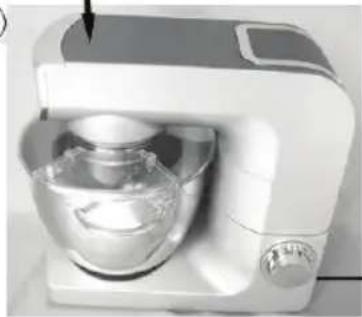
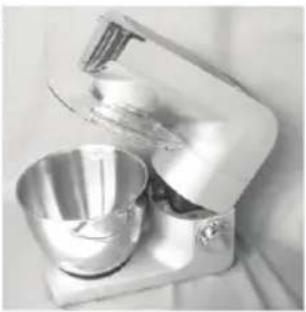
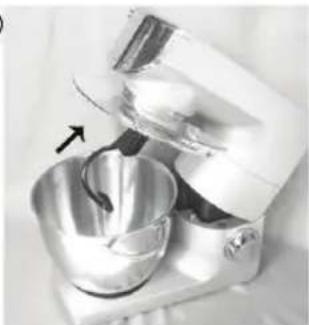
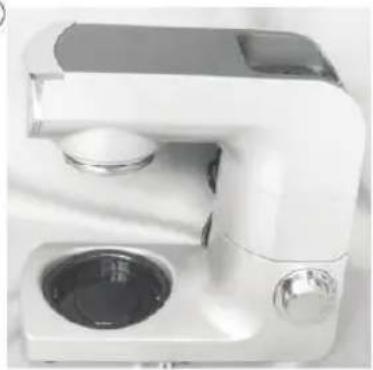
1 Press the release button for multifunction head (5) up, lift the multifunction head then fit the bowl (3) onto the appliance by turning until it locks in position. place the ingredients in bowl first.
2 Put the stainless steel bowl cover onto the stainless bowl and insert the mixer blade, Hook or whisk (depending on the consistency your prefer). Adjust the height by turning the shaft: adjust the accessories to the ideal position.
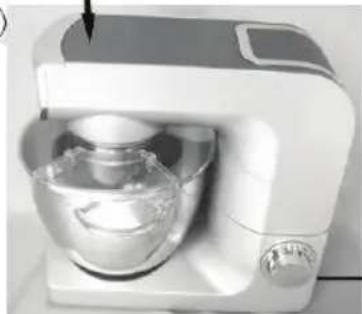
3 Press the multifunction head (5) of the appliance down until a click is heard.
4 During preparation, you can add ingredients through the opening the cover
5 To stop the appliance, turn the knob (6) back to 0.
6 Before using for the first time, clean all parts of the accessories with soapy water rinse and dry.
7 Place the appliance on a flat, clean and dry surface and then plug in your appliance.
Making.blender
①
natural_image
Close-up of a white industrial vacuum cleaner with dual circular components (no visible text or symbols)②
natural_image
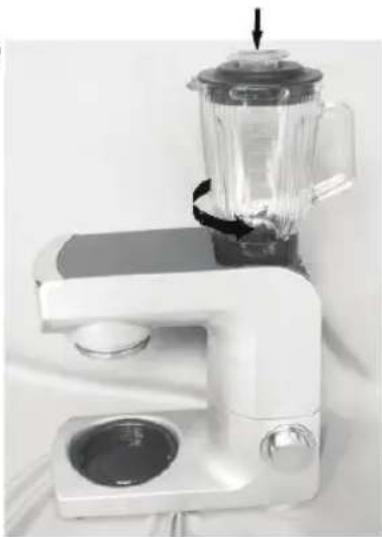
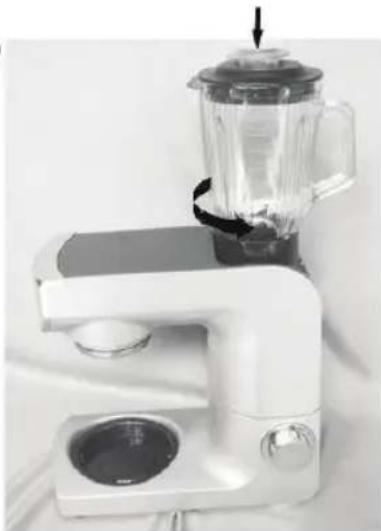
White kitchen blender with a glass lid and side sink, no visible text or symbolsDepending on the nature of the ingredients, the glass jug can be used to prepare up to 1.4 l of mixture.
Assembling and fitting the attachment.
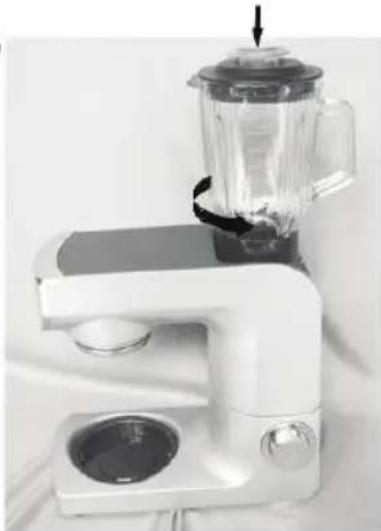
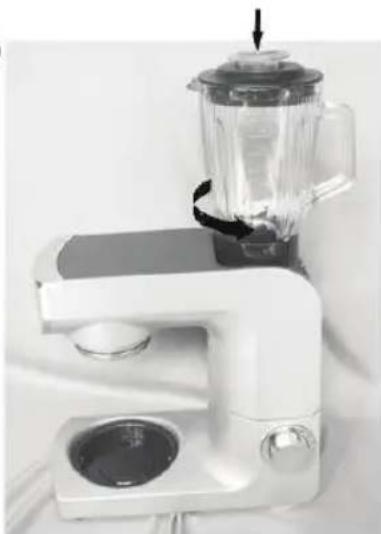
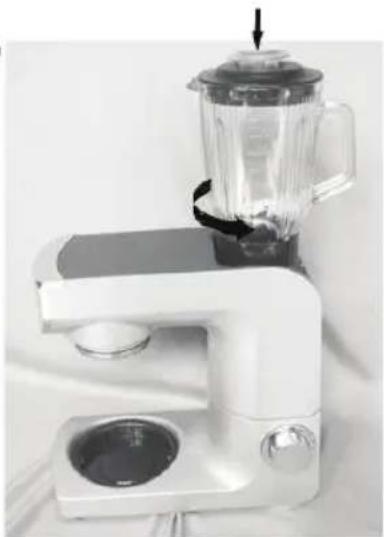
1 Assemble the blade assembly to the seal and lock it with a quarter turn anticlockwise into the bottom of the glass jug (the glass jug must be upright).
2 Fit the multifunction heard of the appliance (5) to a horizontal position and then remove the cover (4).
3 Place the ingredients in the blender jug, weighing them as indicated under the weighing function and then fit the cover with the measuring plug.
4 Fit the glass jug on the Power outlet for blender (7) and lock it in position by turning it clockwise.
Caution:
■ Do not run the blender empty for more than 1 minute.
■ Never fill the mixing jug with boiling fluids, you could allow these to cool down to a room temperature. Otherwise, the appliance could overheat and the glass of the mixing jug could crack.
When you use the jug operate ice, you could select nine ices each time and the every ice size is 40 mm * 40 mm * 20 mm.
Making mincer
natural_image
Exploded view diagram of a mechanical assembly showing components like gears, shafts, and parts (no text or labels)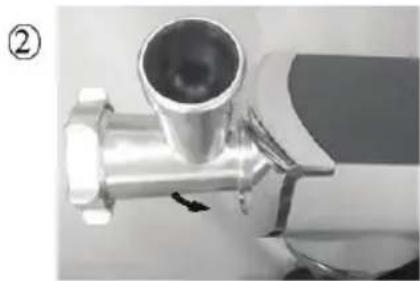
natural_image
Close-up of a metallic mechanical component with a cylindrical port and flange (no visible text or symbols)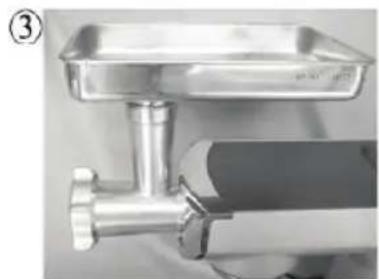
natural_image
Close-up of a stainless steel kitchen utensil with a flat plate and handle (no visible text or symbols)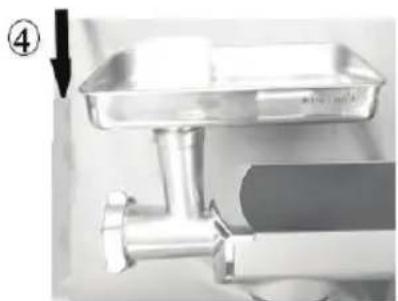
natural_image
Close-up of a stainless steel kitchen tool with a rectangular tray and metal bracket (no visible text or symbols)Assembling and fitting the attachment.
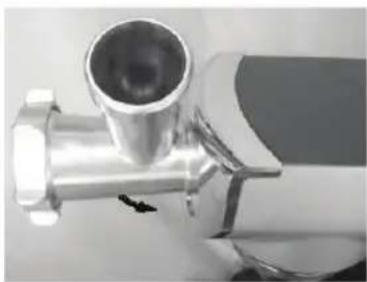
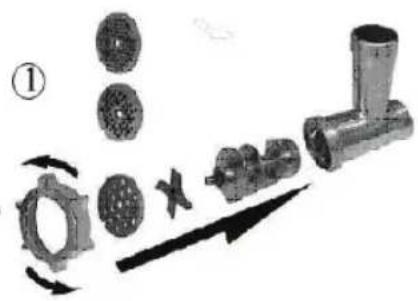
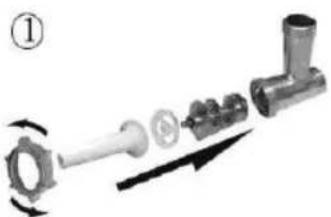
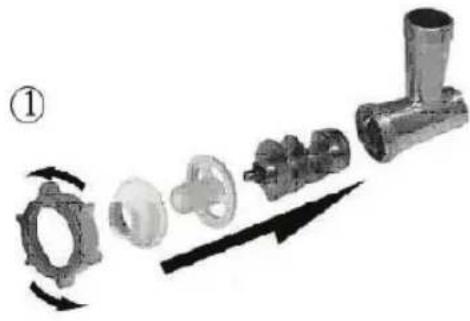
1 Take the body (Cutter housing 28) by the feed tube with the largest opening upwards.
2 Insert the worm shaft 18 (drive pins first) in the cutter housing (28). Fit the cutter blade 19 on the shaft with the cutting edges upwards.
3 Place the medium grinding disc, fine grinding disc or coarse grinding disc (depending on the consistency you prefer) onto the worm shaft.
4 Screw ring (21) the cap nut fully home on the body.
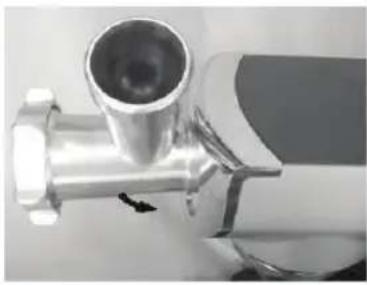
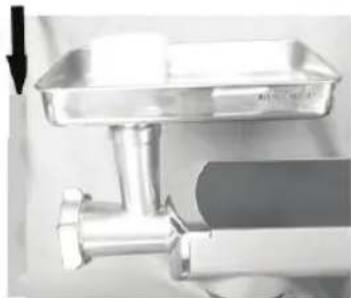
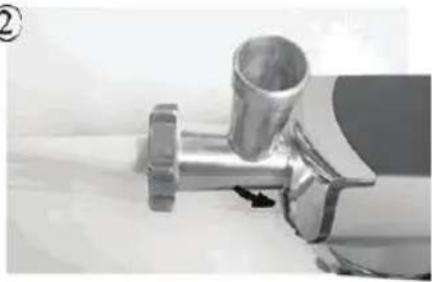
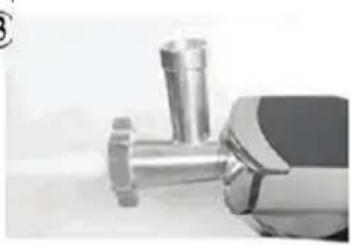
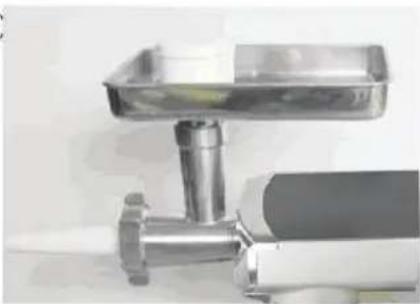
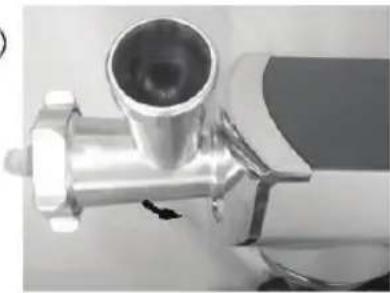
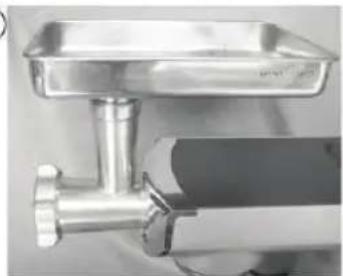
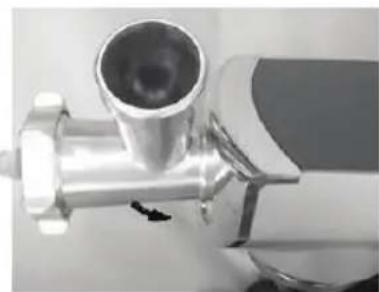
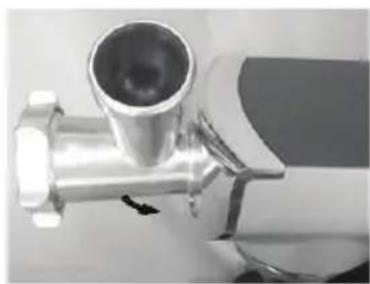
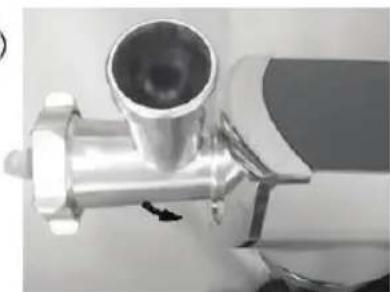
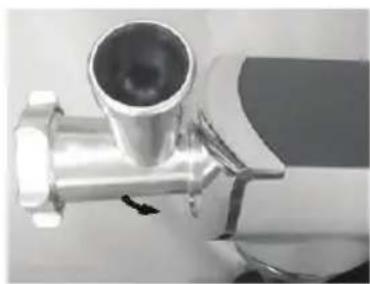
5 Put the Cutter housing (28) into the multifunction head by turning it anticlockwise in the vertical position (a click should be heard).
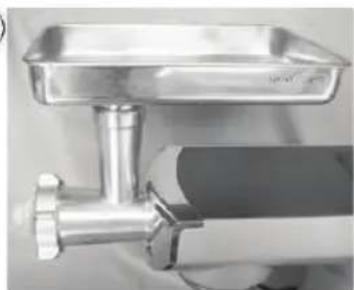
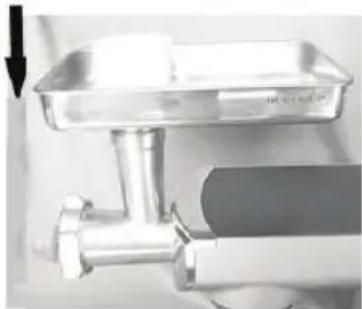
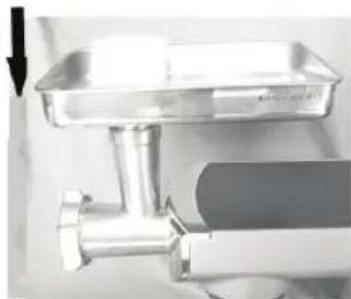
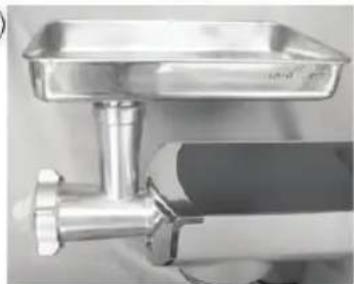
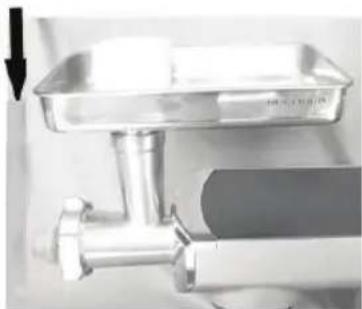
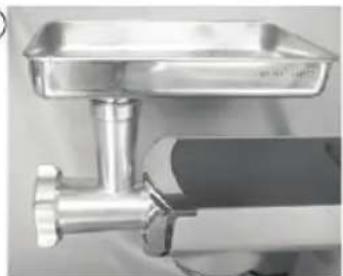
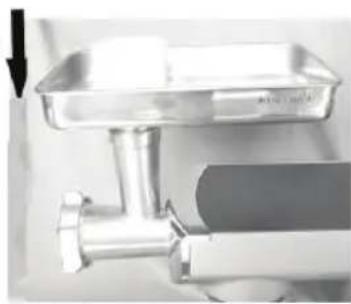
6 Place the tray on the upright part of the cutter housing.
7 Now the appliance is ready for mincing
- Cut the meat into 10 cm-long, 2 cm-thick strips. Remove bones, pieces of gristle and sinews as much as possible. (Never use frozen meat)!
- The meat in the tray. Use the pusher to gently push the meat into the cutter housing. (For steak tartare, mince the meat with the medium grinding disc twice).
- When you dissembled the body (Cutter housing 28), you must press the Release button for Cutter housing button (9) to up.
- Insert the pieces of meat in the feed tube piece by piece using the pusher, never push the meat with the finger or any other utensil.
Making.sausages
natural_image
Exploded view diagram of a mechanical assembly showing parts like a valve, shaft, and gear (no text or labels)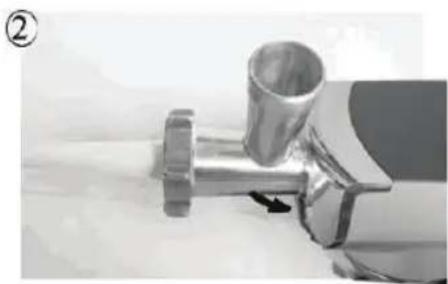
natural_image
Close-up of a metallic mechanical component with a flanged shaft and cylindrical port (no visible text or symbols)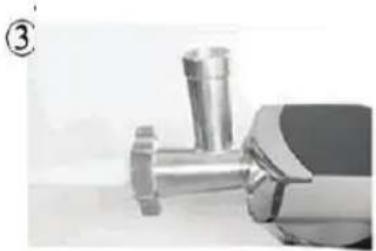
natural_image
Close-up of a metallic mechanical component with a cylindrical shaft and flange (no visible text or symbols)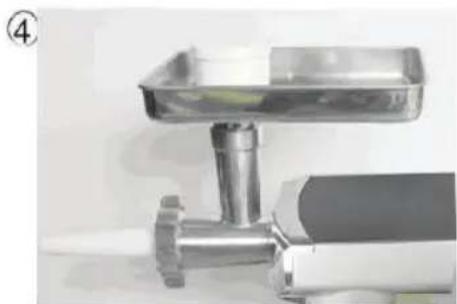
natural_image
Close-up of a stainless steel kitchen utensil with a handle and metal base (no visible text or symbols)1 Mince the meat.
2 Insert the worm shaft (18) into the cutter housing (28), the plastic end first.
3 Place the separator (22) in the cutter housing.
4 Place the sausage horn (23) on the cutter housing and screw the ring on the cutter housing. (Make sure the notches of the separator fit onto the projections of the mincer head).
5 Put the Cutter housing (28) into the multifunction head by turning it anticlockwise in the vertical position (a click should be heard).
6 Place the tray on the upright part of the cutter housing
7 Now the appliance is ready for making sausages.
- Put the ingredients in the tray. Use the pusher to gently push the meat into the utter housing.
- Put the sausage skin in lukewarm water for 10 minutes. Then slide the wet skin onto the sausage horn. Push the (seasoned) minced meat into the cutter housing.
- If the skin gets stuck onto the sausage horn, wet it with some water.
- When you dissembled the body (Cutter housing 28, you must press the Release button for Cutter housing button (9) to up.
Making kebab
natural_image
Exploded view diagram of a mechanical assembly showing components like gears, flanges, and a T-shaped pipe fitting (no text or labels)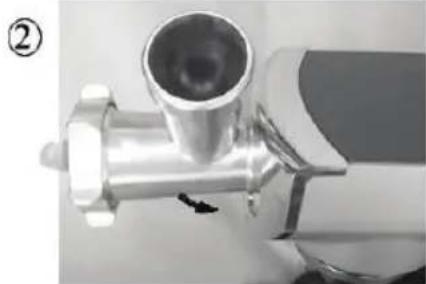
natural_image
Close-up of a metallic mechanical component with a cylindrical port and flanged base (no visible text or symbols)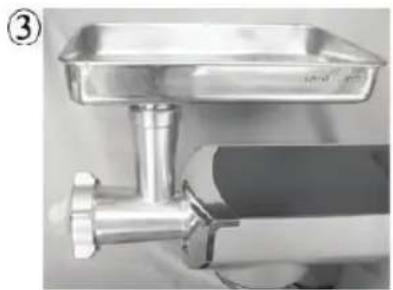
natural_image
Close-up of a stainless steel kitchen utensil with a flat plate and metal fittings (no visible text or symbols)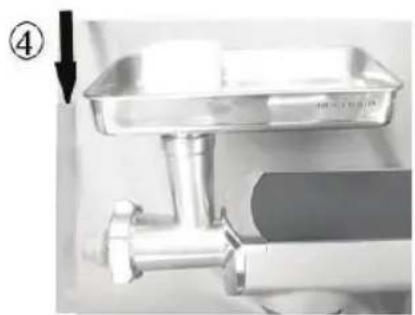
natural_image
Close-up of a stainless steel kitchen tool with a tray and handle (no visible text or symbols)1 Insert the worm shaft (18) into the cutter housing (28), the plastic end first.
2 Place the former (24) in the cutter housing.
3 Then place the cone (25) on the cutter housing and screw the ring on the cutter housing (Make sure the notches of the separator fit onto the projections of the mincer head).
4 Put the Cutter housing (28) into the multifunction head by turning it anticlockwise in the vertical position (a click should be heard).
5 Place the tray on the upright part of the cutter housing.
6 Now the appliance is ready for making kebbe.
- Feed the prepared kebbe mixture through the kebbe maker. Cut the continuous hollow cylinder into the desired lengths and user as required.
- Kebble is a traditional Middle Eastern dish made primarily of lamb and bulgur wheat which are minced together to form a paste the mixture is extruded through the kebbe maker and cut into short lengths. The tubes can then be stuffed with a minced meat mixture, the ends pinched together and then deep fried.
- When you dissembled the body (Cutter housing 28, you must press the Release button for Cutter housing button (9) to up.
Making.slicer
natural_image
Two views of a pipe fitting showing internal components and directional arrows (no text or symbols)②
natural_image
Close-up of a white cylindrical device with a metallic handle and a small circular component, possibly a lamp or optical lens (no visible text or symbols)③
natural_image
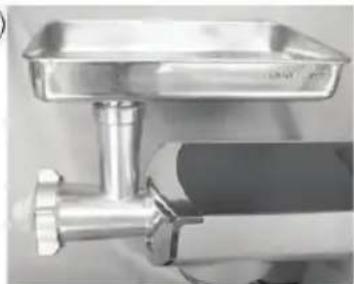
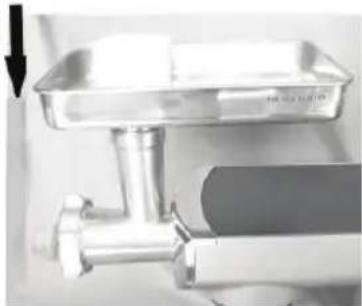
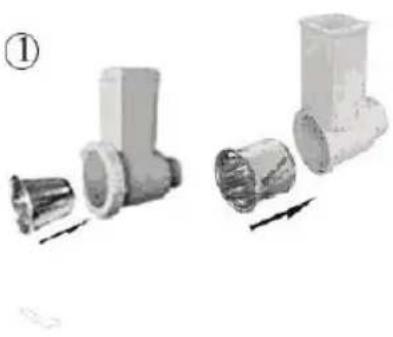
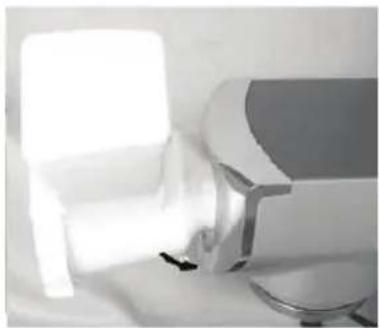
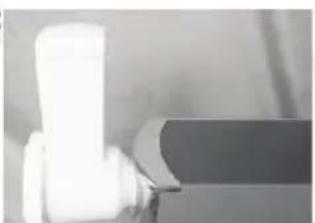
Close-up of a white cylindrical object with a dark rectangular base, possibly a mechanical component or tool (no visible text or symbols)1 Insert the slice cutter (or the fine bar cutter and the coarse slice) into the cutter housing (31).
2 Put the Cutter housing (31) into the multifunction head by turning it anticlockwise in the vertical position (a click should be heard).
3 Now the appliance is ready for slicing
- Cut the potato or other vegetable for processing it to pieces, which size is suitable for cutter housing.
- Choose the different kind of cutter as requested.
- Put the pieces into cutter housing and press slightly by pusher
Caution:
■ Never press by finger.
When you dissembled the body (Cutter housing 31), you must press the Release button for Cutter housing button (9) to up.
■ After use, always turn the switch to the OFF position
Making.Tomato
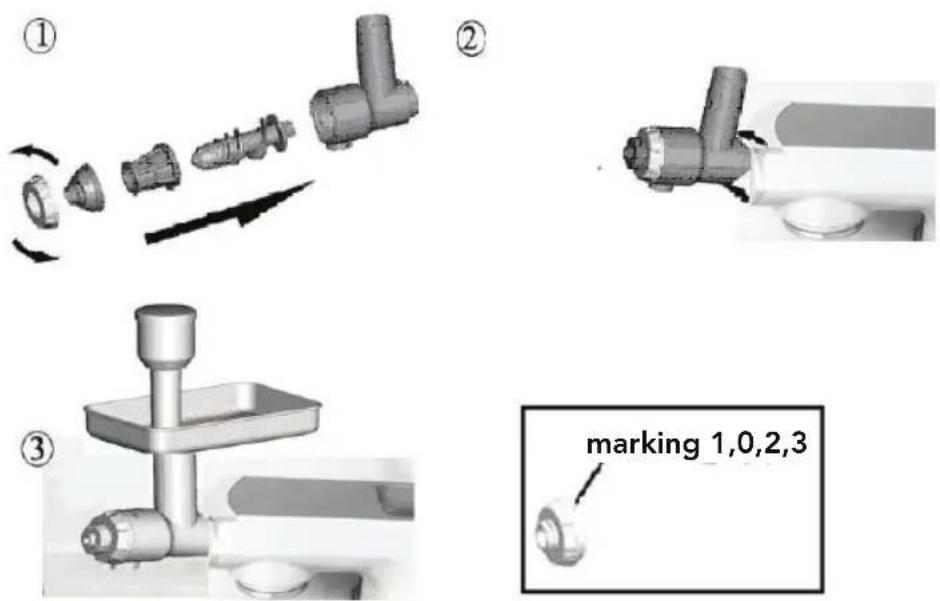
1 Insert the worm shaft D into the cutter housing D, the plastic end first. place the cone D in the cutter housing D. then place the former D on the cutter housing D and screw D the ring on the cutter housing D.
2 Attach the cutter housing to the motor unit.
3 Place the tray on the upright part of the cutter housing.
4 Now the appliance is ready for making tomato mush.
Caution
Put the Tomatoes in the tray. Use the pusher to gently push the Tomatoes onto the cutter housing. When you finished using the attachment, please use the clean brush to remove residue.
Screw ring is marking 1,0,2,3 (see the picture), when you disassemble the accessory you should Rotation Shaper to marking 0 position, when you are extracting of vegetables contain more cellulose you should Rotation Shaper to marking 1 position and extracting the vegetables with less cellulose you should Rotation Shaper to marking 2 or 3.
Cleaning
1 Unplug the appliance.
2 Never immerse the motor until in water or put it under running water wipe it with a soft dry or slight damp cloth.
3 For easier cleaning, quickly rinse the accessories after use. Completely dismantle the mixer attachment handle the blades with care, as some have sharp cutting edges.
4 Wash, rinse and wipe the accessories or the can be put in the dishwasher, except for the metal components of the mincer attachment body Fine grinding disc (16), Medium grinding disc (17), Worm shaft (18), Cutter blade (19). Coarse grinding disc (20) and Screw ring (21).
5 The grinding disc and the blade must be kept lubricated. Wipe them over with cooking oil after each use.
6 If your accessories are discoloured by food (carrots, oranges etc), rub them gently with kitchen towel dipped in cooking oil and then clean in the usual way.
7 Blender assembly: pour hot water with a few drops of washing up liquid into the blender jug. Close the cover. Fit it on the appliance and give a few pulses. Remove the blender, rinse the jug under running water and leave it upside down to dry for cleaning more difficult residues, especially with thicker preparations. The blade nut assembly can be detached from the bottom of the jug, to do this, place the empty blender upside down on a flat surface, release the blade /nut assembly with a quarter turn and lift out the seal with care.
Processing Guide
| Accessory Food Maximum | Operation time | Speeds | Preparation | ||
| Whisk | Cream(include 38 % fat) | 250 ml 5 minutes | Max / | ||
| Egg white | 12 pcs | 5 minutes | Max | / | |
| Dough hook | Flour 1350 g | 5 minutes Max | / | ||
| Salt 10 g | |||||
| Yeast 20 g | |||||
| Sugar 10 g | |||||
| Water (43 °C) | 650 g | ||||
| Lard | 30 g | ||||
| Mixer blade | Flour 200 g | 5 minutes Max | / | ||
| Castor sugar | 200 g | ||||
| Margarine | 200 g | ||||
| Egg | 4 pcs | ||||
| Blender | Carrot | 560 g | 3 minutes Max | 15×15×15 mm | |
| Water | 840 g | / | |||
| Meat Grinder | Beef | 2000 g | 3 minute | Max | 20×20×60 mm |
| Pork | 2000 g 3 minute | ||||
| Slicing/Shreddingdiscs | carrots | 400 g | 15 seconds | 4 | / |
| potatoes | 400 g | 15 seconds | 4 | / | |
| onions | 400 g | 15 seconds | 4 | / | |
According to the Waste Electrical and Electronic Equipment (WEEE) Directive, this type of waste must be collected and treated separately. If it becomes necessary to dispose of this product at some point, kindly make sure that it is not discarded with your everyday household refuse. Instead, bring the product to your closest WEEE collection centre.

Brand : WILFA
Model : Grand Gourmet KM-1500VS
Category : Food processor