
IAN 46344 - Uncategorized FLORABEST - Free user manual and instructions
Find the device manual for free IAN 46344 FLORABEST in PDF.

| Product Type | Cordless Hedge Trimmer |
| Dimensions (L x W x H) | 95 x 25 x 20 cm |
| Weight | 3.2 kg |
| Power Source | Rechargeable lithium-ion battery, 18 V |
| Battery Capacity | 2.0 Ah |
| Runtime | Approx. 45 minutes |
| Charging Time | 1.5 hours |
| Blade Length | 50 cm |
| Tooth Spacing | 20 mm |
| Sound Level | 85 dB(A) |
| Vibration Level | 2.5 m/s² |
| Blade Material | Tempered steel |
| Main Functions | Trimming hedges, shrubs, and bushes |
| Maintenance | Regular cleaning, occasional blade sharpening |
| Safety Features | Dual switch safety mechanism, blade guard |
| Spare Parts Availability | Blade, battery, charger, and other parts available |
| Brand | Florabest |
| Model | IAN 46344 |
Frequently Asked Questions - IAN 46344 FLORABEST
User questions about IAN 46344 FLORABEST
0 question about this device. Answer the ones you know or ask your own.
Ask a new question about this device
Download the instructions for your Uncategorized in PDF format for free! Find your manual IAN 46344 - FLORABEST and take your electronic device back in hand. On this page are published all the documents necessary for the use of your device. IAN 46344 by FLORABEST.
USER MANUAL IAN 46344 FLORABEST
Ann: 2012 Sep: 12/7-29 May 31, 2012

PEDESTAL BARBEQUE
PYLVÄSGRILLI S∅JLEGRILL SÄULENGRILL
PELARGRILL ΨΗΣΤΙΕΡΑ
GB IE
United Kingdom Landmann® Ltd.
Unit 1. Rylands Business Center, Rylands Lane, Hinley Earth, West, 1959 2PT, United Kingdom
United Kingdom
d'octec lepine 46-1259-22174
Sales Office 194, -141-1295-2352-12 Algonists Thongsuflam to 5pm Friday, June to June
e-mail: enguiness.lardmann.co.uk, internet: www.lardmann.co.uk
图
Finland Landmann® Finland Of
Lanzkja 4, H. 1, SF-05421 Belurki, Enzans
Tel. 02358-9-477055-0/26 02358-9-47705550
Kasanta Prjattai 8:30 - 16:30
email: lordmannyklantmannf, internet: www.landmann.h
ST
Sweden Lantmann® Skandinavia 12
Stongatan 70, 5-563 32 Skilingaryd, Sverige
Tel.**46-370-693580,1m**45-370-49580
The image is too blurry to recognize any text content.
Tel. **09-4791-308-59 oder 78, Fax **09-4791-308-36
natural_image
Black-and-white photo of a portable outdoor grill with meat and a grater on a stand, placed on a stone surface (no text or symbols visible)① E Assembly and operating instructions
GB IE CF "Pedestal Barbecue" Assembly and Operation Manual 3
n 'Grilli' Asentamis- ja käyttöohjeet 7
⑤ "Pelargnill" Monterings- och bruksanvisning 11
©4
'Grill' Montage- og betjeningsvejledning 15
"Ψηστιερα" Οδηγίες συναρμολόγησης και χρήσης 19
DE AF 'Säulengrill' Montage- und Betriebsanleitung 23
"Pedestal Barbecue" Assembly and Operation Manual
Preface
Please read this assembly and operation manual carefully before you start using your high-quality Florabest barbecue.
You will quickly notice the following:
The assembly and operation processes are simple and straightforward.
Proper Use
The barbeque may only be used for preparing suitable foods. All requirements of this assembly and operation manual must be complied with.
For private use only!
Safe Operation of the Barbecue
Before using the barbecue for the first time, it should be heated with fuel (charcoal or wood briquets) for approximately 30 minutes.
General Safety Precautions

WARNING - risk of burns!
→To prevent the barbecue from tipping over, it must be placed on a stable and secure surface during operation.
CAUTION! This barbecue becomes very hot and should not be moved during operation!
→Wear oven gloves or use barbecue tongs when barbecuing.
⇒ Allow the barbecue to cool down completely before cleaning it.
Do not use spirit or petrol to light or re-light the fire, as this can result in uncontrollable heat due to deflagration. Only use approved lighting aids for barbecuing, such as DIN solid firelighters!
→Never use water to extinguish the charcoal.

WARNING - risk of suffocation!
→Do not use indoors or under roofs.

DANGER to children, mentally or ally handicapped persons, and pets!
→Never leave the hot barbecue unattended. Keep children, mentally or physically handicapped persons, and pets at a safe distance.
Preparing Assembly
- Please read the assembly instructions carefully and follow the safety precautions.
- Allow sufficient time for assembly.
- Before starting assembly, clear an area measuring approximately two to three square metres.
- Remove the set from the packaging!
- Lay out all parts and any necessary tools so that they are within easy reach.
- Please use the following list and drawing to check that all parts are present.
Parts List
Name Qty.
| A: Windbreak 1 | |
| B: Cooking grill 1 | |
| C: Wooden handles for cooking grill 2 | |
| D: Coal grill | 1 |
| E: Fire bowl handle | 2 |
| F: Fire bowl | 1 |
| G: Rear pedestal panel | 1 |
| H: Front pedestal panel | 1 |
| I: Ash pan | 1 |
| J: Base | 1 |
| K: Ventilation disc | 1 |
Specifications
Setup dimensions: approx. 58 x 84 x 43 cm
Grill: approx. ∅ 39 cm
Weight: approx. 5.2 kg
Capacity: approx. 1.5 kg
Required Tools
 | Phillips screwdriver |
 | Spanner8 mm |
Connection Elements
(PRE-ASSEMBLED CONNECTION ELEMENTS ARE ALSO INCLUDED IN THE LIST!)
 | [H23T] |  |
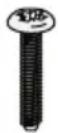
| M5x252x | M5x1022x | M524x |
Carrying out Assembly

CAUTION!
For your safety, the bolt heads should always point outwards in order to prevent injury.
To prevent undesired material tension, firmly tighten all screw connections only after finishing assembly.
- Fasten the ventilation disc (K) onto the front pedestal panel (H), using an M5x10 bolt and M5 nut. Attach the pedestal halves (G + H) with M5x10 bolts and M5 nuts. Attention: All bolts must be firmly tightened.
- Fasten the pedestal (G + H) to the base (J), using M5x10 bolts and M5 nuts.
- Fasten the fire bowl (F) to the pedestal (G + H), using M5x10 bolts and M5 nuts.
- Fasten the fire bowl handle (E) to both sides of the fire bowl (F), using M5x10 bolts and M5 nuts.
-
Fasten the windbreak (A) to the fire bowl (F), using M5x10 bolts and M5 nuts.
-
Insert the coal grill (D) into the fire bowl (F).
- Insert the ash pan (I) into the pedestal (G + H) from the side.
- Push the wooden handles (C) for the cooking grill onto the protruding ends of the cooking grill (B).
- Insert the cooking grill (B) into the windbreak (A) at the desired position.

WARNING!
To prevent the barbecue from tipping over, it must be placed on a stable and secure surface during operation.
Lighting the Fuel

WARNING - risk of burning!
Using petrol or spirits for the ignition can result in uncontrollable heat due to deflagration. Therefore, use only harmless fuel, such as firelighters. During operation, the barbecue must be placed on a stable and secure surface.
- Use quality products from DIN, such as DIN charcoal, DIN wood briquets, and DIN solid firelighters.
- Stack a portion of the charcoal or wood briquets in the fire bowl (F).
- Light one or two solid firelighters using a match. Place these firelighters on top of the layer of charcoal or wood briquets.
- Allow the solid firelighters to burn for 2 to 4 minutes. Then slowly fill the fire bowl (F) with charcoal or wood briquets.
- A white layer of ash should develop on the fuel after approximately 15 to 20 minutes. This indicates that the optimal grilling condition has been reached. Distribute the fuel evenly in the fire bowl (F), using a suitable metal tool.
- Insert the greased cooking grill and start barbecuing.
Cleaning/Care

WARNING - risk of burning!
Allow the barbecue to cool down completely before cleaning it. Never use water to quench the hot barbecue. This could result in burns or scalding.
Occasional cleaning is necessary to preserve the beautiful appearance. Do not use any scouring agents.
- This barbecue is made of AISI 430 type stainless steel. Under certain extreme conditions, e.g. in salty air, acid rain, and other circumstances, the colour may change due to superficial rust. To avoid such discolouring, we recommend protecting your barbecue with a cover or storing it indoors in a garage etc.
- A rinsing cloth and some water with standard detergent is sufficient for the normal cleaning process.
- Clean the grill using some washing-up liquid and a rust proof cleaning pad.
Environmental Protection & Disposal
Pay attention to cleanliness when using the barbecue and dispose of waste in a clean and safe manner. As a general rule, only dispose of waste in designated metal or non-flammable containers.
Observe the local waste disposal regulations.
Warranty
The barbecue is subject to our warranty for a term of three years from the date of purchase. The warranty covers the repair of manufacturing defects and the replacement of defective parts. The cost of freight, assembly, replacement of worn parts, and other issues are not covered by this warranty.
Wear and tear parts are components of the device that are subject to natural wear in the course of proper use. This especially affects components that are exposed to intensive heat or to the burning process, such as cooking grills and coal grills, grill plates, grill pans, grill spits, and fire bowls.
The warranty will expire in the event of incorrect handling and any kind of unauthorised modification of the barbecue.