
Xonar U3 Plus - Soundcard ASUS - Free user manual and instructions
Find the device manual for free Xonar U3 Plus ASUS in PDF.
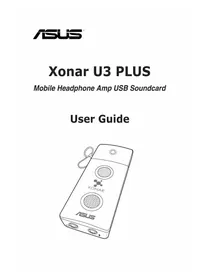


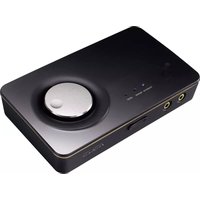
| Product Type | External USB Sound Card |
| Brand | ASUS |
| Model | Xonar U3 Plus |
| Connectivity | USB 2.0 / 1.0 |
| Audio Chipset | CMedia CM6510B |
| Output Port | 3.5 mm combo (analog headphone/speaker + S/PDIF optical via adapter) |
| Input Port | 3.5 mm combo (Line-In / Mic) |
| Headphone Amplifier | Built-in, optimized for 32–150 Ω |
| Signal-to-Noise Ratio (Line Out) | 100 dB (A-weighted) |
| Total Harmonic Distortion + Noise | 0.005% (−86 dB) |
| Frequency Response | 20 Hz – 20 kHz |
| Sample Rate | Up to 96 kHz (24-bit) |
| Output Channels | 2-channel stereo (analog); S/PDIF: PCM 2-channel or pass-through AC3/DTS |
| Special Features | Karaoke (key shifting, vocal cancellation), FlexBass, 10-band EQ, environment effects, Smart Volume Normalization |
| Operating System Support | Windows 10 / 8.1 / 8 / 7 / XP (32/64-bit) |
| System Requirements | USB 1.1+ port, 256 MB RAM, 60 MB HDD, CD-ROM drive |
| Package Contents | Sound card, USB extension cable, S/PDIF optical adapter, driver CD, quick start guide |
| LED Indicator | On when playing (not muted); off when muted or idle |
| Power Source | USB bus-powered |
| Compliance | FCC Part 15, ICES-003, Australian Consumer Law |
Frequently Asked Questions - Xonar U3 Plus ASUS
User questions about Xonar U3 Plus ASUS
0 question about this device. Answer the ones you know or ask your own.
Ask a new question about this device
Download the instructions for your Soundcard in PDF format for free! Find your manual Xonar U3 Plus - ASUS and take your electronic device back in hand. On this page are published all the documents necessary for the use of your device. Xonar U3 Plus by ASUS.
USER MANUAL Xonar U3 Plus ASUS
Mobile Headphone Amp USB Soundcard
User Guide
E11105
Second Edition (V2)
November 2015
Copyright © 2015 ASUSTeK Computer Inc. All Rights Reserved.
No part of this manual, including the products and software described in it, may be reproduced, transmitted, transcribed, stored in a retrieval system, or translated into any language in any form or by any means, except documentation kept by the purchaser for backup purposes, without the express written permission of ASUSTeK COMPUTER INC. ("ASUS").
Product warranty or service will not be extended if: (1) the product is repaired, modified or altered, unless such repair, modification of alteration is authorized in writing by ASUS; or (2) the serial number of the product is defaced or missing.
ASUS PROVIDES THIS MANUAL "AS IS" WITHOUT WARRANTY OF ANY KIND, EITHER EXPRESS OR IMPLIED, INCLUDING BUT NOT LIMITED TO THE IMPLIED WARRANTIES OR CONDITIONS OF MERCHANTABILITY OR FITNESS FOR A PARTICULAR PURPOSE. IN NO EVENT SHALL ASUS, ITS DIRECTORS, OFFICERS, EMPLOYEES OR AGENTS BE LIABLE FOR ANY INDIRECT, SPECIAL, INCIDENTAL, OR CONSEQUENTIAL DAMAGES (INCLUDING DAMAGES FOR LOSS OF PROFITS, LOSS OF BUSINESS, LOSS OF USE OR DATA, INTERRUPTION OF BUSINESS AND THE LIKE), EVEN IF ASUS HAS BEEN ADVISED OF THE POSSIBILITY OF SUCH DAMAGES ARISING FROM ANY DEFECT OR ERROR IN THIS MANUAL OR PRODUCT.
SPECIFICATIONS AND INFORMATION CONTAINED IN THIS MANUAL ARE FURNISHED FOR INFORMATIONAL USE ONLY, AND ARE SUBJECT TO CHANGE AT ANY TIME WITHOUT NOTICE, AND SHOULD NOT BE CONSTRUED AS A COMMITMENT BY ASUS. ASUS ASSUMES NO RESPONSIBILITY OR LIABILITY FOR ANY ERRORS OR INACCURACIES THAT MAY APPEAR IN THIS MANUAL, INCLUDING THE PRODUCTS AND SOFTWARE DESCRIBED IN IT.
Products and corporate names appearing in this manual may or may not be registered trademarks or copyrights of their respective companies, and are used only for identification or explanation and to the owners' benefit, without intent to infringe.
Contents
Notices.... iv
Safety information ...... v
Trademarks ...... v
License ...... v
- Package contents...... 1
- System requirements.... 1
- Specifications summary.... 1
- Card Installation.... 3
- Driver installation.... 3
- Hardware introduction...... 4
- Connecting speakers.... 5
- Xonar U3 PLUS Audio Center 7
8.1 Xonar U3 PLUS Audio Center GUI 7 8.2 Xonar U3 PLUS Audio Center Icon....9 8.3 Music Main Settings....10 8.4 Mixer/Volume 11 8.5 Effects....13 8.6 FlexBass 15 8.7 Karaoke Main Settings....16 8.8 Mixer 23 8.9 Intensifier 25
- Troubleshooting and FAQs......26
Notices
Federal Communications Commission Statement
This device complies with Part 15 of the FCC Rules. Operation is subject to the following two conditions:
• This device may not cause harmful interference, and - This device must accept any interference received including interference that may cause undesired operation.
This equipment has been tested and found to comply with the limits for a Class B digital device, pursuant to Part 15 of the FCC Rules. These limits are designed to provide reasonable protection against harmful interference in a residential installation. This equipment generates, uses and can radiate radio frequency energy and, if not installed and used in accordance with manufacturer's instructions, may cause harmful interference to radio communications. However, there is no guarantee that interference will not occur in a particular installation. If this equipment does cause harmful interference to radio or television reception, which can be determined by turning the equipment off and on, the user is encouraged to try to correct the interference by one or more of the following measures:
• Reorient or relocate the receiving antenna. • Increase the separation between the equipment and receiver. • Connect the equipment to an outlet on a circuit different from that to which the receiver is connected. • Consult the dealer or an experienced radio/TV technician for help.
Canadian Department of Communications Statement
This digital apparatus does not exceed the Class B limits for radio noise emissions from digital apparatus set out in the Radio Interference Regulations of the Canadian Department of Communications.
This class B digital apparatus complies with Canadian ICES-003.
Australia statement notice
From 1 January 2012 updated warranties apply to all ASUS products, consistent with the Australian Consumer Law. For the latest product warranty details please visit http://support.asus.com. Our goods come with guarantees that cannot be excluded under the Australian Consumer Law. You are entitled to a replacement or refund for a major failure and compensation for any other reasonably foreseeable loss or damage. You are also entitled to have the goods repaired or replaced if the goods fail to be of acceptable quality and the failure does not amount to a major failure.
If you require assistance please call ASUS Customer Service 1300 2787 88 or visit us at http://support.asus.com
Safety information
- Before installing the device on a motherboard, carefully read all the user guides that came with the package.
- To prevent electrical shock hazard or short circuits, switch off the power supply before installing the device on a motherboard or connecting any signal cables to the device.
- If the device is broken, do not try to fix it by yourself. Contact a qualified service technician or your retailer.
- Before using the product, make sure all cables are correctly connected. If you detect any damage, contact your dealer immediately.
- To avoid short circuits, keep paper clips, screws, and staples away from connectors, sockets, and circuitry.
- Avoid dust, humidity, and temperature extremes. Do not place the product in any area where it may be exposed to moisture.
- Place the product on a stable surface.
- If you encounter technical problems with the product, contact a qualified service technician or your retailer.

This symbol of the crossed out wheeled bin indicates that the product (electrical and electronic equipment) should not be placed in municipal waste. Check local regulations for disposal of electronic products.
Trademarks
Xonar and ASUS logo are trademarks of ASUSTek Computer Inc. "Dolby" and "Dolby Digital Live", "Dolby Pro Logic IIx", "Dolby Virtual Speaker", "Dolby Headphone" are trademarks of Dolby Laboratories. EAX and A3D are trademarks of Creative Technology Ltd. Microsoft, DirectSound3D, and Windows are trademarks of Microsoft Corporation. Other company and product names may be trademarks of the respective companies with which they are associated. ASIO is a trademark and software of Steinberg Media Technologies GmbH.
License
Dolby Master Studio driver is manufactured under license from Dolby Laboratories.
1. Package contents
Check your ASUS Xonar U3 PLUS external USB audio card package for the following items:
• ASUS Xonar U3 PLUS external USB audio card • S/PDIF TOSLINK optical adapter x 1 - USB extension cable x1 - Driver / User Guide CD x 1 - Quick Start Guide x 1
2. System requirements
To ensure a successful installation of the Xonar U3 PLUS external USB audio card, your computer must meet the following requirements:
- IBM compatible PC with one USB1.1 (or higher) compatible port for the USB audio device
- Microsoft Windows 10 / 8.1 / 8 / 7 / XP (32/64bit)
- Intel Pentium 4 1.4GHz or AMD Athlon 1400 CPU or faster CPU • 256 MB DRAM system memory
- 60 MB available HDD space for driver installation package
- CD-ROM drive (or DVD-ROM drive) for software installation
- High-quality headphones or powered analog speakers to enjoy the ultra-high fidelity sound of the card
3. Specifications summary
| Category Item Description | ||
| Audio Controller and Codec | Audio Chipset CMedia CM6510B USB Audio Chip | |
| Bus Interface | USB Bus USB 2.0 and 1.0 Full-speed compatible | |
| USB Audio Class USB Audio Device Class v1.0 compatible | ||
| I/O Ports | Analog Output Jack & Digital S/PDIF Output Combo | 3.50mm mini analog and digital combo jack*1 (Headphone/Speakers/SPDIF output) |
| Built-in Headphone Amplifier | 100dB SNR1.1Vrms full-scale output voltage for 32 ohms load>1.7Vrms full-scale output voltage for 150 ohms loadFrequency Response (-3dB/48KHz): 20~20KHz for 32ohms | |
| Analog Input Jack: 3.50mm mini shared jack *1 (Line-In/Mic-In) | ||
| Outlook Features | LED indicator | Play music. Idle: LED onMute: LED off |
| Operating System Windows | ® 10 / 8.1 / 8 / 7 / XP(32/64bit) | |
| Driver Features | Operating System Windows | ® 10 / 8.1 / 8 / 7 / XP(32/64bit) |
| Karaoke Functions | Music Pitch-Shifting, Vocal Cancellation, and Microphone Echo effects with Stereo Mix recording (Wave and Mic-in) for online Karaoke or online DJ applications | |
| FlexBassTM | Professional Bass Management/Enhancement system | |
| Audio Performance | Output Signal-to-Noise Ratio (A-Weighted): | 100dB for Line out |
| Output Total Harmonic Distortion + Noise at 1kHz (A-Weighted): | 0.005% (-86dB) for Line out | |
| Frequency Response (-3dB, 24-bit/96kHz input): | 20Hz to 20kHz | |
| Output/Input Full-Scale Voltage | 1.7Vrms | |
| Headphone Impedance Optimized for 32~150Ω | ||
| Accessories | S/PDIF optical adaptor x1, USB extension cable x1, Driver CD x1, Quick Start Guide x1 | |
(continued on the next page) * Specifications are subject to change without notice.
4. Card Installation
Connect the USB connector to any USB port on your notebook or PC as the following drawing shows.

5. Driver installation
After installing the Xonar U3 PLUS external USB audio card on your computer, you need to install the device driver that enables the Xonar U3 PLUS audio card to work with Windows operating system.

The version and content of the support CD are subject to change without notice.
To install the device driver:
- Insert the ASUS Xonar U3 PLUS support CD into your optical drive. If Autorun is enabled, the ASUS Xonar Card Driver screen appears automatically. Go to step 4. If Autorun is not enabled in your computer, perform step 2.
- Click My Computer on your desktop and double-click the optical drive icon.
- Double-click the setup.exe icon located on the optical drive.
- Follow the on-screen instructions to complete the installation. Read the END USER LICENSE AGREEMENT in the process and make sure that you understand and accept it before continuing the installation.
- When the installation finishes, you may be prompted to restart your computer. You can choose to restart the computer later if desired.
6. Hardware introduction
Xonar U3 PLUS external USB audio card layout
- Light indicator
| Description Status | |
| Play music (not Mute) LED | D on |
| Play music (Mute) LED off | |
| Idle (not Mute) LED on | |
| Idle (Mute) LED off | |
- Headphone & S/PDIF-Out port
- Mic & Line-in port
7. Connecting speakers
For Analog Speakers
2 Speakers

For Digital Speakers
SPDIF Out

Plug the optical TOSLINK adapter into the S/PDIF-Out port. Then, connect your decoder's S/PDIF In port to the optical adapter with a TOSLINK optical cable.

The TOSLINK optical cable is purchased separately.
Connecting headphone / microphone
Connecting Line-In audio sources
8. Xonar U3 PLUS Audio Center
8.1 Xonar U3 PLUS Audio Center GUI

The screenshots in this section are for reference only. The actual GUI may differ.
- After driver installation is complete and your computer has been rebooted, you will find the Xonar U3 PLUS Audio Center's icon in the system tray on the bottom right-hand corner of the screen. Double click this icon to open the Xonar U3 PLUS Audio Center utility.


If the icon does not appear on the system tray, launch the Xonar U3 PLUS Audio Center from the Windows desktop by clicking Start > All Programs > ASUS Xonar U3 PLUS > Xonar U3 PLUS Audio Center.
- The Xonar U3 PLUS Audio Center is the Graphical User Interface (GUI) for the Xonar U3 PLUS driver. You can control the functions and features of the Xonar U3 PLUS driver on the Xonar U3 PLUS Audio Center. The following picture shows a basic overview of the Xonar U3 PLUS Audio Center. The following sections of this user guide will describe its functions in more detail.

| No Item Description | |
| 1 Display Area | This display area shows the 10-band signal meter, volume level, status of preset, equalizer, and signal output.* * This area displays information, but is not used to change settings. |
| 2 Menu Open/Close | Clicking this button will reveal the configuration settings. Clicking it again will move the display area back to its original position and hide the configuration area. |
| 3 Master Volume | This knob controls the master playback volume. Turn to change the volume level. |
| 4 SVN Button | Click this button to enable the “Smart Volume Normalization” feature for consistent volume levels from all playback sources. It will display a blue light when enabled. |
| 5 Mute Button | Click this button to mute audio playback. It will display a red light when playback is muted. |
| 6 Settings Tab | Two tabs are available for quick access to Music Playback and Karaoke features. |
| 7 Settings Menu Panel | This panel provides access to audio settings, including Main Settings, Mixer/Volume, Effects, FlexBass, and Enhancer. |

To start using the Karaoke features of the Xonar U3 PLUS, plug in your microphone and click the Karaoke tab in the Xonar U3 PLUS Audio Center. Click the Mixer option and select "microphone".
8.2 Xonar U3 PLUS Audio Center Icon

| No Item Description | |
| 1 Information icon | Click this icon to display driver options. Double-click the icon to launch the Xonar U3 PLUS Audio Center. |
| 2 Restore | Click to restore Xonar U3 PLUS Audio Center application window. |
| 3 About Xonar U3 Plus Audio Center | Click to find out more about Audio Center version. |
| 4 Edit Hot Key | Click to edit shortcut keys for volume control, master presets, sampling rate, and analog out. |
| 5 Master Preset | Click to apply a master preset. |
| 6 Exit | Click to exit. |
8.3 Music Main Settings

| No Item Description | |
| 1 Audio Channel | The audio channel refers to the available speaker channels that can be used to mix sounds. |
| 2 Sample Rate | The sample rate determines the number of audio samples per second that the Digital-to-Analog Converters (DAC) and S/PDIF digital interface will output. |
| 3 Analog Out | The analog out setting defines your actual speaker and headphone setting. |
| 4 S/PDIF Output | S/PDIF output enables a single digital connection to carry high quality audio from your PC to digital speakers and AV receivers via PCM.** PCM - Pulse Code Modulation is a typical raw audio data format. |
8.4 Mixer/Volume
The mixer page is designed to control the volume for playback and recording on the Xonar U3 PLUS. The Xonar U3 PLUS also provides a high-quality digital monitoring function for playing the recorded audio from the speakers.
8.4.1 Playback Volume

| No Item Description | |
| 1 Playback Volume Tab | Click this button to show the playback volume page. |
| 2 Source/Path Name | Left and Right volume controls for each speaker/channel. |
| 3 Mute/Unmute button | Click this button to mute or unmute the audio channel. |
| 4 Volume Slider | Drag this slider down to decrease the volume; drag it up to increase the volume. The tool-tip displays percentage increments. |
| 5 Reset | Click to reset all volume controls to the default settings. |
8.4.2 Recording/Monitoring Volume

| No Item Description | |
| 1 Recording Volume Tab | Click this button to show the recording volume page. |
| 2 Recording volume slider | Drag this slider down to decrease the recording volume; drag up to increase the recording volume. The tool-tip displays percentage increments. |
| 3 Recording Selector button | Click this button to select the path/source you are going to record. The recording function on Windows is a one-path selector. Only one default recording source can be used at a time. You may have to restart the recorder application if you switch to a different source.*Note: On Windows Vista and later OS, some application programs may allow you to select the recording device/ path in the recording programs themselves. |
| 4 Monitoring button | Click this button to monitor and loopback recording audio to output speakers. The recording volume will affect monitoring signals from speaker output. The audio will be mixed into the streams from your PC and all digital audio effects will be applied to both the source and the output. |
| 5 Source/Path Name | Displays the source name for each volume control slider:Line-In: Recording from Line-In jack for external audio devices.MIC: Recording from MIC rear panel jack. |
| 6 Reset | Click to reset all volume controls to the default settings. |
8.5 Effects
8.5.1 Environment Effects
Environment effects can be used to create realistic listening experiences that mimic different environments. There are 27 available environment options that can be applied to music and other 2D sound sources.

| No Item Description | |
| 1 Default environments | There are four default environments available: Bathroom, Concert hall, Underwater, and Music Pub. |
| 2 More options | Clicking this button will apply the environment effect selected from the pull-down menu. 21 additional options are available in this menu. |
| 3 Environment size | Three size settings are available for each environment: Large, Medium, and Small. |
8.5.2 10-Band Equalizer
The equalizer can modify the audio output for different frequencies and can be used to compensate for deficiencies in your speakers/sound system. You can create custom settings in addition to the 12 default patterns available.

| No Item Description | |
| 1 Default equalizer options | There are 12 available equalizer patterns. Click an item to apply a pattern to audio playback. |
| 2 User Defined | You can click this button to apply a selected User Defined setting. |
| 3 Equalizer slider | Adjusts the gain for each band (30~16KHz) |
| 4 Save name | Type a name for your own “User Defined” equalizer setting in the text box. |
| 5 Add / save | Click the “+” button to add the defined parameters to the User Defined list as a preset. |
| 6 Delete | Click the “-” button to delete a saved preset from the User Defined list. |
8.6 FlexBass
FlexBass is an advanced bass management and enhancement mechanism that allows you to select each satellite speaker's type for optimal sound performance. It comes with an adjustable crossover frequency for the boundary of the bass signals. FlexBass will filter out the bass signals from small speaker channels and redirect them to the subwoofer or large speakers.

Standard speakers that cannot produce low frequencies are considered "Small" while wide-band speakers that can produce low frequencies are categorized as "Large."

| No Item Description | |
| 1 On/Off | Click this button to disable or enable all FlexBass functions. |
| 2 Small/Large speaker option | Select the speaker type connected to the Xonar U3 PLUS.If your speaker type cannot handle low-frequency signals (bass), select “Small” speaker type. Xonar U3 PLUS will filter out the bass signals and send them to the subwoofer channel. If the speakers support full-range signals, you can select the “Large” speaker type.**In most cases, low-cost desktop PC 2-channel speakers are small-type speakers. Refer to speaker’s specifications or consult your speaker vendor to identify correct speaker type. However, common 2.1 speakers with a subwoofer should be categorized as large speakers because the subwoofer can redirect the bass signals inside the two channels to the subwoofer speaker automatically. |
| 3. Picture for Small/Large speaker | Small/large speakers are identified by their colors:Orange: large speakersGreen: small speakers |
| 4 LFE Crossover Frequency | Adjusts the cut-off frequency (50~250Hz) for LFE (Low-Frequency Effects) signals. Xonar U3 PLUS will filter out bass signals below the crossover frequency from small speaker channels and forward them to the subwoofer. Higher crossover frequency values would result in reduced bass signals. |
8.7 Karaoke Main Settings

To start using the Karaoke features of the Xonar U3 PLUS, plug in your microphone and click the Karaoke tab in the Xonar U3 PLUS Audio Center. Click the Mixer option and select "microphone".

| No Item Description | |
| 1 Master Preset | The master preset lists multiple combinations of presets such as EQ, Compressor, Reverb, and so on. Click this dropdown box to select, save, or edit a master preset. |
| 2 Select all/Unselect all | Click this checkbox to select all or unselect all presets. |
| 3 Preset Checkbox | Click desired checkbox to apply a sound effect to playback audio. |
| 4 Preset | Click dropdown box to select presets or switch to Manual Mode. |
| 5 Advanced Setting | Click this button to access advanced controls and customize presets. |
| 6 Bypass | Click this button to temporarily disable all sound effects to compare audio before and after sound effects are applied. |
8.7.1 Advanced Settings

| No Item Description | |
| 1 Mix with Wave On | Select check box if you intend to record music audio with your voice. |
| 2 Software Monitoring (StereoMix) | Select check box to record the vocal only and it's possible to hear the background music. |
8.7.2 Master Preset
The Master Preset is a quick way to save your preset combinations.

| No Item Description | |
| 1 Master Preset | Click dropdown box to select, save, or edit a master preset. |
| 2 Save as | Select a combination of presets and clickSave asto create a new master preset. You may also choose to adjust settings for the current master preset. |
| 3 Edit Preset | Click edit to delete, rename, import, or export master preset. |
8.7.3 HPF/LPF
High Pass Filter affects frequency ranges below the set cutoff frequency. Low Pass Filter applies to frequency ranges above the set cutoff frequency.

| No Item Description | |
| 1 Preset | Click dropdown box to view current preset parameters or select Manual Mode to change parameters under the Advanced Settings Panel. |
| 2 Center Frequency | This slider determines cutoff frequency. Drag the slider or input specific values in the text box. |
8.7.4 Ducking
The DJ Mix effect (Ducking) conveniently gets music to duck under vocals. Create your own podcast professionally.

| No Item Description | |
| 1 Ratio (Music vs Mic) | The ratio that the background music automatically decreases when the microphone detects vocal. |
| 2 Threshold | Adjust this setting (in dB) as to when ducking function starts. |
| 3 Attack Time | The time that the ducking function starts after the microphone detects vocal. |
| 4 Release Time | The time that the volume of the background music returns to normal when the microphone stops detecting vocal. |
| 5 Fading Time | Adjusts the time that the background music will fade in or out. |
8.7.5 EQ

| No Item Description | |
| 1 Preset | Click the dropdown box to view current preset parameters or select Manual Mode to change parameters under the Advanced Settings Panel. |
| 2 Frequency Band | Drag the slider up or down to change the gain of each frequency band. |
8.7.6 Reverb
| No Item Description | |
| 1 Preset | Click the dropdown box to view current preset parameters or select Manual Mode to change parameters under the Advanced Settings Panel. |
| 2 Reverb | Intensity level of late reverberation |
| 3 Reverb Delay | Time limit between early reflection and late reverberation |
| 4 Reflections | Intensity level of early reflection |
| 5 Reflections Delay | Delay time of first reflection |
| 6 Decay Time | Reverbation decay time at low frequencies |
| 7 Decay Ratio | Ratio of high frequency delay time relative to low frequency delay time |
| 8 HF Reference | High frequency threshold reference point |
| 9 Diffusion | Echo density in late reverberation decay. High diffusion represents regular density with an evenly spread out signal. Low diffusion represents irregular and grainy sound. |
| 10 Density | Modal density in late reverberation decay. High density represents more natural sounding timber. Low density represents more hollow or “colored” space like the bathroom. |
| 11 Room | Intensity level for room effect |
| 12 Room HF | Attenuation at high frequencies relative to intensity and low frequencies. |
| 13 Room Rolloff Factor | Intensity of room effect adjusted by distance. |
8.8 Mixer
8.8.1 Playback Volume

| No Item Description | |
| 1 Playback Volume Tab | Click this button to show the playback volume page |
| 2 Volume Slider | Drag this slider down to decrease the volume; drag it up to increase the volume. The tool-tip displays percentage increments. |
| 3 Mute/Unmute button | Click this button to mute or unmute the audio channel. |
| 4 Source/Path Name | Left and Right volume controls for each speaker/channel |
| 5 Reset | Resets all volume controls to the default settings. |
8.8.2 Recording/Monitoring Volume
| No Item Description | |
| 1 Recording Volume Tab | Click this button to show the recording volume page. |
| 2 Recording volume slider | Drag this slider down to decrease the recording volume; drag up to increase the recording volume. The tool-tip displays the percentage increments. |
| 3 Recording Selector button | Click this button to select the path/source you are going to record. The recording function on Windows is a one-path selector. Only one default recording source can be used at a time. You may have to restart the recorder program if you switch to a different source.*Note: On Windows Vista and later OS, some application programs may allow you to select the recording device/ path in the recording programs themselves. |
| 4 Monitoring button | Click this button to monitor and loopback recording audio to output speakers. The recording volume will affect monitoring signals from speaker output. The audio will be mixed into the streams from your PC and all DGP effects will be applied to both the source and the output. |
| 5 Reset | Click to reset all volume controls to the default settings. |
8.9 Intensifier
The Xonar U3 PLUS provides powerful features for karaoke, including Key-Shifting and Vocal Cancellation. Key-Shifting can change the pitch of the karaoke background music. Vocal Cancellation can reduce the original vocals in songs while retaining the music and symphony for karaoke.

| No Item Description | |
| 1 On/Off | Click this button to disable or enable all functions on this page. |
| 2 Key-Shifting | This checkbox is used to enable or disable key shifting for music playback. This feature can adjust the pitch from 4 semitones below to 4 semitones above the audio level. |
| 3 Vocal Cancellation | This checkbox is used to enable or disable the vocal cancellation function. Voice cancellation levels can be adjusted from 0 to +100. A value of +100 will eliminate most original vocals. Default values are set to 50. |
| 4 Reset | Reset all settings to default. |
9. Troubleshooting and FAQs
[Troubleshooting]
The audio card driver could not be installed on my PC.
Instructions:
- Make sure that you have properly plugged Xonar U3 PLUS into a USB port.
- Check that the Windows hardware device manager has discovered a USB audio device. If no device is found, try scanning for new hardware or restart Windows.
- Remove Xonar U3 PLUS, plug it into another USB port, and try again.
I cannot find the Xonar U3 PLUS Audio Center
Instructions:
- Make sure you have installed the driver.
- Locate the Xonar U3 PLUS Audio Center icon in the system tray on the bottom right-hand corner of the screen. Double-click the icon to open the Xonar U3 PLUS Audio Center utility.

- If the icon could not be found in the system tray, go to the Windows Control Panel and double-click the "Xonar U3 PLUS Audio Center" icon to make it visible in the system tray again.
- After the driver installation is complete, it's recommended that you reboot your computer to complete the setup. If the icon still doesn't appear, please try installing the driver package again.
I cannot hear any sound from my analog speakers.
Instructions:
- Ensure that you have connected speakers properly and have powered on your speakers.
- Ensure that the device master volume or the software player has NOT been muted on the Xonar U3 PLUS Audio Center.
- If you are using Dolby Digital Live encoder through the S/PDIF output, the analog output will be muted to get rid of the interference between your digital speaker system and analog speakers or headphones. Please check if this is the case.
- Try restarting your Windows.
I cannot hear any sound from the S/PDIF output.
Instructions:
- Ensure that you have enabled S/PDIF output in the Audio Center GUI (Main page).
- Ensure that you are connecting the correct S/PDIF output jack on the card to the decoder's (AV receiver) S/PDIF input jack.
- You may need to select the correct input and mode of your decoder or AV receiver. For Dolby Digital Live, you may have to double check that the AV receiver is in that decoding mode.
I cannot hear audio input from my speakers
Instructions:
- Go to the mixer recording page in the Audio Center and select the correct input as the recording source. If you are using Windows Vista, also go to system audio control panel to see the current default recording/input device is right.
- Remember to turn on the digital monitoring button for that recording source.
[FAQ]
Q1: Does the Xonar U3 PLUS support Windows 7 / 8 / 8.1 / 10?
Answer:
Yes, the Xonar U3 PLUS driver package does support Windows 7 / 8 / 8.1 / 10 32/64-bit and most key features are available.
Q2: What is the most important benefit of the Xonar U3 PLUS for Karaoke users?
Answer:
- The Xonar U3 PLUS audio center supports various Karaoke functions, such as HP Filter, LP Filter, and much more.
- The Xonar U3 PLUS audio center supports the Ducking function. When the Ducking function is enabled, the volume of the background music decreases when a human voice is detected, and returns to normal when the human voice is gone.
- The Xonar U3 PLUS audio center supports the Software Monitoring function. When enabled, users can record their voices without background sound.
Q3: Will PCM sound output through S/PDIF be just 2 channels even with different analog output channels?
Answer:
The S/PDIF protocol specification (IEC-60958) can only carry 2-channel PCM data or non-PCM AC3/DTS data. So, when a user selects PCM output for S/PDIF, the Xonar sound card will always deliver 2-channel PCM data through the S/PDIF output port.


- COPYRIGHT © 2015 ASUSTEK COMPUTER INC. ALL RIGHTS RESERVED
- CONTENTS
- NOTICES
- FEDERAL COMMUNICATIONS COMMISSION STATEMENT
- CANADIAN DEPARTMENT OF COMMUNICATIONS STATEMENT
- AUSTRALIA STATEMENT NOTICE
- SAFETY INFORMATION
- TRADEMARKS
- LICENSE
- PACKAGE CONTENTS
- SYSTEM REQUIREMENTS
- SPECIFICATIONS SUMMARY
- CARD INSTALLATION
- DRIVER INSTALLATION
- HARDWARE INTRODUCTION
- CONNECTING SPEAKERS
- FOR ANALOG SPEAKERS
- SPEAKERS
- FOR DIGITAL SPEAKERS
- SPDIF OUT
- XONAR U3 PLUS AUDIO CENTER
- XONAR U3 PLUS AUDIO CENTER GUI
- XONAR U3 PLUS AUDIO CENTER ICON
- MUSIC MAIN SETTINGS
- MIXER/VOLUME
- PLAYBACK VOLUME
- RECORDING/MONITORING VOLUME
- EFFECTS
- ENVIRONMENT EFFECTS
- BAND EQUALIZER
- FLEXBASS
- KARAOKE MAIN SETTINGS
- ADVANCED SETTINGS
- MASTER PRESET
- HPF/LPF
- DUCKING
- EQ
- MIXER
- INTENSIFIER
- TROUBLESHOOTING AND FAQS
- [TROUBLESHOOTING]
- INSTRUCTIONS
- I CANNOT FIND THE XONAR U3 PLUS AUDIO CENTER
- I CANNOT HEAR ANY SOUND FROM MY ANALOG SPEAKERS
- I CANNOT HEAR ANY SOUND FROM THE S/PDIF OUTPUT
- I CANNOT HEAR AUDIO INPUT FROM MY SPEAKERS
- [FAQ]
- ANSWER
- Q3: WILL PCM SOUND OUTPUT THROUGH S/PDIF BE JUST 2 CHANNELS EVEN WITH DIFFERENT ANALOG OUTPUT CHANNELS
Brand : ASUS
Model : Xonar U3 Plus
Category : Soundcard