
the Kitchen Wizz Pro BFP80 - Food processor SAGE - Free user manual and instructions
Find the device manual for free the Kitchen Wizz Pro BFP80 SAGE in PDF.


| Brand | Sage |
| Model | The Kitchen Wizz Pro BFP80 |
| Product Type | Food Processor |
| Main Bowl Capacity | 15 cups (approx. 3.5 L) for dry ingredients |
| Motor Power | 1200 W |
| Power Supply | 220-240 V, 50/60 Hz |
| Speeds | On/Off and Pulse |
| Display | LCD screen with timer and countdown |
| Main Functions | Chop, mix, knead, slice, grate, julienne, whip, emulsify |
| Included Accessories | 4-blade system, dough blade, mini blade, julienne disc, french fry disc, reversible grater, adjustable slicer, whisk disc, mini bowl, large and small pushers, cleaning brush, spatula, storage box |
| Safety | Bowl and lid locking, overload protection system, non-slip feet, automatic shut-off in case of overheating |
| Care and Cleaning | Bowl, lid and accessories are dishwasher safe (top rack), wipe the motor base with a damp cloth |
| Warranty | Motor 30 years, parts 3 years |
| Cord Length | Approximately 1.2 m (estimate) |
| Weight | Approximately 5 kg (estimate) |
Frequently Asked Questions - the Kitchen Wizz Pro BFP80 SAGE
User questions about the Kitchen Wizz Pro BFP80 SAGE
0 question about this device. Answer the ones you know or ask your own.
Ask a new question about this device
Download the instructions for your Food processor in PDF format for free! Find your manual the Kitchen Wizz Pro BFP80 - SAGE and take your electronic device back in hand. On this page are published all the documents necessary for the use of your device. the Kitchen Wizz Pro BFP80 by SAGE.
USER MANUAL the Kitchen Wizz Pro BFP80 SAGE
the Kitchen Wizz Pro™
BFP800/SFP800
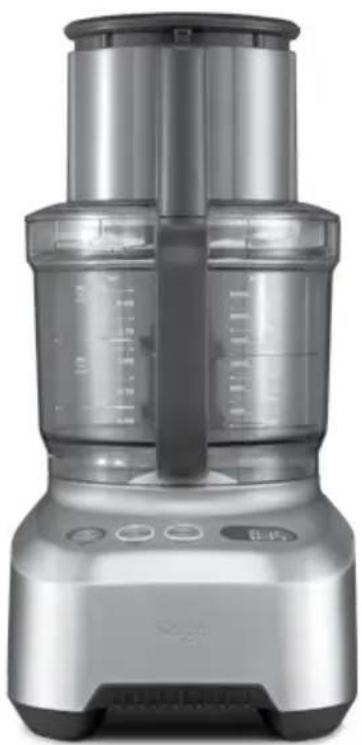
natural_image
Exterior view of a modern kitchen blender with control buttons and a clear glass interior (no visible text or symbols)EN QUICK GUIDE
DE KURZANLEITUNG
FR GUIDE RAPIDE
NL SNELSTARTGIDS
IT GUIDA RAPIDA
ES GUÍA RÁPIDA
PT MANUAL RÁPIDO
Sage®
CONTENTS
2 Sage® Recommends Safety First
6 Components
8 Assembly
10 Food Processing Guide
14 Care, Cleaning & Storage
15 Troubleshooting
17 Guarantee
SAGE® RECOMMENDS SAFETY FIRST
At Sage® we are very safety conscious. We design and manufacture consumer products with the safety of you, our valued customer, foremost in mind. In addition, we ask that you exercise a degree of care when using any electrical appliance and adhere to the following precautions.
IMPORTANT SAFEGUARDS
READ ALL INSTRUCTIONS BEFORE USE AND SAVE FOR FUTURE REFERENCE
- A downloadable version of this document is also available at sageappliances.com
-
Before using for the first time ensure your electricity supply is the same as shown on the label on the underside of the appliance.
-
Remove and safely discard any packaging materials before first use.
- To eliminate a choking hazard for young children, safely discard the protective cover fitted to the power plug.
- This appliance is for household use only. Do not use the appliance for anything other than its intended use. Do not use in moving vehicles or boats. Do not use outdoors. Misuse may cause injury.
- Fully unwind the power cord before operating.
- Position the appliance on a stable, heat resistant, level, dry surface away from the edge and do not operate on or near a heat source such as a hot plate, oven or gas hob.
- Vibration during operation may cause the appliance to move.
- Do not let the power cord hang over the edge of a bench or table, touch hot surfaces or become knotted.
- This appliance shall not be used by children.
- Always disconnect the appliance from the supply if it is left unattended and before assembling, disassembling or cleaning.
• Children should not play with the appliance. - Cleaning of the appliance and user maintenance should not be carried out by children unless they are 8 years or older and supervised.
SAGE® RECOMMENDS SAFETY FIRST
- Keep the appliance and its cord out of reach of children.
- The appliance can be used by persons with reduced physical or mental capabilities or a lack of experience and knowledge, only if they have been given supervision or instruction concerning use of the appliance in a safe way and understand the hazards involved.
- Do not use the appliance if the power cord, plug, or appliance becomes damaged in any way. If damaged and maintenance other than cleaning is required, please contact Sage Customer Service or go to sageappliances.com
- Any maintenance other than cleaning should be performed by an authorised Sage® service centre.
- The installation of a residual current safety switch is recommended to provide additional safety when using all electrical appliances. Safety switches with a rated operating current not more than 30mA are recommended. Consult an electrician for professional advice.
-
Always ensure the appliance is properly assembled as per instructed before use. Use the appliance without properly assembled may cause product malfunction, product damage or pose safety risk including personal injury.
-
Do not use the food processor on slippery, unstable or uneven surfaces such as a sink drain board.
- Keep hands, fingers, hair, clothing as well as spatulas and other utensils away from moving or rotating parts during operation.
- Do not use the appliance for anything other than food and/or beverage preparation.
- In order to avoid the possible hazard of the appliance starting by itself due to inadvertent resetting of the overload protection, do not attach an external switching device (such as a timer) or connect the appliance to a circuit that can regularly switch the appliance on and off.
- Keep the appliance clean. Follow the cleaning instructions provided in this book.
- This appliance is for household use only. Do not use this appliance for anything other than its intended use. Do not use in moving vehicles or boats. Do not use outdoors. Misuse may cause injury.
-
Never use attachments or accessories that are not supplied with this product or authorised by Sage® to be used on this product. Failing to follow this instruction may cause product malfunction, product damage or even pose safety risk.
-
For optional accessories authorised by Sage® to be used on this product, please read all instructions supplied with the accessory in conjunction with the instructions contained in this booklet
- Care should be taken when removing the food from the processing bowl by ensuring the motor, Quad™ blade, dough blade or disc, have completely stopped before disassembling. Ensure the OFF button has been pressed to switch the motor off; the appliance is switched off at the power outlet and unplugged, before removing the lid from the bowl. The processing bowl should then be unlocked from the motor body and the Quad™ blade, dough blade or discs carefully removed before attempting to remove the processed food.
- Do not process hot or boiling liquids - allow liquids to cool before placing into the processing bowl. Hot liquid can be ejected to cause injury due to sudden steaming.
-
Ensure the OFF button has been pressed, and the food processor is switched off at the power outlet and unplugged before attaching the Quad™ blade, dough blade, disc or processing lid.
-
To avoid possible malfunction of the processing bowl's auto switch, do not place the processing lid in the locked position when the appliance is not in use
- Do not place hands or fingers in the bowl of the food processor unless the motor, Quad™ blade, dough blade or discs have come to a complete stop.
- The processing blades and discs are extremely sharp, handle with care at all times. Avoid contact with moving parts during operation. Keep hands, hair, clothing, spatulas and other utensils out of food processor feed chute to prevent personal injury or damage to the mixer. Always use the food pusher to push the food down the feed chute.
- Handle the food processor and attachments with care – remember the blades and discs are razor-sharp and should be kept out of reach of children.
- Care should be taken when handling the sharp cutting blades, emptying the bowl and during cleaning.
- Do not fill bowl above marked liquid levels or 15 cups dry level (shredding). Always add drier or thicker ingredients to the processing bowl prior to adding fluids.
SAGE® RECOMMENDS SAFETY FIRST
- Never remove the lid while the processor is operating. Always use the POWER/OFF button to stop the machine before removing the lid.
- Do not place the food processor near the edge of a bench or table during operation. Ensure the surface is level, clean and free of water, flour, etc.
- Do not place any part of the food processor in the microwave oven.
- Do not leave the food processor unattended when in use.
- Do not move the food processor whilst in operation.
- Do not use attachments other than those provided with the food processor.
- Do not attempt to operate the food processor by any method other than those described in this booklet.
- Do not push food into the feed chute with your fingers or other utensils. Always use the food pusher provided.
• Always operate the food processor with the processing lid securely in position. -
Always secure the processing bowl onto the motor base before attaching the Quad™ blade, dough blade or discs.
-
Please do not crush ice in the large or small processing bowls. This will cause damage to the blades (Quad™ or mini blade). We recommend that you use a blender for ice crushing.
- When mixing yeast dough, the operating time of the food processor should not longer than 30 seconds. Allow the appliance to cool down before next use.
- Some stiff mixtures, such as dough, may cause the processing blade to rotate more slowly than normal. If this happens, do not process for longer than 30 seconds.
The symbol shown indicates that this appliance should not be disposed of in normal household waste. It should be taken to a local authority waste collection centre designated for this purpose or to a dealer providing this service. For more information, please contact your local council office.

To protect against electric shock, do not immerse the power plug, cord orance in water or any liquid.
SAVE THESE INSTRUCTIONS
COMPONENTS


natural_image
Circular mechanical component with a central shaft and gear-like end, labeled 'N' in the top-left corner (no other text or symbols)
natural_image
Circular object with a black cylindrical component and a curved line, labeled 'Q' in the top-left corner (no other text or symbols)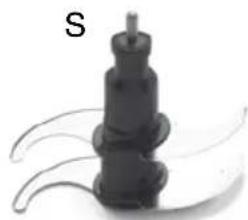
natural_image
Close-up of a mechanical component with a cylindrical shaft and curved blades, labeled 'S' in the top-left corner (no other text or symbols visible)
natural_image
Black mechanical component with curved ends and a small protrusion, labeled 'T' in the top-left corner (no other text or symbols)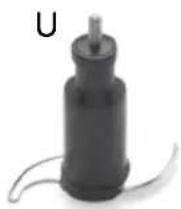

natural_image
Close-up of a mechanical component with a circular frame and textured surface (no visible text or symbols)
natural_image
Mechanical component with a circular base and central shaft, no visible text or symbols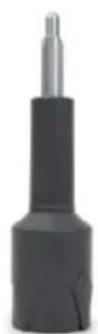

natural_image
Close-up of a transparent electronic device with three cylindrical components and a curved top component (no visible text or symbols)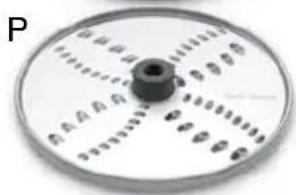
natural_image
Circular mechanical dial with evenly spaced teeth and a central knob (no text or symbols visible)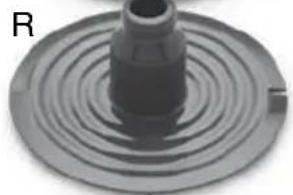
natural_image
Close-up of a mechanical component with concentric circular grooves and a central shaft (no visible text or symbols)COMPONENTS
A. Small Food Pusher
B. Large Food Pusher
C. Extra Wide Feed Chute
D. Processing Lid
E. PULSE Button
F. POWER / OFF Button
G. Feed Chute Safety System
H. Silicone Seal
I. Processing Bowl With Handle
J. Count Up & Count Down Timer
K. LCD Display
L. Direct Drive Motor Base
M. Non-skid Rubber Feet
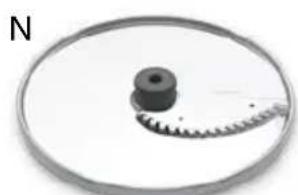
N. Julienne Disc
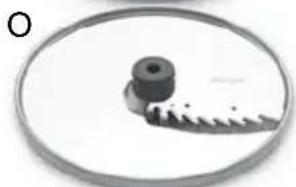
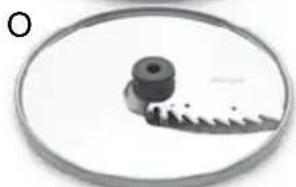
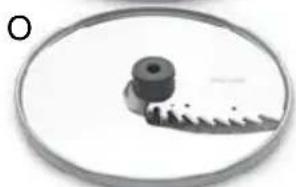
O. Chip Cutter
P. Reversible Shredder
Q. Adjustable Slicer
R. Whisk / Emulsifying Disc
S. 4 Blade Processor
T. Dough Blade
U. Mini Processing Blade
V. Disc Spindle
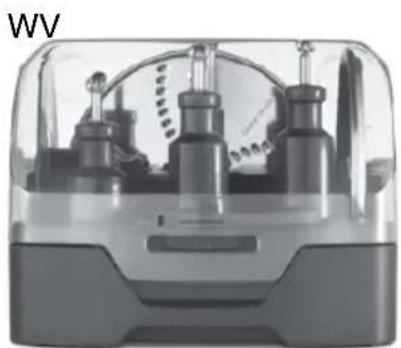
W. Storage Container with Lid
NOT SHOWN
Cleaning Brush
Plastic Spatula
Mini Processing bowl
Cord Storage
Sage ® Assist Plug
ASSEMBLY
BEFORE FIRST USE
Before using your Sage® food processor, become familiar with all the parts. Remove all packaging materials and promotional labels, being careful when handling the processing blades and discs as they are very sharp. Wash the processing bowl, processing lid and other attachments in warm, soapy water. Rinse and dry thoroughly. (Refer to cleaning, care and storage section).
- Place the motor base on a dry, level work surface. Place the processing bowl on to the motor base with the handle in line with the ALIGN HANDLE graphic on the motor base.

natural_image
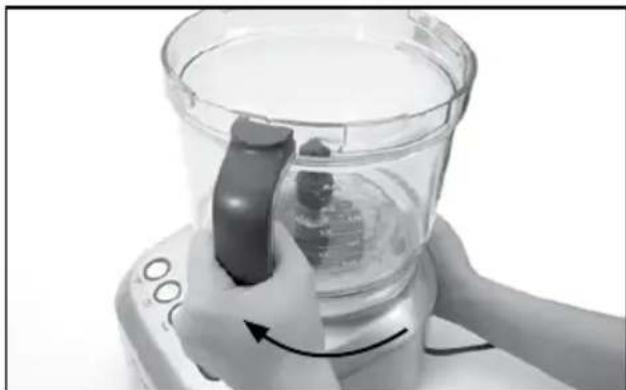
Hand operating a clear omelet on a digital kitchen saucer (no visible text or symbols)- Turn the processing bowl clockwise until the handle aligns with the TURN TO LOCK graphic. The processing bowl should be securely locked into position.
natural_image
Close-up of a hand holding a kitchen appliance with a brush, showing liquid and a small container (no text or symbols visible)- If using a disc, first assemble the disc spindle onto the bowl drive coupling. Orientate the disc so that the side you wish to use is facing upwards. Hold the disc by the centre plastic moulding and position the central hole above the attachment spindle. Push down firmly until fitted correctly. (Please note that these discs only fit the larger processing bowl).

natural_image
Hand placing a small object into a kitchen blender with a downward arrow indicating action (no text or symbols visible)- For using the processing blades, carefully grasp either the 4 blade processor, dough blade or mini processing blade using the central plastic support and position it over the bowl drive coupling and push down until inserted correctly. If using the mini processing blade, ensure the mini processing bowl is assembled into the main bowl first.

natural_image
Close-up of a kitchen blender with a black tool inserted, showing liquid and control buttons (no text or symbols visible)ASSEMBLY
- Place the processing lid onto the processing bowl so the feed chute is slightly right of the bowl handle and the arrow graphics are aligned HOLDING the feed chute and pressing down firmly at the same time, turn the lid clockwise (as indicated by the graphic) so the 'Locking Tab' on the lid slots into the 'Interlocking Safety Catch' on the handle. The lid should be securely locked into position.

natural_image
Hand operating a kitchen blender with a hand holding the lid and blade (no text or symbols visible)NOTE
The food processor will not operate unless both the processing bowl and lid are correctly locked into position.

CAUTION
The processing blade (including the mini bowl blade) and discs are extremely sharp, handle with care at all times.
- Insert the power plug into a 220–240 volt power outlet and switch the power outlet on.
- At the end of processing, always wait until the blades or discs have stopped spinning before unlocking and removing the lid. To remove the processing lid, ensure the POWER / OFF button has been pressed, the power is switched off at the power outlet and the cord is unplugged from the power outlet. Holding the feed chute and pressing down firmly at the same time, turn the lid anti-clockwise so that the arrow graphics are no longer aligned.
- Remove the processing bowl (before removing blade or discs) by turning it anti-clockwise until the handle is in line with the ALIGN HANDLE. Lift the bowl off the motor shaft. When removing the discs – carefully remove by gripping the plastic hub on the centre of the disc and lifting the disc up and away from the pin on the spindle.
OVERLOAD PROTECTION SYSTEM
If the motor overloads, the food processor will go to STANDBY mode and OVERLOAD icon in the LCD starts to flash. The food processor can still be switched off by pressing the POWER / OFF button. To operate the food processor again, allow the machine to cool for approx 30 minutes.
Some stiff mixtures, such as dough, may cause the dough blade to rotate more slowly than normal. If this happens, do not process for longer than 1 minute.
NOTE
The food processor is very powerful and recommended using PULSE function where possible as to avoid over chopping or whipping.
| FOOD BLADE TYPE (DOUGH/4 BLADE PROCESSOR/MINI) | ADJUSTABLE SLICING BLADE THICKNESS | RECOMMENDED DISC TYPE (CHIP/SHRED/JULIENNE/WHISK) | |
| Avocado 4 blade | processor or miniUse: Guacamole | 2-5 | |
| Asparagus (cooked) | 4 blade processor or miniUse: Asparagus Dip | ||
| Beetroot 2-5 Shredding Use: | Salad | ||
| Broccoli (cooked) | 4 blade processorUse: Broccoli Soup | ||
| Cabbage Thin 1-2 and med 2-3 | Use: Accompaniment | Shredding Use: Salad | |
| Carrot 4 blade processor or miniUse: Vegetable Soup | 0-5 Shredding Use: | Salad | |
| Cauliflower (cooked) | 4 blade processor or miniUse: Cauliflower Soup | ||
| Celery 4 blade processor or miniUse: Vegetable Soup | Thin 1-2 med 2-3Use: Salad | ||
| Chilli 4 blade processor or miniUse: Seasoning | |||
| Aubergine 4 blade | processor or miniUse: Accompaniment, soups | 2-5Use: Grilled aubergine | Shred or Julienne Use: Accompaniment to dishes |
| Garlic 4 blade processor or miniUse: Seasoning | |||
| Ginger | 4 blade processor or miniUse: Seasoning | ||
| Herbs | 4 blade processor or miniUse: Seasoning pesto | ||
| Leeks | 4 blade processor or miniUse: Cooked for soups | 2-5Use: Vegetable Soup | |
| Lettuce | 2-4Use: Salad | ||
FOOD PROCESSING GUIDE
| FOOD BLADE TYPE (DOUGH/4 BLADE PROCESSOR/MINI) | ADJUSTABLE SLICING BLADE THICKNESS | RECOMMENDED DISC TYPE (CHIP/SHRED/JULIENNE/WHISK) | |
| Mushrooms (raw) | 4 blade processor or mini Use: Vegetable Soup | 4-6 Use: Salad, vegetable soup, mushroom sauce, mushroom soup" | |
| Mushrooms (cooked) | 4 blade processor Use: Mushroom Soup | 4-6 Use: Salad, vegetable soup, mushroom sauce, mushroom soup | |
| Onion 4 blade processor or mini Use: Soups, Sauces | 0-5 Use: Salad | ||
| Parsnip 4 blade processor or mini Use: Vegetable soup | 2-5 Use: Vegetable lasagna | ||
| Parsnip (cooked) | 4 blade processor Use: Accompaniment | ||
| Peas (cooked) | 4 blade processor or mini Use: Accompaniment, baby food | ||
| Potatoes 0.5-6 | Use: Potato bake | Chip / Julienne / Shredder Use: Chips | |
| Potatoes (cooked) | 4 blade processor or mini Use: Mash potato, Skordallia | ||
| Spinach 4 blade processor or mini Use: Accompaniment | |||
| Spinach (cooked) | 4 blade processor or mini Use: Creamed spinach | ||
| Swede 4 blade processor or mini Use: Vegetable Soup, creamed swede | |||
| Tomatoes 4 blade processor or mini Use: Salsa | 2-5 Use: sandwich filling, Tomato Bocconcini Salad, tomato relish | ||
| Courgette 3-6 | Use: Accompaniment, courgette slice, gratin | Shredder – Coarse or fine Use: Salad, Frittata | |
| Apple 4 blade processor or mini Use: Apple sauce | 2-5 Use: Apple galette | ||
| Apple (cooked) | 4 blade processor or mini Use: Baby food | 4-6 Use: Fruit Salad | |
| Banana | 4 blade processor or mini Use: Dessert sauces | ||
FOOD PROCESSING GUIDE
| FOOD BLADE TYPE (DOUGH/4 BLADE PROCESSOR/MINI) | ADJUSTABLE SLICING BLADE THICKNESS | RECOMMENDED DISC TYPE (CHIP/SHRED/JULIENNE/WHISK) | |
| Berries 4 blade processor or mini Use: Fruit salad | |||
| Citrus Fruit 4 blade processor or mini Use: Fruit mince | |||
| Citrus Peel 4 blade processor or mini Use: Fruit mince | |||
| Dried Fruit 4 blade processor or mini Use: Fruit salad, dessert sauce | |||
| Kiwi fruit 4 blade processor or mini Use: Fruit salad, dessert sauce | 4-6 Use: Dessert decoration | ||
| Mango 4 blade processor or mini Use: Fruit salad, dessert sauce | |||
| Melon (Honeydew / rockmelon) | 4 blade processor or mini Use: Fruit salad | ||
| Pear 4 blade processor or mini Use: Fruit salad | 4-6 Use: Pear pie | ||
| Pear (cooked) 4 blade processor or mini Use: Baby food | |||
| Pineapple 4 blade processor or mini Use: Fruit salad | |||
| Stone Fruit (Apricot, nectarine, peach, plum) | 4 blade processor or mini Use: Fruit salad, dessert sauce | ||
| Strawberries 4 blade processor or mini Use: Fruit salad, dessert sauce | |||
| Batters Dough | Use: Cakes, crepes | Whisk Use: cakes, muffins, crepes | |
| Breadcrumbs 4 blade processor or mini Use: Coatings, breadcrumb stuffing | |||
| Cheese Shredder | - Coarse | or Fine Use: Grated Cheese | |
FOOD PROCESSING GUIDE
| FOOD BLADE TYPE (DOUGH/4 BLADE PROCESSOR/MINI) | ADJUSTABLE SLICING BLADE THICKNESS | RECOMMENDED DISC TYPE (CHIP/SHRED/JULIENNE/WHISK) | |
| Chocolate 4 blade | processor or miniUse: Chocolate Ganache | Shredder – Coarse or FineUse: Dessert decoration | |
| Cream Cheese 4 | blade processor or miniUse: Dips, cheese cake | ||
| Doughs Dough | Use: Pastry, scones, bread | ||
| Egg Whites use PULSE function | WhiskUse: Egg foams (not recommended for meringue, pavlova) | ||
| Eggs (hard boiled) | 4 blade processor or miniUse: Sandwich filling | 2–5Use: sandwich filling | |
| Eggs (whole or yolks) use PULSE function | WhiskUse: Mayonnaise | ||
| Cream use PULSE function | WhiskUse: recommended PULSE function to avoid over whipping | ||
| Milkshakes and smoothies | 4 blade processorUse: recommend using PULSE function | ||
| Meat (raw) use PULSE function | 4 blade processorUse: Mince meatloaf, burgers | ||
| Meat (cooked) use PULSE function | 4 blade processorUse: Sandwich fillings, pate, baby food | ||
| Meat (deli) 1–6 | Use: Sandwiches, antipasto, pizza toppings | ||
CARE AND CLEANING
When finished processing, switch the food processor off at the power outlet and unplug the power cord.
Motor base
Wipe the motor base with a clean, damp cloth after each use. Dry thoroughly with a soft, clean cloth.
Processing bowl, lid and food pusher
Hand wash in hot, soapy water using a mild detergent. Do not use a scourer or abrasive cleaners as they will scratch the plastic surface. The plastic parts may occasionally be washed in the dishwasher (top shelf only). It is not recommended on a regular basis, as prolonged exposure to hot water temperatures and harsh detergents will damage and shorten the life of the plastic.
NOTE
Do not place food pusher in the dishwasher as the heat may deform it.
Processing 4 blade processor, dough blade and discs
Hand wash the bowl and lid. Use the cleaning brush accessory to scrub stubborn foods off the blades and discs. The handle end of the brush is designed for scraping.
To avoid accidental cuts, do not leave 4 blade processor or discs to soak in sudsy water. The 4 blade processor, dough blade, discs and spindle can also be washed in the dishwasher (top shelf only).
NOTE
The 4 blade processor cover can be assembled onto the 4 blade processor while it is placed in the dishwasher for added safety.
WARNING
The 4 blade processor, mini and adjustable processing blades and discs are extremely sharp, handle with care at all times.
Never immerse the motor base, power cord or power plug in water or any other liquid.
Never store your food processor with the bowl fixed and lid locked into position. Doing so will cause unnecessary strain on the auto operating switch on the handle of the processing bowl and the automatic safety switch on the motor base.
Do not put any part of the food processor in the microwave oven.
TROUBLESHOOTING
| PROBLEM EASY SOLUTION | |
| Food is unevenly processed | Ingredients should be cut evenly into 2.5cm pieces before processing.Ingredients should be processed in batches to avoid overloading. |
| Slices are slanted or uneven | Load food in feed chute. Place pusher onto food and apply pressure. Then press start. |
| Food falls over in the feed chute | The large feed chute must be packed full for best results.If processing smaller quantities, use the small feed chute. |
| Chipper disk | Always clear any blocked potato from the chipper disc before processing more potatoes. |
| Some food remains on the disc after processing | It is normal for small pieces to remain after processing. |
| Motor slows down when mixing dough | Amount of dough may exceed maximum capacity.Remove half and process in two batches.Dough may be too wet (see next page). If motor speeds up, continue processing. If not, add more flour, 1 tablespoon at a time until the motor speeds up. Process until dough cleans the side of the processing bowl. |
| Motor slow to start with the 4 blade processor | The amount of meat may have exceed the maximum capacity.Refer to the Instruction Booklet for maximum quantities.Remove the meat and process in two batches.Note that for best results trim the meat of fat before processing. |
| The motor does not start | There is a safety interlock switch to prevent the motor from starting if it is not properly assembled. Make sure the processing bowl, lid and the pusher are securely locked into position.If you are slicing or shredding and the above solution does not work, make sure that the food contents in the feed chute are cut below the maximum fill line so that the activation rod can engage the motor.If the motor still will not start, check the power cord and power outlet. |
TROUBLESHOOTING
| PROBLEM EASY SOLUTION | |
| The food processor shuts off during operation | · The lid may have become unlocked, check to make sure it is securely in position.· If the motor overloads, the ‘OVERLOAD’ icon in the LCD will start to flash. Switch off by pressing the POWER / OFF button and unplug the power cord. Allow the food processor to cool for 20–30 minutes before resuming. |
| The motor slowed down during operation | · This is normal as some heavier loads may require the motor to work harder. Reposition the food in the feed chute and continue processing.· The maximum load capacity may have been exceeded. Refer to the Instruction Booklet for maximum quantities. Remove some of the ingredients and continue processing. |
| The food processor vibrates/moves during processing | · Make sure the rubber feet at the bottom of the unit are clean and dry. Also make sure that the maximum load capacity is not being exceeded. |
| Dough doesn’t fully incorporate ingredients | · When kneading dough, always start the food processor before adding liquid. Add liquid in a slow, steady stream, allowing the dry ingredients to absorb it. If too much liquid is added, wait until ingredients in the processing bowl have mixed, then add remaining liquid slowly (do not turn off the machine). Pour liquid onto the dough as it passes under the feed chute opening, do not pour liquid directly onto the bottom of the processing bowl. |
| Dough feels tough after kneading | · Divide dough into 2 or 3 pieces and redistribute evenly in processing bowl. Process 10 seconds or until uniformly soft and pliable. |
| Dough is too dry | · While machine is running, add water through the small feed chute, 1 tablespoon at a time until dough cleans the inside of the processing bowl. |
| Dough is too wet | · While machine is running, add flour through the small feed chute, 1 tablespoon at a time until dough cleans the inside of the processing bowl. |
GUARANTEE
3 YEAR LIMITED GUARANTEE AND 30 YEAR LIMITED MOTOR GUARANTEE
Sage Appliances guarantees this product for domestic use in specified territories for 3 years for all parts of the product and 30 years for the product's motor from the date of purchase against defects caused by faulty workmanship and materials. During this guarantee period Sage Appliances will repair, replace, or refund any defective product (at the sole discretion of Sage Appliances).
All legal warranty rights under applicable national legislation will be respected and will not be impaired by our guarantee. For full terms and conditions on the guarantee, as well as instructions on how to make a claim, please visit www.sageappliances.com.
INHALTE

natural_image
Three circular diagrams labeled N, O, and P showing mechanical components with no visible text or symbols.
natural_image
Three views of a mechanical device with labeled parts (Q, R, and a small cylindrical component), no readable text or symbols present.
natural_image
Two black mechanical components with metallic tips, one labeled 'S' and the other marked 'V', shown without any text or symbols.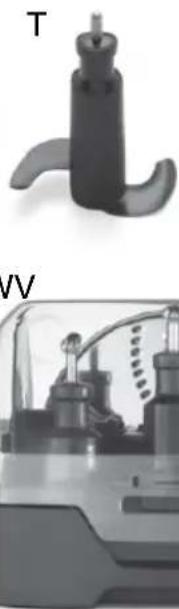
natural_image
Two grayscale images: top shows a mechanical component labeled 'T', bottom shows a close-up of a mechanical assembly (no visible text or symbols)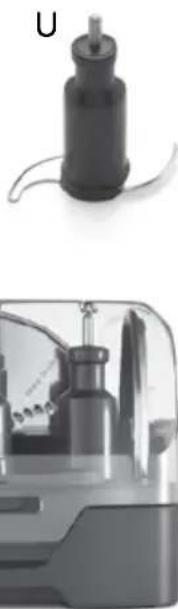
natural_image
Two grayscale images: top shows a cylindrical device with a screw, bottom shows a close-up of a mechanical component (no visible text or symbols)KOMPONENTEN
natural_image
Hand operating a clear glass omelet on a digital kitchen stand (no visible text or symbols)natural_image
Close-up of a hand using a kitchen blender with a brush, showing liquid and a small container (no text or symbols visible)natural_image
Hand placing a small object into a kitchen blender with a downward arrow indicating action (no text or symbols visible)natural_image
Close-up of a kitchen blender with a brush applying liquid, showing a downward arrow (no text or symbols visible)natural_image
Hand operating a kitchen blender with a hand holding the lid and blade (no text or symbols visible)HINWEIS
natural_image
Exterior view of a modern stainless steel robotic mixer (no visible text or symbols)
GUIDE RAPIDE
Sage®
TABLE DES MATIÈRES

natural_image
Circular object with a central hole and a chain of teeth, labeled 'N' in the top-left corner (no other text or symbols)
natural_image
Circular object with a central knob and a curved line, labeled 'Q' in the top-left corner (no other text or symbols)
natural_image
Close-up of a mechanical component with a cylindrical shaft and flanged base, no visible text or symbols
natural_image
Close-up of a black mechanical component with curved ends and a small protrusion (no visible text or symbols)

natural_image
Close-up of a mechanical component with a circular frame and textured surface (no visible text or symbols)
natural_image
Mechanical component with a central cylindrical shaft and flange, enclosed in a circular frame (no text or symbols visible)

natural_image
Close-up of a mechanical device with three cylindrical components and a transparent casing (no visible text or symbols)
natural_image
Close-up of a circular mechanical dial with evenly spaced teeth and a central knob (no visible text or symbols)
natural_image
Circular mechanical component with concentric rings and a central shaft (no visible text or symbols)COMPOSANTS
natural_image
Hand operating a clear glass coffee maker on a digital kitchen stand (no visible text or symbols)natural_image
Close-up of a hand holding a transparent kitchen blender with a black plastic lid, rotating around its side (no text or symbols visible)natural_image
Hand pouring liquid into a plastic container with a handle (no text or symbols visible)natural_image
Hand pouring liquid into a blender with a vertical arrow indicating motion (no text or symbols)ASSEMBLAGE
natural_image
Hand pressing a cylindrical container with arrows indicating motion (no text or symbols visible)REMARQUE
natural_image
Exterior view of a modern stainless steel robotic mixer (no visible text or symbols)
SNELSTARTGIDS
Sage®
INHOUD
natural_image
Circular mechanical component with a central gear-like shaft and a circular base, labeled 'N' in the top-left corner (no other text or symbols)
natural_image
Circular object with a central knob and a curved line, labeled 'Q' in the top-left corner (no other text or symbols)
natural_image
Close-up of a mechanical component with curved blades and a central shaft (no visible text or symbols)
natural_image
Close-up of a black mechanical component with curved ends and a small protrusion (no visible text or symbols)
natural_image
Close-up of a mechanical component with a circular frame and textured surface (no visible text or symbols)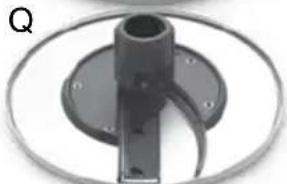
natural_image
Mechanical component with a circular ring and central shaft, no visible text or symbols

natural_image
Close-up of a mechanical device with multiple cylindrical components and a transparent casing (no visible text or symbols)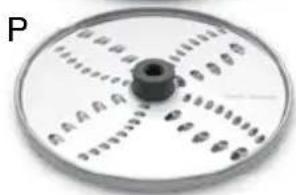
natural_image
Circular mechanical component with evenly spaced holes and a central knob (no visible text or symbols)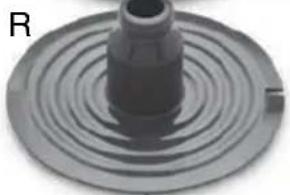
natural_image
Circular mechanical component with concentric rings and a central shaft (no visible text or symbols)ONDERDELEN
natural_image
Hand operating a clear glass coffee maker on a kitchen stand (no visible text or symbols)natural_image
Close-up of a hand holding a small container with liquid, being heated by an appliance on a digital kitchen scale (no visible text or symbols)natural_image
Hand pouring liquid into a container with a submerged object, no text or symbols visiblenatural_image
Hand pouring liquid into a blender with a downward arrow indicating motion (no text or symbols)MONTAGE
natural_image
Hand operating a kitchen blender with a hand holding the lid and arrow indicating rotation (no text or symbols visible)OPMERKING
natural_image
Exterior view of a modern stainless steel robotic mixer (no visible text or symbols)
GUIDA RAPIDA
Sage®
SOMMARIO

natural_image
Circular object with a central hole and a chain of teeth, labeled 'N' in the top-left corner (no other text or symbols)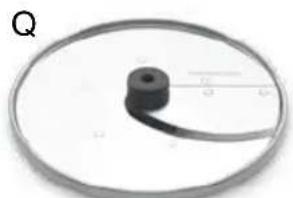
natural_image
Circular object with a black cylindrical component and a curved line, labeled 'Q' in the top-left corner (no other text or symbols)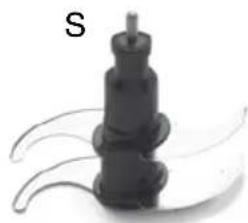
natural_image
Close-up of a mechanical component with curved blades and a central shaft (no visible text or symbols)
natural_image
Close-up of a black mechanical component with curved ends and a small protrusion (no visible text or symbols)
natural_image
Close-up of a mechanical component with a circular frame and textured surface (no visible text or symbols)
natural_image
Mechanical component with a central cylindrical shaft and flange, enclosed in a circular frame (no text or symbols visible)

natural_image
Close-up of a transparent electronic device with three cylindrical components and a curved top component (no visible text or symbols)
natural_image
Close-up of a circular mechanical dial with evenly spaced teeth and a central knob (no visible text or symbols)
natural_image
Circular mechanical component with concentric rings and a central shaft (no visible text or symbols)COMPONENTI
natural_image
Hand operating a clear water heater with control panel (no visible text or symbols)natural_image
Close-up of a kitchen appliance being heated by a hand, showing liquid and a small container (no text or symbols visible)natural_image
Hand pouring liquid into a clear container with a submerged object (no text or symbols visible)natural_image
Hand pouring liquid into a blender with a downward arrow indicating motion (no text or symbols)MONTAGGIO
natural_image
Hand holding a kitchen blender with a black arrow indicating rotation (no text or symbols visible)NOTA
natural_image
Exterior view of a modern stainless steel Bovinger blender with control panel and digital display (no visible text or symbols)
GUÍA RÁPIDA
Sage®
ÍNDICE

natural_image
Circular object with a central hole and a chain of teeth, labeled 'N' in the top-left corner (no other text or symbols)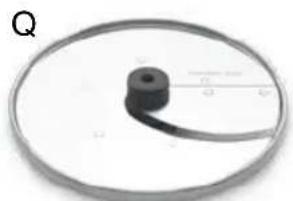
natural_image
Circular object with a central black cylindrical component and a curved line, labeled 'Q' in the top-left corner (no other text or symbols)
natural_image
Close-up of a cylindrical mechanical component with a protruding rod, possibly a motor or sensor device (no visible text or symbols)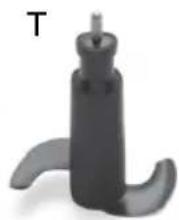
natural_image
Black mechanical component with curved ends and a small protrusion, labeled 'T' in the top-left corner (no other text or symbols)
natural_image
Close-up of a mechanical component with a circular frame and textured surface (no visible text or symbols)
natural_image
Mechanical component with a circular base and central shaft, no visible text or symbols
natural_image
Close-up of a transparent electronic device with three cylindrical components and a curved top component (no visible text or symbols)
natural_image
Circular mechanical dial with evenly spaced teeth and a central knob (no text or symbols visible)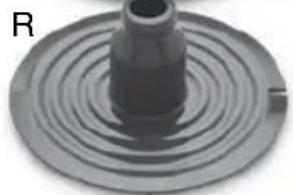
natural_image
Close-up of a mechanical component with concentric circular grooves and a central cylindrical shaft (no visible text or symbols)COMPONENTES
natural_image
Hand operating a clear water heater on a digital kitchen scale (no text or symbols visible)natural_image
Close-up of a hand holding a kitchen appliance with a brush, showing liquid and a small container (no text or symbols visible)natural_image
Hand placing a small object into a kitchen blender with a downward arrow indicating action (no text or symbols visible)natural_image
Close-up of a kitchen blender with a hand holding a pipette, showing liquid level and control buttons (no text or symbols visible)ENSAMBLAJE
natural_image
Hand operating a kitchen blender with a hand holding the lid and blade (no text or symbols visible)NOTA
natural_image
Exterior view of a modern stainless steel robotic mixer (no visible text or symbols)PT
MANUAL RÁPIDO
Sage®
2ASage ® recomenda a segurança como máxima prioridade

natural_image
Three circular diagrams labeled N, O, and P showing mechanical components with no visible text or symbols.
natural_image
Three views of a mechanical device with labeled parts (Q, R, and a small component), no readable text or symbols present.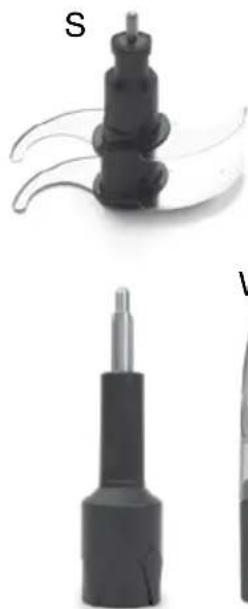
natural_image
Two black mechanical components with metallic tips, one labeled 'S' and the other marked 'V', shown without any text or symbols.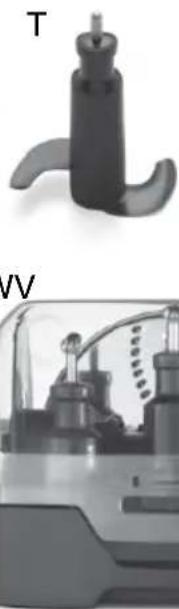
natural_image
Two grayscale images: top shows a mechanical component labeled 'T', bottom shows a close-up of a device with internal components (no visible text or symbols)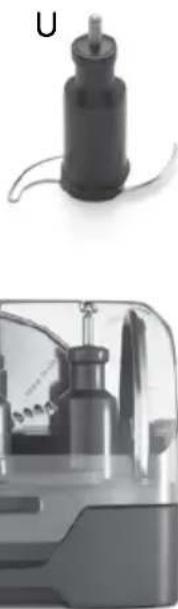
natural_image
Two grayscale images: top shows a cylindrical device with a probe, bottom shows a close-up of a mechanical component (no visible text or symbols)COMPONENTES
natural_image
Hand operating a clear water heater on a digital kitchen scale (no visible text or symbols)natural_image
Close-up of a hand holding a small appliance inside a clear glass kitchen appliance, with a rotary knob on the base (no visible text or symbols)natural_image
Hand pouring liquid into a container with a submerged object, no text or symbols visiblenatural_image
Hand pouring liquid into a blender with a vertical arrow indicating motion (no text or symbols)MONTAGEM
natural_image
Hand holding a kitchen blender with a black arrow indicating rotation (no text or symbols visible)NOTA
www.sageappliances.com
Registered in Germany No. HRB 81309 (AG Düsseldorf).
Registered in England & Wales No. 8223512.
- Due to continued product improvement, the products illustrated or photographed in this document may vary slightly from the actual product.
•Aufgrund kontinuierlicher Produktverbesserungen kann das auf dieser Verpackung dargestellte Produkt leicht vom tatsächlichen Produkt abweichen. - En raison de son amélioration continue, le produit représenté sur cet emballage peut différer légèrement du produit réel.
- Vanwege de voortdurende verbetering van de producten kunnen de producten die in dit document
worden geïllustreerd of gefotografeerd enigszins afwijken van het daadwerkelijke product. - A causa del continuo miglioramento dei prodotti, il prodotto illustrato su questa confezione può variare leggermente rispetto al prodotto reale.
- Perfeccionamos nuestros productos continuamente, por lo que el artículo podría diferir ligeramente de la ilustración o imagen en este documento.
- Devido à melhoria contínua dos produtos, os produtos ilustrados ou fotografados neste documento podem variar ligeiramente do produto real.
Copyright BRG Appliances 2019.



- the Kitchen Wizz Pro™
- CONTENTS
- SAGE® RECOMMENDS SAFETY FIRST
- IMPORTANT SAFEGUARDS
- SAVE THESE INSTRUCTIONS
- COMPONENTS
- NOT SHOWN
- ASSEMBLY
- BEFORE FIRST USE
- NOTE
- CAUTION
- OVERLOAD PROTECTION SYSTEM
- FOOD PROCESSING GUIDE
- CARE AND CLEANING
- Motor base
- Processing bowl, lid and food pusher
- Processing 4 blade processor, dough blade and discs
- WARNING
- TROUBLESHOOTING
- GUARANTEE
- YEAR LIMITED GUARANTEE AND 30 YEAR LIMITED MOTOR GUARANTEE
- INHALTE
- KOMPONENTEN
- HINWEIS
- TABLE DES MATIÈRES
- COMPOSANTS
- ASSEMBLAGE
- REMARQUE
- INHOUD
- ONDERDELEN
- MONTAGE
- OPMERKING
- SOMMARIO
- COMPONENTI
- MONTAGGIO
- NOTA
- ÍNDICE
- COMPONENTES
- ENSAMBLAJE
- MONTAGEM
Brand : SAGE
Model : the Kitchen Wizz Pro BFP80
Category : Food processor