
SVSV 550 A1 - Autres robots de cuisine SILVERCREST - Free user manual and instructions
Find the device manual for free SVSV 550 A1 SILVERCREST in PDF.

| Product type | Automatic sous vide cooker |
| Brand | SilverCrest |
| Model | SVSV 550 A1 |
| Power supply | 230 V ~ 50 Hz |
| Power | 550 W |
| Protection class | I |
| Tank capacity | 2.5 to 5.5 liters |
| Temperature range | 40 °C to 99 °C |
| Timer range | 1 minute to 24 hours |
| Main functions | Low-temperature sous vide cooking, precise temperature and time adjustment, digital display |
| Included accessories | Lid, water tank, base unit, bottom grid, separation grid, power cable, instruction manual |
| Care and cleaning | Base unit: damp cloth; other parts: hand wash in soapy water |
| Safety | Automatic shut-off at end of program, overheating protection, indicated hot surfaces |
| Warranty | 3 years (HOYER Handel GmbH) |
| Repairability | Authorized service center; no user repair |
Frequently Asked Questions - SVSV 550 A1 SILVERCREST
User questions about SVSV 550 A1 SILVERCREST
0 question about this device. Answer the ones you know or ask your own.
Ask a new question about this device
Download the instructions for your Autres robots de cuisine in PDF format for free! Find your manual SVSV 550 A1 - SILVERCREST and take your electronic device back in hand. On this page are published all the documents necessary for the use of your device. SVSV 550 A1 by SILVERCREST.
USER MANUAL SVSV 550 A1 SILVERCREST
natural_image
Silver Crest® rice cooker with digital display and open lid, no visible text or symbols on the device itself.SOUS-VIDE-GARER SVSV 550 A1
DE AT CH
SOUS-VIDE-GARER
Bedienungsanleitung
IT CH
MACCHINA PER COTTURA SOUS-VIDE
Operating instructions
IAN 115124
- Baguette fresca
- P a s t a
10.5 Asparagi
5.1 What is sous-vide? 60
5.2 Advantages of sous-vide 60
5.3 Things to remember with sous-vide 61
5.4 Required accessories.... 62
- How to use 62
6.1 Unpacking 62
6.2 Preparation 62
- Operating the device 63
7.1 Insert bag 63
7.2 Starting the program 63
- Tips and tricks 64
8.1 Suitable food for sous-vide 64
8.2 Unsuitable food for sous-vide.... 64
8.3 Reverse cooking.... 64
8.4 Tips.... 65
- Cooking times 65
9.1 Cooking meat to the core temperature 65
9.2 Cooking table.... 66
- Recipes 67
10.1 Beef tenderloin 67
10.2 Roast beef.... 67
10.3 Rack of lamb.... 67
10.4 Mediterranean chicken breast 68
10.5 Asparagus 68
10.6 Carrots for antipasti 68
10.7 Salmon....68
10.8 Tuna (semi-raw) 69
- Cleaning 69
- Disposal 70
- Technical specifications 70
- Troubleshooting 70
- Warranty of the HOYER Handel GmbH 71
1. Overview
1 Lid handle
2 Lid
3 Bottom grid
4 Water container
5 Base unit handle
6 Base unit
7 Operating panel
8 Mains power socket
9 Mains power cable and mains plug
10 Separating grid
11 Display: shows the time and the temperature
12 Timer: set time
13 -/+ Setting the time and the temperature
14 Star/nd program with LED
15 Switching the device on and off.
16 Set temperature with LED
17 MAX Marking (MIN marking not visible)
Thank you for your trust!
Congratulations on your new Sous-Vide Cooker.
For a safe handling of the device and in order to get to know the entire scope of features:
• Thoroughly read these operating instructions prior to initial commissioning.
- Above all, observe the safety instructions!
• The device should only be used as described in these operating instructions.
- Keep these operating instructions for reference.
- If you pass the device on to someone else, please include these operating instructions.
We hope you enjoy your new Sous-Vide Cooker!
Symbols on your device

DANGER! Hot surfaces
In order to avoid injury as a result of burns, the surfaces of the device must not be touched during operation. Only use the handles and control elements provided.
2. Intended purpose
This Sous-Vide Cooker allows you to gently cook vacuum-packed food.
The device is designed for private, domestic use. The device must only be used in dry, indoor areas.
This device must not be used for commercial purposes.
Foreseeable misuse
WARNING! Risk of material damage!
The food must never be placed directly into the water bath. All food must be placed into the water bath vacuum-packed in a heat-resistant plastic bag. A vacuum-sealing device is not included in the scope of supply.
3. Safety information
Warnings
If necessary, the following warnings will be used in these operating instructions:

DANGER! High risk: failure to observe this warning may result in injury to life and limb.
WARNING! Moderate risk: failure to observe this warning may result in injury or serious material damage.
CAUTION: low risk: failure to observe this warning may result in minor injury or material damage.
NOTE: circumstances and specifics that must be observed when handling the device.
Instructions for safe operation
- This device can be used by children from the age of 8 and people with restricted physical, sensory or intellectual abilities or people without adequate experience and/or understanding, if they are supervised or instructed on how to use this device safely and if they are aware of the resulting danger. Children must not play with the device. Cleaning and user maintenance must not be performed by unsupervised children unless they are older than 8 years and supervised.
-Children under the age of 8 must be kept away from the device and the power cable.

The surfaces of the device become very hot during operation. While the device is in operation, only touch the operating panel lid handle or device handle.
- If the mains power cable of this device should become damaged, it must be replaced by the manufacturer, the manufacturer's customer service department or a similarly qualified specialist, in order to avoid any hazards.
- The base unit, the mains power cable and the mains plug must not be immersed in water or any other liquids.
- If liquid gets into the base unit, remove the mains plug immediately. Have the device checked before reusing.
- Do not use any abrasive or corrosive cleaning agents.
- This device is not intended to be operated using an external timer clock or a separate remote control system.
The device is suitable for:
... use in kitchens for employees in shops, offices and other commercial areas, ... use in agricultural premises, ... customers in hotels, motels and other residential facilities, ... bed-and-breakfast establishments.
- In order to prevent overheating, the device should never be covered. Otherwise, heat may accumulate in the device.

DANGER for children
- Packing materials are not children's toys. Children should not be allowed to play with the plastic bags: there is a risk of suffocation.
- Keep the device out of the reach of children.

DANGER! Risk of electric shock due to moisture
The base unit, the mains power cable and the mains plug must not be immersed in water or any other liquids.
- Protect the base unit from moisture, water drops and water splashes: failure to observe this instruction may result in an electrical shock hazard.
- If liquid gets into the base unit, remove the mains plug immediately. Have the device checked before reusing.
- Never touch the device with wet hands.

DANGER! Risk of electric shock
Do not use the device if the device or the mains power cable has any visible damage, or if the device has previously been dropped.
- Only connect the mains plug to a properly installed and easily accessible ground power socket whose voltage corresponds to the specifications on the rating plate. The wall socket must continue to be easily accessible after the device is plugged in.
- Ensure that the mains power cable cannot be damaged by sharp edges or hot points.
- When using the device, ensure that the mains power cable cannot be trapped or crushed.
The device is not fully disconnected from the power supply, even after it is switched off. In order to fully disconnect it, pull out the mains plug.
- When removing the mains plug from the wall socket, always pull the plug and never the cable.
- Disconnect the mains plug from the wall socket ...
... if there is a fault, ... when you are not using the device, ... before you clean the device and ... during thunderstorms.
To avoid any risk, do not make modifications to the product.

FIRE HAZARD
Before turning the device on, place it on a level, stable, dry, heat-resistant surface.
- Continuous monitoring during operation is not necessary; it should however be checked regularly. This applies in particular when very long cooking times are set.

DANGER! Risk of injury through burning!
- Only transport the device when it has cooled down.
Do not reach into the water with bare hands when you place the bag into or remove it from the water bath.
- Wait for the device to cool down before cleaning.
WARNING! Risk of material damage
- Never operate the Sous-Vide Cooker without water. This could result in the device overheating.
- Only place sealed foods into the water bath. Penetrating water would have a negative effect on the food, and could spoil it.
The lid ...
... is fragile. ... may crack if exposed to sudden temperature changes. So allow both to cool before immersing them in water.
- Never place the device on hot surfaces (e.g. hob plates) or near heat sources or open fire.
The device is fitted with non-slip plastic feet. As furniture is coated with a variety of different varnishes and acrylics and treated with different cleaning agents, we cannot rule out that some of these substances could damage and soften
the rubber feet. If necessary, place a non-slip mat under the device.
Do not use any astringent or abrasive cleaning agents.
4. Items supplied
1 lid 2
1 bottom grid 3
1 separating grid 10
1 water container 4
1 base unit 6
1 mains power cable 9
1 operating instructions
5. Sous-vide!?
5.1 What is sous-vide?
The dream of every hobby cook: a steak that is pink and juicy on the inside, crispy on the outside. But unfortunately it does not always work using conventional methods, or it requires exact timing. Sous-vide makes cooking easier, and almost always yields perfect results.
In principle, sous-vide is nothing more than the slow cooking of vacuum-sealed food. On the one hand, sous-vide is a very simple method for achieving excellent results when preparing food. On the other hand, sous-vide is a clear rejection of the "quick quick" attitude of our age.
Professional cooks have been using this method for many years. With the new Sous-Vide Cooker, this cooking method is now also affordable for hobby cooks at home.
- By precisely setting and maintaining the temperature of the water bath, the cooking process is directly matched to the structure and characteristics of the food.

• Large quantities can easily be prepared. The final processing can then take place very quickly (briefly searing steaks).
- It is not a case of "every second counts". The core temperature of the food being cooked can never rise higher than the water temperature. This cooking method therefore forgives small deviations in terms of temperature and timing.
- You have perfect control over the aroma and the texture of the food.
- The vacuum-sealing process ensures that the food loses neither aroma nor fluid. This means that fish and meat remain deliciously juicy at all times, and do not become dry.
- The vacuum-sealing process causes marinades to penetrate deeper and more intensively into the food. You will experience an entirely new intensity of marinated food.
5.3 Things to remember with sous-vide
• The Sous-Vide Cooker is a slow cooker, and requires a start-up time to preheat the water, see example below.
Examples for preheating time:
- Preheating 5.5 litres from approx. 20 °C to approx. 62 °C: duration approx. 1.5 hours
- Preheating 5.5 litres from approx. 40 °C to approx. 62 °C: duration approx. 1 hour.
The cooking table (see "Cooking table" on page 66) shows the times the program is started. The program only starts after the selected temperature has been reached. You can see that the program has started when the time on the display 11 is counting down in minutes.
Take the extended time in the water bath into consideration when planning the individual cooking stages.
We therefore recommend filling the device with water at the temperature you require for the next cooking process. You can find the required temperature e.g. in the Cooking Table (see "Cooking table" on page 66).
- Only vacuum-packed food must be placed in the water bath.
- Because the food is not boiled or well-done, great emphasis must be placed on hygiene. All parts that come into contact with raw or semi-raw food must immediately be cleaned, in order to avoid transferring germs to other kitchen utensils.
- After cooking, the food must be eaten immediately, processed further, or must be cooled down inside the vacuum bag using iced water and then stored in the 0^ section of the refrigerator.
- Ensure that you use high-quality bags that are heat and cold-resistant. On the packaging of the vacuum bags, you can find the temperature specifications for which the bag is designed.
- Before placing the food to be cooked into the water, ensure that the bag is tightly sealed. If water gets inside, it would spoil the food or make it taste watery and flavourless.
- The food to be cooked must always be completely covered with water. If it floats, place a plate on the food to be cooked.
- Frozen food must be thawed before cooking. Quick thawing in the water bath damages the structure of the food. Furthermore, it is almost impossible to define a cooking time for frozen food.
5.4 Required accessories
Sous-vide is not possible without vacuum-packed food.
The following accessories are not included in the scope of supply, but are required:
- Vacuum-sealing device
- Cold and heat-resistant vacuum bags.
6. How to use
6.1 Unpacking
- Remove all parts from the packaging.
- Check that all parts are present and intact.
6.2 Preparation
- Clean the device prior to its first use (see "Cleaning" on page 69)!
- Place the base unit 6 on a level, dry and non-slip surface, so that it can neither fall nor slip off.
- Place the bottom grid 3 into the water container 4. The bottom grid ensures that the food is always in contact with water on all sides, and does not lie directly on the bottom.
NOTE:
if you intend to place multiple vacuum bags into the water bath (e.g. for steaks), place the separating grid 10 onto the bottom grid 3.
- Pour hot water into the water container 4: minimum 2.5 litres, maximum 5.5 litres of water. Note that the water level will still rise when you add the food. The level must not rise above the marking MAX 17, or fall below the marking MIN 17.
62
GB
NOTE: the temperature of the water should be as close as possible to the temperature that you require for the next cooking process. This allows you to avoid long waiting times before the set temperature is reached. You can find the required temperature e.g. in the Cooking Table (see "Cooking table" on page 66).
Examples for preheating time:
- Preheating 5.5 litres from approx. 20 °C to approx. 62 °C: duration approx. 1.5 hours
- Preheating 5.5 litres from approx. 40 °C to approx. 62 °C: duration approx. 1 hour.
The water should not be hotter than the desired temperature, however.
- Place the water container 4 into the base unit 6.
- If you have not yet vacuum-sealed the food that you wish to cook, do so now.
- Look at the recipe or in the chapter "Cooking times" on page 65 to find out the time and temperature for the food to be cooked.
- Plug the mains plug 9 into the socket 8 at the back of the device, and into a wall socket. You will hear a beep, and the display 11 will light up briefly.


7. Operating the device
7.1 Insert bag
- Place the vacuum bag into the water container 4. Ensure that the water level does not rise above the marking MAX 17. If necessary, scoop out water with a cup.
- The bags should be underwater. If they float on the surface, cover them e.g. with a plate.
- Replace the lid 2. Without the lid, too much heat escapes, and the times specified in the recipes will no longer be correct.
Working with the separating grid
If you use the separating grid, allow one vacuum bag to slide into each of the 4 compartments.
Ensure that all the bags are standing freely in the compartments, and that they are in contact with the water on all sides.
FIGURE A: the separating grid is placed perpendicular to the bottom grid. The standing surfaces of the separating grid are placed directly on the base of the water container 4.
NOTE: if bags are pressed firmly against one another (e.g. by pressing them down into the individual compartments), the cooking time becomes longer and incalculable.
7.2 Starting the program

DANGER! Risk of injury through burning!
The surfaces of the device become very hot during operation. During operation, only touch the device on the oper-
ating panel 7, on the lid handles 1, or by the handles 5 of the base unit.
- When removing the cooked food, use appropriate kitchen utensils. The water can be very hot.
NOTES:
- Pressing the buttons -/+ 13 adjusts the minutes or degrees with each press. Hold the buttons down to switch to high-speed adjustment.
-
During the first use, you may notice slight formation of smoke and odour. This is harmless and stops after a short amount of time. Please ensure sufficient ventilation in the meantime.
-
Press the On/Off button 15 for at least 2 seconds. The display 11 shows 0000. The device is now switched on.
- Press the Temperature button 16. The display will show 40C as the pre-set temperature. This is not the current water temperature.
- Set the desired water temperature, at which the food should be cooked, using the buttons -/+ 13. The selected temperature is shown on the display 11. You can select values between 40 and 99 degrees Celsius. The LED will flash for as long as you are working in temperature mode.
- Press the button for the time settings ☑ 12. The display 11 will show 01:00 (one hour).
- Set the desired time, for which the food should be cooked, using the buttons -/+ 13. You can set precisely any time between 1 minute and 24 hours.
- Start the program by pressing the button ▶■ 14. The LED 14 lights up. On the display 11, the time is counted down in minutes once the set temperature has been reached. The LED 14 starts to flash.

NOTE: important for your time management when cooking: if the water is not yet at the selected temperature, the program will not yet start. The program waits until the selected temperature has been reached - and then it starts automatically. You can see how the time counts down on the display 11. Take the extended time in the water bath into consideration when planning the individual cooking stages.
-
When the time has counted down, you will hear three beeps, and the LED 14 goes out.
-
Press the On/Off button 15 for at least 2 seconds in order to switch off the device.
-
Remove the lid 2. If possible, ensure while doing so that the condensation from the inside of the lid runs into the water container 4.
-
Remove the cooked food from the water bath using appropriate kitchen utensils.
-
Pull out the mains plug 9.
-
Cut open the vacuum bag and remove the cooked food.
Depending on the type of cooked food, it can either be served immediately, or may need to be processed further (e.g. quickly seared) before being served.
8. Tips and tricks
8.1 Suitable food for sous-vide
Meat is particularly suitable for the sous-vide method, which absolutely includes less choice cuts. The long cooking time and a corresponding marinade mean that even less choice cuts become soft as butter.
But this method is also suitable for fish and hard vegetables, eggs and hard fruit.
The full range of possibilities can be found in a sous-vide cookbook, which you can obtain e.g. in a specialist book shop.
8.2 Unsuitable food for sous-vide
- The following foods are less suitable for the sous-vide method: cabbage, leek, chard, spinach, and green vegetables that easily overcook, such as cauliflower, Brussels sprouts, or broccoli.
- Green vegetables emit sulphurous gases, which cannot escape during this process, and which therefore have a negative effect on the taste.
8.3 Reverse cooking
- You can also sear meat at the beginning of the process. You can then add the desired spices or a marinade, and then vacuum-seal it. After sous-vide cooking, the meat can then immediately be served. This method is most suitable for roasting cuts.
8.4 Tips
- Test your favourite dishes with sous-vide, buy yourself a sous-vide cookbook, or search the internet for sous-vide recipes.
- Marinating: the combination of vacuum-packing with marinade and slow cooking in the water bath offers very intense taste experiences.
- First test your usual seasoning process using the sous-vide method on small pieces of food. The spices may react differently during the vacuum-sealing process. Salt and garlic in particular are perceived more intensely, and generally need to be used more conservatively than with other cooking methods.
- Food to be marinated should be vacuum-packed with the marinade a day earlier and placed in the refrigerator. In the case of small pieces (e.g. small scallops), the marinating and vacuum-sealing can take place a few hours beforehand.
- Ensure that vacuum bags are not pressed together in the water bath. Wherever the bags are in continuous contact, the food has a different cooking temperature.
- The Sous-Vide Cooker is not a kettle. It is therefore advisable for the water already to be at the desired temperature when poured into the water container. You can thus avoid extended waiting times when heating the water.
- Ensure that the water is not hotter than the desired temperature, as this could falsify the results.
9. Cooking times
The times indicated in the table are guidelines. The actual cooking time depends on:
- the size and freshness of the food;
- the filling volume and shape (flat or round) of the vacuum bag;
• personal preferences (steak medium or well-done; vegetables firm or soft).
NOTES:
- Ensure that all pieces are approximately equal in size/thickness.
• Prepare the vegetables by cutting off stems and cutting large vegetables into pieces of equal size. - Poultry in particular must be fully cooked through in order to avoid the risk of salmonella infection. Poultry should be seared briefly before serving.
9.1 Cooking meat to the core temperature
The following table shows how done a piece of meat is when the specified core temperature has been reached. This does not change, even after longer periods in the water bath, because the core temperature in the food can never rise higher than the set water temperature.
The core temperature is the temperature in the centre of the food.
Table for beef, pork, lamb and game
Bear in mind that it is only safe to eat poultry when it is completely cooked through, in order to avoid the risk of salmonella infection.
| Core temperature | Cooking level |
| 49 °C blue - almost raw | |
| 52 °C - 55 °C rare/bloody - narrow margin is cooked |
| 55 °C - 60 °C medium rare - a thick proportion is still pink |
| 60 °C - 65 °C medium - pink inside |
| 65.5 °C - 68 °C medium well - almost cooked through |
| 68 °C - 71 °C well done - fully cooked through |
9.2 Cooking table
All specifications are just guidelines. The end result is always dependent on the quality and properties of the product, and the
breed of the animal. The specifications apply to a vacuum bag (see "Starting the program" on page 63).
| Food to be cooked | Cooking level | Thick-ness/weight | Tempera-ture of wa-ter bath | Cooking time in water bath |
| Beef fillet, steak | medium rare 30 mm 56 °C 50 min | |||
| medium rare 40 mm 56 °C 75 min | ||||
| Beef Roast beef | medium strip | 60 mm | 56 °C 6 hours | |
| Beef Flank steak | medium 57 °C 12 hours | |||
| Pork fillet | well done 30 mm 60 °C 2 hours | |||
| well done 40 mm 60 °C 2.5 hours | ||||
| Pork neck | well done | 700 g | 68 °C | 24 hours |
| Rack of lamb | medium | 10 -15 mm | 56 °C | 45 min |
| Chicken breast | well done | 20 - 25 mm | 72 °C 2 hours | |
| Turkey breast | well done | 15 - 30 mm | 72 °C | 2 hours |
| Duck breast | well done | 15 - 25 mm | 72 °C | 3 hours |
| Goose breast | well done 20 mm | 80 °C 8 hours | ||
| Salmon | tender | 25 mm 45 °C 20 min | ||
| Cod | tender | 25 mm 52 °C 40 min | ||
| Ocean perch | tender | 25 mm 47 °C 20 min | ||
| Prawns | done | lined up | 85 °C 20 min | |
| Scallops | firm | 18 - 25 mm | 47 °C 30 min | |
| Carrots | somewhat firm | approx. 10 mm | 85 °C 40 min | |
| Asparagus | firm | lined up | 82 °C 25 min | |
| Food to be cooked | Cooking level | Thickness/weight | Temperature of water bath | Cooking time in water bath |
| Eggs in shell Yolk thick egg white almost entirely liquid | 62 °C 1 hour | |||
| Eggs in shell Yolk creamy egg white more solid | 66 °C 1 hour | |||
| Eggs in shell Yolk solid egg white solid | 75 °C 1 hour | |||
10. Recipes
Please find the cooking times in the table or in your sous-vide cookbook.
10.1 Beef tenderloin
-
Season the meat with a little salt.
-
Vacuum-seal the meat.
-
Place the bag into the Sous-Vide Cooker.
-
At the end of the program, remove the meat from the bag and dab it dry with paper towel.
-
Heat butter or oil in a pan, and sear the fillet briefly on both sides. During searing, season to taste. Add coarse black pepper only at the end of the frying process.
10.2 Roast beef
-
Season the meat with a little salt.
-
Vacuum-seal the meat.
-
Place the bag into the Sous-Vide Cooker.
-
At the end of the program, remove the meat from the bag and dab it dry with paper towel.
-
Heat butter or oil in a pan, and sear the roast beef briefly on two sides or on all sides. During searing, season to taste. Add coarse black pepper only at the end of the frying process.
This goes particularly well:
- Fried potatoes
- Tartar sauce
10.3 Rack of lamb
- Press 1-2 cloves of garlic into a little olive oil.
- Add a little salt and pepper to the oil and mix it all with a fork.
- Drag the rack of lamb through the oil, and place the cutlets individually or next to one another in the vacuum bag.
- Vacuum-seal the meat.
- Place the vacuum-sealed meat in the refrigerator for approx. 12 hours.
- Place the bag into the Sous-Vide Cooker.
- At the end of the program, remove the meat from the bag and dab it dry with paper towel.
- Heat olive oil in a pan and sear the lamb cutlets briefly from both sides, so that they take on a nice colour.
This goes particularly well:
- Herb crust (follow-up process in the oven)
- Hot tomatoes
- Fried courgette slices
10.4 Mediterranean chicken breast
- Take one medium-sized tomato and several slices of courgette per vacuum bag. Cut the tomatoes into small cubes, and the courgette into thin slices.
- Press one clove of garlic.
- Mix the tomatoes with the courgette and the garlic, add a table spoon of olive oil, and mix it all with a fork.
- Salt and pepper the chicken breasts, and then very briefly and fiercely sear them in an oiled pan.
- Place the chicken breasts individually into the vacuum bag and then add the vegetables to the chicken breast.
- Vacuum-seal the meat.
- Place the bag into the Sous-Vide Cooker.
- At the end of the program, remove the meat and vegetables from the bag, and place it directly onto the plate.
This goes particularly well:
- Fresh baguette
- P a s t a
10.5 Asparagus
- Peel and wash the asparagus.
- Cut off the bottom ends.
- Salt the asparagus stems.
- Place the asparagus stems next to one another in the vacuum bag.
- Use a knife to spread a little butter on the asparagus.
- Vacuum-seal the asparagus.
- Place the bag into the Sous-Vide Cooker.
This goes particularly well:
- Baby potatoes
- Raw ham or a Wiener Schnitzel
- Grilled salmon fillet
10.6 Carrots for antipasti
- Peel and wash the carrots.
- Cut off the bottom ends and then cut the carrots into slices.
- Pour a little olive oil into a bowl.
- Press 1-2 cloves of garlic into the oil.
- Add a teaspoon of rosemary, a little fennel and a pinch of salt and pepper to the oil.
- Stir all ingredients into the oil with a fork.
- Place the carrot slices into the vacuum bag.
- Pour the oil into the vacuum bag.
- Vacuum-seal the carrots.
- Leave the bag(s) in the refrigerator overnight.
- Place the bag into the Sous-Vide Cooker.
- Pour the carrots into a bowl. They can be enjoyed hot or cold.
This goes particularly well:
- Other antipasti such as marinated olives, courgette etc.
10.7 Salmon
- Wash the salmon and then dab it dry. If the fish still has its skin, leave it on. It will hold the fish together later, and can be deliciously fried on.
- Cut one to two slices off a lemon.
- Repeatedly stab a fork into the pulp of the lemon.
- Place the salmon, the slices of lemon, and 1-2 leaves of sage into the vacuum bag.
- Vacuum-seal the salmon.
- Place the bag into the Sous-Vide Cooker.
- After the end of the program, carefully remove the salmon from the bag, using a spatula (fish slice) if possible.
- Dab the salmon dry using paper towel.
- Heat butter or oil in a pan, and sear the salmon briefly on both sides. During searing, season to taste.

This goes particularly well:
• Asparagus, green vegetables
- Potatoes
- Horseradish sauce
10.8 Tuna (semi-raw)
- Wash the tuna and then dab it dry. If the fish still has its skin, leave it on. It will hold the fish together later, and can be deliciously fried on.
- Scatter a few grains of sea salt on the tuna.
- Place the tuna into the vacuum bag.
- Vacuum-seal the tuna.
- Place the bag into the Sous-Vide Cooker.
- After the end of the program, carefully remove the tuna from the bag, using a spatula (fish slice) if possible.
- Dab the tuna dry using paper towel.
- Heat butter or oil in a pan, and sear the tuna briefly on both sides. During searing, season to taste. Add coarse black pepper only at the end of the frying process.
This goes particularly well:
- Wasabi, soy sauce
- Rice
- Garlic bread
11. Cleaning
Clean the device prior to its first use!

DANGER! Risk of electric shock!
- Pull the mains plug out of the wall socket before you clean the device.

DANGER! Risk of injury through burning!
- Allow all the parts to cool down before cleaning.
WARNING! Risk of material damage!
- Do not use any astringent or abrasive cleaning agents.
- Clean the device after every use
Cleaning the base unit
- Clean the base unit 6 with a damp cloth.
- Do not use the device until it is completely dry again.
Cleaning the accessories
- Clean the lid 2, the water container 4 and the bottom grid 3 by hand in a sink using hot, soapy water.
Cleaning kitchen utensils
- All kitchen utensils (knives, forks, chopping boards) that come into contact with raw food must immediately be cleaned, ideally using hot, soapy water. Comply with any cleaning instructions for the kitchen utensils.


12. Disposal
The symbol showing a wheelie bin crossed through indicates that the product requires separate refuse collection in the European Union. This applies to the
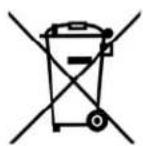
product and all accessories marked with this symbol. Products identified with this symbol may not be discarded with normal household waste, but must be taken to a collection point for recycling electric and electronic appliances. Recycling helps to reduce the consumption of raw materials and protect the environment.
Packaging
When disposing of the packaging, make sure you comply with the environmental regulations applicable in your country.
13. Technical specifications
| Model: SVSV 550 A1 |
| Mains voltage: 230 V ~ 50 Hz |
| Protection class: I |
| Power rating: 550 W |
| Filling volume: 2.5 to 5.5 litres |

Subject to technical modification.
14. Troubleshooting
If your device fails to function as required, please try this checklist first. Perhaps there is only a minor problem, and you can solve it yourself.

DANGER! Risk of electric shock! Do not attempt to repair the device yourself under any circumstances.
| Fault | Possible causes/Action |
| No function | Has the device been connected to the power supply?Is the device switched on? |
| Food not yet cooked after the specified time | Did you fill with very cold water? This extends the required cooking time.Is the food significantly thicker than described in the recipe or the table?Have you set the right temperature?Either vacuum-seal the food again and return it to the water bath, or continue cooking it with another method. |
| A great deal of water in the vacuum bag | This indicates an error during the vacuum-sealing process. The vacuum bag was not properly closed. |
15. Warranty of the HOYER Handel GmbH
Dear Customer,
your device is provided with a 3 year warranty starting with the purchase date. In the event of product defects, you are entitled to statutory rights against the vendor. These statutory rights are not restricted by our warranty presented in the following.
Warranty conditions
The warranty period starts with the purchase date. Please keep the original purchase receipt in a safe place. This document is required to verify the purchase.
If within three years from the purchase date of this product a material or factory defect occurs, the product will be repaired or replaced by us – at our discretion – free of charge to you. This warranty implies that within the period of three years the defective device and the purchase receipt are presented, including a brief written description of the defect and the time it occurred.
If the defect is covered by our warranty, the repaired or a new product will be returned to you. No new warranty period starts with a repair or replacement of the product.
Warranty period and statutory claims for defects
The warranty period is not extended when the warranty has been claimed. This also applies to replaced and repaired parts. Any damages and defects already existing at the time of purchase must be reported immediately upon unpacking. Repairs arising after the expiration of the warranty period are subject to a charge.
Warranty coverage
The device was produced carefully according to strict quality guidelines and tested diligently prior to delivery.
The warranty applies to material or factory defects. This warranty does not include product parts that are subject to standard wear and therefore can be considered wear parts; the same applies to damages at fragile parts, e.g. switches, rechargeable batteries or parts made of glass.
This warranty expires if the product is damaged, not used as intended or not serviced. For the proper operation of the product, all instructions listed in the operating instructions must be observed carefully. Any form of use and handling that is advised against in the operating instructions or warned against must always be avoided.
The product is only intended for private and not for commercial use. In the case of incorrect and improper treatment, use of force and interventions not performed by our authorised Service Centre, the warranty shall cease.
Handling in case of a warranty claim
In order to ensure prompt processing of your matter, please observe the following notes:
- Please keep the article number
IAN: 115124 and the purchase receipt as a purchase verification for all inquiries. - If faulty operation or other defects occur, first contact the Service Centre listed in the following by telephone or email.
- Then, you are able to send a product reported as defective free of charge to the service address specified to you, including the purchase receipt and the information on the defect and when it occurred.

Please visit www.lidl-service.com to download this and many other manuals, product videos and software.
GB
71


Service Centre
GB Service Great Britain
Tel.: 0871 5000 720 (£ 0.10/Min.)
E-Mail: hoyer@lidl.co.uk
IE Service Ireland
Tel.: 1890 930 034
(0,08 EUR/Min., (peak))
(0,06 EUR/Min., (off peak))
E-Mail: hoyer@lidl.ie
IAN: 115124

Supplier
Please note that the following address is no
service address. First contact the aforementioned Service Centre.
HOYER Handel GmbH
Kühnehöfe 5
22761 Hamburg
Germany


- SOUS-VIDE-GARER SVSV 550 A1
- SOUS-VIDE-GARER
- MACCHINA PER COTTURA SOUS-VIDE
- Asparagi
- Overview
- Thank you for your trust!
- Symbols on your device
- DANGER! Hot surfaces
- Intended purpose
- Foreseeable misuse
- WARNING! Risk of material damage!
- Safety information
- Warnings
- Instructions for safe operation
- DANGER for children
- DANGER! Risk of electric shock due to moisture
- DANGER! Risk of electric shock
- FIRE HAZARD
- DANGER! Risk of injury through burning!
- WARNING! Risk of material damage
- Items supplied
- Sous-vide!?
- What is sous-vide?
- Things to remember with sous-vide
- Examples for preheating time:
- We therefore recommend filling the device with water at the temperature you require for the next cooking process. You can find the required temperature e.g. in the Cooking Table (see "Cooking table" on page 66).
- Required accessories
- How to use
- Unpacking
- Preparation
- NOTE:
- Operating the device
- Insert bag
- Working with the separating grid
- Starting the program
- NOTES:
- Tips and tricks
- Suitable food for sous-vide
- Unsuitable food for sous-vide
- Reverse cooking
- Tips
- Cooking times
- Cooking meat to the core temperature
- Table for beef, pork, lamb and game
- Cooking table
- Recipes
- Beef tenderloin
- Roast beef
- This goes particularly well:
- Rack of lamb
- Mediterranean chicken breast
- Asparagus
- Carrots for antipasti
- Salmon
- Tuna (semi-raw)
- Cleaning
- Clean the device prior to its first use!
- DANGER! Risk of electric shock!
- Cleaning the base unit
- Cleaning the accessories
- Cleaning kitchen utensils
- Disposal
- Packaging
- Technical specifications
- Troubleshooting
- Warranty of the HOYER Handel GmbH
- Warranty conditions
- Warranty period and statutory claims for defects
- Warranty coverage
- Handling in case of a warranty claim
- Service Centre
- Supplier
Brand : SILVERCREST
Model : SVSV 550 A1
Category : Autres robots de cuisine