
40/133O-WB-11B-FEGBQP-EU - TV BLAUPUNKT - Free user manual and instructions
Find the device manual for free 40/133O-WB-11B-FEGBQP-EU BLAUPUNKT in PDF.


| Product type | LED TV |
| Screen size | 40 inches (102 cm) |
| Resolution | Full HD 1920x1080 pixels |
| Dimensions (without stand) | 900 x 520 x 80 mm |
| Weight (without stand) | 8 kg |
| Power supply | 220-240 V, 50/60 Hz |
| Power consumption | 70 W (standby < 0.5 W) |
| Main functions | DVB-T/T2/C/S2 tuner, Smart TV, Wi-Fi, HDMI x2, USB x1 |
| Maintenance and cleaning | Clean with a soft dry cloth; avoid solvents |
| Safety | VESA 200x200 wall mount; child lock |
| Spare parts and repairability | Remote control, stand, batteries; repairability index available |
| General information | Brand Blaupunkt; 2-year warranty |
Frequently Asked Questions - 40/133O-WB-11B-FEGBQP-EU BLAUPUNKT
User questions about 40/133O-WB-11B-FEGBQP-EU BLAUPUNKT
0 question about this device. Answer the ones you know or ask your own.
Ask a new question about this device
Download the instructions for your TV in PDF format for free! Find your manual 40/133O-WB-11B-FEGBQP-EU - BLAUPUNKT and take your electronic device back in hand. On this page are published all the documents necessary for the use of your device. 40/133O-WB-11B-FEGBQP-EU by BLAUPUNKT.
USER MANUAL 40/133O-WB-11B-FEGBQP-EU BLAUPUNKT
natural_image
Line drawing of a flat-screen TV with a diagonal screen on the left (no text or symbols)User guide
Enjoy it.
Bedienungsanleitung
USB Multimedia Player
Important safety instructions

CAUTION
RISK OF ELECTRIC SHOCK DO NOT OPEN

Please, read these safety instructions and respect the following warnings before the appliance is operated:
No naked flame sources, such as lighted candles, should be placed on the apparatus.

- TV's with the weight of more than 20 kg must be lifted and carried by at least two people.
- This TV does not contain any parts which could be repaired by the user. In case of a fault, contact the manufacturer or the authorised service agent. Contact with certain parts inside the TV might endanger your life. The guarantee does not extend to faults caused by repairs carried out by unauthorized third parties.
- Do not remove the rear part of the appliance.
- If the supply cord is damaged, it must be replaced by the manufacturer, a service agent or similarly qualified persons in order to avoid a hazard.
- This appliance is designed for the receiving and reproduction of video and sound signals. Any other use is strictly forbidden.
- The apparatus shall not be exposed to dripping or splashing. No objects filled with liquids, such as vases, containers, shall be placed on the apparatus. These containers might get pushed over, which would endanger electric safety. Place the TV exclusively on flat and stable surfaces.
- The ideal distance to watch TV is approximately five times longer than the diagonal of the screen. Reflections on the screen from other light sources can make the quality of the picture worse.
- Ensure the TV has sufficient ventilation and is not close to other appliances and other pieces of furniture.
- Minimum distance around the apparatus for sufficient ventilation is 5 cm. The ventilation should not be impeded by covering the ventilation openings with items, such as newspapers, table-cloths, curtains, etc...
- Do not place any objects such as newspaper or blankets, etc. on or under the TV.
- The apparatus shall be used in moderate climates only.
- The TV set is designed exclusively for operation in a dry place. When using the TV outside, please, make sure it is protected against moisture (rain, splashing water). Never expose to moisture.
- Make sure the appliance does not stand on any power cables as they might get damaged. Mobile phones and other devices such as WLAN adapters, monitoring cameras with wireless signal transmission, etc. might cause electromagnetic interference and they should not be placed near the appliance.
- Do not place the appliance near heating elements or in a place with direct sunlight as it has a negative effect on cooling of the appliance. Heat storage is dangerous and it can seriously reduce the lifetime of the appliance. In order to ensure the safety, ask a qualified person to remove the dirt from the appliance.
- Try to prevent damage to the mains cable or mains adapter. The appliance can only be connected with the supplied mains cable/adapter.
• Storms are dangerous for all electric appliances. If the mains or aerial wiring is struck by lightening the appliance might get damaged, even if
it is turned off. You should disconnect all the cables and connectors of the appliance before a storm.
- To clean the screen of the appliance use only a damp and soft cloth. Use only clean water, never detergents and in no case use solvents.
- Position the TV close to the wall to avoid the possibility of it falling when pushed.
- WARNING - Never place a television set in an unstable location. A television set may fall, causing serious personal injury or death. Many injuries, particularly to children, can be avoided by taking simple precautions such as:
- Use cabinets or stands recommended by the manufacturer of the television set.
- Only use furniture that can safely support the television set.
- Ensure the television set is not overhanging the edge of the supporting furniture.
- Not place the television set on tall furniture (for example, cupboards or bookcases) without anchoring both the furniture and the television set to a suitable support.
- Not place the television set on cloth or other materials that may be located between the television set and supporting furniture.
- Educate children about the dangers of climbing on furniture to reach the television set or its controls.
- Ensure that children do not climb or hang onto the TV.
- If your existing television set is being retained and relocated, the same considerations as above should be applied.
- The instructions shown below are a safer way to set up the TV, by fixing it to the wall and will avoid the possibility of it falling forwards and causing injury and damage.
- For this type of installation you will need a fastening cord
A) Using one/both of the top wall-mounting holes and screws (the screws are already supplied in the wall mounting holes) fasten one end of the fastening chord/s to the TV.
B) Secure the other end of the fastening chord/s to your wall.
- The software on your TV and the OSD layout can be changed without notice.
Warning:
- Never connect any external devices to a live appliance. Switch off not only the TV but also the devices which are being connected! Plug the TV plug into the wall socket after connecting any external devices and the aerial!
- Always make sure there is free access to the TV mains plug. The plug shall remain readily operable.
- The appliance is not designed for a use in a workplace fitted with monitors.
- The systematic use of headphones at high volume might lead to irreversible hearing damage.
- Ensure environmental disposal of this appliance and any components including batteries. When in doubt, please, contact your local authority for details of recycling.
- While installing the appliance, do not forget that furniture surfaces are treated with various varnishes, plastics, etc. or they might be polished. The chemicals contained in these products might have a reaction with the TV stand. This could result in bits of the material sticking to the furniture surface, which are difficult to remove, if not impossible.
- The screen of your TV has been produced under top quality conditions and was checked in detail for faulty pixels several times. Due to the technological properties of the manufacturing process, it is not possible to eliminate the existence of a small number of faulty points on the screen (even with maximum care while in production). These faulty pixels are not considered faults in terms of guarantee conditions, if their extent is not greater than the boundaries defined by DIN norm.
- The manufacturer cannot be held responsible, or be liable, for customer service-related issues related to the third party content or services. Any questions, comments or service-related inquiries relating to the third
party content or service should be made directly to the applicable content or service provider.
- There are a variety of reasons you may be unable to access content or services from the device unrelated to the device itself, including, but not limited to, power failure, the Internet connection, or failure to confi gure your device correctly. Universal Media Corporation, its directors, offi cers, employees, agents, contractors and affi liates shall not be liable to you or any third party with respect to such failures or maintenance outages, regardless of cause or whether or not it could have been avoided.
- All third party content or services accessible via this device is provided to you on an "as-is" and "as available" basis and Universal Media Corporation and its affiliates make no warranty or representation of any kind to you, either express or implied, including, without limitation, any warranties of merchantability, non-infringement, fitness for a particular purpose or any warranties of suitability, availability, accuracy, completeness, security, title, usefulness, lack of negligence or error-free or uninterrupted operation or use of the content or services provided to you or that the content or services will meet your requirements or expectations.
- 'Universal Media Corporation' is not an agent of and assumes no responsibility for the acts or omissions of third party content or service providers, nor any aspect of the content or service related to such third party providers.
- In no event will 'Universal Media Corporation' and/or its affiliates be liable to you or any third party for any direct, indirect, special, incidental, punitive, consequential or other damages, whether the theory of liability is based on contract, tort, negligence, breach of warranty, strict liability or otherwise and whether or not Universal Media Corporation and/or its affiliates have been advised of the possibility of such damages.
Important information regarding use of video games, computers, captions and other fixed image displays.
- The extended use of fixed image program material can cause a permanent "shadow image" on the LCD screen (this is sometimes incorrectly referred to as "burnout to the screen"). This shadow image is then permanently visible on the screen in the background. It is irreversible damage. You can avoid such a damage by following instructions below:
- Reduce the brightness/contrast setting to a minimum viewing level.
- Do not display the fixed image for a long period of time. Avoid displaying of:
» Teletext time and charts,
» TV/DVD menu, e.g. DVD contents,
» In the „Pause“ mode (hold): Do not use this mode for a long time, e.g. while watching a DVD or a video.
» Turn off the appliance if you are not using it.
Batteries
- Observe the correct polarity when inserting the batteries.
- Do not expose batteries to high temperatures and do not place them on locations where the temperature might increase quickly, e.g. near the fire or on the direct sunshine.
- Do not expose batteries to excessive radiant heat, do not throw them into the fi re, do not disassemble them and do not try to recharge un-rechargeable batteries. They could leak or explode.
» Never use different batteries together or mix new and old ones.
» Danger of explosion if battery is incorrectly replaced. Replace only with the same or equivalent type.
» Different types of batteries or new and used batteries are not to be mixed. Batteries are to be inserted with the correct polarity. Exhausted batteries are to be removed from the product. Batteries shall be disposed of in a safe way. Only dispose of batteries in

Cd
specifi c collection containers (contact the your retailer for more information) in order to protect the environment.
» Warning: Batteries shall not be exposed to excessive heat such as sunshine, fire or the like.
» Dispose of batteries in an environmentally friendly way.
» Most of the EU countries regulate the disposal of batteries by law.
Disposal
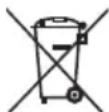
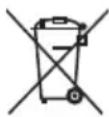
- Do not dispose of this TV as unsorted municipal waste. Return it to a designated collection point for the recycling of WEEE. By doing so, you will help to conserve resources and protect the environment. Contact your retailer or local authorities for more information.

Trademarks
- The terms HDMI and HDMI High-Definition Multimedia Interface, and the HDMI Logo are trademarks or registered trademarks of HDMI Licensing, LLC in the United States and other countries.
- The "HD TV" Logo is a trademark of DIGITALEUROPE.
- The "HD TV 1080p" Logo is a trademark of DIGITALEUROPE.
- The DVB logo is the registered trademark of the Digital Video Broadcasting - DVB - project.
- Manufactured under license from Dolby Laboratories. Dolby, Dolby Audio and the double-D symbol are trademarks of Dolby Laboratories.
What is included in the box
Supply of this TV includes following parts:
• 1x TV
- 1x Remote control
- 2x AAA batteries
- 1x User guide
- 1x RF cable
• 1x TV stand installation packet
• 3D glasses (Only for models with 3D function)
Attaching the Stand
Please follow the instructions in the Stand installation leaflet, located in the accessories bag.
Getting started - initial set up
- Using the RF cable supplied, connect the TV to the TV Aerial wall socket. Connect the power cable to the Electrical outlet.
- Turn on the device with marked ON/OFF switch
- Insert the batteries supplied into the Remote control and press the Standby button to power on the TV.
- You will now be welcomed with the initial set-up screen. If it does not appear, on the remote control, please press [MENU] then 8-8-8 and the menu will appear. If you wish to make changes to any of the default settings, use the scroll ▲/▼/◄/► buttons. To exit this menu at anytime, press [EXIT] button.
- Please select desired language, country and environment. Set LCN to ON if you want to arrange found channels by cable provider preferences (only applies to DVB-C channels).
To confirm settings press [OK] button.
- In the next step select the type of digital broadcasting. You can choose between DVB-T (terrestrial), DVB-C (cable) or DVB-S2(satellite)*. The analog channel will be searched automatically, as most of the cable network includes analog channels.
Press [OK] button to start the tuning process.
- Optional channel presets DVB-C: Select DVB-C if your TV is connected to a cable TV network. Keep all default settings as it is recommended.
Press [OK] button to start the tuning process.
If DVB-C channels are not found, contact your network provider for the valid "Network ID". Then perform a new search. Press the [MENU], select "Network ID" and enter the network ID.
- Optional channel presets DVB-S2*: Select "Satellite" in the "Digital-type" in the menu for the optional channel presets. Here you can choose between the various satellites. Since selection completed, then the channel list of the exact satellite will be available to be imported into your TV system. This take several seconds.
Press [OK] button to start the tuning process.
TIP: If you are missing channels, the reason for this is likely to be signal strength, you should consider connecting signal booster and re-tuning the TV.
TIP: As part of our continuing efforts to reduce energy consumption, we added a new Home Mode feature (appears on the first installation screen). This function helps reduce energy consumption up 15% compared to other modes. The image brightness is reduced using Home Mode. If this setting does not suit your environment, you can choose from other modes (Note: the Store mode is the optimal default mode, but consumes 15% more than the Home Mode).
* - Available only for TVs with DVB-S function
Remote control
STANDBY – Switch on TV when in standby or vice versa.
MUTE – Mute the sound or vice versa.
DTV- Switch to digital TV source.
RADIO - TV/RADIO – Switch to Digital and switch between TV and radio in Digital mode.
USB – Switch to USB source.
ATV- Switch to analog TV source.
DVD ^1 – Switch to DVD mode
0 - 9 - to select a TV channel directly.
TV GUIDE – Opens the 7 Day TV Guide (Digital mode).
- To return to the previous channel viewed.
VOL ▲/▼ - To increase / decrease the sound level.
S.MODE - Scrolls through sound mode options
P.MODE - Scrolls through picture mode options
FAV – To display favourites menu.
CH ▲/▼ – To increase or decrease the channel being watched.
(▲/▼/◄/►/OK) – Allows you to navigate the on-screen menus and adjust the system settings to your preference.
MENU – To display OSD menu.
EXIT – To exit all menus.
SOURCE – To display the input/source menu.
INFO – Press once for now/next channel information. Press twice for programme information about current programme.
ASPECT – To switch the screen between the different picture formats.
SLEEP – Press repeatedly to cycle through the sleep options.
AUDIO – To change the audio language (if available).
SUBTITLE – To switch the dialogue at the bottom of the screen (on/off).
TEXT - Teletext mode - To enter Teletext
TEXT HOLD - HOLD - Teletext mode - Hold current page which is displayed
TEXT/ DVD ZOOM - DVD mode - Teletext Mode - To zoom in
ZOOM - DVD mode - Teletext Mode - To zoom in -
DISPLAY – To switch off the screen when listening to radio
DVD MENU ^1 – DVD mode - To display the DVD disc menu
Rec ^2 – PVR mode - PVR Record
DVD SETUP ^1 – DVD mode - To display the DVD setup menu
Rec List ^2 – PVR mode - Opens the list of recordings.
- To restart the current chapter
▶▶- To advance forward to the next chapter
■ / ▲ – To stop the playback / To EJECT the disc press/hold the button for 4 seconds.
- To play in fast rewind mode.
▶▶ – To play in fast forward mode.
▶ I – To play/pause
GOTO ^1 – DVD mode - To go to a specific chapter
A-B ^1 – DVD mode - Press once to set point, press a second time to return to point
ANGLE ^1 – DVD mode - Select different angle of DVD (if available)
REPEAT - DVD mode ^1 - USB mode - To repeat playback
REVEAL – Teletext mode - To reveal or hide the hidden words
SIZE - Teletext mode - To change the display size in Teletext mode
TITLE ^1 – To display the DVD disc menu
D. DIS ^1 – To display the current disc information
INDEX - Teletext mode - To display the index page
Red Green Yellow Blue button- Additional teletext and OSD functions
3D button ^3 - Switches between 3D type settings
1 - available only for TVs with DVD players
2 - available only with PVR function
3 - Available only for TVs with 3D function
TV buttons & Source menu

Eject*

Play / Pause*
Vol+ Volume up and menu right
Vol- Volume down and menu left
CH+ Programme/Channel up and menu up
CH- Programme/Channel down and menu down
MENU Displays Menu/OSD
SOURCE Displays the input source menu
STANDBY Standby Power On/Off
* - Only for models with DVD-Player
Choosing Mode Input/Source
To switch between the different input/connections.
a) Using the buttons on the remote control:
-
Press [SOURCE/ AV] - The source menu will appear.
-
Press [▼] or [▲] to select the input you require.
-
Press [OK].
b) Using the buttons on the Television:
-
Press [SOURCE].
-
Scroll up / down using CH+/CH- buttons to the input/source you require.
-
PressVol+ to change input/source to the one selected.
Connections


USB 1,2*
USB-Input


HDMI 1, 2*, 3*, 4* in
HDMI-Input 1, 2*, 3*, 4*


VGA(PC)*
VGA PC-Input

VGA (PC) Audio In*
3.5mm PC audio input


R/L - Video & YPbPr audio In*
Component / Video audio input

Mini AV*
Component / Video audio input


Video (CVBS)*
VIDEO Input


Mini YPbPr*
Mini Component HD Input

YPbPr*
Component HD Input

SCART*
SCART-Input

CI Card IN
SCART input


RF In
RF / TV Aerial Input


Sat In*
Satellite Input


Digital Optical Audio Out*
Digital optical output


HEADPHONES
3.5mm Headphone output
* - Only on supported devices
TV Menu navigation
To access this menu, press [MENU] button on the remote control. To enter a menu press [OK]. If you wish to make changes to any of the default settings, use the scroll (▲/▼/◄/►) buttons. To confirm any settings press [OK] button. To exit this menu at anytime, press [EXIT] button.
Channel
Auto Tuning - Allows you to retune the television for all digital channels, digital radio stations and analogue channels.
Analogue Manual Tuning - Allows you to manually tune your analogue signal.
Digital Manual Tuning - Allows you to manually tune your digital signal.
Programme Edit - Allows you to delete, skip and add favourite channels.
Schedule List - Lists your programme reminders.
Signal Information - Information about DVB signal.
CI Information - Pay per view services require a "smartcard" to be inserted into the TV. If you subscribe to a pay per view service the provider will issue you with a 'CAM' and a "smartcard". The CAM can then be inserted into the COMMON INTERFACE PORT (CI Card In).
Dish Setup* - This menu is only available in DVB-S2 mode. You can select the type of satellite, your transponder and your LNB type, etc.
* - Only for models with DVB-S tuner
Picture
Picture Mode - Choose from the following presets.
- Standard - Default settings
- Dynamic - Recommended settings for fast moving pictures
- Mild - Set to be lighter in colour and less bright
- Personal - Lets you manually alter all the settings
- Economy - Consume 15% less energy.
Contrast - Picture contrast setting
Brightness - Picture brightness setting.
Colour - Colour saturation setting
Tint - Picture tint setting.
Sharpness - Picture sharpness setting.
Colour Temperature - Choose from the following presets.
- Normal - Default settings
- Warm - Increases red within the picture
- Cold - Increases blue within the picture
Noise Reduction - Choose from the following presets.
- Off - Turns noise reduction off
- Low - Minor system adjustment
- Middle - Medium system adjustments
- High - Maximum system adjustments
- Default - Default settings
3D Settings\*
TIP: For the best 3D picture effect, watch your TV from vertical angle +/- 10°.
3D Type - 3D Type- When connecting a 3D product some the picture maybe displayed incorrectly; choose from the following settings to correct this. You can toggle these settings by pressing the '3D' button on your remote.
- 3D off - Turns 3D off
- Side by Side 3D Format - 3D format is commonly used in 3D broadcasting, works by halving the horizontal resolution of videos to store left and right eye images in each frame. It eff ectively displays up to 960 × 1080 -pixel pictures to each eye, enabling TV stations to telecast 3D content at a much lower bandwidth compared with 3D
Blu-ray discs. Typical supported resolutions are limited to 720p and 1080i for 3D TV programs. Users will need to manually select the correct 3D format to properly display side-by-side 3D content on a 3D TV.
- Top Bottom 3D Format - 3D format is alternative for 3D broadcast, which is pretty similar to side-by-side 3D except that it halves the vertical resolution instead. Available primarily up to 720p resolution, top-and-bottom 3D offers 1,280 pixels horizontally. The higher pixel count is generally considered more suitable for displaying panning motion in sports programs.
- Frame Alternative - As its name suggests, this format stacks the left and right eye images in each frame to retain the content's original resolution for the best 3D pictures. Most, if not all, 1080p 3D Blu-ray movie discs and 720p PS3 3D games are produced utilizing this technique. Another key differentiator is that all 3D TVs should be able to automatically detect frame-packing 3D signals and correctly display the content without user intervention.
- Line by Line - The picture signals for left and right eyes are interleaved in alternate lines. The left clip's resolution is halved then placed in the odd lines of the video stream. Correspondingly, the right clip's resolution is halved then placed in the even lines of the video stream. When combined the video stream totals 1920 × 1080 .
Exchange 3D L/R- change picture sequence for different viewing 2D to 3D- Changes the picture from regular 2 dimensions to 3 (3D). Please note as content is being changed by the TV the effects are limited 3D to 2D- Changes the picture from 3D to regular 2 dimensions (2D).
2D to 3D Depth - Depth of pictures converted from 2D to 3D.
* - Only for models with 3D function
Sound
Sound Mode - Choose from the following presets
- Standard - Default settings
- Music - Emphasises music over voices
- Movie - Provides live and full sound for movies
- Personal - Selects your personal sound settings
- Sports - Emphasises sound for sports
Tip: Treble and bass levels can only be adjusted when the sound mode 'Personal' is selected.
Treble - To adjust the level of high frequency within the sound.
Bass-To adjust the level of low frequency within the sound.
Balance - To switch the sound between the left and right speakers.
Auto Volume Level (AVL) - When 'on' is selected, the volume will stay at a constant level regardless of input/source.
Digital Output - This is the digital Audio output. Choose from the following options:
- Off - Off
- Auto - Selects the best settings automatically
- PCM - Select this option if you are connecting to a Stereo Hi-fi via digital cable (Pulse-code modulation (PCM) is a digital representation of an analogue signal).
Audio Description - Additional sound track for visually impaired. Available only on selected DTV shows.
Time
Clock - Set the date and time. Date and time is set up automatically in DVB mode.
Off Time - Allows you to set a specific time for your TV to turn off.
On Time - Allows you to set a specific time for your TV to turn on, the channel it will then display, the source it will be on and also the volume. This function can then be toggled to repeat every day or a certain day.
Time Zone - Change your current time zone.
Sleep Timer - Lets you set the sleep timer so the television automatically switches off after a set amount of time. Off -> 10min -> 20min -> 30min -> 60min -> 90min -> 120min -> 180min -> 240min.
Auto standby - Adjustment for the auto standby in hourly increments: Off -> 3h -> 4h -> 5h.
OSD Timer - Lets you adjust the amount of time the On Screen Menu stays on the screen before disappearing.
Lock
System Lock - Allows you to lock or unlock the menu. You will be asked to enter a 4 digit password. Use the ◀ button to quit the password input. Use the ▶ button to clear. Default password is 0000.
Set Password - Change the default password.
Channel lock - Lock specifi c TV channels.
Parental Guidance - Lock TV channels based on age restriction.
Key Lock - Lock the TV buttons.
Hotel mode
For access to Hotel mode press buttons „MENU 7 9 0 6“. In hotel mode you may preset and lock some TV functions.
Setup
Language - Allows you to change the language of the menu.
TT Language - Encoding settings for the proper display of teletext characters.
Audio Languages - Allows you to change audio language on selected DVB channels.
Subtitle Language - Allows you to change subtitles language on selected DVB channels.
Hearing Impaired - If signal provides support for the hearing impaired, the subtitles can be played by pressing the "Subtitle". If you set Hearing Impaired ON and switch to a channel with supports for hearing impaired subtitles will be activated automatically.
Aspect Ratio - Within the EU the picture form varies depending on the channel/broadcast. There are a number of different options to best meet your needs.
- Auto-Automatically displays the best picture format. So the picture is in the correct position. May have black lines at the top/bottom and/or sides.
- 4:3 - Displays the 4:3 picture in its original size. Side bars are shown to fill the 16:9 screen.
- 16:9 - Fills the screen with a regular 16:9 signal.
- Zoom 1/2 - The picture is the correct proportion but zoomed in to fill the screen.
- Full Screen - Stretch signal to fill the screen.
Blue Screen - Changes the background when there is no input between transparent and a blue background (Only available on some sources).
First Time Installation - Starts the first time installation.
Reset - This resets the menus to factory settings.
Software Update (USB) - From time to time we may release new fi rmware to improve the operation of the television (available to download). This menu lets you install the new software/ fi rmware onto the television. Further details of how to do this will be issued with the fi rmware. Contact the helpline or refer to the 'www.umc-slovakia.sk/products-support/' website.
HDMI CEC* - Allows you to operate devices connected via HDMI with TV remote control.
- Auto power* - Automatically turn on/off connected devices via HDMI CEC
- Device menu* - Allows you to access devices menu and operate the menu using TV remote control.
- HDMI ARC* - Sends audio signal from terrestrial/satellite broadcast via HDMI to the AV receiver without using any additional audio cables, this functions is available only on HDMI 1 output.
** - HDMI CEC must be supported by connected device.
PC Settings\*
Auto Adjust - Lets you automatically configure the television to be used as a computer monitor.
H Off set - Changes the horizontal position of the picture.
V Off set - Changes the vertical position of the picture.
Size - increase picture size.
Phase - To adjust delay time of phase in order to reduce the noise of picture
Position Reset - Changes back to the original settings
TIP: If the computer is left in-active for a period of time, the television will switch into a 'sleep' state (the screen will power off to save power). To switch back on press the standby button.
TIP: If you do not press any buttons for 10 seconds, the menu will automatically exit. You can change the length of time before the menu exits automatically - see 'OSD Timer' section.
* - only for devices with VGA connector
7 Day TV Guide
TV Guide is available in Digital TV mode. It provides information about forthcoming programmes (where supported by the Digital channel). You can view the start and end time of all programmes and on all channels for the next 7 days and set reminders.
-
Press [TV GUIDE]. The following 7 Day TV Guide will appear.
-
Navigate through the menu using ▲/▼/◄/►.
You can now:
Record selected TV channel and TV show by pressing the RED button.*
Set a reminder by pressing BLUE.
View a previous day by pressing GREEN.
View the next day by pressing YELLOW.[INFO] shows detailed information about the selected post
- Press [EXIT] to exit the 7 day TV Guide.
* - only for models with recording function
USB mode / Media player
USB mode offers playback of various different types of content that you have saved on your USB Memory Stick. On switching to USB source the USB mode menu screen will appear. The content will be divided into Photo, Music, Movie and File based on file type.
- You can navigate through the menus using the scroll ▲/▼/◄/► buttons. To confirm the item you wish to play/view press [OK] button.
- Select the drive you require. (If your drive only has 1 partition you will only see 1 item).
- You can now access the item. Press OK to view.
- While viewing you may control the item playback modes by using the remote control buttons or by invoking playback navigation menu and selecting on-screen buttons ▲/▼/◄/► and [OK]
USB Record - Digital mode\*
Built into this television is a USB record facility. This function is available in Digital mode when used in conjunction with a compatible USB memory stick or USB Hard drive. The benefits of this are as follows:
- Pause live TV and then playback, fast forward and rewind (up to live TV).
- One button record, if you decide you want to record the current programme.
- Easy programmable recording from the 7 day TV Guide
- Record TV and watch back on your computer/laptop.
Due to the nature of the product, it is necessary to use a high speed USB memory stick (as the TV reads from and writes to the memory stick at the same time, some memory sticks may not be suitable).
Minimum Specification - USB Memory Stick
- Read Speed - 20 MB/s (Mega Byte Per Second)
- Write Speed - 6 MB/s (Mega Byte Per Second)
Pause Live TV (Time Shift)\*
Pausing Live TV is very simple.
- Press the play/pause button and the television will pause and the live content will be recorded. To resume watching press play/pause again.
- Press fast forward to go forward in a recording (i.e. to skip adverts).
- Press fast rewind to go back in a recording (i.e. if you fast forwarded too far).
TIP: When you switch the TV to standby or change channel the Time Shift memory is wiped. To restart time shift you must press play/pause button.
One Button Record
At any point in time you may decide to record the current channel that you are watching. To do this you need to press the [REC] button.
TIP: This television contains one TV tuner, therefore it can only record the channel you are watching or record one channel while the television is in standby mode.
Note: USB record function is only available in Digital TV mode. Due to copyright laws and illegal copying/recording it is not possible to record to/from any other input/output source.
* - only for devices with built in PVR function
DVD Menu\*
To access this menu, press [D. MENU] button on the remote control. If you wish to make changes to any of the default settings, use the scroll ▲/▼/◄/► buttons. To confirm any settings press [OK] button. To exit this menu at anytime, press [EXIT] button.
General Setup Page
TV Display - Choose from the following options 4:3
- PanScan - PS Traditional picture format, often used on old film
- 4:3 LetterBox - LB Traditional picture which has been adapted for widescreen
- Wide - Widescreen picture format
OSD Language - Select desired language
Audio Setup Page
Speaker Setup - Choose from the following options
- LT/RT - Set LT/RT Downmix
- Stereo - Set Stereo Downmix
Dolby Digital Page
Dual Mono
- Stereo - Outputs 2 channels of sound both left and right
- Mono L - Outputs left side sound
- Mono R - Outputs right side sound
- Mix Mono - Outputs a single channel of sound but mix between right and left
Dynamic Range - This is the difference between the quietest and loudest sounds. This setting works only with DVD discs recorded in Dolby digital.
Preference Page
TV Type - Choose from the following options
- NTSC - Normally used for discs from North America, Japan etc
- PAL - The standard for discs from UK/Europe, most of Asia, Australia etc
- Multi - For both NTSC and PAL
Default - This option allows you reset all DVD settings to factory settings.
* - only for devices equipped with built in DVD Player
RISQUE D'ÉLECTROCUTION NE PAS OUVRIR

- G./D. - Lt/Rt downmix
- Stéréo - Stereo downmix
Réglage Dolby D
Dual Mono
- Lt/Rt - Lt/Rt downmix
- Stereo - Stereo downmix
▶ I – Odtwarzanie/pauza
- Ee/Di - Lt/Rt downmix
USB mode / Media player
USB nudi prikazivanje raznih tipova sadržaja koje ste pospremiliu na USB memoriji. Prelaskom na USB izvor USB meni će se pojaviti. Sadržaj će biti podijeljen na Photo (fotografi je),
Music (muzika), Movie (fi lm) and Text (tekst) u zavisnosti od vrste dokumenta.
-
Možete se kretati kroz meni koristeći ▲ /▼ /◀/▶ tipke Kako biste potvrdili Vaš izbor pritisnuti tipku [OK].
-
Izaberite željeni prenosnik. (ako prenosnik sadrži 1 podjelu vidjećete samo 1 predmet).
-
Možete pristupiti pritiskom na OK.
-
Dok gledate možete kontrolisati gledanje koristeći daljinski upravljač ili pozivanjem navigacijskog menija i izborom tipaka ▲ /▼ / ◀/▶ a zatim [OK]
USB snimanje - Digitalni mode\*
U Vaš televizor ugrađen je USB zapis. Ova funkcija je dostupna u digitalnom modu kada se koristi zajedno sa odgovarajućom USB memorijom ili USB hard disk.Prednosti ovoga su:
- Pauziranje TV uživo a zatim gledanja, premotavanja.
- Snimanje jednim dugmetom, ako želite možete snimati trenutne programe.
- Lako programiranje snimanja sa 7 dnevnog TV programa.
- Snimanje TV i gledanje na kompjuteru/laptopu. Zbog prirode proizvoda potrebno je koristiti USB memoriju visoke brzine (pošto TV čita i zapisuje na memoriju u istom trenutku, neke USB memorije nisu prihvatljive).
Minialne specifi kacije - USB Memorija
- Brzina čitanja - 20 MB/s (Mega Byte Po Sekundi)
- Brzina zapisivanja - 6 MB/s (Mega Byte Po Sekundi)
Pause Live TV (Time Shift)\*
ATV- Switch to analog TV source.
DVD ^1 – preklopite na DVD.
The Ground Truth image displays a single, solid horizontal line. According to Rule 2 (UNDERSCORE & LINE RULES), this is a stylistic or background line, not a placeholder underscore. Therefore, the OCR result must ignore it and output nothing or only meaningful text. The provided OCR content is "____", which consists of four underscores. This is an incorrect interpretation of the line as a placeholder, violating the rule that stylistic lines must be ignored. The OCR has hallucinated underscores where none should exist based on the GT's visual context. Hence, the OCR result is inconsistent with the Ground Truth.
Търговски марки
Mod USB / Media player
MENU – For at vise OSD menu
SOURCE – For at vise input/source menu
TEXT – Teletext mode: For at gå til Teletext
TEXT HOLD - HOLD – Teletext mode: Hold nuværende side som vises
TEXT / DVD ZOOM – Teletext mode: DVD mode: For at zoome ind på teksten
DISPLAY – Sluk for LCD panelet
DVD MENU ^1 – DVD mode: For at vise DVD disc menu
SIZE – Teletext mode: For at skifte display størrelsen i Teletext mode
TITLE ^1 – DVD mode: For at vise DVD disc menu
D. DIS ^1 – Hvis information om DVD playback
3D button ^3 – Switches between 3D type settings
3.5mm Headphone output
The Ground Truth image displays a single, solid horizontal line. According to Rule 2 (UNDERSCORE & LINE RULES), this is a stylistic or background line, not a placeholder underscore. Therefore, the OCR result must ignore it and output nothing or only meaningful text. The provided OCR content is "____", which consists of four underscores. This is an incorrect interpretation of the line as a placeholder, violating the rule that stylistic lines must be ignored. The OCR has hallucinated underscores where none should exist based on the GT's visual context. Hence, the OCR result is inconsistent with the Ground Truth.
Εμπορικά σήματα
b) Using the buttons on the Television:
DTV – Switch to digital TV source.
RADIO – Prepnutie na Digital a prepínanie medzi TV a rádio v režime Digital
- Multi - Pre NTSC a PAL
.(م waterfront) [OK] ا Compact
natural_image
Solid blue square with rounded corners (no text or symbols)
BLA/MAN/0301