BPS 686 - Pregnant GoGen - Free user manual and instructions
Find the device manual for free BPS 686 GoGen in PDF.


| Product Type | Bluetooth Party Speaker |
| Model | BPS 686 |
| Brand | GoGen |
| Power Supply | AC 100-240V ~50/60Hz, 33W; Built-in rechargeable battery (4000mAh) |
| Power Output | 2 x 30W |
| Bluetooth Version | 2.1+EDR |
| Bluetooth Range | Up to 10 meters (open air) |
| FM Frequency Range | 87.5 - 108 MHz |
| USB Ports | 2 (for music playback, not charging) |
| Microphone Inputs | 2 x 6.3mm jacks |
| AUX Input | 3.5mm jack |
| LED Lighting | Disco LED (5 modes) and decoration LED (3 modes) |
| Equalizer Modes | FLAT, CLASSIC, ROCK, POP, JAZZ |
| Super Bass | Yes (via SUPER BASS button) |
| Microphone Echo | Adjustable (on/off) |
| Automatic Standby | After approx. 15 minutes no audio signal |
| Charging Time | Approx. 7 hours |
| Battery Playback Time | Approx. 4 hours |
| Included Accessories | AC power cord, instruction manual |
Frequently Asked Questions - BPS 686 GoGen
User questions about BPS 686 GoGen
0 question about this device. Answer the ones you know or ask your own.
Ask a new question about this device
Download the instructions for your Pregnant in PDF format for free! Find your manual BPS 686 - GoGen and take your electronic device back in hand. On this page are published all the documents necessary for the use of your device. BPS 686 by GoGen.
USER MANUAL BPS 686 GoGen
natural_image
Abstract logo design with a stylized white 'S' inside a circle on black background (no text or symbols)BPS 686
GoGEN
natural_image
Close-up of a black air fryer with control knobs and a digital display (no visible text or symbols)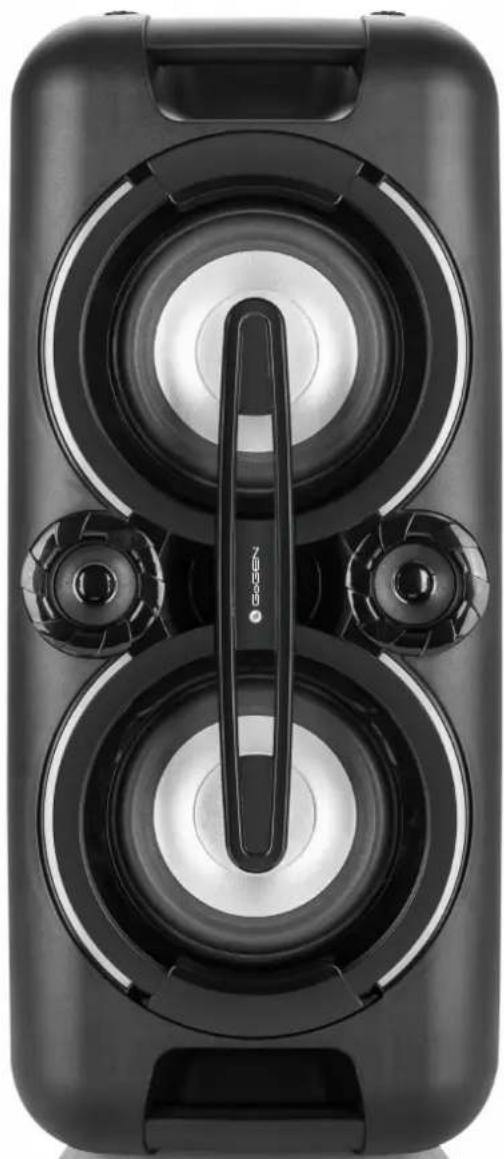
natural_image
Top-down view of a black electronic device with dual speakers and a central vertical knob (no visible text or symbols)PÁRTY REPRODUKTOR S BLUETOOTH PÁRTY REPRODUKTOR S BLUETOOTH IMPREZOWY GŁOŚNIK BLUETOOTH BLUETOOTH PARTY SPEAKER BLUETOOTH PARTY HANGSZÓRÓ

NÁVOD K POUŽITÍ NÁVOD NA POUŽITIE INSTRUKCJA OBSŁUGI USER MANUAL HASZNÁLATI UTASÍTÁS
ZAČÍNÁME
NAPÁJENÍ
- Indikátor NABÍJANIA
- Tlačidlo HLASITOSTI MIKROFÓNU
- Ovládanie HLASITOSTI
POHL'AD SPREDU A ZOZADU
- Rukovät
- Reproduktory
- DISCO LED svetlá
- Výškové reprod.
- Anténa fm
- Ventilačné otvory
- Napájací otvor
- LED svetlá
ZAČÍNAME
NAPÁJANIE
- WSKAŻNIK ŁADOWANIA
- POKRETŁO GŁOŚNOŚCI MIKROFONU
- POKRETŁO GŁOŚNOŚCI
WIDOK Z PRZODU I Z TYŁU
IMPORTANT: Please read before using and retain for future reference.
IMPORTANT NOTES
INTRODUCTION
• Thank you for buying our product.
- Please read through these operating instructions, so you will know how to operate your equipment properly. After you finished reading the instructions manual, put it away in a safe place for future reference.
SYMBOL DEFINITIONS
DANGER - Indicates an imminently hazardous situation, which, if not avoided, will result in death or serious injury. This symbol appears only in the most extreme situations.
WARNING - Indicates a potentially hazardous situation which could result in death or serious injury.
CAUTION - Indicates a potentially hazardous situation, which, if not avoided, may result in minor/moderate injury or product/property/damage. It also warns against unsafe practices

The lightning flash with arrowhead symbol, within an equilateral triangle is intended to alert the user to the presence of insulated ‘dangerous voltage’ within the product’s enclosure that may be of sufficient magnitude to constitute a risk of electric shock to persons.
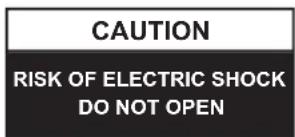
WARNING: TO REDUCE THE RISK OF ELECTRIC SHOCK DO NOT REMOVE COVER (OR BACK), NO USER SERVICEABLE PARTS INSIDE REFER SERVICING TO QUALIFIED SERVICE PERSONNEL

The exclamation point within an equilateral triangle is intended to alert the user to the presence of important operating and maintenance (servicing) instructions in the literature accompanying the appliance.
READ ALL INSTRUCTIONS BEFORE USE

Always follow basic safety precautions when using this Bluetooth speaker system with Microphone, especially when children are present.
SAFETY INSTRUCTIONS
- Read this Instruction Manual before you attempt to connect or operate the appliance.
- Keep these instructions in good condition. Heed all warnings. Follow all instructions.
- Save this Instruction Manual for future reference.
- The apparatus shall not be exposed to dripping or splashing and no objects filled with liquids, such as vases, shall be placed on the product. Dry location use only.
- No naked flame source, such as candles, should be placed on the product.
- Children should be supervised to ensure that they do not play with the appliance.
- Ventilation should not be impeded by covering the ventilation openings.
- Ensure that the unit is plugged into an AC 220-240 V 50 Hz power outlet. Using higher voltage may cause the unit to malfunction or even fire catching. Turn off the unit before unplugging it from power source to completely switch it off.
- Do not plug/ unplug the power plug into/from an electrical outlet with wet hands.
- If the power plug does not fit into your outlet, do not force the plug into an electrical socket if it does not fit.
- Use replacement parts, which are specified by the manufacturer.
-
Install the unit in accordance with the manufacturer's instructions.
-
Place the unit where there is good ventilation. Place the system on a flat, hard and stable surface. Do not expose to temperatures above 40^ C. Allow at least 30 cm clearance from the rear and the top of the unit and 5 cm from each side.
- Press the buttons of the unit gently. Pressing them too hard can damage the unit.
- Dispose of used batteries in an environmental-responsible manner.
- Always ensure that the product is unplugged from the electrical outlet before moving or cleaning. Clean it with dry cloth only.
- Unplug the product during lightning, storms or when it will not be used for long periods of time.
- This product has no user-serviceable parts. Do not attempt to repair this product yourself. Only qualified service personnel should perform servicing. Take the product to the electronics repair shop of your choice for inspection and repair.
- NEVER let anyone, especially children, push anything into holes, slots or any other openings in the unit's casing as this could result in a fatal electric shock.
- Don't mount this product on a wall or ceiling.
- Do not place the unit near TVs, speakers and other objects that generate strong magnetic fields.
- Do not leave the unit unattended when it is in use.
NOTE: To disconnect the system completely if it not to be used for a long time, remove the AC power plug from the wall outlet.
GUIDE TO THE APPLIANCE
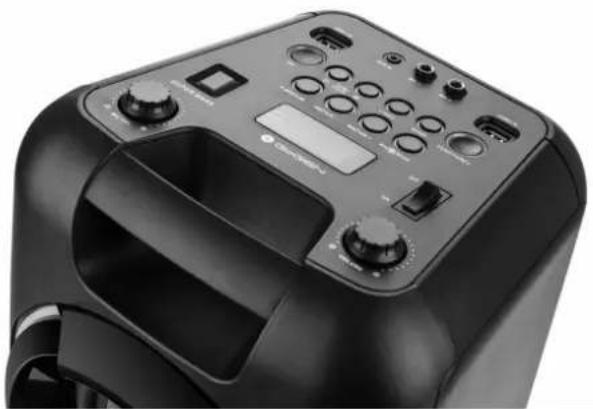
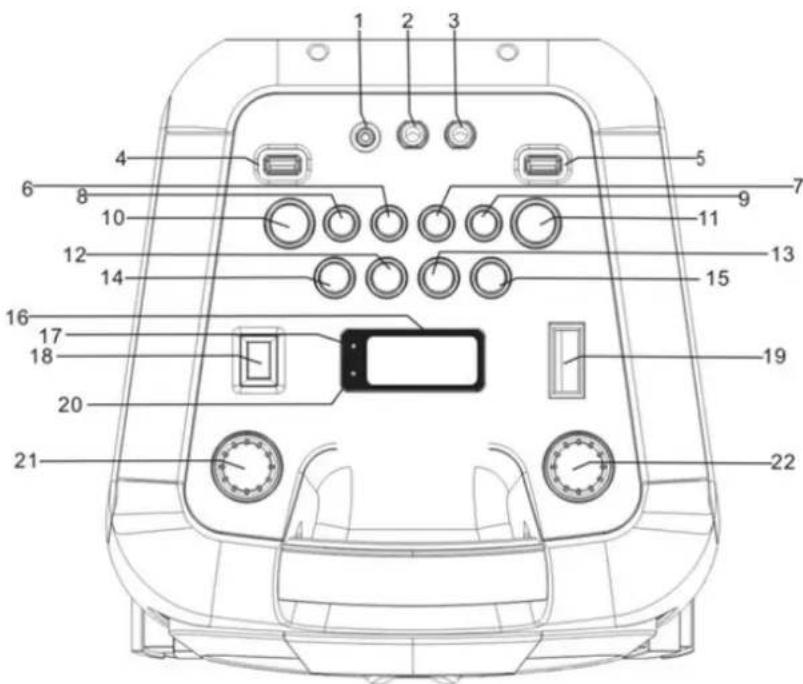
TOP VIEW
- 3.5 mm AUX IN JACK
- 6.3 mm MIC JACK 1
- 6.3 mm MIC JACK 2
- USB PORT 1
- USB PORT 2
- 10/M./FOLD.+ BUTTON
- LIGHT BUTTON
- 10/M./FOLD.- BUTTON
- ECHO BUTTON
- EQ BUTTON
- FUNCTION/O BUTTON
- ◀/TUN - BUTTON
- ▶/TUN.+ BUTTON
- P-MODE/M. BUTTON
15 ▶/PAIR/SCAN BUTTON - LCD DISPLAY
- PAIR INDICATOR
- SUPER BASS BUTTON
- POWER ON/OFF BUTTON
20 CHARGE INDICATOR - MIC VOL. CONTROL
- VOLUME CONTROL
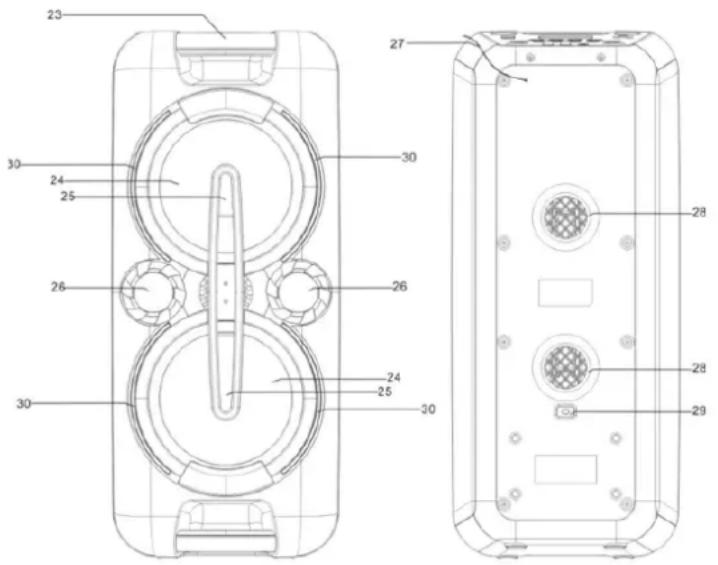
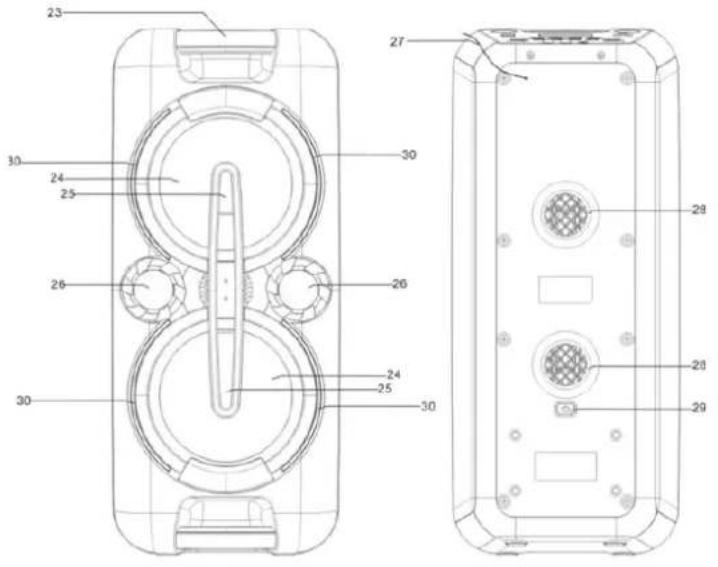
FRONT AND BACK VIEW
- HANDLE
- SPEAKERS
- DISCO LED LIGHT
- TWEETERS
- FM ANTENNA
- VENTILATION HOLES
- AC SOCKET
- DECORATION LEDS
GETTING STARTED
POWER SOURCE
This unit works with rechargeable lead-acid battery (the battery capacity 4000 mAh). Fully charge the unit (around 7 hours) before using the product for the first time. The playback time has about 4 hours after full charging. Unplug the AC Power cord from the AC socket to work on the battery pack after fully charged. Plugging the AC Power cord while the battery pack is attached initiates the charging of this battery, the charge LED indicator lights red during charging, when the battery is fully charged the indicator will turn to green. When the unit is with low battery, the LED indicator will flash in red.
Warning: Do not change the battery, only high-qualified personnel can perform this operation.
Press the power ON/OFF button to switch the unit on/off.
NOTE: In USB/Bluetooth/AUX mode, when the unit is not providing the main function for around 15 minutes, the unit will automatically switch into standby mode. Press the FUNCTION/O button to turn on the unit again. Please note that low volume setting in the audio source may be recognized as "no audio signal", this will affect the capability of signal detection from the device and can also originate an automatic switch into standby mode. If this happens please reactivate the audio signal transmission or increase the volume setting on the audio source player in order to resume playback.
Electrostatic Discharge hints – The unit may reset or may not reset to normal operation mode due to electrostatic discharge, just switch it off and reconnect again.
SETTING THE FUNCTION MODE
To change the function modes, press the FUNCTION button repeatedly to choose USB1/USB2/BLUETOOTH/AUX/RADIO function.
ADJUSTING THE VOLUME
- Rotate the VOLUME knob on the unit to increase or decrease the music volume.
- Rotate the MIC VOL. knob on the unit to increase or decrease the microphone volume.
BASS ADJUSTMENT
Press the SUPER BASS button on unit to increase the bass effect.
This unit has a built-in equalizer system, Press the EQ button on unit to select a setting that best matches the music style: FLAT, CLASSIC, ROCK, POP and JAZZ.
MICROPHONE ECHO ADJUSTMENT
Press the ECHO button on unit turn on or off the microphone echo effect.
FLASHING LIGHT
There are 5 modes for the DISCO LED lighting. Press the LIGHT button to choose the light modes.
L-1: Blue LED will be on constantly.
L-2: Blue LED will be on flashing mode.
L-3: Red LED will be on constantly.
L-4: Red LED will be on flashing mode.
L-5: 7 colors LED will be on flashing mode.
There are 3 modes for the decoration LED lighting around the speakers.
Press and hold the LIGHT button to choose the light modes.
E-1: Blue LED will be on constantly.
E-2: Red LED will be on constantly.
E-3: Blue and red LED flashing alternatively.
RADIO OPERATION
Listen to FM radio broadcasts. Press the FUNCTION button on the unit, the display reads FM and the radio frequency.
Note: in order to get the best reception, extend the FM ANT. on the rear of the unit before use to its full length.
TUNING TO A RADIO STATION
If you know the station frequency that you want to tune to directly:
- Tune to a station by press the ▶/TUN.+ or ◀/TUN.- button repeatedly. The station frequency is shown on the display.
To tune to a preset station:
• To tune to the next preset station, press the 10/M./FOLD.+ button.
• To tune to the previous preset, press the 10/M./FOLD.- button.
AUTO PRESET MEMORY / SCAN
To scan for stations within reception range and save them to preset memory automatically, press and hold the PLAY/PAUSE/PAIR/SCAN button. After the unit is finished scanning, the unit will automatically tune to preset number 1 (P01).
Choose which stations to save in preset memory instead of scanning automatically.
- Use the ▶/TUN.+ or ◀/TUN.- button to tune to the station that you want to save as a preset (e.g., 93.1).
-
Press the P-MODE/M. button. "P01" will flash on the display to indicate that you are saving the station as Preset Memory 01. (To change the preset memory number, press the 10/M./FOLD.+ or 10/M./FOLD.- buttons.)
-
Press the P-MODE/M. button to finish saving the station (e.g., P01 is now set to 93.1).
- To save another station, repeat steps 1 to 3. You may save up to 30 FM stations.
USB OPERATION
This unit provides two USB ports for music playback.
- Press the FUNCTION button on unit to select "USB1" or "USB2" mode.
- Plug the USB memory stick to the USB port on top of the unit. Playback will start automatically from Track 1.
-
To pause playback, press the PLAY/PAUSE/PAIR/SCAN button on unit. The playing time will flash on the display.
-
To resume playback, press the PLAY/PAUSE/PAIR/SCAN button again.
-
To select a desired track, press the ▶ or ◀ button respectively during playing until the desired track appears on the display. The unit will start play automatically.
-
To search for a particular passage during playback, press and hold the ▶ or ◀ button to scan the current playing track at high speed until desired point (passage) appears, then release the button for normal playback mode.
-
To select a song which track number exceeds 10, press the 10/M./FOLD.+ or 10/M./FOLD.-button each time to skip forward/backward 10 tracks, then press the ▶ or ◀ button to select desired track.
-
To select a desired folder (if the USB contains more than one folder), press and hold the 10/M./FOLD.+ or 10/M./FOLD.- button each time to skip forward/backward a folder, then press the ▶ or ◀ button to select desired track.
Important: The USB port is intended for data transfer only, the external devices cannot be charged via this USB port. The use of USB extension cords is not recommended. Don't plug the USB from the unit when playing or reading the USB device.
REPEAT PLAY
You can play one track or all tracks on the USB repeatedly.
To Repeat a Single Track
- Press P-MODE/M. button on unit during play, the display will show " " and the current track will be played over an over again.
- To cancel repeat play, press P-MODE/M. button on unit until " " disappears from the display.
To repeat all the Tracks
- Press P-MODE/M. button on unit until the “” shows steadily on the display, all tracks on the USB will be played over and over again.
- To cancel repeat play, press the P-MODE/M. button on unit until "disappears from the display.
To repeat the folder (only for USB which contains more than one folder)
- Press the P-MODE/M. button on unit until “FOLDER” shows steadily on the display, the current folder will be repeated over and over again.
- To cancel repeat play, press the P-MODE/M. button on unit until “⊂ ➕ FOLDER” disappears from the display.
RANDOM PLAY
Press the P-MODE/M. button on unit in play mode till the "RAND" shows steadily on the display, the random play will start from next track automatically. Press the P-MODE/M. button on unit again until the "RAND" disappears from the display to cancel.
BLUETOOTH OPERATION
- Press the FUNCTION button on unit to switch to BLUETOOTH function, the LCD will display "bt" and the pair indicator will flash at high speed.
- Turn on the Bluetooth function on the device, scan the unit "GOGEN DANCE" and connect, then input the password 0000 if required, the pair indicator keep light up to indicate connection done, and the display will show "bt". Press Play to start playback.
- Rotate the VOLUME knob on the unit or adjust the volume on the external device to increase or decrease the music volume to your desired level.
- Press and hold the PLAY/PAUSE/PAIR/SCAN button to disconnect Bluetooth.
Note: The Bluetooth works best within 10 meters in open air.
AUX-IN OPERATION
- Press the FUNCTION button on unit to select the "AUX" mode.
- Connect your audio device to the AUX IN jack on the top panel of the unit with an AUX IN cable.(audio cable is not included)
- Rotate the VOLUME knob on the unit or adjust the volume on the external device to increase or decrease the music volume to your desired level.
- Control the playback with your audio device.
MIC JACK OPERATION
Microphone input is available in all modes.
- Connect your microphone to the 6.3 mm MIC JACK found on the top panel of the unit.
- Rotate the MIC VOL, knob on the unit to increase or decrease the microphone volume.
- Press the ECHO Button to turn on or off the echo effect of the microphone.
TECHNICAL SPECIFICATIONS
GENERAL
Power Requirements AC100-240 V\~60/50 Hz
Power consumption 33 W
Power output 2 x 30 W
FM frequency FM 87.5-108 MHz
AUX in jack 3.5 mm
Microphone jack 6.3 mm
Work temperature 5 °C - +40 °C
BLUETOOTH
Communication system Bluetooth Standard version 2.1+EDR
Reception Range 10 meter (line-of-sight distance)
Compatible Bluetooth profiles Advanced Audio Distribution Profile (A2DP)
Wireless Working Frequency 2,402 - 2,480 GHz
E.i.r.p. -4,71 dBm
ACCESSORIES
Instruction Manual, AC Cord
WARRANTY
Our product is warranted for 2 full year from the date of purchase. The warranty is provided on all material defects and workmanship. Guarantee of 24 months does not apply to decrease in the accumulator's effective capacity caused by its use or age. Effective capacity gradually decreases depending on the method of use of the accumulator.
WE RESERVE THE RIGHT TO CHANGE TECHNICAL SPECIFICATIONS.
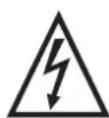
WARNING: DO NOT USE THIS PRODUCT NEAR WATER, IN WET AREAS TO AVOID FIRE OR INJURY OF ELECTRIC CURRENT. ALWAYS TURN OFF THE PRODUCT WHEN YOU DON'T USE IT OR BEFORE A REVISION. THERE AREN'T ANY PARTS IN THIS APPLIANCE WHICH ARE REPARABLE BY CONSUMER. ALWAYS APPEAL TO A IED AUTHORIZED SERVICE. THE PRODUCT IS UNDER A DANGEROUS TENTION.
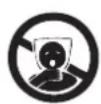

TO AVOID DANGER OF SUFFOCATION, KEEP THE PLASTIC BAG AWAY FROM BABIES AND CHILDREN. DO NOT USE THIS BAG IN CRIBS, BEDS, CARRIAGES OR PLAYPENS. THIS BAG IS NOT A TOY.
Disposal of old Electrical & Electronic Equipment (Applicable in the European Union and other European countries with separate collection systems)
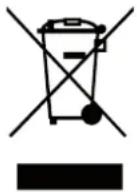
This symbol on the product or on its packaging indicates that this product shall not be treated as household waste. Instead it shall be handed over to the applicable collection point for the recycling of electrical and electronic equipment. By ensuring this product is disposed of correctly, you will help prevent potential negative consequences for the environment and human health, which could otherwise be caused by inappropriate waste handling of this product. The recycling of materials will
help to conserve natural resources. For more detailed information about recycling of this product, please contact your local Civic Office, your household waste disposal service or the shop where you purchased the product.
Hereby, ETA a.s. declares that the radio equipment type BPS686 is in compliance with Directive 2014/53/EU. The full text of the EU declaration of conformity is available at the following internet address: http://www.gogen.cz/declaration_of_conformity
ELSŐ ÉS HÁTSÓ NÉZET
ELSŐ HASZNÁLAT
ENERGIAFORRÁS
CSATORNÁK MANUÁLIS MENTÉSE
AUX in aljzat 3.5 mm
Mikrofon aljzat 6.3 mm
natural_image
Abstract logo design with white stylized 'S' inside a black circle (no text or symbols)GoGEN
- GoGEN
- ZAČÍNÁME
- NAPÁJENÍ
- POHL'AD SPREDU A ZOZADU
- ZAČÍNAME
- NAPÁJANIE
- WIDOK Z PRZODU I Z TYŁU
- IMPORTANT NOTES
- INTRODUCTION
- SYMBOL DEFINITIONS
- READ ALL INSTRUCTIONS BEFORE USE
- SAFETY INSTRUCTIONS
- GUIDE TO THE APPLIANCE
- TOP VIEW
- FRONT AND BACK VIEW
- GETTING STARTED
- POWER SOURCE
- SETTING THE FUNCTION MODE
- ADJUSTING THE VOLUME
- BASS ADJUSTMENT
- MICROPHONE ECHO ADJUSTMENT
- FLASHING LIGHT
- RADIO OPERATION
- TUNING TO A RADIO STATION
- AUTO PRESET MEMORY / SCAN
- USB OPERATION
- This unit provides two USB ports for music playback.
- REPEAT PLAY
- To Repeat a Single Track
- To repeat all the Tracks
- To repeat the folder (only for USB which contains more than one folder)
- RANDOM PLAY
- BLUETOOTH OPERATION
- AUX-IN OPERATION
- MIC JACK OPERATION
- TECHNICAL SPECIFICATIONS
- GENERAL
- BLUETOOTH
- ACCESSORIES
- WARRANTY
- WE RESERVE THE RIGHT TO CHANGE TECHNICAL SPECIFICATIONS.
- Disposal of old Electrical & Electronic Equipment (Applicable in the European Union and other European countries with separate collection systems)
- ELSŐ ÉS HÁTSÓ NÉZET
- ELSŐ HASZNÁLAT
- ENERGIAFORRÁS
- CSATORNÁK MANUÁLIS MENTÉSE
Brand : GoGen
Model : BPS 686
Category : Pregnant