
HPRF200BK - Headphones NEDIS - Free user manual and instructions
Find the device manual for free HPRF200BK NEDIS in PDF.


| Product type | Wireless audio headset |
| Brand | Nedis |
| Model | HPRF200BK |
| Transmission frequency | 863 MHz |
| Frequency response | 20 - 20,000 Hz |
| Signal-to-noise ratio | 54 dB |
| Transmission range | 100 m (open area), 30 m (indoors) |
| Power supply | Mains adapter 12 V DC, 200 mA; rechargeable batteries 2 x AAA NiMH 550 mAh |
| Charging time | Approximately 10 hours (first charge 24 hours) |
| Battery life | Approximately 11 hours |
| Main features | PLL technology, auto tuning, channel selection, automatic power on/off, built-in charging |
| Maintenance and cleaning | Clean only with a dry cloth; do not use solvents or abrasive products |
| Safety | Do not open the device; do not expose to water or moisture; unplug if there is a problem |
| Warranty | Warranty void if modified or used incorrectly |
| General information | Design and specifications subject to change without notice; logos and trademarks |
Frequently Asked Questions - HPRF200BK NEDIS
User questions about HPRF200BK NEDIS
0 question about this device. Answer the ones you know or ask your own.
Ask a new question about this device
Download the instructions for your Headphones in PDF format for free! Find your manual HPRF200BK - NEDIS and take your electronic device back in hand. On this page are published all the documents necessary for the use of your device. HPRF200BK by NEDIS.
USER MANUAL HPRF200BK NEDIS
natural_image
Black headband headphones on white background (no text or symbols visible)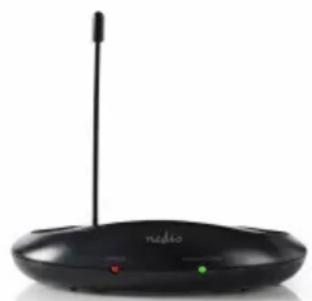
natural_image
Black radio device with antenna and two small indicator lights (no visible text or symbols)MANUAL (p. 2)
Wireless Headphones
MODE D'EMPLOI (p. 10)
Casque sans fil
MANUALE (p. 19)
Cuffie senza fili
HASZNÁLATI ÚTMUTATÓ (o. 27.)
MANUAL DE USO (p. 23)
The Nedis wireless headphones are the perfect solution for enjoying music in and around the house. The closed headphones ensure a great listening experience. Equipped with PLL technology for optimal reception of the signal. Auto detecting system for automatic power on or off. Integrated charging circuit for charging the batteries inside the headphone and auto tuning for the audio signal. Suitable for use with TV, CD, PC, MP3, RADIO, etc.
How to begin:
Before the wireless headphones can be used the following has to be done first.
Step 1:
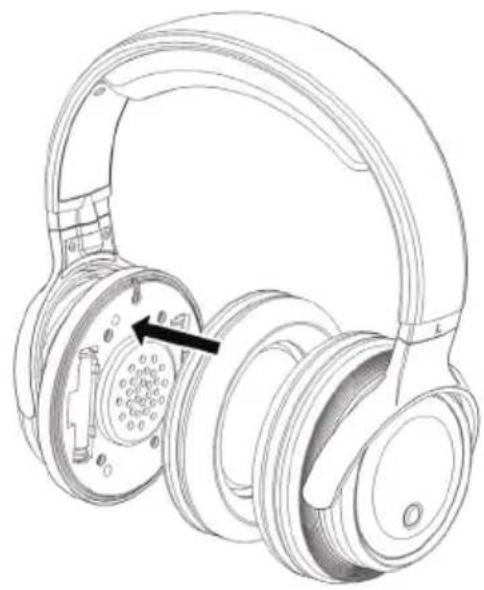
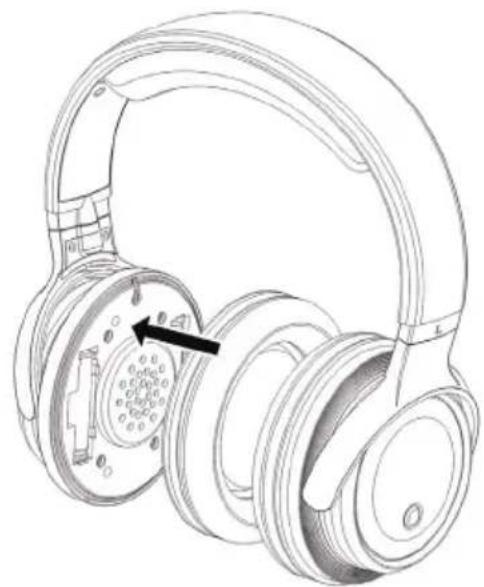
Open the battery compartment on the *right side to insert the rechargeable batteries. Make sure the positive (+) and negative (-) poles are correctly aligned.
*Note: the right side of the headphone is marked with R in the headband and also recognizable as the shell with the power button.

Step 2:
Close the battery compartment after inserting the rechargeable batteries.
natural_image
Line drawing of a pair of hardcover headphones with an arrow pointing to the front wheel (no text or symbols present)Step 3:
Insert the antenna into the antenna socket of the transmitter.

natural_image
Simple line drawing of a medical or laboratory device with a curved tube and a vertical rod above a circular base (no text or symbols)Step 4:
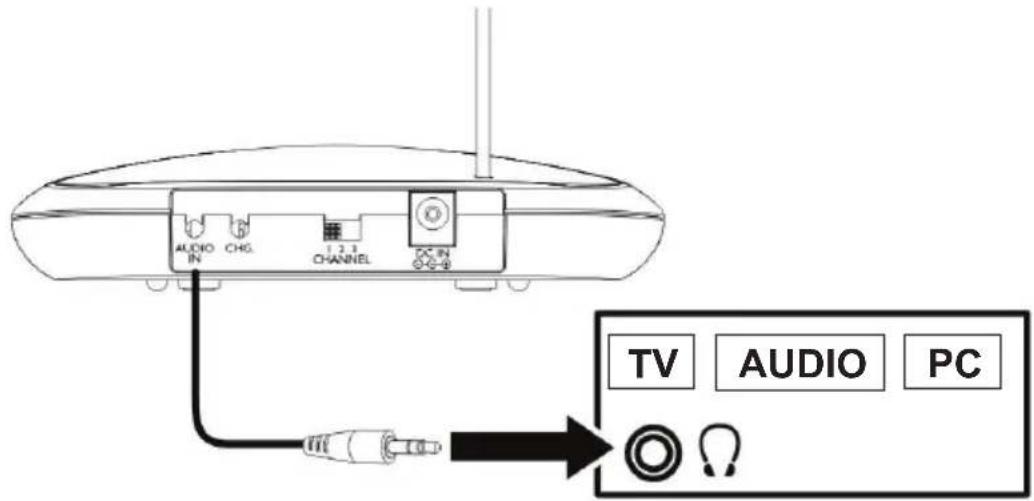
Connect the audio cable of the transmitter, fitted with a 3.5 mm jack plug, to the headphones (audio) output of an audio providing appliance, like TV, audio equipment, PC, etc.
Step 5:
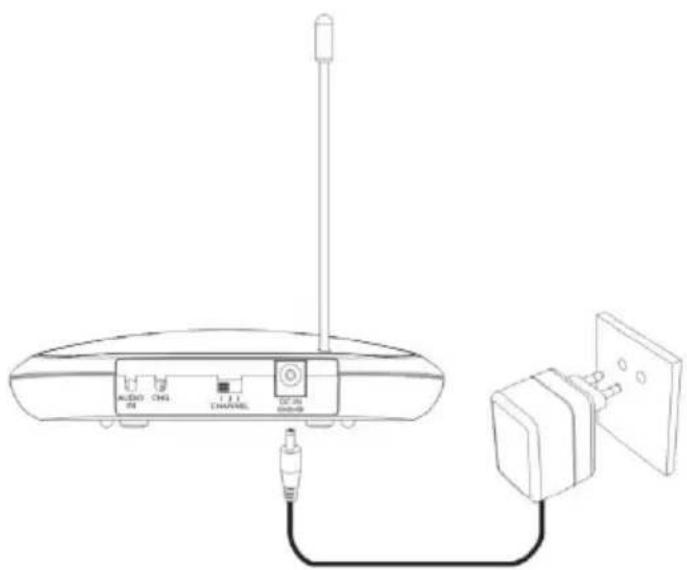
Connect the plug on the AC/DC mains adapter cable to the DC IN socket at the back of the transmitter. Then plug the adapter into a wall outlet.
Note: the power LED will not light up if the receiver is not receiving an audio signal.
natural_image
Line drawing of a wireless router connected to an electrical outlet (no text or symbols visible)Step 6:
Before using the headphones, the batteries need to be charged. Take the charging cable with the 2.5 mm power jack and plug it into the recharging socket of the right shell of the headphones.
Note: Leave the headphones to charge for 24 hours before first use. Second and subsequent charges take about 10 hours.
The red charge LED will light up indicating that charging is in progress.

Operation:
Switch on the audio providing appliance and adjust its volume to roughly a quarter of the maximum setting. The transmitter will switch on automatically. When the audio appliance is switched off the transmitter will automatically switch off after 4\~5 minutes.
Note: If the volume output is too low the transmitter will switch off or switch to standby mode and the SIGNAL/POWER LED will not light up. It is not possible to charge and listen at the same time. Charging has priority.
natural_image
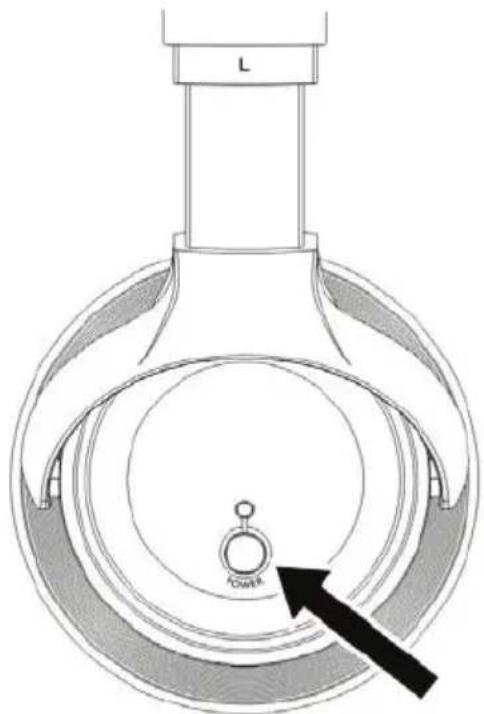
Technical line drawing of a mechanical component with a central circular feature and an arrow pointing to a small circular feature labeled 'TOWA' (no text or symbols beyond the label)Step 1:
Switch on the headphones and the POWER LED will light up.
Do not turn the volume to maximum when switching on the headphones.
natural_image
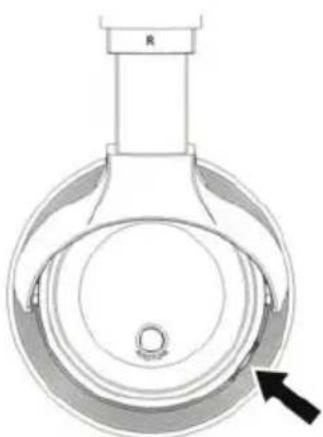
Technical line drawing of a mechanical component with no visible text or symbolsStep 2:
Select a channel with the channel switch at the back of the transmitter. Adjust the headphones reception by pressing the AUTO TUNE button at the left shell of the headphones.

Note: When using the headphones at a maximum volume level, the batteries will run empty in a shorter time. It will also increase the possibility of hearing noise due to the wireless connection. Therefore it is recommended to increase the volume level of the audio providing appliance and decrease the volume level of the headphones. This will improve the performance of the wireless headphones.
Specifications:
• Transmission frequency: 863 MHz
• Frequency response: 20 - 20.000Hz
• S/N ratio: 54 dB
• Range: 100 m (open area), 30 m (indoors)
• Power supply: 12 V DC, 200 mA
- Batteries: 2 x AAA, NiMH, 550 mAh (included)
• Charging time: ± 10hrs
- Playing time: ± 11hrs
Safety precautions:
To reduce risk of electric shock, this product should ONLY be opened by an authorized technician when service is required. Disconnect the product from mains and other equipment if a problem should occur. Do not expose the product to water or moisture.
Maintenance:
Clean only with a dry cloth. Do not use cleaning solvents or abrasives.
Warranty:
No guarantee or liability can be accepted for any changes and modifications of the product or damage caused due to incorrect use of this product.
General:
Designs and specifications are subject to change without notice.
All logos brands and product names are trademarks or registered trademarks of their respective holders and are hereby recognized as such.
Keep this manual and packaging for future reference.
Attention:
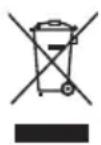
This product is marked with this symbol. It means that used electrical and electronic products should not be mixed with general household waste. There is a separate collections system for these products.
DEUTSCH
Einleitung:
Schritt 2:
natural_image
Line drawing of a pair of stacked headphones with an arrow pointing to the front wheel (no text or symbols present)Schritt 3:
natural_image
Simple line drawing of a medical or laboratory device with a curved tube and a rod inserted into a circular base (no text or symbols)Schritt 4:
Schritt 5:
natural_image
Line drawing of a wireless router connected to an electrical outlet (no text or symbols present)Schritt 6:
natural_image
Diagram of a mechanical device with a central circular component and a black arrow pointing to it (no text or symbols present)Schritt 2:
Etape 2 :
natural_image
Line drawing of a pair of hardcover headphones with a circular head cover and an arrow pointing to the front wheel (no text or symbols present)Etape 3 :
natural_image
Simple line drawing of a medical or laboratory device with a curved tube and bulb, no text or symbols present.Etape 4 :
natural_image
Line drawing of a wireless router connected to an electrical outlet via cable (no text or symbols)Etape 6 :
natural_image
Technical diagram of a mechanical component with no visible text or symbolsEtape 2 :
natural_image
Line drawing of a pair of hardcover headphones with a circular head cover and an arrow pointing to the front wheel (no text or symbols present)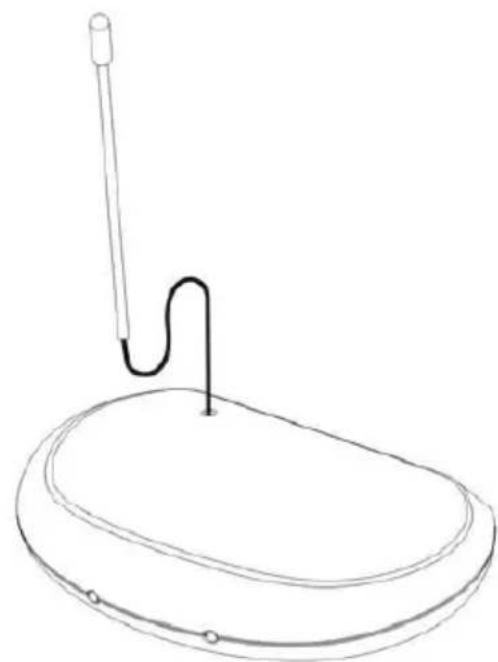
natural_image
Simple line drawing of a medical or laboratory device with a curved tube and a rod inserted into a circular base (no text or symbols)Stap 4:
Stap 5:
natural_image
Line drawing of a wireless router connected to an electrical outlet via cable (no text or symbols)Stap 6:
natural_image
Technical line drawing of a mechanical component with no visible text or symbolsStap 2:
Fase 2:
natural_image
Line drawing of a pair of hardcover headphones with visible internal components and a black arrow pointing to the head (no text or symbols)natural_image
Simple line drawing of a medical or laboratory device with a curved tube and a vertical rod inserted into a circular base (no text or symbols)natural_image
Line drawing of a wireless router connected to an electrical outlet (no text or symbols visible)Fase 6:
natural_image
Technical line drawing of a mechanical component with no visible text or symbolsFase 2:
Paso 2:
natural_image
Line drawing of a pair of hardcover headphones with an arrow pointing to the front wheel (no text or symbols present)Paso 3:
natural_image
Simple line drawing of a medical or laboratory device with a curved tube and a vertical rod above a circular base (no text or symbols)Paso 4:
natural_image
Line drawing of a wireless router connected to an electrical outlet (no text or symbols present)Paso 6:
natural_image
Diagram of a mechanical device with a central circular component and a black arrow pointing to it (no text or symbols present)Paso 2:

2. lépés:
natural_image
Line drawing of a pair of stacked audio headphones with a black arrow pointing to the front wheel (no text or symbols present)3. lépés:
natural_image
Simple line drawing of a medical or laboratory device with a curved tube and a vertical rod inserted into a circular base (no text or symbols)4. lépés:
5. lépés:
natural_image
Line drawing of a wireless router connected to an electrical outlet (no text or symbols)6. lépés:
Használat:
natural_image
Technical line drawing of a mechanical component with no visible text or symbols2. lépés:
Vaihe 2:
natural_image
Line drawing of a pair of outdoor headphones with an arrow pointing to the front wheel (no text or symbols present)Vaihe 3:
natural_image
Simple line drawing of a medical or laboratory device with a curved tube and bulb, no text or symbols present.Vaihe 4:
Vaihe 5:
natural_image
Line drawing of a wireless router connected to a power outlet (no text or symbols visible)Vaihe 6:
natural_image
Technical line drawing of a mechanical component with no visible text or symbolsVaihe 2:
Steg 2:
natural_image
Line drawing of a pair of stacked audio headphones with an arrow indicating the headrest (no text or symbols present)Steg 3:
natural_image
Simple line drawing of a medical or laboratory device with a curved tube and a vertical rod, no text or symbols present.Steg 4:
Steg 5:
natural_image
Line drawing of a wireless router connected to an electrical outlet via cable (no text or symbols)Steg 6:
natural_image
Technical line drawing of a mechanical component with a central circular feature and a labeled arrow pointing to a small circular feature (no text or symbols present)Steg 1:
natural_image
Technical line drawing of a mechanical component with no visible text or symbolsSteg 2:

Krok 2:
natural_image
Line drawing of a pair of hardcover headphones with a black arrow pointing to the front wheel (no text or symbols present)Krok 3:
natural_image
Simple line drawing of a medical or laboratory device with a curved tube and a vertical rod inserted into a circular base (no text or symbols)Krok 4:
natural_image
Line drawing of a wireless router connected to an electrical outlet (no text or symbols present)Krok 6:
Použití sluchátek:
natural_image
Technical line drawing of a mechanical component with no visible text or symbolsKrok 2:

Pasul 2:
natural_image
Line drawing of a pair of hardcover headphones with a black arrow pointing to the front wheel (no text or symbols present)Pasul 3:
natural_image
Simple line drawing of a medical or laboratory device with a curved tube and a vertical rod inserted into a circular base (no text or symbols)Pasul 4:
natural_image
Line drawing of a wireless router connected to an electrical outlet (no text or symbols present)Pasul 6:
Functionare:
natural_image
Technical line drawing of a mechanical component with no visible text or symbolsPasul 2:
Βήμα 2:
natural_image
Line drawing of a pair of hardcover headphones with a black arrow pointing to the front wheel (no text or symbols present)Βήμα 3:
natural_image
Simple line drawing of a medical or laboratory device with a curved tube and a vertical rod above a circular base (no text or symbols)Βήμα 4:
natural_image
Line drawing of a wireless router connected to a power outlet (no text or symbols present)Βήμα 6:
natural_image
Technical line drawing of a mechanical component with no visible text or symbolsΒήμα 2:

Trin 2:
natural_image
Line drawing of a pair of outdoor headphones with an arrow pointing to the front wheel (no text or symbols present)Trin 3:
Sæt antennen ind i antennestikket på senderen.

natural_image
Simple line drawing of a medical or laboratory device with a curved tube and bulb, no text or symbols present.Trin 4:
Step 5:
natural_image
Line drawing of a wireless router connected to a power outlet (no text or symbols present)Trin 6:
Betjening:
natural_image
Technical line drawing of a mechanical component with a central circular feature and an arrow pointing to a labeled point (no text or symbols present)natural_image
Technical diagram of a mechanical component with no visible text or symbolsTrin 2:
natural_image
Technical line drawing of a mechanical component with a central circular feature and a labeled arrow pointing to it (no text or symbols present)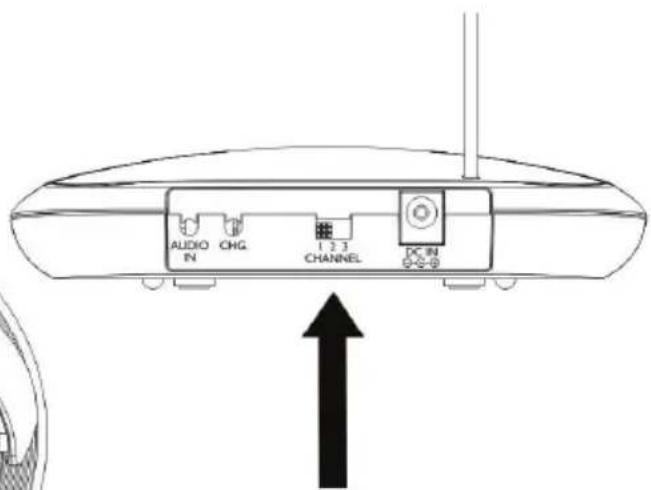
Trinn 2:
natural_image
Line drawing of a pair of hardcover headphones with a black arrow pointing to the front wheel (no text or symbols present)Trinn 3:
natural_image
Simple line drawing of a medical or laboratory device with a curved tube and a vertical rod inserted into a circular base (no text or symbols)Trinn 4:
natural_image
Line drawing of a wireless router connected to an electrical outlet via cable (no text or symbols)Trinn 6:
natural_image
Technical diagram of a mechanical component with a central circular feature and a labeled arrow pointing to it (no text or symbols present)natural_image
Technical line drawing of a mechanical component with no visible text or symbolsTrinn 2:




- How to begin:
- Step 1:
- Step 2:
- Step 3:
- Step 4:
- Step 5:
- Step 6:
- Operation:
- Specifications:
- Safety precautions:
- Maintenance:
- Warranty:
- General:
- Attention:
- DEUTSCH
- Einleitung:
- Schritt 2:
- Schritt 3:
- Schritt 4:
- Schritt 5:
- Schritt 6:
- Etape 2 :
- Etape 3 :
- Etape 4 :
- Etape 6 :
- Stap 4:
- Stap 5:
- Stap 6:
- Stap 2:
- Fase 2:
- Fase 6:
- Paso 2:
- Paso 3:
- Paso 4:
- Paso 6:
- lépés:
- lépés:
- lépés:
- lépés:
- lépés:
- Használat:
- Vaihe 2:
- Vaihe 3:
- Vaihe 4:
- Vaihe 5:
- Vaihe 6:
- Steg 2:
- Steg 3:
- Steg 4:
- Steg 5:
- Steg 6:
- Krok 2:
- Krok 3:
- Krok 4:
- Krok 6:
- Použití sluchátek:
- Pasul 2:
- Pasul 3:
- Pasul 4:
- Pasul 6:
- Functionare:
- Βήμα 2:
- Βήμα 3:
- Trin 2:
- Trin 3:
- Trin 4:
- Trin 6:
- Betjening:
- Trinn 2:
- Trinn 3:
- Trinn 4:
- Trinn 6:
Brand : NEDIS
Model : HPRF200BK
Category : Headphones