
SLR 55 A1 - Air purifier SILVERCREST - Free user manual and instructions
Find the device manual for free SLR 55 A1 SILVERCREST in PDF.

| Product type | Air purifier |
| Model | SLR 55 A1 |
| Brand | SilverCrest |
| Dimensions (W x D x H) | 330 x 200 x 480 mm |
| Weight | Approx. 4700 g |
| Power supply | 220-240 V~, 50 Hz |
| Rated power | 65 W |
| CFM (max) | 220.0 m³/h |
| Negative ion density | ≥ 3,000,000 / cm³ |
| Filter type | HEPA/activated carbon pre-filter + activated carbon filter |
| Filter replacement interval | Approx. 2000 hours of operation |
| Fan speeds | 3 speeds (1, 2, 3) + auto, turbo, sleep modes |
| Timer | 1, 2, 4, or 8 hours |
| Ioniser | Yes, can be turned on/off |
| Child lock | Yes (hold filter + option key 3 seconds) |
| Air quality indicator | LED: green (good), yellow (medium), red (poor) |
| Pre-filter cleaning | Washable in warm soapy water |
| Protection class | II (double insulated) |
| Noise level | Not specified (estimated < 55 dB according to typical units) |
| Warranty | 3 years |
| Manufacturer | TARGA GmbH, Coesterweg 45, DE-59494 Soest, Germany |
Frequently Asked Questions - SLR 55 A1 SILVERCREST
User questions about SLR 55 A1 SILVERCREST
0 question about this device. Answer the ones you know or ask your own.
Ask a new question about this device
Download the instructions for your Air purifier in PDF format for free! Find your manual SLR 55 A1 - SILVERCREST and take your electronic device back in hand. On this page are published all the documents necessary for the use of your device. SLR 55 A1 by SILVERCREST.
USER MANUAL SLR 55 A1 SILVERCREST
natural_image
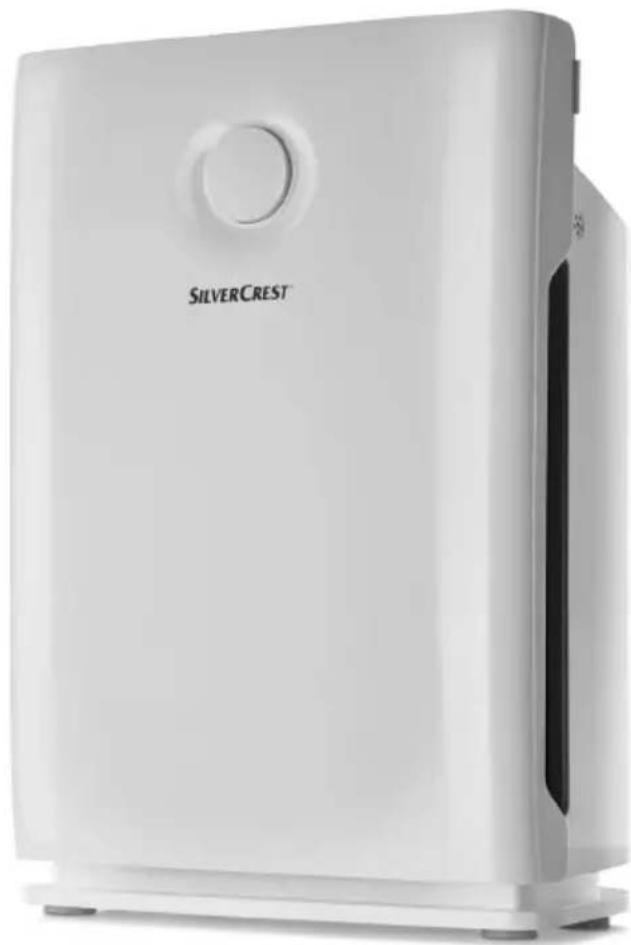
Exterior view of a silver Silver Crest air purifier (no signage or text visible on body)AIR PURIFIER SLR 55 A1
GB IE NI CY
AIRPURIFIER
Operation and safety notes
DE AT CH
LUFTREINIGER
Before reading, unfold the page containing the illustrations and familiarise yourself with all functions of the device.
GR CY
GB/IE/NI/CY Operation and safety notes
Page 5
List of pictograms used....Page 6
Introduction......Page 6
Intended use....Page 6
Delivery contents......Page 6
Parts description Page 6
Technical data....Page 6
Safety instructions....Page 7
Before use......Page 8
Set-up......Page 8
Functions......Page 9
Maintenance and cleaning......Page 9
Cleaning the product....Page 9
Cleaning the filter....Page 9
Replacing the filter Page 9
Troubleshooting Page 10
Disposal Page 10
Warranty Page 11
Warranty conditions....Page 11
Warranty period and legal warranty rights....Page 11
Scope of warranty Page 11
Submitting warranty claims ......Page 11
Service Page 11
Manufacturer......Page 12
Declaration of conformity....Page 12
| List of pictograms used | |||
 | Read the instructions! Protection class II |  | |
 | Observe the warnings and safety instructions! |  | Danger to life and risk of accidents for infants and children! |
 | Volt (alternating current) Warning! Danger |  ctric shock! ctric shock! | |
 | Hertz (frequency) | 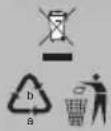 | Dispose of the packaging and device in an environmentally friendly manner! |
 | Watt (effective power) | ||
Air purifier
- Introduction

Congratulations on the purchase of your new product. You have chosen a high-quality product. The instructions for use
are a part of this product. They contain important information concerning safety, use and disposal. Before using the product, please familiarise yourself with all the instructions for use and safety instructions. Only use the product as described and for the specified purposes. When passing this product on to third parties, please be sure to include all documentation.
Intendeduse
This air purifier is designed to clean room air and is only intended for use in private households. Any modifications to the product are considered improper use and may result in considerable hazards. The manufacturer assumes no liability for damages arising from improper use. This product is not intended for commercial use.
●Deliverycontents
1 Air purifier 1 Instructions for use
Partsdescription
1 Control panel
2 Grip
3 Air outlet
4 Mainsconnection cable with plug
5 Front cover
6 HEPA/activated carbon pre-filter
7 Activated carbon filter
8 Air inlet
9 Air quality LED
Control panel
10 Timer button
11 Ioniser button
12 ON/OFF button
13 Filter button
14 Fan speed / mode option key
- Technicaldata
Input voltage: 220-240V\~50Hz
Rated power: 65 W
CFM: 220.0 m^3/H MAX
Negative ion density: ≥ 3,000,000 / cm ^4
Weight: approx. 4700g
Dimensions: 330 x 200 x 480 mm
$$ (W \times D \times H) $$
Protection class: II/☐


Safety instructions
PLEASE READ THE INSTRUCTIONS FOR USE PRIOR TO USE! PLEASE KEEP THE INSTRUCTIONS FOR USE IN A SAFE PLACE! IF PASSING THIS PRODUCT ON TO A THIRD PARTY, INCLUDE ALL DOCUMENTS!

WARNING!
This
product may be used by children aged 8 years and up, as well as by persons with reduced physical, sensory or mental capacities, or those lacking experience and / or knowledge, as long as they are supervised or instructed in the safe use of the product and they understand the associated risks. Do not allow children to play with the product. Never allow children to clean or maintain this product unsupervised.
- Keep the packaging materials away from children!
- Do not place containers of water, e.g. vases, on the product.
■ Never touch the power supply or the product with wet hands.
■ Never use the product if your feet are bare or wet.
■ Protect the product from moisture and humidity. Never immerse the product in water or other liquids!
■ Ensure that the mains socket used is always easy to access so that the mains plug can be unplugged in case of emergency.
■ Always unplug the mains plug from the mains socket by the plug. Never unplug the mains plug from the mains socket by pulling the mains connection cable.
■ Unplug the mains plug from the mains socket to de-energise the product.
■ Unplug the mains plug from the mains socket if you will not use the product for a long time.

WARNING!
DANGER OF ELECTRIC
SHOCK! Never attempt to re-pair the product yourself. In the event of a defect, switch off the product, unplug the mains plug and contact customer service.
Otherwise there is a risk of electric shock.
If themainsconnectioncable of this device is damaged, it must be replaced by the manufacturer or its serviced department, or a similarly qualified person to prevent hazards.
Safety instructions / Before use / Set-up
- Do not pull on the mains connection cable to move or shift the product.
- Do not move the product during use.
- Do not carry out any modifications or repairs to the device yourself.

WARNING!
DANGER OF ELECTRIC
SHOCK! If damaged, the mains connection cable must be replaced by the manufacturer or its authorized service centre to avoid any hazards. Otherwise there is a risk of electric shock.
■ Do not use extension cords.
- Do not block the air inlet and air outlet grilles.
- Place the product on an even, level surface.
- Keep the product and cable away from heat, oil and sharp edges.
- Do not operate the product in potentially explosive environments with inflammable vapours, gases or dusts.
■ Protect the product from direct sunlight.
- Keep the product away from radiators and other sources of heat.
■ Do not stand or sit on the product.
If the product has not been used for a prolonged period and you
notice a burnt smell when starting the device or the mains connection cable and plug become hot, switch off the device, unplug from the mains socket and contact a specialty retailer.

Before use
Note: Remove all packaging material from the product.
Place the product on a stable, even surface at least one meter away from a wall. The air inlet and air outlet 8, 3 must not be covered or blocked.
☐ Remove the front cover 5 (see Fig. Cl).
☐ Remove the HEPA / activated carbon pre-filter 6 and the activated carbon filter 7 from the product (see Fig. CII and CIII) and remove the plastic packaging.
Now, replace the activated carbon filter 7 and then the HEPA / activated carbon pre-filter 6 in the product. The black side of the HEPA / activated carbon pre-filter 6 must be facing forward.
☐ Now attach the front cover 5 again (see Fig. CIV).
☐ Now insert the mains plug 4 into the mains socket. The product will sound a beep and all LEDs will light up briefly.

Set-up
☐ Press the ON / OFF button 12. The product will start in the first level of auto mode.
☐ Select the fan speed (1 / 2 / 3) by pressing the option key 14. The LED assigned to the function will light up.
Note: A beep will sound when the buttons are pressed.
Functions
Timer function
You can select a delayed switch-off time with the timer function.
☐ When the product is switched on, press the timer button 10 until the LED for the desired operating time lights up. The product will automatically switch to standby mode after 1 / 2 / 4 or 8 hours.
Note: The product does not switch off after the timer switching time has ended, but goes into standby mode. After the timer switching time has ended, press the ON / OFF button 12 to switch off the product.
loniser
☐ Press the ioniser button 11 when the product is switched on. The respective LED will light up and the product will emit negatively charged ions into the ambient air through the purified air, which will remove pollutants from the air.
Filter
After about 2000 hours of operating time, the filter button 13 will light up. This indicates that the filter must be replaced.
☐ Replace the filter as described in the chapter "Replacing the filter".
Child safety lock
☐ Hold the filter button 13 and option key 14 pressed at the same time for three seconds when the product is switched on. A beep will sound when the child safety lock has switched on. The ON/OFF button 12 will flash. All buttons are now locked.
Note: If the filter button and option key 14 are not pressed at the exact same time, the filter button 13 will flash three times. Child safety lock has not been activated.
☐ Hold the filter button 13 and option key 14 pressed for three seconds again when the child safety lock is switched on. The beep sounds when the child safety lock has been switched off.
Mode
☐ Press the option key 14 until the LED for the desired function lights up:
Sleepmode: After pressing sleep mode, the lighting on the device front will switch off after approx. 10 seconds. Only the buttons on the top of the device will light up in sleep mode. This means that lighting will be kept at a minimum during the night.
Turbomode: The fans run at maximum speed.
Auto mode: The product will test the air quality and - depending on the result - automatically adjust ventilation when in this mode.
LED colour for air quality 9:
green: good air quality yellow: medium air quality red: poor air quality
● Maintenance and cleaning
■ Always unplug the mains plug 4 from the mains socket before maintaining or cleaning the product.
- Cleaning the product
- Do not use aggressive chemicals or scouring agents.
□ Clean the housing with a soft, dry cloth.
- Cleaning the filter
☐ Remove the front cover 5 at regular intervals to examine the condition of the HEPA / activated carbon pre-filter 6.
☐ If dust or other impurities have accumulated, remove the HEPA / activated carbon pre-filter 6 and wash it in a warm, soapy solution.
☐ Then allow the HEPA/ activated carbon pre-filter 6 to dry properly and replace it as depicted in Figure C.
● Replacing the filter (see Fig. C)
If the filter button 13 lights up, the filter must be replaced. Proceed as follows:
☐ Remove the front cover 5 (see Fig. Cl).
Maintenance and cleaning/Troubleshooting/Disposal
☐ First, remove the HEPA / activated carbon pre-filter 6 and then the activated carbon filter 7 (see Fig. CII and CIII).
☐ Insert a new activated carbon filter 7 in the product first, then insert the HEPA / activated carbon pre-filter 6. The black side of the HEPA/activated carbon pre-filter 6 must be facing forward.
☐ Close the front cover 5 as depicted in Figure CIV.
☐ Hold the filter button 13 pressed for approx. 3 seconds until the beep sounds and the LED on the button goes out.
Note: Replacement filters can be ordered online at www.shop.targa.de.
- Troubleshooting
| Problem Possible cause Solution | ||
| The ON/OFF button 12 is not responding. | The product is not connected to the power circuit. | Insert the mains plug 4 into the mains socket. |
| The fuse is at the 0 setting or is defective. | Set the fuse in your fuse box to the I setting or replace the fuse. | |
| Power failure Wait until the power | has been switched on again. | |
| The front cover 5 has not been assembled correctly. | Remove the front cover 5 and close it as depicted in Figure CIV. | |
| The product is unusually loud during operation. | The product is standing at an angle or is on an uneven surface. | Place the product on a stable, even surface. |
| A filter 6, 7 is clogged. | Clean the HEPA / activated carbon pre-filter 6 and replace the activated carbon filter 7. To do so, proceed as described in the chapter “Maintenance and cleaning”. | |
| The air inlet and air outlet 8, 3 are covered or blocked. | Ensure that the air inlet and air outlet 8, 3 are not covered or blocked. | |
Disposal
The packaging is made entirely of recyclable materials, which you may dispose of at local recycling facilities.
Observe the marking of the packaging materials for waste separation, which are marked with abbreviations (a) and
numbers (b) with following meaning: 1-7: plastics / 20-22: paper and fibreboard / 80-98: composite materials.

The product and packaging materials are recyclable, dispose of it separately for better waste treatment. The Triman
logo is valid in France only.

Contact your local refuse disposal authority for more details of how to dispose of your worn-out product.
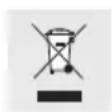
This label indicates that this product may not be disposed of in the domestic waste throughout the entire EU. To prevent po-
tential environmental damage or damage to human health due to unregulated waste disposal, please
recycle it responsibly to support the sustainable reuse of resources. Please use your local municipal return and collection systems or contact the retailer where the product was purchased to return the used device. This can contribute to the product being reused in an environmentally friendly way.
Warranty
Dear Customer,
This device is sold with three years warranty from the date of purchase. In the event of product defects, you have legal rights towards the seller. These statutory rights are not restricted by our warranty as described below.
Warrantyconditions
The warranty period commences upon the date of purchase. Please keep the original receipt in a safe place as it is required as proof of purchase. If any material or manufacturing faults occur within three years of purchase of this product, we will repair or replace the product free of charge as we deem appropriate.
- Warranty period and legal warranty rights
The warranty period is not extended in the event of a warranty claim. This also applies to replaced and repaired parts. Any damage or defects discovered upon purchase must be reported immediately when the product has been unpacked. Any repairs required after the warranty period will be subject to charge.
- Scope of warranty
The device was carefully manufactured in compliance with stringent quality guidelines and subjected to thorough testing before it left the works. The warranty applies to material and manufacturing faults. This warranty does not cover product components which are subject to normal wear and which can therefore be regarded as wearing parts, or damage to fragile components such as switches, rechargeable batteries or components made of glass. This warranty is void if the product is damaged, incorrectly used or serviced. To ensure correct use of the product, always comply fully with all instructions contained in the user manual. The warnings and recommendations in the user manual regarding correct and incorrect use and handling of the product must always be observed and complied with. The product is solely designed for private use and is not suitable for commercial applications. The warranty is rendered void in the event of incorrect handling and misuse, if it is subjected to force, and also if any person other than our authorised service technicians interfere with the device. No new warranty period commences if the product is repaired or replaced.
- Submitting warranty claims
To ensure speedy handling of your complaint, please note the following:
- Before using your product for the first time, please read the enclosed documentation carefully. Should any problems arise which cannot be solved in this way, please call our hotline.
- Always have your receipt, the product article number as well as the serial number (if available) to hand as proof of purchase.
- If it is not possible to solve the problem on the phone, our hotline support staff will initiate further servicing procedures depending on the fault.
Service
GB
Phone: 020-70 49 04 03
E-Mail: service.GB@targa-online.com
IE
Phone: 01-4370121
E-Mail: service.IE@targa-online.com
CY
Phone: 02-20 09 025
E-Mail: service.CY@targa-online.com
IAN 296100
●Manufacturer
Please note that the following address is not a service address. First contact the service point stated above.
TARGA GmbH
Coesterweg 45
DE-59494 Soest
GERMANY
● Declaration of conformity CE
This product fulfils the requirements of the applicable European and national directives. Conformity has been demonstrated. The relevant declarations and documents are held by the manufacturer.
The complete EU Declaration Of Conformity is available for download at:
www.targa.de/downloads/conformity/296100.pdf
www.targa.de/downloads/conformity/296100.pdf
- AIR PURIFIER SLR 55 A1
- AIRPURIFIER
- LUFTREINIGER
- List of pictograms used....Page 6
- Introduction......Page 6
- Safety instructions....Page 7
- Before use......Page 8
- Set-up......Page 8
- Maintenance and cleaning......Page 9
- Troubleshooting Page 10
- Disposal Page 10
- Warranty Page 11
- Service Page 11
- Manufacturer......Page 12
- Declaration of conformity....Page 12
- Air purifier
- - Introduction
- Intendeduse
- ●Deliverycontents
- Partsdescription
- Control panel
- - Technicaldata
- Safety instructions
- WARNING!
- DANGER OF ELECTRIC
- Safety instructions / Before use / Set-up
- Before use
- Set-up
- Functions
- Timer function
- loniser
- Filter
- Child safety lock
- Mode
- ● Maintenance and cleaning
- - Cleaning the product
- - Cleaning the filter
- ● Replacing the filter (see Fig. C)
- Maintenance and cleaning/Troubleshooting/Disposal
- - Troubleshooting
- Disposal
- Warranty
- Warrantyconditions
- - Warranty period and legal warranty rights
- - Scope of warranty
- - Submitting warranty claims
- Service
- ●Manufacturer
- ● Declaration of conformity CE
Brand : SILVERCREST
Model : SLR 55 A1
Category : Air purifier