
FRD28 - Alarm Clock Sunstech - Free user manual and instructions
Find the device manual for free FRD28 Sunstech in PDF.


| Product type | Radio alarm clock |
| Brand | Sunstech |
| Model | FRD28 |
| Dimensions (W x H x D) | 178 x 100 x 62 mm |
| Weight | 366 g |
| Main power supply | AC 230 V ~ 50 Hz |
| Backup battery | CR2032 3V (not included) |
| FM range | 87.5 - 108 MHz |
| Number of alarms | 2 (AL1 and AL2) |
| Snooze function | Yes, repeats every 9 minutes |
| Nap function (countdown) | 10 to 90 minutes |
| Sleep function (radio timer) | 15 to 90 minutes |
| Display brightness adjuster | 3 levels (high, medium, low) |
| Daylight saving time mode (DST) | Yes, manually adjustable |
| Automatic backlight display | Turns off after 15 seconds (optional) |
| Radio presets | 10 FM stations |
| Calendar display | Year, month, day |
| Cleaning | Soft, slightly damp cloth, no abrasives |
| Operating temperature | 20 °C to 60 °C |
| Repairability | Repair by certified technician only |
Frequently Asked Questions - FRD28 Sunstech
User questions about FRD28 Sunstech
0 question about this device. Answer the ones you know or ask your own.
Ask a new question about this device
Download the instructions for your Alarm Clock in PDF format for free! Find your manual FRD28 - Sunstech and take your electronic device back in hand. On this page are published all the documents necessary for the use of your device. FRD28 by Sunstech.
USER MANUAL FRD28 Sunstech
natural_image
Abstract geometric design with a white sphere, two white circles, and a gray book-like shape on a dark background (no text or symbols)FRD28
ALARM CLOCK RADIO
USER GUIDE
ENGLISH
User guide
FRD28
CONTENT
FUNCTION AND CONTROLS....1
POWER CONNECTION....2
TIME AND CALENDAR MANUAL SETTING....2
Setting Time and Calendar....2
DISPLAY LIGHT ON/OFF FUNCTION....2
SLEEP OPERATION.... 2
ALARM.... 3
ALARM SETTING....3
Setting Alarm 1 and Alarm 2....3
SNOOZE FUNCTION.... 3
AUTO CHANGE DISPLAY CONTENT....4
RADIO MODE....4
To preset radio station....4
To recall the radio preset....4
DAYLIGHT SAVING TIME (DST) MODE....4
DIMMER CONTROL....5
NAP FUNCTION (count down timer)......5
RESETTING....5
SPECIFICATIONS....5
WARNINGS....6
ENGLISH
User guide
FRD28
FUNCTION AND CONTROLS

- VOLUME DOWN
- VOLUME UP / DISPLAY AUTO CHANGE ON/OFF
- << / TUNE - / YEAR/MONTH/DAY
- SNOOZE / SLEEP / DIMMER
-
/ TUNE + / DST
- MEM.SET / M+ / NAP / AUTO OFF DISPLAY
- ON/OFF RADIO / ALARM OFF
- PM INDICATOR
- STANDBY INDICATOR
- ALARM 1 INDICATOR
- DISPLAY
- ALARM 2 INDICATOR
- CLOCK ADJ.
- (AL2) ALARM 2 ON / OFF SET
- (AL1) ALARM 1 ON / OFF SET
- SPEAKER
- AC POWER CORD
- FM ANTENNA
- BATTERY COMPARTMENT
- RATING LABEL (IN BOTTOM OF UNIT)
ENGLISH
User guide
FRD28
POWER CONNECTION
Plug the AC power cord to a household outlet AC source. This unit is equipped with a battery backup system, it requires a 3V CR2032 flat lithium battery (not included). Insert the battery in the battery compartment, making certain that the positive and negative (+ and -) battery terminals are attached to the corresponding terminals on the plate in the battery compartment. If an AC power failure occurs, the clock automatically switches to the battery power supply, the clock and timer memory continue running. When the AC power resumes, the clock switches back to AC again.
TIME AND CALENDAR MANUAL SETTING
Setting Time and Calendar
Press Clock ADJ. (13) button in standby mode and keep depress over 2 seconds to enter time set mode, after enter the setting mode, press Clock ADJ. button (13) to change the mode cycle as follows:
Normal / Year / Month / Day / 12/24h format / Real time Hour / Real time Min / Normal
Action (during data adjustment):
- Press << / Tune - button (3) to adjust data backward.
- Press >> / Tune + button (5) to adjust data forward.
- Keep depressed << or >> button for 2 seconds to enable auto forward.
- Use Clock ADJ. (13) button to confirm each setting.
DISPLAY LIGHT ON/OFF FUNCTION
- Press key MEM. Set / M+ / display light auto on-off /NAP button (6) for 3 seconds, the LED display indicator will light on, the LED display will turn off after 15 seconds automatically. Press any button to maintain the LED display for 15 seconds.
- Press key MEM. Set / M+ / display light auto on-off /NAP (6) button for 3 seconds, the LED display indicator will light off to cancel this function.
SLEEP OPERATION
When you listen to the radio, press the SNOOZE/SLEEP/DIMMER (4) button to enter into the sleep mode. You can adjust the sleep timer from 90 minutes to 15 minutes by pressing repeatedly the SNOOZE/ SLEEP/DIMMER button (4). When sleep timer is selected, the unit will automatically turn off once time is up.
ENGLISH
User guide
FRD28
ALARM
Beep alarm or radio alarm will ring for 30 minutes if no key is pressed will stop automatically and will sound the alarm time on next day.
ALARM SETTING
Setting Alarm 1 and Alarm 2
In standby mode, press the AL1 (15) or AL 2 (14) button once to preview the alarm time. The alarm time is displayed, press & hold the AL1 / AL2 buttons for 3 seconds and the hours will blink. Press AL1 / AL2 button (15/14) and keep pressed over 2 seconds to enter alarm set mode. Once in the setting mode, press alarm set button (15/14) to change the mode cycle as follows:
Normal / AL 1 Hour / AL 1 Min / AL 1 weekday Alarm / AL 1 wake beep / AL 1 wake radio / AL 1 wake radio volume / Normal.
Normal / AL 2 Hour / AL 2 Min / AL 2 weekday Alarm / AL 2 wake beep / AL 2 wake radio / AL 2 wake radio volume / Normal.
Select alarm weekday mode as follows:
1-5: Monday to Friday.
1-7: Whole week.
6-7: Saturday & Sunday.
1-1: One day of week.
Action (during data adjustment):
- Press << / Tune - (3) button to adjust data backward.
- Press >> / Tune + (5) button to adjust data forward.
- Keep pressed << or >> button for 2 seconds to enable auto forward.
- Use AL1 / AL2 set button to confirm each setting.
SNOOZE FUNCTION
When Alarm rings, press Snooze button (4) to suspend the alarm & to activate the snooze function, Beep or Radio alarm will stop. 9 minutes later the alarm will ring again. Press Snooze button (4) again, alarm will be suspended again, another 9 minutes later the alarm will ring again and so on until the next alarm rings.
Note: If you want to disable the SNOOZE function and stop alarm completely, press AL/OFF button (7). If you don't press any button, the alarm will ring during 30 minutes & stop automatically. Icon of AL1 and AL2 will blink as long as Snooze function is still operating. Once Snooze is turned off icon of AL1 / AL2 stop blinking and lights on the display.
ENGLISH
User guide
FRD28
AUTO CHANGE DISPLAY CONTENT
In radio off mode, press the VOLUME UP / DISPLAY AUTO CHANGE ON/OFF (2) button and keep pressed over 2 seconds to enter time AUTO CHANGE DISPLAY mode ("ON" will appear on the display). The Year will be displayed and press again to display Month/Day, the display returns to time display after 5 seconds, and will display again the same info in cycle. Press and keep pressed over 2 seconds again to turn off AUTO CHANGE DISPLAY mode ("OFF" will appear on the display).
RADIO MODE
Ensure that the FM antenna is completely unrolled and extended to have the best FM reception. Press the AL/OFF button (7) to turn the unit on.
Use the Tune - (3) or Tune + (5) button to select the desired radio station. If you press and hold the Tune - (3) or Tune + (5) button for one second, then release, the unit will automatically scan to the next broadcasting station. Press the AL/OFF button (7) to turn the radio OFF.
To preset radio station
Press the AL / OFF button (7) to turn the unit ON. Use the Tune - (3) or Tune + (5) button to select the desired radio station. Press the MEM.SET/M+ (6) button; "P02" will blink in the display. Press the MEM.SET / M+" (6) button again to set the preset. Repeat steps 2 through 4 to set more presets. The unit can preset 10 stations totally for FM. When "P01-P10" blinks, press Tune - (3) or Tune + (5) button to select the preset number.
To recall the radio preset
To recall a preset station, press MEM.SET/M+/NAP (6) button to select the desired preset number.
DAYLIGHT SAVING TIME (DST) MODE
For countries with daylight saving time (DST) (one hour of difference between summer time and winter time), this clock radio offers you DST option to adjust summer time.
In standby mode press and hold for 2 seconds the >>/TUNE+/DST button (5). The clock advances by one hour. To exit DST mode, repeat the above operation.
ENGLISH
User guide
FRD28
DIMMER CONTROL
The dimmer switch (4) allows you to set the brightness of the LED display to high, medium and low 3 levels.
NAP FUNCTION (count down timer)
In radio off mode, press MEM.SET/M+/NAP (6) button to enter into the NAP mode, the NAP time 90 will be displayed during 5 seconds. In the meantime, press repeatedly MEM.SET/M+/NAP (6) button to set the duration time from 90 min to 10 min.
Once time is up, the alarm buzzer will sound for 30 min and then shut off automatically. To stop the alarm buzzer, press the AL/OFF button (7). Press the MEM.SET/M+/NAP (6) button has no effect during alarm operation. Press AL/OFF button (7) to cancel the NAP function.
RESETTING
If the system does not respond or exhibits erratic or intermittent operation, you may have experienced an electrostatic discharge (ESD) or a power surge that triggered the internal microcontroller to shut down automatically. If this occurs, simply disconnect the ac power cord and remove the system backup battery, wait for at least 3 minutes and then setup the unit again as if it is a brand new unit.
SPECIFICATIONS
Dual alarm
NAP function
SLEEP function
DIMMER control
TIME DST mode
DISPLAY LIGHT ON/OFF function.
FM radio - Frequency range: 87.5 - 108 MHz
Battery backup: 3 V (CR2032 Flat Lithium battery x1) not included
Power supply: AC 230 V \~ 50 Hz
Width: 178 mm
Height: 100 mm
Deep: 62 mm
Weight: 366 g
ENGLISH
User guide
FRD28
WARNINGS
 | Correct disposal of this Product(Waste Electrical & Electronic Equipment)(WEEE)Your product is designed and manufactured with high quality materials and components which can be recycled and reused.This symbol means that electrical and electronic equipment, at their end of-life should be disposed of separately from your household waste.Please dispose of this equipment at your local community waste collection/recycling centre.In the European Union there are separate collection systems for used electrical and electronic products. Please help us to conserve the environment we live in! |
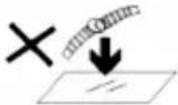 | DO NOT place objects on top of the device, as objects may scratch the device. |
 | DO NOT expose the device to dirty or dusty environments. |
 | DO NOT place the device on an uneven or unstable surface. |
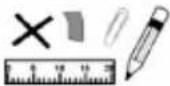 | DO NOT insert any foreign objects into the device. |
 | DO NOT expose the device to strong magnetic or electrical field. |
 | DO NOT expose the device to direct sunlight as it can damage the device. Keep it away from heat sources. |
 | DO NOT store your device in temperatures higher than 40°C (104°F). The internal operating temperature for this device is from 20°C (68°F) to 60°C(140°F). |
ENGLISH
User guide
FRD28
 | DO NOT use the device in the rain. |
 | Please check with your Local Authority or retailer for proper disposal of electronic products. |
 | The device and adaptor may product some heat during normal operation of charging. To prevent discomfort or injury from heat exposure, DO NOT leave the device on your lap. |
 | POWER INPUT RATING: Refer to the rating label on the device and be sure that the power adaptor complies with the rating. Only use accessories specified by the manufacturer. |
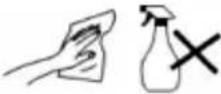 | Clean the device with a soft cloth. If needed, dampen the cloth slightly before cleaning. Never use abrasives or cleaning solutions. |
 | Always power off the device to install or remove external devices that do not support hot-plug. |
 | Disconnect the device from an electrical outlet and power off before cleaning the device. |
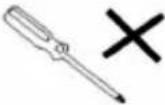 | DO NOT disassemble the device. Only a certified service technician should perform repair. |
 | The device has apertures to disperse heat. DO NOT block the device ventilation, the device may become hot and malfunction as a result. |
 | Risk of explosion if battery replaced by an incorrect type. Dispose of used batteries according to the instruction. |
 | PLUGGABLE EQUIPMENT: the socket-outlet shall be installed near the equipment and shall be easily accessible. |
ENGLISH
User guide
FRD28
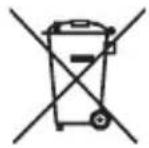 | European Union: Disposal Information.This symbol means that according to local laws and regulations your product and/or its battery shall be disposed of separately from household waste. When this product reaches its end of life, take it to a collection point designated by local authorities. The separate collection and recycling of your product and/or its battery at the time of disposal will help conserve natural resources and ensure that it is recycled in a manner that protects human health and the environment. |
| MADE IN CHINA |

natural_image
Abstract geometric design with a white sphere, two white circles, and a gray book-like shape on a dark background (no text or symbols)FRD28
RADIO DESPERTADOR
GUÍA DE USUARIO
ESPAÑOL
Guía de usuario
FRD28
CONTENIDO
MODO SLEEP (REPOSO)....2
ALARMA....3
AJUSTE DE ALARMA....3
Definir Alarma 1 y Alarma 2....3
natural_image
Abstract geometric design with a white sphere, two white circles, and a gray book-like shape against a dark background (no text or symbols)FRD28
RADIO-RÉVEIL
GUIDE DE L'UTILISATEUR
FRANÇAIS
natural_image
Abstract geometric design with a white sphere, two white circles, and a gray book-like shape on a dark background (no text or symbols)FRD28
RÁDIO DESPERTADOR
GUIA DO UTILIZADOR
PORTUGUÊS
Guia do utilizador
FRD28
CONTEÚDO
FUNÇÕES E CONTROLOS....1
For you. For everyone.

- FRD28
- ENGLISH
- User guide
- CONTENT
- POWER CONNECTION
- TIME AND CALENDAR MANUAL SETTING
- Setting Time and Calendar
- DISPLAY LIGHT ON/OFF FUNCTION
- SLEEP OPERATION
- ALARM
- ALARM SETTING
- Setting Alarm 1 and Alarm 2
- SNOOZE FUNCTION
- AUTO CHANGE DISPLAY CONTENT
- RADIO MODE
- To preset radio station
- To recall the radio preset
- DAYLIGHT SAVING TIME (DST) MODE
- DIMMER CONTROL
- NAP FUNCTION (count down timer)
- RESETTING
- SPECIFICATIONS
- ESPAÑOL
- Guía de usuario
- CONTENIDO
- FRANÇAIS
- PORTUGUÊS
- Guia do utilizador
- CONTEÚDO
Brand : Sunstech
Model : FRD28
Category : Alarm Clock