009208 - Lawn mower Meec Tools - Free user manual and instructions
Find the device manual for free 009208 Meec Tools in PDF.


| Product Type | Manual Reel Lawn Mower (Hand Mower) |
| Brand | Meec Tools |
| Model | 009208 |
| Working Width | 40 cm |
| Mowing Height Range | 15–35 mm (4 adjustable positions) |
| Weight | 7.5 kg |
| Power Source | Manual (push operation, no motor) |
| Max Grass Height for Cutting | Up to 10 cm |
| Intended Use | Household lawn mowing only |
| Grass Catcher Included | Yes (fabric/plastic, attaches to drum and handle) |
| Handle Type | Two-piece tubular handle with top part |
| Number of Wheels | 2 (one on each side) |
| Blade Material | Steel (blade drum and fixed blade) |
| Assembly Required | Yes (handle, grass catcher, strap) |
| Safety Features | Warning symbols, safety distance, keep hands/feet away |
| Maintenance | Clean after use, lubricate moving parts, check screws, adjust fixed blade |
| Spare Parts | Only manufacturer-recommended parts |
| Storage Temperature | 5–30°C, dry and frost-free |
| Transport | Carry by handle, secure against movement |
| Warranty | Standard Jula warranty (refer to retailer) |
| Manufacturer | Jula AB, Box 363, 532 24 SKARA, Sweden |
Frequently Asked Questions - 009208 Meec Tools
User questions about 009208 Meec Tools
0 question about this device. Answer the ones you know or ask your own.
Ask a new question about this device
Download the instructions for your Lawn mower in PDF format for free! Find your manual 009208 - Meec Tools and take your electronic device back in hand. On this page are published all the documents necessary for the use of your device. 009208 by Meec Tools.
USER MANUAL 009208 Meec Tools
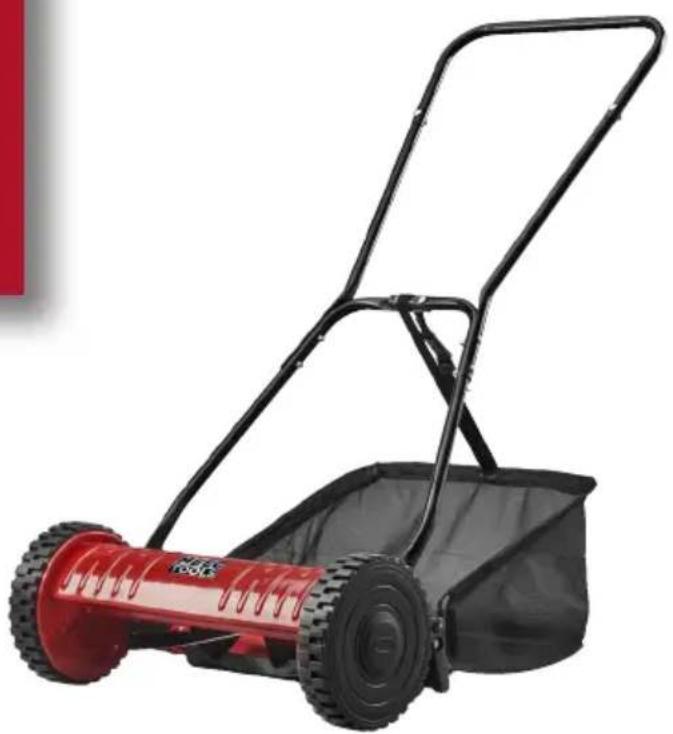
natural_image
Red and black lawn mower with visible tire, no text or symbols on the device itself
OPERATING INSTRUCTIONS HAND MOWER HÄNDGRESSKLIPPER
▲ Important! Read the user instructions carefully before use. Save them for future reference. (Translation of the original instructions)

BRUKSANVISNING HANDGRÄSKLIPPARE
Jula reserves the right to make changes. In the event of problems, please contact our customer service. www.jula.com
Tillverkare/Produsent/Producenci/Manufacturer
Jula AB, Box 363, 532 24 SKARA
Distributör/Distributør/Dystrybutor/Distributor
Jula Poland Sp. z o.o., ul.
natural_image
Top-down view of a mechanical lawn mower with visible blades and base (no text or symbols)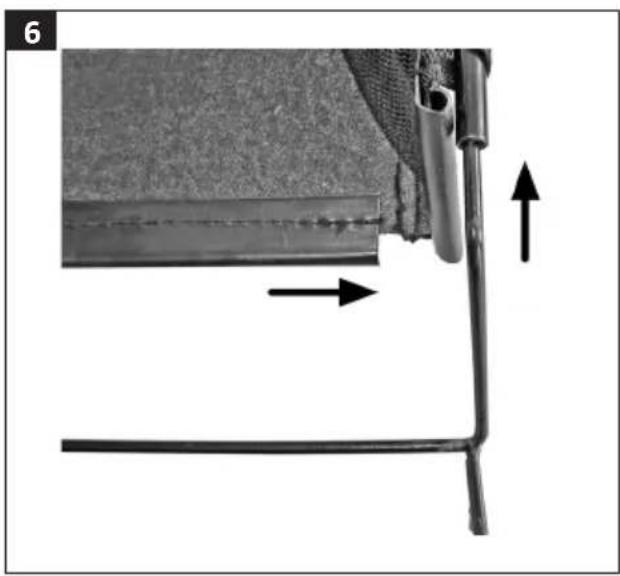
natural_image
Close-up of a metal pipe joint with arrows indicating direction, no text or symbols present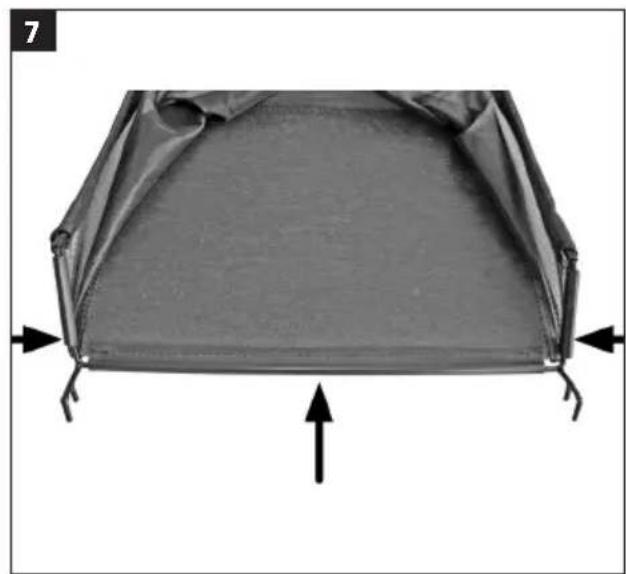
natural_image
Top-down view of a rectangular fabric or mesh structure with directional arrows indicating compression or force (no text or symbols)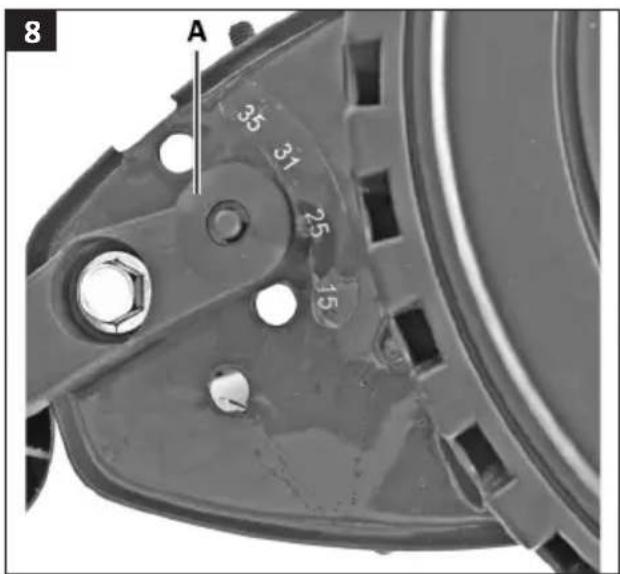
natural_image
Mechanical tool with a curved arrow indicating rotational motion (no text or symbols)SÄKERHETSANVISNINGAR
FÖRVARING OCH TRANSPORT
Förvaring
- Carefully read these instructions before use, and follow all the instructions and safety instructions to avoid personal injury and/or material damage. Save these instructions for future reference. These instructions should be enclosed with the product if it is sold or passed on. The manufacturer cannot accept liability for any damage resulting from failure to follow these instructions.
- Failure to follow all the instructions and safety instructions can result in the risk of serious personal injury. Save these instructions and safety instructions for future reference.
- Read all the instructions carefully before use, to minimise the risk of personal injury.
- Keep onlookers, especially children, and pets at a safe distance.
WARNING!
- The blades are sharp – risk of cut injuries. Wear safety gloves when assembling and/or for maintenance.
- Keep your hands and feet away from the openings when the product is in use.
SYMBOLS

Read the operating instructions.

Approved in accordance with the relevant directives.

WARNING!
 | Watch out for ejected objects. |
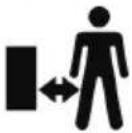 | Observe the safety distance. |
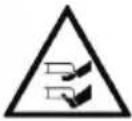 | Keep your hands and feet away from the openings when the product is in use. |
TECHNICAL DATA
Working width 40 cm
Mowing height 15–35 mm
Weight 7.5 kg
DESCRIPTION
- Wheel
- Blade
- Mower drum
- Grasscatcher
- Strap
- Handle, top part
- Handle, top tube (2)
- Handle, bottom tube (2)
- Screw M6 x 30 (4)
- Screw M6 x 25 (4)
- Nut M6
FIG. 1
FIG. 2
ASSEMBLY
WARNING!
Wear safety gloves when assembling and/or for maintenance.
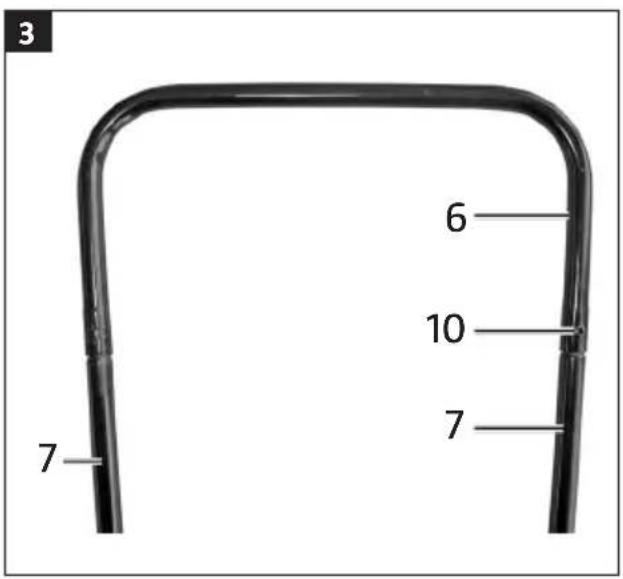
- Screw the top part of the handle (6) on the two handle tubes (7) with two screws M6 x 25 (10) and two nuts.
FIG. 3
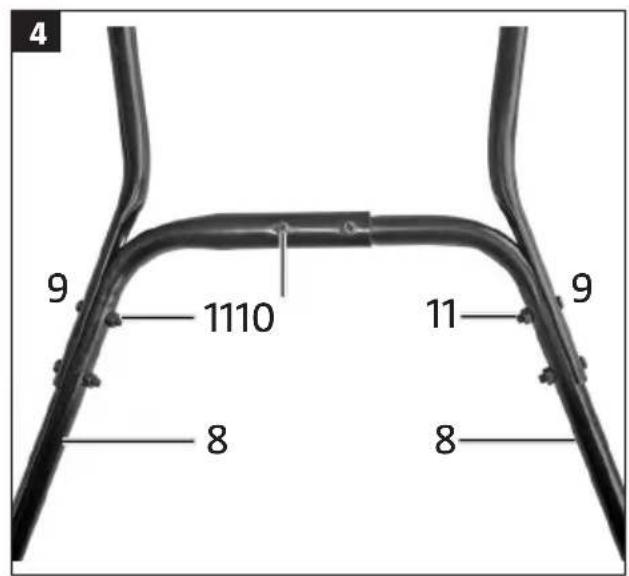
- Screw the bottom tube on the handle (8) on the two top tubes (7) with four screws M6 x 30 (9), two M6 x 25 (10) and nuts (11).
FIG. 4
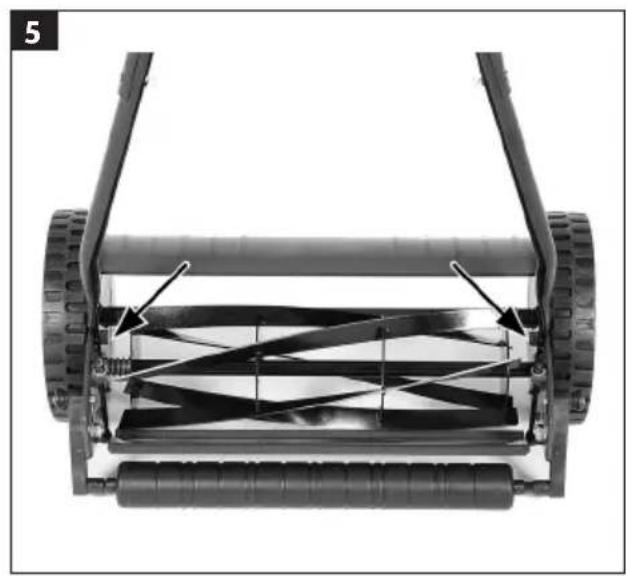
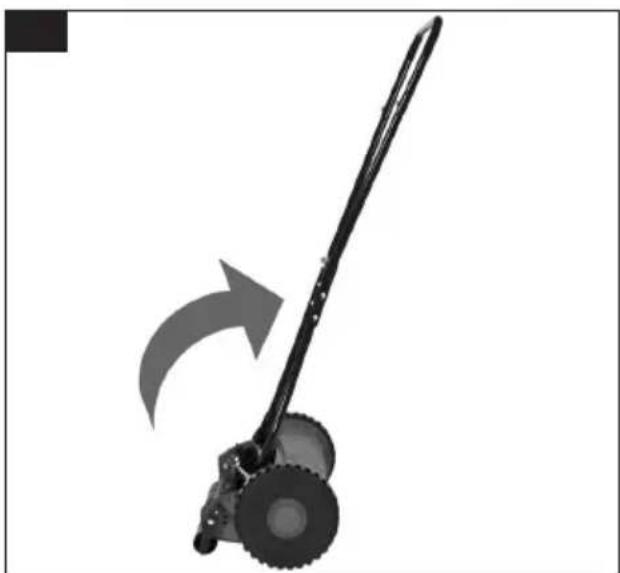
- First fit one side of the handle on the product, press the handle together a little and then fit the other side.
FIG. 5
FITTING THE GRASS CATCHER
- Press the frame into the tubes on the grass catcher.
FIG. 6
- Snap the side attachments on the catcher over the frame.
FIG. 7
- Snap the bottom attachments on the catcher over the frame.
FIG. 8
-
Fit the grass collector on the drum.
-
The grass catcher must also be fastened in the handle with the supplied straps.
USE
INTENDED USE
• The product is intended for cutting grass.
- The product is only intended for household use, not for commercial use.
HOW TO USE
- The lawn mower can cut grass up to 10 cm high.
- Mow the lawn regularly – the grass will grow faster and become thicker and more resistant if it is kept short, unless the climate is very dry.
- Mow the lawn with a relatively high mowing height first, and then gradually reduce the height. A mowing height of about 2.5 cm gives the lawn a well-mown look.
- Only cut the grass when it is relatively dry.
- Mow in a straight line with an overlap of a few centimetres for best results.
Adjusting the mowing height
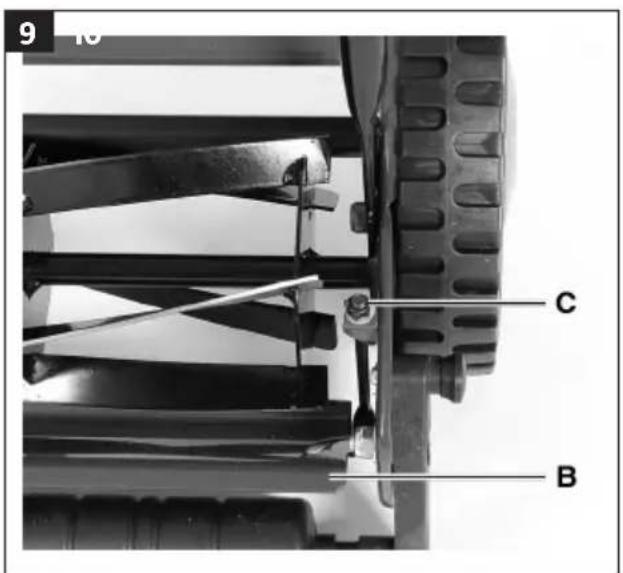
The lawn mower has four mowing heights, from 15 to 35 mm. Adjust the mowing height by pulling out the spring-loaded pins (A) on both sides and moving them to the required positions.
FIG. 9
MAINTENANCE
- Follow the maintenance instructions for best functionality and useful life.
- Clean the product with a brush or cloth after use.
- Check that all screw unions are properly tightened at regular intervals.
- Replace damaged or worn parts immediately.
- Clean and lubricate all the screw unions and moving parts, such as the wheels and axles, at regular intervals for best functionality and life span.
- The blade drum is subjected to heavy wear. Check at regular intervals the condition of the blade and that the blade drum is firmly in place.
- Contact the retailer if the blade is blunt and needs to be replaced. Only use spare parts recommended by the manufacturer.
ADJUSTING THE FIXED BLADE
WARNING!
Wear safety gloves.
Undo the adjust nuts (10 mm) on each side and adjust the fixed blade to the required position. The blade is correctly adjusted if a sheet of paper placed between the drum and the blade is cut by turning the wheels forward by hand.
NOTE:
The blade should only be adjusted before using for the first time and when the blade is worn.
STORAGE AND TRANSPORT
Storage
- Store the product and accessories in the original pack, in a dark, dry, frost-free place, out of the reach of children. The recommended storage temperature is from 5 to 30°C.
- Store the product in a dry place out of the reach of children. Remove the grass catcher and put the handle vertical to save space.
Transport
- Carry the product by the handle. Never put your hands or other parts of the body in the cutting mechanism.
• Fit transport protection where appropriate. - Protect the product from damage and heavy vibrations, especially when transporting in a vehicle.
- Secure the product so that it cannot move or tip over.
TROUBLESHOOTING
| Problem Possible cause Action | ||
| Abnormal noise. Loose screw connections. Tighten the screw joints. | ||
| Blade blocked by foreign object. | ||
| Damaged blade. Replace the blade. | ||
| Incorrectly adjusted blade. Adjust the blade. | ||
| Unsatisfactory mowing results. Incorrectly adjusted blade. Adjust the blade. | ||
| Blunt blade. Have the blade sharpened or replaced. | ||
- OPERATING INSTRUCTIONS HAND MOWER HÄNDGRESSKLIPPER
- BRUKSANVISNING HANDGRÄSKLIPPARE
- SÄKERHETSANVISNINGAR
- FÖRVARING OCH TRANSPORT
- Förvaring
- WARNING!
- SYMBOLS
- TECHNICAL DATA
- DESCRIPTION
- ASSEMBLY
- 3
- 4
- 5
- FITTING THE GRASS CATCHER
- 6
- 7
- 8
- USE
- INTENDED USE
- HOW TO USE
- Adjusting the mowing height
- 9
- MAINTENANCE
- ADJUSTING THE FIXED BLADE
- Wear safety gloves.
- NOTE:
- STORAGE AND TRANSPORT
- Storage
- Transport
Brand : Meec Tools
Model : 009208
Category : Lawn mower