SCORICG15E - Loudspeaker Sandstrøm - Free user manual and instructions
Find the device manual for free SCORICG15E Sandstrøm in PDF.


| Product Type | Portable Bluetooth Speaker |
| Model | SCORICG15E |
| Brand | Sandstrøm |
| Dimensions (W x H x D) | 200 x 100 x 100 mm |
| Weight | 0.5 kg |
| Power Source | Rechargeable Li-ion battery, USB-C charging |
| Battery Life | Up to 10 hours |
| Bluetooth Version | 5.0 |
| Supported Audio Codecs | SBC, AAC |
| Speaker Driver | 1 x 40 mm full-range driver |
| Output Power | 10W RMS |
| Frequency Response | 100 Hz – 20 kHz |
| Impedance | 4 ohms |
| Signal-to-Noise Ratio | >80 dB |
| Connectivity | Bluetooth 5.0, AUX 3.5mm, USB-C (charging) |
| Controls | Power, Volume +/-, Play/Pause, Bluetooth pairing button |
| Waterproof Rating | IPX5 (splash resistant) |
| Included Accessories | USB-C charging cable, AUX cable, user manual |
| Cleaning Instructions | Wipe with a soft, dry cloth; do not use liquids or solvents |
| Safety Features | Overcharge protection, short-circuit protection |
| Spare Parts Availability | Contact Sandstrøm support for replacement battery or charging port |
| Repairability | Battery is replaceable; other repairs by qualified technician |
Frequently Asked Questions - SCORICG15E Sandstrøm
User questions about SCORICG15E Sandstrøm
0 question about this device. Answer the ones you know or ask your own.
Ask a new question about this device
Download the instructions for your Loudspeaker in PDF format for free! Find your manual SCORICG15E - Sandstrøm and take your electronic device back in hand. On this page are published all the documents necessary for the use of your device. SCORICG15E by Sandstrøm.
USER MANUAL SCORICG15E Sandstrøm
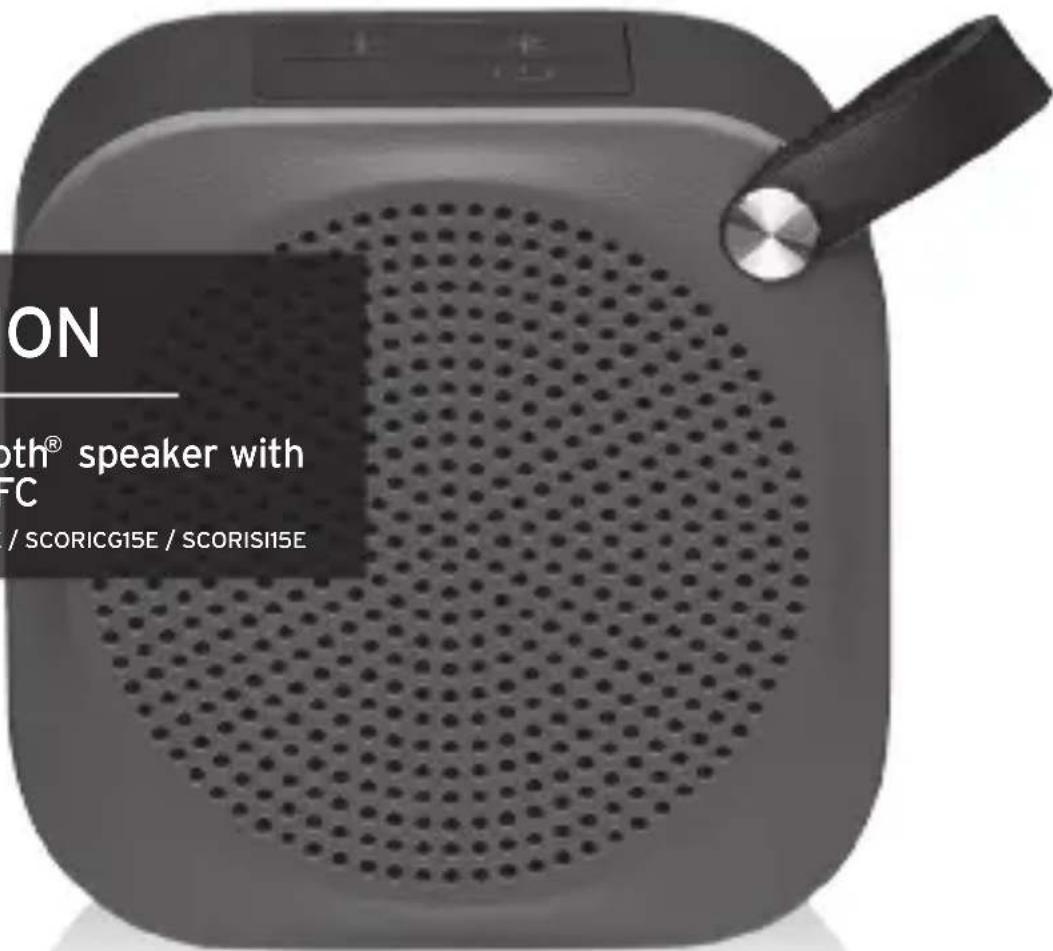
Portable Bluetooth® speaker with NFC
SCORIBL15E / SCORIRD15E / SCORICG15E / SCORISI15E
Contents
GB
Safety Warning ......6
Unpacking 22
Product Overview......23
Front View....23
Left Side View 23
Right Side View 24
Top View 24
Important Information about Water Resistant Operation.....25
First Charge / Recharge the Battery....27
Connection......29
Using the AUX IN Connection... 29
General Operation......30
Powering ON/OFF......30
Bluetooth® Operation......31
NFC (Near Field
Communication) Operation...34
AUX IN Operation......35
Maintenance ....35
Hints and Tips......36
Specifications......39
Innhold
NO
Sikkerhetsadvarsler ......9
Pakke Opp....41
Produktoversikt......42
Sett forfra 42
- Retain the manual. If you pass the unit onto a third party make sure to include this manual.
Damage
- Please inspect the unit for damage after unpacking.
- Do not continue to operate the unit if you are in any doubt about it working normally, or if it is damaged in any way - switch off, unplug and consult your dealer.
Location of Unit
- The unit must be placed on a flat stable surface and should not be subjected to vibrations.
- Do not place the unit on sloped or unstable surfaces as the unit may fall off or tip over.
- Do not place the unit close to table edge. It may fall off due to vibration during high volume listening.
Temperature
- Avoid extreme degrees of temperature, either hot or cold. Place the unit well away from heat sources such as radiators or gas/electric fires.
- Avoid exposure to direct sunlight and other sources of heat.
Naked Flames
- Never place any type of candle or naked flame on the top of or near the unit.
Moisture
- Do not submerge this unit in water. It can cause serious damage.
Ventilation
- To prevent the risk of electric shock or fire hazard due to overheating, ensure that curtains and other materials do not obstruct the ventilation vents.
- Do not install or place this unit in a bookcase, built-in cabinet or in another confined space. Ensure the unit is well ventilated.
Interference
- Do not place the unit on or near appliances which may cause electromagnetic interference. If you do, it may adversely affect the working performance of the unit, and cause a distorted sound.
Service
- To reduce the risk of electric shock, do not remove screws. The unit does not contain any user-serviceable parts. Please leave all maintenance work to qualified personnel. - Do not open any fixed covers as this may expose dangerous voltages.
Built-in Battery Care
- Your product is powered by a built-in rechargeable battery.
- The battery can be charged and discharged hundreds of times, but will eventually wear out.
-
Unplug the charger from the electrical plug and the product when not in use.
-
Do not leave a fully charged battery connected to a charger, since overcharging may shorten its lifetime.
- If left unused, a fully charged battery will lose its charge over time.
• Leaving the product in hot or cold places, such as in a closed car in the summer and winter conditions, will reduce the capacity and lifetime of the battery. - Always try to keep your device in a cool, moisture-free environment that's less than 32°C. A product with a hot or cold battery may not work temporarily, even when the battery is fully charged. Battery performance is particularly limited in temperatures well below freezing.
- If you plan to store your device for longer than six months, charge the battery for an hour every six months to keep it fresh.
- The unit should be fully recharged after using the device each time. This will keep the health of the battery.
Battery warning
- The battery used in this product may present a risk of fire or chemical burn if mistreated.
- Do not attempt to open the product or replace the battery. It is built-in and not changeable. Use of other batteries may present a risk of fire or explosion and the warranty will be terminated.
- Only recharge your battery with the provided approved USB cable designated for this product.
- Dispose of batteries according to local regulations. Please recycle when possible. Do not dispose as household waste or in a fire as they may explode.
• Batteries may explode if damaged.
Maintenance
• Ensure to unplug before cleaning.
- Do not use any type of abrasive pad or abrasive cleaning solutions as these may damage the unit's surface.
• Do not use liquids to clean the unit.
Sikkerhetsadvarsler
NO
- Ta vare på bruksanvisningen. Hvis du overdrar enheten til en tredjepart sørg for å ta med denne håndboken.
Skade
Thank you for purchasing your new product.
We recommend that you spend some time reading this instruction manual in order that you fully understand all the operational features it offers. You will also find some hints and tips to help you resolve any issues.
Read all the safety instructions carefully before use and keep this instruction manual for future reference.
Unpacking
GB
Remove all items from the packaging. Retain the packaging. If you dispose of it please do so according to local regulations.
The following items are included:
- Main Unit
• USB to Micro USB Cable
• 3.5 mm to 3.5 mm Stereo Audio Cable
• Instruction Manual - Carry Bag
Product Overview
Front View Left Side View

natural_image
Simple diagram of a circular object with a handle and label '1' (no text or symbols within the diagram itself)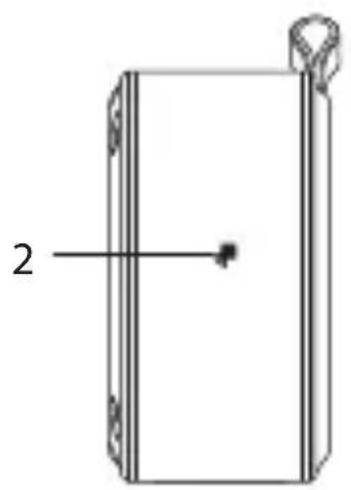
natural_image
Simple line drawing of a rectangular object with a label '2' pointing to its side (no text or symbols on the object itself)1. Speaker 2. NFC Sensor
GB
Right Side View Top View
GB
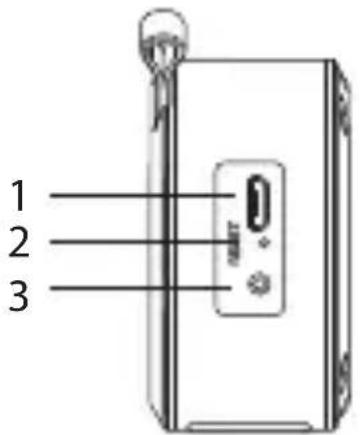
- DC IN 5V Socket
- RESET Button
- LINE IN Socket
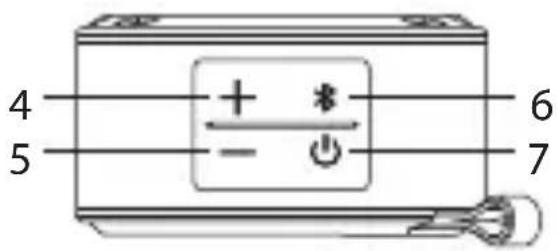
- VOL+ Button
- VOL- Button
- *Bluetooth® Button
- ⏻ON/OFF Button

Open the plastic cover at the right side of the unit for the connector panel shown above.

natural_image
Diagram of a device with a tag and control panel, showing a rotation arrow (no text or symbols)Important Information about Water Resistant Operation
GB
For proper water resistant operation, make sure the plastic jack cover of the unit is completely flush with the unit by pressing along the entire edge of the cover until it is completely and securely in place.
The unit is splash proof rated. However, DO NOT immerse the unit in water. It may cause product failure.
• Make sure the jack cover and surrounding surfaces are completely dry before opening the jack cover to prevent moisture from damaging the internal electronics.
GB
- Keep the jack cover free of dirt, sand, or other objects that can interfere with proper sealing. If for any reason the jack cover is not making a tight waterproof seal water may enter the unit.
• DO NOT clean unit with oily soaps or use chemicals or solvents. Clean with damp cloth.
First Charge / Recharge the Battery
The unit has a built-in rechargeable battery. The battery is charged automatically whenever the unit is connected to a computer or a USB charging device.

| Recharging | The light of the ⏻ ON/OFF Button flashes. |
| Fully Recharged | The light of the ⏻ ON/OFF Button turns off. |

- Ensure the unit is switched off while charging.
- Do not overcharge the battery as it may shorten its life. Disconnect the USB cable and then switch off the unit after the unit is fully charged.

- It takes 3 hours (approx.) to fully charge the battery.
• A fully charged unit has up to 6 hours of playback time (depending on the volume level). - When the battery power is low, you will hear 3 beeps and the ⏻ button will flash.
Connection
Using the AUX IN Connection
Use the AUX IN Cable to connect the headphone socket of an audio device and the LINE IN socket of the unit.


- When an AUX IN cable is connected with the unit, it will switch the source to AUX mode automatically, even if you are listening to music via Bluetooth® connection.
- Disconnect the AUX IN cable to enable Bluetooth® mode.
General Operation
Powering ON/OFF
- PressButton to switch on the unit. You will hear a "beep" tone.
- Press and hold Button to switch off the unit.
Bluetooth® Operation
- Switch on the unit, and it will enter Bluetooth® mode automatically.
- *Bluetooth® button will flash in blue rapidly.
- Search for the system with your Bluetooth® device and you should see "ORION". Enter password "0000" if requested. When connected, Bluetooth® button will light up blue, and you will hear a beep tone twice.

When the unit has found the last paired Bluetooth® device, it will connect automatically.

- If the unit is not paired in a few minutes, it will exit pairing mode.

- The operating range of the Bluetooth® for this unit is 10 metres, without obstruction. Walls, structures and other objects may affect the Bluetooth® range.
- For better signal reception, remove any obstacles between the unit and the Bluetooth® device.
- This unit supports A2DP (Advanced Audio Distribution Profile) and AVRCP (Audio Video remote Control Profile) functions. This can only be paired with one Bluetooth® device at one time.
- Compatibility with all devices and media types is not guaranteed.
- Some mobile phones with the Bluetooth® function may connect and disconnect as you make and end calls. This is not an indication of a problem with your unit.
- Disconnect the AUX IN cable to enable Bluetooth® mode.
| To Operation | |
| Increase Volume Press/Press and hold the + Button. | |
| Decrease Volume Press/Press and hold the - Button. | |
| Pause/Play playback Press the * Button. | |
| Answer an incoming call Press the * Button. | |
| End Call Press the * Button. | |
| Reject an incoming call Press +/- Button. | |
| Clear all the connection with the paired Bluetooth® devices | Press and hold the * Button. |
Call functions only applicable if mobile phone is paired and connected with the speaker and both are switched on.

- To successfully answer a call, ensure your mobile device supports Bluetooth® HFP.
- Ensure your Bluetooth® device is configured to take full advantage of the unit's functions. Please refer to your Bluetooth® device's manual for detailed instructions.
NFC (Near Field Communication) Operation
NFC enables you pair and connect with Bluetooth® devices in a easy way.
- Make sure that your NFC is turned "On" on your mobile device.
- Hold your mobile device about or less than 1.5cm close to NFC logo on the left side of unit for receiving an auto-connection between your mobile device and radio.
- Your device then will turn-on Bluetooth® automatically and will pair your device with radio. No additional settings are necessary.
AUX IN Operation
Use the 3.5mm audio cable to connect the unit to an audio device. The unit will enter AUX IN mode automatically.
- Press +/- to adjust the volume.
- Press* Button to mute the speaker. Press +/-/* button to resume.
Maintenance

Ensure the unit is fully unplugged before cleaning.
- To clean the unit, wipe the case with a slightly moist, lint-free cloth.
- Do not use any cleaning fluids containing alcohol, ammonia or abrasives.
- Do not spray aerosol at or near the unit.
Hints and Tips
GB
| Problem Solution | |
| No power. • The | battery may be exhausted.Connect the USB cable and plug into a USB port of a computer which is turned on.Ensure that the unit is switched on. |
| No Sound. • Ensure | sure that the unit is switched on.Check the volume level of the unit.Check the sound input source. |
| Sound is distorted. | Volume is too high. Adjust the volume control. |
| I cannot find “ORION” on my Bluetooth® device. | · Ensure that the unit is switched on. · Ensure that the Bluetooth® function is activated on your Bluetooth® device. · The unit has a Bluetooth® function that can receive a signal within 10 metres. Keep a distance within 10 metres between the unit and your Bluetooth® device. |
| Not charging. · Ensure that the Micro USB charging cable is correctly connected with the unit. | |
| Voice interrupted in Bluetooth® mode. | · Ensure that the unit and Bluetooth® device is connected within 10 metres. · Ensure that no obstruction between the unit and the Bluetooth® device. |
| NFC Pairing failed. | ·Ensure that the Bluetooth® device supports NFC function. ·Ensure that the unit is in pairing mode. ·For first time pairing, ensure that the Bluetooth® device touches NFC sensor of the unit. ·Remove mobile phone protection shell for NFC pairing. |
| No Sound in AUX IN mode. | ·Ensure the audio cable is properly connected. |
| The unit does not respond when pressing any buttons. | ·The unit may freeze up during use. Switch the unit off and then on again at the mains socket to reset the unit. ·Press the reset button, and then press ⏻ button to switch on the unit. |
Specifications
| Model SCORIBL15E/SCORIRD15E/SCORICG15E/SCORISI15E | D15E/ | |
| Charging Input DC 5V, 1A (Micro USB) | Micro USB) | |
| Charging Time Approx 3 hours (DC 5V, 1A [Micro USB]) | [Micro USB]) | |
| Amplifier Output 3 Wrms | ||
| Bluetooth®Bluetooth®Version | Bluetooth®V2.1 EDR | |
| Maximum power transmitted | < 20 dbm | |
| Frequency bands | 2402 MHz ~ 2480 MHz | |
| Dimension 75 mm x 75 mm x 40 mm | ||
Features and specifications are subject to change without prior notice.
natural_image
Simple line drawing of a circular object with a handle and label '1' (no text or symbols beyond the label)
natural_image
Simple line drawing of a rectangular object with a knob and arrow, no text or symbols presentnatural_image
Diagram of a device with a scroll and control panel, showing a rotation arrow (no text or symbols)
natural_image
Simple diagram of a circular object with a handle and label '1' (no text or symbols beyond the label)Vänster sida

natural_image
Simple line drawing of a rectangular object with a label '2' pointing to its side (no text or symbols on the object itself)1. Högtalare 2. NFC-Sensor
natural_image
Diagram of a device with a scroll and control panel, showing a rotation arrow (no text or symbols)natural_image
Simple line drawing of a circular object with a handle and label '1' (no text or symbols beyond the label)
natural_image
Simple line drawing of a rectangular object with a knob and arrow, no text or symbols present- VOL+ -painike
- VOL--painike
- *Bluetooth®-painike
- ON/OFF-painike

natural_image
Diagram of a device with a scroll and control panel, showing a rotation arrow (no text or symbols)
natural_image
Simple diagram of a circular object with a handle and label '1' (no text or symbols beyond the label)
natural_image
Simple line drawing of a rectangular object with a handle and labeled dimension '2' (no text or symbols beyond the number)1. Højttaler 2. NFC Sensor
DK
Se fra højre side

natural_image
Diagram of a device with a scroll and control panel, showing a rotation arrow (no text or symbols)DK
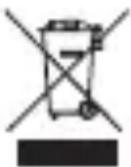
The symbol on the product or its packaging indicates that this product must not be disposed of with your other household waste. Instead, it is your responsibility to dispose of your waste equipment by handing it over to a designated collection point for the recycling of waste electrical and electronic equipment. The separate collection and recycling of your waste equipment at the time of disposal will help conserve natural resources and ensure that it is recycled in a manner that protects human health and the environment.
For more information about where you can drop off your waste for recycling, please contact your local authority, or where you purchased your product.
The Bluetooth® word mark and logos are registered trademarks owned by Bluetooth SIG, Inc. and any use of such marks by DSG Retail Limited is under license. Other trademarks and trade names are those of their respective owners and all rights are acknowledged.
All trademarks are the property of their respective owners and all rights are acknowledged.
www.lefdal.com/support
SE www.elgiganten.se/support
- Contents
- Innhold
- Damage
- Location of Unit
- Temperature
- Naked Flames
- Moisture
- Ventilation
- Interference
- Service
- Built-in Battery Care
- Battery warning
- Maintenance
- Sikkerhetsadvarsler
- Skade
- Thank you for purchasing your new product.
- Unpacking
- GB
- Product Overview
- Front View Left Side View
- Speaker 2. NFC Sensor
- Right Side View Top View
- Important Information about Water Resistant Operation
- First Charge / Recharge the Battery
- Connection
- Using the AUX IN Connection
- General Operation
- Powering ON/OFF
- Bluetooth® Operation
- NFC (Near Field Communication) Operation
- AUX IN Operation
- Hints and Tips
- Specifications
- Vänster sida
- Högtalare 2. NFC-Sensor
- Højttaler 2. NFC Sensor
- Se fra højre side
Brand : Sandstrøm
Model : SCORICG15E
Category : Loudspeaker