53 PLATINIUM - Smartphone ARCHOS - Free user manual and instructions
Find the device manual for free 53 PLATINIUM ARCHOS in PDF.
User questions about 53 PLATINIUM ARCHOS
0 question about this device. Answer the ones you know or ask your own.
Ask a new question about this device
Download the instructions for your Smartphone in PDF format for free! Find your manual 53 PLATINIUM - ARCHOS and take your electronic device back in hand. On this page are published all the documents necessary for the use of your device. 53 PLATINIUM by ARCHOS.
USER MANUAL 53 PLATINIUM ARCHOS
Description of the phone. 3
Assembling. 6
Getting started. 8
Through the wizard. 9
3G & WiFi connection. 10
Google account & Contacts. 12
Touch screen actions. 14
Getting familiar with AndroidTM 15
Troubleshooting. 18
For more information, please consult the FAQs on www.archos.com. Make sure to read them before considering any product return. Your deal may be no big deal. As we are often updating and improving our products, your device's software may have a slightly different appearance or modified functionality than presented in this Quick Start Guide.
1
Package Contents
Check your product box for the following items:
- ARCHOS 50 Platinum
- Battery
- Headset
- Micro SIM adaptor
- USB cable
- Charger
- Quick start guide
- Warranty Legal & Safety notices
The items supplied with your device and available accessories may vary depending on your region or service provider.
The supplied items are designed only for your device and may not be compatible with other devices.
Unapproved accessories may cause your device to malfunction.
2
Description of the phone
① Webcam
② Loudspeaker
Volume buttons
④ Microphone
⑤ ON/OFF button

EN
3
Description of the phone
⑥ Headset jack
⑦ Micro-USB port
Camera
⑨ Flashlight
10 Loudspeaker

EN
11Menu button
⑫Home button/Recent apps
13 Back button

Menu button: open the list of options available on the current screen.
Home button: short press to return to the Home screen; double press to open the list of recent applications.
Back button: return to the previous screen.
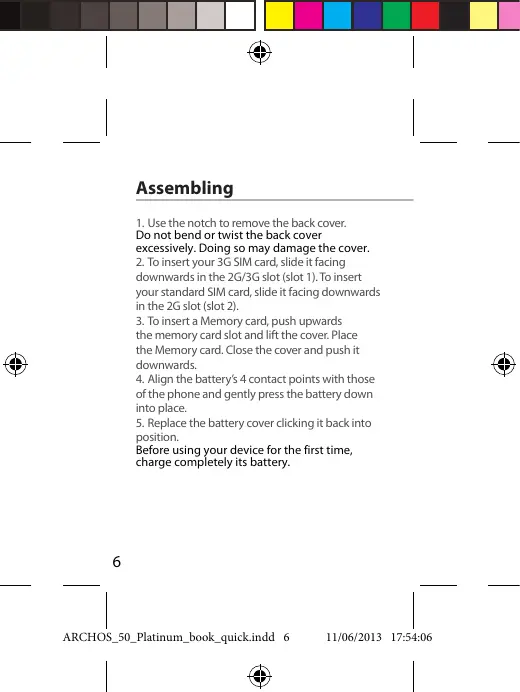
Assembling
- Use the notch to remove the back cover.
Do not bend or twist the back cover excessively. Doing so may damage the cover. - To insert your 3G SIM card, slide it facing
downwards in the 2G/3G slot (slot 1). To insert your standard SIM card, slide it facing downwards in the 2G slot (slot 2). - To insert a Memory card, push upwards
the memory card slot and lift the cover. Place the Memory card. Close the cover and push it downwards. - Align the battery's 4 contact points with those of the phone and gently press the battery down into place.
- Replace the battery cover clicking it back into position.
Before using your device for the first time, charge completely its battery.


EN


Memory card slot
7
Getting started
Turn ON
- Press and hold the ON/OFF button to turn on the device.
When you turn on your device, a PIN code may be requested. - Type the PIN code supplied with your SIM card. Beware of typing a wrong PIN code.
- Select 'OK'.
If you are turning on your device for the first time, follow the on-screen instructions to set up your device. You must sign in to Google or create a Google account to use applications such as Play store and Gmail.
Turn OFF
To turn off your device, press and hold the ON/OFF button, and then select Power off > OK.
Through the wizard
The first time you start up your ARCHOS, the installation wizard will help you set up your device:
- Language
- Date & time
WiFi connection - Location service options
Tip:
Your device turns off the touch screen when you do not use it for a specified period. To turn on the screen, press the ON/OFF button.
EN
9
3G & WiFi connection
3G connection
With your 3G SIM card, you can connect to the Internet without setting.
The ARCHOS will only have signal if you are in an area covered by your 3G provider's 3G or EDGE network.
When connected to the 3G network, the 3G icon is displayed in the status bar.
To be able to access Internet, the mobile data icon must be activated. Drag down the status bar and touch the mobile data icon to activate it. The mobile data icon is blue when activated.

mobile data icon


WiFi connection
WARNING: Make sure that you are in a WiFi zone. You can access the WiFi settings quickly from the status bar.
- Drag down the status bar.
The status dashboard is displayed. - Touch the "Settings" icon to open the settings menu.
- In the "Wireless & networks", if the WiFi is off, slide the WiFi switch to the "ON" position. Once the WiFi is on, the ARCHOS will scan for WiFi networks in range.
- Touch "WiFi" to display available networks
- Touch the name of network you want to connect to.
Private networks are shown with a lock icon and will require you to enter your password.

11
Google & Contacts
Adding a Google account
A Google account lets you take full advantage of any Google apps and services that you may want to use.
- Go to "Settings" > "Accounts" > "Add account".
- Select the account type "Google" to add.
- Follow the onscreen steps to enter information about the account.
Once the account is created, you can access Play Store, Gmail, Talk, Maps and many other apps.
- Go to "Settings" > "Accounts" > "Google".
- Select your account.
The list of information that can be sync are displayed. Make sure they are all checked in order to be sync. Your data are backed up and you can get them back in case of loss of your device or SIM card.

Touch screen actions:
Tap: touch once to select or launch a menu, option, or application.
Tap and hold: tap an item and hold it for more than 2 seconds.
Drag: tap an item and move it to a new location.
Double-tap: tap an item twice quickly.
Flick: briskly scroll up, down, left, or right to move through lists or screens.
Pinch: place two of your fingers far apart, and then pinch them together.
Hints & tips with Android™
EN
The extended home screen:
Navigate between different home screen panels by swiping left and right.
Home button
Short press the Home button to go back to the main screen.
Double press the Home button to display all the apps you have opened. Swipe any app left or right to close it.
Moving a home screen item:
Touch and hold your finger onto it until the positioning gridlines appear, then slide it to the desired location, and release your finger.
Removing a home screen item:
Touch and hold it, slide your finger towards the top of the screen and drop it over the "Remove" icon.
Uninstalling an item:
From the "All apps" screens, touch and hold it, slide your finger towards the top of the screen and drop it over "Uninstall" bin.
Hints & tips with Android™
Creating application folders:
Drop one app icon over another on a home screen and the two icons will be combined.
Widgets:
Touch the "All Apps" icon on your home screen. Touch "Widgets" at the top of the screen. From the main Widget screen, you can move around widgets just as you do for app icons.
Changing your wallpaper:
Hold your finger on a home screen at an empty location, then choose from the list.
Locking the touchscreen:
From the quick settings dashboard in the status bar, touch "Settings". In "Settings", scroll down and touch "Security". Touch "Screen lock". Touch the type of lock you would like to use. After you set a lock, a lock screen is displayed whenever your screen wakes up, requesting the pattern, pin or other specified key.

Troubleshooting
My phone is frozen or cannot switch on
Check the battery contacts, remove and reinstall your battery, then turn your phone on. Check the battery power level, charge for at least 20 minutes.
My phone cannot connect to a network or "No service" is displayed
Try connecting in another location. Verify the network coverage with your operator.
Unable to make outgoing calls
Make sure your phone is connected to a network, and the network is not overloaded or unavailable.
Unable to receive incoming calls
Make sure your phone is switched on and connected to a network (check for overloaded or unavailable network).
SIM card PIN locked
Contact your network operator to obtain the PUK code (Personal Unblocking Key).
To configure a new 3G network:
On your device, tap Settings.
Select Wireless & networks > More... > Mobile networks.
Select Network settings. In Network operators, select your operator. In Access Point Names, select the correct access point name and enter the exact connection parameters provided by your 3G provider.

Table des matieres
FR
Tocca e premi (Tap and hold)
C KOTOPO Bbl CTOLKHyinCb, He npeCTabJrE T c60
Hnueero CIOXHOrO. NockoJIbky Mbl aCtO o6HOBIAeM
I COBepueHCTBye CBOU IN3dJIIN, npOrpamMHOe
OeueHnHa BaWem yCTpoIcTBe MoXeT
He3HaHTeBHO OTnuaTbCn IO BHeuHEmy BnDy nnn
fHKUHOHaJIbHOCTNOTIpeDCTaJIeHHOROBdAHHOM
KpaTkom pyKOBoDCTBE.
RU
139
Copejxmoe ynaKOBKn
PnOpeBte, BxOaTn Li B KOMnIeKT NOCTABKm CneJyUoIe MCON0ENTb?
ARCHOS 50 Platinum
-AKKymyTOp
- TapHnType
- Micro SIM aanterp
- Ka6eIb USB
-3apraHoe yctpoiCTBO
-KpaTKe pyKOBoDCTBO
- TapaHTnN INHCTpyKUn N 6e3OnaCHOCTN
KOMIOHENTbI, BXOJAMUE B KOMNIJEKT NCTABKMI YcTPOBCTBA, IN DQOTNHYB AKECCPABr bMOYT PaaNJHATCBa 3BAVCSMOCNT O TPERNOHA IINI NOCTABNUsCAyTL.
KOMHOENTb, BXOJIAUE B KOMNKET,
PnpDAHNAHcHBeHn IYNCN0B3OBAHIN TOBLK
C DAHNBM YCTPOCTBOM M OYETbBtB
HECOBEMCTNBHMcD CpyTNMMYCTPOCTBAMn.
NcnoIb0BaBOne AaCecccyapOB,KOTOpbYe H6blnPa3peuChbNy K pIIMMeHEnO C daHbMbYcTPOyTBOM,MOKET pINBECTN K EFOHNCPABHOCTO.
Oncanhe yctpoictBa
①Be6-kamepa
② D
③ KhoNkny peYnIPOBKn I pOIOCTN 1
④ MinkpofoH
⑤ KHOKI BIXIOHEH N BIKHOIIKHO

Oncanhe yctpoictBa
⑥TheapoIraIpaHnIpybI 10promokhorobopunrebn
⑦ Flopt micro-USB
Kamepa
9ΦOnapnK

142
1KhONka《MeHIO》
⑫ Khonka Home
13 Khonka Ha3a

RU
Khonka «MeHIO»:
TkpbTNIe CnNCKa 0yHKnI,doCTynbIX hA TeKyuE m3paHe.
Khonka Home: HaxmteIe IaO8Bpata K TlaBHOMy kKapHy; IBoHoe KacahneIe IaOtBbMy CnIcKa NocOpHeNKn PnpIOXeNH
Khonka «Haaz»: Bo38pAT k peneblyuemy ekpahy.


C6opka
1.CHIMITE 3aDHOIO KpbIkyu. He I3r6baiTe He KcpyUHaiBe TkpBkyu CnIyKoM cnIbHo. 3To MoKet PrNBeCTN K ee NOBPEXdHIO.
2. 7to6bIyCTaHOBHTb3G SIM-kapTy, BCTabBe ee liuebeo CTopoHOBn BnH3 B rhe3do 2G/3G (rhe3do1).
YtObUy YCTAHOBITb CTaNAdTHyIO SIM-KAPTy, BCTABBeE ee IJIeBOeB CTOpOHoB BVH3B rHe3do 2G (rHE3do 2).
- YToObb yCTAHOBITb KAPTy nAMTn, HADABNTe Ha
rH3eOДЯ KPTbI nAMTn BnAPBANEHN BBEpX
n OKTOPIE KpIiKhY, YCTAHOBITb KAPTy nAMTn.
3AOKoTIe KpIiKhY nZaDBNHTe eB NH3. - CoBmTEITE 4 TOCKI KOHTAKTOB AKKMynTATOPA C COOTBECTBYUQIMNI TOKAMN HA TENEFOHE N OCTOPOXHNO HADABITE NA HAKKYMnTAP BHN3, TTOb6I 3aDINHyTB eHO HA MeCTO.
- UctaONBITE KpbIshky AkkymyTAPOTa, TAKTO6bO hOA cU OJIeTNKOM CTana HA MECTO. Pered nepBbIM cHnPb3OBaMmEY cTpyoIcTBa nnoHCTbIO 3aqrJaTe AKKMyNTOp.
144
ARCHOS_50_Platinum_book QUICK.indd 144 11/06/2013 17:54:31


RU

Cnot nJa KapT namrTa
145
Hauano pa60tbI
BknoucheHne
- HaxMKNTIy u NEpDKBIAWaeN KNYKBIQNHOENH y BKNKIOHNY,TO6BbI KBNIOHTbY TcPOTNCTBO.
ПИЗ ВКИОЕНИУ CTРОДСBA MOERT NOВТБСАЗпОС на БGOД PIN-KODA. - BvEeITpe PIN-KoD, npEoCTabIeMbIc SIM-KaptO.
- Haxmnte OK.
Прип新股ов ВКИLOЧЕНИМ СLEДУЛТ ИнСТРУКИМА НЗКAPANE ДИНСТРОЙК ΥСТΡОЛСТВА. Ротьш ИСПОЛБЗOBATВ Прим loженья, ВЗIMОДСТБУОПЕС серBERpOM Google, НЕбХОДМУ BOΥΝΙΝ СИСТERY Google IncuO SODAчБУETHYOZ 3ANICb Google.
BbIKIOUeHne
YTObI BYIKLIOUHTB YCTPOICTBO,HAXMMTE N yDEPKINBAITE KHOKNY BKLIOUHEHNI BYIKLIOUHEHNI,a3aTEM BIIbEepNTePOW off> OK (BikLIOUHEHNE>OK).
Mactep hactpoKn
Пп necрв мзусcke устор茧а ARCHOS Мостер устови PMOJOKТ BИРОЛНИТь Н actoioky:
-3b1K
-ДаТиВремЯ
- CoeHHHeHWe Wi-Fi
- Onzun cnjxkbreolokaun
RU
Nodka3K. Ecmn yctpoiCTBO He NcnoJIb3yETC B TceHne OIpedEnHOTO BPEMeHN, CecOpHHK 3KpaH BblKIOUaTcY. TcOb6B BLKIOUYtB kPahn, HAKMITE KONKPY BILKIOUeHN bIKBIOUeHN.
147


Поdklio ueHne 3G &Wi-Fi
3G
PnH nAnuHm 3G SIM-kapbMoKHO
yCTaHOBHT noKnIoueHne K INHTepHety6e3
HaCToPiKJ.
YCTpOHTBO ARCHOS 6yDet pNHHMaTb CInHAI
ToBko B 30ne NokpBTNa cETM 3G mN EDGE
NoCTABuA kCynr CBsR 3G.
PrrnodklnoueHHK cetni 3G na nenHc coctoHHOrOToObpaKaTeT NIKTORpAMMa 3G.
TtObI IMeBT B03MOXHOCTDOC7yNA K INTEPHTY, Heo6xOIMMo AKTNIBPOBaT NIKTOrPAMMy MOBILNbHbIx DAHNbIX. PepetaUHTe CTpOKy COToTHIN BHINi KOCHITecb NIKTOrPAMMb MoBILNbHbIx DAHNbIX, TtObIb AKNIBPOBaT be.e.

148
MoBInbHNo hepeaun DaHHBX3HAUYOK


Wi-Fi
Y6eIeMb,TOBbHaxoDteBcB 3OHe Wi-Fi. blyctbpo doctyn K hactpoKam Wi-Fi OUCyIeCTBaNtEa n3 CTPOKn COCTOBHnA.
- Nepetaaithi STCPKoCOTHOHN BHA3. BuSyet OTO6pAKHeNAHEn COTHOHN
- Hakmite 37aHOK.WiFi IaJIOCTyNA K HACTPOIKAM.
- Ecni Cb8aBb Wi-Fi BbIKNoHena, nepemecntne nepeknOaHefi WiFi bnoLoXeHene ON (BKJI). Pocne BkIooHeyu yctpoRCTBO ARCHOS BblONHINT NOCCK doCTyNbHbIX CETe Wi-Fi.
- BbIbepTe Wi-Fi.
- BbIbEpnte Tc tct, K KOtOpO XOTnTe nOaKIOuHbTcBc. NaCTbe cTeN. OTObpaKaTocR B VnDE 3HaNuC a 3aMKoN, I nIa NHX NTpe6yetra BBeTc npAolb.
RU


3NaUOK HAcTpoKn
149
yehha 3anncb Google n KOHTaKtbl
D6ablenne yuetno 3annc Google
Yuethana3aunbc Google No3b0rajan
Pnol3b08atcbnpemyuuectbAmu IIO6b1x
pnploXenheny u cytlg Google, KOTOPBte Bbl
3AXOTITE nCNPOL3b08atb.
- Перацпг Краздени Settings > Accounts
Add account (Hactropiou > Yuethhe bazincu > Dooabuty yuethyo zanibcs).
- Bb6epHTe TNI DO6aBnEMoI yUeTHo 3aIncs Google.
- BöInOnJIHeI NtchTyrKmI Na 3kPaHe IJN BbOaH NtHpOmaKIO6 UyETHOI ZAITNC KAc Tof JToB YcHTHae 3aIncb 6byet CooDAHa, BBy 6byTe MeMBo DocTyI K Play Store, Gmail, Talk, Maps INMOrIM DpyTm PnINoKeHNIM.
- PapejniTre ka paskeny Settings > Accounts > Google (Hactrojnki > Yutjenhie zanics > Google).
- Bb6BePte yUeTHyO 3aNcB. ByEt OTo6paxen CnICOK DaHbNk, KOTopBe MOYr 6bTb CnHXPOHN3UPOBaHbI. Y6eDITBeC, YTO CE OHI OTMeueHbI fAnKOM for nCnHXPOHN3aZm. ByEt CO3JaHa p3ePBAH a KOINJ DAHbNx, IN XMOXHO 6bET BoCCTAHOBInB b Cnyae noteRpn UyctpoiTbA nIN SIM-KapTrb.

CoxpaHeHMe KOHTAKTOB
Bce Bausn KHTaBt bI Mo60M MoMeH TocTynHbB C bCTN MOrTy 6bTbC INcXPOHNIOBPAOBHbC NIOb6m TEJFOHOM Android, HactPoEHbHM Ha TY kEeTHyO 3aINcGb Google
- Uctahobite B Tenefoh SIM-Kapty, HA Kotoporo 3aIcAnbHy KOHTAktb.
- Ha rlabhOM 3kpaHE mI IN kpaHE All Appes (Bce npiloxeHn) Bi6peTe npiloxeHne People (KoHTakTb)
- KCHATAEb KHONKIA MeHO> Import/Export (HMnopt/Kechnopt).
- B pādēne I M N O P T A/3 K C N O P T A K O T A K T O B
Bb6epitte Import from SIM card (V M n o p t c SIM-kaprtb). - Pepejntre ka paskeny Settings > Accounts > Google (Hactrojnoy > Yuethne zanmci > Google).
- BbEgePitte Baayu YehTeHy 3aIaNcB Google. YBeDnteC, TOny nHKT Contacts (KoTakTb) oTMeehy fPhaekOM.
- Hakmktne KhoNKy eMeHO, 3atEM bVbepnre Sync now (CINHPOH3I3P0BATb cHaac).
KoNTakTb 6byT coXaPHeHb B aBaen yChTHO 3aIImc Google.
Демоствая на ceHCOPHON kpaHe
Kacahne
KoCHITAEcO DzHmP a3I yBbOpa IyI 3aYCKsA MEHO, YHKNuI INI pNIOXeHHa.
Kacahne u ydepkaHne
KoCHIATAcBt zHMeHNTa H undepKbAte rero He MeHe 2 cEUYd.
NepetacknBaHne
KOKHITeBc 3JIEMeHTa INIpeMECTITE erB HOBoe MECTO.
Двоиhoe kacahne
BbICTPO DBAKDbI KCHINTECb 3JIeMeHtA.
PpOBeHne
BbCTPO NPOBEJNTO NO k3KApH NpJIbIeM BVEPx, BHN3, BJIeBO VINN BpABo, YTO6bl POKpyTITb CINCKOIN NOCDepKIMOE 3KpaHa.
Ckatae
PABeDitBe Dba nablb, a 3aTeM cBvEITNe IH YIINKOBMbY BDNBEHKeHN

3hakomctboc AndroidTM
PacwnpeHbI JOMaHnH Nkpan:
BbIOnHnIte nepexOdbI meKdy pa3JIuHbIMn naHeJIaMdoJHeroEkpaHa, CmeuaqIx HbEOB n BpAO.
Khonka Home:
HaxmMITEI pynI Bo3BpATA K rIaBbOMy 3kpaHy. IBoiHoe kacAnaI dI ONKpbITN cIeNcKa NocneHHIX pinnOKeHHI.
Open Source Software Offer
The software bundled with this product includes software files subject to certain open source license requirements. Such open source software files are subject solely to the terms of the relevant open source software license. Such open source software is provided on an "AS IS" basis to the maximum extent permitted by applicable law.
For the open source files contained herein, please access "Open source license" section located at: Settings|About tablet|Legal information on the device for the relevant copyright and licensing terms. You may obtain a copy of Apache License, Version 2.0 at http://www.apache.org/licenses/LICENSE-2.0. You may also obtain a copy of GNU General Public License, Version 2 at the Free Software Foundation, INC., 51 Franklin Street, Fifth Floor, Boston, MA 02110-1301, USA.
Until the date that is three years after our last shipment of this product, you may obtain a copy of the source code corresponding to the binaries for any GPL-Licensed file by contacting ARCHOS customer service at http://www.archos.com and ARCHOS will send you a link to such source code or will provide instructions to get the source on a physical medium. This offer is valid to anyone in receipt of this information.
National restrictions
This device is intended for home and office use in all EU countries (and other countries following the EU directive 1999/5/EC) without any limitation except for the countries mentioned below:
| Country | Restriction | Reason/remark |
| Bulgaria | None | General authorization required for outdoor use and public service |
| France | Outdoor use limited to 10 mW e.i.t.p. within the band 2454-2483.5 MHz | Military Radiolocation use. Reforming of the 2,4 GHz band has been ongoing in recent years to allow current relaxed regulation. Full implementation planned 2012 |
| Italy | None | If used outside of own premises, general authorization is required. |
| Luxembourg | None | General authorization required for network and service supply (not for spectrum) |
| Norway | Implemented | This subsection does not apply for the geographical aera within a radius of 20 km from the centre of Ny-Alesund |

Russian
None
Only for indoor applications
Federation
Note: Frequency 2454-2483.5MHZ are restricted to indoor use in France.
Consult the declaration of conformity on http://www.archos.com/products/declaration_conformity.html
SAR
After the laboratory measurement, this mobile phone SAR value is: MAX SA:Head 0.333W/Kg Body 0.509W/Kg