001-092 - Drill Meec Tools - Free user manual and instructions
Find the device manual for free 001-092 Meec Tools in PDF.


| Product Type | Hammer Drill |
| Model | 001-092 |
| Brand | Meec Tools |
| Voltage | 230 VAC, 50 Hz |
| Power Consumption | 900 W |
| No Load Speed | 800 rpm |
| Drill Capacity (Concrete/Masonry) | 26 mm |
| Three Functions | Drilling, Hammer Drill, Percussion Drilling |
| Safety Class | II (Double Insulated) |
| Sound Pressure Level (LpA) | 91 dB(A), K=3 dB |
| Sound Power Level (LwA) | 102 dB(A), K=3 dB |
| Vibration Level (Main Handle) | 14 m/s², K=1.5 m/s² |
| Vibration Level (Auxiliary Handle) | 14 m/s², K=1.5 m/s² |
| Chuck Type | SDS |
| Support Handle | Included, adjustable |
| Depth Stop | Adjustable |
| Carbon Brushes | Replaceable (pair) |
| Lubrication Interval | Every 6 months or with brush replacement |
| Hearing Protection | Required (wear ear protection) |
| Weight | Not specified (typically ~4-5 kg for this class) |
Frequently Asked Questions - 001-092 Meec Tools
User questions about 001-092 Meec Tools
0 question about this device. Answer the ones you know or ask your own.
Ask a new question about this device
Download the instructions for your Drill in PDF format for free! Find your manual 001-092 - Meec Tools and take your electronic device back in hand. On this page are published all the documents necessary for the use of your device. 001-092 by Meec Tools.
USER MANUAL 001-092 Meec Tools
Operating Instructions for Hammer Drill
001-092
natural_image
Exterior view of a modern office building (no signage)SV Bruksanvisning i original
NO Bruksanvisning i original
EN Operating instructions in original
SVENSKA 4
SÄKERHETSANVISNINGAR 4
SAFETY INSTRUCTIONS....28
Work area 28
Electrical safety....28
Personal safety 28
Using and looking after power tools.... 29
Service 29
Safety instructions....29
Use....30
Symbols 30
TECHNICAL DATA....31
DESCRIPTION 31
Parts....31
ASSEMBLY 32
SDS drill bit and chisel 32
OPERATION....32
Working tips 32
Drilling in metal 32
Preparations....32
Starting/stopping 33
Fitting the support handle 33
Depth stop....33
Operating modes 34
Drilling/hammer drill mode/percussion drilling selector 34
MAINTENANCE 35
Replacing the carbon brushes 35
Lubrication 35
SÄKERHETSANVISNINGAR
natural_image
Close-up of a mechanical drill bit with labeled component (6), no visible text or symbols beyond the numbernatural_image
Close-up of a mechanical drill bit with a black handle and screwdriver (no visible text or symbols)natural_image
Close-up of a drill bit with labeled component '3' (no text or symbols beyond label)Driftlägen
natural_image
Simple line drawing of a camera with no text or symbols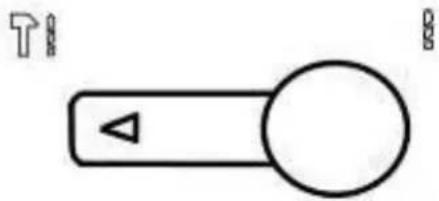
natural_image
Simple line drawing of a right-hand rule with a handle, arrow, and circle (no text or symbols)Slagborrning
natural_image
Simple line drawing of a camera with no text or symbols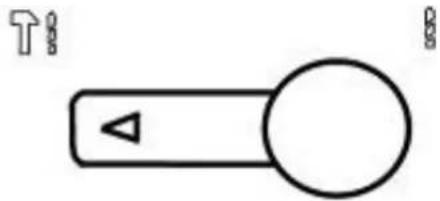
natural_image
Simple diagram of a right-hand rule with a play button and arrow (no text or symbols)natural_image
Simple line drawing of a camera with no text or symbols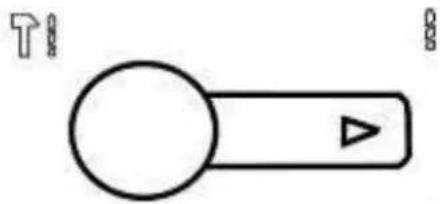
natural_image
Simple line drawing of a button with a play button and arrow, no text or symbols presentBorning
natural_image
Simple line drawing of a camera with no text or symbols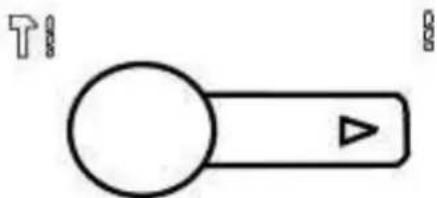
natural_image
Simple line drawing of a button with a play button and arrow, no text or symbols presentWARNING! Ingen funktion.
Motorn arbetar obelastad, axeln roterar inte.
MONTERING
Monter bor/meisel i chuckhylsen i henhold til anvisningene nedenfor.
SDS-bor og meisel
Monter bor/meisel i chuckhylsen i henhold til anvisningene.
natural_image
Close-up of a mechanical drill bit with labeled component (6), no visible text or symbols beyond the numbernatural_image
Close-up of a mechanical drill bit with a black handle and metallic blade (no visible text or symbols)natural_image
Close-up of a mechanical drill bit with labeled component '3' (no text or symbols beyond label)Driftsmodus
Velger boring/borhammermodus/slagboring
natural_image
Simple line drawing of a camera with no text or symbols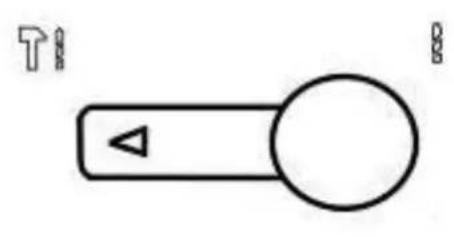
natural_image
Simple line drawing of a directional arrow pointing left, with no text or symbolsSlagboring
natural_image
Simple line drawing of a camera with no text or symbols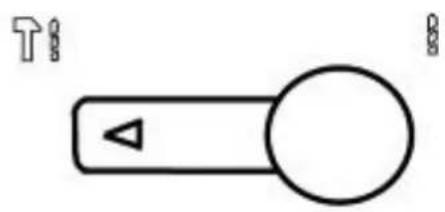
natural_image
Simple diagram of a directional arrow pointing left inside a rounded rectangle, with no text or symbols present.natural_image
Simple line drawing of a device with two arrows pointing to it (no text or symbols)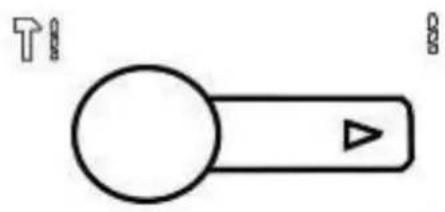
natural_image
Simple line drawing of a button with a play button and arrow, no text or symbols presentBoring
natural_image
Simple line drawing of a device with arrows pointing to top and bottom (no text or symbols)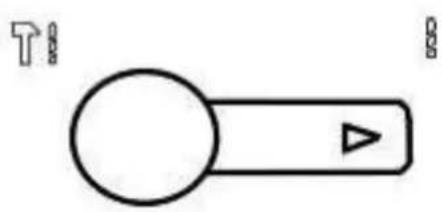
natural_image
Simple line drawing of a button with a triangular play button (no text or symbols)ADVARSEL! Ingen funksjon. Motoren arbeider ubelastet, akselen roterer ikke.
MONTAŻ
natural_image
Close-up of a mechanical drill bit with labeled component (6), no visible text or symbols beyond the numbernatural_image
Close-up of a mechanical drill bit with a black handle and screwdriver (no visible text or symbols)natural_image
Close-up of a mechanical drill bit with labeled component '3' (no text or symbols beyond label)Tryby pracy
natural_image
Simple line drawing of a device with two arrows pointing to the top and bottom (no text or symbols)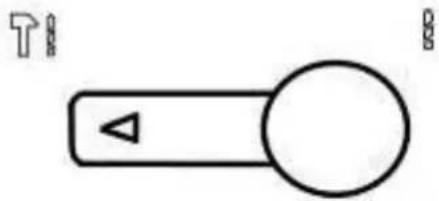
natural_image
Simple line drawing of a right-hand rule with a handle, arrow, and circle (no text or symbols)Wiercenie udarowe
natural_image
Simple line drawing of a camera with no text or symbols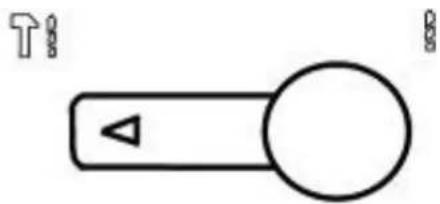
natural_image
Simple diagram of a right-hand rule with a play button and arrow (no text or symbols)natural_image
Simple line drawing of a camera with no text or symbols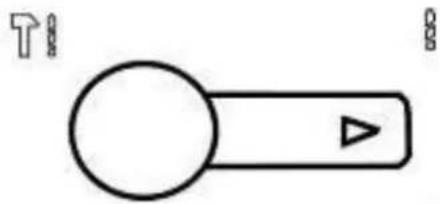
natural_image
Simple line drawing of a button with a play button and arrow symbols (no text or labels)Wiercenie
natural_image
Simple line drawing of a camera with no text or symbols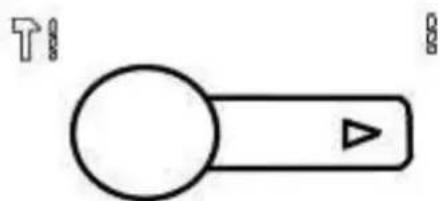
natural_image
Simple line drawing of a button with a play button and arrow, no text or symbols presentRead the User Instructions carefully before use.
Save these instructions for future reference.
WARNING:
- Failure to follow all the instructions and safety instructions can result in the risk of electric shock, fire and/or serious personal injury.
- The term "power tool" in all the warnings below refers to your mains-powered (corded) or battery-powered (cordless) power tool.
Work area
- Keep the work area clean and well lit. Dark and cluttered work areas increase the risk of accidents and injuries.
- Do not use power tools in explosive environments, such as in the vicinity of flammable liquids, gases or dust. Power tools produce sparks that can ignite dust and fumes.
- Keep children and onlookers at a safe distance when using power tools. You can easily lose control of the tool if you are distracted.
Electrical safety
- The mains plug on the power tool must match the mains outlet. Never modify the plug in any way. Never use adapters with earthed appliances. Unmodified plugs and matching outlets reduce the risk of electric shock.
- Avoid body contact with earthed surfaces such as pipes, radiators, cookers and refrigerators. There is an increased risk of electric shock if your body is earthed.
- Do not expose power tools to rain or moisture. There is a greater risk of electric shock if water gets into a power tool.
- Be careful with the power cord. Never use the power cord to carry or pull the machine, or to pull out the plug from the mains socket. Keep the power cord away from heat, oil, sharp edges and moving parts. Damaged or tangled power cords increase the risk of electric shock.
- If using the tool outdoors, only use an extension cord approved for outdoor use. Cords intended for outdoor use reduce the risk of electric shock.
- If it is absolutely necessary to use electrical appliances in damp conditions, use a mains connection protected by a residual current device. Using an RCD reduces the risk of electric shock.
Personal safety
- Stay alert. Observe care at all times and use your common sense when working with electrical appliances. Never use power tools if you are tired or under the influence of drugs, alcohol or medication. A moment of inattention when using a power tool can result in serious personal injury.
- Use personal safety equipment. Always wear safety glasses. Depending on the type of tool and how it is used, safety equipment such as dust masks, non-slip safety shoes, safety helmets and ear protection reduce the risk of personal injury.
- Avoid accidental starting. Check that the power switch is in the OFF position before plugging in the power cord and/or the battery, or lifting/carrying the tool. Carrying a power tool with your finger on the switch, or connecting a tool to the mains supply when the switch is in the ON position, increases the risk of accidents and injuries.
- Remove Alan keys/spanners etc. before starting the machine. Spanners or the like that are left in a rotating part of the tool can cause personal injury.
- Do not overreach. Always maintain a firm footing and good balance. This will ensure you have better control over the tool in unexpected situations.
- Wear suitable clothing. Do not wear loose-fitting clothing or jewellery. Keep your hair, clothing and gloves away from moving parts. Loose-fitting clothing, jewellery and long hair can get caught in moving parts.
- If dust extraction and dust collection equipment is available, this should be connected and used correctly. The use of such equipment can reduce the risk of dust-related problems.
Using and looking after power tools
- Do not force the power tool. Use the correct power tool for the planned work. The tool does the job better and safer when used at the rate for which it was designed.
- Do not use the tool if it cannot be switched on and off with the power switch. Power tools that cannot be controlled with the power switch are dangerous and must be repaired.
- Unplug the power cord and/or remove the battery before making any adjustments, changing accessories or putting the power tool away. These safety precautions reduce the risk of accidentally starting the power tool.
- Store power tools out of the reach of children when not in use. Never allow children, or anyone who is unfamiliar with the power tool and these instructions, to use the tool. Power tools are dangerous if used by inexperienced people.
- Keep the power tool properly maintained. Check that moving parts are properly adjusted and do not jam, and that no parts are incorrectly fitted or damaged. Check for other factors that could affect functionality. If the power tool is damaged, it must be repaired before being used again. Many accidents are caused by poorly maintained power tools.
- Keep cutting tools sharp and clean. Properly maintained cutting tools with sharp cutting edges are less likely to jam and are easier to control.
- Use the power tool, accessories and bits etc., in accordance with these instructions, taking into account the actual working conditions and the work that is to be done. It can be dangerous to use power tools for purposes other than those they are intended to be used for.
Service
The power tool must only be serviced by qualified personnel using identical spare parts. This will ensure that the power tool remains safe to use.
Safety instructions
IMPORTANT: Always take basic safety precautions when using electrical appliances to reduce the risk of fire, electric shock and/or personal injury. Read these instructions carefully before use.
- Check that the mains voltage corresponds to the rated voltage on the type plate.
- If you use a cord reel as an extension cord, always make sure to reel out the full length of cord. The minimum conductor cross-section is 1.0 mm2.
- If using the tool outdoors, only use an extension cord approved for outdoor use.
- Be careful when working on ladders, scaffolding or similar.
- Before starting work on walls, ceilings or floors, check that there are no concealed electrical cables or conduits.
- Wear ear protection.
- Wear safety glasses. Wear a dust filter mask if the work produces a lot of dust.
- Do not use power tools in explosive environments, such as in the vicinity of flammable liquids, gases or dust.
- Unplug the power cord before cleaning, adjusting and/pr replacing accessories.
- Keep the power cord away from heat, oil, sharp edges and moving parts.
- Do not overload the tool. Secure the work piece.
IMPORTANT: In addition to these instructions, you should always comply with the applicable regulations and laws concerning health, safety and the environment.
Use
• Make sure the drill bit or bit are properly clamped in the chuck and cannot be ejected during operation - risk of injury.
- Check the chuck regularly for damage.
- Never start the tool in hammer drill mode unless the bit is pressed against the surface.
- Once the work has been completed, switch off the machine, unplug the power cord, and wait until all moving parts have completely stopped before removing the bit.
- Switch off the tool, unplug the power cord, and wait until all moving parts have completely stopped before adjusting or changing accessories.
- Wear safety glasses or a face mask.
- Wear safety gloves.
- Vibrations can injure your hands and arms. Take appropriate measures to reduce exposure to vibration.
- Keep the power cord away from the work area. The power cord should always be behind you.
- Store the tool out of the reach of children.
- Hold the tool firmly with both hands. Always maintain a firm footing and good balance.
Symbols
| CE | Complies with the relevant safety standards. |
 | Read these instructions carefully before use. |
 | Equipment, class II. The tool has double insulation and does not need to be earthed. |
 | Recycle the tool, accessories and the packaging in accordance with local regulations. |
 | Wear safety glasses. |
 | Wear ear protection. |
 | Wear a breathing mask. |
 | Wear gloves. |
TECHNICAL DATA
| Voltage | 230 VAC, 50 Hz |
| Power consumption | 900 W |
| Speed, no load | 800 rpm |
| Drill capacity | Concrete/masonry 26 mm |
| Three functions | |
| Safety class | 回/II |
| Sound pressure level, LpA | 91dB(A), K= 3 dB |
| Sound power level, LwA | 102dB(A), K= 3 dB |
| Vibration level: | |
| - Main handle | 14m/s2, K= 1,5 m/s2 |
| - Auxiliary handle | 14m/s2, K= 1,5 m/s2 |
Always use hearing protection!
The vibration level specified in these instructions has been measured in accordance with standardised tests and can be used when comparing different tools. The value may also be used for a preliminary assessment of exposure.
WARNING: Vibration levels can deviate from the declared value during the actual use of the tool, depending on how the tool is used. The appropriate precautions implemented by users must be based on the actual conditions, taking into account all parts of the operating cycle, such as the time when the tool is switched off and the idling time, in addition to the time when the power switch is pressed.
DESCRIPTION
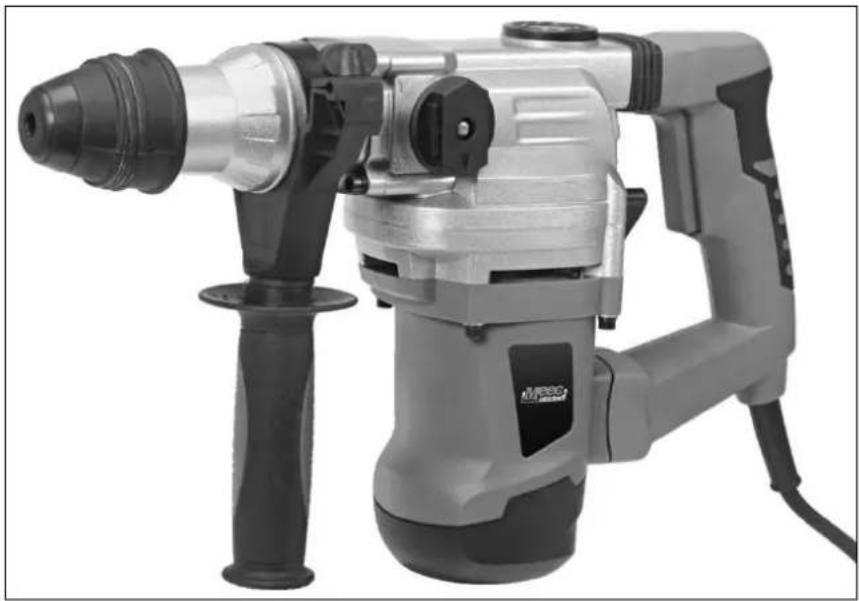
The tool is designed for percussion drilling in concrete, brick and stone and for light cutting work. It can also be used without the percussion function for drilling in wood, metal, ceramics and plastics.
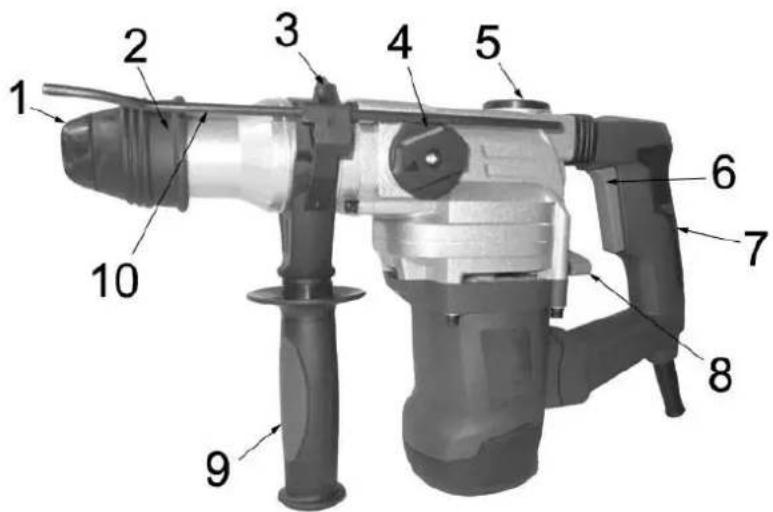
Parts
- Dust cover
- Chuck sleeve
- Depth stop locking knob
- Front mode selector with catch
- Oil cover
- Power switch
- Handle
- Rear mode selector
- Support handle
- Depth stop
ASSEMBLY
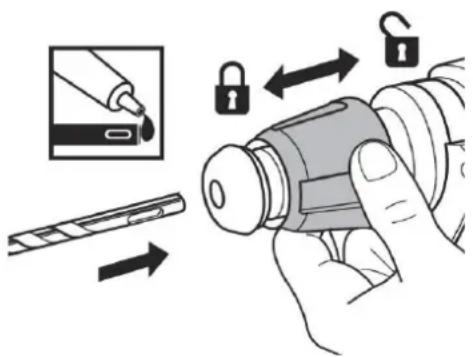
Fit the drill/chisel in the chuck sleeve as instructions below.
SDS drill bit and chisel
Fit the drill/chisel in the chuck sleeve as the instructions.
- Hold the chuck sleeve (2) pulled back.
- Insert the bit into the SDS chuck. Turn and press so that the bit is gripped. Release the chuck sleeve.
- Pull on the bit to check that it is properly fitted.
SDS bits can be eccentrically positioned when the tool is unloaded, but are centred automatically during operation without impairing accuracy.
Remove the drill/chisel in the chuck sleeve as instructions.
- Hold the chuck sleeve (2) pulled back.
- Turn and pull the bit out of the chuck sleeve.
WARNING: Accessories can become very hot after prolonged use – risk of burn injury. Wear safety gloves.
OPERATION
Working tips
Always use the support handle and hold the tool firmly with both hands while working. The depth stop is used to drill holes to an exact depth.
Drilling in metal
- When drilling large holes in metal, you should pre-drill with a small drill and then drill out the hole with the larger drill.
- Use lubricant to make the work easier and the drill lasts longer.
When drilling near the edge in wood, you should pre-drill with a small drill bit to prevent the wood from splitting.
Preparations
- Check that the tool is in good condition before use.
- Before starting work on walls, ceilings or floors, check that there are no concealed metal beams. Bits with tungsten carbide tips can be damaged if metal beams are hit.
- Never start the tool in hammer drill mode unless the bit is pressed against the surface.
- When drilling vertically, downward holes no pressure is needed over and above the weight of the tool. When drilling in other directions, press on the tool with a maximum of 50–100 N. Do not press the tool too firmly, as this overloads the motor and entails a risk of the bits having a shorter service life.
- Keep the bit perpendicular to the substrate. Never attempt to change the direction of the hole while drilling, this produces a non-circular hole and can damage the bit. When drilling deep holes, pulling back the bit out of the hole regularly to remove swarf and prevent overheating and excessive wear.
- Before starting work on walls, ceilings or floors, check that there are no concealed electrical cables or conduits.
Starting/stopping
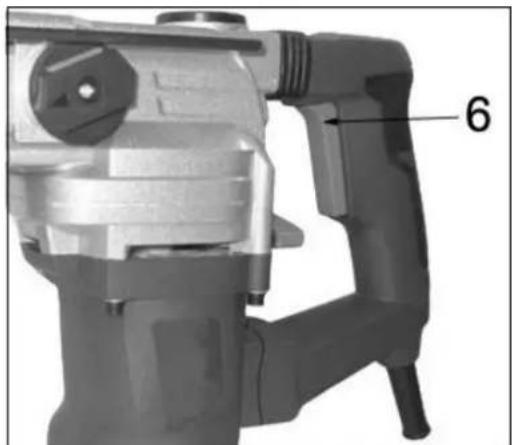
- Plug in the power cord. Starting: Press in the power switch (6). Stopping: Release the power switch (6)
natural_image
Close-up of a mechanical drill bit with labeled component (6), no visible text or symbols beyond the numberFitting the support handle
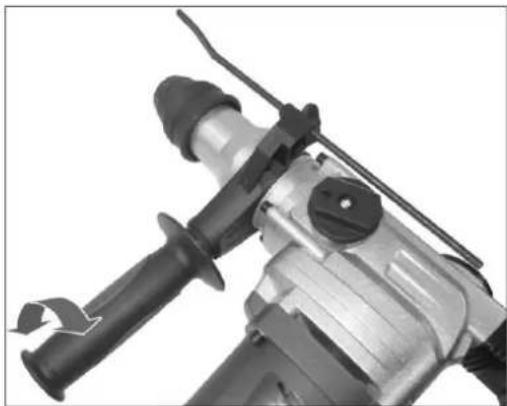
Always use the support handle (9).
- Open the handle holder by turning the handle anticlockwise.
- Fit the handle holder over the chuck as illustrated and turn the handle to the required position.
- Tighten the handle holder by turning the handle clockwise.
natural_image
Close-up of a mechanical drill bit with handle and screwdriver (no visible text or symbols)NOTE: Always use the support handle and hold the tool firmly with both hands while working.
Depth stop
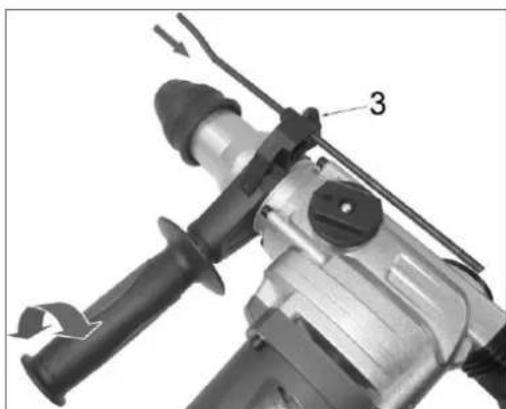
- Set the required drilling depth with the depth stop (10).
- Loosen the lock knob for the depth setting (3) adjust the depth stop to the required position and tighten the lock knob (3).
- Check the depth with a ruler or similar
natural_image
Close-up of a drill bit with labeled component '3' (no text or symbols beyond label)Operating modes
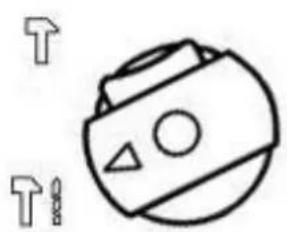
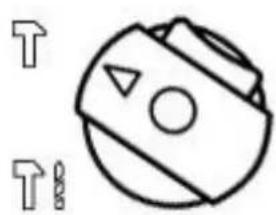
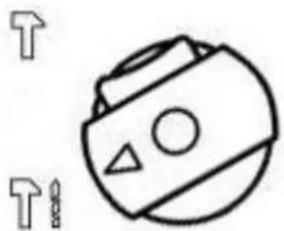
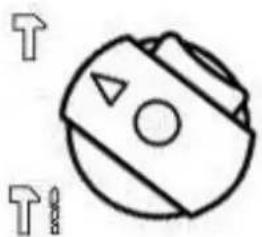
Drilling/hammer drill mode/percussion drilling selector
- Select the operating mode with the selectors on the tool.
The front selector (4) has a catch to prevent accidental actuation. - Select the required mode by setting the front and rear selectors according to the table below.
natural_image
Simple line drawing of a device with two arrows pointing to the top and bottom (no text or symbols)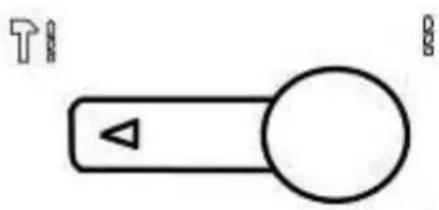
natural_image
Simple diagram of a lever with a triangular load and circular head, no text or symbols presentPercussion drilling
To drill in masonry, concrete and stone.
Do not use this mode to drill tiles or the like, that cannot withstand the percussive energy.
Hammer drill mode
natural_image
Simple line drawing of a camera with no text or symbols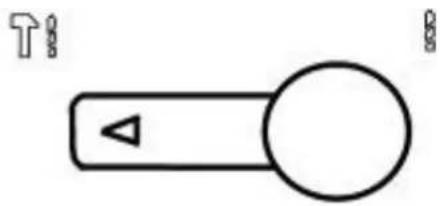
natural_image
Simple line drawing of a right-hand rule with a play button and arrow (no text or symbols)To drill in masonry, concrete and stone.
natural_image
Simple line drawing of a camera with no text or symbols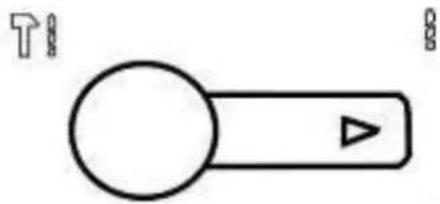
natural_image
Simple line drawing of a button with a play button and arrow symbols (no text or labels)Drilling
For drilling wood, synthetic materials and metal.
natural_image
Simple line drawing of a camera with no text or symbols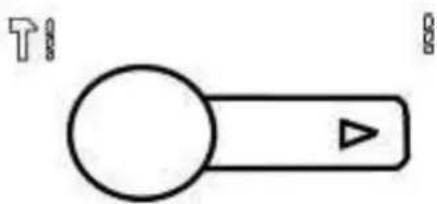
natural_image
Simple line drawing of a button with a play button and arrow, no text or symbols presentWARNING: No function. The motor runs unloaded, the spindle does not rotate.
Never set the selector in this position, it can seriously damage the motor.
WARNING: Do not press the tool too hard when working. The percussive mechanism is activated when the bit is pressed lightly against the surface.
When percussion drilling the best result is achieved if the bit is pressed lightly against the surface all the time. In conventional drilling, the bit should not be pressed against the substrate.
Switch off the tool, unplug the power cord and wait until all moving parts have completely stopped before switching operating modes.
MAINTENANCE
- Unplug the power cord, switch off the tool, and wait until all moving parts have completely stopped before working on the tool.
- Always clean the tool after use.
- Do not use aggressive detergents.
- Clean the ventilation openings with compressed air (max. 3 bar) after each use.
- Check the carbon brushes regularly. Significant sparking can be caused by dirt or worn carbon brushes.
Replacing the carbon brushes
The tool has a function which stops it automatically if the carbon brushes are worn. When the carbon brushes have been worn to a certain level, this therefore stops the motor. Replace the carbon brushes with new ones of the same type.
IMPORTANT: The carbon brushes must always be replaced in pairs.
IMPORTANT: Unplug the power cord before removing covers or guards.
Lubrication
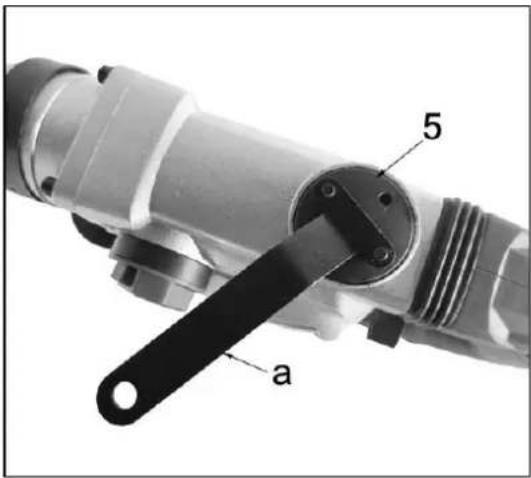
The tool does not require daily lubrication. We recommend that the transmission is lubricated with a suitable lubricant every 6 months or each time the carbon brushes are replaced. Follow the instructions below. Run the tool warm for a few minutes. Switch off the tool and unplug the power cord. Remove the oil cover (5) with the supplied spanner (a). Place the tool on a flat surface with the chuck facing upwards. This means that the old lubricant flows down into the crankcase. Wipe off the old lubricant and fill with lubricant of the appropriate type. Total filling capacity is 45 g. Fill 15 g at a time. Refit the oil cover (5) and tighten with the supplied spanner (a).
Jula reserves the right to make changes. In the event of problems, please contact our service department www.jula.com
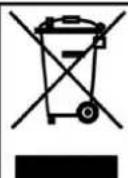
Care for the environment!
Must not be discarded with household waste! This product contains electrical or electronic components that should be recycled. Leave the product for recycling at the designated station e.g. the local authority's recycling station.
CE
EC DECLARATION OF CONFORMITY EG FÖRSÄKRAN OM ÖVERENSSTÄMMELSE EF SAMSVARSERKLÆRING DEKLARACJA ZGODNOŚCI WE

Jula AB, Box 363, SE-532 24 SKARA, SWEDEN
RoHS Directive 2011/65/EU
This product was CE marked in year -13
Name and address of the person authorised to compile the technical file:
Jonas Backstad Box 363, SE-532 37 Skara, Sweden
Skara 2013-06-24
Bo Eriksson PRODUCT MANAGER
- Operating Instructions for Hammer Drill
- SVENSKA 4
- SÄKERHETSANVISNINGAR 4
- SÄKERHETSANVISNINGAR
- Driftlägen
- MONTERING
- SDS-bor og meisel
- Driftsmodus
- Velger boring/borhammermodus/slagboring
- MONTAŻ
- Tryby pracy
- Read the User Instructions carefully before use.
- WARNING:
- Work area
- Electrical safety
- Personal safety
- Using and looking after power tools
- Service
- Safety instructions
- Use
- DESCRIPTION
- Parts
- ASSEMBLY
- SDS drill bit and chisel
- OPERATION
- Working tips
- Drilling in metal
- Preparations
- Starting/stopping
- Fitting the support handle
- Depth stop
- Operating modes
- Drilling/hammer drill mode/percussion drilling selector
- MAINTENANCE
- Replacing the carbon brushes
- Lubrication
- Care for the environment!
- CE
- EC DECLARATION OF CONFORMITY EG FÖRSÄKRAN OM ÖVERENSSTÄMMELSE EF SAMSVARSERKLÆRING DEKLARACJA ZGODNOŚCI WE
Brand : Meec Tools
Model : 001-092
Category : Drill