
CM 95 - Coffee grinder GRAEF - Free user manual and instructions
Find the device manual for free CM 95 GRAEF in PDF.


| Product Type | Coffee Grinder |
| Brand | Graef |
| Model | CM 95 |
| Grinding Mechanism | Burr grinder |
| Grind Settings | Adjustable via grind adjustment collar |
| Coffee Bean Container | Removable, clear glass |
| Ground Coffee Container | Removable container for ground coffee |
| Dosing Options | Pre-set for 1 cup (12 sec) and 2 cups (20 sec), programmable from 2 to 40 seconds |
| Operation Modes | Manual (On/Off) and automatic (Auto) with button selection |
| Safety Features | Overload protection; child safety (use only by children above 8 under supervision); automatic shutoff when accessing moving parts |
| Cleaning Method | Removable burrs for cleaning; use brush; do not immerse in water |
| Warranty | 2 years manufacturer's warranty |
| Customer Service | Graef, Donnerfeld 6, 59757 Arnsberg, Germany; Tel: +49 (0) 2932 - 9703-688; Email: service@graef.de |
| Intended Use | Household use only for grinding coffee beans |
| Material | Housing: black plastic; Bean container: clear glass |
Frequently Asked Questions - CM 95 GRAEF
User questions about CM 95 GRAEF
0 question about this device. Answer the ones you know or ask your own.
Ask a new question about this device
Download the instructions for your Coffee grinder in PDF format for free! Find your manual CM 95 - GRAEF and take your electronic device back in hand. On this page are published all the documents necessary for the use of your device. CM 95 by GRAEF.
USER MANUAL CM 95 GRAEF
natural_image
Modern coffee graser with clear glass and black casing, no visible text or symbolsnatural_image
Simple line drawing of a hand pressing down on a mechanical component with red arrows indicating motion (no text or symbols)natural_image
Line drawing of a coffee maker with a side panel and lid (no text or symbols)natural_image
Hand holding a small glass coffee maker with a tray (no text or symbols visible)natural_image
Line drawing of a hand holding an object, possibly a tool or device, with no visible text or symbols.natural_image
Line drawing of a coffee maker with a hand operating the cup (no text or symbols)natural_image
Illustration of hands holding a cylindrical object with a red arrow indicating rotation (no text or symbols)natural_image
Line drawing of two hands holding a small cylindrical object with a grid pattern (no text or symbols)HINWEIS
natural_image
Hand holding a cylindrical device with a lid, no visible text or symbolsnatural_image
Line drawing of a hand pouring liquid into a bottle (no text or symbols)natural_image
Line drawing of a kitchen appliance with a circular top and control buttons (no text or symbols)Information about these operating instructions
These operating instructions are a component of the coffee grinder (in the following referred to as the unit) and provide important information about its first use, safety, the intended use and care of the unit.
The operating instructions must always be kept available near the unit. Every person who deals with the following must read and apply them:
■ First use,
Operation,
■ Repairing faults and/or
- Cleaning
Keep the operating instructions and pass them on to the next owner together with the unit.
These operating instructions cannot cover every possible use. For more information or if you have any problems not covered or not sufficiently dealt with in these instructions, please contact the GRAEF customer service
department or your dealer.
Use as intended
This unit is not intended for commercial usage. Use the coffee grinder solely in closed rooms for grinding coffee beans.
All claims of any type due to non-intended usage are excluded.
The risk is borne solely by the operator.
Customer service department
If your Graef unit becomes damaged, please contact your dealer or the Graef customer service department.
Customer service department Donnerfeld 6
59757 Arnsberg
Germany
Tel.: +49 (0) 2932 - 9703-688
Fax: +49 (0) 2932 - 9703-0
Email: service@graef.de
Safety
This unit complies with the statutory safety regulations. Improper use can, however, lead to personal injury and property damage.
o handle the unit safely, follow the instructions below:
- Check the unit for external, visible damage to the housing, the supply cord and the plug before using it. Do not put a damaged unit into operation.
■ Repairs are only allowed to be performed by a specialist or by the GRAEF customer service department. Improper repairs can lead to extreme hazards for the user. Furthermore, the warranty claim expires.
■ Only GRAEF customer service is authorised to repair the unit during the warranty period, otherwise there the warranty expires for additional damages.
■ Defective components must be replaced solely with genuine spare parts. Fulfilment of the safety regulations is only guaranteed if these parts are used.
■ This appliance can be used by children aged from 8 years and above and persons with reduced physical, sensory or mental capabilities or lack of experience and knowledge if they have been given supervision or instruction concerning use of the appliance in a safe way and understand the hazards involved. Children shall not play with the appliance. Cleaning and user maintenance shall not be made by children unless they are older than 8 and supervised.
- Keep the appliance and its cord out of reach of children less than 8 years.
■ The unit is not intended to be used with an external timer or a separate telecontrol system.
■ This unit is intended to be used in household and similar applications such as:
→ staff kitchen areas in shops, offices ar other working enviroments;
→ farm houses;
→ by clients in hotels, motels and first use
residential type environments;
→ bed and breakfast type environments.
First use
Unpacking
To unpack the unit, proceed as below:
EN
■ If the supply cord is damaged, it must be replaced by the manufacturer, its service or similar qualified persons in order to avoid a hazard.
■ Always pull the supply line from the electric socket using the connector plug, not on the supply cord.
■ Do not carry the unit by the supply cord.
■ Never transport the unit during operation.
■ The unit is not intended to be used with an external timer or a separate telecontrol system.
■ The unit is suitable solely for grinding coffee beans.
■ Do not touch the plug with moist hands.
■ Do not use the packing material as a toy. Danger of suffocation.
- Follow the instructions regarding the requirements for the place of installation and on the unit's electrical connection to prevent personal harm and property damage.
■ Never put your hands, hair, clothing or other foreign bodies in the bean grinder while the unit is in operation.
■ Do not try to regrind previously ground coffee.
■ Switch off the appliance and disconnect from supply before changing accessories or approaching parts that move in use.
■ Let the unit cool off before cleaning.
■ Do not use any aggressive or abrasive cleaning agents and do not use any solvents. PI
■ Do not scratch off stubborn soiling with hard objects.
■ Make sure that no liquid gets into the interior of the unit.
■ Do not put the unit in the dishwasher and do not hold it under flowing water.
■ Take the unit out of the carton.
■ Remove all pieces of the packing.
■ Remove any possibly extant labels on the coffee grinder (do not remove the rating plate).
Requirements for the installation location
For safe and flawless operation of the unit,
with place of location must meet these pre-requisites:
■ The unit must be set up on a firm, flat, level, non-slip and heat resistant base that has sufficient load bearing capacity.
■ Select the place of location so that children cannot reach the hot surfaces of the unit.
■ The unit is not intended for installation in a wall or a built-in cupboard.
■ Do not set up the unit in a hot, wet or moist environment.
■ The electric socket must be readily accessible so that the power cord can be easily unplugged.
Before the first use
Clean all parts as described in "Cleaning".
Grind setting
You can influence the composition of the coffee with various grind settings.
The wide range of grind settings lets you make a precise adjustment.
lease observe the instructions below when sing the coffee grinder.
■ The finer the grind, the longer the grinding process takes.
■ If you use a fine grind level, it is possible that the coffee sticks together. During grinding, knock on the coffee bean container cover so that any possible coffee bean clumps do not block the grinding.
EN
Grinding coffee
- Plug the plug into the electric socket.
■ Fill the coffee bean container with coffee beans.
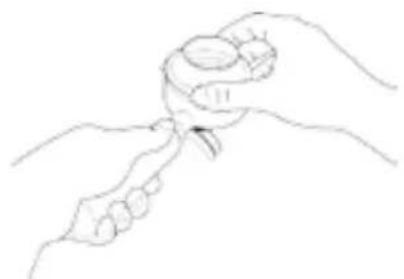
■ Select the grind by turning the grind adjustment collar to the desired setting
natural_image
Line drawing of two hands holding a small object, possibly a tool or device (no text or symbols present)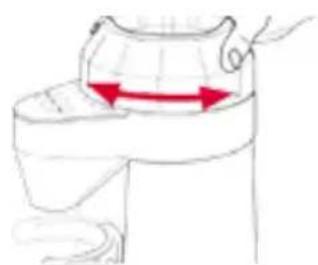
natural_image
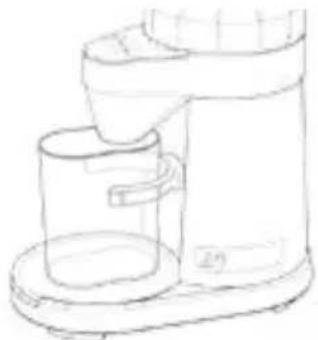
Diagram of a hand pressing down on a mechanical component with red arrows indicating motion direction (no text or symbols)■ Remove the lid from the ground coffee container and slide onto the preparation mat.
natural_image
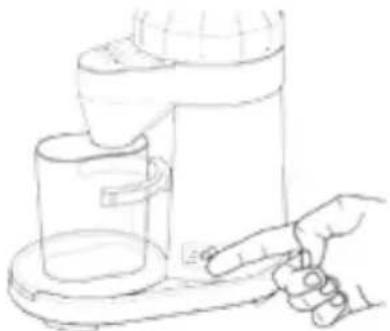
Line drawing of a coffee maker with lid and side tray (no text or symbols)■ To grind coffee, flip the switch to the 'On' position
natural_image
Hand holding a small glass brush applying liquid to a tall container (no text or symbols visible)- When the desired amount of coffee has been ground, flip the switch to the 'Off' position. Remove the coffee container and scoop out the ground coffee.
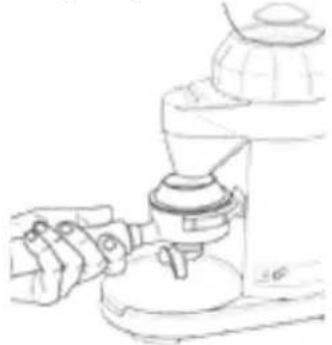
■ Position the group handle with grind funnel into the group handle locator
natural_image
Line drawing of a microscope with a hand operating it (no text or symbols)- Flip the switch to the 'Auto' position. - To select your already pre-setmeasurement of ground coffee, press the ☐ for 1 cup or 📋 for 2 cup buttons located on the control panel. The pre-programmed dose of coffee grind will be delivered into your group handle..
■ When the grind has stopped, remove the grind funnel from the top of the group handle and collapse the coffee by tapping it on the bench.
NOTE
If the cutters block due to any possible stones or other foreign bodies do not use force. Switch the unit off, pull the power cord and clean the unit as described under "Cleaning". You can now put the unit back into operation. If it nevertheless does not function, contact a specialist or GRAEF factory customer service.
Grinding coffee directly in the group handle using and buttons
■ Place the grind funnel on top of the group handle.
How to programm and grind measurements

NOTE
■ The factory default setting for cup is 12 seconds, and for cups is 20 seconds.
■ To reset original factory default settings, press and hold the program P button for a period of 5 seconds. All three buttons will flash once after 1 second - continue pressing the program P button and all three buttons will flash three times at 5 seconds. This will indicate the factory default settings have been restored.
■ Position the group handle with grind funnel positioned on top into the group handle locator.
■ Flip the switch to the 'Auto' position.
- On the control panel, press and hold program P button for a period of 1 second - all three buttons will flash once indicating you have activated program mode. Remove your finger from the program P button. The program P button will stay fully illuminated, while the button and buttons will soften in brightness.
NOTE
The programming mode can be aborted at any stage by pressing the program P button again.
Select either the cup or button to program the grind time for that selected button. The selected button will begin to flash, and the motor will become activated. Ground coffee will begin to deliver into the group handle.
◆ To stop the coffee grind and set your programmed or grind measurement, re-select the or button that was previously selected (this is indicated by the flashing but-
ton). The motor will be de-activated, and the time of the selected or function will be stored.
NOTE
Allowable program time for and uttons is 2 sec – 40 sec..
Cleaning
Old coffee remains in the unit can lead to oxidation. That spoils the beverage; it can cause an unpleasant, rancid taste. The units should always be in optimum condition to be able to provide optimum espresso at any time.
IMPORTANT!
■ Spots and marks on the surface of the burrs are part of the hardening process. These marks do not affect the performance of the grinder or the taste of the coffee.
■ Ensure the unit is switched off and unplugged from the power outlet.
■ Clean the exterior of the unit with a soft, moist cloth. If heavily soiled, a mild detergent can be used.
■ Take off the coffee bean container. Press it down and turn counter clockwise.
■ Take out the unused beans and put them in an airtight container so they stay fresh.
■ Clean the coffee bean container and the coffee container with warm water and a little detergent.
■ After that, dry both receptacles well.
Cleaning the burrs
If the coffee grinder is used frequently (every day), the burrs need to be cleaned every three weeks to ensure best performance of the coffee grinder. Regular cleaning helps the burrs achieve consistent grinding results, which is especially important when grinding coffee for espresso
■ Remove the coffee bean container as described in "Cleaning".
Coffee Grinder CM 95
GRAEF.
EN
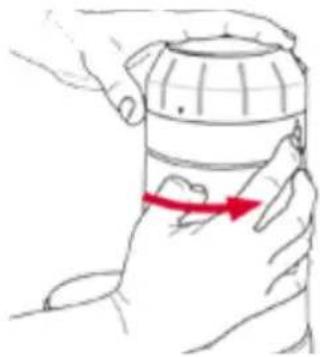
■ To remove the upper mill, turn the latching ring counter clockwise until it no longer turns.
natural_image
Illustration of hands holding a cylindrical device with a red arrow indicating rotation (no text or symbols)NOTE
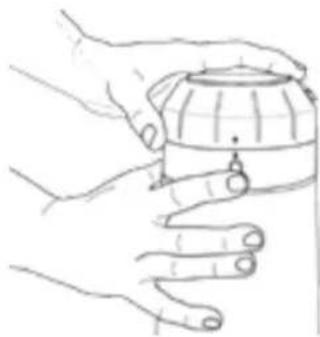
The top burr can only be removed when the graphic arrow on the grind adjustment collar is aligned with the arrow on the motor base.
- Press and hold down the 'UNLOCK' button at the rear of the motor base and with the other hand turn the grind adjustment collar anti-clockwise until the graphic arrow on the collar is aligned with the arrow on the motor base.
natural_image
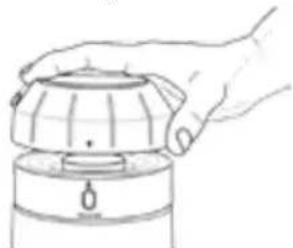
Line drawing of two hands holding a dome-shaped object (no text or symbols)■ Lift out the top burr from the grind adjustment collar using the handle. Clean using the burr-cleaning brush.
natural_image
Hand holding a mechanical component with a lid and handle (no text or symbols visible)■ Lift the grind adjustment collar away from the motor base and clean with the brush.
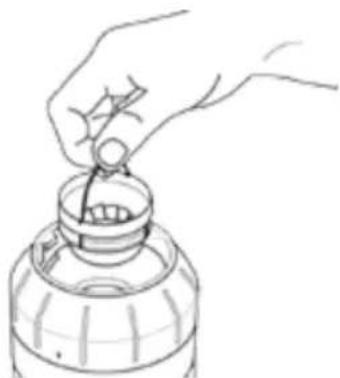
natural_image
Line drawing of a hand pouring liquid into a bottle (no text or symbols)■ Clean the bottom burr using the burrcleaning brush.
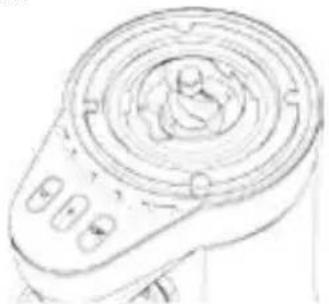
natural_image
Line drawing of a kitchen appliance with a circular fan and control buttons (no text or symbols)■ Once both burrs are cleaned, return the grind adjustment collar to its position in the motor base.
■ With the grind adjustment collar in hand align the arrow on the collar with the arrow on the rear of the motor base, press downl.
- Replace the top burr back into position in the grind adjustment collar and turn clockwise to the desired grind setting.
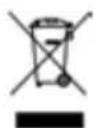
Disposal
At the end of its service life, this product must not be disposed through normal domestic waste; rather it must be disposed at a collection point for recycling electronic domestic refuse. The symbol on the product and in the operating instructions points this out. The materials can be recycled in accordance with their markings. By recycling, making use of the materials or other forms of recycling old units you are making an important contribution to protecting our environment. Please ask your municipal administration about the responsible disposal sites.
2 year warranty
Starting with the date of purchase, we assume a 24 month manufacturer's warranty for defects that are attributable to manufacturing and material defects. Your legal warranty rights in accordance with § 439 ff. German Civil Code-E remain unaffected by this clause. Not included in the warranty are damages that have arisen due to improper handling and use as well as defects which have only a slight influence on the functioning or value of the unit. Furthermore, shipping damages, unless our responsibility, are excluded from warranty rights. Warranty claims are excluded for damages that arise due to repairs we or our representatives have not performed. In case of a justified complaint, we will repair or replace the defective product with a flawless product as we choose.
EN

- HINWEIS
- Information about these operating instructions
- Use as intended
- Customer service department
- Safety
- First use
- Unpacking
- EN
- Requirements for the installation location
- Before the first use
- Grind setting
- Grinding coffee
- NOTE
- Grinding coffee directly in the group handle using and buttons
- How to programm and grind measurements
- Cleaning
- IMPORTANT!
- Cleaning the burrs
- Coffee Grinder CM 95
- GRAEF.
- Disposal
- year warranty
Brand : GRAEF
Model : CM 95
Category : Coffee grinder