
POS-833 - Barcode Reader Deltaco - Free user manual and instructions
Find the device manual for free POS-833 Deltaco in PDF.


| Product Type | Barcode Reader |
| Model | POS-833 |
| Brand | Deltaco |
| Interface Options | Keyboard Wedge, RS-232, USB |
| Scan Technology | Laser or CCD (configurable) |
| Supported Symbologies | Code 39, Code 128, EAN-13, UPC-A, Interleaved 2 of 5, Codabar, and many more |
| Indicator | LED and Buzzer |
| Power Source | USB bus power or external power adapter for RS-232 |
| Weight | Approx. 150 g (5.3 oz) |
| Dimensions (H x W x D) | Approx. 15 x 6 x 4 cm (6 x 2.5 x 1.5 in) |
| Cable Length | Approx. 1.5 m (5 ft) |
| Operating Temperature | 0°C to 50°C (32°F to 122°F) |
| Drop Resistance | 1.5 m (5 ft) onto concrete |
| IP Rating | IP30 |
| Material | Plastic |
| Color | Black |
| Configuration Method | Scanning barcode labels from the manual |
| Default Interface | Keyboard Wedge (unless ordered otherwise) |
| Regulatory Approvals | FCC, CE |
| Warranty | 1 year |
Frequently Asked Questions - POS-833 Deltaco
User questions about POS-833 Deltaco
0 question about this device. Answer the ones you know or ask your own.
Ask a new question about this device
Download the instructions for your Barcode Reader in PDF format for free! Find your manual POS-833 - Deltaco and take your electronic device back in hand. On this page are published all the documents necessary for the use of your device. POS-833 by Deltaco.
USER MANUAL POS-833 Deltaco
Installing the Keyboard Wedge Scanner .... 3
Installing the RS-232 Interface Scanner .... 3
Installing the USB Interface Scanner .... 3
Configuration Of The Scanner
Setup Procedures 4-6
Setup Flow Chart 7
GROUP 0 : Interface Selection .... 8
GROUP 1 : Device Selection For Keyboard Interface . 9-10
GROUP 2 : Intercharacter Delay ..... 11
GROUP 3 : Language For Keyboard Interface ...... 12-13
GROUP 4 : Terminator .....14-15
GROUP 5 : Scan Mode .....16-17
GROUP 6 : Preamble and Postamble ..... 18
GROUP 7 : RS-232 Parameters ..... 19-21
GROUP 8 : CODE 39 / CODE 32 ...... 22-23
GROUP 9-1 : INTERLEAVED 2 of 5 ...... 24
GROUP 9-2 : INDUSTRIAL 2 of 5 / IATA ..... 25-26
GROUP 9-3 : MATRIX 2 OF 5 ...... 27
GROUP 9-4 : CHINA POSTAGE 28
GROUP 10 : CODE 128 ...... 29
GROUP 11 : CODE 11 .... 30
GROUP 12 : CODE 93 ...... 31
GROUP 13 : MSI-PLESSEY 32
GROUP 14 : CODABAR / NW7 ...... 33
GROUP 15 : CODE 4 ...... 34
GROUP 16-1 : EAN-13 / JAN-13 ...... 35
GROUP 16-2 : UPC-A 36
GROUP 16-3 : EAN-8 / JAN-8 ...... 37
GROUP 16-4 : UPC-E 38
GROUP 16-5 : ISBN/ISSN ...... 39
GROUP 17 : RSS-14 40
GROUP 18 : Truncate Header/Trailer Character ..... 41
GROUP 19 : Predefined Code ID 42
GROUP 20 : User-Defined Code ID Setting .... 43
GROUP 21 : Enable All Barcod .... 44
GROUP 22 : Function Keys Emulation .... 45
GROUP 23 : General Parameters ...... 46
Appendix:
Function Code For PC XT/AT 47-48
Table-HEX: Hexadecimal 49
ASCII Table.... 50-51
Hexadecimal-Decimal Conversion Table 52
Pre-Defined Barcode ID 53
Pin Assignment 54-55
Getting Started
Installing the Keyboard Wedge Scanner
To install the keyboard wedge scanner, follow the steps as listed below:
1) Make sure that the scanner has the correct cable for the system (a PC or terminal)
2) Turn off the power of the system
3) Unplug the keyboard from the system
4) Connect the cable to the system and keyboard
5) Turn on the power of the system
6) If the indicator LED lights up and the buzzer sounds, the scanner is ready for reading
Installing the RS-232 Interface Scanner
To install the RS-232 interface scanner, the host device should have an RS-232 port to receive data from the scanner, follow the steps as listed below:
1) Make sure that the scanner has the right connector for the RS-232 port of the host device
2) Make sure that there is a power supply to the scanner (if necessary)
3) Connect the cable to the RS-232 port of the device
4) If the indicator LED lights up and the buzzer sounds, the scanner is ready for reading
Installing the USB Interface Scanner
To install the USB interface scanner, the host device should have a USB port to receive data from the scanner, follow the steps as listed below:
1) Make sure that the scanner has the right connector for the USB port of the host device
2) Connect the cable to the USB port of the device
3) If the indicator LED lights up and the buzzer sounds, the scanner is ready for reading
Configuration Of The Scanner
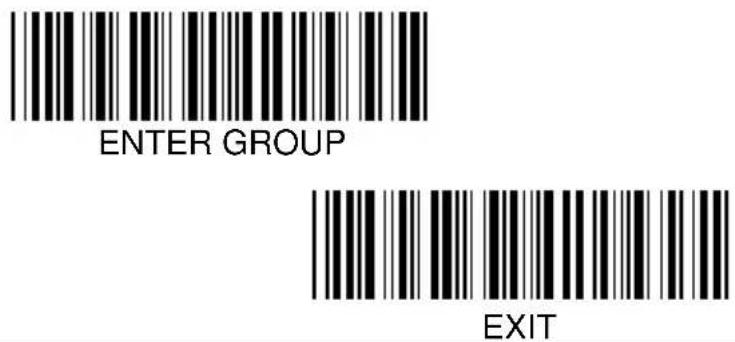
Setup Procedures
1) Locate a group that contains the parameters to be changed
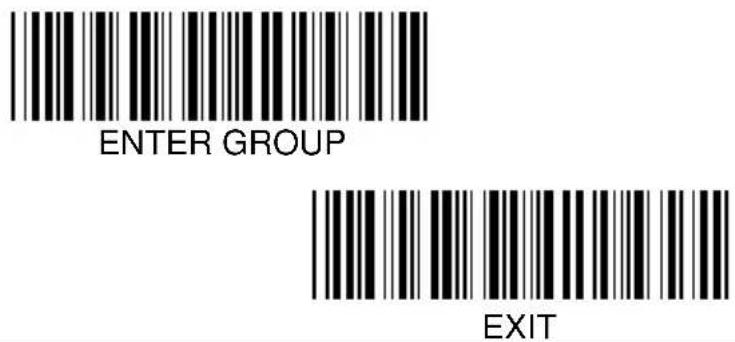
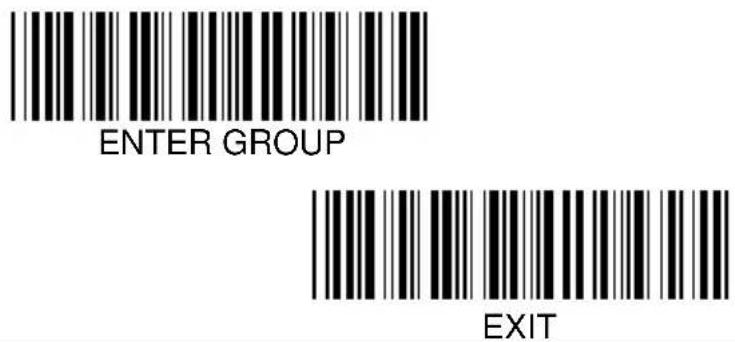
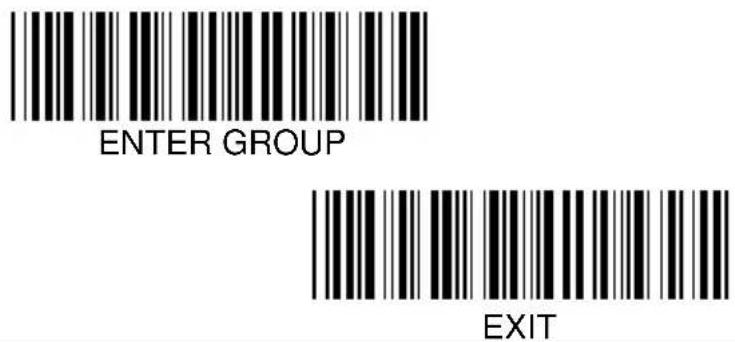
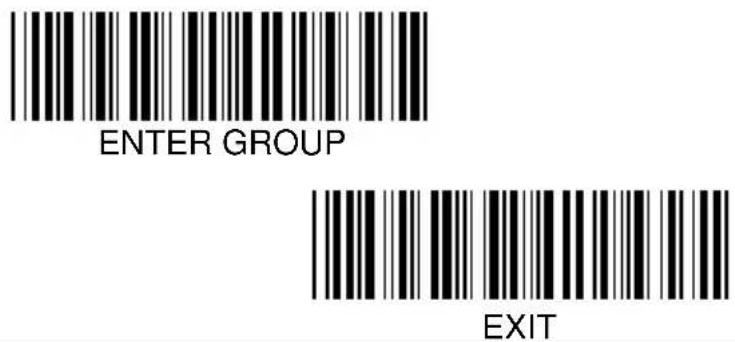
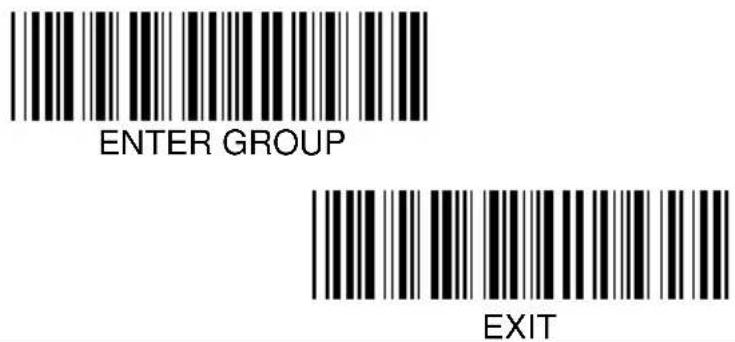
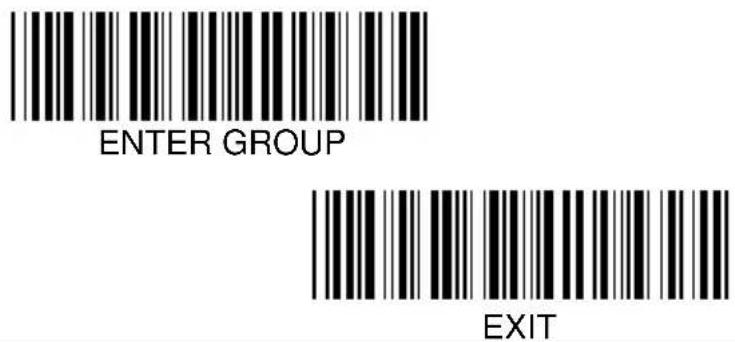
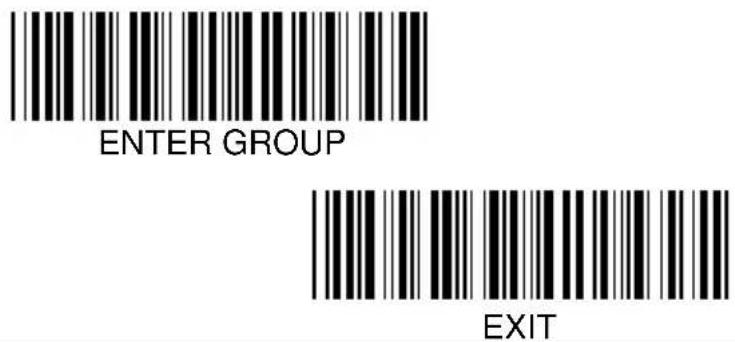
2) Scan the "Enter Group #" label. The scanner will make beeping sounds to indicate that setup is in progress
3) Scan the label representing the parameter to be changed
4) Scan the "Exit" to end the group currently selected, the scanner will sound beeps
5) Repeat the procedure for other groups including the parameters to be changed
Example 1:
Set the operating mode to "Continuous mode"
1) Scan "Enter Group 5"
2) Scan "Continuous/Trigger off"
3) Scan "Exit"
Example 2:
Assign Preamble string as "#", and postamble string as "END"
1) Scan "Enter Group 6"
2) Scan Preamble
3) Refer to ASCII Table (page 50) and find the code number in hex decimal:
# ASCII => 23 hex The two digit numbers are:
2 3
4) Refer to Table-Hex: HEXADECIMAL (page 49) and scan the two digit labels accordingly.
5) Scan "Confirm" Label in Table-Hex
6) Scan "Postamble"
7) Refer to the ASCII Table for the code numbers in hexadecimal (E => 45, N => 4E, D => 44)
8) Refer to Table-Hex: HEXADECIMAL (page 49) and scan the six digit labels consecutively.
4 5 4 E 4 4
9) Scan "Confirm" Label in Table-Hex.
10) Go back to Group 6 and scan Exit
Example 3:
Fixed Barcode Length Setting (i.e. Group 9-1 Interleaved 2 OF 5, Barcode Length= 15 digits):
1) Scan Enter Group 9-1 Label
2) Scan Length Define Label
3) Scan Four Digit Labels in Table Hex (Page 49)
Tips:
- Refer to the Hexadecimal-Decimal Conversion Table (page 52) to acquire the barcode length in Hexadecimal Number
$$ 1 5 \text { dec } = > 0 F \text { hex } $$
• The Four Digit numbers are:
0 F 0 F
- Refer to the Table-Hex: HEXADECIMAL (page 49) and scan the Four digit Labels accordingly.
4) Scan Confirm Label in Table-Hex: HEXADECIMAL (Page 49)
5) Go back to Group 9-1 and scan "Exit" Label.
Example 4:
3-Set Barcode Length Setting (i.e. Group 9-4: CHINA POSTAGE, the 3 Barcode Length Settings are as below):
11 digits
28 digits
43 digits
1) Scan Enter Group 9-4 Label
2) Scan User Define Label
3) Scan Six Digit Labels in Table Hex (Page 49)
Tips:
- Refer to the Hexadecimal-Decimal Conversion Table (page 52) to acquire the 3 sets of barcode length in Hexadecimal Number
$$ \mathbf {1 1} \text { dec } \Rightarrow \mathbf {0 B} \text { hex } $$
$$ 2 8 \text { dec } \Rightarrow 1 C \text { hex } $$
$$ 4 3 \text { dec } \Rightarrow 2 B \text { hex } $$
- Refer to the Table-Hex: HEXADECIMAL (page 49) and scan the 3 sets Labels accordingly.
0B 1C 2B
4) Scan Confirm Label in Table-Hex: HEXADECIMAL (Page 49)
5) Go back to Group 9-4 and scan "Exit" Label.
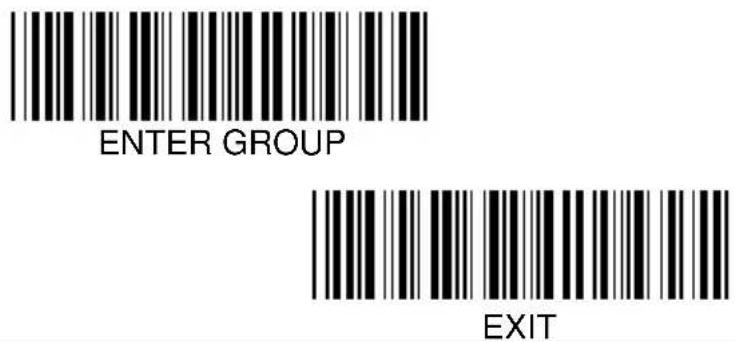
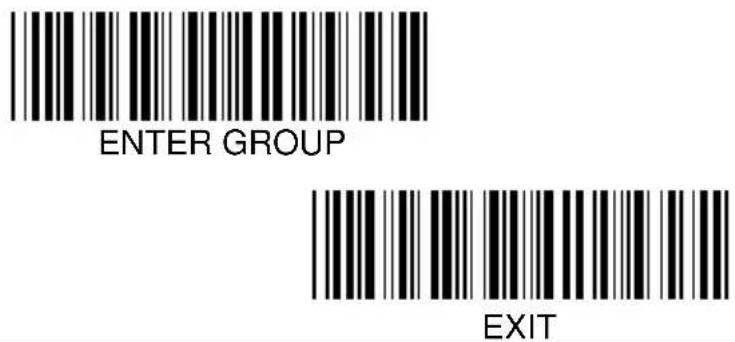
Setup Flow Chart

flowchart
graph TD
    A["ENTER GROUP"] --> B["SELECT ITEMS"]
    B --> C["EXIT"]


Warning: All the current settings will be lost and reset to the factory default.
Note: (*) denotes default setting. Options marked by () are only available upon request.
Group 0: Interface Selection


KEYBOARD

RS-232
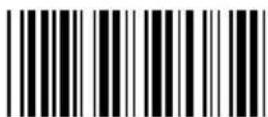
(DTMF)

(OCIA)
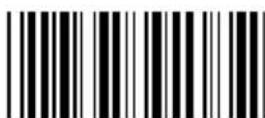
Reserved 2

Resered 3

Reserved 4
Note: The interface is pre-set at factory according to the model of the device.
Group 1: Device Selection for Keyboard Interface


Note: Options marked by ( ) are only available upon request.
Group 1: Device Selection for Keyboard Interface


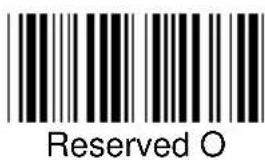


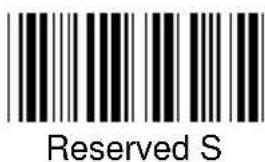


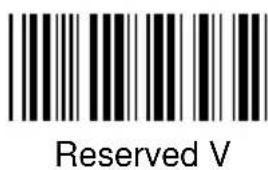

Group 2: Intercharacter Delay


Start Keyboard Setting
1) Scan Enter Group 2 Label
2) Scan Start Keyboard (or RS-232/USB) Setting Label
3) Scan two digits labels in Table-Hex (page 49)
4) Scan Confirm Label in Table-Hex (Page 49)

Start USB Setting
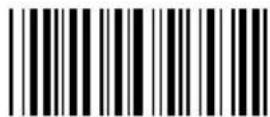
Start RS-232 Setting
Keyboard Default Value: 05
RS-232 Default Value: 00
USB Default Value: 05
Group 3: Language for Keyboard Interface

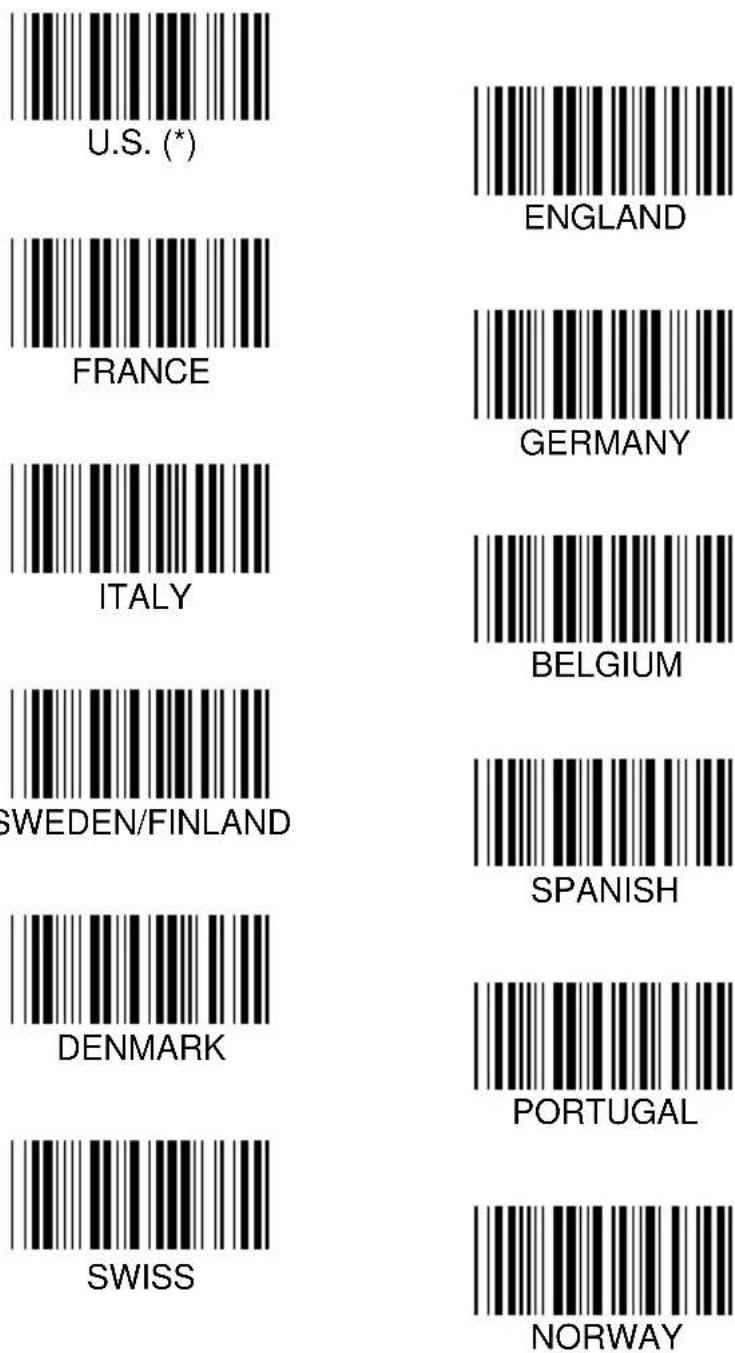
Note: (*) denotes default setting.
Group 3: Language for Keyboard Interface


Note: Options marked by ( ) are only available upon request.
Group 4: Terminator

KEYBOARD

Group 4: Terminator
RS-232

Group 5: Scan Mode
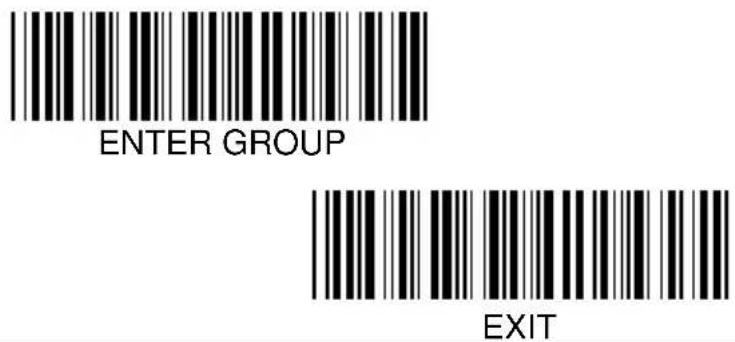
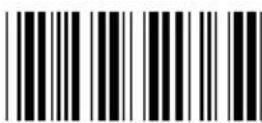
1: Trigger On/Off
2: Trigger On/ Good Read Off (*)

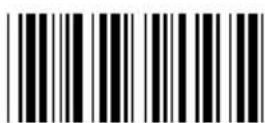
3: Trigger On/ Good Read Off/ Delay Timeout = ?

4: Continuous/Trigger Off

5: Continuous/LED Always on
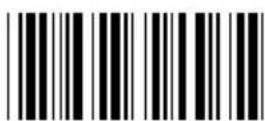
6: Continuous/No Trigger
Delay Timeout Setting:
1) Scan Enter Group 5 Label
2) Scan Label 3 "Delay-Timeout"
3) Scan two digit labels in Table-Hex (Page 49)
4) Scan Confirm Label in Table-Hex (Page 49)
5) Scan Exit Label
Note: Scan mode setting is only available for CCD/LASER type scanner.
Group 5: Scan Mode
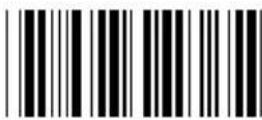
FLASH OFF(*)
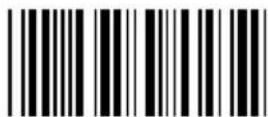
FLASH ON
Note: This programming setting is only available under continuous mode.
Group 6: Preamble and Postamble


Preamble

Postamble
Preamble & Postamble Setting:
1) Scan Enter Group 6 Label
2) Scan Preamble or Postamble Label
3) Refer to ASCII Table (Page 50), scan two digits in Table-Hex (Page 49) representing one character, maximum 10 characters can be accepted
4) Scan Confirm Label in Table-Hex (Page 49)
5) Scan Exit Label

Clear
Clear Preamble & Postamble:
1) Scan Enter Group 6 Label
2) Scan Preamble or Postamble Label
3) Scan Clear Label
4) Scan Exit Label
5) Scan Exit Label
Group 7: RS-232 Parameters

Baud Rate

Data Bit

Group 7: RS-232 Parameters
Parity :
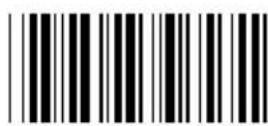
NONE (*)

ODD
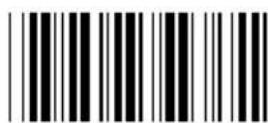
EVEN
Handshaking:

NONE (*)

XON/XOFF

Scanner Ready

Data Ready

ACK/NAK
Group 7: RS-232 Parameters
(ACK/NAK Response Time CTS Observation Time:)

Group 8: CODE 39 / CODE 32

Code 39

Enable (*)

Disable

Full ASCII

Standard (*)
Transmit Start/End Character

Enable
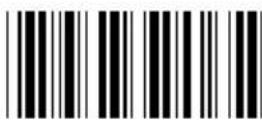
Disable (*)
Transmit Check Character

Enable (*)
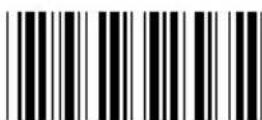
Disable
Verify Checksum

Enable

Disable (*)
Group 8: CODE 39 / CODE 32


Enable CODE 32

Disable CODE 32 (*)

Verify Normal

Verify Strick (*)
Group 9-1: Interleaved 2 OF 5
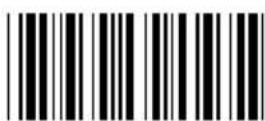
Enable

Disable (*)
Transmit Check Character

Enable (*)

Disable
Verify Checksum
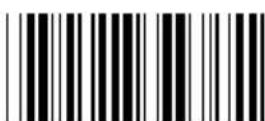
Enable

Disable (*)

Length Define
Min: 4
Max: 48
Barcode Length Setting:
1) Scan Enter Group 9-1 Label
2) Scan Length Define Label
3) Scan Four Digit Labels in Table Hex (Page 49)
4) Scan Confirm Label in Table-Hex (Page 49)
5) Scan Exit Label
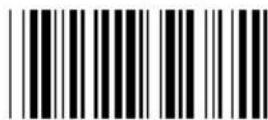
User Define
3 Sets available
Min: 4
Max: 48
User Define Length Setting:
1) Scan Enter Group 9-1 Label
2) Scan User Define Label-->
3) Scan Six Digit Labels in Table Hex (Page 49) (Only 3 sets of length can be defined)
4) Scan Confirm Label in Table Hex (Page 49)
5) Scan Exit Label
Group 9-2: Industrial 2 OF 5 / IATA

Enable

Disable (*)
Transmit Check Character
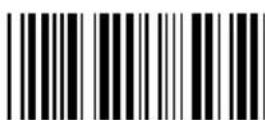
Enable (*)
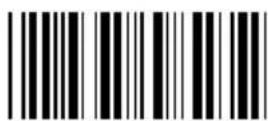
Disable
Verify Checksum

Enable
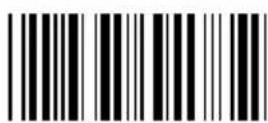
Disable (*)

Length Define
Min: 2
Max: 24
Barcode Length Setting:
1) Scan Enter Group 9-2 Label
2) Scan Length Define Label
3) Scan Four Digit Labels in Table Hex (Page 49)
4) Scan Confirm Label in Table-Hex (Page 49)
5) Scan Exit Label

User Define
3 Sets available
Min: 2
Max: 24
User Define Length Setting:
1) Scan Enter Group 9-2 Label
2) Scan User Define Label
3) Scan Six Digit Labels in Table Hex (Page 49) (Only 3 sets of length can be defined)
4) Scan Confirm Label in Table Hex (Page49)
5) Scan Exit Label
Group 9-2: Industrial 2 OF 5 / IATA

IATA
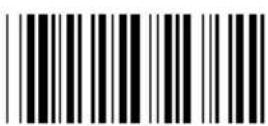
Enable

Disable (*)
Group 9-3: Matrix 2 OF 5


Enable
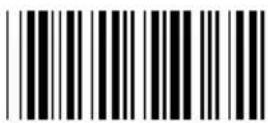
Disable (*)
Transmit Check Character
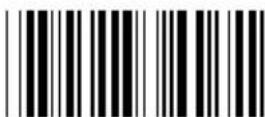
Enable (*)

Disable
Verify Checksum

Enable

Disable (*)

Length Define
Min: 2
Max: 40
Barcode Length Setting:
1) Scan Enter Group 9-3 Label
2) Scan Length Define Label
3) Scan Four Digit Labels in Table Hex (Page49)
4) Scan Confirm Label in Table-Hex (Page 49)
5) Scan Exit Label

User Define
3 Sets available
Min: 2
Max: 40
User Define Length Setting:
1) Scan Enter Group 9-3 Label
2) Scan User Define Label
3) Scan Six Digit Labels in Table Hex (Page 49) (Only 3 sets of length can be defined)
4) Scan Confirm Label in Table Hex (Page 49)
5) Scan Exit Label
Group 9-4: CHINA POSTAGE

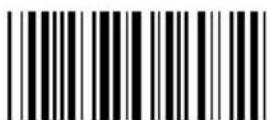
Enable
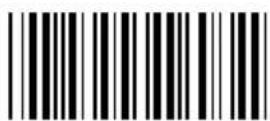
Disable (*)
Transmit Check Character

Enable (*)

Disable
Verify Checksum
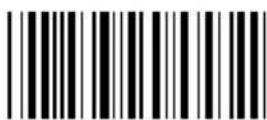
Enable
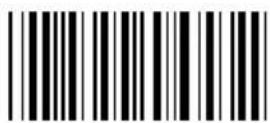
Disable (*)
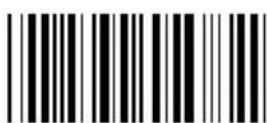
Length Define
Min: 2
Max: 40
Barcode Length Setting:
1) Scan Enter Group 9-4 Label
2) Scan Length Define Label
3) Scan Four Digit Labels in Table Hex (Page 49)
4) Scan Confirm Label in Table-Hex (Page 49)
5) Scan Exit Label

User Define
3 Sets available
Min: 2
Max: 40
User Define Length Setting:
1) Scan Enter Group 9-4 Label
2. Scan User Define Label-->
3. Scan Six Digit Labels in Table Hex (Page 49) (Only 3 sets of length can be defined)
4. Scan Confirm Label in Table Hex (Page 49)
5. Scan Exit Label
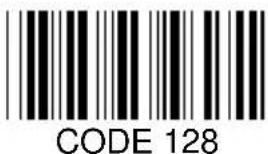
Group 10: Code 128


Enable (*)
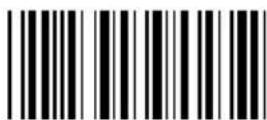
Disable
Enable/Disable Checkdigit
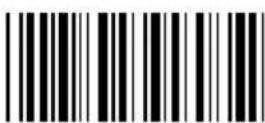
Enable (*)
(not send checkdigit)

Disable
UCC/EAN/128

Enable

Disable (*)
Group 11: CODE 11


Enable (*)

Disable
Number of Check Character
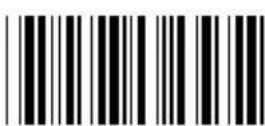
Two (*)
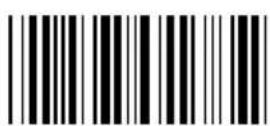
One
Transmit Check Character

Enable (*)

Disable
Enable/Disable Checkdigit
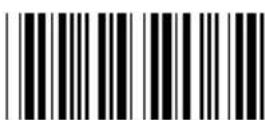
Enable (*)

Disable
Group 12: Code 93


Enable
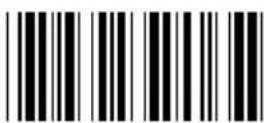
Disable (*)
Verify Checkdigit
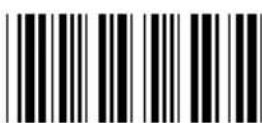
Enable (*)

Disable
Group 13: MSI-PLESSEY


Enable (*)

Disable
Verify Checkdigit

Enable (*)

Disable
Enable MOD

Enable MOD 10-10

Enable MOD 10 (*)
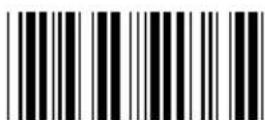
Enable MOD 11-10
Transmit/Truncate Checkdigit
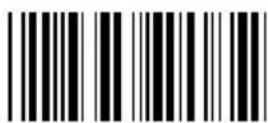
Truncate 1 ^st checkdigit
Truncate Leading Digit

Enable

Disable (*)
UPC-A Convert to EAN-13
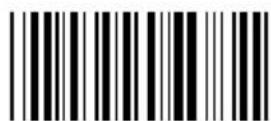
Enable
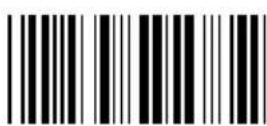
Disable (*)
Group 16-3: EAN-8/JAN-8

Enable (*)

Disable
ADD-ON 2/5

Enable

Disable (*)
Transmit Check Character

Enable (*)
Disable
Truncate Leading Digit
Enable

Disable (*)
EAN-8 Convert to EAN-13

Enable 1
(add zeros in the front of barcode)
Disable (*)
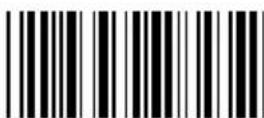
Enable 2
(add zeros in the middle of barcode)
Group 16-4: UPC-E


Enable (*)

Disable
ADD-ON 2/5

Enable

Disable (*)
Transmit Check Character
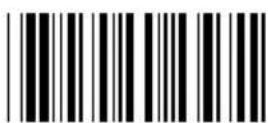
Enable (*)

Disable
Truncate Leading Digit
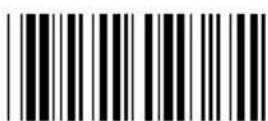
Enable

Disable (*)
UPC-E Convert to UPC-A

Enable

Disable (*)
Group 16-5: ISBN/ISSN

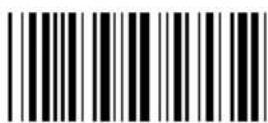
Enable (*)

Disable
ADD-ON 2/5

Enable
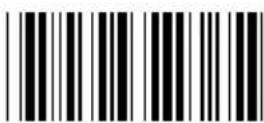
Disable (*)
Group 17: RSS-14
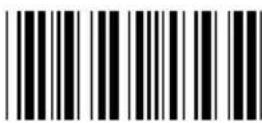
RSS-14 Enable

RSS-14 Disable (*)

AI Enable

AI Disable (*)

Checksum Enable

Checksum Disable (*)
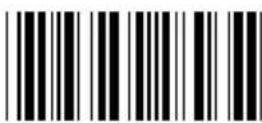
GS1-128 Enable

GS1-128 Disable (*)
Group 18: TRUNCATE HEADER/TRAILER CHARACTER

Truncate Header
Character

Truncate Trailer Character
1) Scan Enter Group 18 Label
2) Scan Header or Trailer Label
3) Refer to ASCII Table for corresponding HEX Code (Page 50)
4) Scan two digits in Table-Hex(Page 49)
5) Scan Confirm Label in Table Hex (Page 49)
6) Scan Exit Label

Clear
Clear Header & Trailer:
1) Scan Enter Group 19 Label
2) Scan Header or Trailer Label
3) Scan Clear Label
4) Scan Exit Label
Group 19: Predefined Code ID

Enable

Disable (*)
Identifying Barcode ID
The Identifying Barcode ID is an optional code to identify the barcode of the label that user is scanning.
Please refer to the Pre-Defined Barcode ID (page 53) for the ID code.
Group 20: User-Defined Code ID Setting






Note: Refer to ASCII Table (Page 50), scan two hexadecimal labels in Table Hex (Page 49) to represent one character.
Warning: Be sure to Disable the Pre-defined Code ID (Group 19, page 42) before setup
Group 21: Enable All Barcode


Enable All Barcodes
Group 22: Function Keys Emulation

Enable

Disable (*)
Enable Function Key Emulation:
1) Scan Enter Group 22 Label
2) Scan Enable Label
3) Scan Exit Label
- To concatenate a function key with input data, please refer to Function Key Table for its hexadecimal representation.
Example: Preamble data with F1
1) Scan Enter Group 6 Label
2) Scan Preamble Label
3) Scan Label 0 and 1 respectively in Table-Hex (Page 49)
4) Scan Confirm Label in Table-Hex (Page 49)
5) Scan Exit Label
| Function Key Table (Full ASCII Code 39 Table) | |||
| F1:01 F2:02 F3:03 F4:04 | |||
| F5:05 F6:06 F7:07 F8:08 | |||
| F9:09 F10:0A F11:0B F12:0C | |||
| Enter:0D Tab:0E BS:0F Up:10 | |||
| Down:11 Left:12 Home:14 End:15 | |||
| PgUp:16 PgDn:17 Ins:18 Del:19 | |||
| Esc:1B | Right:13 | S-Tab:1C | |
- To scan a function key barcode label, Full ASCII must be enabled. Please refer to Full ASCII Code 39 Table to produce the function key barcode label.

Full ASCII Code 39 Enable
Group 23: General Parameters


Upper Case (*)
Lower Case

Universal

ALT Mode
Buzzer Pitch & Buzzer Duration Setting
Buzzer Pitch
(Default : 21)

Buzzer Duration
(Default: AA)
To set the Buzzer Pitch & Buzzer Duration:
1) Scan Enter Group 23 Label
2) Scan Buzzer Pitch or Buzzer Duration Label
3) Scan Two Digit Labels in Table-Hex (Page 49)
4) Scan Confirm Label in Table-Hex (Page 49)
5) Scan Exit Label
Power Up Beeping

Enable (*)

Disable
Appendix:
Function Code for PC XT/AT

F1 (\$A)

F7 (\$G)

F2 (\$B)

F8 (\$H)

F3 (\$C)
F9 (\$I)
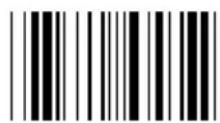
F4 (\$D)

F10 (\$J)

F5 (\$E)

F11 (\$K)

F6 (\$F)

F12 (\$L)

Enter (\$M)
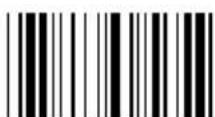
End (\U) (\B)

Tab (\$N)

PgUp (\$V)

BS (\$O)
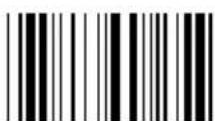
PgDn (\$W)

Up (\$P)

Ins (\$X)

Down (\$Q)
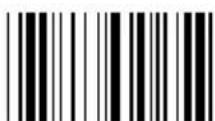
Del (\$Y)
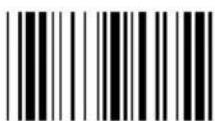
Left (\$R)
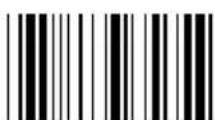
Esc (%A)

Right (\$S)

Home (\$T)









ASCII TABLE
| ASCII | HEX | DEC | ASCII | HEX | DEC |
| NUL | 00 | 0 | [Space] | 20 | 32 |
| SOH | 01 | 1 | ! | 21 | |
| STX | 02 | 2 | " | ||
| ETX | 03 | 3 | # | 23 | |
| EOT | 04 | 4 | $ | 24 | |
| ENQ | 05 | 5 | % | 25 | |
| ACK | 06 | 6 | & | 26 | |
| BEL | 07 | 7 | ' | ||
| BS | 08 | 8 | ( | 28 | 40 |
| HT | 09 | 9 | ) | ||
| LF | 0A | 10 | * | 2A | 42 |
| VT | 0B | 11 | + | 2B | 43 |
| FF | 0C | 12 | , | 2C | 44 |
| CR | 0D | 13 | - | 2D | 45 |
| SO | 0E | 14 | . | 2E | 46 |
| SI | 0F | 15 | / | 2F | 47 |
| DLE | 10 | 16 | 0 | ||
| DC1 | 11 | 17 | 1 | ||
| DC2 | 12 | 18 | 2 | 32 | 50 |
| DC3 | 13 | 19 | 3 | 33 | 51 |
| DC4 | 14 | 20 | 4 | 34 | 52 |
| NAK | 15 | 21 | 5 | 35 | 53 |
| SYN | 16 | 22 | 6 | 36 | 54 |
| ETB | 17 | 23 | 7 | 37 | 55 |
| CAN | 18 | 24 | 8 | 38 | 56 |
| EM | 19 | 25 | 9 | 39 | 57 |
| SUB | 1A | 26 | 3A | ||
| ESC | 1B | 27 | ; | 3B | 59 |
| FS | 1C | 28 | < | 3C | 60 |
| GS | 1D | 29 | = | 3D | 61 |
| RS | 1E | 30 | > | 3E | 62 |
| US | 1F | 31 | ? | 3F | 63 |
ASCII TABLE
| ASCII | HEX | DEC | ASCII | HEX | DEC |
| @ | 40 64 | 60 | 96 | ||
| A | 41 65 a | 61 | 97 | ||
| B | 42 66 b | 62 | 98 | ||
| C | 43 67 c | 63 | 99 | ||
| D | 44 68 d | 64 | 100 | ||
| E | 45 69 e | 65 | 101 | ||
| F | 46 70 f | 66 | 102 | ||
| G | 47 71 g | 67 | 103 | ||
| H | 48 72 h | 68 | 104 | ||
| I | 49 73 l | 69 | 105 | ||
| J | 4A 74 j | 6A | 106 | ||
| K | 4B | 75 | k | 6B | 107 |
| L | 4C | 76 | l | 6C | 108 |
| M | 4D | 77 | m | 6D | 109 |
| N | 4E | 78 | n | 6E | 110 |
| O | 4F | 79 | o | 6F | 111 |
| P | 50 | 80 | p | 70 | 112 |
| Q | 51 81 q | 71 | 113 | ||
| R | 52 82 | r | 72 114 | ||
| S | 53 83 s | 73 | 115 | ||
| T | 54 84 t | 74 | 116 | ||
| U | 55 85 u | 75 | 117 | ||
| V | 56 86 v | 76 | 118 | ||
| W | 57 87 | w | 77 119 | ||
| X | 58 88 x | 78 | 120 | ||
| Y | 59 89 y | 79 | 121 | ||
| Z | 5A 90 z | 7A | 122 | ||
| [ | 5B | 91 | { | 7B | 123 |
| \ | 5C | 92 | | | 7C | 124 |
| ] | 5D | 93 | } | 7D | 125 |
| ^ | 5E 94 ~ | 7E | 126 | ||
| - | 5F | 95 | DEL | 7F | 127 |
For Example:
| ASCII Code | HEX |
| ESC | 1B |
| DEL | 7F |
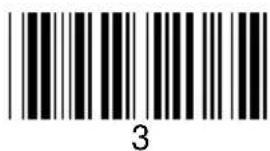
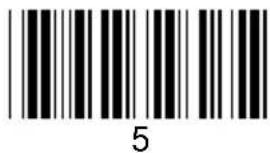
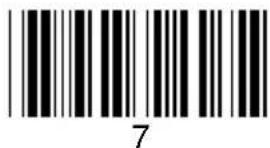
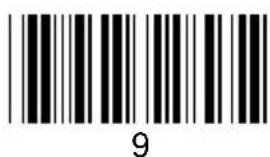
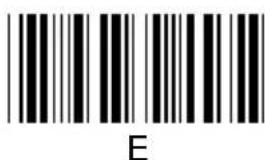
Refer to the page 49 and scan the barcode "1",
barcode "B" for the code "ESC".
Scan the barcode "Confirm" to complete.
Hexadecimal-Decimal Conversion Table
| H/10 123 | 4567 | 89A | BCD EF | |||||||||
| 001234567 | 8910 | 1112 | 131415 | |||||||||
| 11617181920 | 2122 | 2324 | 252627 | 28293031 | ||||||||
| 23233343536 | 37 | 3839 | 40414243 | 44454647 | ||||||||
| 34849505152 | 53 | 5455 | 56575859 | 60616263 | ||||||||
| 46465666768 | 69 | 7071 | 72737475 | 76777879 | ||||||||
| 58081828384 | 85 | 8687 | 88899091 | 92939495 | ||||||||
| 6 | 96 | 97 | 98 | 100 | 101 | 102 | 103 | 104 | 105 | 106 | 107 | 108 |
| 7 | 112 | 113 | 114 | 115 | 116 | 117 | 118 | 119 | 120 | 121 | 122 | 123 |
| 8 | 128 | 129 | 130 | 131 | 132 | 133 | 134 | 135 | 136 | 137 | 138 | 139 |
| 9 | 144 | 145 | 146 | 147 | 148 | 149 | 150 | 151 | 152 | 153 | 154 | 155 |
| A | 160 | 161 | 162 | 163 | 164 | 165 | 166 | 167 | 168 | 169 | 170 | 171 |
| B | 176 | 177 | 178 | 179 | 180 | 181 | 182 | 183 | 184 | 185 | 186 | 187 |
| C | 192 | 193 | 194 | 195 | 196 | 197 | 198 | 199 | 200 | 201 | 202 | 203 |
| D | 208 | 209 | 210 | 211 | 212 | 213 | 214 | 215 | 216 | 217 | 218 | 220 |
| E | 224 | 225 | 226 | 227 | 228 | 229 | 230 | 231 | 232 | 233 | 234 | 235 |
| F | 240 | 241 | 242 | 243 | 244 | 245 | 246 | 247 | 248 | 249 | 250 | 251 |
For Example:
| Decimal | Hexadecimal | ||
| 11 | 0B | H:0 | L:B |
| 83 | 53 | H:5 | L:3 |
| 213 | D5 | H:D | L:5 |
Pre-Defined Barcode ID
| Barcode Symbology Identifying ID | |
| EAN-13 A | |
| EAN-8 B | |
| UPCE C | |
| Code 39 / Code 32 D | |
| CODABAR E | |
| Matrix 2 OF 5 F | |
| Industrial 2 OF 5 / IATA G | |
| Interleaved 2 OF 5 H | |
| Code 128 I | |
| Code 93 J | |
| Code 11 K | |
| MSI-PLESSEY L | |
Note:
The preset ID values of Pre-Defined Barcode ID may be changed if the User-Defined Code ID is set and the values of Identifying ID are overwritten
PIN ASSIGNMENTS
10 Pin Modular Plug
| RJ-45 Male10P10C | TTL W | AND KB RS | S-232 KB USB | ||
| 1 | × | × | × | RTS | × |
| 2 | × | × | × | × | |
| 3 | × | × | × | ||
| 4 | |||||
| 5 | GOOD-READ | × | |||
| 6 | DATA | DATA | PC-CLK | × | PC-CLK |
| 7 | VCC | VCC | VCC | VCC | VCC |
| 8 | SW-DET | × | KB-CLK | × | × |
| 9 | S.O.S | × | KB-DATA | × | × |
| 10 | × | × | × | × |

RS-232 Signal Output
| Function | DB9F+DC (or without DC) |
| GND | 5 |
| CTS | 7 |
| RTS | 8 |
| RX | 3 |
| TX | 2 |
| VCC+5V | 9 |
Note: For PC applications, a cable with DC power jack is required to accept external power input.
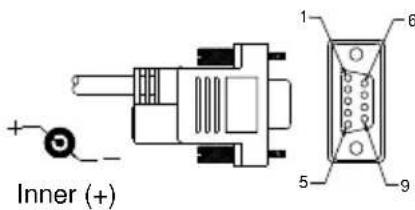
DB9F+DC -Jack
Keyboard Signal Output
| Funcion | Din5F | Din5M | Mini-Din6M | Mini-Din6F |
| GND 4 | 4 3 | 3 | ||
| PC_Data | --- 2 | 1 --- | ||
| PC_CLK | --- 1 | 5 --- | ||
| VCC+5V | 5 5 | 4 4 | ||
| KB_CLK | 1 --- | --- 5 | ||
| KB_Data | 2 --- | --- 1 |

USB Signal Output
| FUNCTION USB-A | |
| GND | 4 |
| Vcc | 1 |
| D+ | 3 |
| D- | 2 |


- Configuration Of The Scanner
- Appendix:
- Getting Started
- Installing the Keyboard Wedge Scanner
- Installing the RS-232 Interface Scanner
- Installing the USB Interface Scanner
- Setup Procedures
- Example 1:
- Example 2:
- Example 3:
- Tips:
- F 0 F
- Example 4:
- 0B 1C 2B
- Setup Flow Chart
- Delay Timeout Setting:
- Preamble & Postamble Setting:
- Clear Preamble & Postamble:
- Barcode Length Setting:
- User Define Length Setting:
- Clear Header & Trailer:
- Identifying Barcode ID
- Enable Function Key Emulation:
- Example: Preamble data with F1
- To set the Buzzer Pitch & Buzzer Duration:
- Function Code for PC XT/AT
- Pre-Defined Barcode ID
- Note:
- PIN ASSIGNMENTS
Brand : Deltaco
Model : POS-833
Category : Barcode Reader