
MG-1600 - Barbecue WILFA - Free user manual and instructions
Find the device manual for free MG-1600 WILFA in PDF.


| Product Type | Electric Barbecue Grill (Multigrill) |
| Brand | Wilfa |
| Model | MG-1600 Fest Multigrill |
| Dimensions (Cooking Plate) | 41.5 x 24.5 cm (16.3 x 9.6 inches) |
| Weight | Approximately 6.5 kg (14.3 lbs) with accessories |
| Power Supply | 220-240V, 50Hz, ~1800W (estimated) |
| Temperature Settings | Low (~121°C), Medium (~191°C), High (~232°C) |
| Main Cooking Surface | Reversible die-cast nonstick plate: grill side (ribbed) and griddle side (smooth) |
| Kebab Feature | Two pull-out drawers with 10 skewers and motorized rotation |
| Hot Dog Feature | 10 hot dog rollers with skewers for simultaneous cooking |
| Drip Systems | Drip cup (for plate) and two drip pans (for kebab drawers) |
| Material | Brushed stainless steel and chrome housing; nonstick coating on cooking plate |
| Accessories Included | 10 kebab skewers, 10 hot dog rollers, heat shield, drip cup, 2 drip pans |
| Dishwasher Safe Parts | Cooking plate, skewers, hot dog rollers, heat shield, drip cup, drip pans |
| Hand Wash Only | Kebab drawers (with handles) and base housing |
| Safety Features | Polarized plug, short cord, automatic shut-off via OFF setting, heat shield |
| Power Cord Length | Short (~0.6 m) to prevent tripping; extension cord use allowed |
| Storage | Power cord wraps around base; assemble and store dry |
| Warranty | Standard Wilfa warranty (check manufacturer) |
| Repairability | Authorized service only; no user-serviceable parts inside |
Frequently Asked Questions - MG-1600 WILFA
User questions about MG-1600 WILFA
0 question about this device. Answer the ones you know or ask your own.
Ask a new question about this device
Download the instructions for your Barbecue in PDF format for free! Find your manual MG-1600 - WILFA and take your electronic device back in hand. On this page are published all the documents necessary for the use of your device. MG-1600 by WILFA.
USER MANUAL MG-1600 WILFA
natural_image
Exterior view of a stainless steel grater with multiple side grates (no text or symbols visible)MG-1600 FEST MULTIGRILL
BRUKSANVISNING
BRUKSANVISNING
BRUGSANVISNING
KÄYTTÖOHJE
INSTRUCTION MANUAL
WWW.WILFA.COM
V i k t i g e f o r h o l d s r e g l e
F∅R F∅RSTE GANGS BRUK
natural_image
Close-up of a hand using a power tool to press or adjust a component (no visible text or symbols)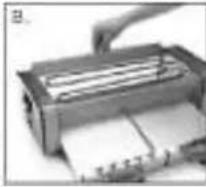
natural_image
Close-up of a hand operating a printer with paper sheets (no visible text or symbols)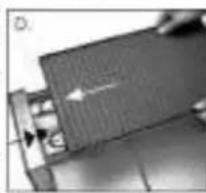
natural_image
Close-up of a mechanical component with a white arrow indicating direction (no visible text or symbols)natural_image
Mechanical device with open lid and partially assembled parts, no visible text or symbols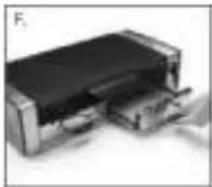
natural_image
Close-up of a mechanical component with a black body and metallic casing (no visible text or symbols)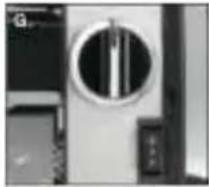
natural_image
Close-up of a mechanical device with a circular component and a vertical shaft (no visible text or symbols)BRUKS-ANVISNING
natural_image
Close-up of a computer monitor with an arrow pointing to the screen (no visible text or symbols)- Sett støpselet inn i et standard strømuttak.
natural_image
Close-up of hands holding a small object with a string (no visible text or symbols)- Plasser stekespiddene i stekespiddsporet slik at stjerneformen ved stekespiddets håndtaksende settes inn i stangsporene på forsiden av kebabskuffen.
natural_image
Interior view of a printer with visible internal components (no text or symbols)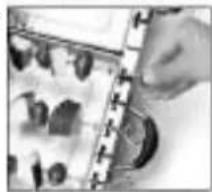
natural_image
Close-up of a hand adjusting a mechanical component with no visible text or symbolsnatural_image
Close-up of a mechanical component with circular and rectangular features, no visible text or symbolsnatural_image
Close-up of mechanical components with no visible text or symbolsnatural_image
Close-up of a hand inserting a component into a cylindrical device (no visible text or symbols)- Obs! Enten du bruker grill-/takkeplaten eller ikke, må du alltid ha den på plass när du bare bruker kebabfunksjonen. Husk at den er svært varm mens enheten er aktivert.
FÖRE FÖRSTA ANVÄNDNINGSTILLFÄLLET
natural_image
Close-up of a hand operating a mechanical device with a knob (no visible text or symbols)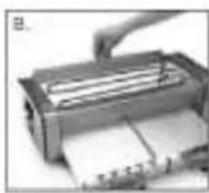
natural_image
Close-up of a printer with paper and paper roll, no visible text or symbols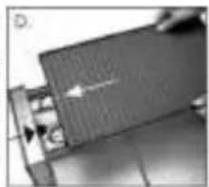
natural_image
Close-up of a mechanical component with a white arrow indicating direction (no visible text or symbols)natural_image
Mechanical device with a black cover and paper tray, no visible text or symbols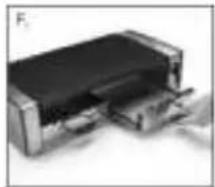
natural_image
Close-up of a mechanical device with a black component and metallic casing (no visible text or symbols)BRUKSANVISNING
natural_image
Close-up of a mechanical component with a circular aperture and central shaft (no visible text or symbols)natural_image
Close-up of a mechanical component with a metallic housing and a curved arrow indicating direction (no visible text or symbols)natural_image
Close-up of a hand inserting a small component into a device (no visible text or symbols)natural_image
Close-up of a device with a screen and a hand holding it, showing internal components (no visible text or symbols)natural_image
Exterior view of a printer or printer device with no visible text or symbolsnatural_image
Close-up of a hand holding a small object with a string, possibly a tool or device (no visible text or symbols)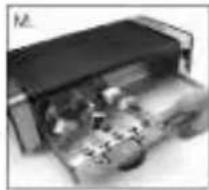
natural_image
Interior view of a printer with visible internal components (no text or symbols)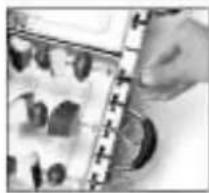
natural_image
Close-up of a hand adjusting a mechanical component with circular components (no visible text or symbols)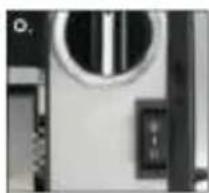
natural_image
Close-up of a mechanical device with a circular component and a small button (no visible text or symbols)natural_image
Two-panel image showing a mechanical device and a close-up of a tool interacting with a component (no visible text or symbols)WARNING: FÖRE RENGÖRING MÅSTE PRODUKTEN SVALNA HELT.
INDEN BRUG
natural_image
Close-up of a hand operating a mechanical device with a knob (no visible text or symbols)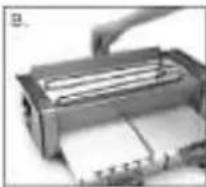
natural_image
Mechanical device with a black component and paper feed, no visible text or symbols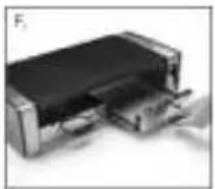
natural_image
Exterior view of a printer or printer device with no visible text or symbolsBETJENINGS-VEJLEDNING
natural_image
Close-up of a metallic circular device with a vertical bar and control panel (no visible text or symbols)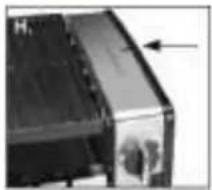
natural_image
Close-up of a mechanical component with a curved arrow indicating direction (no visible text or symbols)natural_image
Close-up of a hand using a tool to press or adjust a mechanical component (no visible text or symbols)natural_image
Close-up of a mechanical component with a white arrow indicating direction (no visible text or symbols)natural_image
Exterior view of a printer or printer device with no visible text or symbolsnatural_image
Close-up of a hand holding a small object with a string, possibly a tool or device (no visible text or symbols)natural_image
Close-up of a mechanical device with internal components (no visible text or symbols)natural_image
Close-up of a hand adjusting a mechanical component with no visible text or symbolsnatural_image
Close-up of a mechanical device with a circular top and black buttons (no visible text or symbols)natural_image
Close-up of hands holding a pen, no visible text or symbols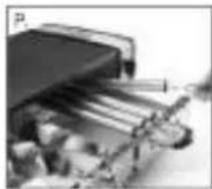
natural_image
Stacked office supplies with mechanical parts (no visible text or labels)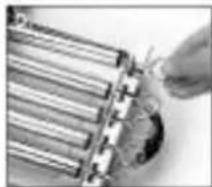
natural_image
Close-up of a hand inserting a component into a cylindrical device (no visible text or symbols)ADVARSEL! F∅R DU RENSER APPARATET, SKAL DU S∅RGE FOR AT DET ER HELT AFK∅LET.
ENNEN ENSIMMÄISTÄ KÄYTTÖKERTAA
natural_image
Close-up of a hand turning a button into a device (no visible text or symbols)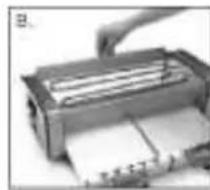
natural_image
Close-up of a printer with paper being inserted (no visible text or symbols)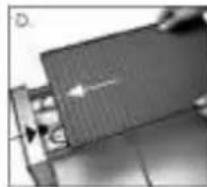
natural_image
Close-up of a mechanical component with a white arrow indicating direction (no visible text or symbols)natural_image
Mechanical device with paper feed and clamped parts, no visible text or symbols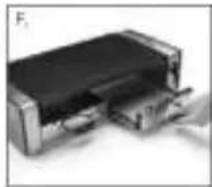
natural_image
Close-up of a mechanical component with a black top and metallic base, partially submerged in a lighter housing (no visible text or symbols)KÄYTTÖ-OHJEET
natural_image
Close-up of a mechanical device with a circular component and a button (no visible text or symbols)natural_image
Close-up of a mechanical component with a metallic housing and a small inset showing a circular feature (no visible text or symbols)natural_image
Close-up of a hand using a tool to press or adjust a mechanical component (no visible text or symbols)natural_image
Close-up of a mechanical component with a white arrow indicating direction (no visible text or symbols)natural_image
Exterior view of a printer or printer device with no visible text or symbolsnatural_image
Close-up of a hand holding a small object, possibly a tool or device, with no visible text or symbols.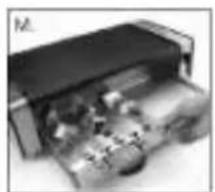
natural_image
Interior view of a printer or printer with visible internal components (no text or symbols)
natural_image
Close-up of a hand holding a mechanical component with circular features (no visible text or symbols)
natural_image
Close-up of a mechanical device with a circular component and a rectangular button (no visible text or symbols)natural_image
Close-up of a hand holding a pen, no visible text or symbolsnatural_image
Stacked office supplies with no visible text or symbolsnatural_image
Close-up of a hand holding a mechanical component with metallic rods (no visible text or symbols)- Read all INSTRUCTIONS.
- Do not touch hot surfaces; use handles or knobs.
- To protect against fire, electric shock, and injury to persons, DO NOT IMMERSE CORD OR PLUG in water or other liquids.
- Close supervision is necessary when any appliance is used by or near children.
- Unplug from outlet when not in use and before cleaning. Allow to cool before putting on or taking off parts, and before cleaning appliance.
- Do not operate any appliance with a damaged cord or plug, or after the appliance has malfunctioned or has been damaged in any manner.
- The use of accessory attachments not recommended by Wilfa may result in fire, electrical shock, or risk of injury to persons.
- Do not use outdoors.
- Do not let power cord hang over edge of table or counter, or touch hot surfaces.
- Do not place on or near hot gas or electric burner, or in a heated oven.
- Unplug the unit when finished using.
- Do not use appliance for other than intended use.
- Extreme caution must be exercised when moving an appliance containing hot oil or other hot liquids.
- To disconnect, turn Selector Dial to OFF setting, then remove plug from wall outlet.
- WARNING: TO REDUCE THE RISK OF FIRE OR ELECTRIC SHOCK, ONLY AUTHORIZED PERSONNEL SHOULD DO REPAIRS.
SAVE THESE INSTRUCTIONS FOR HOUSEHOLD USE ONLY SPECIAL CORD SET INSTRUCTIONS
A short power-supply cord is provided to reduce the risks resulting from becoming entangled in or tripping over a longer cord. Longer extension cords are available and may be used if care is exercised in their use. If a long extension cord is used, the marked electrical rating of the extension cord should be at least as great as the electrical rating of the appliance, and the longer cord should be arranged so that it will not drape over the countertop or tabletop where it can be pulled on by children or animals, or tripped over.
NOTICE
This appliance has a polarized plug (one blade is wider than the other) to reduce the risk of electric shock. This plug will fit in a polarized outlet only one way. If the plug does not fit fully in the outlet, reverse the plug. If it still does not fit, contact a qualified electrician. Do not modify the plug in any way.
CONTENTS
Important Safeguards 42
Parts and Features 44
Before the First Use 44/45
Assembly Instructions 45/46
Operating Instructions 46
Cleaning and Care 50
S t o r a g e 5 0
PARTS AND FEATURES
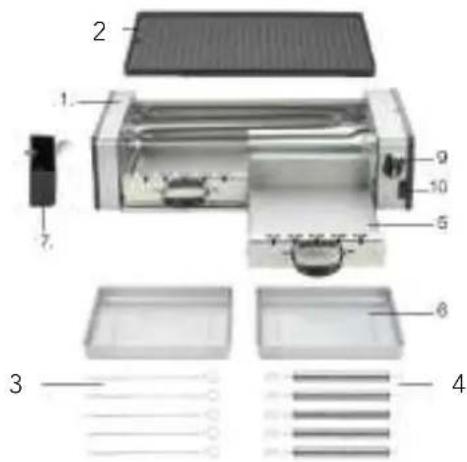
- Base: Elegant brushed stainless & chrome housing.
- Reversible die-Cast Cooking plate: Extra large 41,5 X 24,5cm" nonstick cooking surface. One side is a grill surface; the other side is a griddle surface.
- 10 piece kebab skewer set
- 10 piece hot dog roller set
- Two pull out kebab drawers with handles:
- Two kebab drip pans: Collects grease from rotating kebabs.
- Drip Cup: Collects grease from grill/griddle.
- Removable heat shield (not shown)
- Temperature Control: OFF, LOW, MEDIUM, HIGH position.
- Kebab motor control switch
BEFORE THE FIRST USE
Remove all packaging materials and any promotional labels or stickers from your grill. Be sure all parts (listed above, parts and features) of your new appliance have been included before discarding any packaging materials. You may want to keep the box and packing materials for use at a later date.
Before using your for the first time, remove any dust from shipping by wiping the base and temperature control with a damp cloth. Thoroughly clean both sides of the cooking plate, drip tray & pans and skewers and hot dog rollers. The cooking plate, skewers, hot dog rollers, heatshield, drip cup and pans can be submerged in water or placed in the dishwasher for cleaning. Never place the housing or drawers with handles in water. Always use a damp cloth to clean these parts.
ASSEMBLY INSTRUCTIONS
-
Place base on a clean, flat surface where you intend to cook.
-
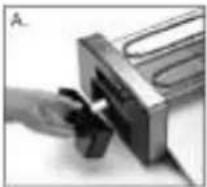
One end of the base has an opening provided for the drip cup. With the metal spout tilted slightly forward, slide the drip cup into the base and push in until the tab is locked, (see figure A).
natural_image
Close-up of a hand using a tool to adjust or press a mechanical component (no visible text or symbols)- Slide the heat shield in between the guides on the back of the unit, (see figure B).
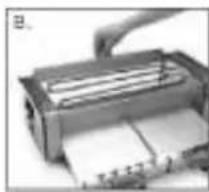
natural_image
Close-up of a printer with paper being inserted (no visible text or symbols)- The cooking plate has two sides: The grill side with ribbed surface is intended for grilling steaks, hamburgers, chicken, seafood and vegetables
The griddle side with smooth surface is perfect for frying bacon and eggs, pancakes, French toast and toasted sandwiches. Choose the side you intend to cook on and place the cooking plate on the base with the chosen side facing up. It is important that you place the cooking plate ontothe base correctly. Locate
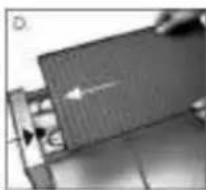
natural_image
Close-up of a mechanical component with a white arrow indicating direction (no visible text or symbols)the drip hole on one end of the cooking plate (see figure D). Place the cooking plate onto the base with the drip holes lining up over the metal drip tray spout on the left side of the unit. If the cooking plate is placed on the base with the drip holes at the wrong end, it will not sit level.
- Place the drip pans in the kebab drawers with front side towards you (see figure E). Insert the drawers on the bottom of the unit under the grill plate (see figure F).
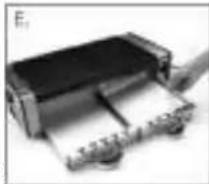
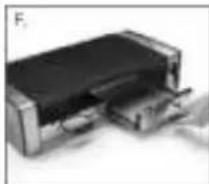
natural_image
Exterior view of a printer or printer device with no visible text or symbols- Plug the cord into a standard electrical outlet. You are now ready to begin cooking.
OPERATING INSTRUCTIONS
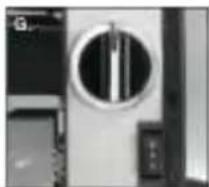
Once the Grill is assembled properly and you are ready to begin cooking, turn the control knob to the desired temperature setting –High, Medium or Low (see figure G).
The indicator light on the top of the unit will illuminate to indicate that the unit is operating (see figure H). It may take 10 to 12 minutes to reach operating temperature, depending on the temperature level that has been set. The temperature control is used to set and maintain the temperature of the cooking surface. Temperatures
natural_image
Close-up of a metallic mechanical component with a circular recess and internal shaft (no visible text or symbols)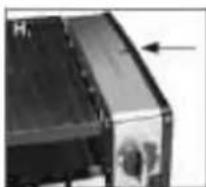
range from about 121°C on the Low setting, 191°C on the Medium setting to 232°C on the High setting. You can vary the setting of the control knob at any time during cooking, and may wish to do so, depending on the types of foods on the cooking plate. Refer to the Cooked food Temperature Chart on page TBD for recommendations.
CAUTION: Handles will become hot during use. Always use a pot holder when touching any part of the unit when cooking. The cooking plate should not be
removed from the base or flipped over while hot. Allow unit to cool down for at least 30 minutes before handling.
NOTE: The first time you use your Grill, it may have a slight odor and smoke a bit. This is normal and common to appliances with a nonstick surface.
Flipping the grill/griddle plate over to use reverse side
- Turn temperature control knob to OFF setting.
- Unplug appliance from wall outlet.
- Allow unit to cool down completely (at least 30 minutes).
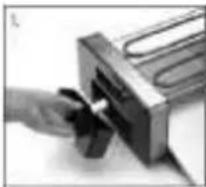
- Carefully slide out the drip cup by pressing down on the tab and gently pull out the cup to dispose of its contents (See figure I). Clean cup and replace in base. (see Cleaning and Care).
natural_image
Close-up of a hand inserting a small component into a device (no visible text or symbols)-
Thoroughly clean cooking plate. (see Cleaning and Care)
-
Flip the plate over, and return to base.
-
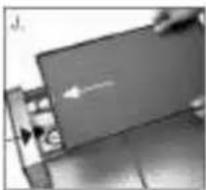
Make sure that hole in plate line up over drip cup. (see figure J).
-
Reconnect the plug into a standard electrical outlet.
natural_image
Close-up of a mechanical component with a white arrow indicating direction (no visible text or symbols)Using the kebab feature
-
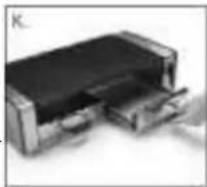
Assemble the unit with the grill plate and drip cup in proper position. Slide out kebab drawers and place the drip pans in the kebab drawers and slide drawers in place (see figure K). Turn the control dial to desired temperature and preheat for approximately 10 to 12 minutes.
-
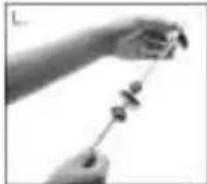
Prepare your food according to you favorite recipe and slide food onto each of the skewers. (see figure L).
-
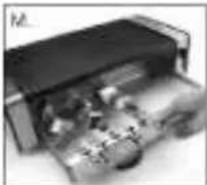
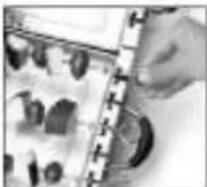
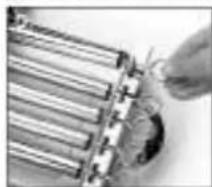
Place skewers onto the skewer slot so that the star-like shape at the handle end of the skewer is inserted into the gear slots in the front end of the kebab drawer (see figures M, N). Slide drawer back into place.
Note: When using large cubes of meat or fish, you may only cook up to six skewers at a time.
natural_image
Close-up of a hand adjusting a mechanical component with no visible text or symbols-
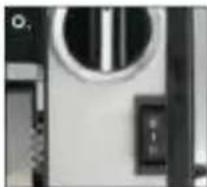
Once all the skewers are in position, press the skewer control switch to the ON position to start the kebabs rotating. The switch light will illuminate to let you know the kebabs are rotating (see figure O).
-
To check if your kebabs are cooked, press the kebab control button to stop them from rotating and use a pot holder to remove one of the kebabs. If more time is needed, replace the skewer and press the kebab control button.
natural_image
Close-up of a mechanical device with circular components and a small rectangular component (no visible text or symbols)Using the hot dog feature
-
Assemble the unit with the grill plate and drip cup in proper position. Slide kabob drawer out and place the drip trays in the kebab drawers and slide drawers into place. Turn the control dial to desired temperature and preheat for approximately 10 to 12 minutes.
-
Assemble the kebab skewers and hot dog rollers by slipping the skewer through the holes in each end of the hot dog roller cap and give it a slight turn to lock it in place. Be careful not to turn too far (see figure P).
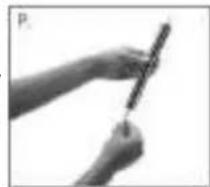
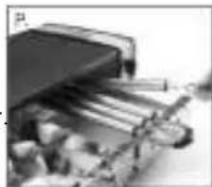
- Place the skewer with hot dog roller onto the skewer slot so that the star like shape at the handle end of the skewer is inserted into the gear slot in the front end of the kebab drawer (see figures P, Q).
natural_image
Stacked books with visible spines and covers, no text or symbols present- Using tongs, position the hot dogs in between two of the hot dog rollers. Four hot dogs will fit on each of the drawers. Slide the drawer back into place.
natural_image
Close-up of a hand inserting a component into a cylindrical device (no visible text or symbols)- Please note: Whether using the grill/griddle plate or not, you must always have it in place when just using the kebab feature. Please keep in mind that it is very hot when the unit is operating.
Using both kebab and grill or griddle feature simultaneously
- You may use both cooking methods simultaneously. Just follow the assembly instructions on page 3 for flipping the grill/ griddle plate and the instructions above for using the kebab and hot dog features.
USER MAINTENANCE
- Never use metal utensils, as they will scratch the nonstick grill plate. Instead, use only wooden or heat-proof plastic utensils.
- Never leave plastic utensils in contact with the hot grill plate.
- After using, scrape excess food buildup through holes and into drip tray, then wipe off any residue with a paper towel before proceeding with next recipe.
CLEANING AND CARE CAUTION: BEFORE CLEANING APPLIANCE, MAKE SURE IT HAS COOLED DOWN COMPLETELY.
Once you have finished cooking, turn the Selector Dial control to the Off position and unplug the power cord from the wall outlet. Allow the unit to cool down for at least 30 minutes before handling. Dispose of grease from the drip tray and drip cups once cooled. The drip pans and drip cup can be cleaned by hand or in the dishwasher. The cooking plate can be washed by hand, using a soft sponge or cloth and hot water. The cooking plate may be submerged in water, or washed in the dishwasher. Do not use metallic objects such as knives or forks for cleaning the cooking plate. Do not use a scouring pad for cleaning. The nonstick coating can be damaged. If you have been cooking seafood, wipe the cooking plate with lemon juice to prevent seafood flavor transferring to the next recipe. The heat shield, drip cup, drip pans, skewers and hot dog rollers may be submerged in water or washed in the dishwasher. The kebab drawers, housing base, and control knob can be wiped clean with a soft, dry cloth. For tough stains, dampen cloth. Never use an abrasive cleaner or harsh pad. The kebab drawers are not immersible or dishwasher safe.
STORAGE
Always dry and assemble the grill before storing. Ensure that the base, cooking plate and drip tray are correctly positioned. The power cord can be wrapped around the back of the base for storing.
Marketed by: AS WILFA
Industriveien 25
Postboks 146
1483 Skytta, Norway
Tlf: + 47 67 06 33 00
Fax: +47 67 06 33 91
Salg@wilfa.com
According to Waste of Electrical and Electronic Equipment (WEEE) directive, WEEE should be separately collected and treated. If at any time in future you need to dispose of this product please do NOT dispose of this product with household waste. Please send this product to WEEE collecting points where available.
- V i k t i g e f o r h o l d s r e g l e
- F∅R F∅RSTE GANGS BRUK
- BRUKS-ANVISNING
- FÖRE FÖRSTA ANVÄNDNINGSTILLFÄLLET
- BRUKSANVISNING
- INDEN BRUG
- BETJENINGS-VEJLEDNING
- ADVARSEL! F∅R DU RENSER APPARATET, SKAL DU S∅RGE FOR AT DET ER HELT AFK∅LET.
- ENNEN ENSIMMÄISTÄ KÄYTTÖKERTAA
- KÄYTTÖ-OHJEET
- SAVE THESE INSTRUCTIONS FOR HOUSEHOLD USE ONLY SPECIAL CORD SET INSTRUCTIONS
- NOTICE
- CONTENTS
- PARTS AND FEATURES
- BEFORE THE FIRST USE
- ASSEMBLY INSTRUCTIONS
- OPERATING INSTRUCTIONS
- Using the kebab feature
- Using the hot dog feature
- Using both kebab and grill or griddle feature simultaneously
- USER MAINTENANCE
- CLEANING AND CARE CAUTION: BEFORE CLEANING APPLIANCE, MAKE SURE IT HAS COOLED DOWN COMPLETELY.
- STORAGE
Brand : WILFA
Model : MG-1600
Category : Barbecue