RAK-QH18PCBST - Air-conditioner HITACHI - Free user manual and instructions
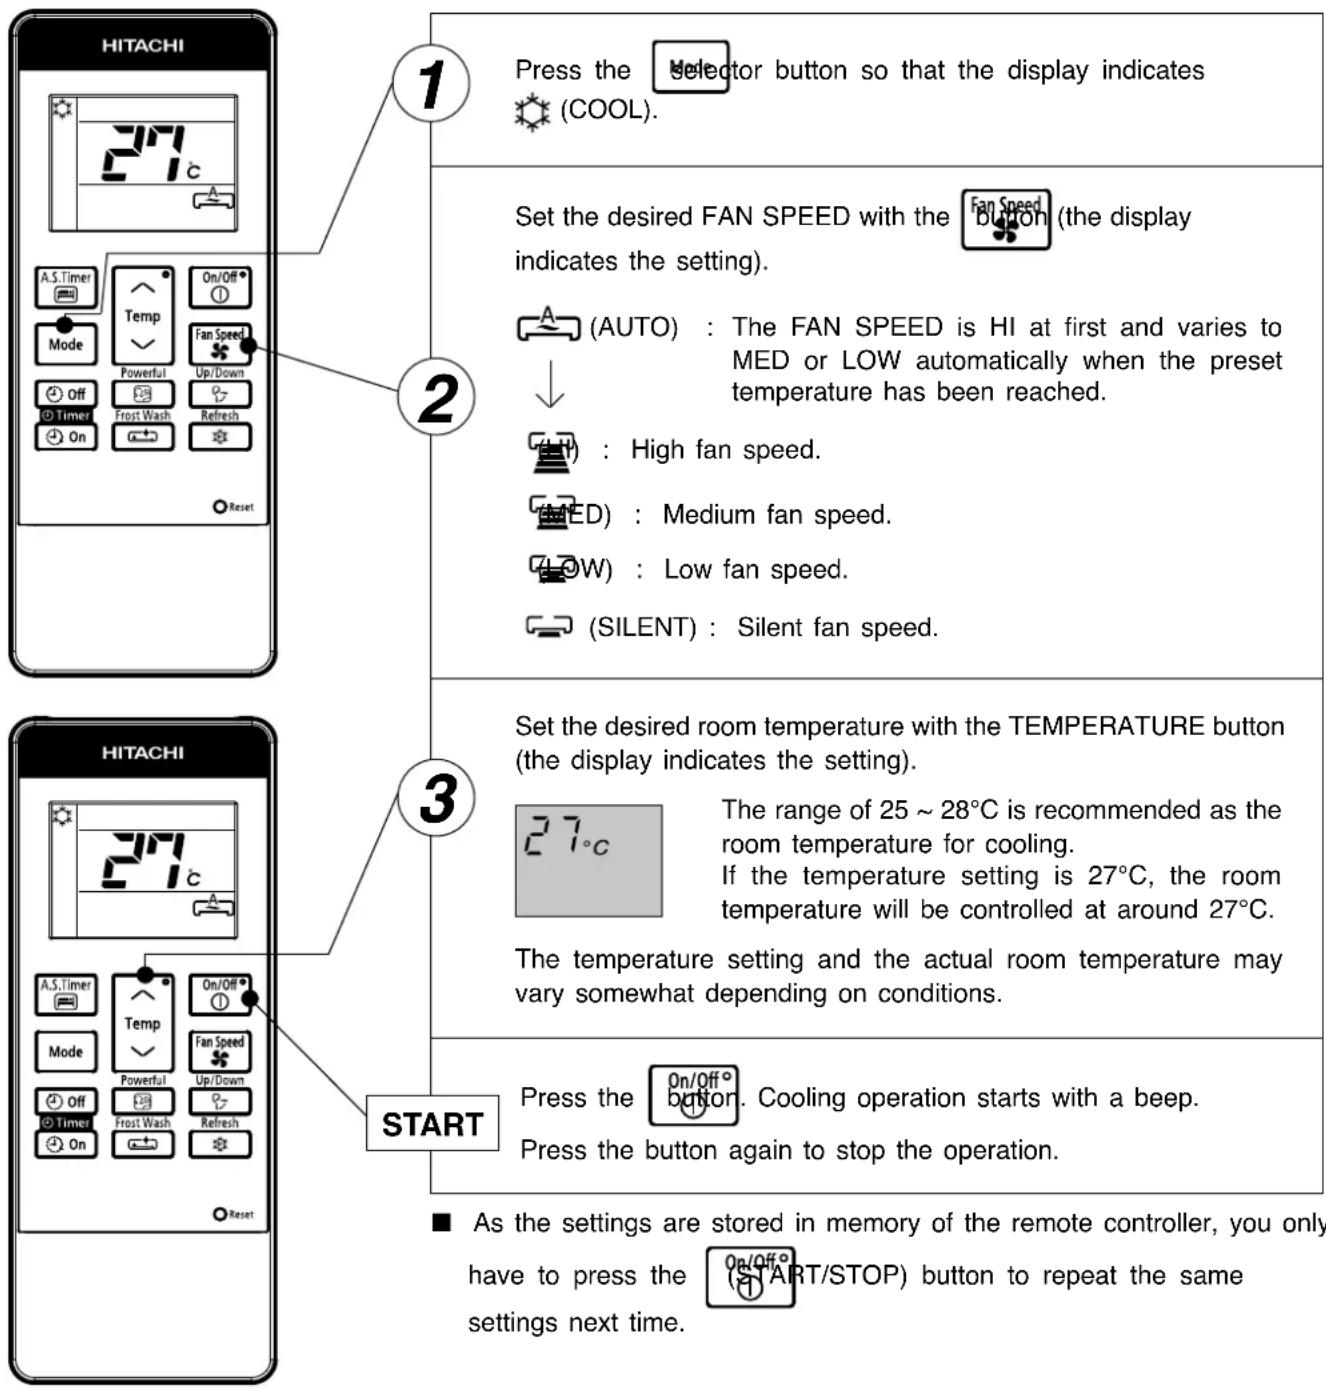
Find the device manual for free RAK-QH18PCBST HITACHI in PDF.

| Product Type | Split-type Air Conditioner (Cooling & Heating) |
| Indoor Unit Model | RAS-CH10PCAST / RAS-CH13PCAST |
| Outdoor Unit Model | RAC-CH10PCAST / RAC-CH13PCAST |
| Indoor Unit Dimensions (WxHxD) | 780 x 280 x 230 mm |
| Outdoor Unit Dimensions (WxHxD) | 658 x 530 x 275 mm |
| Power Supply | 220-240 V ~ 50 Hz |
| Refrigerant | R32 (flammable) |
| Fan Speeds | Auto, Silent, Low, Medium, High |
| Operating Modes | Cool, Silent, Dehumidify, Fan |
| Timer Functions | ON Timer (1-12 hours), OFF Timer (1-12 hours), Air Sleep Timer (1-10 hours) |
| Special Functions | Frost Wash, Refresh, One Touch Powerful, Auto Swing (horizontal) |
| Air Purifying Filter | Optional (not washable, vacuum clean, replace yearly) |
| Pre-filter | Washable, clean every 2 weeks |
| Remote Control Range | Approx. 7 meters |
| Safety Features | Earth line required, circuit breaker, 3-minute restart delay |
| Cooling Operating Temperature Range | Indoor: 21-32°C DB, Outdoor: 21-46°C DB |
| Heating Operating Temperature Range | Not specified (Cooling & Heating model) |
| Installation | Professional installation required, use specified piping for R32 |
| Maintenance | Clean filters regularly; professional inspection every 6-12 months |
| Spare Parts & Repairability | Authorized service centers only; supply cord replaceable with special cord; air purifying filter type available for order |
| Brand | Hitachi |
Frequently Asked Questions - RAK-QH18PCBST HITACHI
User questions about RAK-QH18PCBST HITACHI
0 question about this device. Answer the ones you know or ask your own.
Ask a new question about this device
Download the instructions for your Air-conditioner in PDF format for free! Find your manual RAK-QH18PCBST - HITACHI and take your electronic device back in hand. On this page are published all the documents necessary for the use of your device. RAK-QH18PCBST by HITACHI.
USER MANUAL RAK-QH18PCBST HITACHI
natural_image
Line drawing of a high-pressure air conditioner unit (no text or symbols)INDOOR UNIT
RAS-CH10PCAST
RAS-CH13PCAST
OUTDOOR UNIT
natural_image
Line drawing of a Hitachi air conditioner unit with fan and ventilation grille (no text or symbols)RAC-CH10PCAST
RAC-CH13PCAST
EN iINSTRUCTION MANUAL
TH คู่มีจการใช้งาน
Access the full version of the User Operation Manual by scanning the code.
https://docs.hitachiaircon.com/
RAS-CH-PCAST-RAC-CH-PCAST

Cooling & Heating
SAFETY PRECAUTION
- Please read the "Safety Precaution" carefully before operating the unit to ensure correct usage of the unit.
- Pay special attention to signs of “Warning” and “Caution”. The “Warning” section contains matters which, if not observed strictly, may cause death or serious injury. The “Caution” section contains matters which may result in serious consequences if not observed properly. Please observe all instructions strictly to ensure safety.
- The sign indicate the following meanings.

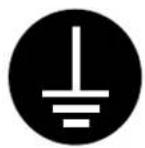
Make sure to connect earth line.

The sign in the figure indicates prohibition.

Indicates the instructions that must be followed.
- Please keep this manual after reading.
| EXPLANATION OF SYMBOLS DISPLAYED ON UNIT | |||||
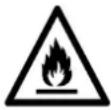 | WARNING | This symbol shows that this equipment uses a flammable refrigerant.If the refrigerant is leaked, together with an external ignition source, there is a possibility of ignition. |  | CAUTION | This symbol shows that a service personnel should be handling this equipment with reference to the Installation Manual. |
 | CAUTION | This symbol shows that the Operation Instructions should be read carefully. |  | CAUTION | This symbol shows that there is information included in the Operation Manual and/or Installation Manual |
PRECAUTIONS DURING INSTALLATION
!
WARNING

- Do not reconstruct the unit.
Water leakage, fault, short circuit or fire may occur if you reconstruct the unit by yourself.
- Please ask your sales agent or qualified technician for the installation of your unit. Water leakage, short circuit or fi re may occur if you install the unit by yourself.
- Please use earth line.
Do not place the earth line near water or gas pipes, lightning-conductor, or the earth line of telephone. Improper installation of earth line may cause electric shock.
- Be sure to use the specified piping set for R32. Otherwise, this may result in broken copper pipes or faults.
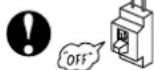
- A circuit breaker should be installed depending on the mounting site of the unit. Without a circuit breaker, the danger of electric shock exists.
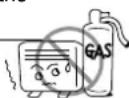
- Do not install the unit near a location where there is flammable gas. The outdoor unit may catch fire if flammable gas leaks around it.
- Please ensure smooth flow of water when installing the drain hose.

!
CAUTION
PRECAUTIONS DURING SHIFTING OR MAINTENANCE
!
WARNING
- Should abnormal situation arises (like burning smell), please stop operating the unit and turn off the circuit breaker. Contact your agent. Fault, short circuit or fire may occur if you continue to operate the unit under abnormal situation.

- Please contact your agent for maintenance. Improper self maintenance may cause electric shock and fire.
- Please contact your agent if you need to remove and reinstall the unit. Electric shock or fire may occur if you remove and reinstall the unit yourself improperly.
- If the supply cord is damaged, it must be replaced by the special cord obtainable at authorized service/parts centers.
- If the air conditioner is not cool, one possible cause could be due to refrigerant leakage, so consult your dealer. The refrigerant gas used in the air conditioner is harmless. But if refrigerant gas leaks into the room, harmful products are generated when in contact with fire from appliances such as a stove heater.
When there is refrigerant gas accumulation in the room, immediately stop the air conditioner. Open the windows for ventilation and contact your agent.
PRECAUTIONS DURING OPERATION
!
WARNING
- Avoid an extended period of direct air flow for your health.
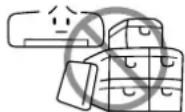
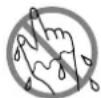
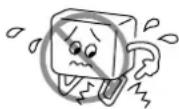
- Do not insert a finger, a rod or other objects into the air outlet or inlet. As the fan is rotating at a high speed, it will cause injury. Before cleaning, be sure to stop the operation and turn the breaker OFF.
- Do not use any conductor as fuse wire, this could cause fatal accident.
PRECAUTIONS DURING OPERATION
- The product shall be operated under the manufacturer specification and not for any other intended use.
- Do not attempt to operate the unit with wet hands, this could cause fatal accident.
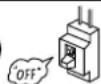
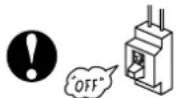
- During thunder storm, disconnect and turn off the circuit breaker.
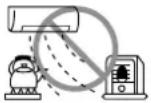
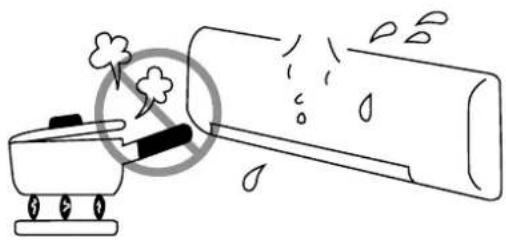
- Do not direct the cool air coming out from the air-conditioner panel to face household heating apparatus as this may affect the working of apparatus such as the electric kettle, oven etc.
- Please ensure that outdoor mounting frame is always stable, firm and without defect. If not, the outdoor unit may collapse and cause danger.
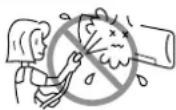
- Do not splash or direct water to the body of the unit when cleaning it as this may cause short circuit.
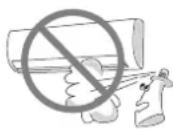
- Do not use any aerosol or hair sprays near the indoor unit. This chemical can adhere on heat exchanger fin and blocked the evaporation water flow to drain pan. The water will drop on tangential fan and cause water splashing out from indoor unit.
- Please switch off the unit and turn off the circuit breaker during cleaning, the high-speed fan inside the unit may cause danger.
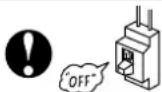
- Turn off the circuit breaker if the unit is not to be operated for a long period.
- Do not climb on the outdoor unit or put objects on it.
- Do not put water container (like vase) on the indoor unit to avoid water dripping into the unit. Dripping water will damage the insulator inside the unit and causes short-circuit.
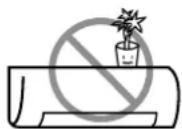

- Do not place plants directly under the air flow as it is bad for the plants.
- When operating the unit with the door and windows opened, (the room humidity is always above 80% ) and with the air deflector facing down or moving automatically for a long period of time, water will condense on the air deflector and drips down occasionally. This will wet your furniture. Therefore, do not operate under such condition for a long time.
- If the amount of heat in the room is above the cooling or heating capability of the unit (for example: more people entering the room, using heating equipments and etc.), the preset room temperature cannot be achieved.
- This appliance is not intended for use by persons (including children) who are physically handicapped sensory or mental or lack of experience and knowledge. Unless supervised or instructed on the use of electrical appliances by persons responsible for their safety.
INDOOR UNIT
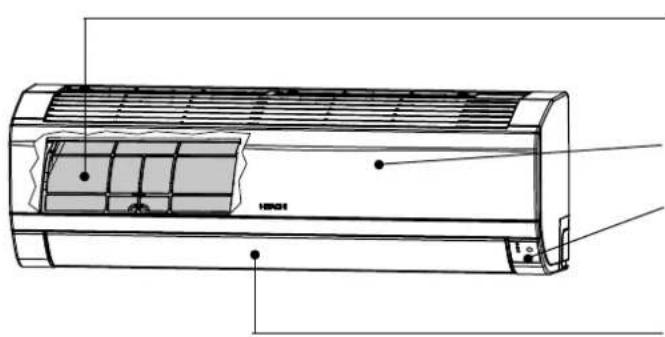
Pre-fi Iter
To prevent dust from coming into the indoor unit. (Refer page 21)
Front panel
Indoor unit indicators
Light indicator showing the operating condition. (Refer page 5)
Horizontal defl ector• Vertical defl ector (Air Outlet)
(Refer page 15)
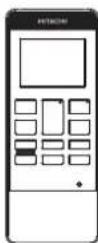
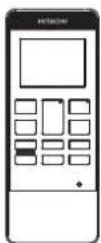
Remote controller
Send out operation signal to the indoor unit. So as to operate the whole unit. (Refer page 6)
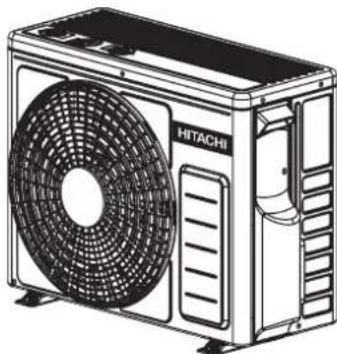
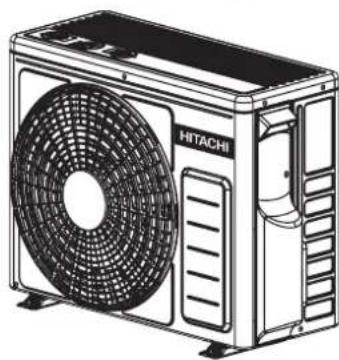
OUTDOOR UNIT

natural_image
Technical line drawing of a Hitachi air conditioner unit with fan and cooling pipes (no text or symbols)Drain pipe
Condensed water drain to outside.
Connecting cord and insulation pipe for piping
Air inlet (Back, Left side)
Air outlet
MODEL NAME AND DIMENSIONS
| MODEL | WIDTH (mm) | HEIGHT (mm) | DEPTH (mm) |
| RAS-CH10PCAST, RAS-CH13PCAST | 780 | 280 | 230 |
| RAC-CH10PCAST, RAC-CH13PCAST | 658 | 530 | 275 |
INDOOR UNIT INDICATORS
OPERATION LAMP
This lamp lights during operation.
FROST WASH LAMP
This lamp lights when the Frost Wash function is in operation. This lamp blinks to suggest operating manual FROST WASH operation after 200 hours of air conditioner cumulative usage. Please refer to page 16 for the details of Frost Wash operation.
TIMER LAMP
This lamp lights when the timer is working.


Temporary Switch


TEMPORARY SWITCH button
TEMPORARY SWITCH
Use this switch to start and stop when the remote controller does not work.
- By pressing the temporary switch, the operation is done in automatic mode.
- When the operation is done using the temporary switch after the power source is turned off and turn on again, the operation is done in automatic mode.
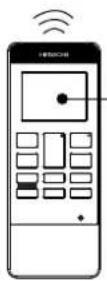
REMOTE CONTROLLER
This controls the operation of the indoor unit. Signal range to reach indoor unit is about 7 meters. If inverter lamp is used, the range of control may be shorter.
This unit can be fixed on a wall using the fixture provided. Before fixing it, make sure the indoor unit can be controlled from the remote controller.

Use the device for cooling when the outdoor temperature is 21 \~ 46°C.
If indoors humidity is very high (over 80%), some dew may form on the air outlet grille of the indoor unit.
NOTE
HI fan speed mode selected
When unit has been operating for a long period of time and the difference between remote controller setting temperature and actual room temperature is continuously large, the fan speed may increase causing higher air blow sound.
During the time, cooling capacity will be maximized. If the air blow sound causes any discomfort, please select "AUTO" or other than "HI" fan speed.

During Cooling mode, press the selector button so that the display indicates SILENT) along with the (COOL) symbol. Silent operation starts with a beep. The FAN SPEED will be automatically changed to SILENT.
CANCELLATION of SILENT Operation
| Cancel Condition | Operation mode after cancel | |
 | Key press | Stop operation |
| Mode | Key press | Selected mode operation |
 | Key press | COOLING operation in previous setting |
 | Key press | POWERFUL operation |
NOTE:
Under SILENT mode operation and quiet environment, phenomena like flowing noise of refrigerant in the refrigerating cycle may occur, but this is normal for the operation.
Use the device for dehumidifying when the room temperature is over 16°C.
When it is under 15^ C, the dehumidifying function will not work.
flowchart
graph TD
    A["1: Press the selector button so that the display indicates (DEHUMIDIFY)."] --> B["2: Set the desired room temperature with the TEMPERATURE button (the display indicates the setting)."]
    B --> C["3: The range of 20 ~ 26°C is recommended as the room temperature for dehumidifying."]
    C --> D["4: Press the button on/Off Dehumidifying operation starts with a beep. Press the button again to stop the operation."]
    D --> E["5: As the settings are stored in memory in the remote controller, you only have to select (DEHUMIDIFY) then press the button next time."]
■ Dehumidifying Function
When the room temperature is higher than the temperature setting: The device will dehumidify the room and reducing the room temperature to the preset level.
When the room temperature is lower than the temperature setting: Dehumidifying will be performed at the temperature setting slightly lower than the current room temperature, regardless of the temperature setting. The function will stop (the indoor unit will stop emitting air) as soon as the room temperature becomes lower than the setting temperature. You might feel a bit colder in dehumidifying operation.
In Fan operation mode the device is function as an air circulator.
As the settings are stored in memory in the remote controller, you
only have to select button next time.


(FAN) then press the

FAN Function
During FAN operation, compressor does not run and there is no cooling operation with only indoor fan running.

Press the
Powerful
button.
- Operation start with a signal received sound "beep".
- Unit will be forced operate in (COOL) with SUPER COOL fan speed for 60 minutes. Indicator appear during this period. (Operation lamp at indoor unit is blinking).
- After 60 minutes, operation lamp stop blinking and indicator will disappear while unit will be in (COOL) mode.
● Air blow sound will be slightly high due to forced operation.
CANCELLATION of POWERFUL Operation
| If feeling so cold,cancel this powerfulmode as mentioned in"CANCELLATION ofPOWERFUL operation". |
| Cancel Condition | Operation mode after cancel |
| Stop operation | |
| Selected mode operation(COOLING) →(SPENT)↓(FAN) ←(DEHUMIDIFY) | |
| AIR SLEEP TIMER operation | |
| COOLING operation in previous setting |
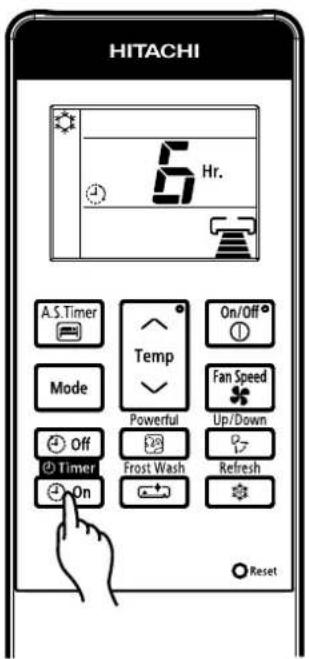
Press the

and the display changes as shown below.

| Mode | Indication |
| Air Sleep Timer | 1 hour interval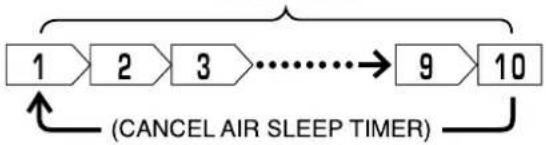 |
Air Sleep Timer: The device will continue working for the designated number of hours and then turn off.
Point the signal window of the remote controller toward the indoor unit, and press the AIR SLEEP TIMER button.
The timer information will be displayed on the remote controller. The TIMER lamp lights with a beep from the indoor unit.
Explanation of the air sleep timer
The device will control the FAN SPEED and room temperature automatically so as to be quiet and good for people's health.
You can set the sleep timer to turn off after 1,2,3 9 or 10 hours. The FAN SPEED and room temperature will be controlled as shown below.
Operation with the air sleep timer
| Function Operation | |
Cooling Silent[ DG CY ]andDehumidifying“ ◇ ” Silent[ DG CY ]andDehumidifying“ ◇ ” | The room temperature will be controlled 2°C above the setting temperature and the FAN SPEED will be set to LOWEST immediately after the setting of the air sleep timer. 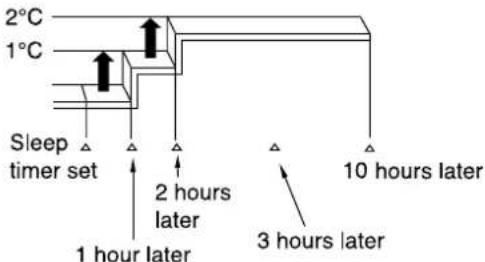 |
To slightly reduce air blow temperature of air conditioner and room humidity if unit has been operating for a long period of time for the day.
1
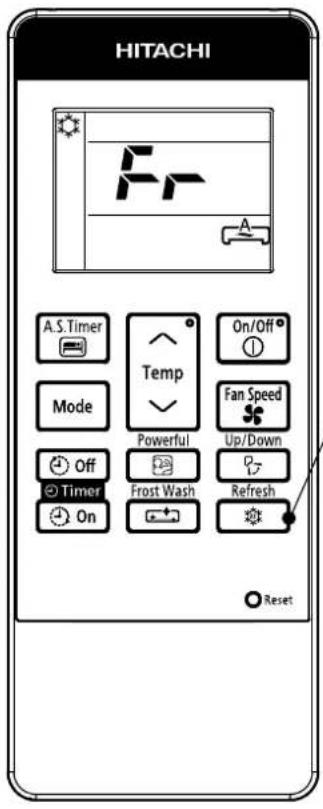
(a) During COOLING or SILENT operation, press the to start REFRESH operation.
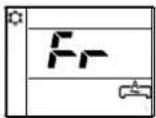
(b) REFRESH operation starts with a beep and "Fr" is displayed on the remote controller LCD for about 10 second.

(c) REFRESH operation will be in operation for 60 minutes. After 60 minutes the air blow temperature will return back gradually to previous condition.
(d) If the Refresh button is pressed again, REFRESH operation will be reset, step (b) and step (c) will be repeated.
CANCELLATION of REFRESH Operation
| Cancel Condition | Operation mode after cancel | |
 Key press Key press | Stop operation | |
 Key press Key press | Selected mode operation(COOLING)→(SIMENT)(FAN)←(DEHUMIDIFY) | |
 Key press Key press | AIR SLEEP TIMER operation in COOLING operation of previous setting | |
Press  or Press or Press  or Press or Press  | COOLING operation in previous setting | |
 Key press Key press | POWERFUL operation | |
 Key press Key press | OFF Timer/ON Timer operation in COOLING operation of previous setting | |
NOTE
The effectiveness of Refresh operation may not be significant in the following situation:
a) Cooling operation operates for a short time.
b) Unit is operated under high load condition such as to cool a big room, room which is directly expose to sunlight and high outside temperature.
c) Temperature setting by the remote controller is lower than recommended temperature for cooling operation (refer page 7)
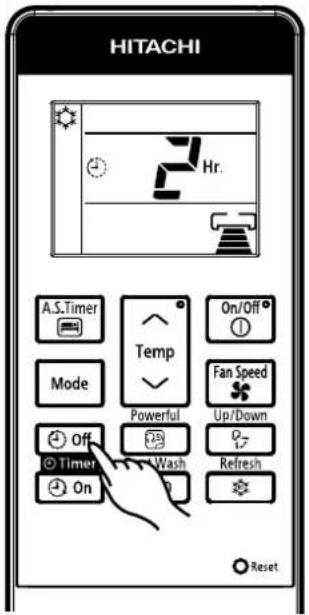
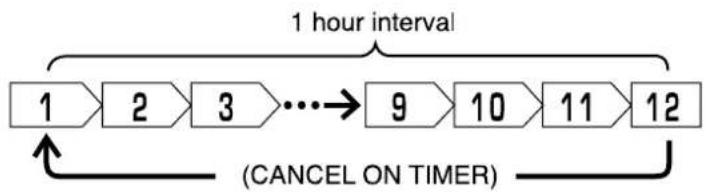
■ ON Timer and OFF Timer are available.
OFF Timer Reservation
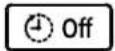
OFF TIMER setting
- Select the OFF TIMER by pressing the (OFF) Timer) Button.
- Setting time will change according to the below sequence when you press the button.

flowchart
graph LR
    A["1 hour interval"] --> B["2"]
    B --> C["3"]
    C --> D["..."]
    D --> E["9"]
    E --> F["10"]
    F --> G["11"]
    G --> H["12"]
    H --> I["(CANCEL OFF TIMER)"]
    I --> A
- After the OFF TIMER is set, the hour display will be counting down as time passes.
■ Operation stop at setting time
ON Timer Reservation
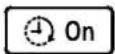
ON TIMER setting
- Select the ON TIMER by pressing the TIMER) Button.
- Setting time will change according to the below sequence.
flowchart
graph LR
    A["1 hour interval"] --> B["2"]
    B --> C["3"]
    C --> D["..."]
    D --> E["9"]
    E --> F["10"]
    F --> G["11"]
    G --> H["12"]
    H --> I["(CANCEL ON TIMER)"]
    I --> A
- After the ON TIMER is set, the hour display will be counting down as time passes.
■ Operation will start for setting temperature at setting time.

Adjustment of the conditioned air in the upward and downward directions.
The horizontal air deflector is automatically set to the proper angle suitable for each operation. The deflector can be swung up and down continuously and also set to the desired angle using the “Up/Down (AUTO SWING (HORIZONTAL))” button.
- If the “(AUTO SWING (HORIZONTAL))” button
is pressed once, the horizontal air defl ector swings up and down. If the button is pressed again, the defl ector stops in its current position. Several seconds (about 6 seconds) may be required before the defl ector starts to move. - Use the horizontal air deflector within the adjusting range shown on the right.
- When the operation is stopped, the horizontal air deflector moves and stops at the position where the air outlet closes.
CAUTION
- In "Cooling" operation, do not keep the horizontal air defl ector swinging for a long time. Some dew may form on the horizontal air defl ector and dew may drop.

Adjustment of the conditioned air to the left and right.
Hold the second vertical air deflector of each set of vertical air deflectors from right as shown in the figure and adjust the conditioned air to the left or right.
natural_image
Line drawing of a hand pressing down on the air conditioner panel, with an inset showing a close-up of the component (no text or symbols present)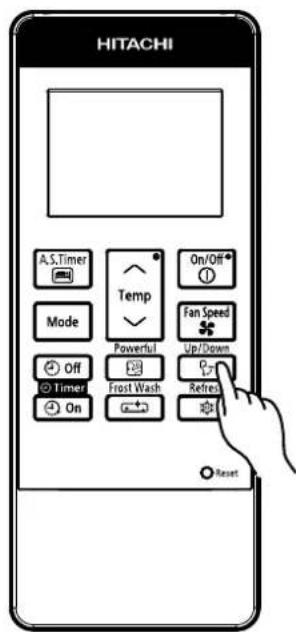

WARNING
Do not insert a finger, a rod or other objects into the air outlet or inlet as the fan is rotating at a high speed, it will cause injury. Before any cleaning or adjusting the deflectors, be sure to switch OFF the operation.
FROST WASH OPERATION (GENERAL INFORMATION)
Cleaning function by frosting the indoor exchanger and allowing melted water to wash away dust particles collected on surface of exchanger. This function only applicable during OFF mode.
Note
● Operate FROST WASH when under the following conditions
| Outdoor temperature | 21°C ~ 43°C |
| Indoor temperature | 21°C ~ 32°C |
● During FROST WASH operation, there could be sound generated during frosting and defrosting of heat exchanger.
● FROST WASH operation is only available when unit is in standby mode.
● During FROST WASH, LED Indicator will lit up.
- If air conditioner cumulative operation time has passed, F.Wash LED indicator will blink as reminder to user to operate FROST WASH function. (Blinking remain for max. 4 min. after stopping operation)
● FROST WASH is recommended to be operated every 2 weeks. Not operate FROST WASH would cause accumulation of dust or particles which would be difficult to be removed. In this case, manual servicing will be recommended.
- Failure to operate FROST WASH regularly, heat exchanger would be difficult to be cleaned up. If operate FROST WASH when much dust has accumulated on heat exchanger, fallen dust would cause the clogging of the drain flow path.
CAUTION
● During "FROST WASH" operation, please do not open the door and windows. Water will condense on unit surface and drip down.
● During "FROST WASH" operation, please do not open and remove the Front Panel. It may cause injury or malfunction.
FROST WASH (MANUAL OPERATION)

flowchart
graph LR
    A[""FROST WASH" operation About 120 min (max)"] --> B["Defrost period"]
    B --> C["Heat exchanger drying period Automatically stop"]
    D[""Normal operation (EX. Cooling operation)"] --> E["Unit stop"]
    E --> F["Fan period"]
    F --> G["FROST period"]
    G --> H["Operation start"]
    I[""Operation stop"] --> J["Frost Wash"]
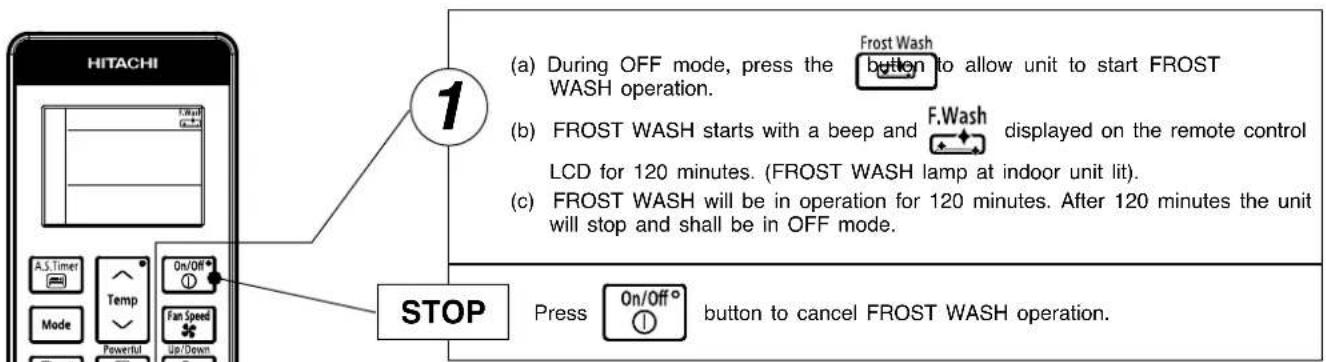
- The operation time of "FROST WASH" is around 120 min (max).
- It may reduce the operation time depending the room condition.
- During "FROST WASH" function, the horizontal deflector open.
- If Frost Wash is pressed immediately after unit operation is stopped, compressor will be prohibited for 3 min due to protection (However F.Wash LED Indicator will lit up)
- User can cancel "FROST WASH" operation by pressing ① On/Off° button.
- "Manual FROST WASH operation starts" operation is prohibited to run for 60 min after the last "FROST WASH (FROST period)" operation.
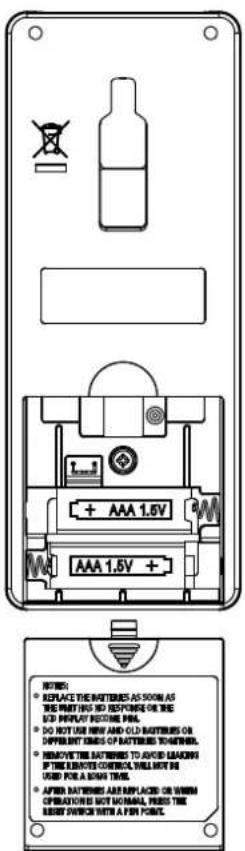
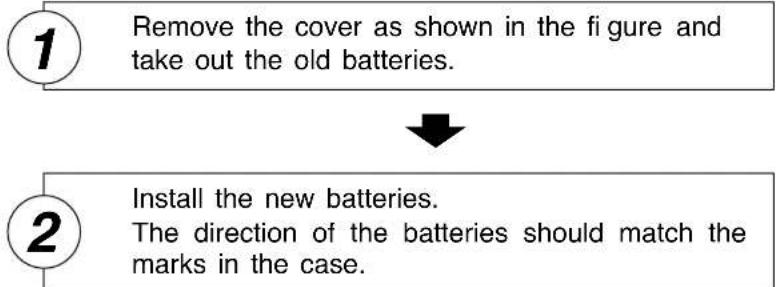
When using the remote control, if there is no response from the air conditioner unit and or the remote control has fading and dim displays, the batteries in the remote control device need to be removed and replaced with new ones
flowchart
graph TD
    A["1 Remove the cover as shown in the figure and take out the old batteries."] --> B["2 Install the new batteries. The direction of the batteries should match the marks in the case."]
CAUTION
- Do not use new and old batteries, or different kinds of batteries together.
- Take out the batteries when you do not use the remote controller for 2 or 3 months.
- Use high quality and high performance AAA batteries to avoid short operating life and electrolyte leakages.
- After batteries are replaced or when an operation is abnormal, press the reset button with a pen point.
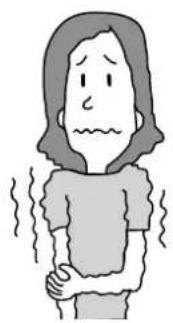
Suitable Room Temperature
natural_image
Illustration of a person with wavy lines indicating discomfort or pain (no text or symbols)Warning
Freezing temperature is bad for health and a waste of electric power.
Install curtain or blinds
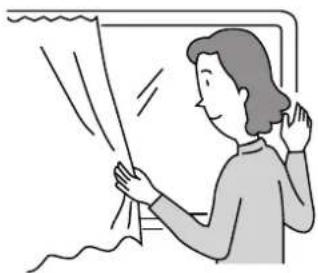
natural_image
Illustration of a person standing near a window with curtains, no text or symbols presentIt is possible to reduce heat entering the room through windows.
Ventilation
Caution
Do not close the room for a long period of time. Occasionally open the door and windows
to allow the entrance of fresh air.
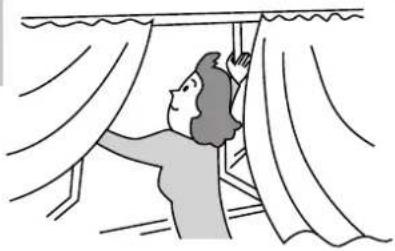
natural_image
Illustration of a person hanging from a window with curtains (no text or symbols)Effective Usage Of Timer
At night, please use the "OFF or ON timer or SLEEP timer operation mode", together with your wake up time in the morning. This will enable you to enjoy a comfortable room temperature. Please use the timer effectively.

Do Not Forget To Clean The Pre-Filter
Dusty air filter will reduce the air volume and the cooling efficiency. To prevent from wasting electric energy, please clean the filter every 2 weeks.
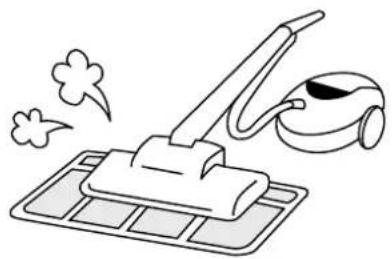
natural_image
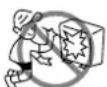
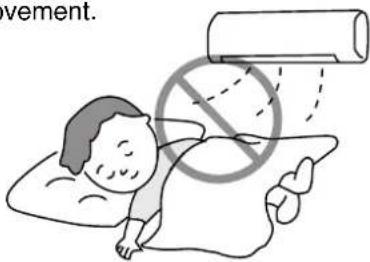
Line drawing of a vacuum cleaner with smoke and foam, no text or symbols presentPlease Adjust Suitable Temperature For Baby And Children
Please pay attention to the room temperature and air flow direction when operating the unit for baby, children and old folks who have diffi culty in movement.
The Air Conditioner And The Heat Source In The Room

Caution
If the amount of heat in the room is above the cooling capability of the air conditioner (for example: more people entering the room, using heating equipments and etc.), the preset room temperature cannot be achieved.
natural_image
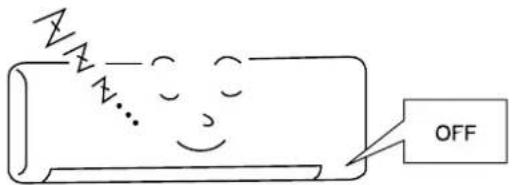
Simple line drawing of a fire extinguisher emitting smoke, with no text or symbols present.Not Operating For A Long Time
When the indoor unit is not to be used for a long period of time, please switch off the power from the mains. If the power from mains remains "ON", the indoor unit still consumes about 2.5W in the operation control circuit even if it is in "OFF" mode.
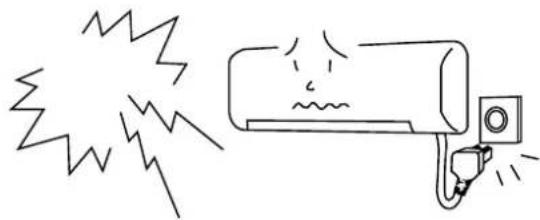
When Lightning Occurs

Warning
To protect the whole unit during lightning, please stop operating the unit and remove the plug from the socket.
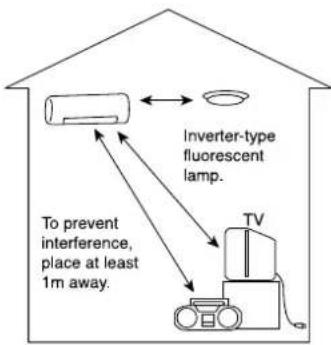
natural_image
Simple line drawing of a wall-mounted air conditioner with exhaust plume and fan (no text or symbols)Interference From Electrical Products

Caution
To avoid noise interference, please place the indoor unit and its remote controller at least 1m away from electrical products.
CAUTION
Before cleaning, stop operation and switch off the power supply.

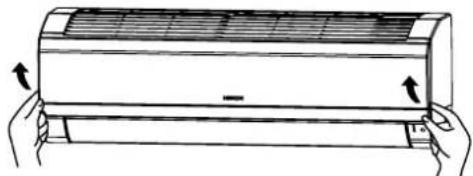
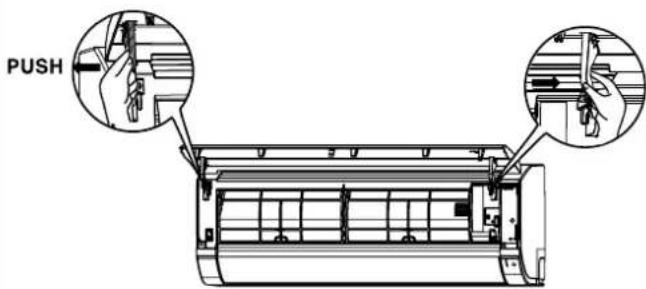
Open the front panel
- Pull up the front panel by holding it at both sides with both hands.

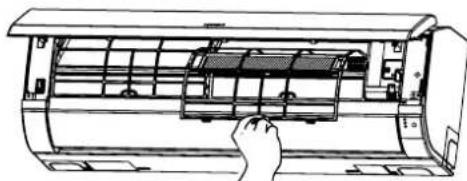
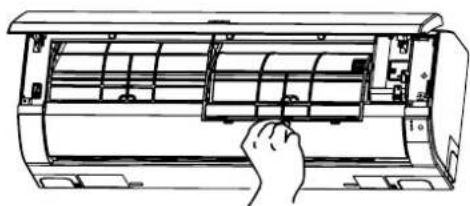
Remove the Pre-fi Iter
- Push upward to release the claws and pull out the Pre-fi iter.

Attaching the air purifying filters
- Attach the air purifying filters to the C-case by gently inserting from the either side and securely fitted as shown in diagram. Do not bend the frame or edge of the filters.
- Bring the C-case to the back side of the pre-fi iter. Insert it claws on left and right to the C-case fi xing slot securely.
CAUTION
Do not bend the air purifying fi Iter as it may cause damage to the structure.
Please do not smell direct from source of filter.
natural_image
Illustration of hands holding a large air conditioner unit with cooling fins (no text or symbols)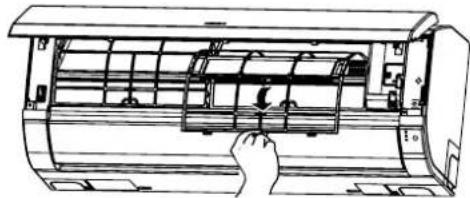
natural_image
Line drawing of a hand inserting a component into an air conditioner unit (no text or symbols visible)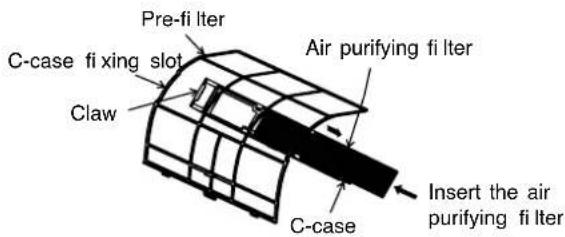
natural_image
Line drawing of a hand inserting a component into an air conditioner unit (no text or symbols)
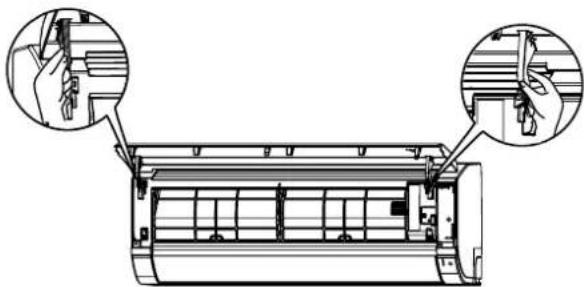
Attach the Pre-fi Iters
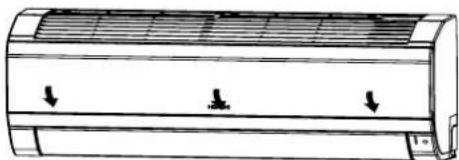
- Attach the Pre-filters by ensuring that the surface written "FRONT" is facing front.
- After attaching the Pre-filters, push the front panel at three arrow portions as shown in figure and close it.
natural_image
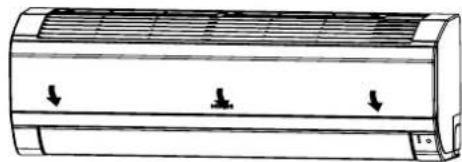
Diagram of a cylindrical air conditioner unit with three downward arrows indicating cooling or ventilation direction (no text or symbols present)NOTE
- In case of removing the air purifying filters, please follow the above procedures.
- The cooling capacity is slightly weakened and the cooling speed becomes slower when the air purifying filters are used. So, set the fan speed to "HIGH" when using it in this condition.
- Air purifying filters are not washable. It is recommended to use vacuum to clean it. It can be used for 1 year time. Type number for this air purifying filter is
. Please use this number for ordering when you want to renew it.
CAUTION
Before cleaning, stop operation and switch off the power supply.
1. PRE-FILTER
Clean the Pre-filter, as it removes dust inside the room. In case the Pre-filter is full of dust, the air flow will decrease and the cooling capacity will be reduced. Further, noise may occur. Be sure to clean the Pre-fi iter following the procedure below.
PROCEDURE

Open the front panel and remove the Pre-fi Iter
- Gently lift and remove the air purifying filters from the air purifying filter frame.
natural_image
Illustration of hands holding a cylindrical air conditioner unit with cooling fins (no text or symbols)
Vacuum dust from the Pre-fi Iter and air purifying fi Iter using vacuum cleaner. If there is too much dust, rinse under running tap water and gently brush it with soft bristle brush. Allow filters to dry in shade.
natural_image
Line drawing of a hand inserting a fan into an air conditioner unit (no text or symbols)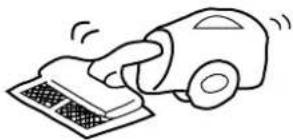
natural_image
Simple line drawing of a hand using a car to clean or remove the surface (no text or symbols)
- Re-insert the air purifying filter to the filter frame. Set the Pre-filter with "FRONT" mark facing front, and slot them into the original state.
- After attaching the Pre-filters, push the front panel at three arrow portions as shown in figure and close it.
natural_image
Diagram of a cylindrical air conditioner unit with airflow arrows indicating down or up motion (no text or symbols)CAUTION
- Do not wash with hot water at more than 40°C. The Pre-filters may shrink.
- When washing it, shake off moisture completely and dry it in the shade; do not expose it directly to the sun. The Pre-fi Iters may shrink.
- Do not use detergent on the Pre-filter as some detergent may deteriorate the Pre-filter electrostatic performance.
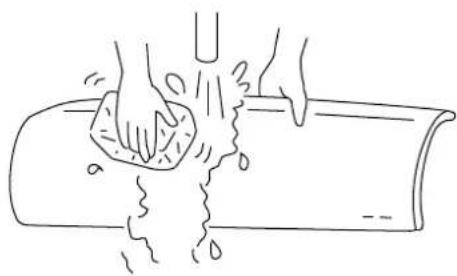
2. CLEANING OF FRONT PANEL
- Remove the front panel and wash with clean water. Wash it with a soft sponge.
After using neutral detergent, wash thoroughly with clean water.
- When front panel is not removed, wipe it with a soft dry cloth. Wipe the remote controller thoroughly with a soft dry cloth.
- Wipe the water thoroughly. If water remains at indicators or signal receiver of indoor unit, it causes trouble.
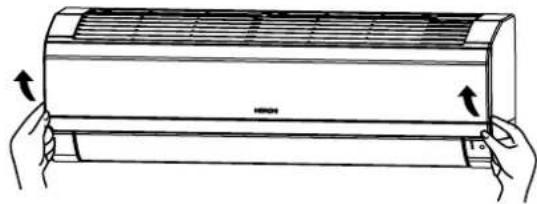
Method of removing the front panel.
Be sure to hold the front panel with both hands to detach and attach it.
natural_image
Line drawing of hands washing a cylindrical object with liquid, no text or symbols present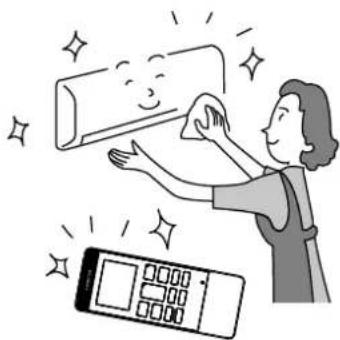
natural_image
Illustration of a woman cleaning a wall with a digital timer and sparkle effects (no text or symbols)Removing the Front Panel
-
Push the end of the right-side arm outward to release the right tab.
-
Move the left-side arm outward to release the left tab and then pull the panel towards you.
Attaching the Front Panel
natural_image
Technical line drawing of a car air conditioner unit with two hand-cranked views showing internal components (no text or symbols)-
Insert the shaft of the left arm along the step on the unit into the hole.
-
Securely insert the shaft of the right arm along the step on the unit into the hole.
-
Make sure that the front panel is securely attached an then close the front panel.
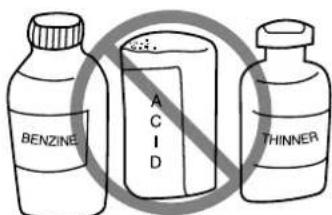
CAUTION
- Never use hot water (above 40°C), benzine, gasoline, acid, thinner or a brush, because they will damage the plastic surface and the coating.
CAUTION
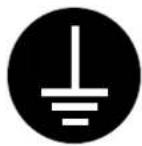
- Please use earth line.
Do not place the earth line near water or gas pipes, lightning-conductor, or the earth line of telephone. Improper installation of earth line may cause electric shock.
- A circuit breaker should be installed depending on the mounting site of the unit. Without a circuit breaker, the danger of electric shock exists.
IMPORTANT
The wires in this mains lead are coloured in accordance with the following code:
Green-and-yellow : Earth
Blue : Neutral
Brown : Live
As the colours of the wires in the mains lead of this appliance may not correspond with the coloured markings identifying the terminals in your plug, proceed as follows:
The wire which is coloured green-and-yellow must be connected to the terminal in the plug which is marked with the letter E or by the earth symbol or coloured green or green-and-yellow.
The wire which is coloured blue must be connected to the terminal which is marked with the letter N or coloured black.
The wire which is coloured brown must be connected to the terminal which is marked with the letter L or coloured red.
NOTE
If the supply cord is damaged, it must be replaced by the special cord obtainable at authorized service/parts centers.
CAUTION
Cleaning and maintenance must be carried out only by qualified service personnel. Before cleaning, stop operation and switch off the power supply.
REGULAR INSPECTION
PLEASE CHECK THE FOLLOWING POINTS BY QUALIFIED SERVICE PERSONNEL EITHER EVERY HALF YEARLY OR YEARLY. CONTACT YOUR SALES AGENT OR SERVICE SHOP.
| 1 | 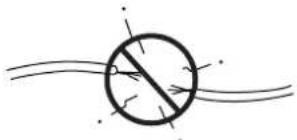 | Is the earth line disconnected or broken? |
| 2 |  | Is the mounting frame seriously affected by rust and is the outdoor unit tilted or unstable? |
| 3 |  | Is the plug of power line fi rmly plugged into the socket?(Please ensure no loose contact between them). |
WHEN ASKING FOR SERVICE, CHECK THE FOLLOWING POINTS
| CONDITION CHECK THE FOLLOWING POINTS | |
| When it does not operate | Is the fuse all right?Is the voltage extremely high or low?Is the circuit breaker “ON”? |
| When it does not cool well | Was the air filter cleaned?Does sunlight fall directly on the outdoor unit?Is the air flow of the outdoor unit obstructed?Are the doors or windows opened, or is there any source of heat in the room?Is the set temperature suitable? |

natural_image
Illustration of a smiling man in a suit giving two thumbs up (no text or symbols)Notes
- In quiet or stop operation, the following phenomena may occasionally occur, but they are not abnormal for the operation.
(1) Slight flowing noise of refrigerant in the refrigerating cycle.
(2) Slight rubbing noise from the fan casing which is cooled and then gradually warmed as operation stops.
- The odor will possibly be emitted from the room air conditioner because the various odor, emitted by smoke, foodstuffs, cosmetics and so on, sticks to it. So the air filter and the evaporator regularly must be cleaned to reduce the odor.
- Please contact your sales agent immediately if the air conditioner still fails to operate normally after the above inspections. Inform your agent for the model of your unit, serial number, date of installation. Please also inform him regarding the fault.
- Power supply shall be connected at the rated voltage, otherwise the unit will be broken or could not reach the specified capacity.
Please note:
On switching on the equipment, particularly when the room light is dimmed, a slight brightness fluctuation may occur. This is of no consequence.
The conditions of the local Power Supply Companies are to be observed.
Note
- Avoid to use the room air conditioner for cooling operation when the outside temperature is below 21°C (70°F).
The recommended maximum and minimum operating temperatures of the hot and cold sides should be as below:
| Minimum | Maximum | ||
| Indoor Dry bulb | °C 21 32 | ||
| Wet bulb °C 1 | 5 23 | ||
| Outdoor Dry bulb | °C 21 46 | ||
| Wet bulb °C 1 | 5 26 |
MEMO
คู่มิจ
การใช้งาน
natural_image
Line drawing of a HROH air conditioner unit (no text or symbols on the body)เครื่องภายใน
RAS-CH10PCAST
RAS-CH13PCAST
เครื่องภาษานอก
natural_image
Line drawing of a Hitachi air conditioner unit with fan and ventilation slots (no text or symbols)RAC-CH10PCAST
RAC-CH13PCAST
EN rINSTRUCTION MANUAL
TH คู่มิจการใช้งาน
Cooling & Heating
natural_image
Technical line drawing of a refrigerated air conditioner unit (no text or symbols)natural_image
Line drawing of hands installing or adjusting the air conditioner panel inside a large fan (no text or symbols present)
คำเตือน
natural_image
Illustration of a person with wavy lines indicating discomfort or pain (no text or symbols)
คำเตือน
natural_image
Illustration of a person opening a window with curtains, no text or symbols presentnatural_image
Illustration of a person hanging from a window with curtains (no text or symbols)natural_image
Illustration of a vacuum cleaner on a grid base with smoke and motion lines (no text or symbols)natural_image
Illustration of a person lying on their back with a no-smoking symbol overlay (no text or symbols present)natural_image
Simple line drawing of a washing machine emitting exhaust smoke from a bottle (no text or symbols)natural_image
Simple line drawing of a car with exhaust smoke and a wall-mounted fan (no text or symbols)natural_image
Illustration of hands holding a large air conditioner unit with cooling fins and airflow arrows (no text or symbols)natural_image
Line drawing of an air conditioner unit with a hand inserting a spring into the chamber (no text or symbols)natural_image
Line drawing of an air conditioner unit with a hand inserting a component (no text or symbols)natural_image
Line drawing of a car air conditioner unit with three downward arrows indicating airflow or cooling zones (no text or symbols)หมายเหตุ
natural_image
Illustration of hands holding a large air conditioner panel with cooling fins (no text or symbols)natural_image
Line drawing of an air conditioner unit with a hand inserting a spring-loaded component (no text or symbols)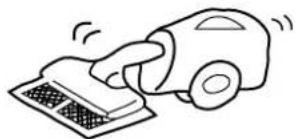
natural_image
Simple line drawing of a hand using a vacuum cleaner to clean or remove the surface (no text or symbols)natural_image
Diagram of a car air conditioner unit with cooling fins and airflow arrows (no text or labels)ข้อควรระวัง
natural_image
Line drawing of hands washing a cylindrical object with liquid, no text or symbols present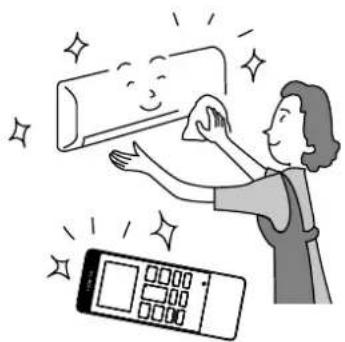
natural_image
Illustration of a woman cleaning a wall with a digital timer and sparkles (no text or symbols)natural_image
Technical line drawing of a car air conditioner unit with hand tool insertion (no text or symbols)natural_image
Technical line drawing of an air conditioner unit with two close-up insets showing hand positioning (no text or symbols)ข้อควรระวัง