
SWS 4440 - Weather Station SENCOR - Free user manual and instructions
Find the device manual for free SWS 4440 SENCOR in PDF.


| Product Type | Color Display Weather Station with Wireless Outdoor Sensor |
| Brand | Sencor |
| Model | SWS 4440 |
| Dimensions (Main Unit) | 138 x 84 x 27 mm |
| Weight (Main Unit) | 166 g |
| Power Supply (Main Unit) | 3 x 1.5V AA batteries (not included) or 5V 1.2A DC adapter (included) |
| Power Supply (Outdoor Sensor) | 2 x 1.5V AA batteries (not included) |
| Transmission Frequency | 433.92 MHz |
| Transmission Range | Up to 80 m in open area |
| Weather Forecast Icons | 5 statuses: Sunny, Partly Cloudy, Cloudy, Rainy, Snowy |
| Time Synchronization | RCC-DCF automatic time adjustment |
| Alarm | Alarm with snooze function (5-60 minutes) |
| Temperature Range (Indoor) | -9°C to +50°C |
| Temperature Range (Outdoor) | -40°C to +60°C |
| Humidity Range | 1% to 99% |
| Number of Supported Sensors | Up to 3 (1 included) |
| Barometric Pressure Range | 850-1100 hPa; units: hPa/mb, inHg, mmHg |
| Backlight | 3 modes: Bright, Dim, Off (DC mode); 20 sec on battery |
| Display Languages | 8 languages: English, Czech, German, French, Spanish, Italian, Dutch, Danish |
| Mounting Options | Table standing or wall hanging |
| Outdoor Sensor Protection | IP54, waterproof for daily use |
| Complete Package Contents | 1 x Digital Weather Station, 1 x Remote Sensor, 1 x User Manual, 1 x DC Adapter |
| Warranty | 24 months from date of purchase |
Frequently Asked Questions - SWS 4440 SENCOR
User questions about SWS 4440 SENCOR
0 question about this device. Answer the ones you know or ask your own.
Ask a new question about this device
Download the instructions for your Weather Station in PDF format for free! Find your manual SWS 4440 - SENCOR and take your electronic device back in hand. On this page are published all the documents necessary for the use of your device. SWS 4440 by SENCOR.
USER MANUAL SWS 4440 SENCOR
We thank you for the purchase of our Color Display Weather Station. It has been designed and constructed using innovative components and techniques to enable the perfect display by this device. This unit is also equipped with an outdoor sensor and a power adaptor.
Please read the entire instruction manual before using the product and then save it for future reference. We reserve the right for any errors in test or images and any necessary changes made to technical data.
Things to consider:
- Other wireless equipment using the same frequency band can reduce the transmission range.
- The range of all wireless equipment depends on the type of obstacles located between the transmitter and the receiver (e.g. a concrete wall will interfere with the signal much more than a plasterboard wall).
If you experience problems, try the following:
- Turn off any other existing wireless equipment to check whether this is the cause of the problem.
- Move any other existing wireless equipment. Shorten the distance between the sending and receiving devices and reduce the number of obstacles(walls, furniture, etc.) between them.
- Try removing and reassembling batteries, if the batteries are old, try new ones.
SAFETY AND GUIDE
Do not clean any part of the product with benzene, thinner or other solvent chemicals. If necessary, clean it with a soft cloth.
Do not dismantle or modify the product in any way.
Never immerse the product in water, It will damage the product.
Do not subject the product to extreme force, shock, or fluctuations in temperature or humidity.
Do not tamper with the internal components.
Do not use used batteries.
Do not use different types of batteries alkaline, standard or rechargeable batteries with this product.
Remove the batteries if storing this product for a long period of time, otherwise the battery might damage the product.
Do not dispose of this product as unsorted municipal waste, it's necessary to separately collect it for special treatment.
Do not place the main unit in rain or moisture. The transmit range depends on the type of obstacles located between the transmitter and the receiver (e.g. a concrete wall will interfere with the signal much more than a plasterboard wall).
Be sure the sensor is mounted vertically, to allow moisture to drain out properly.
Place out of direct sunlight & ensure the sensor is well-ventilated.
The distance between main unit and sensors should be at least 5\~6.5 feet (1.5\~2 meters) away from any interfering sources such as computer monitors or TV sets.
The main unit stay away from the metal window frames.
Please do not use other electrical products such as headphones or microphone operating on the same signal frequency. (433.92MHz), neighbors using electrical devices operating on the same signal frequency can also cause interference.
Place the main unit in a dry area, free of dirt and dust. To ensure accurate temperature measurement, place out of direct sunlight and away from heat sources or vents.
PACKAGE CONTENTS
1 x Digital Weather Station
1 x Remote Sensor
1 x User Manual
1*DC Adaptor
(Batteries are not included)
POWER SUPPLY
MAIN UNIT INSTALLATION
- Remove the protective film that is applied to the LCD screen prior to using the product.
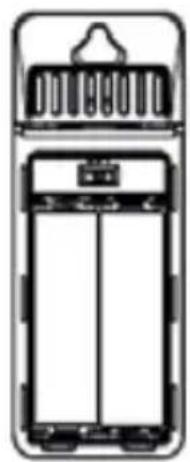
- Open the battery compartment cover, plugged in with power adapter and use, battery-power is optional, since previous setting will be reset when plugged out, we recommend install the batteries for the base station.
● Base station can stand upright on the table or mount on the wall.
SENSOR INSTALLATION
Base station supports up to 3 sensors connection, the sensor switch is located inside the battery compartment, it can be switched 1,2,3,
matching the info of Channel 1, Channel 2, Channel 3 that synchronize on the OUTDOOR position.
- Remove the battery compartment cover, chose the channel (1,2,3) by switching the channel shift.
- Insert 2 x AA batteries matching the correct polarity (+ and -), the red led light will flash for once, then assemble the battery compartment.
- During connection of main unit and sensor, make sure they are close to each other. Once connected, free to put the sensor the position you desire, upwardly.
natural_image
Technical line drawing of a mechanical device with no visible text or symbols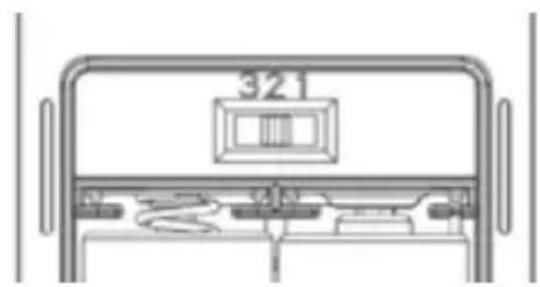
natural_image
Technical line drawing of a mechanical component with no visible text or symbolsEN-4
Low Battery Indicator
When battery power for main unit is lower than 3.6V, or when the power for remote sensor is lower than 2.5V, the low battery indicator will display on the LCD.
When it is powered by DC adaptor, the batteries are for memory function. If the low battery indicator for main unit still shows, that means the batteries' power for main unit is lower than 3.6V, please check the batteries situation.
To avoid batteries runs out, getting rotten and damage the units. please change batteries on time when low battery indicator appear.
Please use alkaline dry batteries, do not use rechargeable batteries.
OVERVIEW
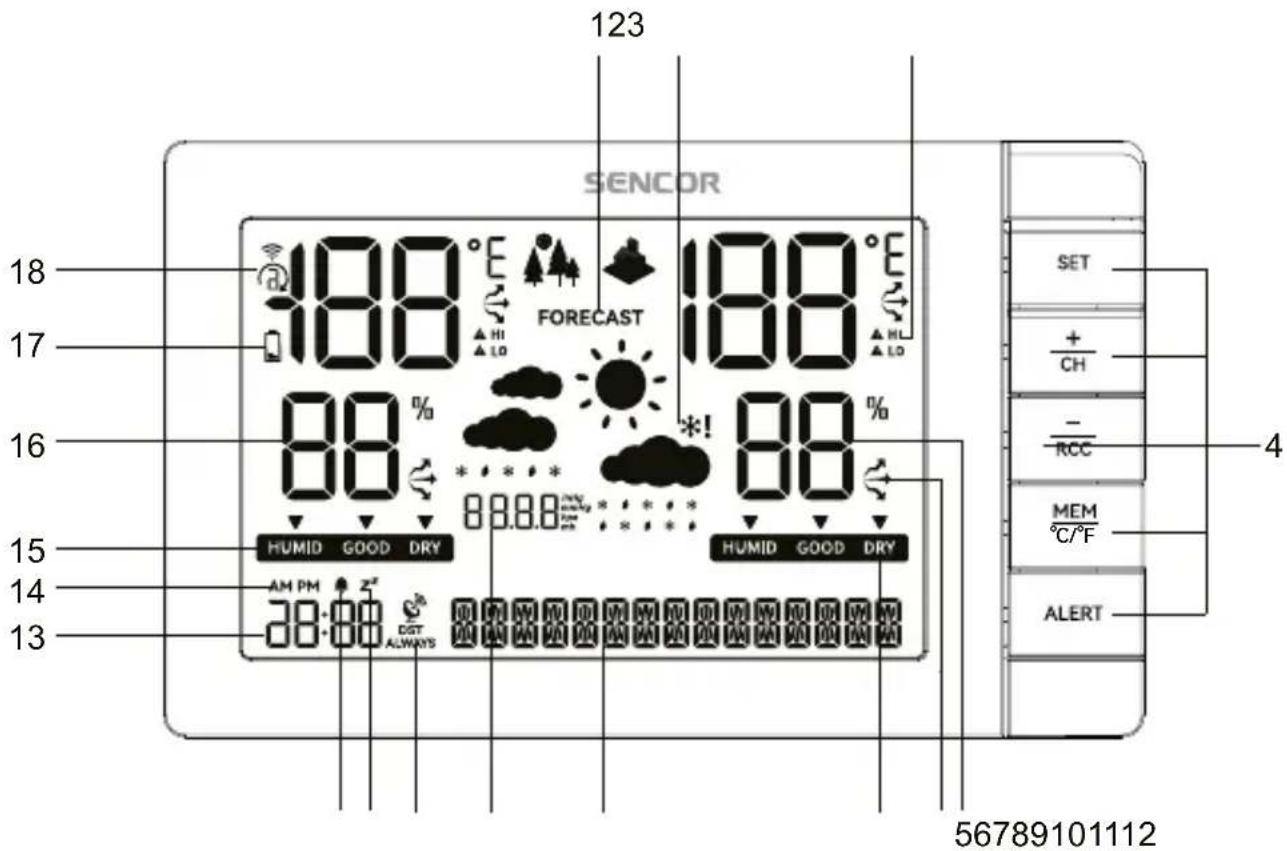
- Weather Forecast
-
Freezing Alert
-
HI & Lo Temperature Alert
- Buttons: SET, +/CH, -/RCC, MEM/°C/°F, ALERT
- Indoor temperature and humidity
- Trends for temperature and humidity
- Comfortable Indicator for main unit
- Calendar & Snooze Time
- Barometer Pressure Value
- RCC
- Snooze
- Alarm
- Time
- 12 hours format in AM/PM
- Comfortable Indicator for outdoor sensor
- Outdoor temperature and humidity
- Low battery Indicator (sensor)
- Sensor Channel and cycling display icon
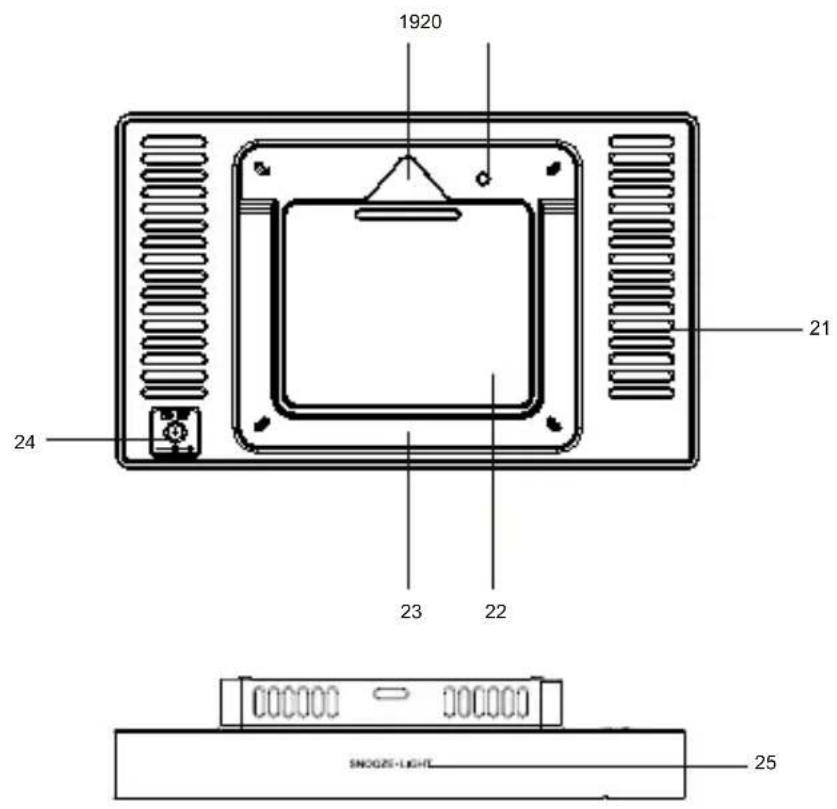
EN - 6
- Hanging Hole
- Alarm buzz hole
- Ventilation hole for temperature and humidity
- Battery Compartment cover
- Stand
- DC Jack
- Top Touch Button: SNOOZE·LIGHT
SENSOR
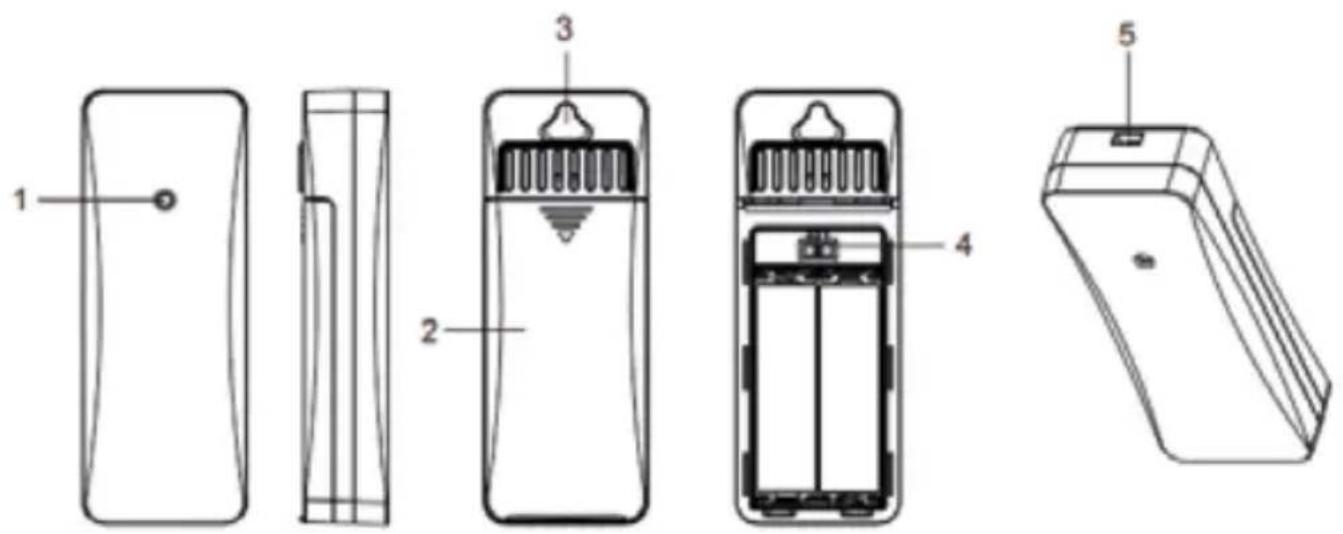
- LED light
- Battery compartment Cover
- Hanging hole
- Channel shift
- Rope hanging hole
Waterproofing for daily use, lever: IP54.
When the red led light flash, it is sending signal to main unit.
Be sure our sensor is mounted vertically, to allow moisture to drain out properly.
Keep out of direct sunlight & ensure the sensor is well-ventilated.
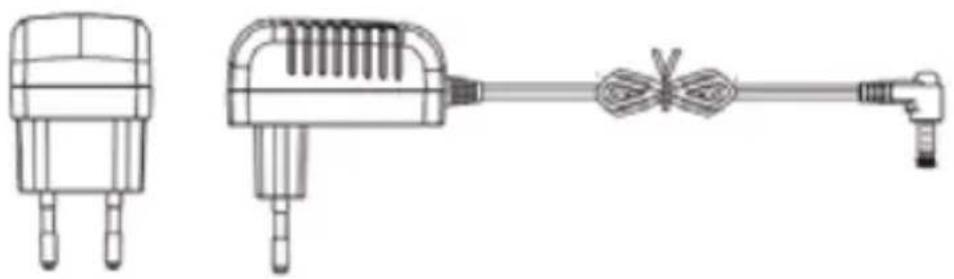
DC ADAPTOR
natural_image
Technical line drawings of three electronic components: a plug, a connector with a cable, and a terminal connector (no text or symbols present)To get accurate readings, please keep the main unit away from any unusual source of heat or cold and make sure that the outdoor sensor is also protected from direct sunlight, rain, or the heat it may experience from being mounted on a warm wall, or be closed near to a warm wall.
SENSOR INSTALLATION
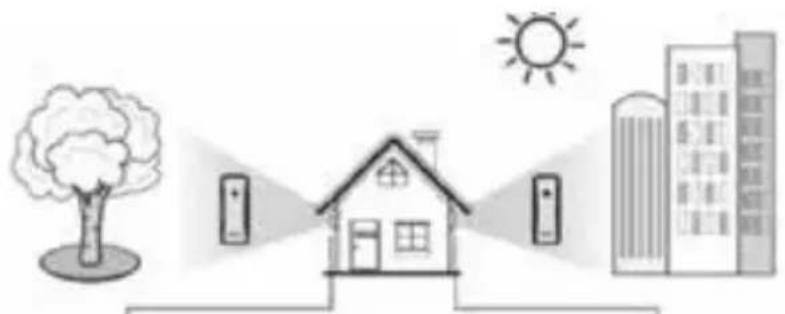
The data of weather forecast and outdoor humidity & temperature come from outdoor sensors. Make sure the outdoor sensor is placed in proper place. Take an example:
natural_image
Illustration of a smart home with surveillance camera, trees, and city buildings under a sun (no text or symbols)If place the sensor here, the temperature goes down, the humidity goes up.
If place the sensor there, the temperature goes up, the humidity goes down.
(1) This is forbidden, if the outdoor sensor is directly exposed to rain, facing direct sunlight and close to any heat source.

(2) Keep well-ventilated and leave a certain space of gap between the sensor and the wall to avoid blocking the vent of the sensor.
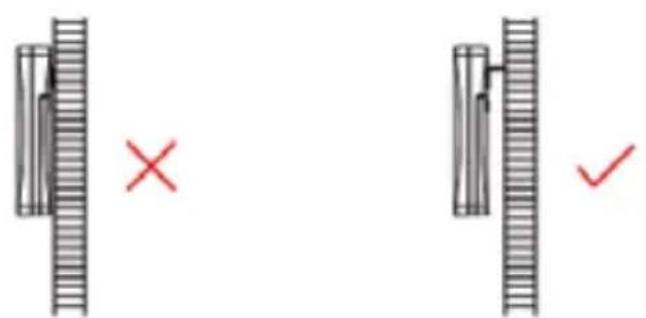
(3) Place the sensor at a height about 1.2-2.5 meters/3.93-8.20 feet vertically.
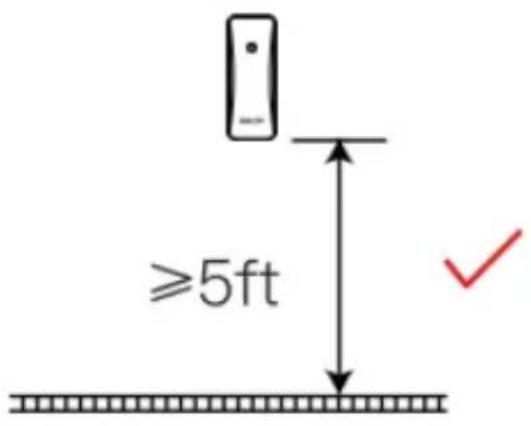
EN - 9
(4) Make sure sensor is close to the main unit. Avoid thick walls between the units or strong interference source using same signal frequency(433Ghz). (such as TVs, microwaves, computers, etc).
(5) If the main unit disconnects most likely the sensor is too far from the main unit. Please place it nearer to the sensor. Transmission Range: 80m in Open Air.
(The sensor is the unit that connects to the main unit and transfer the signal to the main unit.)
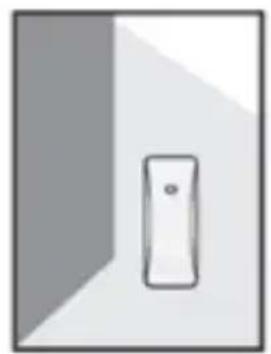
(6) Vertically placement is required:
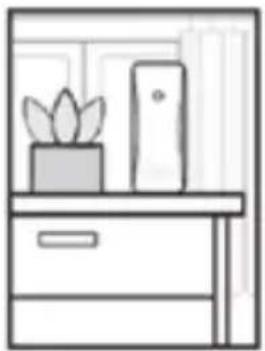
natural_image
Simple line drawing of a cabinet with a potted plant on top and a door on the shelf (no text or symbols)Place on a stable surface
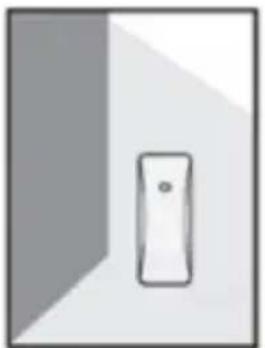
natural_image
Simple line drawing of a door with a vertical handle, no text or symbols presentHang from the back hole using a nail
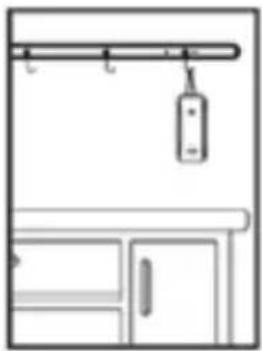
natural_image
Simple line drawing of a kitchen sink with hanging bag and door (no text or symbols)Lift with a rope
Note: Allow the main unit and the sensor together at the same position or 30 minutes to establish a strong connection.
Main Unit Position Recommendation
Make sure the main unit is at a height about 1.2-2.5 meters/3.93-8.20 feet vertically, not lying down on the table.
If you have more than 1 set of weather station, please make sure they are at least in 8cm distance from each other for better reception of signals.
Make sure the main unit is in wild open area, not at low blocked corner.
FEATURES
- Weather forecast with 5 status: sunny, partly cloudy, cloudy, rainy, and snowy
- Weekday display in 8 languages in full language
- Freezing Alert Function
- Time and Calendar(Date/Month/Year)
- RCC-DCF automatic time adjustment
- 12/24 hours format switchable
- Alarm with snooze time(5-60mins)
- Indoor temperature and humidity
- Outdoor temperature and humidity
- Support up to 3 sensors(1 included)
- Function auto scrolling measured data of all 3 outdoor sensors
- Max/ Min memory records for all indoor and outdoor temperature and humidity
- Comfortable Indicator for all indoor and outdoor temperature and humidity
- Temperature & humidity trend display
- Indoor &Outdoor temperature HI & LO alert (independent setting).
- Barometer pressure value display
- 3-mode brightness: Bright/Dim/Off
- C/F(Celsius/Fahrenheit) switchable
- Low battery indicator for sensor
- Tone on/off function
- Transmission range: up to 80 meters in open area
- Table standing or wall hanging
- Sensor Transmission Frequency:433.92MHZ
- Main Unit Power: 3*1,5V type AA (Batteries Not Included) & 5V 1.2A DC Adaptor(Included)
- Sensor Power:2*1,5V type AA(Batteries Not Included)
BUTTONS FUNCTION
SET
In standard mode, press the SET button once to cycle through: Time→Alarm
- In standard mode, press and hold the SET button for 3 seconds to enter the time setting
- In alarm checking mode, press and hold the SET button for 3 seconds to enter the alarm setting
+/CH
- In standard mode, press the + / CH button to switch to different channels, Channel order:CH1-CH2-CH3-cycling display 3 channels.
- In standard mode, press and hold the + / CH button to clear all channel and re-register for reception
- In time and alarm clock setting mode, single press the + / CH button to increase by 1, press and hold to increase by 8 steps per second.
-/RCC
- In standard mode, press and hold the -/RCC button to manually enter RCC reception, and press again during reception to exit RCC reception.
- In time and alarm clock setting mode, single press the -/RCC button to decrease by 1, press and hold to decrease by 8 steps per second.
MEM/°C/°F
- In standard mode, press the MEM button to view the maximum/minimum temperature and humidity values within 24 hours
- When the maximum and minimum values are displayed, press and hold the MEM button for 3 seconds to clear the maximum and minimum temperature and humidity memory values at the same time.
- In standard mode, press and hold the MEM button for 3 seconds to switch the temperature unit //
ALERT
- In standard mode, press the ALERT button to switch display high and low alert temperature values for indoor and 3 outdoor sensors.
- In standard mode, press and hold the ALERT button to enter the alert temperature value setting
SNOOZE·LIGHT
- When the alarm sounds, press the SNOOZE·LIGHT button to enter snooze, and any other button will stop the alarm.
-
In DC mode, when the backlight is on, press the SNOOZE·LIGHT button to switch the brightness level.
-
In DC mode, when the backlight is on, press and hold the SNOOZE•LIGHT button for 3 seconds to turn on/off alarm
- In the setting state, press the SNOOZE·LIGHT button to save and exit the setting.
- In battery-powered mode, press any button to highlight the backlight for 20 seconds.
TIME SETTING MODE
In standard mode, press and hold SET button for 3 seconds to enter time setting. The setting item flash at a frequency of 1HZ. Short press the SET button to select the setting items. The order is: Language→Button tone ON/OFF→RCC ON/OFF(ON:ZONE±12HR)→Year→DM/MD→Month→Day→12/24HR→Hour→Minute→Temperature unit °C/°F→Barometric pressure unit→exit
- In time setting mode, when the setting item flashes at 1HZ frequency, short press the + / CH button to add 1, and press and hold the + / CH button to quickly add up at 8 steps/second.
- In the time setting mode, when the setting item flashes at a frequency of 1HZ, short press the -/RCC button to decrease by 1, and press and hold the -/RCC button to quickly decrease at 8 steps/second.
- In time setting mode, if you do not operate for 20 seconds or press the SNOOZE button during the setting process, you can save the current setting value and exit the time setting.
During Time setting, if RCC is set OFF, the RCC function is turned off permanently. Once it is set OFF, press “-/RCC” button will not turn on the RCC any more. You have to turn it on by Time setting mode to turn it ON
TIME ZONE SETTING
* The RCC (DCF) signal is transmitted from Germany. Germany is in UTC-1 Zone, countries that are in the same time zone as Germany (for example, Czech, France, Italy, Spain, Denmark, Netherlands), the time zone selection is 0. Countries not in UTC-1 time zone need to add or subtract the time zones, for example, Portugal with UTC-0 time zone, the time zone selection is -1.
RCC FUNCTION
During Time setting, if RCC is set as OFF, it will skip the time zone setting, directly to time format setting. RCC function is turned off permanently. It will not receive RCC signal any more.
Once it is set OFF, press and hold “-/RCC” button will not turn on the RCC neither. You have to turn it on by Time setting mode to turn it ON.
If RCC is set as ON, it will receive RCC signal every day automatically. Press and hold “-/RCC” button will start a immediate RCC signal searching. And press “-/RCC” button again will quit the RCC searching.
After re-powering on or reset, it will automatically enters the RCC receiving mode. The RCC icon 📄 displays and flashes at a frequency of 1Hz.
After receiving a valid signal, the symbol 📄 displays statically, and the signal wave symbol 🌐 flashes at a frequency of 1Hz. If the signal is received during valid reception,
If the signal is suddenly interrupted, the signal wave symbol will not display, and the RCC icon will be displays and flash until a valid signal is received again.
The RCC reception time is 7 minutes. If the RCC reception is successful within 7 minutes, the time displays on the unit the reception will be exited immediately and the RCC symbol 📋 will displays all the time, indicating that the RCC reception is successful.
Automatically receive RCC function: Regardless of whether the RCC signal is received or not, it will automatically enter the RCC reception at 1:00, 2:00, 3:00, 4:00, and 5:00 every morning. The unit will receive signal on 1:00, 2:00 and 3:00, if 3:00 is not received successfully, the receiving is turned on in turn, as long as there is 1 successful reception. If it succeeds, the receiving will not be turned on for the next few times, no matter whether the receiving is successful or not
In standard mode, press and hold the -/RCC button for 3 seconds to manually enter the RCC receiving mode. Press the -/RCC button again to exit reception. If there is no reception within 7 minutes, it will automatically exit RCC reception and continue to run at the original time, and then every 3 hours at 0:00, 3:00, 6:00, 9:00, 12:00, 15:00, 18:00, 21:00 automatically RCC reception will be turn on. It does not follow the early morning reception rules. As long as the reception is successful once, it will become the early morning reception rules.
- When the time zone setting is not 0, the time will automatically changes with the time zone.
- When there is a conflict between sensor signal reception, RCC the priority order is RCC'sensor signal reception
- When the sensor signal reception is interrupted by RCC. It will be turn on again after the RCC reception is completed.
When the device is trying to receive RCC signal, all the other functions will be stopped and not working, until RCC reception is finished.
To stop and quit the RCC reception, press -/RCC button to quit the current reception, the RCC icon will disappear, the unit will be back to work standardly.
8 LANGUAGES DISPLAY
| English Czech German French Spanish Italian Dutch Danish | |||||||
| ENGLISH | CESTINA | DEUTSCH | FRANCAIS | ESPANOL | ITALIANO | NEDERLANDS | DANSK |
| MONDAY PONDELI MONTAG LUND | LUNES LUNEDI | MAANDAG | MANDAG | ||||
| TUESDAY | UTERY | DIENSTAG | MARDI | MARTES | MARTEDI | DINSDAG | TIRSDAG |
| WEDNESDAY | STREDA | MITTWOCH | MERCREDI | MIERCOLES | MERCOLEDI | WOENSDAG | ONSDAG |
| THURSDAY | CTVRTEK | DONNERSTAG | JEUDI | JUEVES | GIOVEDI | DONDERDAG | TORSDAG |
| FRIDAY | PATEK | FREITAG | VENDREDI | VIERNES | VENERDI | VRIJDAG | FREDAG |
| SATURDAY | SOBOTA | SAMSTAG | SAMEDI | SABADO | SABATO | ZATERDAG | L∅RDAG |
| SUNDAY | NEDELE | SONNTAG | DIMANCHE | DOMINGO | DOMENICA | ZONDAG | S∅NDAG |
| BEEP | PIPNUTI | PIEP | BIP | BIP | BIP | PIEP | BIP |
| RCC RADIO WAVE | RCC-RADIEM RIZENE | RCC FUNKWELLE | ONDES RCC | ONDAS RCC | ONDA RADIO RCC | RCC RADIOGOLF | RCC RADIOB∅LGE |
| TIME ZONE | CASOVE PASMO | Zeitzone | FUSEAU HORAIRE | Zona horaria | fuso orario tijdzone tidszone | ||
| DST | DST | SOMMERZEIT | Heure DETE | HORA DE VERENO | ORA Legale | ZOMERTIJD | SOMMERTID |
| YEAR | ROK | Jahr | ANNEE | ANO | ANNO | jaar | AR |
| DM | DM | DM | DM | FM | DM | DM | DM |
| MONTH | MESIC | Monat | Mois | MES | mese | maand | mAned |
| DATE | DATUM | DATUM | DATE | Fecha | DATA | DATUM | dato |
| TIME | CAS | ZEIT | TEMPS | TIEMPO | TEMPO | TIJD | TID |
| HOUR | HODINA | Stunde | Heure | HORA | ora | uur | TIME |
| MINUTE MINUTA | MINUTE MINUTE | MINUTO | MINUTO | MINUUT MINUT | |||
| TEMPERATURE | TEPLOTA | TEMPERATUR | TEMPERATURE | TEMPERATURA | TEMPERATURA | TEMPERATUUR | TEMPERATUR |
| PRESSURE | TLAK | DRUCK | PRESSION DAIR | PRESION | PRESSIONE | DRUK | TRYK |
| WEATHER | POCASI | WETTER | METEO | CLIMA | METEO | WEER | VEJR |
| ALARM | BUDIK | ALARM | ALARME | ALARMA | ALLARME | ALARM | ALARM |
| SNOOZE | SNOOZE | SCHLUMMER | LA sieste | SNOOZE | SNOOZE | SNOOZE | SNOOZE |
| ALERT | VYSTRAHA | ALARM | ALERTE | ALERTA | ALLARME | ALERT | ALARM |
| HIGH TEMP | VYSOKA TEPLOTA | HOHE TEMP | HAUTE TEMP | ALTA TEMP | ALTA TEMP | HOGE TEMP | Høj TEMP |
| LOW TEMP | NIZKA TEPLOTA | NIEDRIGE TEMP | BASSE TEMP | BAJA TEMP | BASSA TEMP | LAGE TEMP | LAV TEMP |
| CALIBRATION | KALIBRACE | EICHUNGEN | ÉTALONNAGE | CALIBRACION | CALIBRAZIONE | KALIBRATIE | KALIBRERING |
| GOOD MORNING | DOBRE RANO | GUTEN MORGEN | BONJOUR | BUENOS DIAS | BUONGIORNO | GOEDEMORGEN | GODMORGEN |
| ON | ZAPNUTO | EIN | ON | ON | ON | AAN | ON |
| OFF VYPNUTO AUS OFF OFF OFF UIT OFF | |||||
| JAN LED JAN JAN ENE GEN JAN JAN | |||||
| FEB UNO FEB FEV FEB FEB FEB | |||||
| MAR BRE MAR MAR MAR MAR MAA MAR | |||||
| APR DUB APR AVR ABR APR APR APR | |||||
| MAY KVE MAI MAI MAY MAG MEI MAJ | |||||
| JUN CER JUN JUL JUN GIU JUN | JUN | ||||
| JUL CRV JUL JUL LUG JUL | JUL | ||||
| AUG SRP AUG AOU AGO AGO AUG AUG | |||||
| SEP ZAR SEP SEP SEP SET SEP SEP | |||||
| OCT RIJ OKT OCT OCT OTT OKT OKT | |||||
| NOV LIS NOV NOV NOV NOV NOV | |||||
| DEC PRO DEZ DEC DIC DIC DEC DEC |
ALARM SETTING MODE
Press SET button once to check the alarm.
No operation in 5 seconds, it will be back to time display mode.
In alarm mode, Press and hold SET button for 3 seconds to enter into the alarm clock setting mode.
Press the SET button to make the settings in the following sequence:
Alarm on/off → Hour → Minute → Snooze time → Exit
If you chose Alarm off, It will exit the alarm setting mode, and display normal time mode
Alarm default as OFF
Snooze time range:5min-60min
Press +/CH and -/RCC button to adjust the value.
Press the SET button again (or no operation for 20 seconds) to complete the settings.
Note:
When the alarm clock is ON, the symbol will be displayed on the top of the time. When the alarm clock is disabled, the symbol will not be displayed.
In time display mode, press and hold top "Snooze.Light" button will turn on/off alarm immediately.
ALARM MODE
Alarm time: 2 minutes
Alarm Period: 0-10 seconds: BI once every second
10-20 seconds: BI BI twice per second
21-30 seconds: BI BI BI three times per second
31-11minute: continuous BI BI BI BI beep
When the alarm sounds, press the SNOOZE/LIGHT button to enter snooze. There is no limit to the number of snooze times. Press any other button to stop the alarm.
In battery-powered mode, the backlight is off by default when the alarm sounds.
After pressing the button to stop the alarm, the backlight turns off automatically after 20 seconds.
BACK LIGHT
When DC powered, backlight brightness is Bright, Dim, OFF.
When batteries powered, backlight brightness is 100% Bright for 20 seconds.
When it is off, press any button to highlight the backlight for 20 seconds. If there is button operation, the backlight will be off.
When DC power supply, after power-on ,the default backlight is 100% bright and always on. press the SNOOZE/LIGHT button and the backlight will cycle between high brightness Bright,Dim, OFF
HI&LO ALERT SETTING
In the standard time display mode, press the ALERT button to view the alert temperature setting items of indoor→CH1→CH2→CH3 in sequence, and press and hold for 3 seconds under the current display item.
ALERT button to enter the current high and low temperature alarm value setting (default OFF, default upper limit 35°C, lower limit 10°C)
- In normal display mode, press and hold the ALERT button for 3 seconds to enter the high and low temperature alarm settings. Press the ALERT button to enter the next setting item. The setting sequence is: indoor ON/OFF→
- Indoor high temperature→Indoor low temperature→CH1 ON/OFF→CH1 high temperature→CH1 low temperature→CH2 ON/OFF→CH2 high temperature→CH2 low temperature→CH3 ON/OFF→CH3 high temperature→CH3 Low Temperature→Exit, It will skip the value setting step when the alert is set as OFF
- When the setting item flashes, short press the + / CH or - / RCC button to increase or decrease by 1, and long press the UP button to quickly increase or decrease at 8 steps/second.
- If there is no operation for 20 seconds during the setting process, press ALERT to exit or the SNOOZE button to save the current setting value and exit the high and low temperature alarm value setting.
- When the outdoor alarm temperature reaches the set value, the icon and HI (or LO) of the current channel flash, and only the icon of the non-current channel flashes. All three channels have sound prompts.
- When the alarm temperature reaches the set value, the buzzers will sound BIBIBIBI as a group. If there is no button pressed, the buzzer will sound in one group every minute until it exits the alarm temperature range. When the alarm occurs,
- If any button is pressed, the sound will stop alarming, and the icon will still flash at a frequency of 1HZ until it exits the alarm range.
- During the indoor and outdoor high and low temperature warning setting process, press the MEM button to clear all saved setting values (default as off)
Indoor/Outdoor Temperature and Humidity and Trend
Indoor temperature range:-9°C\~50°C
Outdoor temperature range:-40°C\~60°C
LL& HH will display when out of range
Indoor/outdoor humidity detection range: 1% to 99%;
if it is higher than 99%, it will display 99%, if it is lower than 1%, it will display 1% Detect cycle:every 30seconds
°C/°F switchable
In the normal display interface, long press the MEM/°C/°F button to switch the temperature unit °C/°F.
2. Trends:
Trends Icon will not display at the moment of powering on.
The trend will display, when the temperature increase 1^ C compared to last data, or increase 1^ C in 1 hour;
The trend will display, when the humidity value increase 5% compared to last data, or increase 5% in 1 hour vice the verse for decrease trends.
When the increase/decrease is less then 1^ C or 5% in 1 hour, will display
Comfort level indicator
Humidity 40-70% indicates GOOD
Humidity below 40% indicates DRY;
Humidity above 70% indicates HUMID
MEMORY
- Under normal time displaying mode, press MEM button to check the 3 channel indoor and outdoor temperature and humidity, MAX or Min will display during checking the record.
- The record sequence is :Indoor/outdoor maximum temperature&humidity→Indoor/outdoor minimum temperature&humidity. No operation in 6 seconds, it will return to current temperature &humidity display.
- Record Clear: The maximum/minimum records will be cleared automatically at 00:00 everyday. Or manually clear the max/min record by holding MEMat Max/min record checking mode. It will clear the record, display --, and then display the current value.
Atmospheric Pressure
3 UNITS for choice: hPa/mb, inHg, mmHg
Range:850-1100 hPa
Detect cycle:every 1 hour
To manually calibrate the barometer pressure, please check below
[CALIBRATION] operation step.
CALIBRATION
The product is factory calibrated and does not normally need to be re-calibrated. If required, you can manually calibrate the temperature, humidity and air pressure sensors on the weather station. To do so, proceed as follows:
- Press and hold the SET and ALERT buttons at the same time.
Calibration mode will be enabled, Calibration order: Temperature deviation→Humidity deviation→calibrated pressure value→Exit Press the +/CH or -/RCC button to set the desired value.
If no need to calibrate the current value, press SET to move on to next order. Press the SET button again to confirm your selection and exit calibration mode.
Frost Alert
When the outdoor display temperature of the current RF channel is within the range of 0\~2.9°C, the frost point alarm symbol “★!” flashes; when temperature of the outdoor channel is lower than 0°C, the frost and snow symbol “★” displays all the time, when temperature is higher than 2.9°C the freezing point symbol “★!” disappear.
WEATHER FORECAST
| WEATHER ICON |  | 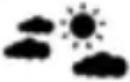 |  | 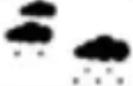 | 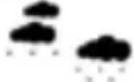 |
| Description | Sunny | Partly Cloudy | Cloudy Rainy Snowy | ||
Weather forecast in 12+ Hour: Sunny, Partly Cloudy, Cloudy, Rainy, Snowy The weather icon displays are based on the hourly calculation of indoor/outdoor temperature &humidity. The forecast station predict weather conditions for the next 12 hours with 70-75% accuracy. The remote sensor should be put on the outside to have accurate outdoor data. Or it will effect the accurate of weather forecast. The default display weather is partly cloudy, the main unit will calibrate the weather report in 1-2 weeks with the temperature and humidity data changes.
The remote sensor should be place outside to get accurate outdoor data or it will effect the accurate of weather forecast.
RF-OUTDOORTERPERATUREANDHUMIDITY
After the power is turned on, main unit is powered on or reset, if all three channels receive signals within 3-minute reception time, the reception will close immediately, as long as there is still one channel that has not received successfully, the RF receiving mark is still flashing. During long-term reception, the RF signal sign “flashes at a frequency of 1Hz. After the RF signal is successfully received, the symbol “will be displayed all the time
If the receiver only receives 1 or 2 channels within 3 minutes, the channel that does not receive a signal will no longer be automatically opened for reception in the future, and only the channel that has been paired and registered will be received, unless it is powered on again, reset or manually forced pairing to receive all channels
CHANNEL & SENSOR OPERATION
- The weather station supports max connection with up to 3 sensors.
- Remove the battery cover of sensor and slide CH switch to CH1/CH2/CH3, make sure each sensor is assigned to a different CHANNEL number.
- It is recommended to put CH1 sensor in outdoor for more accurate weather forecast, and put other sensors in your desired area.
- In standard mode, Press + / CH button to check the outdoor temperature and humidity of channel 1/2/3. When you switch to the mode, the display will automatically loop 3 sensor' data. If you want to reset all the data of sensors, press and hold + / CH button 3 seconds, and it will reconnect with the sensors.
Note:
When there is conflict among RF, RCC and alarm sound, the priority order is: Alarm RCC RF
When the RF is on reception for 3 minutes, it is interrupted by RCC or interrupted by an alarm. After the RCC reception is completed or the alarm is completed, the RF is turned on again for 3 minutes.
RCC Function
During Time setting, if RCC is set OFF, the RCC function is turned off permanently, until it is set ON again.
After power-on or reset, it will automatically enters the RCC receiving mode. The RCC icon 📋 displays and flashes at a frequency of 1Hz. If there is a connection during RCC reception,
After receiving a valid signal, the symbol 📋 displays statically, and the signal wave symbol 🌐 flashes at a frequency of 1Hz. If the signal is received during valid reception,
If the signal is suddenly interrupted, the signal wave symbol will not display, and the RCC icon will be displays and flash until a valid signal is received again. The RCC reception time is 7 minutes. If the RCC reception is successful within 7 minutes, the time displays on the unit the reception will be exited immediately and the RCC symbol will displays all the time, indicating that the RCC reception is successful.
Automatically receive RCC function: Regardless of whether the RCC signal is received or not, it will automatically enter the RCC reception at 1:00, 2:00, 3:00, 4:00, and 5:00 every morning. The unit will receive signal on 1:00, 2:00 and 3:00, if 3:00 is not received successfully, the receiving is turned on in turn, as long as there is 1 successful reception. If it succeeds, the receiving will not be turned on for the next few times, no matter whether the receiving is successful or not
In standard mode, press and hold the -/RCC button for 3 seconds to manually enter the RCC receiving mode. Press the -/RCC button again to exit reception. If there is no reception within 7 minutes, it will automatically exit RCC reception and continue to run at the original time, and then every 3 hours at 0:00, 3:00, 6:00, 9:00, 12:00, 15:00, 18:00, 21:00 automatically RCC reception will be turn on. It does not follow the early morning reception rules. As long as the reception is successful once, it will become the early morning reception rules.
- When the time zone setting is not 0, the time will automatically changes with the time zone.
-
When there is a conflict between sensor signal reception, RCC the priority order is RCC → sensor signal reception
-
When the sensor signal reception is interrupted by RCC. It will be turn on again after the RCC reception is completed.
- When the device is trying to receive RCC signal, all the other functions will be stopped and not working, until RCC reception is finished.
To stop and quit the RCC reception, press -/RCC button to quit the current reception, the RCC icon will disappear, the unit will be back to work standardly.
| Adapter technical specifications: | |
| Manufacturer's name or trade mark, commercial registration number and address: | Dongguan Shijie Hua Xu Electronics Factory, No.200, Technology East Road, Shijie Town, Dongguan City, Guangdong P.R. China |
| Model identifier: HX075-0501200-AG-001 | |
| Input voltage: AC100 - 240V | |
| Input AC frequency: 50/60Hz | |
| Output voltage: 5.0V | |
| Output current: 1.2A | |
| Output power: 6.0W | |
| Average active efficiency: 75.0% | |
| Efficiency at low load (10 %): 73.0% | |
| No-load power consumption: ≤0.1W | |
PRECAUTIONS
Do not clean any part of the product with benzene, thinner or other solvent chemicals. When necessary, clean it with a soft cloth.
Never immerse the product in water. This will damage the product.
Do not subject the product to extreme force, shock, or fluctuations in temperature or humidity.
Do not tamper with the internal components.
Do not mix new and old batteries or batteries of different types.
Do not mix alkaline, standard or rechargeable batteries with this product.
Remove the batteries if storing this product for a long period of time.
Do not dispose of this product as unsorted municipal waste. Collection of such waste separately for special treatment is necessary
TECHNICAL SPECIFICATIONS
- Weather forecast with 5 status: sunny, partly cloudy, cloudy, rainy, and snowy
- Weekday display in 8 languages in full language
- Freezing Alert Function
- Time and Calendar(Date/Month/Year)
- RCC-DCF automatic time adjustment
- 12/24 hours format switchable
- Alarm with snooze time(5-60mins)
- Indoor temperature and humidity
- Outdoor temperature and humidity
- Support up to 3 sensors(1 included)
- Function auto scrolling measured data of all 3 outdoor sensors
- Max/ Min memory records for all indoor and outdoor temperature and humidity
- Comfortable Indicator for all indoor and outdoor temperature and humidity
- Temperature & humidity trend display
- Indoor &Outdoor temperature HI & LO alert (independent setting).
- Barometer pressure value display
- 3-mode brightness: Bright/Dim/Off
- C/F(Celsius/Fahrenheit) switchable
- Low battery indicator for sensor
- Tone on/off function
- Transmission range: up to 80 meters in open area
- Table standing or wall hanging
- Sensor Transmission Frequency:433.92MHZ
- Main Unit Power: 3*1,5V type AA (Batteries Not Included) & 5V 1.2A DC Adaptor(Included)
- Sensor Power:2*1,5V type AA(Batteries Not Included)
- Dimensions of main unit:(w/h/d)138x 84 x 27mm
- Weight of Main Unit:166 g
INSTRUCTIONS AND INFORMATION ON THE DISPOSAL OF DISCARDED PACKAGING MATERIALS
Take the packaging material to a collection yard for disposal.
DISPOSAL OF DISCARDED ELECTRICAL AND ELECTRONIC EQUIPMENT
natural_image
Symbol of a trash bin crossed with no text or numbers, representing waste sorting or disposal (no text present)This symbol on the product, accessory or packaging indicates that the product must not be treated as normal household waste. Please dispose of this product in a collection yard designated for the recycling of electrical and electronic equipment. In some EU countries or in some European countries, you can return your products to your local retailer when you buy an equivalent new product. Correct disposal of this product helps save valuable natural resources and prevents possible adverse impacts on the environment and human health that might be caused by improper waste disposal. Please contact your local authority or the nearest waste collection yard for further details. Improper disposal of this type of waste may be subject to a legal fine.
For companies in the European Union
If you need to dispose of electrical or electronic equipment, ask your dealer or supplier for the necessary information.
Disposal in countries outside the European Union
To dispose of this product, please ask your local authorities or dealer for the necessary information on correct disposal.

This product complies with EU requirements.
FAST ČR, a. s. hereby declares that the radio device type SWS 4440 complies with Directive 2014/53/EU. For full version of the EU declaration of conformity, please refer to the website: www.sencor.cz
Changes in the text, design and technical specifications may be made without prior notice and we reserve the right to make such changes.
The original version is in Czech.
Manufacturer: FAST ČR, a.s., U Sanitasu 1621, Říčany 251 01, Czech Republic info@sencor.com
Authorized service centers: Visit www.sencor.com for detailed information about authorized service centers.
SENCOR®
EN Warranty conditions
Warranty card is not a part of the device packaging.
This product is warranted for the period of 24 months from the date of purchase to the end-user. Warranty is limited to the following conditions. Warranty is referred only to the customer goods using for common domestic use. The claim for service can be applied either at dealer's shop where the product was bought, or at below mentioned authorized service shops. The end-user is obligated to set up a claim immediately when the defects appeared but only till the end of warranty period. The end user is obligated to cooperate to certify the claiming defects. Only completed and clean (according to hygienic standards) product will be accepted. In case of eligible warranty claim the warranty period will be prolonged by the period from the date of claim application till the date of taking over the product by end-user, or the date the end-user is obligated to take it over. To obtain the service under this warranty, end-user is obligated to certify his claim with duly completed following documents: receipt, certificate of warranty, certificate of installation.
This warranty is void especially if apply as follows:
■ Defects which were put on sale.
■ Wear-out or damage caused by common use.
The product was damaged by unprofessional or wrong installation, used in contrary to the applicable instruction manual, used in contrary to legal enactment and common process of use or used for another purpose which has been designed for.
The product was damaged by uncared-for or insufficient maintenance.
The product was damaged by dirt, accident of force majeure (natural disaster, fire, and flood).
■ Defects on functionality caused by low duality of signal, electromagnetic field interference etc.
The product was mechanically damaged (e.g. broken button, fall).
■ Damage caused by use of unsuitable media, fillings, expendable supplies (batteries) or by unsuitable working conditions (e.g. high temperatures, high humidity, quakes).
■ Repair, modification or other failure action to the product by unauthorized person.
■ End-user did not prove enough his right to claim (time and place of purchase).
■ Data on presented documents differs from data on products.
Cases when the claiming product cannot be identified according to the presented documents (e.g. the serial number or the warranty seal has been damaged).
Manufacturer:
FAST ČR, a.s., U Sanitasu 1621, Řičany 251 01, Czech Republic
Visit www.sencor.com for detailed information about authorized service centers.
The original version of the instructions is in the Czech language, other language versions are made by the appropriate translation.
natural_image
Line drawing of a portable electronic device with top panel and front panel (no text or symbols)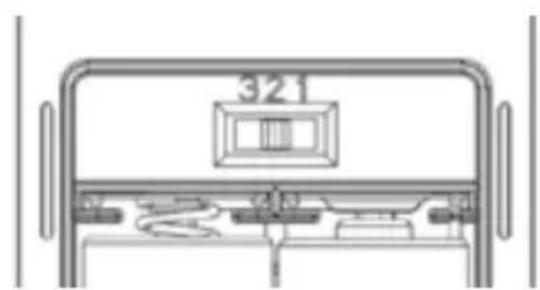
natural_image
Technical line drawing of a mechanical component with no visible text or symbolsnatural_image
Line drawing of a mechanical component with two vertical pins (no text or symbols)
natural_image
Technical line drawing of a mechanical tool with a spring and cord, no text or symbols presentnatural_image
Illustration of a smart home with trees, a house, and a cityscape under sunlight (no text or symbols)natural_image
Simple line drawing of a cabinet with a potted plant on top and a door on the side (no text or symbols)natural_image
Simple line drawing of a door with a handle, no text or symbols presentnatural_image
Simple line drawing of a kitchen sink with hanging weight and door (no text or symbols)REŽIM NASTAVENÍ ČASU
| OFF VYPNUTO AUS OFF OFF OFF UIT OFF | |||||
| JAN LED JAN JAN ENE GEN JAN JAN | |||||
| FEB UNO FEB FEV FEB FEB FEB | |||||
| MAR BRE MAR MAR MAR MAR MAA MAR | |||||
| APR DUB APR AVR ABR APR APR APR | |||||
| MAY KVE MAI MAI MAY MAG MEI MAJ | |||||
| JUN CER JUN JUL JUN GIU JUN | JUN | ||||
| JUL CRV JUL JUL LUG JUL | JUL | ||||
| AUG SRP AUG AOU AGO AGO AUG AUG | |||||
| SEP ZAR SEP SEP SEP SET SEP SEP | |||||
| OCT RIJ OKT OCT OCT OTT OKT OKT | |||||
| NOV LIS NOV NOV NOV NOV NOV | |||||
| DEC PRO DEZ DEC DIC DIC DEC DEC |
REŽIM NASTAVENÍ BUDÍKU
natural_image
Symbol of a trash bin with crossed lines indicating no waste or discharge, and a solid black bar below (no text or numbers present)natural_image
Technical line drawings of a battery pack and its internal components (no text or symbols)- LED indikátor
- Kryt priestoru na batérie
- Otvor na zavesenie
- Prepínač kanálov
- Otvor na zavesenie na šnúru
Vodoodolnost na každodenné použitie, trieda: IP54.
natural_image
Line drawing of a mechanical component with two vertical pins (no text or symbols)
natural_image
Technical line drawing of a mechanical tool with a spring and connecting rod (no text or symbols)natural_image
Illustration of a smart home with trees, a house, and a cityscape under sunlight (no text or symbols)natural_image
Simple line drawing of a cabinet with a potted plant on the shelf (no text or symbols)Umiestnite na stabilný povrch
natural_image
Simple line drawing of a door with a handle, no text or symbols presentnatural_image
Simple line drawing of a kitchen sink with hanging weight and cabinet (no text or symbols)Zdvihnite pomocou lana
REŽIM NASTAVENIA ČASU
| OFF VYPNUTO AUS OFF OFF OFF UIT OFF | |||||
| JAN LED JAN JAN ENE GEN JAN JAN | |||||
| FEB UNO FEB FEV FEB FEB FEB | |||||
| MAR BRE MAR MAR MAR MAR MAA MAR | |||||
| APR DUB APR AVR ABR APR APR APR | |||||
| MAY KVE MAI MAI MAY MAG MEI MAJ | |||||
| JUN CER JUN JUL JUN GIU JUN | JUN | ||||
| JUL CRV JUL JUL LUG JUL | JUL | ||||
| AUG SRP AUG AOU AGO AGO AUG AUG | |||||
| SEP ZAR SEP SEP SEP SET SEP SEP | |||||
| OCT RIJ OKT OCT OCT OTT OKT OKT | |||||
| NOV LIS NOV NOV NOV NOV NOV | |||||
| DEC PRO DEZ DEC DIC DIC DEC DEC |
REŽIM NASTAVENIA BUDÍKA
Na kontrolu budíka stlačte raz tlačidlo SET.
natural_image
Symbol of a trash bin crossed with no text or numbers, representing environmental restriction (no text present)natural_image
Technical line drawing of a mechanical device with no visible text or symbols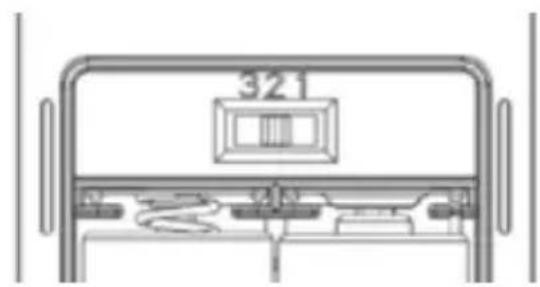
natural_image
Technical line drawing of a mechanical component with no visible text or symbolsHU - 86
natural_image
Technical line drawings of three electronic components: a plug, a thermistor, and a cable (no text or symbols present)natural_image
Illustration of a smart home with trees, a house, and a cityscape under sunlight (no text or symbols)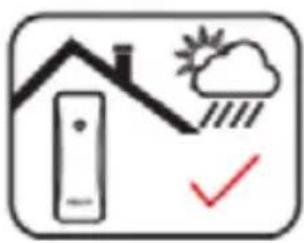
natural_image
Simple line drawing of a house with roof, sun, and checkmark (no text or symbols)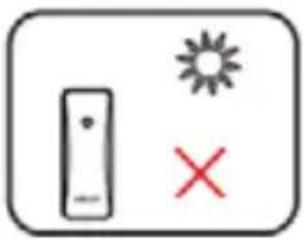
natural_image
Simple icon showing a device with sun symbol and X mark, no text or labels present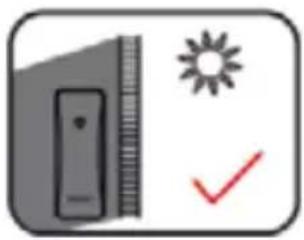
natural_image
Simple icon showing a TV with a ruler and sun symbol, next to a checkmark (no text or labels)natural_image
Simple line drawing of a ladder with a cross mark (no text or symbols)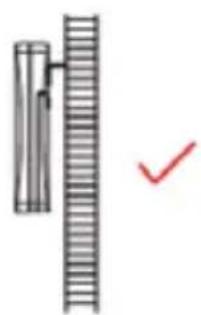
natural_image
Simple line drawing of a ladder and a vertical bar with a checkmark (no text or symbols)natural_image
Simple line drawing of a room with a potted plant on a cabinet and a door (no text or symbols)natural_image
Simple line drawing of a door with a handle, no text or symbols presentnatural_image
Simple line drawing of a cabinet with hanging weight and door (no text or symbols)| OFF VYPNUTO AUS OFF OFF OFF UIT OFF | |||||
| JAN LED JAN JAN ENE GEN JAN JAN | |||||
| FEB UNO FEB FEV FEB FEB FEB | |||||
| MAR BRE MAR MAR MAR MAR MAA MAR | |||||
| APR DUB APR AVR ABR APR APR APR | |||||
| MAY KVE MAI MAI MAY MAG MEI MAJ | |||||
| JUN CER JUN JUL JUN GIU JUN | JUN | ||||
| JUL CRV JUL JUL LUG JUL | JUL | ||||
| AUG SRP AUG AOU AGO AGO AUG AUG | |||||
| SEP ZAR SEP SEP SEP SET SEP SEP | |||||
| OCT RIJ OKT OCT OCT OTT OKT OKT | |||||
| NOV LIS NOV NOV NOV NOV NOV | |||||
| DEC PRO DEZ DEC DIC DIC DEC DEC |
natural_image
Symbol of a trash bin with crossed lines and a horizontal bar below (no text or numbers present)natural_image
Technical line drawing of a mechanical device with no visible text or symbols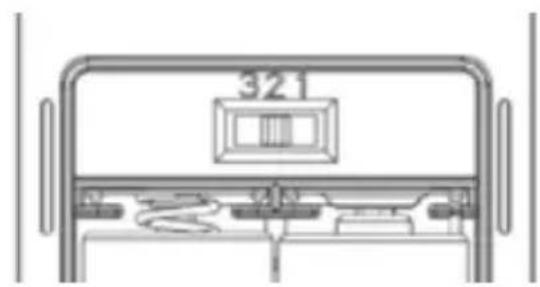
natural_image
Technical line drawing of a mechanical component with no visible text or symbolsPL-117
natural_image
Technical line drawings of three electronic components: a two-pin plug, a thermistor with a winding cable, and a terminal connector (no text or symbols)natural_image
Illustration of a smart home with trees, a house, and buildings under sunlight (no text or symbols)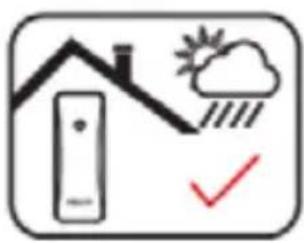
natural_image
Simple line drawing of a house with roof, sun, and checkmark (no text or symbols)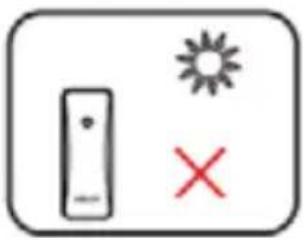
natural_image
Simple diagram with a device and sun symbol, no text or labels present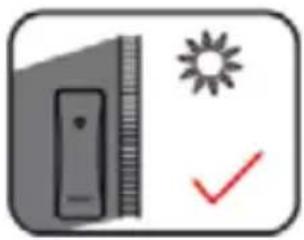
natural_image
Simple icon showing a tower, sun, and checkmark (no text or symbols)natural_image
Simple line drawing of a ladder with a cross mark (no text or symbols)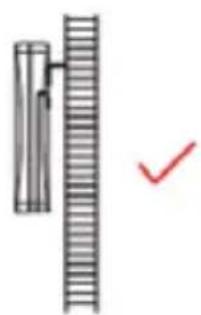
natural_image
Simple line drawing of a ladder and a vertical bar with a checkmark (no text or symbols)natural_image
Simple line drawing of a cabinet with a potted plant on top and a door on the shelf (no text or symbols)natural_image
Simple line drawing of a door with a handle, no text or symbols presentnatural_image
Simple line drawing of a kitchen sink with hanging weight and cabinet (no text or symbols)| OFF VYPNUTO AUS OFF OFF OFF UIT OFF | |||||
| JAN LED JAN JAN ENE GEN JAN JAN | |||||
| FEB UNO FEB FEV FEB FEB FEB | |||||
| MAR BRE MAR MAR MAR MAR MAA MAR | |||||
| APR DUB APR AVR ABR APR APR APR | |||||
| MAY KVE MAI MAI MAY MAG MEI MAJ | |||||
| JUN CER JUN JUL JUN GIU JUN | JUN | ||||
| JUL CRV JUL JUL LUG JUL | JUL | ||||
| AUG SRP AUG AOU AGO AGO AUG AUG | |||||
| SEP ZAR SEP SEP SEP SET SEP SEP | |||||
| OCT RIJ OKT OCT OCT OTT OKT OKT | |||||
| NOV LIS NOV NOV NOV NOV NOV | |||||
| DEC PRO DEZ DEC DIC DIC DEC DEC |
TRYB USTAWIEN BUDZIKA
SYGNAŁ RF – TEMPERATURA I WILGOTNOŚĆ ZEWNETRZNA
natural_image
Symbol of a trash bin with crossed lines and a horizontal bar below (no text or numbers present)- Things to consider:
- If you experience problems, try the following:
- SAFETY AND GUIDE
- PACKAGE CONTENTS
- POWER SUPPLY
- MAIN UNIT INSTALLATION
- SENSOR INSTALLATION
- Low Battery Indicator
- DC ADAPTOR
- Main Unit Position Recommendation
- FEATURES
- BUTTONS FUNCTION
- SET
- +/CH
- -/RCC
- MEM/°C/°F
- ALERT
- SNOOZE·LIGHT
- TIME SETTING MODE
- TIME ZONE SETTING
- RCC FUNCTION
- ALARM SETTING MODE
- Note:
- ALARM MODE
- BACK LIGHT
- HI&LO ALERT SETTING
- Indoor/Outdoor Temperature and Humidity and Trend
- Indoor/outdoor humidity detection range: 1% to 99%;
- °C/°F switchable
- Trends:
- Comfort level indicator
- MEMORY
- Atmospheric Pressure
- CALIBRATION
- Frost Alert
- RF-OUTDOORTERPERATUREANDHUMIDITY
- CHANNEL & SENSOR OPERATION
- PRECAUTIONS
- TECHNICAL SPECIFICATIONS
- INSTRUCTIONS AND INFORMATION ON THE DISPOSAL OF DISCARDED PACKAGING MATERIALS
- DISPOSAL OF DISCARDED ELECTRICAL AND ELECTRONIC EQUIPMENT
- For companies in the European Union
- Disposal in countries outside the European Union
- SENCOR®
- EN Warranty conditions
- This warranty is void especially if apply as follows:
- Manufacturer:
- REŽIM NASTAVENÍ ČASU
- REŽIM NASTAVENÍ BUDÍKU
- REŽIM NASTAVENIA ČASU
- REŽIM NASTAVENIA BUDÍKA
- TRYB USTAWIEN BUDZIKA
- SYGNAŁ RF – TEMPERATURA I WILGOTNOŚĆ ZEWNETRZNA
Brand : SENCOR
Model : SWS 4440
Category : Weather Station