
ME 3565 SMART - Weather Station GoGen - Free user manual and instructions
Find the device manual for free ME 3565 SMART GoGen in PDF.


| Product Type | Weather Station |
| Brand | GoGen |
| Model | ME 3565 SMART |
| Display | LCD color display with backlight |
| Indoor Temperature Range | 0°C to 50°C (32°F to 122°F) |
| Outdoor Temperature Range | -20°C to 60°C (-4°F to 140°F) |
| Humidity Measurement | 20% to 95% RH |
| Barometric Pressure | 700 to 1100 hPa |
| Weather Forecast | 12-24 hour weather prediction with icons |
| Atomic Clock | DCF-77 radio-controlled time |
| Alarm Function | Single alarm with snooze |
| Wireless Outdoor Sensor | 433 MHz, range up to 100 m (328 ft) open area |
| Power Supply (Base Station) | 2x AAA batteries (not included) or USB-C cable (5V, 1A) |
| Power Supply (Outdoor Sensor) | 2x AA batteries (not included) |
| Dimensions (Base Station) | 165 x 120 x 30 mm (6.5 x 4.7 x 1.2 in) |
| Weight (Base Station) | 265 g (9.3 oz) without batteries |
| Sensor Dimensions | 65 x 45 x 25 mm (2.6 x 1.8 x 1.0 in) |
| Mounting Options | Table stand or wall mount |
| Maintenance & Cleaning | Clean with a soft, dry cloth. Do not use harsh chemicals or water. |
| Safety | Keep away from water and extreme heat. Use fresh batteries. Dispose of batteries properly. |
| Spare Parts | Outdoor sensor (model TH-N13), replacement batteries |
| Repairability | Consumer replaceable batteries. No user-serviceable parts inside. Contact support for issues. |
Frequently Asked Questions - ME 3565 SMART GoGen
User questions about ME 3565 SMART GoGen
0 question about this device. Answer the ones you know or ask your own.
Ask a new question about this device
Download the instructions for your Weather Station in PDF format for free! Find your manual ME 3565 SMART - GoGen and take your electronic device back in hand. On this page are published all the documents necessary for the use of your device. ME 3565 SMART by GoGen.
USER MANUAL ME 3565 SMART GoGen
Scan the QR code to download the app.
ÚVOD
- Thank you for buying our product.
- Please read through these operating instructions, so you will know how to operate your equipment properly. After you finished reading the instructions manual, put it away in a safe place for future reference.
MAINTENANCE / CLEANING
- Ensure the unit is fully unplugged from the mains socket before cleaning.
- Never use any harsh or strong solvents to clean the device since these may damage the surface of the device. Dry, soft cloth is appropriate, however, if the device is extremely dirty, it may be wiped off with a slightly moist cloth. Make sure the device is dried off after cleaning.
DISPLAY
NOTE: You can find the picture of the display at the beginning of the user manual.
- Time, Date, Day, Alarm
- Indoor temperature/humidity, Comfort level
- Weather forecast of the current day
-
Weather forecast for the following days
-
Outdoor temperature/humidity, Channel number, Battery status
NOTE: If the weather station is not connected to the Internet, the weather forecast will not be available.
GETTING STARTED
Installation
The main unit and the outdoor sensor can be placed onto any flat surface, or wall mounted by the hanging hole at the backside.
NOTE: Transmissions between the main unit and the outdoor sensor can reach up to 70 m in an open area. Open area means there are no interfering obstacles such as buildings, walls, trees, high voltage lines, etc.
Outdoor Sensor
NOTE: Batteries compartment is located behind the back cover.
- Set the Channel number [1-2-3] of the sensor to the channel you want.
- Insert 2 x AAA batteries [not included] observing polarity ["+" and "-" marks].
The display shows the set Channel number, temperature, and humidity.
Main Unit
- Connect the power adaptor to the DC IN socket on the main unit, then plug it into the power socket.
NOTE: Make sure your local voltage is the same as marked on the adaptor. The display backlight is on. To turn off/on the display, press the SNOOZE/LIGHT button. - Insert 3 x AAA batteries [not included] observing polarity ["+" and "-" marks].
NOTE: The main unit is not able to connect to the internet if powered by a battery. The weather forecast will not be available. The display backlight is off. To turn on the display, press the SNOOZE/LIGHT button and the display will light up for about 10 seconds.
INTERNET CONNECTION
Install the TUYA app on your device. Create an account and log in.
NOTE: You can use the QR code at the beginning of the user manual to download the app.
- Press and hold the SNOOZE/LIGHT button for more than 3 seconds to enter the WiFi network configuration. The 📞on will flash in the upper left corner.
- Open the TUYA app. Click the icon in the upper right corner to add your Weather Station. Continue with the next steps according to the app. After entering the WiFi network password, the Weather Station will be connected to the WiFi network and added to the app. The icon will be solid.
- After connecting to a WiFi network, the Weather Station will get information about the time, date, and local weather forecast.
Using the TUYA app
The Alarm, Temperature alert, and Temperature unit can be set or checked via the app. You can also see data from the Weather Station.
BASIC OPERATION
- Press the MODE button to select a view: Time > Alarm1 > Alarm2 > Alarm3.
- Press and hold the MODE button to enter the setting mode. Press the UP or DOWN button to adjust the setting, press the MODE button to confirm.
- Press the CHANNEL button to select a view of the sensor's data: Channel1 > Channel2 > Channel3. The flagon will show the number of the sensor.
- Press and hold the CHANNEL button to search for a sensor in case the Main unit fails to receive data from the sensor. The Icon will flash during the search.
- Press the DOWN to switch temperature units: ^ C > ^ F .
TIME SETTING
- Under the Time display mode, press and hold the MODE button to enter the setting mode.
- The time setting is in order: year > month > day > 12/24HR mode > hour > minute > exit.
ALARM SETTING
- Under the Alarm (A1/A2/A3) display mode, press and hold the MODE button to enter the setting mode.
- The alarm setting is in order: hour > minute > wake-up days. After setting, the alarm will be activated, the 'don' will appear.
- To deactivate the alarm, press the UP or DOWN button under the Alarm (A1/A2/A3) display mode, the icon will disappear.
Turn off the alarm/SNOOZE
- To cancel a sounding alarm, press the MODE button.
- To temporarily silence a sounding alarm, press SNOOZE/LIGHT button, the 🔒 icon will flash. The snooze period is 5 minutes. Under the Snooze mode, press any other button to cancel an alarm.
MAX/MIN DATA
NOTE: Maximum/minimum temperature/humidity records will be cleared and re-recorded at 0:00 every day.
- Press the MAX/MIN button repeatedly to display maximum/minimum temperature/humidity records.
- When maximum or minimum temperature/humidity is displayed press and hold the MAX/MIN button to clear the data.
TEMPERATURE ALERT
- Press the ALERT button to turn on/off the temperature alert, the / icons will appear.
- Press and hold the ALERT button to enter the alert setting.
- The alert setting is in order: highest temperature indoors > lowest temperature indoors > highest temperature outdoors > lowest temperature outdoors.
SPECIFICATIONS
Main unit
Power supply: 5 V / 1,2 A
Supported WLAN Frequency Band/EIRP: 2,4 GHz / - 61,02 dBm
Temperature range/Accuracy: 0^ +50^ / ±1^
Humidity range/Accuracy: 25% \~ 95% / ±5%
Number of sensors: max. 3 external sensors
Dimensions/Weight: 212 x 29 x 139 mm / 350 g
Sensor
Waterproof Rating: IPX3
Wireless transmitter working frequency/EIRP: 433,9 MHz / 0,003 mW
Temperature range/Accuracy: -35^ +60^ / ±1^
Humidity range/Accuracy: 25 % \~ 95 % / ±5%
Dimensions/Weight: 90 x 44 x 24 mm / 55 g
We reserve the right to change technical specifications.
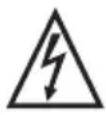
WARNING: DO NOT USE THIS PRODUCT NEAR WATER, IN WET AREAS TO AVOID FIRE OR INJURY OF ELECTRIC CURRENT. ALWAYS TURN OFF THE PRODUCT WHEN YOU DON'T USE IT OR BEFORE A REVISION. THERE AREN'T ANY PARTS IN THIS APPLIANCE
WHICH ARE REPARABLE BY CONSUMER. ALWAYS APPEAL TO A QUALIFIED AUTHORIZED SERVICE. THE PRODUCT IS UNDER A DANGEROUS TENTION.
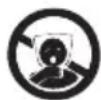

TO AVOID DANGER OF SUFFOCATION, KEEP THE PLASTIC BAG AWAY FROM BABIES AND CHILDREN. DO NOT USE THIS BAG IN CRIBS, BEDS, CARRIAGES OR PLAYPENS. THIS BAG IS NOT A TOY.
Disposal of old Electrical & Electronic Equipment
(Applicable in the European Union and other European countries with separate collection systems)
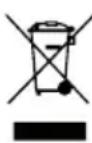
This symbol on the product or on its packaging indicates that this product shall not be treated as household waste. Instead it shall be handed over to the applicable collection point for the recycling of electrical and electronic equipment. By ensuring this product is disposed of correctly, you will help prevent potential negative consequences for the environment and human health, which could otherwise be caused by inappropriate waste handling of this product. The recycling of materials will help to conserve natural resources. For more detailed information about recycling of this product, please contact your local Civic Office, your household waste disposal service or the shop where you purchased the product.
Hereby, ETA a.s. declares that the radio equipment type ME3565SMART is in compliance with Directive 2014/53/EU. The full text of the EU declaration of conformity is available at the following internet address: www.gogen.cz/declaration_of_conformity
WPROWADZENIE
| EN - English | ||
| Charging adapter | ||
| A | Manufacturer's name or trademark, business registration number and address | Dongguan Shijie Hua Xu Electronics Factory91441900345342145HNo.200, Technology East Road, Shijie Town,Dongguan City, Guangdong, P.R.China |
| B | Model identifier HX075-0501200-AG-001 | |
| C | Input voltage 100-240 V | |
| D | Input frequency 50/60 Hz | |
| E | Output voltage 5,0 V | |
| F | Output current 1,2 A | |
| G | Output power 6,0 W | |
| H | Average efficiency in active mode 76,76% | |
| I | Low load efficiency (10%) | - |
| J | Power consumption without load | 0,087 W |
natural_image
Abstract black and white circular logo with stylized white 'S' or wave-like design (no text or symbols)- ÚVOD
- MAINTENANCE / CLEANING
- DISPLAY
- GETTING STARTED
- Installation
- Outdoor Sensor
- Main Unit
- INTERNET CONNECTION
- Using the TUYA app
- BASIC OPERATION
- TIME SETTING
- ALARM SETTING
- Turn off the alarm/SNOOZE
- MAX/MIN DATA
- TEMPERATURE ALERT
- SPECIFICATIONS
- Sensor
- Disposal of old Electrical & Electronic Equipment
- (Applicable in the European Union and other European countries with separate collection systems)
- WPROWADZENIE
Brand : GoGen
Model : ME 3565 SMART
Category : Weather Station