
Alarmex Pro - Alarm system Evolveo - Free user manual and instructions
Find the device manual for free Alarmex Pro Evolveo in PDF.


| Product Type | Wireless Alarm System |
| Brand | Evolveo |
| Model | Alarmex Pro |
| Dimensions (Control Panel) | 160 x 120 x 30 mm |
| Weight (Control Panel) | 0.5 kg |
| Power Supply | DC 12V / 1A adapter with backup battery (3.7V Li-ion) |
| Backup Battery | 3.7V 500mAh rechargeable battery |
| Main Functions | Motion detection, door/window sensors, siren, remote control, smartphone app control, push notifications |
| Number of Sensors | Up to 32 wireless zones |
| Communication | 433 MHz RF, Wi-Fi (2.4 GHz) |
| Alert Type | Audible siren (105 dB), app notification, SMS (optional) |
| Operating Temperature | -10°C to 50°C |
| Maintenance & Cleaning | Wipe with dry cloth; avoid moisture; check battery annually |
| Safety | Overcurrent protection, tamper-proof casing, encrypted communication |
| Spare Parts & Repairability | Contact Evolveo support or authorized service centers; sensors and batteries available separately |
| General Information | Home security system with easy DIY installation; compatible with Evolveo Home app |
Frequently Asked Questions - Alarmex Pro Evolveo
User questions about Alarmex Pro Evolveo
0 question about this device. Answer the ones you know or ask your own.
Ask a new question about this device
Download the instructions for your Alarm system in PDF format for free! Find your manual Alarmex Pro - Evolveo and take your electronic device back in hand. On this page are published all the documents necessary for the use of your device. Alarmex Pro by Evolveo.
USER MANUAL Alarmex Pro Evolveo
natural_image
Product image showing various white and black automotive sensor devices including lockers, a door, and a water dispenser (no text or symbols visible)Obsah / Content / Tartalom / Continut / Kazalo
Česky 4
Slovensky 33
English 62
Magyar 90
Română 120
Slovenščina.... 150
CZ
SK
EN
HU
RO
SL
Obsah
Obecný popis 4
Google Play
App Store
| 1) Červený LED indikátor2) Fresnelova čočka3) Otvory pro montážní šrouby4) Otočný nosič senzoru | 5) Přední kryt detektoru6) Fresnelova čočka7) 9V baterie8) IR fotosenzor |
Copyright © Abacus Electric, s.r.o.
www.evolveo.com
www.facebook.com/EvolveoCZ
Dovozce / Dovozca / Importer / Importór / Importator
Abacus Electric, s.r.o.
No.5, 17/F, Strand 50, 50 Bonham Strand, Sheung Wan, Hong Kong
Vyrobeno v Číně
Google Play
App Store
No.5, 17/F, Strand 50, 50 Bonham Strand, Sheung Wan, Hong Kong
Vyrobené v Číne
Description of the central panel.... 66
Functions 68
User Interface 68
Introduction to the Menu.... 69
Securing/de-securing the panel using a text message command 74
Smart Life application 75
Downloading the application - Smart Life 75
Register and log into the application.... 75
Connecting the panel to the Smart Life application.... 76
Smart Life application user interface.... 77
Smart Life application accessories settings 78
Sensors....79
Motion Sensors....79
Motion sensor installation.... 80
Wireless control.... 81
Magnetic door / window sensor 82
Specifications 84
Security Panel 84
Motion Sensor 84
Door / windows sensor.... 84
Remote control....85
Wireless siren 85
Troubleshooting and Maintenance 85
General description
Dear Customer, thank you for choosing EVOLVEO Alarmex PRO. We believe that the product will serve you well.
The security control panel is equipped with a high-powered intelligent microprocessor with low energy consumption, 4.3" IPS color screen and capacitive touch input. The security control panel can be connected to a motion detector, door sensors, smoke detectors, gas detectors, emergency buttons, remote control and other accessories. After activating the accessories, the security panel may display an alarm status and a warning is set off in real time. It can also send the security panel status in the user's mobile application in real time using integrated WiFi. Owing to GSM module 2G, the user can be notified of any alarm events via phone calls or text messages.
Basic terms description
Security panel: The central unit of the EVOLVEO Alarmex PRO product is an integrated gate for all accessories.
Complete activation: If the security panel is in the Complete activation mode, after activation the accessories set off an alarm.
Partial activation: In case the user is at home, it is possible to activate only the peripheries of the guarded object.
Deactivated: Alarm is activated by SOS button only, or by accessories in the "Continuous activity" mode.
Remote control: When paired, the security panel can be controlled remotely and can go over to “Complete activation”, “Partial activation” and “Deactivation” mode. Remote control also has the SOS button.
Accessories: Install in the appropriate area based on the accessory type.
After activating the sensor alarm is immediately sent to the switchboard for further processing. Common sensors include door sensors, infra-red motion detectors, smoke detectors, gas detectors, etc.
Wireless siren: When accessories are activated, the alarm is set off by the security panel and also by the paired wireless siren.
Telephone: When the security panel sets off an alarm, a text message is sent or a call is made to the mobile phone number set for warnings in real time.
Delay when the alarm is activated: if the security panel is in the “Complete activation” mode, the security panel goes to the guard with delay status, so the user has enough time to leave the monitored space.
Alarm delay: When the security panel receives an alarm signal from detectors, the alarm is delayed for some time. During the delayed alarm it
can be cancelled by using the user password on the security panel, remote control, or via the application.
Siren alarm length: Alarm length duration, after which the siren stops wailing.
User password: Default user password is 1234 and the user can modify their user password. User password is necessary if you want to configure the WiFi network, arm, set your accessory and the mobile phone number, and edit the security settings.
System password: Default system password is 9876 and the user can modify their system password. System password is required for “Restoring” and “Restarting” the security panel.
Rules for entering password: After entering the right password it is not necessary to enter the password again for the period of 5 minutes. After this period expires, or in case the security panel goes into the sleep mode, it is necessary to enter the password again.
Hidden password: When entering your password, you can enter 5 to 8 digits of the hidden password. If the numerical sequence contains 4 correct digits following one after another, it can be recognized as the correct password.
Switchboard local alarm: When activating accessories, the security panel and wired siren make an alarm sound signal.
Siren alarm: After activating accessories, the wireless siren makes an alarm sound signal.
Siren beeping: When the security panel status switches, an impulse is sent for the siren to beep shortly.
Delayed beeping sound: If the security panel is in the delayed activation or delayed alarm mode, the sound signal sets off after the period of delay is over.
Warning of opened doors/windows: Unless the doors and windows are closed, a message appears in the security panel interface after switching to the “Complete activation” mode.
Ringing when doors/windows are open: When opening doors or windows, the security panel makes a sound signal.
Voice message: When the user uses the security panel, they have a corresponding message at their disposal.
Keypad sounds: When the user uses the security panel, a beeping sound is heard after pressing the keys, which makes using the touch panel very easy.
Bell volume: When you press the bell key, the security panel makes the bell sound.
Remote control: The user can activate and deactivate the device via their mobile application.
Tamper: In the back of the panel, there is a switch protecting it against disassembly, which sends a signal if the panel is removed using external force.
Timer: In the application the user can adjust the time, when the security panel automatically enters into the Complete activation / Partial activation / Deactivated mode.
Bell: When the bell activates, no alarm starts and the security panel makes a warning “dingdong” sound.
Alarm type: The individual accessories are designed for various types of monitoring. The type of alarm helps the user and the security panel to distinguish between them.
The types of alarm are as follows: System alarm, door alarm, alarm in the hall, emergency alarm, alarm in the bedroom, window alarm, balcony alarm, perimeter violation alarm, fire alarm, gas leak, CO leak, and water leak.
Zone: It is used to distinguish between the individual detectors, e.g. based on the room where they are located.
Mode: 7 options
- Always active : After activating detectors in this mode, alarm is set off if the security panel is in the “Complete activation” or “Partial activation” mode.
- Partial activation : After detectors are activated in this mode, alarm is set off only if the security panel is in the “Partial activation” mode.
- Continuous activation : Regardless of the security panel status, whenever the detector is activated, the alarm is announced. This mode is recommended to be set for detectors of gas leak, smoke, etc.
- Inactive : The security panel will not react to the activation of detector set in this mode.
- Secret report : If accessories set in this mode set off an alarm, the security panel sends a remote report (notice, application, phone/text message notification), but it will not activate any local alarm report (for example siren).
- Always active (without delay) : Activation of a detector set in this mode sets off the alarm immediately, without delay, if the security panel is set in the “Complete activation”, or “Partial activation” mode.
- Partial activation (without delay) : Activation of a detector set in this
Security panel:
Main functions
- Built-in highly efficient processor with a core, main frequency up to 600 MHz, high power, fast and smooth operation.
- 4.3" color IPS display, wide observation angle of the display, better visual experience.
- Comfortable control using capacity, touch display.
- New interactive interface Xsense UI.
- Built-in WiFi 2.4GHz, support of application notifications, GSM 2G for phone/text message notification.
- Up to 200 detectors, remote controls and bells.
• 7 modes of accessories
• Automatic synchronization of date and time - Event history (150 records of alarm, 50 records of securing and de-securing)
- Up to five mobile phone numbers settings for text messages and calls.
- Notification of power failure, flat battery, disassembly of the central unit
- Gong function when opening doors/windows.
- Alarm warning using application notifications.
• Support of wired/wireless siren. - Hidden password input function.
- Remote control using application.
• Support of multiple languages.
• Support of online OTA update.
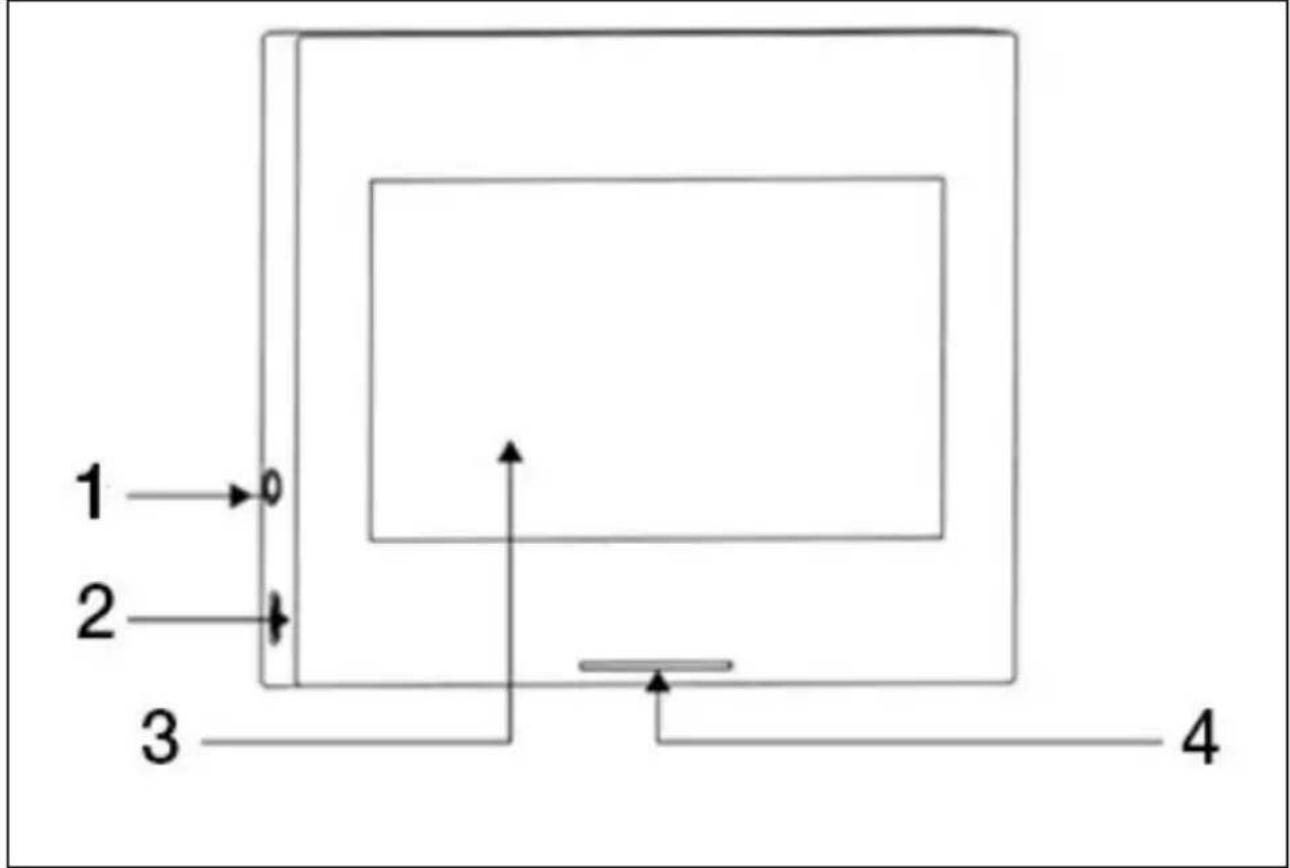
Description of the central panel
flowchart
graph TD
    A["1"] --> B["0"]
    C["2"] --> D["1"]
    E["3"] --> F["4"]
    G["4"] --> H["5"]
    style A fill:#f9f,stroke:#333
    style C fill:#f9f,stroke:#333
    style E fill:#f9f,stroke:#333
    style G fill:#f9f,stroke:#333
    style H fill:#f9f,stroke:#333
| 1) 3.5mm siren interface(Warning: Do not use for connecting your earphones)2) MicroUSB 5V ~1A power supply | 3) 4.5” capacity touch display4) LED indicator |
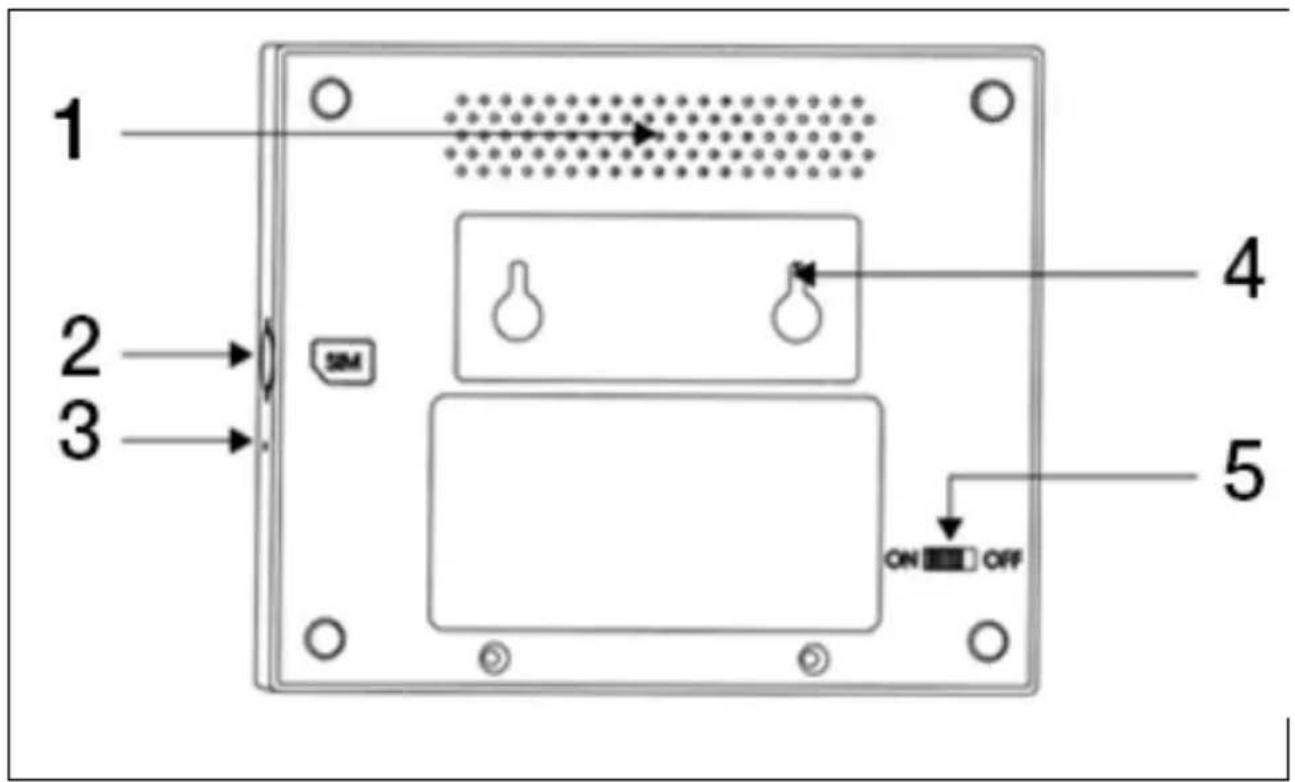
| 1) Loudspeaker2) Micro SIM slot3) Microphone | 4) Switch against disassembly5) Battery switch(Warning: Switch on before use) |
LED:
| Color | Panel status |
| Red | Alarm activated |
| Yellow | Complete Activation |
| Green | Deactivated |
| Blinking | Panel status |
| Yellow / Green | Delayed activation |
| Red / Green | Delayed alarm |
Warning:
- The security panel should be installed approximately in the middle of the detectors location to ensure the best possible wireless communication between the security panel and the detectors.
- With respect to the fact that the security panel and detector use wireless communication, do not install any sources of interference, such as microwave ovens, motors, and other similar devices.
User Interface
| Status line | 1) Time | Shows the real time |
| 2) Text message | Sending text messages | |
| 3) Call | Calling the preset phone number | |
| 3) Wifi signal | Shows the WiFi signal strength | |
| All segments grey mean there is no WiFi signal | ||
| 4) 2G signal | SIM card not inserted | |
| Shows the 2G signal strength | ||
| All segments grey mean there is no 2G signal | ||
| 5) Power Supply status | External power supply | |
| Battery power supply | ||
| Main menu interface | 6) Security panel status | Deactivated: The shield is whiteDelayed activation: The orange circle shows the countdownComplete activation: The shield is orangeAlarm delay: The red circle shows the countdownAlarm: The shield is red |
| 7) Time / Event | Displays current time / year / month / day. At abnormal condition it displays detailed information. | |
| 8) Complete Activation | Orange pattern means that the “Complete activation” function has been activated or is being activated. | |
| 9) Partial Activation | Orange pattern means that the “Partial activation” function has been activated. | |
| 10) Deactivated | The pattern is always white. | |
| 11) Menu | Display the security panel menu by clicking. | |
| 12) Record | By clicking display records of the security switched on / off and notification records. Red dot in the upper right corner indicates that you have some unread records. |
Introduction to the Menu
| Accessories | Detectors | Adjustment of all detectors | |
| Controls | Adjustment of all remote controls / keychains | ||
| Bells | Adjustment of all bells | ||
| Sirens | Pairing of wireless sirens | ||
| Telephone | Call | Dial up the mobile phone number | |
| Phone settings | There can be set 5 phone numbers and it can support individual control of the function that the alarm sends a text message to every number. |
| Security | Delay | Delayed activation (s) | Set up the delay for delayed activation | |
| Range: 0~180 seconds; Default: 40 seconds | ||||
| Alarm delay (s) | Set up delay for “Delayed alarm” | |||
| Range: 0~180 seconds; Default: 30 seconds | ||||
| Siren period | Set up period of alarm siren | |||
| Range: 0~1800 seconds; Default: 180 seconds | ||||
| Password | Adjustment of user password | Change of user password, if you forget the password, please, contact the customer support. | ||
| Range: 0000 ~ 9999; Default: 1234 | ||||
| Adjustment of system password | Change of system password | |||
| Range: 0000 ~ 9999; Default: 9876 | ||||
| Alarm | Warning tune | Switch on / off siren sound | ||
| Default: Switched off | ||||
| Local alarm | Switch on / off local alarm | |||
| Default: Switched on | ||||
| Siren beeping | Switch on / off siren beeping | |||
| Default: Switched off | ||||
| Delayed beeping | Switch on / off the beeping sound during the delay countdown. | |||
| Default: Switched on | ||||
| Ringing when door / windows are open | Switch on/off ringing when door / windows are open. Paired door sensor is necessary. | |||
| Default: Switched on | ||||
| Warning when door / windows are open | Switch on/off warning when door / windows are open. Paired door sensor is necessary. | |||
| Default: Switched on | ||||
| Settings | WiFi | Airlink (recommended) | Quick WiFi configuration (recommended) | |
| SoftAP | WiFi hotspot configuration | |||
| Time | Time settings | Setting the year, month, day, hour, minute and second of the security panel. | ||
| Time synch. | Switch on / off network time synchronization | |||
| Default: Switched on | ||||
| Sound | Warning tune | Switch on / off of voice notification | ||
| Default: Switched on | ||||
| Keypad sounds | Switch on / off keypad sounds | |||
| Default: Switched on | ||||
| Bell volume | Bell Volume Settings | |||
| Range: 0 ~ 9; 0 means that the bell will not generate a tune; Default: 8 | ||||
| Settings of volume for security panel | ||||
| System volume | system notifications | |||
| Range: 0 ~ 9; 0 means that the system will not generate a tune; Default: 7 | ||||
| Display | Screen display time | |||
| Range: 10~180seconds; Default: 60 seconds (0: always switched on) | ||||
| Language | Language selection | Czech / English / Slovak / Hungarian / Romanian / Slovenian / Italian / German / Polish | ||
| Restore | Restore | Restore of factory settings of the security panel | ||
| Restart | Security panel restart | |||
| Cleaning | Select this mode when the device screen needs to be cleaned. No keys react for the period of one minute to prevent false activation. | |||
| Help | Scan the QR code to display Czech/English guide or to download the application. | |||
| Display your model version, Serial number SN, MAC address, CSQ, IMEI serial number and GSM | ||||
Securing/de-securing the panel using a text message command
The switchboard can be secured/de-secured remotely, it can also be secured/de-secured via a text message (firmware version 1.0.20 or higher).
Text messages and the panel actions are specified below:
| no. | Text message order | Action executed by the panel | Text message reply |
| 1 | away arm | The panel goes to the “Complete activation” status | System away armed! |
| 2 | stay arm | The panel goes to the “Partial activation” status | System stay armed! |
| 3 | disarm | The panel goes to the “Deactivated” status | System disarmed! |
The panel responds with a message confirming the successful execution of order.
WARNING: The panel receives text message orders only from the phone number set in the panel (Menu-->Telephone-->Settings), text message orders sent from other mobile phone numbers will not be recognized and executed.
WARNING: For using the option to send text message and call warnings and text message orders for control, it is necessary to insert an active SIM card with deactivated PIN code in the security panel.
Smart Life application
This device can be connected and controlled via Smart Life application (you can also use Tuya Smart application as its alternative). Please download the "Smart Life" application first from the app store. The relevant details of the manual are as follows:
Downloading the application - Smart Life
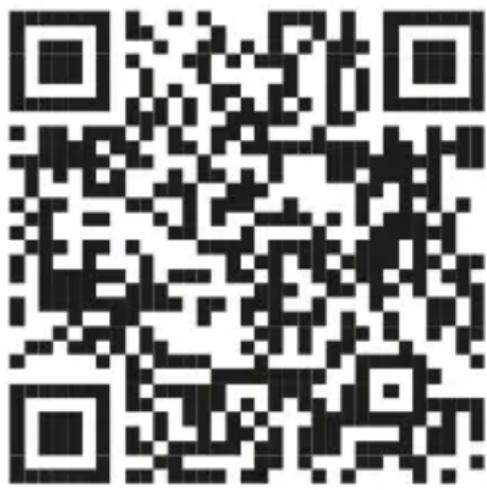
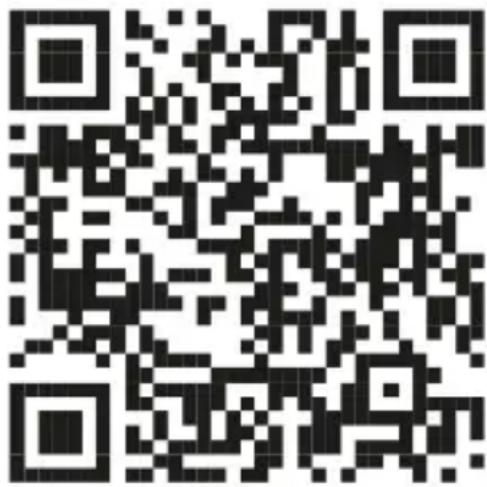
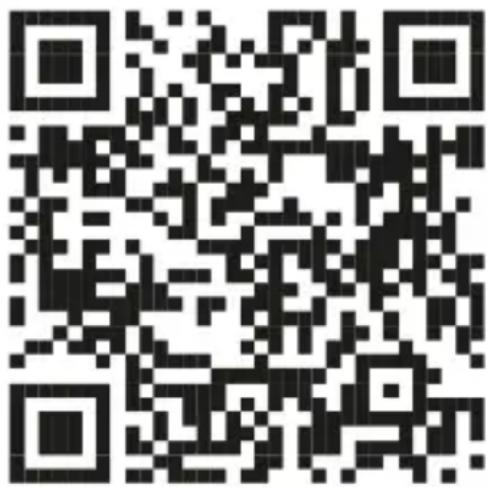
The users can find the “Smart Life” application in the main app stores worldwide or scan the QR code below to download it.
Google Play
App Store
Register and log into the application
- After you launch the application, the "Log In" and "Register" options will display. If you already have your Smart Life account, log in and proceed to "Connect the panel to Smart Life application".
- The user may register his/her new account by clicking the "Register" option. "User Agreement and Privacy Policy" will display, read it carefully and click the "Agree" button.
- After clicking the "Agree" button, the interface for your account registration will appear. There are two options in the interface: "Country", "Mobile phone number/E-mail".
- Select your Country from the list. This information is mandatory.
- We recommend that you enter your mobile phone number in the "Phone number/E-mail" field. Then select "Acquire verification code".
Consequently, fill in the six symbol verification code you acquired, in the application.
- After completing the previous step, the interface for setting a “password” will display. Enter a password at your own discretion. After successfully setting a password, the application window enabling you access the “User Authorization Interface” will appear. Enter the required authorization and select the “Enter APP” option to access the application interface.
WARNING: The application is continuously updated and developed, individual steps may differ after updates. In case of any difficulties in the process we recommend that you contact the service center.
Connecting the panel to the Smart Life application
WARNING: Before you start using the Smart Life application, connect your mobile phone to the 2.4GHz WiFi network.
- Open the "Smart Life" application and enter the "My Home" application interface.
- Click the "+" in the upper right corner and select "Add Device".
- Click the option "Sensors" and then click the "Alarm (WiFi)", the interface will show the WiFi connected to the phone.
- Enter your WiFi password.
- After entering your WiFi password, click the "Next" and in the pop-up interface enter "Confirm that your indicator is blinking fast". Click "next".
- Click "Next". Device search option will appear.
- Click successively the "Menu", "Settings" and "WiFi" on the security panel.
- Enter default user password: 1234 and click the "Airlink (recommended)".
- “WiFi settings will be reset, please confirm” message will appear on your device. After clicking the “OK” option, the device will show the following message: “Setting, please wait”.
- After successful connecting your device to the application, the device will issue “Successfully Set” voice notification. The application will also display that the device was successfully added.
- You can rename the device using the pen symbol now. Then select "Finish" in the upper right hand corner.
- The device is successfully paired with your mobile phone. Now you can use your mobile phone to control the device remotely, even if the phone is not connected to the WiFi network.
Smart Life application user interface
| Status line | Power Supply status | External Power supply | Indicates that the panel is currently powered by an external power supply. |
| Battery power supply | Indicates that the panel is currently powered by a built-in battery. | ||
| 2G signal | No network | Indicated that the security panel is not connected to 2G network. | |
| No SIM card | Indicates that the security panel did not detect any SIM card. | ||
| Network signal | Indicates that the 2G signal strength is 1 ~ 5. | ||
| Security panel status | Display the security panel status, including the Complete Activation, Partial Activation, SOS and Deactivated modes. | ||
| Control panel | Complete Activation | The panel goes to the “Complete activation” status. | |
| Partial Activation | The panel goes to the “Partial activation” status. | ||
| SOS | “SOS” alarm activation. | ||
| Deactivated | The panel goes to the “Deactivated” status. | ||
| Records | Display of alarm records and security switchboard operation records. | ||
| Accessories | You can add, remove, display and rename accessories. | ||
| Settings Various security panel settings. | |||
Smart Life application accessories settings
The procedure is as follows:
- Open the application, click the "Accessories", you can view the number of any added remote controls, detectors, bells and zone types and attributes.
- Accessories can be added remotely using “+” button in the upper right hand corner of the application. A device search will launch, during which a scanner, which you want to pair with the alarm, is activated.
- By pressing and moving accessories to the left you remove or modify your accessories.
- Accessories can be renamed for easier management and detailed alarm contents.
You can edit the type and attribute of every detector in the application.
Sensors
Motion Sensors
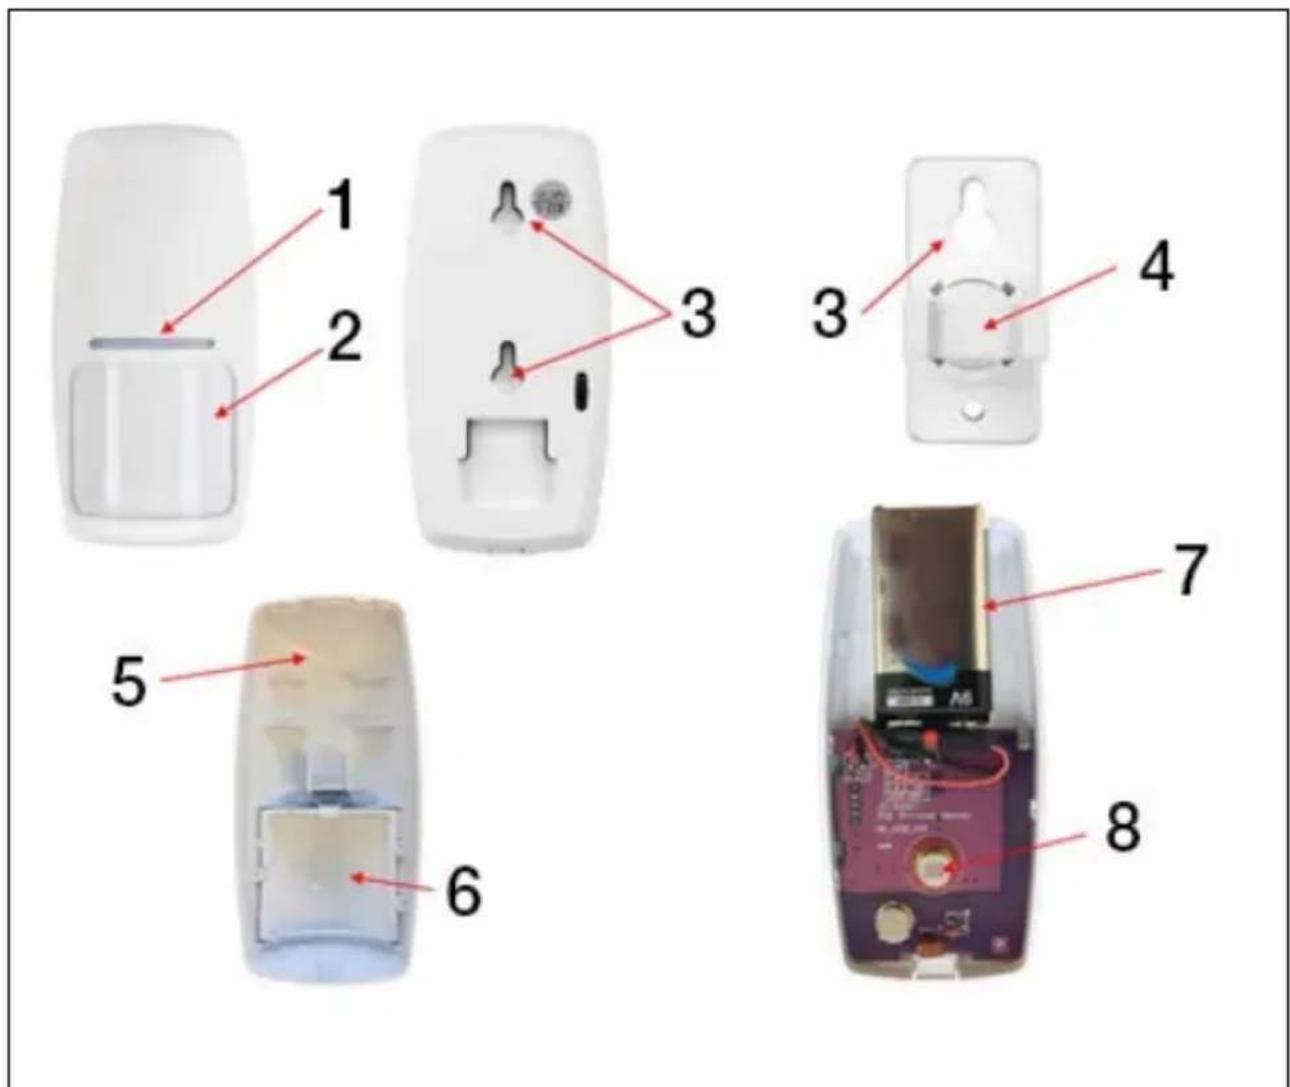
| 1) Red LED Indicator2) Fresnel lens3) Assembly screws holes4) Revolving sensor carrier | 5) Front cover of the sensor6) Fresnel lens7) 9V battery8) IR photosensor |
Motion sensor installation
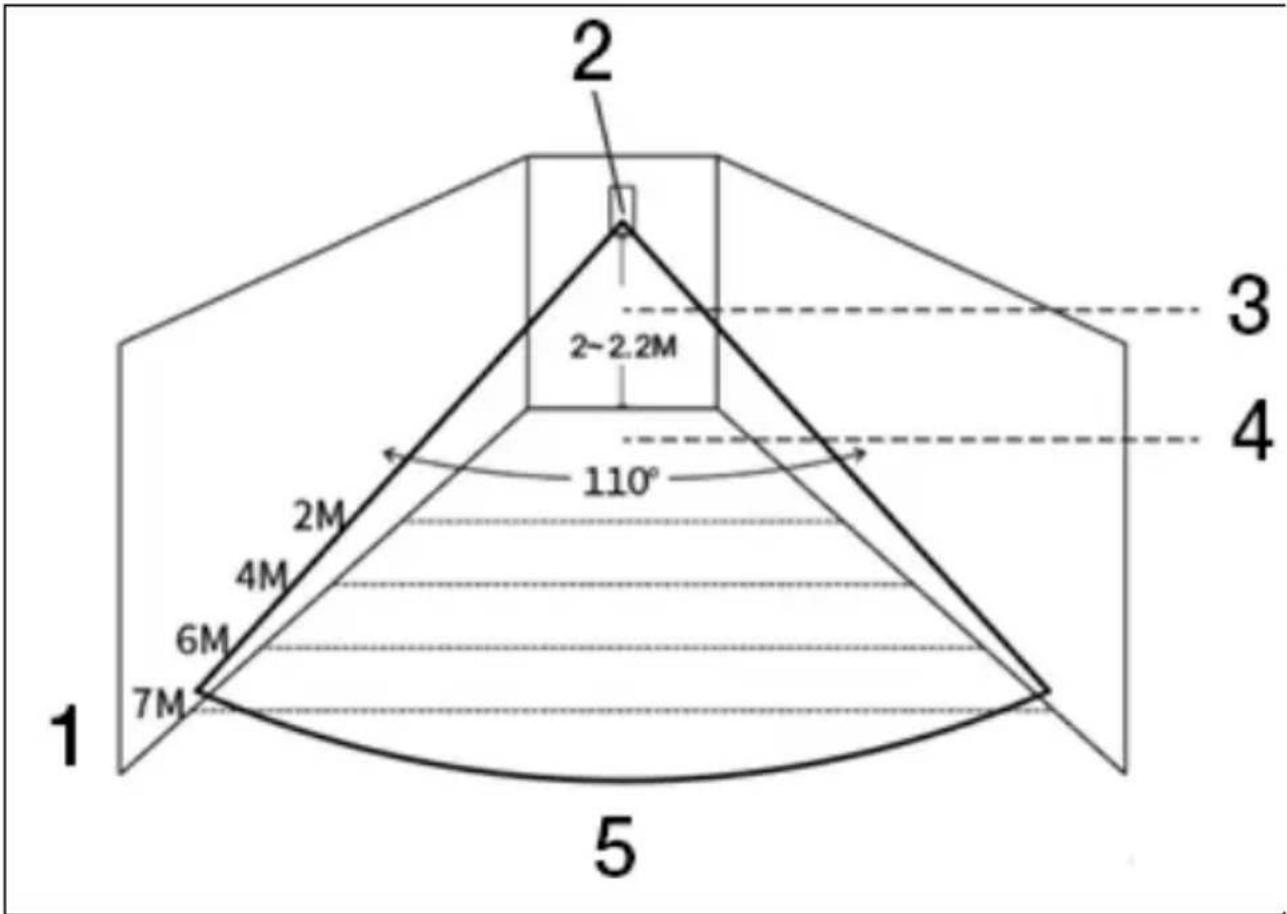
| 1) Effective sensor range2) Infrared motion sensor3) Assembly height | 4) Effective detection angle5) Angle of view |
WARNING:
- Recommended height of installation is 2.0 \~ 2.2 meters above ground, detection distance is ≤12m, transmission distance is ≤150 meters (no obstacles). Test the distance before installation.
- We do not recommend installation directly in front of mirrors, doors and windows.
• We do not recommend installation in the vicinity of cold and heat sources. - Do not install sensors in places with constant flow of air, which could activate a false alarm. For example moving curtains due to draft.
Wireless control
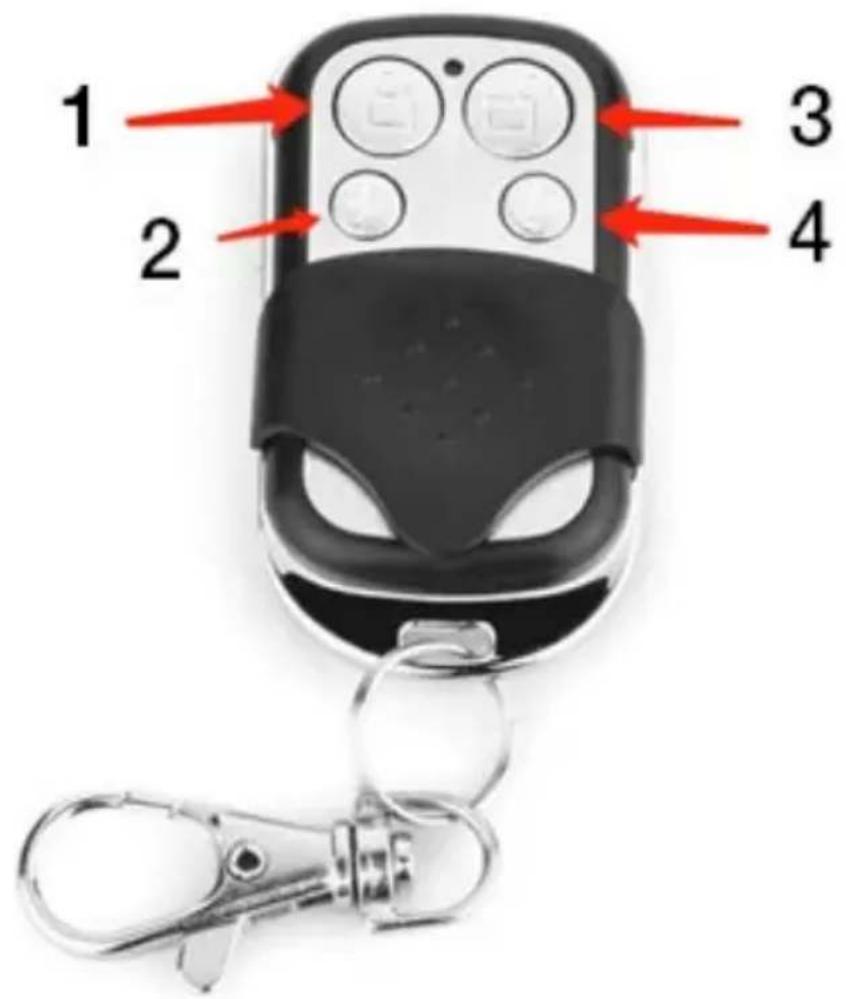
Magnetic door / window sensor
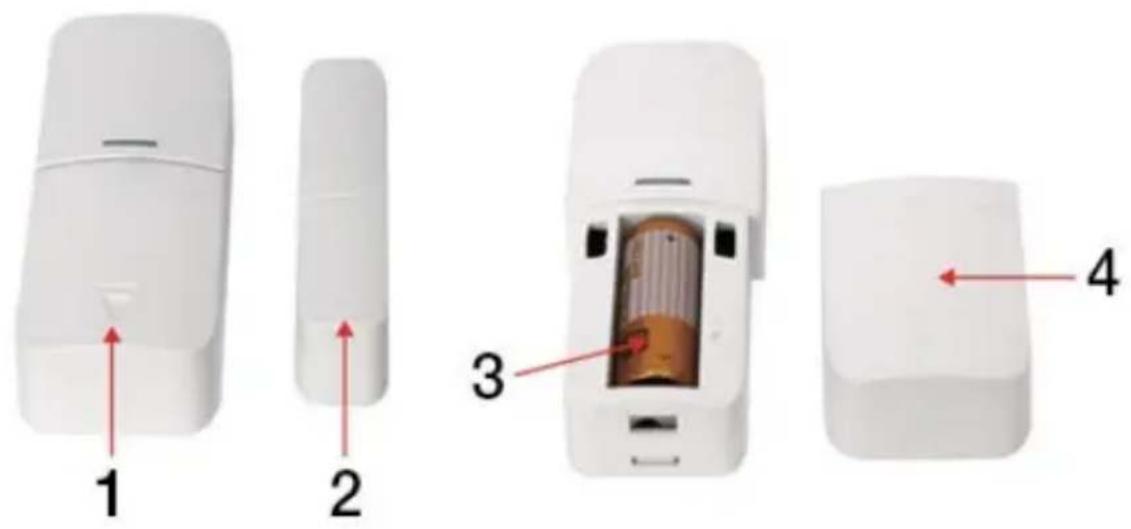
1) Sensor
2) Magnet
3) 12V A23 battery
4) Removable cover
Assembly
Door sensor should be installed on your door or windows.
- First, degrease the place on the door and the bottom of the sensor, best use alcohol. Glue the double-sided tape to the bottom of the sensor.
- Transmitter of the door sensor (large) and the door sensor magnet (small) should be installed separately, i.e. the transmitter should be installed on the solid frame od the door and the magnet should be on the moving part of the door.
- Triangle marks on the transmitter and the magnet should face each other and the distance between them should not exceed 10 mm.
When you open the door after the installation, a warning light, which signals that the installation has been completed, should shine for 2 seconds.
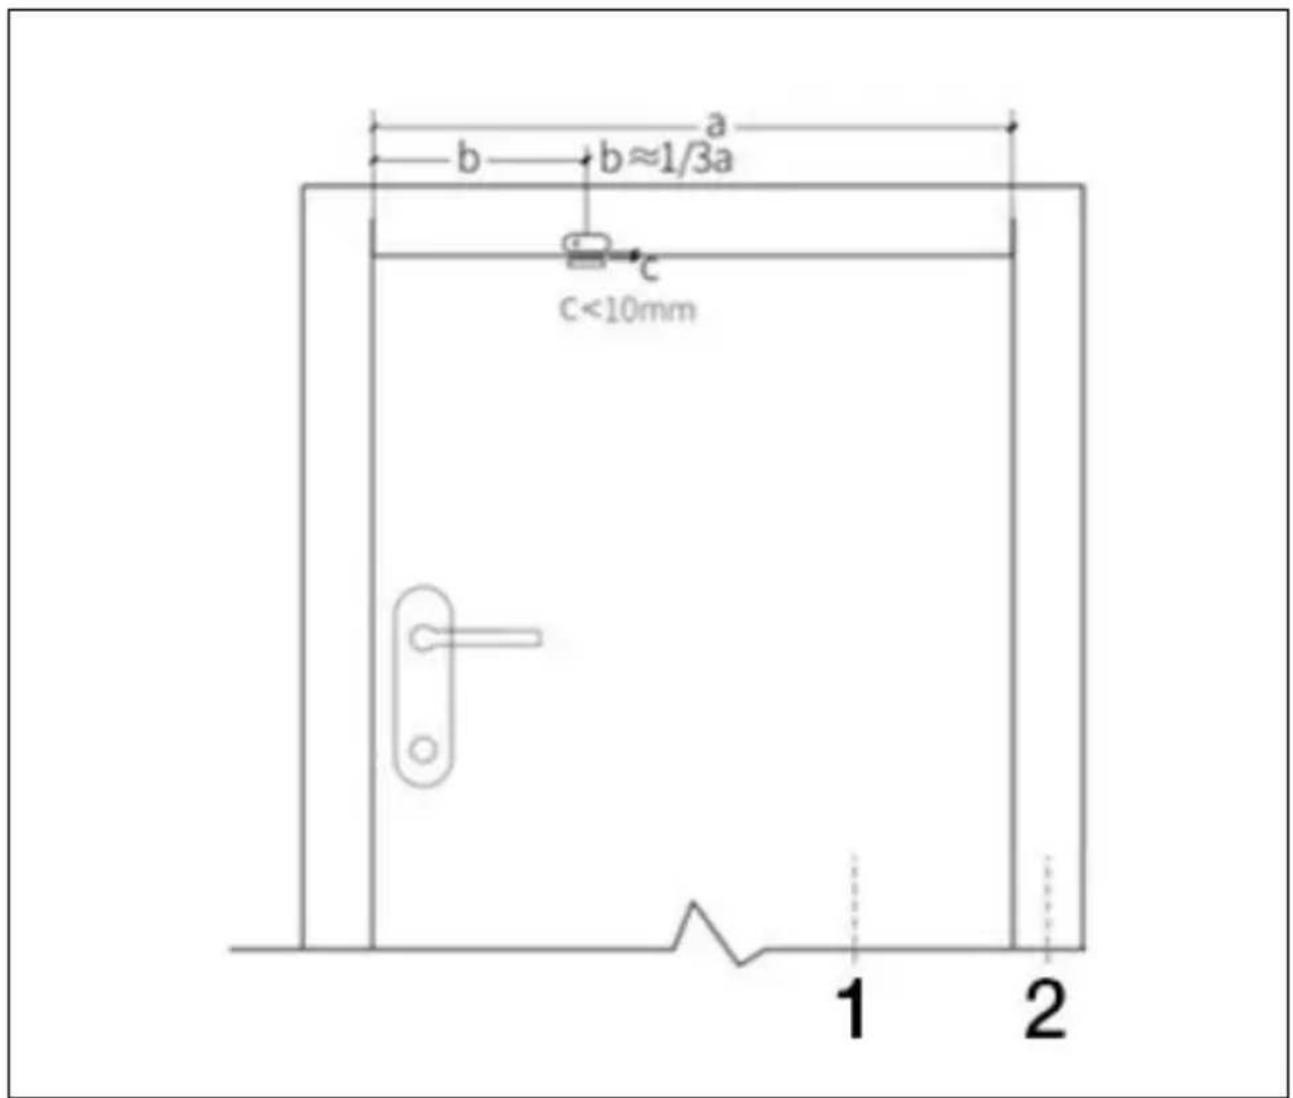
| 1) Door | 2) Doorframe |
WARNING:
- The transmission distance is ≤ 100M (no obstacles), test the distance before installation.
- The warning light shines for 2 seconds, which signals the alarm, and the warning light is blinking for 2 seconds signaling the battery is depleted.
- If the door sensor is installed on an iron door, the distance between sensor and the magnet should be the shortest possible.
Security Panel
| Power supply: 5V 1.0A, micro USB | WiFi: IEEE802.11b/g/n; Frequency bandwidth 2.4G |
| Integrated lithium battery 3.7 V 500mAh | Working temperature: -10 °C ~ +50 °C |
| Consumption when activated: < 3 W | Relative humidity: < 95% (no condensation) |
| Wireless connection: 433MHz | Mobile standard: 2G |
| Product size: 120 x 98 x 12 mm |
Motion Sensor
| Battery Specifications: 6F22 9V *1 | Quiescent current: ≤15μA |
| Alarm current: ≤25mA Motion detection: <12m/110° | |
| Relative humidity: < 95% (no condensation) | Working temperatures: 0°C~ +55°C (32°F~122°F) |
| Wireless connection parameters: 433MHz, | Product size: 110 x 52 x 38 mm |
Door / windows sensor
| Battery Specifications: 23A 12V *1 | Quiescent current: ≤8μA |
| Alarm current: ≤15mA | Relative humidity: < 95% (no condensation) |
| Wireless connection parameters: 433MHz | Working temperatures: 0°C~ +55°C (32°F~122°F) |
| Product size: 65 x 24.5 x 14mm / 51.5 x 12.5 x 11mm |
Remote control
| Battery Specifications: 23A 12V *1 | Quiescent current: ≤5μA |
| Alarm current: ≤15mA | Working temperatures: 0°C~ +55°C (32°F~122°F) |
| Wireless connection parameters: 433MHz | Product size: 53 x 28 x 11 mm |
Wired siren
| Power supply: 3-12V | Alarm current: ≤110mA |
| Sound Volume: 110dB | Product size: 53 x 53 x 48 mm |
Troubleshooting and Maintenance
| Error | Cause | Solution |
| Remote control malfunction | 1. Weak battery2. Bad condition of contacts in the battery compartment, or they are oxidized3. The controls are not paired with the device4. Does not comply with the panel wireless parameters | 1. Exchange the battery of the same type2. Remove contaminants from the metal sheet3. Pair with the panel again4. Purchase accessories of the same type with corresponding technical parameters |
| Door / windows sensor malfunction | 1. Weak battery2. Bad condition of contacts in the battery compartment, or they are oxidized3. Sensor is not paired with the panel4. Does not comply with the panel wireless parameters5. Distance between door sensor and magnet is too large | 1. Exchange the battery of the same type2. Remove contaminants from the metal sheet3. Pair with the panel again4. Purchase accessories of the same type withcorresponding technical parameters5. Install the transmitter of the door sensor and the magnet close to each other. |
| Motion sensor malfunction | 1. Weak battery2. Bad condition of contacts in the battery compartment, or they are oxidized3. Sensor is not paired with the panel4. Does not comply with the panel wireless parameters5. Wrong angle | 1. Exchange the battery of the same type2. Remove contaminants from the metal sheet3. Pair with the panel again4. Purchase accessories of the same type with corresponding technical parameters5. Adjust the fixation angle |
| The security panel does not activate an alarm | 1. It is not in the “Complete Activation” mode2. Incorrect installation of accessories, too far from the panel3. Accessories code does not correspond with the panel | 1. Put the panel into the “Complete Activation” mode2. Adjust the accessories position3. Pair the accessories again |
| Signal distance of the receiving accessories is becoming shorter. | 1. Main power supply is disconnected and the backup power supply is inadequate.2. Similar products in the vicinity interfere with the device3. Receiving module of the panel is defective | 1. Check power supply and reconnect2. Check the source of interference and remove it3. Contact the customer's service |
| No distress call is made, when an alarm is activated | 1. Panel is not in the “Complete Activation” mode2. No distress mobile phone number is set3. Incorrect installation of accessories, too far from the switchboard4. Coding does not respond | 1. Put the panel into the “Complete Activation” mode2. Repeated setting according to instructions3. Adjust the accessories positions4. Repeated pairing with panel |
| WiFi configuration failed | 1. 2.4GHz WiFi is not connected2. The router does not allow for quick configuration.3. Damaged WiFi module | 1. Connection to 2.4GHz WiFi2. Use the mode for WiFi hotspot configuration3. Contact your customer service |
| Opened doors / windows warning is incorrect. | 1. Door sensor pairing error2. Door sensor code does not correspond with the panel3. Wrong type of alarm is set | 1. Pair sensor with the panel again2. Accessories are uncertified devices3. Set this alarm type as the main door alarm and windows alarm |
Technical support
Contact Technical Support EVOLVEO: www.evolveo.cz/helpdesk/
The warranty DOES NOT INCLUDE cases when the device is used for other purposes, installation of other firmware other than the one installed in EVOLVEO Alarmex PRO, or which can be downloaded manually or automatically from the device menu or application, in case of electromechanical or mechanical damage
caused by improper use, damage caused by natural elements, such as fire, water, static discharge, overload, damage caused by unauthorized repair, etc.
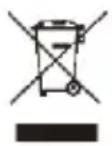
The crossed container symbol on the product, in literature or on the packaging means that in the EU all electric and electronic devices, batteries and accumulators must be disposed of in sorted waste at the end of their working life. These products must not be disposed of as unsorted municipal waste.

Abacus Electric, s.r.o. declares that EVOLVEO Alarmex PRO is in compliance with the requirements of the standards and regulations applicable to this type of device.
The full text of the Declaration of Conformity can be found at https://ftp.evolveo.com/CE/
Copyright © Abacus Electric, s.r.o. www.evolveo.com www.facebook.com/EvolveoCZ
Dovozce / Dovozca / Importer / Importör / Importator Abacus Electric, s.r.o. Planá 2, 370 01, The Czech Republic
Výrobce / Výrobca / Manufacturer / Gyártó / Producător Naxya Limited No. 5, 17/F, Strand 50, 50 Bonham Strand, Sheung Wan, Hong Kong Made in China
All rights reserved. The design and specifications are subject to change without prior notice.
Tartalom
Általános leírás 90
Google Play
App Store
Copyright © Abacus Electric, s.r.o.
www.evolveo.com
www.facebook.com/EvolveoCZ
Dovozce/Dovozca/Importer/Importór/Importator
Abacus Electric, s.r.o.
No.5, 17/F, Strand 50, 50 Bonham Strand, Sheung Wan, Hong Kong
Kínában készült
Minden jog fenntartva.
Google Play
App Store
No.5, 17/F, Strand 50, 50 Bonham Strand, Sheung Wan, Hong Kong
Fabricat în China
Google Play
App Store
Registracija in prijava v aplikacijo
Copyright © Abacus Electric, s.r.o.
www.evolveo.com
www.facebook.com/EvolveoCZ
Dovozce / Dovozca / Importer / Importör / Importator / Uvoznik Abacus Electric, s.r.o.
Planá 2, 370 01, Češka republika


- Obsah / Content / Tartalom / Continut / Kazalo
- Obsah
- General description
- Basic terms description
- Mode: 7 options
- Security panel:
- Main functions
- Warning:
- Securing/de-securing the panel using a text message command
- Smart Life application
- Downloading the application - Smart Life
- Register and log into the application
- Connecting the panel to the Smart Life application
- Smart Life application user interface
- Smart Life application accessories settings
- Sensors
- Motion Sensors
- Motion sensor installation
- Wireless control
- Magnetic door / window sensor
- Assembly
- Remote control
- Wired siren
- Troubleshooting and Maintenance
- Technical support
- Tartalom
- Registracija in prijava v aplikacijo
Brand : Evolveo
Model : Alarmex Pro
Category : Alarm system