
Detective BT4 - Security Camera Evolveo - Free user manual and instructions
Find the device manual for free Detective BT4 Evolveo in PDF.


| Product Type | Security Camera |
| Brand | Evolveo |
| Model | Detective BT4 |
| Dimensions (approx.) | 50 x 50 x 50 mm |
| Weight | 100 g |
| Power Supply | DC 5V via USB (cable included) |
| Resolution | 1080p Full HD |
| Night Vision | Yes, IR LEDs up to 10 m |
| Field of View | 120° |
| Connectivity | Bluetooth 4.0 |
| Storage | MicroSD up to 128 GB (not included) |
| Motion Detection | Yes, with push notifications |
| Audio | Built-in microphone |
| App Support | Yes, Evolveo app (iOS/Android) |
| Operating Temperature | -10°C to 50°C |
| Material | Plastic |
| Spare Parts Included | USB cable, mounting kit, user manual |
| Repairability | Contact authorized service center |
| Cleaning and Maintenance | Wipe with a soft dry cloth; do not use liquids |
| Safety Warnings | Keep away from water and extreme temperatures |
Frequently Asked Questions - Detective BT4 Evolveo
User questions about Detective BT4 Evolveo
0 question about this device. Answer the ones you know or ask your own.
Ask a new question about this device
Download the instructions for your Security Camera in PDF format for free! Find your manual Detective BT4 - Evolveo and take your electronic device back in hand. On this page are published all the documents necessary for the use of your device. Detective BT4 by Evolveo.
USER MANUAL Detective BT4 Evolveo
(spare camera for BT4)
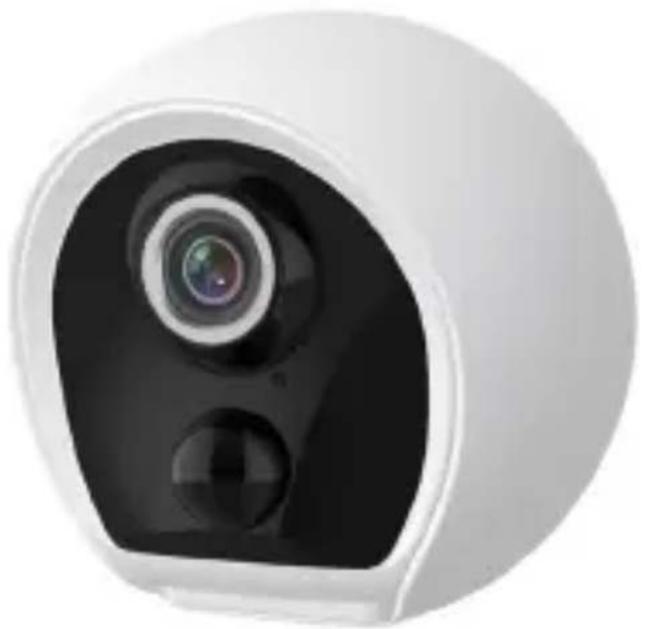
natural_image
Close-up of a white cylindrical device with a black lens and circular head (no visible text or symbols)CZ
SK
CS
HU
RO
Obsah / Content / Tartalom / Cuprins
Česky 3
Slovensky 16
English 30
Magyar 44
Română....58
Obsah
natural_image
Five identical cylindrical objects with different internal patterns, arranged in two rows (no text or symbols)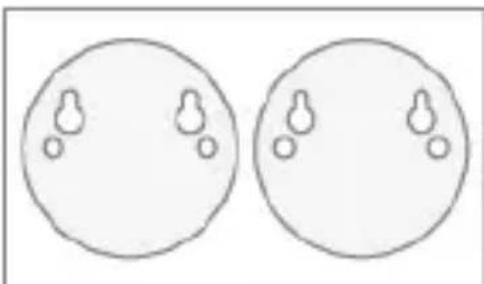
natural_image
Two identical circular diagrams with small circular features, no text or symbols present5.3 Instalace kamery
natural_image
Diagram showing light path through a lens system with lenses and mirrors (no text or labels)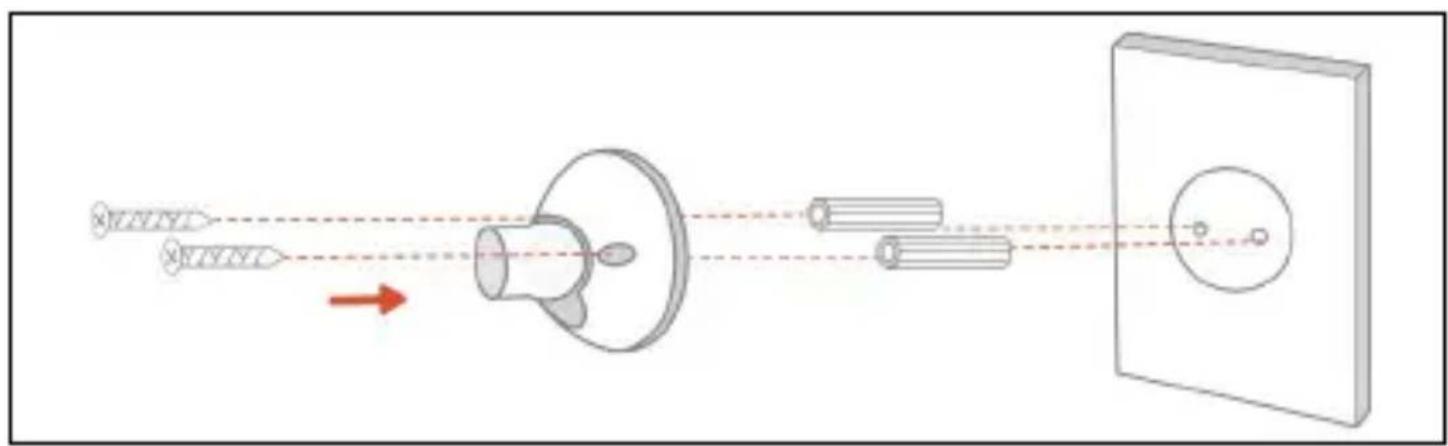
natural_image
Diagram of a mechanical or optical setup with components and light paths, no visible text or symbolsnatural_image
Illustration of a hand using a handheld device to adjust a wall-mounted component, with no visible text or symbols.Záruka se NEVZTAHUJE na:
natural_image
Five identical cylindrical objects with different internal patterns, arranged in two rows (no text or symbols)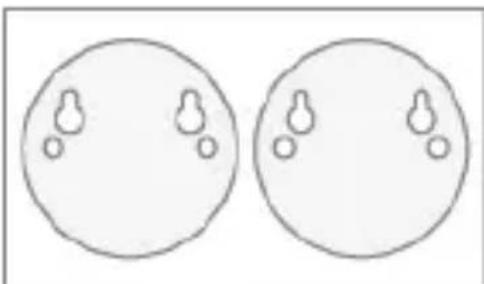
natural_image
Two identical circular diagrams with small circular features, no text or symbols presentnatural_image
Diagram of a human eye system with lens, screen, and camera components (no text or labels)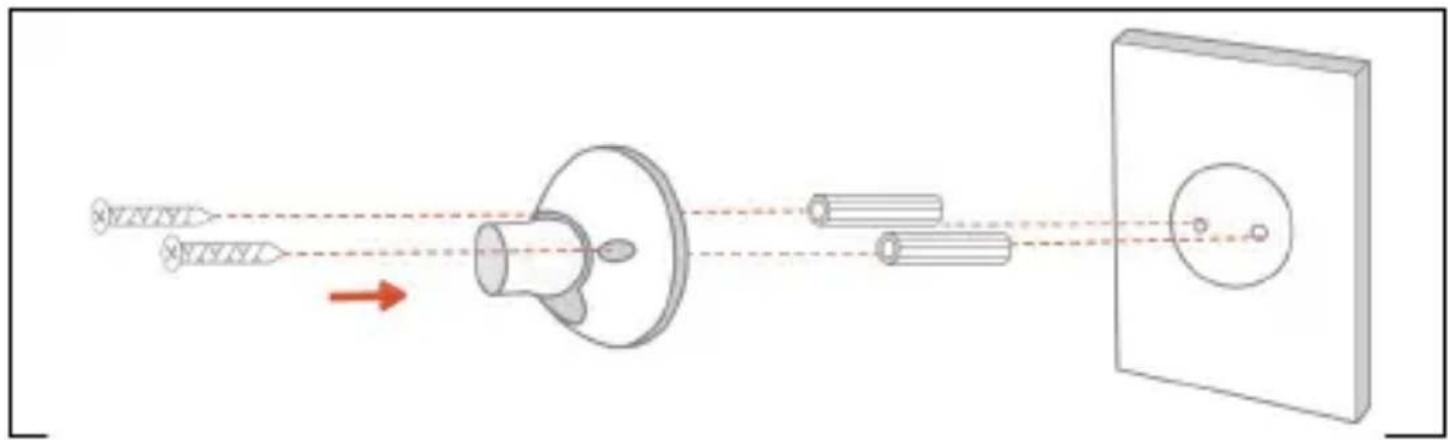
natural_image
Diagram of a mechanical or optical setup with components and directional arrows, no visible text or symbols3) Ak chcete fotoaparát odpojit' od montážneho držiaka, stlačte a podržte svorku na držiaku, aby ste ju odstránili.
natural_image
Illustration of a hand using a tool to adjust a component, with no visible text or symbolsZáruka sa NEvzt'ahuje na:
No. 5, 17/F, Strand 50, 50 Bonham Strand, Sheung
Wan, Hongkong
Vyrobené v Číne
Copyright © Abacus Electric, s.r.o.
www.evolveo.com www.facebook.com/EvolveoCZ
- WHAT'S INCLUDED....31
- PRODUCT OVERVIEW .... 32
- ADDING A SPARE CAMERA .... 32
3.1 Switching on the camera.... 32
3.2 How to pair the camera with HomeBase..... 33 - CHARGING THE CAMERA....35
- CAMERA INSTALLATION .... 37
5.1 Wireless Signal Testing....37
5.2 Locating the installation site.... 38
5.3 Installing the camera.... 39
1. WHAT'S INCLUDED
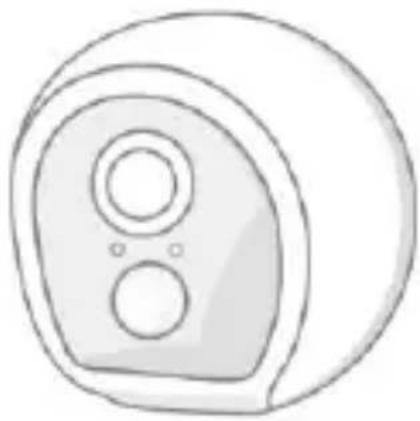 | 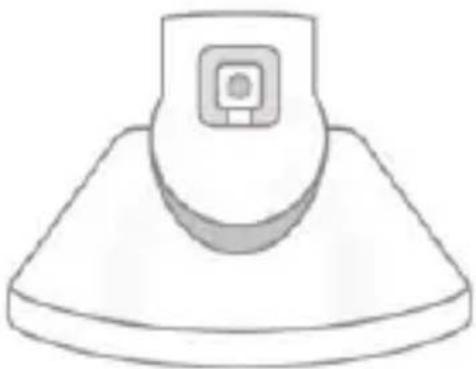 |
| Camera | Mounting bracket |
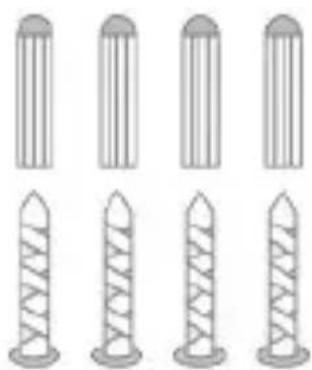
natural_image
Five identical cylindrical objects with different internal patterns, arranged in two rows (no text or symbols)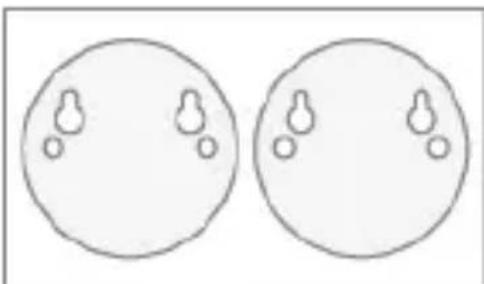
natural_image
Two identical circular diagrams with small circular features, no text or symbols presentMounting screws and anchors
Hole for screw Positioning stickers
2. PRODUCT OVERVIEW
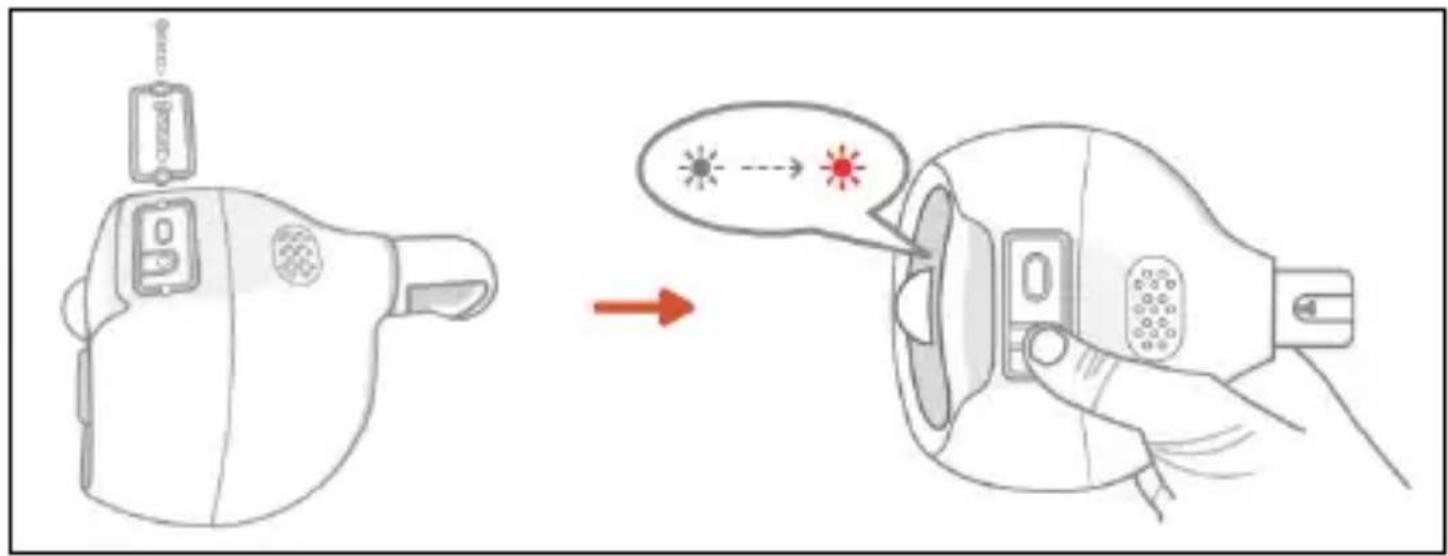
3.1 Switching on the camera
After removing the screws at the bottom of the camera, remove the cover and long press the button at the bottom of the camera until you hear the music prompt.
A red light indicates that the start-up was successful.
Remark: Don't forget to put the cover back on after starting.
3.2 How to pair the camera with HomeBase
1) Connect HomeBase to a power source and to the network.
2) Long press the top "SYNC" button on the HomeBase until the yellow light starts flashing and turns on. A voice prompt will announce the start of pairing.
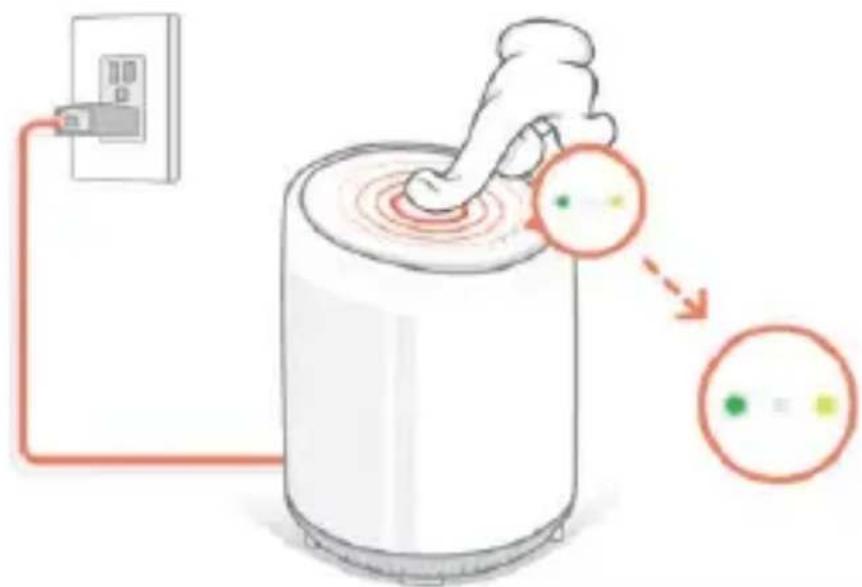
3) Press the ON/OFF button on the bottom of the camera three times . The red and blue LEDs will flash alternately.
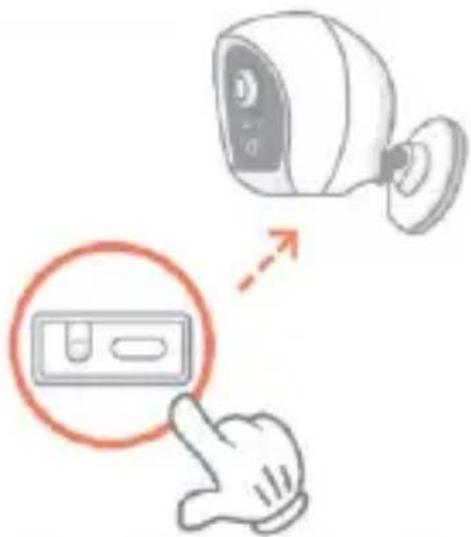
4) A voice prompt from HomeBase notifies you that the pairing was successful.
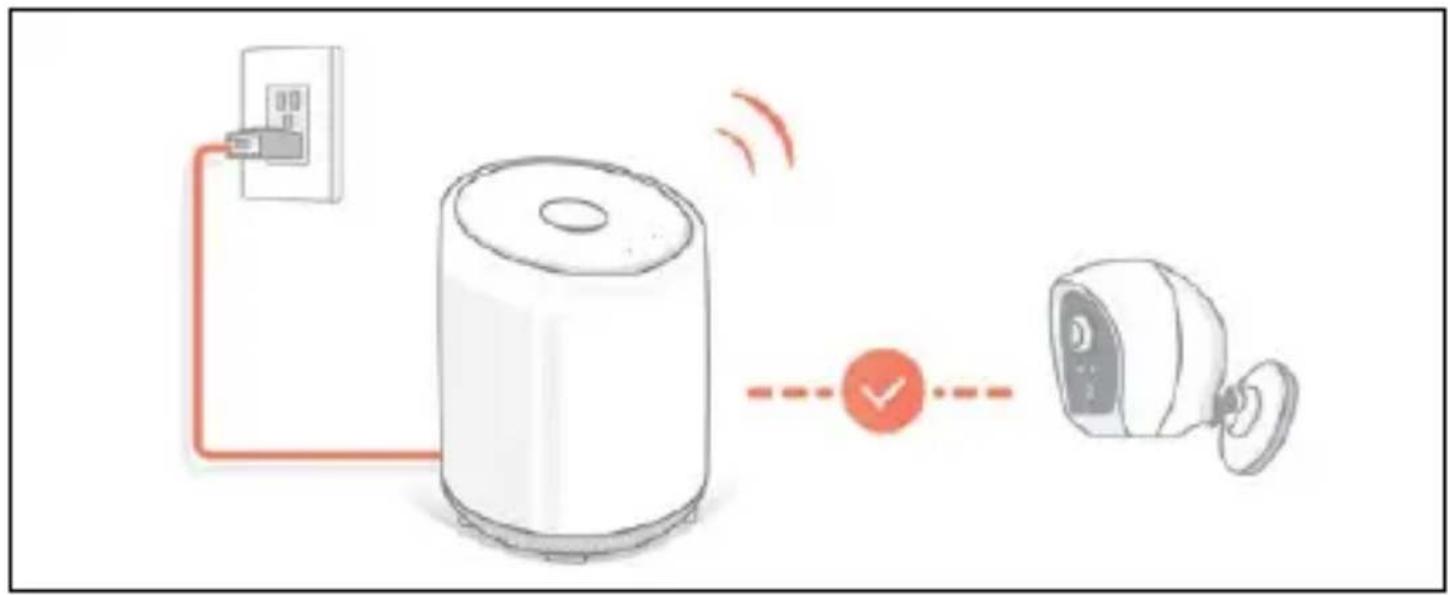
flowchart
graph LR
    A["Device"] -->|Signal waves| B["Switch"]
    B --> C["Device with checkmark icon"]
    C --> D["Device with sensor icon"]
Warning: The cameras and HomeBase were paired before delivery.
Only replacement cameras need to be added manually.
4. CHARGING THE CAMERA
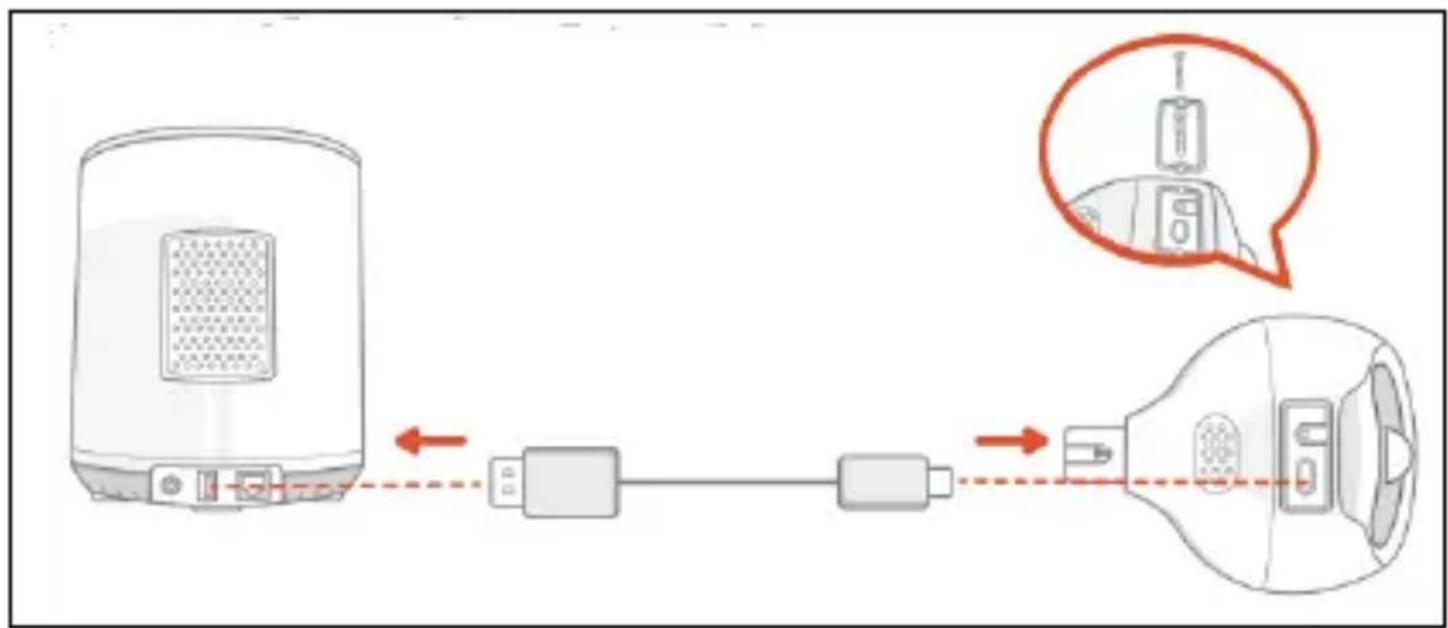
Remark: When charging the camera, remove the back cover by unscrewing the bottom screw of the camera. Once fully charged, the back cover needs to be put back on the camera.
Use the supplied USB Type-C charging cable to connect your device, connect the cable to the camera and
HomeBase for battery charging.
| LED Challenge | Blue LED flashes when charging |
| Blue LED lights up when fully charged | |
| Charging time | 10 hours(minimum battery charge) |
The camera standby time varies according to the number of alarms and wake-ups per day. After a full charge it can be used for 3-4 months. This value is calculated on 10 wake-ups per day and 10 seconds of recording.
5. CAMERA INSTALLATION
5.1 Wireless Signal Testing
To find out where to install the camera, you need to test the strength of the wireless signal
1) To test the strength of the wireless signal, open the live preview in the app and take it and your mobile phone to the location where you want to install the camera.
2) If the wireless signal is not stable, move the camera closer to the HomeBase.
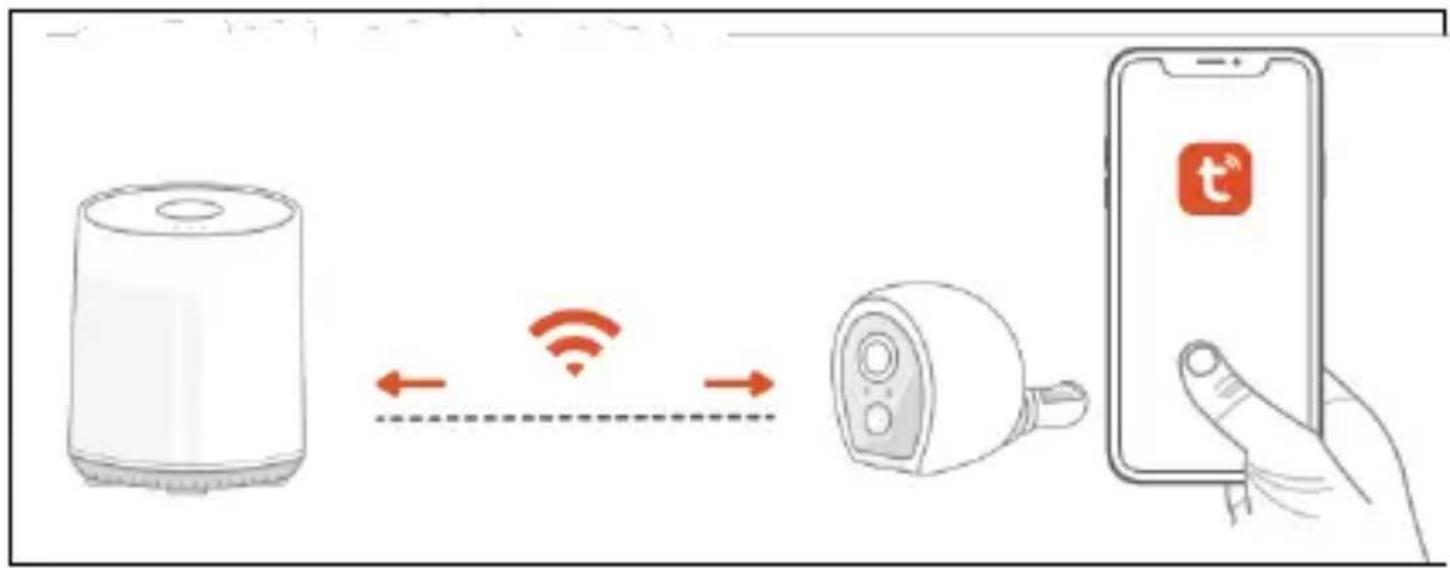
flowchart
graph LR
    A["Device with Wi-Fi Signal"] <--> B["Mobile Phone with USB Port"]
    B --> C["Mobile Phone with USB Port"]
5.2 Locating the installation site
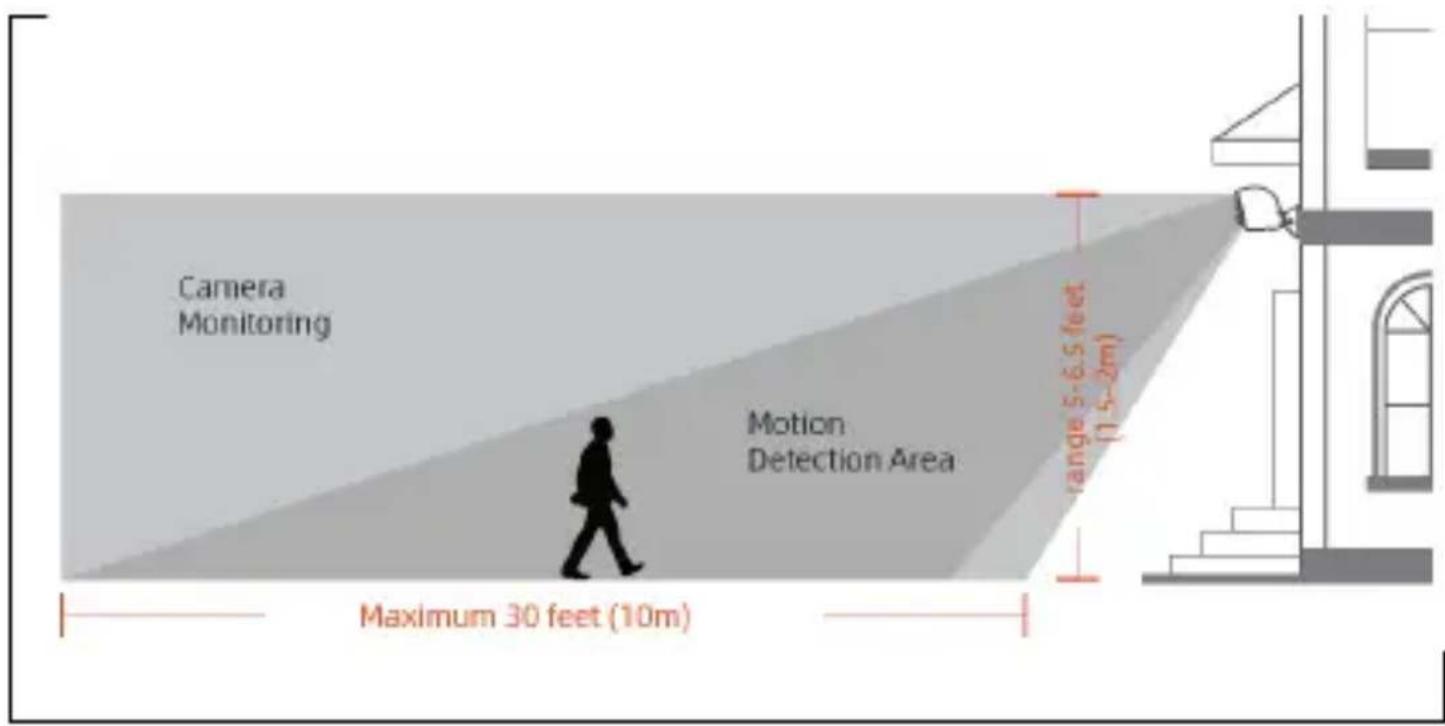
Hang the camera 1.5-2m above the ground. This height maximizes the detection range of the camera's motion sensor.
Warning!: Do not place the camera in direct sunlight. The PIR sensor will then not detect motion!
5.3 Installing the camera
The camera can be installed indoors or outdoors.
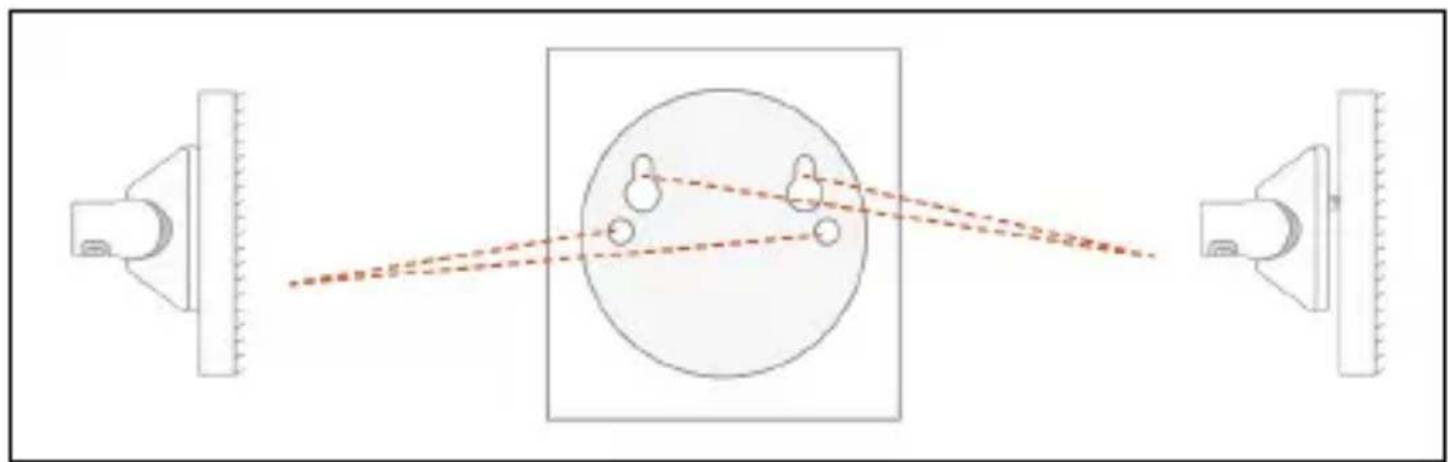
1) Attach a drilling template to the place where you will place the camera
natural_image
Diagram of a human eye system with lens, lens, and screen components (no text or labels)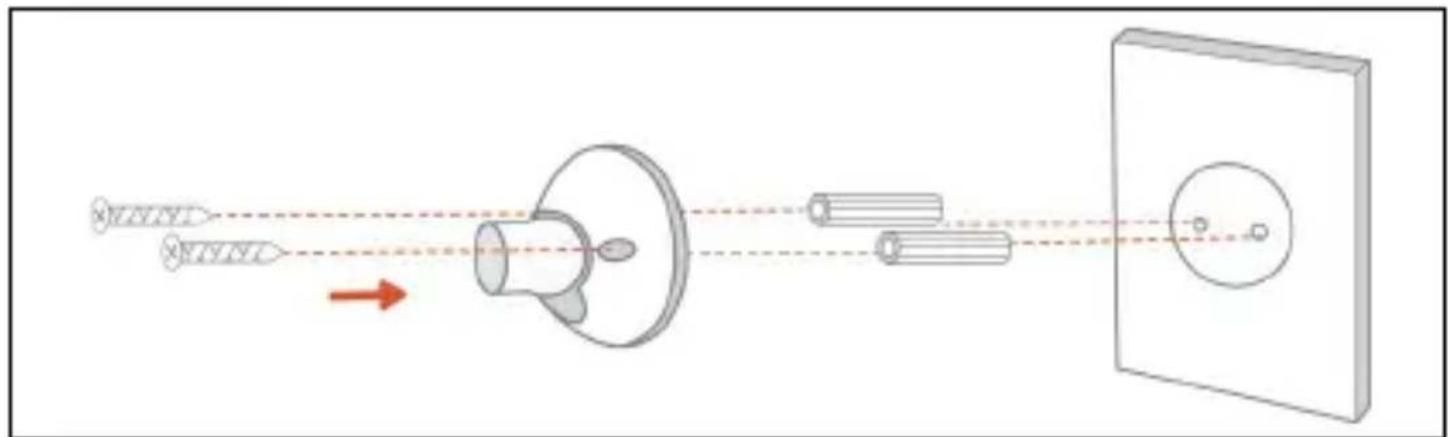
natural_image
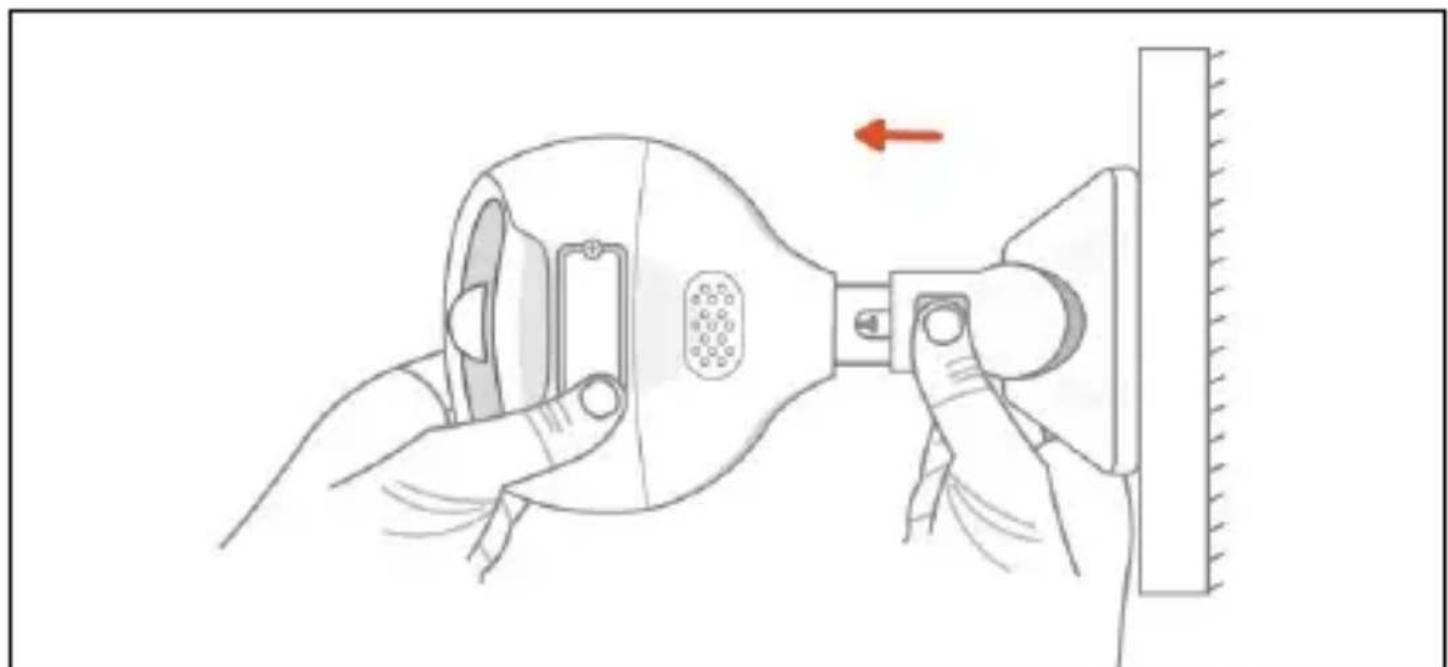
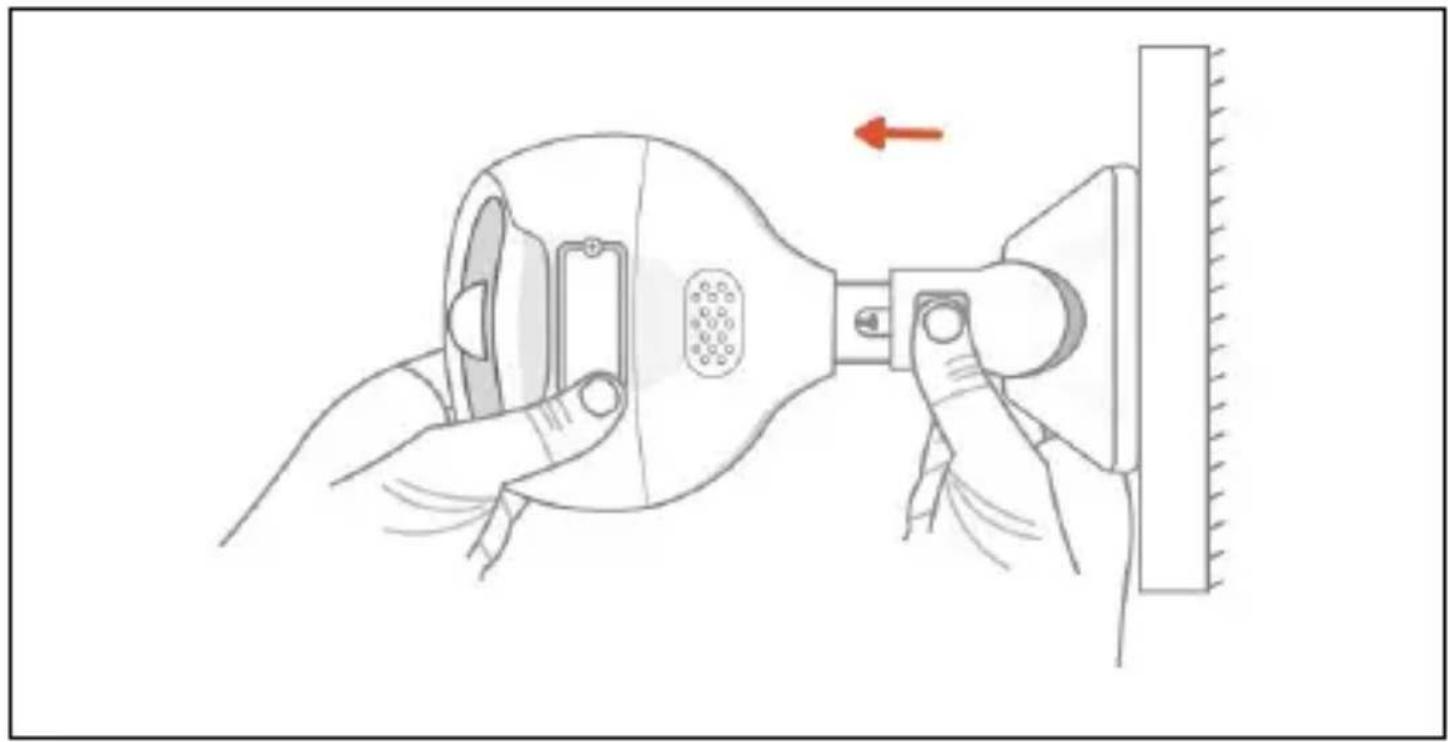
Diagram of a mechanical or optical setup with a beam splitter, lens, and screen, showing light paths and components (no text or symbols)2) Align the camera mount port with the bracket and then snap it into the bracket, push it in until you hear a click, the camera is properly attached and you can adjust the camera angle via the live preview in the Smartlife app.
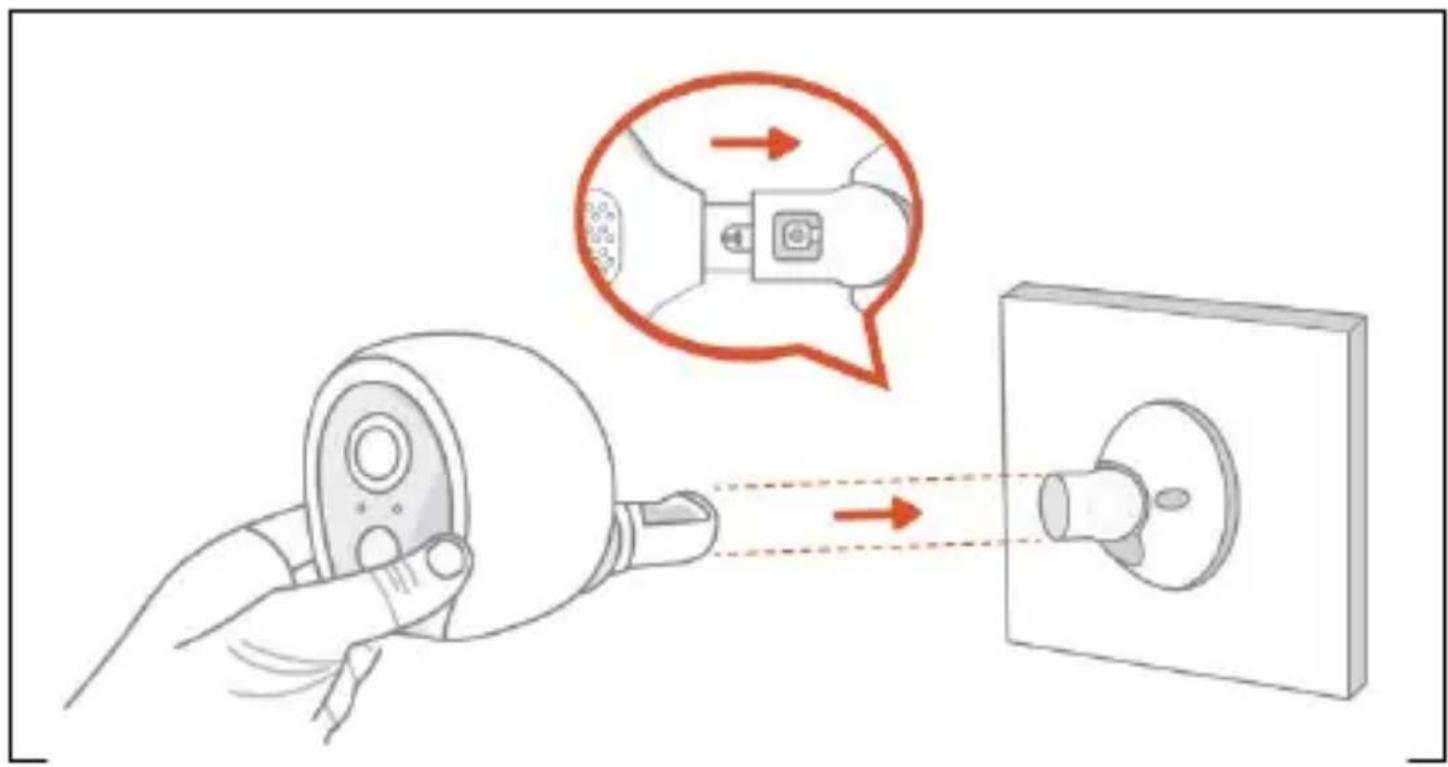
3) To detach the camera from the mounting bracket, press and hold the clip on the bracket to remove it.
natural_image
Illustration of a hand using a tool to adjust or install a component, with no visible text or symbols.The warranty does NOT cover:
- using the device for purposes other than those for which it is intended,
- installing firmware other than that installed on the device.
- electrical or mechanical damage caused by improper use.
- damage caused by natural influences such as water, fire, static electricity, power fluctuations, etc.
- damage caused by repairs carried out by an unqualified person.
- illegible serial number
- battery capacity will decrease after 6 months of use (6 month battery life guarantee)

Disposal
The crossed-out container symbol on the product, in the accompanying documentation or on the packaging means that all electrical and electronic equipment, batteries and accumulators in the European Union must be disposed of as separated waste at the end of their life. These products must not be disposed of as unsorted municipal waste.

DECLARATION OF CONFORMITY
Abacus Electric, s.r.o. hereby declares that the EVOLVEO SEA DET-BT1 meets the requirements of the standards and regulations applicable to this type of equipment. The full text of the Declaration of Conformity can be found at http://ftp.evolveo.com/ce/.
Importer / Importer / Importer / Importer
Abacus Electric, s.r.o.
Planá 2, 370 01, Czech Republic
No. 5, 17/F, Strand 50, 50 Bonham Strand, Sheung
Wan, Hongkong
Made in China
Copyright © Abacus Electric, s.r.o.
www.evolveo.com www.facebook.com/EvolveoCZ
All rights reserved. Product appearance and technical specifications are subject to change without notice.
Tartalom
natural_image
Five identical cylindrical objects with different internal patterns, arranged in two rows (no text or symbols)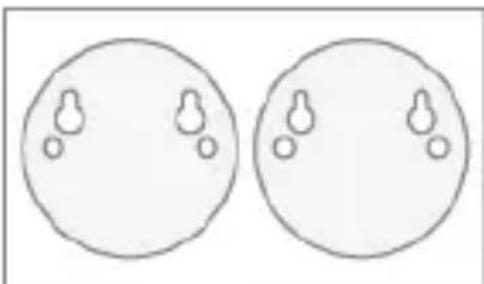
natural_image
Two identical circular diagrams with small circular features, no text or symbols presentflowchart
graph LR
    A["Device with Wi-Fi Signal"] -->|Signal| B["USB Cable"]
    B -->|Signal| C["Mobile Phone with USB Port"]
natural_image
Diagram of a human eye system with lens, screen, and camera components (no text or labels)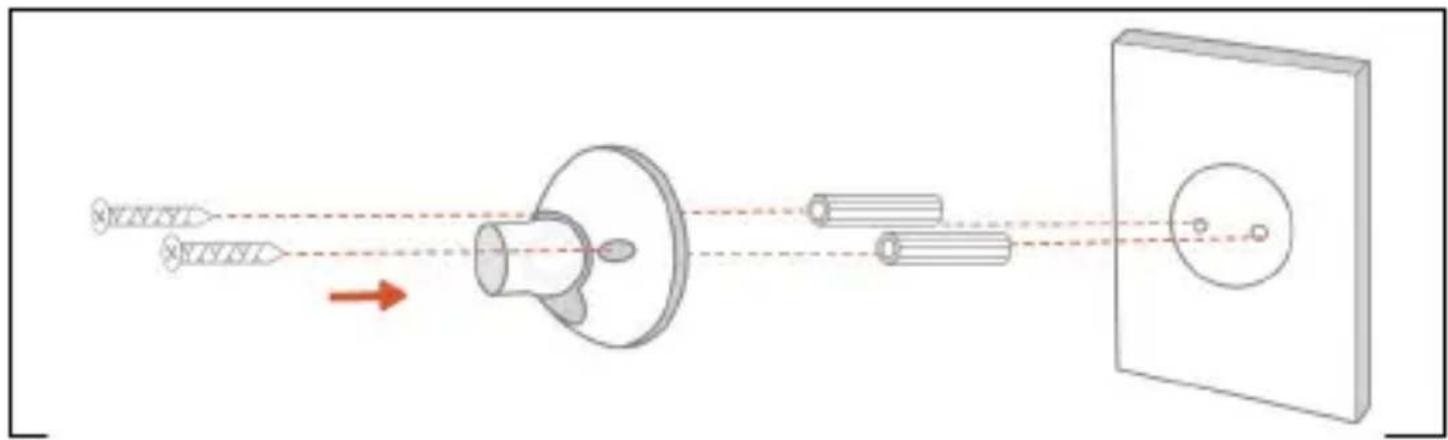
natural_image
Diagram of a mechanical or optical setup with a central component and two parallel rods, connected to a screen (no text or symbols present)natural_image
Illustration of a hand using a handheld device to adjust a wall-mounted component, with no visible text or symbols.Copyright © Abacus Electric, s.r.o.
www.evolveo.com www.facebook.com/EvolveoCZ
natural_image
Five identical cylindrical objects with different internal patterns, arranged in two rows (no text or symbols)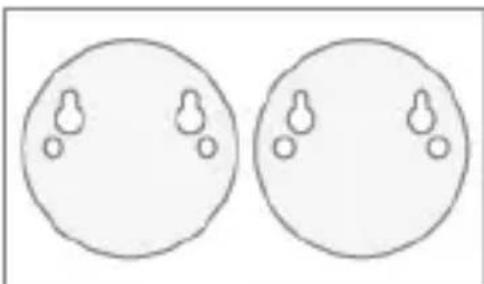
natural_image
Two identical circular diagrams with small circular features, no text or symbols present5.3 Instalarea camerei
natural_image
Diagram of a human eye system with lens, screen, and camera components (no text or labels)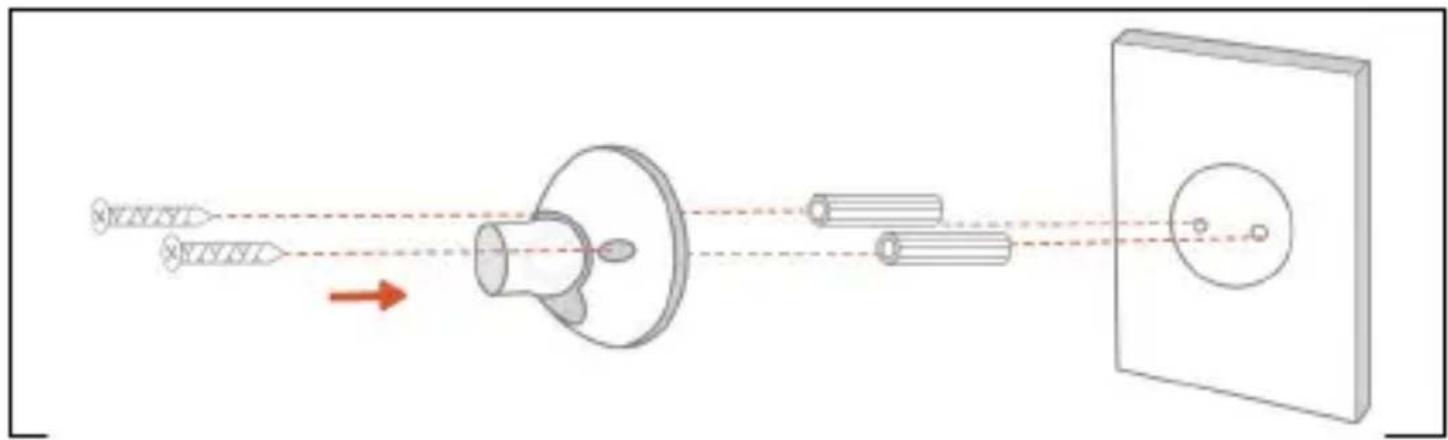
natural_image
Diagram of a mechanical or optical setup with a central component and two parallel rods, connected to a screen (no text or symbols present)natural_image
Illustration of a hand holding a device emitting a device from a screen, with an inset showing a close-up of the device (no text or symbols present)natural_image
Illustration of a hand using a tool to adjust or install a mechanical component, with no visible text or symbols.No. 5, 17/F, Strand 50, 50 Bonham Strand, Sheung
Wan, Hongkong
Fabricat în China
Copyright © Abacus Electric, s.r.o.
www.evolveo.com www.facebook.com/EvolveoCZ
| AC Adaptor | Value and precision | Unit |
| Manufacturer's name or trade mark, commercial registration number and address | Shenzhen ShiAn Power Technology Co., Ltd | - |
| Model identifier | SAN-1201000EUX | - |
| Input voltage 100-240V AC V | ||
| Input AC frequency | 50/60Hz | Hz |
| Output voltage 12 V | ||
| Output current 1 A | ||
| Output power 12 W | ||
| Average active efficiency | 82,96 % | |
| Efficiency at low load (10 %) | X % | |
| No-load power consumption | 0,1 W | |


- Obsah / Content / Tartalom / Cuprins
- Obsah
- Instalace kamery
- Záruka se NEVZTAHUJE na:
- Záruka sa NEvzt'ahuje na:
- WHAT'S INCLUDED
- PRODUCT OVERVIEW
- Switching on the camera
- How to pair the camera with HomeBase
- CHARGING THE CAMERA
- CAMERA INSTALLATION
- Wireless Signal Testing
- Locating the installation site
- Installing the camera
- The warranty does NOT cover:
- Disposal
- DECLARATION OF CONFORMITY
- Tartalom
- Instalarea camerei
Brand : Evolveo
Model : Detective BT4
Category : Security Camera