
Toprig S60 - Camera Accsoon - Free user manual and instructions
Find the device manual for free Toprig S60 Accsoon in PDF.


| Product Type | Motorized Camera Slider |
| Model | Toprig S60 |
| Brand | Accsoon |
| Max. Horizontal Load | 4.0 kg |
| Max. Vertical Load | 2.5 kg |
| Max. Operating Speed | 5 cm/s |
| Max. Travel Distance | 425 mm |
| Panoramic Angle | 55° |
| Power Supply | DC 9-16.8V or NP-F Battery (NP-F550/750/970, not included) |
| Rated Voltage | 7.4 - 16.8V |
| Power Consumption | 0.5W |
| Dimensions | 610 x 106 x 71.3 mm |
| Weight | 1.5 kg |
| Motor Type | Brushless Motor (silent) |
| Control Methods | On-device buttons and TopRig App (Bluetooth) |
| Key Functions | AB Point Setting, Loop Mode (Single/Infinite), Speed Control (0.1-5 cm/s), Stationary Object Tracking, Panoramic Mode, Time-Lapse, Calibration |
| App Compatibility | iOS and Android (TopRig App) |
| Connectivity | Bluetooth, Shutter Release Port (3.5mm), 5V Output, DC Input |
| Included Accessories | Slider unit, Hexagon Wrench, Replacement Belt |
| Warranty | 1 year on device, 3 months on accessories and cables |
| Cleaning and Maintenance | Keep dry and clean; avoid dust and moisture. Use a soft cloth for cleaning. Do not disassemble. |
Frequently Asked Questions - Toprig S60 Accsoon
User questions about Toprig S60 Accsoon
0 question about this device. Answer the ones you know or ask your own.
Ask a new question about this device
Download the instructions for your Camera in PDF format for free! Find your manual Toprig S60 - Accsoon and take your electronic device back in hand. On this page are published all the documents necessary for the use of your device. Toprig S60 by Accsoon.
USER MANUAL Toprig S60 Accsoon
natural_image
Technical line drawing of a mechanical assembly with labeled component 'TOPRIC S60' (no readable text beyond label)S60
VIDEO SLIDER
In the Box 02 Over view 02
Key Feat u res....04 How to Install....05
Functions
Power On/Off……08 Calibration……08
AB PointSetting……09 Loop Mode……10
Speed Control 10
Stationary Object Tracking&Panoramic Mode Setting ……10
APP
AppConnect……12 Calibration……13
A B Point Setting……13 Loop Mode……14
Vid eo Sh ootin g……14 Time-Laps e……14
FirmwareUpdate……15 Specs 16
Warranty 17
基本信息
装配清单……18 主体介绍……18
特点……20 安装说明……21
基础功能
开关机……24 行程校准……24
AB点设置……25 循环模式……26
速度调节……26
追焦扫景设置……26
APP
natural_image
Front view of a black rectangular electronic device with horizontal stripes and a central button (no visible text or symbols)Slider × 1 Hexagon Wrench × 1 Replacement Belt × 1

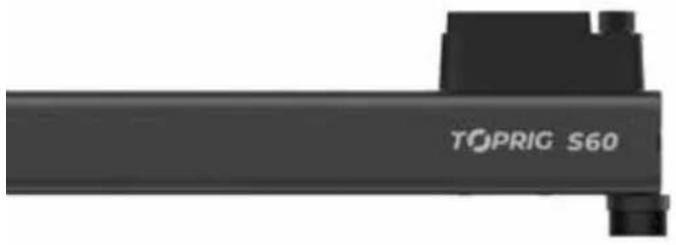
⑦ Panoramic Setting Knob
⑧ Spirit Level
⑨ Slider Platform
1.2 Overview
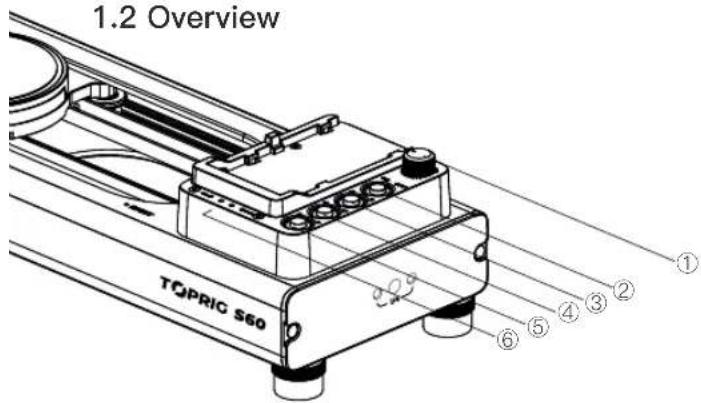
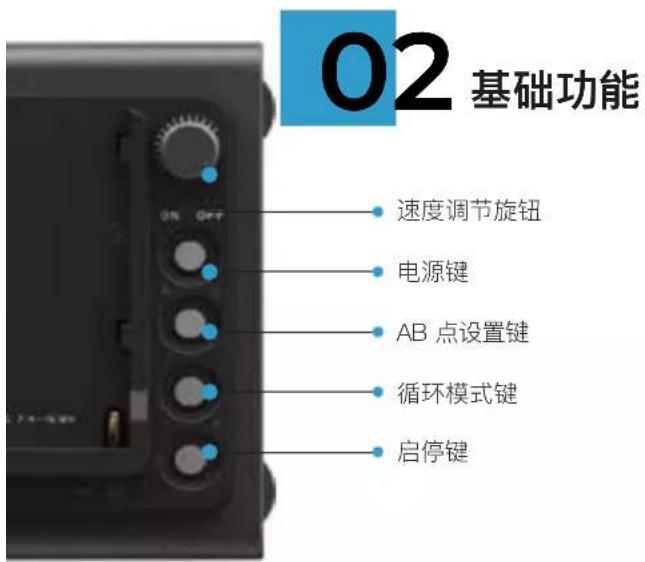
① Speed Control
④ Loop Mode
② Power On/Off
⑤ Start/Stop
③ AB Setting
⑥ Power Indicator

⑩ DC
⑪ 5V Output
⑫ Shutter Release Port
1.3 Key Features
- Brushless Motor
- Stable
-
Adjustable Speed
• Dual-axis Camera Motions -
APP Control
- AB Point Setting
- Time-Lapse
- Silent
1.4 How to Install
Step 1 Install battery (not included)
Battery compatibility: NP-F550/NP-F750/NPF 970

Step 2 Install the tripod ball head (not included) onto the slider install the camera


natural_image
Technical illustration of two camera assembly states showing alignment and movement (no text or symbols)Step 4 Connect the shutter extension cable (not included)

Shutter Release Port
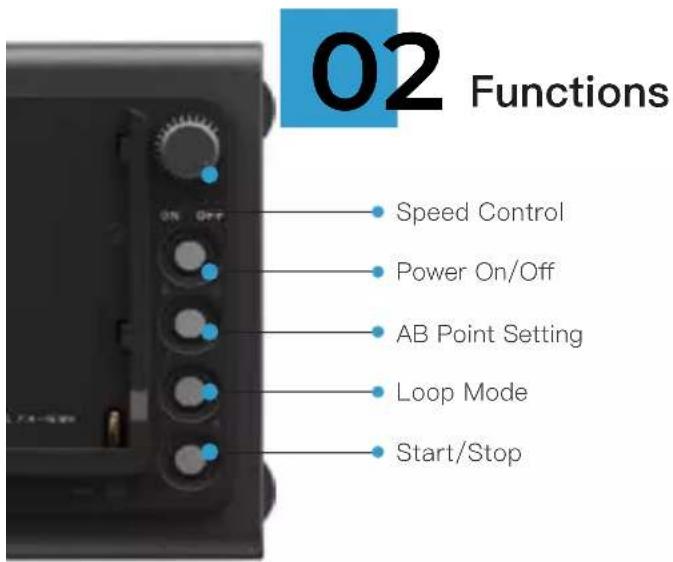
2.1 Power On/Off

Power On: Press the power button Power Off: Press and hold the power button for 2 seconds
2.2 Calibration
Please calibrate the slider before use.

How to calibrate:
Press the Start/Stop button after powering on and the slider will automatically complete the calibration.
2.3 AB Point Setting
1. Default AB Point
The default AB point of the slider upon powering on is shown below:
A

natural_image
Technical line drawing of a cylindrical device with a circular component and control panel (no text or symbols)B

natural_image
Technical line drawing of a cylindrical device with control knobs and a side panel (no text or symbols)2. Customize AB Point
① Move the slider to the 1st position
② Press the AB point setting button to set point A (indicator light A on)
③ Move the slider to the 2nd position
④ Press the AB point setting button to set point B (indicator light B on)
⑤ Setting complete
3. Cancel AB point setting
After the AB point setting is completed, press the AB point setting button again to cancel the AB point. The indicator lights A and B will both be turned off.

2.4 Loop Mode
Slider S60 supports Single-loop mode and Infinite-loop mode, with single-loop mode being the default mode.

Setting: Press the loop mode button to switch between the two modes.
2.5 Speed Control
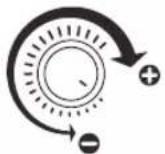
Speed control range: 0.1–5.0cm/s
Control the speed of the slider by rotating the speed control knob.
2.6 Stationary Object Tracking & Panoramic Mode Setting
2.6.1 Pan Shooting Mode: Adjust the knob to the center as shown below.

2.6.2 Focus Shooting Mode: Adjust the knob to the upper left and lower right as shown below.

natural_image
Technical diagram showing a device with labeled ports and internal components, no readable text or symbols present.2.6.3 Panoramic Shooting Mode: Adjust the knob to the lower left and upper right as shown below.

03 App
TopRig App Features
- Calibration
- Video Shooting
- Loop Mode
- AB Point Setting
- Time-Lapse
- Firmware Update
3.1 App Download
Please download the App- TopRig from Google Play Store or iOS Apple Store.
3.2 App Connect
TopRig App connects to Slider S60 via Bluetooth. To use the TopRig App, please enable Bluetooth on your mobile device.

Step 1
Open the TopRig App
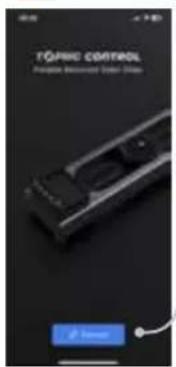
Step 2
Tap「Connect Device」

Step 3
Select the device
'Slider_****'
Step 4
Tap「Confirm」

3.3 Calibration

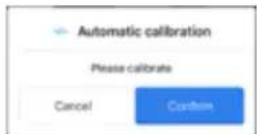
Step 1
Tap「Calibration」

Step 2
Tap「Confirm」
The slider will automatically complete the calibration.
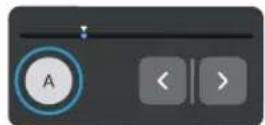
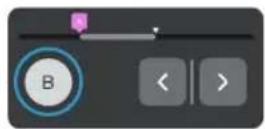
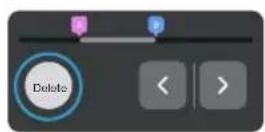
3.4 AB Point Setting
Set Point A
Tap the arrow button to move the slider to the 1st position Tap 「A」
Set Point B
Tap the arrow button to move the slider to the 2nd position Tap 「B」
Cancel AB Point
Tap「Delete」
3.5 Loop Mode
Switch the loop modes by tapping the loop button.

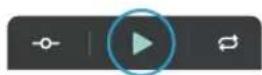
3.6 Video Shooting
Note: A camera control cable is needed for this function.
Step 1
Tap 'Start' to start video shooting
3.7 Time-Lapse
Note: A camera shutter cable is needed for time-lapse.
Users can customize the AB point setting based on different shooting needs.
3.7.1 Parameter Setting
Total Time: Defines how long the shoot lasts. (User setting required)
Interval Time: Defines how long it lasts between each photo shot. Interval time must be longer than exposure time. (User setting required)

Exposure Time: Defines how long the slider remain stationary. Must be longer than the camera's exposure time. (User setting required)
Frame Rate: Defines the frame rate of the final video. (User setting required)
Number of Shots: The total number of photo shots for reference.
Video Length: The final length of the video for reference.
3.7.2 Start/Stop Time-lapse

After the parameter setting, tap 「Start」.

Tap「Stop」
Tap「Confirm」


3.8 Firmware Update
Step 1
Tap 「:」
Step 2
| Rated Voltage | 7.4 -16.8V |
| Max.Horizontal Load | 4.0kg |
| Max.Vertical Load | 2.5kg |
| Max.Operating Speed | 5cm/s |
| Stationary Object Tracking Panoramic Angle | 55° |
| Max.Travel Distance | 425mm |
| Power Supply | DC 9-16.8V NP-F Battery |
| Power Consumption | 0.5W |
| Dimensions | 610 x 106 x 71.3mm |
| Weight | 1.5Kg |
Warranty
01 Warranty Period
- If there is a quality problem that occurs within 15 days after receiving the product, TopRig will provide complimentary maintenance or replacement.
- Under proper use and maintenance, from the date of receipt, TopRig will provide a one-year warranty on the wireless video transmission system and a three-month warranty on the accessories and cables. Free maintenance service is available during the warranty period.
- Please keep the proof of purchase and the user manual in a safe place.
02 Warranty Exclusions
- Out of warranty (If the proof of purchase is not available, the warranty will be calculated from the date the product is delivered from the factory)
- Damage caused by use or maintenance is not following the requirements of the product manual.
- Unauthorized repair, modification or disassembly.
- Damage caused by force majeure such as fre, flood, lightning strike, etc.
03 Warranty Process
Add: Room 302, BLDG D, Zhiyuanyungu, 73 Guanlan Blvd, Longhua District, Shenzhen 518110
Tel: 0086-28-84334099

基本信息
1.1 装配清单

natural_image
Exterior view of a black rectangular electronic device with horizontal stripes and a central button (no visible text or symbols)natural_image
Technical line drawing of a cylindrical device with internal components and a control panel (no text or symbols)natural_image
Technical illustration of a camera assembly showing two stages of motion, no text or symbols present3.5mm 相机快门控制线插孔
natural_image
Technical line drawing of a dual-chamber electrical device with no visible text or symbols2. 自定义 AB 点
natural_image
Technical line drawing of a device rear panel with internal components and directional arrows indicating assembly or movement (no text or symbols)natural_image
Technical diagram showing a device with labeled ports and a blue circular arrow indicating rotation (no text or symbols present)natural_image
Technical line drawing of a mechanical device with internal components and directional arrows indicating motion (no text or symbols)03 App
App 包含如下功能:
- 行程校准
视频拍摄
- 循环模式
- AB 点设置
- 延时摄影
- 固件升级
3.1 APP 下载安装


- S60
- Functions
- APP
- 基本信息
- 基础功能
- Key Features
- How to Install
- Power On/Off
- Calibration
- Please calibrate the slider before use.
- How to calibrate:
- AB Point Setting
- Default AB Point
- Customize AB Point
- Cancel AB point setting
- Loop Mode
- Speed Control
- Stationary Object Tracking & Panoramic Mode Setting
- App
- TopRig App Features
- App Download
- App Connect
- Calibration
- AB Point Setting
- Set Point A
- Set Point B
- Cancel AB Point
- Loop Mode
- Video Shooting
- Step 1
- Time-Lapse
- Parameter Setting
- Start/Stop Time-lapse
- Firmware Update
- Step 2
- Warranty
- Warranty Period
- Warranty Exclusions
- Warranty Process
- 装配清单
- 自定义 AB 点
- App 包含如下功能:
- APP 下载安装
Brand : Accsoon
Model : Toprig S60
Category : Camera