
AI200 - Vacuum Cleaner TESLA - Free user manual and instructions
Find the device manual for free AI200 TESLA in PDF.


| Product Type | Robot Vacuum Cleaner with Laser Navigation |
| Model | Tesla AI200 (TSL-VC-AI200) |
| Dimensions (Diameter x Height) | 330 mm x 96 mm |
| Net Weight | 2.7 kg |
| Battery Type | 14.4 V / 2600 mAh Rechargeable Lithium-ion |
| Charging Time | Approximately 270 minutes (4.5 hours) |
| Cleaning Time | Approximately 100 minutes (standard mode) |
| Dust Box Capacity | 600 ml |
| Water Tank Capacity | Not specified (but included for mopping) |
| Navigation System | Laser Distance Sensor (LDS) for real-time mapping |
| Cleaning Modes | Auto, Zone, Selected Room, PIN & Go, Scheduled, Virtual Wall/Restricted Zone |
| Suction Power Levels | Energy Saving, Standard, Strong (via app) |
| Mopping Function | Yes, with water tank and mopping cloth (not for carpets) |
| Connectivity | Wi-Fi 2.4 GHz 802.15.4, TESLA Smart App (iOS/Android) |
| Smart Features | Real-time map, virtual walls, scheduled cleaning, DND mode, resume cleaning |
| Sensors | Anti-fall, cliff, wall, bumper, laser pressure |
| Filter Type | HEPA filter + prefilter (washable prefilter) |
| Maintenance Frequency | Filter every week, roller brush every week, side brush every month, sensors monthly |
| Replacement Intervals | HEPA filter every 3 months, roller brush every 6-12 months, side brush every 3-6 months |
| Voice Prompts | Yes, with app-controlled voice changes |
| Safety Certifications | Laser class 1 (IEC 60825-1:2014), CE, RoHS |
| Operating Temperature | 0°C to 40°C |
Frequently Asked Questions - AI200 TESLA
User questions about AI200 TESLA
0 question about this device. Answer the ones you know or ask your own.
Ask a new question about this device
Download the instructions for your Vacuum Cleaner in PDF format for free! Find your manual AI200 - TESLA and take your electronic device back in hand. On this page are published all the documents necessary for the use of your device. AI200 by TESLA.
USER MANUAL AI200 TESLA
natural_image
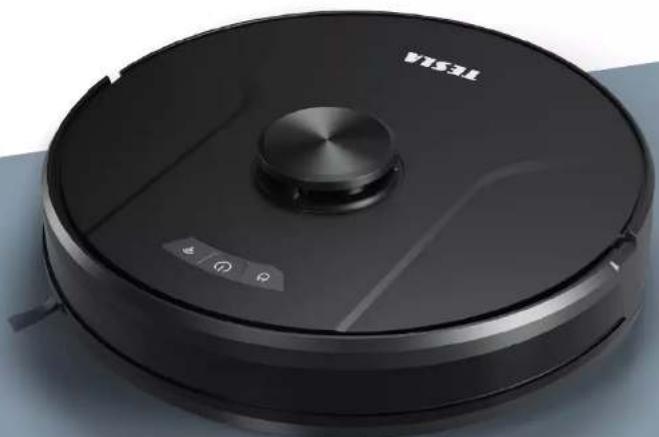
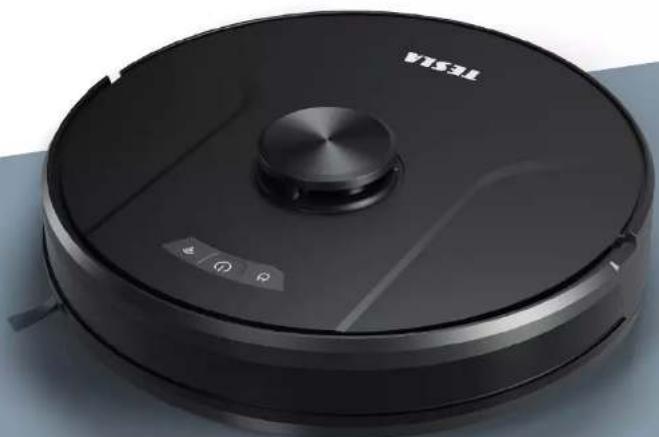
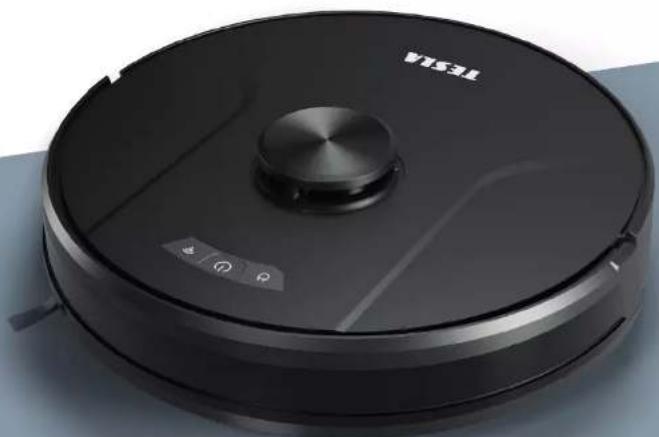
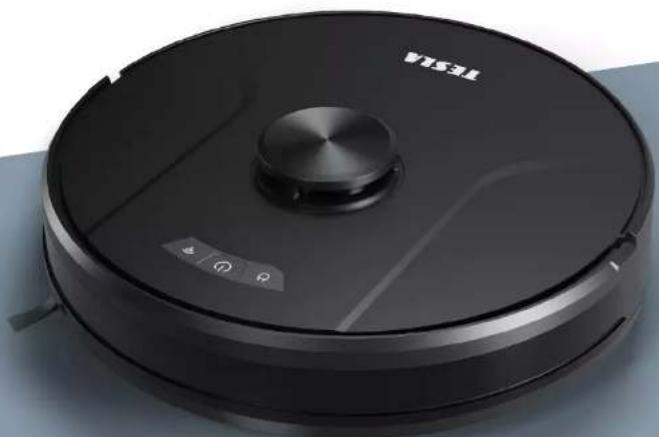
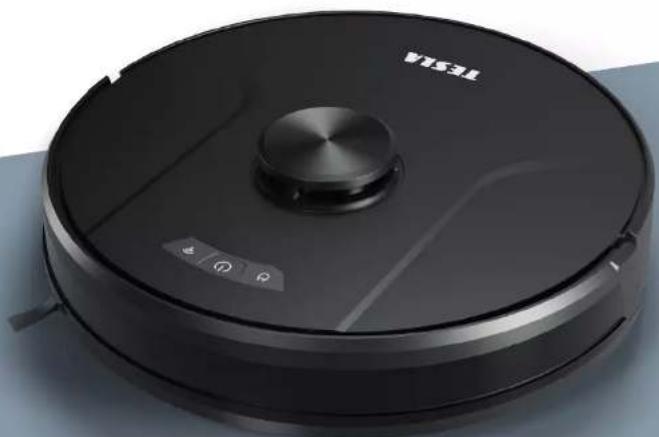
Black robotic vacuum cleaner with circular head and control buttons (no visible text or symbols)TESLA SMART ROBOT VACUUM LASER AI200
USER MANUAL
Safety Instructions
Before using this product, read the following safety instructions and follow all conventional safety precautions. Read this manual carefully, and keep it properly. Any operation not conforming to this manual may cause damage to this product.
Cautions
- Only authorized technicians can disassemble this product. Users are not recommended to disassemble this product by themselves.
- Use only the power adapter provided by the manufacturer for this product. Use of other adapters may cause damage to this product.
3.Do not touch wires, sockets, or power adapter when your hands are wet.
4.Do not roll the curtain or body parts into the product drive wheel. - Keep this product away from cigarettes, lighters and other open flames.
- Clean the product after charging
- Do not bend the wire excessively, or place heavy objects and sharp objects over the machine.
- This product is intended for indoor use. Do not use it outdoors.
9.Do not sit on the product. - Do not use this product in a humid environment, such as the bathroom.
- Before using this product, remove all vulnerable items (such as glasses and lamps) on the ground, as well as articles that may entangle the edge brush and suction channel (such as wires, paper, and curtains).
12.Do not place the product in a place where it is easy to fall off (such as tables and chairs). - Check carefully that the power adapter is connected with the socket before use; otherwise the battery may be damaged.
- To prevent tripping over the product, inform other members of the house when the product is working.
- When the dust box is full, empty the dust box before using this product.
- The operating temperature of this product is 0°C to 40°C.
- Do not use this product in a high temperature environment.
- Remove the battery from the product before scrapping it
- When removing the battery, make sure that the product is disconnected from the power supply.
- Properly recycle the waste batteries.
Warnings
- Use only the original rechargeable battery and docking station provided by the manufacturer. Do not use non-rechargeable batteries. For battery specifications, see "Product Specifications".
- Do not use the product in an environment with open flames or fragile products.
- Do not use the product in an extremely hot (above 40°C) or extremely cold (below 0°C) environment.
- Keep the hair, clothes, fingers and other parts of the human body away from the opening or operating parts of the product.
5.Do not use the product on wet or water-filled ground. - Do not use the product to vacuum any items that may block the product, such as stones and waste paper.
- Do not use the product to vacuum any flammable materials, such as gasoline and toner used in printers or copying machines. Do not use the product in clean areas with flammable materials.
- Do not use the product to vacuum any burning items, such as cigarettes, matches, ashes and other items that may cause fire.
- Do not place any articles at the suction port. Do not use the product when the suction port is blocked. Remove the dust, cotton wool and hair from the suction port to ensure smooth air circulation at the suction port.
- Handle the power cord with care to avoid damage. Do not use the power cord to drag or pull the product and its docking station, use the power cord as a handle, clamp the power cord in the door gap, or pull the power cord at sharp corners. Do not run the product over the power cord. Keep the power cord away from heat sources.
- Do not use a damaged docking station.
- Even if the product is severely damaged, do not burn the product, as the product battery may explode.
The laser ranging sensor complies with IEC 60825-1:2014 class 1 laser product standard and does not produce dangerous laser radiation.
Table of Contents
EN
Safety Instructions 2
Product and its Accessories 4
Product Composition 5
Installation 6
Description of App Icons and Buttons 8
Preparations 10
Charging the Main Unit 11
Product Use/ Start cleaning 12
Use Instructions 13
Using the Water Tank 17
Parts Maintenance - Dust Box 18
Parts Maintenance - Water Tank and Mopping Cloth 21
Parts Maintenance - Roller Brush and Side Brush 22
Parts Maintenance - Charging electrode, anti-fall sensor, drive wheel and omnidirectional wheel 23
Troubleshooting 24
Product Specifications 27
Product and Accessories
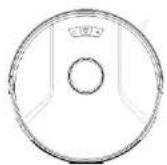
Main unit
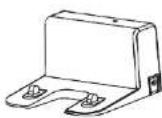
Docking station
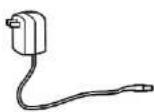
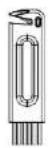
Power adapter Cleaning brush
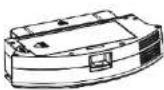
Dust box
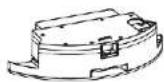
Water tank
Instructions Manual
Side brush (1 sets)
Product Composition
Front view
Wi-Fi button
On/Pause button
Return to docking
station button
Omnidirectional
lens
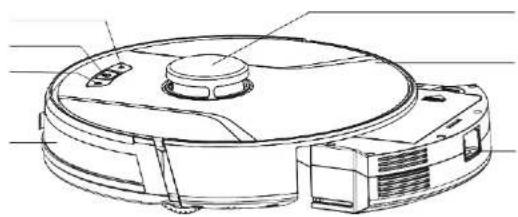
natural_image
Technical line drawing of a mechanical device with no visible text or symbolsCover
Laser head
Dust box button
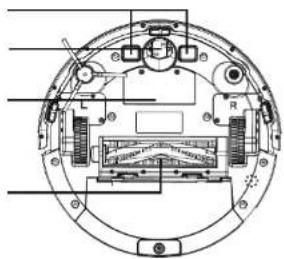
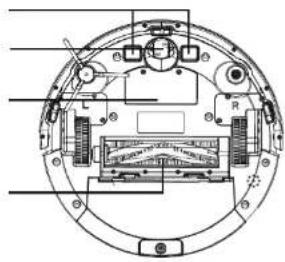
Rear view
Anti-fall sensor
Side brush
Drive wheel
Dust box
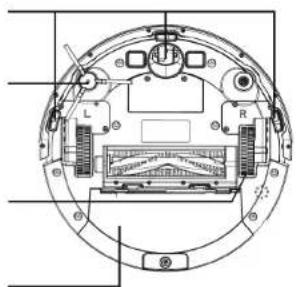
natural_image
Cross-sectional diagram of a circular electronic device with labeled components (no text or symbols)Charging electrode
Omnidirectional wheel
Battery
Roller brush assembly
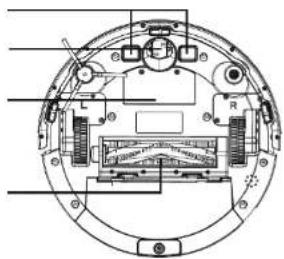
natural_image
Cross-sectional diagram of a circular electronic device with internal components and wiring (no text or symbols)Installation
Notes
-
Before starting the vacuum cleaner, clean up wires and sundries scattered on the ground, and remove easy-to-fall, fragile, valuable and potentially dangerous items. Avoid being entangled, jammed, dragged, or knocked down by the main unit; otherwise, personal or property damage may be caused.
-
Avoid using this product in the wading area; otherwise, the fan may be damaged, affecting the performance of the vacuum cleaner.
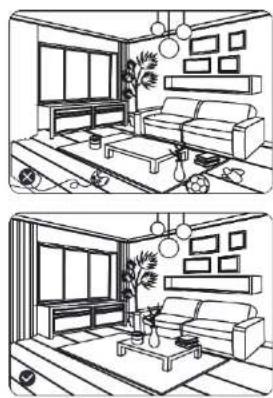
natural_image
Line drawing of a modern living room interior with sofa, coffee table, and wall art (no text or symbols)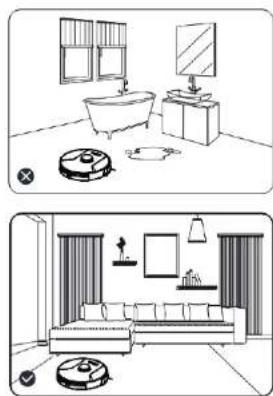
natural_image
Two line drawings of a living room layout: top shows a bathtub, monitor, and vacuum cleaner; bottom shows a sofa with coffee table and wall decor (no text or symbols)Installation
- Download the TESLA Smart from your APP store, register and log in the APP. Make sure that Wi-Fi is 2.4GHz before network connection.

- Preparation: tap "+" on upper-right corner to add your robot.

-
The device supports AP mode:
-
Choose "Robot Vacuum (Wi-Fi)" in the Small Home Appliance column.
- Make sure that Wi-Fi is 2.4GHz and input correct Wi-Fi password,
- Press and hold the Wi-Fi button on robot for 3s', make sure that Wi-Fi indicator light is flashing. Tick "Confirm the indicator is flashing rapidly" in the APP interface, click "Next" and choose AP mode in the pop-up window.
- Find password-less hot-spot which started with SmartLife-XXXX in your Wi-Fi list and click to connect it. After successfully connecting to the hot-spot, return back to the TESLA Smart APP, the APP will automatically jump to the robot connection interface. Wait for the connection and the robot can be operated after the connection is done.
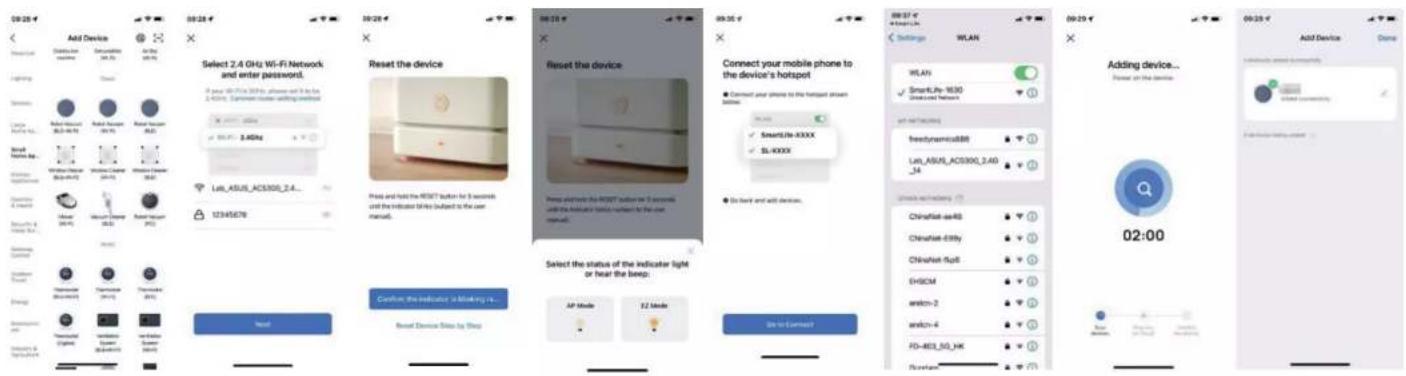
Description of App Icons and Buttons
Icons and Descriptions
| Entire house cleaning: The vacuum cleaner generates a map of the entire house through sensor scanning, and automatically plans the optimal cleaning path. | |
| Configured zone cleaning: You can configure a zone in a certain place on the app map. Then, the vacuum cleaner will automatically move to the zone for cleaning. | |
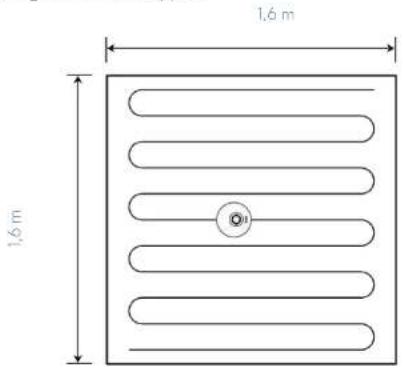
| PIN N GO: You can specify a point on the app map. Then, the vacuum cleaner will automatically move to the point,and clean the 1.6mx1.6m zone centered on this point. You can click or drag on the map to set the target point. | |
| Selected zone cleaning: After the vacuum cleaner generates a map of the entire house, you can select one or more zones for cleaning through the app. | |
| Set a restricted zone for cleaning. | |
| Return to docking station: When this icon is steady on, the vacuum cleaner automatically returns to the docking station for charging. When this icon blinks, the vacuum cleaner stops returning to the docking station. | |
| Scheduled mode: You can make a reservation to carry out a scheduled cleaning task in 24 hours within 7 days through the app. |
Button Description Function Function Description
| Power button | Press this button to power on the machine. | Press and hold this button for 3s to power on the machine | |
| Press and hold this button to power off the machine. | Press and hold this button for 3s to power off the machine. | ||
| Press this button to plan the cleaning path. Press this button for 300ms. | |||
| Press this button to pause. Press this button for 300ms. | |||
| „Return to docking station" button | Press this button to return to the docking station. Press this button for 300ms. | ||
| Press this button during the „return to docking station" process to pause this process.Wi-Fi fast connection (EZ mode) | Press this button for 300ms. | ||
| Wi-Fi button | Press this button during the „return to docking station" process to pause this process. | Press and hold this button for 3s. | |
| Hotspot pairing (AP mode) | |||
Dust Box, Water Tank, and Mopping Cloth Assembly
HEPA filter
Prefilter
Sheet metal of the dust box
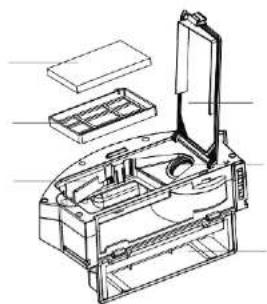
natural_image
Technical line drawing of a mechanical assembly with no visible text or symbolsHEPA filter cover
Conductive shrapnel of the dust box
Side cover of the dust box
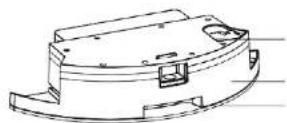
Water inlet
Water tank Mapping cloth
natural_image
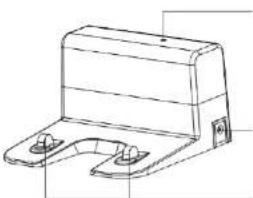
Technical line drawing of a mechanical bracket component (no text or symbols)Signal indicator
DC connector
Charging electrode
Preparations
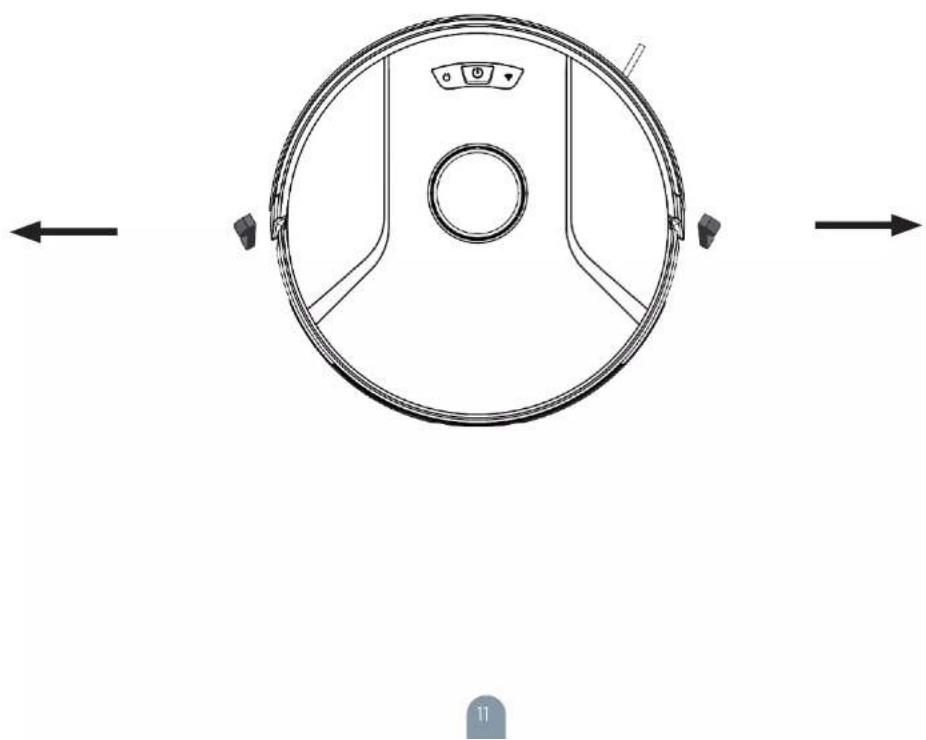
Remove the protective strip
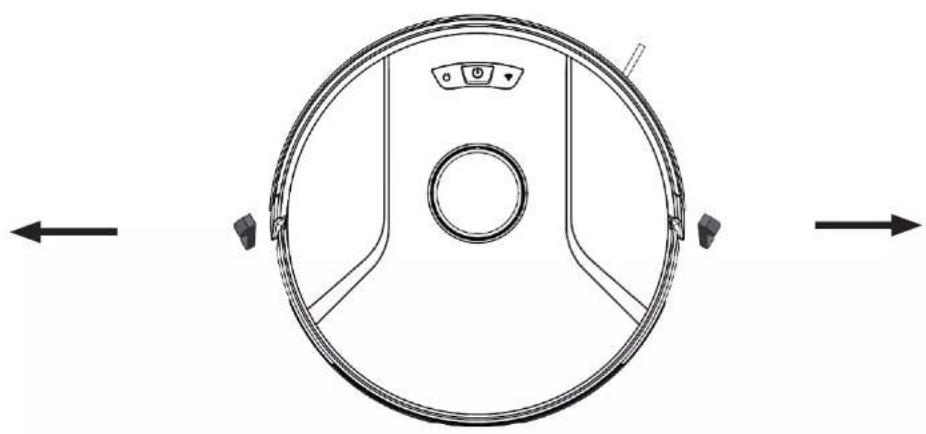
Before using the main unit, remove the protective strip from the main unit.
natural_image
Top-down schematic of a circular device with control panel and directional arrows (no text or symbols)Charging the Main Unit
- Place the docking station on the flat ground against the wall. Do not place any articles 0.5m to the left and right of the docking station and 1.5m in front of the docking station.
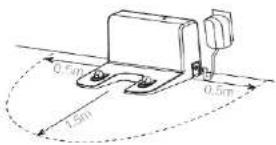
- Connect the docking station to the power supply.
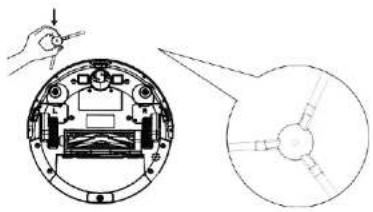
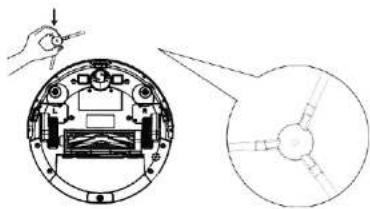
- Install the left and right side brushes.
natural_image
Technical diagram showing a mechanical assembly with a close-up view of a circular component (no text or symbols)- Place the main unit on the docking station to charge the main unit. During charging, the indicator blinks. When charging is completed, the indicator is steady on. It takes about 4-5 hours to fully charge the main unit.
During the cleaning process, the main unit automatically checks its power level. If the power is insufficient, the main unit activates the "Return to docking station" mode, and automatically returns to the docking station for charging.
Alternatively, you can tap the "Return to docking station" button in the app to activate the "Return to docking station" mode of the main unit.
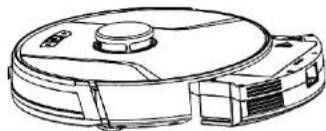
natural_image
Line drawing of a robotic vacuum cleaner (no text or symbols)Note:
Do not use the docking station in a highly reflective environment such as the environment exposed to direct sunlight or with mirrors nearby.
To ensure the normal working time of the main unit, fully charge the main unit before use. The charging time is about 4-5 hours. To ensure the safety of charging and prevent the damp cloth from damaging the floor, remove the water tank before charging the main unit.
Product Use/ Start cleaning
EN
For different cleaning needs, this product has a variety of cleaning methods to choose from. Various cleaning methods can be activated through the robot, remote control or APP.
Auto Cleaning
Applicable scenarios: The most commonly used cleaning method, the robot cleans the whole house in a Zig-zag path according to the actual home environment.
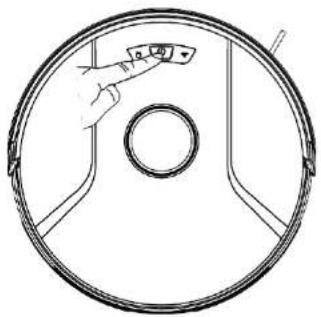
Setting method: In the shutdown state, long press the Power button ⏻ the robot indicator light is on to indicate that the device is turned on; Then short press the button or click the remote control Auto Cleaning button 📄, the robot starts automatic cleaning.
natural_image
Simple line drawing of a hand pointing to a circular object with a scale and arrow (no text or symbols)Use Instructions
Power on and off the machine
Tap and hold the ⏻ button to power on the machine. Then, the power indicator is on, and the vacuum cleaner enters the standby state. When the vacuum cleaner is in a static state, press and hold the ⏻ button to power off the machine and stop the current cleaning task. Tip: The vacuum cleaner in charging state cannot be powered off.
Start cleaning
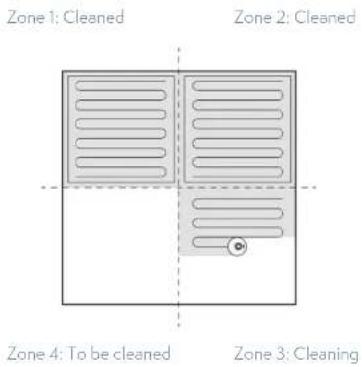
Press the ⏻ button to start cleaning. Then, the vacuum cleaner dynamically plans the cleaning route according to the map generated after scanning, and completes cleaning of different zones one by one. In each zone, the vacuum cleaner first sweeps the floor along the wall, and then moves in zigzag mode to clean the remaining part of the zone in an orderly and efficient manner.
Tips:
- If the power is too low, the vacuum cleaner cannot start cleaning. Therefore, charge the vacuum cleaner before starting it.
- Before cleaning, tidy up all kinds of wires on the ground (including the power cord of the docking station). Otherwise, the vacuum cleaner may drag the wires while cleaning, which may cause power failures of other electric appliance or damage to items or wires.
- If the cleaning area is less than 2 square meters, the vacuum cleaner will clean the area twice by default.
- If the power is insufficient in the cleaning process, the main unit will automatically return to the docking station for charging. After the power is sufficient, the main unit will automatically return to the interrupted point to continue cleaning (ensure that you have enabled the resumable cleaning function).
Pause cleaning
If you need to add water to the water tank or wash the mopping cloth while the vacuum cleaner is working, press the ⏻ button to pause. You can press the ⏻ button to continue cleaning, or press the ⏻ button to return to the docking station and stop the current cleaning task.
Tip:
In pause state, if the vacuum cleaner returns to the docking station for charging, the current cleaning task is stopped.
Enter the sleep mode
If no operation is performed in 10 minutes, the vacuum cleaner automatically enters the sleep mode, and the power indicator blinks every several seconds. In sleep mode, you can press any button to wake up the vacuum cleaner.
Tips:
- When the vacuum cleaner is being charged at the docking station, it cannot enter the sleep mode.
• If the sleep time exceeds 12 hours, the vacuum cleaner automatically powers off
Charge the vacuum cleaner
Auto mode: After completing cleaning, the vacuum cleaner automatically returns to the docking station for charging.
Manual mode: In pause state, you can press the 📋 button to activate the „Return to docking station“ mode.
When the vacuum cleaner is being charged, the power indicator blinks in breathing manner.
Tip:
If the vacuum cleaner fails to find the docking station, it automatically returns to the starting point. In this case, you need to manually put the vacuum cleaner back to the docking station.
Faulty state
If the vacuum cleaner encounters a fault while working, the power indicator blinks quickly in red, and a voice prompt is generated. For details about troubleshooting method, see „Troubleshooting“.
Tips:
• In faulty state, if no operation is performed in 10 minutes, the vacuum cleaner automatically enters the sleep mode.
• In faulty state, if the vacuum cleaner returns to the docking station for charging, the current cleaning task is stopped.
Reset the Wi-Fi settings
If your mobile phone fails to connect to the vacuum cleaner due to reasons such as change of router settings and password forgotten, re-pair the vacuum cleaner with the mobile phone according to the Wi-Fi connection instructions.
Tip:
If the vacuum cleaner is in wait-to-connect state for more than 2 minutes, its Wi-Fi function is automatically disabled. To reconnect the vacuum cleaner to your mobile phone, reset the Wi-Fi settings.
PIN N GO
You can use the mobile app to specify a target point on the map. The vacuum cleaner will automatically plan the route and move to the specified point. If you specify a target point in the app when the vacuum cleaner is in standby or pause state, the vacuum cleaner will clean the 1.6mx1.6m square zone centered on this point. After cleaning, the vacuum cleaner will automatically return to the starting point and stop working.
Tip:
If you activate partial cleaning when the vacuum cleaner is in pause state, the current cleaning task will be stopped.
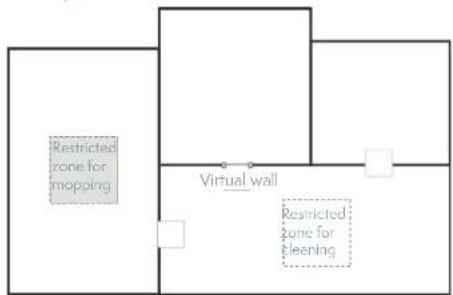
Set a restricted zone or virtual wall
You can use the mobile app to set a restricted zone or virtual wall. After the setting is completed, the vacuum cleaner will not enter the restricted zone or cross the virtual wall for cleaning.
Tips:
- Before using this function, you need to enable the map save mode for the vacuum cleaner in the mobile app.
• This function is only used to divide cleaning zones, but cannot be used to block dangerous zones. - If the vacuum cleaner is moved or there are significant changes in the home environment, the map may become invalid and the settings of the virtual wall or restricted zone may be lost.
| Real-time map update Volume adjustment |
| Cleaning record viewing Map management |
| Robot voice changing Firmware update |
| Robot positioning Robot status viewing |
Tip:
The functions and details of the app may change slightly due to continuous development and upgrade of the app. The specific functions and details of the app are subject to the actual version.
Selected zone cleaning
You can use the mobile app to select one or more zones for cleaning. The vacuum cleaner will clean one or more rooms based on the zone that you select on the app map.
Tips:
- Before using this function, you need to enable the map save mode for the vacuum cleaner in the mobile app, and the vacuum cleaner has already generated a map for cleaning.
• After cleaning starts, the main unit may move to a place beyond the selected zone. Make sure that you have cleared the obstacles on the ground around the selected zone, which cannot be used for safety isolation.
Scheduled cleaning
You can use the mobile app to set the scheduled cleaning time. When the specified time arrives, the vacuum cleaner will automatically start cleaning, and return to the docking station after it completes cleaning.
Configured zone cleaning
You can use the mobile app to configure a zone for cleaning. The vacuum cleaner will start cleaning based on the zone that you plan in the mobile app.
Tip:
After cleaning starts, the main unit may move to a place beyond the configured zone. Make sure that you have cleared the obstacles on the ground around the configured zone, which cannot be used for safety isolation.
Cleaning mode
You can use the mobile app to select the Energy saving, Standard, and Strong mode. The Standard mode is selected by default.
DND mode
During the Do-Not-Disturb (DND) period, the vacuum cleaner will not automatically continue cleaning or play the voice prompt. The power indicator dims. You can use the mobile app to disable the DND mode, or change the DND time range.
Using the Water Tank
-
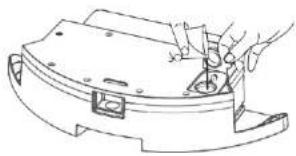
Do not use the mopping function on a carpet.
• After mopping the floor, empty the water tank in time and remove the cloth. -
Add water.
natural_image
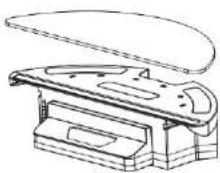
Line drawing of a mechanical component with hands operating it (no text or symbols)- Install the cloth.
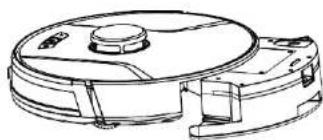
- Install the water tank assembly and Start mopping the floor.
natural_image
Line drawing of a robotic vacuum cleaner with a circular head and attached components (no text or symbols)Parts Maintenance — Dust Box
EN
Regular maintenance
To achieve the best cleaning effect, clean and maintain the main unit regularly according to the table below. Determine the frequency of cleaning and maintenance according to your use habits.
Recommended cleaning and maintenance frequency:
| Component of the Main Unit Cleaning Frequency Replacement Frequency | |
| Filter Every week Every 2 months | |
| Roller brush Every week Every 6 to 12 months | |
| Side brush Every month Every 3 to 6 months, or when it is obviously damaged | |
| Roller brush cover Every month | |
| Sensor Every month / | |
| Charging electrode Every month / | |
| Omnidirectional wheel Every month / |
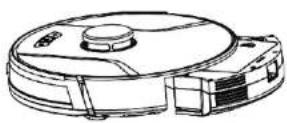
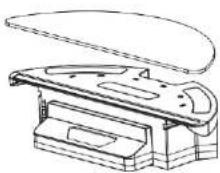
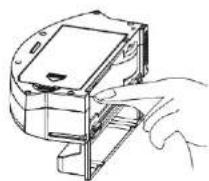
- Press down the button on the dust box to remove the dust box. 4. Open the HEPA filter cover.
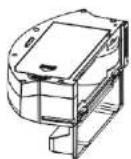
- Open the side cover of the dust box.
- Dump the trash.
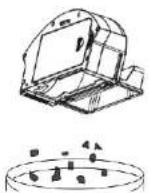
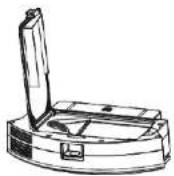
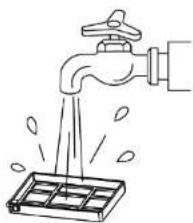
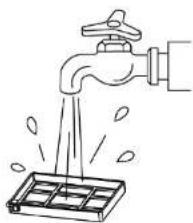
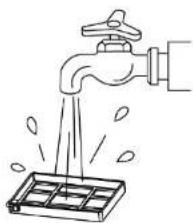
- Take out the HEPA filter and prefilter. Tap the HEPA filter to remove dust. Water washing is not recommended for the HEPA filter.
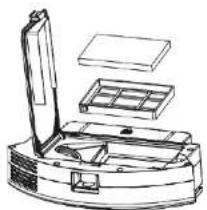
natural_image
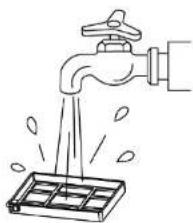
Technical line drawing of a mechanical device with internal components (no text or symbols)- Wash the prefilter.
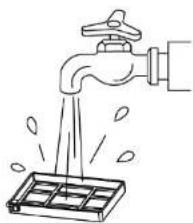
natural_image
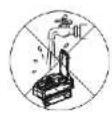
Line drawing of a faucet pouring water into a drain (no text or symbols)- Wipe the dust box clean with a cloth. Do not wash the dust box with water.
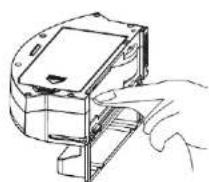
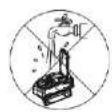
- Dry the dust box and filter components, and keep them dry to ensure their service life.
Note: It is recommended that you wash the prefilter every 15 to 30 days. The maximum service life of the HEPA filter is 3 months.
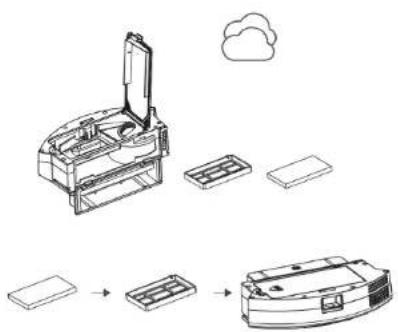
A. Install the prefilter and HEPA filter back to the dust box.
Note: 1. Before installing filters, ensure that the prefilter and HEPA filter are dry.
- Do not expose the prefilter and HEPA filter to the sunlight.
B. Close the cover of the dust box, and install the dust box on the main unit.
Note: Do not wash the dust box with water.
Parts Maintenance - Water Tank and Mopping Cloth
- Take out the water tank assembly. 4. Clean the mopping cloth.
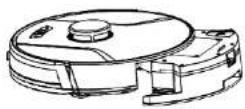
- Take out the mopping cloth. 5. Dry the mopping cloth.
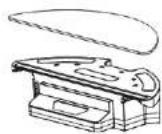
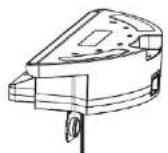
- Empty the water tank, 6. Dry or air dry the water tank,
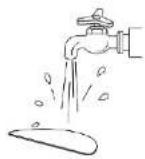
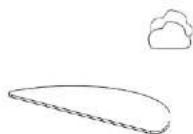
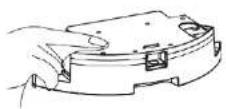
Parts Maintenance - Roller Brush and Side Brush
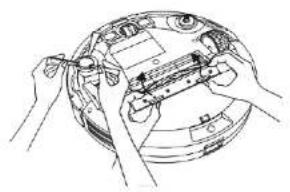
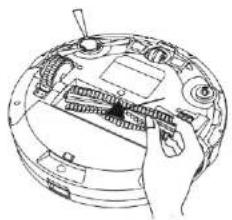
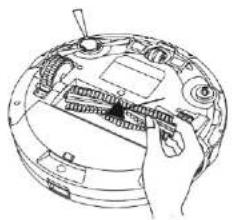
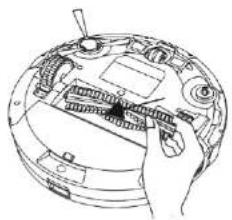
- Open the roller brush cover assembly. 3. Use a tool to clean the tangled hair.
natural_image
Line drawing of hands assembling or adjusting electronic components on a circular device (no text or symbols visible)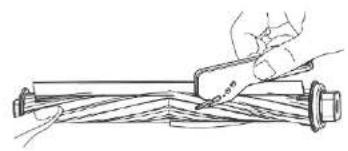
natural_image
Line drawing of a hand using a tool to cut or mark a wooden beam (no text or symbols)- Take out the roller brush shaft. 4. Clean the side brushes
natural_image
Technical line drawing of a mechanical device with hands operating it (no text or symbols visible)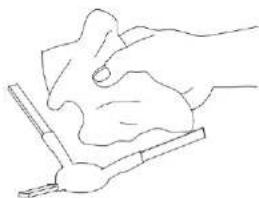
natural_image
Line drawing of a hand using a tool to lift or press a piece of material (no text or symbols)Parts Maintenance - Charging electrode, anti-fall sensor, drive wheel and omnidirectional wheel
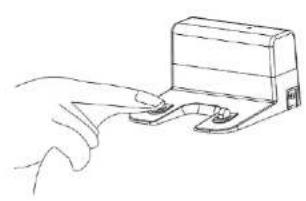
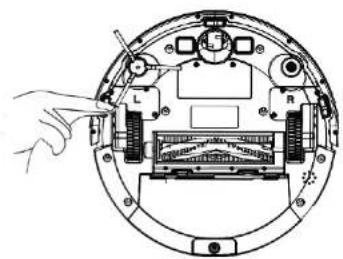
- Clean the charging electrode. 3. Clean the anti-fall sensor.
natural_image
Line drawing of a hand pressing a small electronic device (no text or symbols)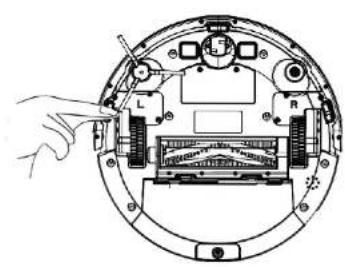
natural_image
Diagram of a mechanical device with labeled parts (L, R) and a hand pointing to a component, no text or symbols present.- Clean the drive wheel and omnidirectional wheel.
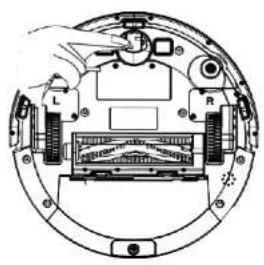
natural_image
Technical diagram of a mechanical assembly with labeled components (no readable text or symbols)Troubleshooting
EN
If the vacuum cleaner encounters a fault while working, the power indicator blinks quickly in red, and a voice prompt is generated. In this case, rectify the fault by referring to the table below.
| Error Prompt Solution | |
| Error 1: Laser head is blocked or stuck, please check. | The laser ranging sensor is blocked or jammed by a foreign object. Remove the obstruction or foreign object. If the obstruction or foreign object cannot be removed, move the main unit to a new position and then start it. |
| Error 2: Collision sensor get stuck,please check the collision sensor | The bumper is stuck. Tap the bumper for several times to remove the foreign object. If there is no foreign object, move the main unit to a new position and then start it. |
| Error 3:Right wheel suspended, please remove the robot in a new place then start again. | The wheel is suspended. Please move the main unit to a new position and then start it. |
| Error 4: Anti-fall sensor is blocked,please check and clean anti-fall sensor. | The main unit is suspended. Please move the main unit to a new position and then start it. This fault may occur when the cliff sensor is too dirty. Please wipe the cliff sensor clean. |
| Error 5: Side brush is entangled, please clean the side brush. | The side brushes may be entangled with foreign objects. Please disassemble and clean the side brushes. |
| Error 6:Right/left wheel is entangled, please clean the right/left wheel. | The wheel may be entangled with foreign objects. Please clean the wheel and start the main unit again. |
| Error 7: The robot is trapped, please remove the robot | The main unit may be stuck. Please remove the obstacles around the main unit. |
| Error 8: Low battery, please charge.. The power is insufficient. Please charge the vacuum cleaner before using it. | |
| Error 9:Charging problem, please check. The battery temperature is too high or too low. | Please wait and use the vacuum cleaner after the battery temperature becomes normal. |
| Error 10: Wall sensor is blocked, please check The wall sensor is covered by dust. Please wipe the wall sensor. | |
| Error 11: Uneven floor,please remove the robot in a new place then start again. | It is detected that the main unit is tilted upon startup. Please place the main unit on an even ground and restart it. |
| Error 12: Top cover of laser is blocked or stuck, please check | The laser pressure sensor is pressed or stuck. Please move the vacuum cleaner to a new position and then restart it. |
Troubleshooting
| Fault Solution | |
| Failed to power on the machine | The battery power is insufficient. Please use the vacuum cleaner after charging it on the docking station.The battery temperature is too high or too low. Please use the vacuum cleaner when the ambient temperature is 0°C to 40°C. |
| Failed to charge the machine | The docking station is not connected to the power supply. Please make sure that both ends of the docking station power cord are properly connected.The docking station is not in proper contact with the main unit. Please clean the docking station shrapnel and the charging contact of the main unit.Check whether the docking station indicator is on. |
| Slow charging | When used in a high or low temperature environment, the main unit will automatically decrease the charging speed to extend the battery life.The charging contact area may be dirty. Please clean the area with a dry cloth. |
| Failed to return to the docking station | There are too many obstacles around the docking station. Please place the docking station in an open area.The main unit is too far away from the docking station. Try to place the main unit near the docking station. |
| Abnormal behavior The vacuum cleaner is powered off and then on again. | |
| There is abnormal noise during cleaning. | The roller brush, side brushes, or main wheel may be entangled with foreign objects.Clean them after powering off the vacuum cleaner.The omnidirectional wheel is covered by dust or is entangled during cleaning. It is recommended that you use a screwdriver to pull it out and rinse it. |
| The cleaning performance is degraded, or ash is dropped. | The dust box is full. Clean the dust box.The filter is blocked. Clean the filter. |
| The Wi-Fi network cannot be connected. | The Wi-Fi function is not activated. Reset the Wi-Fi connection, and try again.The Wi-Fi signal is not good. Ensure that the main unit is located in a place with good Wi-Fi signals.The Wi-Fi connection is abnormal. Reset the Wi-Fi settings, download the mobile app of the latest version, and try to connect to the Wi-Fi network again.The Wi-Fi network suddenly cannot be connected. The family router settings may be incorrect. In this case, contact the customer service for help. |
| Scheduled cleaning cannot be carried out. | The power is insufficient. Scheduled cleaning will be started only when the remaining power is more than 20%. |
EN
| Is any power consumed if the vacuum cleaner always stays at the docking station? | The power consumption is extremely low when the vacuum cleaner always stays at the docking station. This helps to keep the battery in the best performance. |
| Is it necessary to charge the battery for 16 hours when the vacuum cleaner is used for the first three times? | The lithium battery does not have a memory effect. It can be used instantly after it is fully charged. There is no need to wait 16 hours. |
| The mopping module does not output water or the water output is small. | Check whether there is any water in the water tank. Use the mobile app to set the water output to the maximum value.Install the mopping cloth and mop stand properly according to the manual. |
| The power is insufficient during cleaning. After the vacuum cleaner returns to the docking station for charging, it does not continue cleaning. | Check whether the main unit is in DND mode. The vacuum cleaner will not continue cleaning in DND mode.The vacuum cleaner will not continue cleaning if the main unit is manually put back to the docking station. |
| The vacuum cleaner cannot return to the docking station after partial cleaning or after its position is moved. | The vacuum cleaner will re-generate a map after partial cleaning or after it is moved far away.If the main unit is far away from the docking station, the main unit may fail to return to the docking station by itself. In this case, manually put the main unit back to the docking station. |
| The vacuum cleaner misses some areas when cleaning. | The wall sensor or cliff sensor may get dirty. It is recommended that you wipe the sensors using a soft dry cloth. |
Product Specifications
| Category | Item Specification | |
| Diameter 330 mm | ||
| Structure | Height 96 mm | |
| Net weight 2.7 kg | ||
| Battery | Voltage 14.4 V | |
| Battery 2600 mAh rechargeable lithium battery | ||
| Cleaning parameters | Dust box capacity 600 ml | |
| Charging type Auto charging and manual charging | ||
| Charging time About 270 minutes | ||
| Cleaning time About 100 minutes | ||
| Main unit |
INFORMATION ABOUT DISPOSAL AND RECYCLING
This product is marked with the symbol for separate collection. The product must be disposed of in accordance with the regulations for disposal of electrical and electronic equipment (Directive 2012/19/EU on waste electrical and electronic equipment). Disposal together with regular municipal waste is prohibited. Dispose of all electrical and electronic products in accordance with all local and European regulations at the designated collection points which hold the appropriate authorisation and certification in line with the local and legislative regulations. Correct disposal and recycling help to minimise impacts on the environment and human health. Further information regarding disposal can be obtained from the vendor, authorised service centre or local authorities.
EU DECLARATION OF CONFORMITY
Hereby, Tesla Global Limited declares that the radio equipment type TSL-VC-AI200 is in compliance with EU directives. The full text of the EU declaration of conformity is available at the following internet address: tsl.sh/doc
Connectivity: WIFI 802.15.4
Frequency band: 2.400 - 2.480 GHz
Max. radio-frequency power (EIRP): < 20 dBm

Producent
Tesla Global Limited
Far East Consortium Building,
121 Des Voeux Road Central
Hong Kong
www.teslasmart.com
TT
TESLA
natural_image
Black robotic vacuum cleaner with circular head and control buttons (no visible text or symbols)TESLA SMART ROBOT VACUUM LASER AI200
BENUTZERHANDBUCH
Sicherheitshinweise
natural_image
Line drawing of a two-person living room with sofa, coffee table, and wall art (no text or symbols)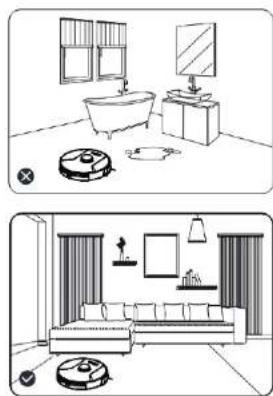
natural_image
Two line drawings of a living room layout: top shows a bathtub, monitor, and vacuum cleaner; bottom shows a sofa with coffee table and wall decor (no text or symbols)Installation
DE
Installation
natural_image
Technical line drawing of a mechanical device with internal components and housing (no text or symbols)natural_image
Technical line drawing of a mechanical bracket component (no text or symbols)natural_image
Top-down schematic of a circular device with control panel and directional arrows indicating left and right motion (no text or symbols)natural_image
Technical diagram showing a mechanical assembly with a hand and a close-up of a circular component (no text or symbols)natural_image
Line drawing of a robotic vacuum cleaner (no text or symbols)natural_image
Simple line drawing of a circular device with a hand pointing to a small screen (no text or symbols)Gebrauchshinweise
natural_image
Line drawing of a mechanical component with hands operating it (no text or symbols)natural_image
Technical line drawing of a mechanical device with no visible text or symbolsnatural_image
Technical line drawing of a mechanical device with internal components (no text or symbols)natural_image
Simple line drawing of a hand pouring liquid into a water tank (no text or symbols)natural_image
Illustration of a hand inserting a device into a device with an inset showing a magnified view of the device (no text or symbols present)natural_image
Illustration of hands assembling or adjusting electronic components on a circular device (no text or symbols visible)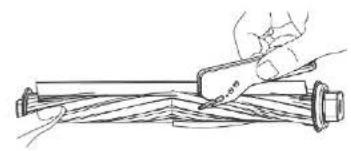
natural_image
Line drawing of a hand using a tool to cut or adjust a cable or wire component (no text or symbols present)natural_image
Technical line drawing of a mechanical device with hands operating it (no text or symbols visible)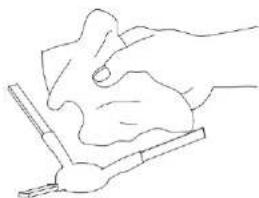
natural_image
Line drawing of a hand using a tool to lift or press a piece of material (no text or symbols)natural_image
Line drawing of a hand pressing a small electronic component (no text or symbols)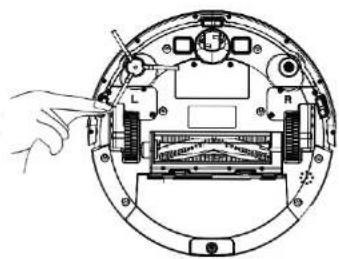
natural_image
Diagram of a mechanical device with labeled components (L, R) and a hand pointing to a component, no text or symbols present.natural_image
Technical diagram of a mechanical assembly with labeled components (no readable text or symbols)Problemlösung
Product Specifications
Produzent
Tesla Global Limited
Far East Consortium Building,
121 Des Voeux Road Central
Hong Kong
www.teslasmart.com
TT
TESLA
natural_image
Black robotic vacuum cleaner with circular head and control buttons (no visible text or symbols)TESLA SMART ROBOT VACUUM LASER AI200
UŽIVATELSKÁ PŘÍRUČKA
Bezpečnostní pokyny
natural_image
Technical diagram of a circular mechanical or electronic component with labeled parts (L, R, U) and no readable text or symbols.Nabíjecí elektroda
Všesměrové kolečko
Baterie
natural_image
Cross-sectional diagram of a mechanical or electronic component with no visible text or symbolsInstalace
Poznámky
natural_image
Line drawing of a modern living room interior with sofa, coffee table, and wall art (no text or symbols)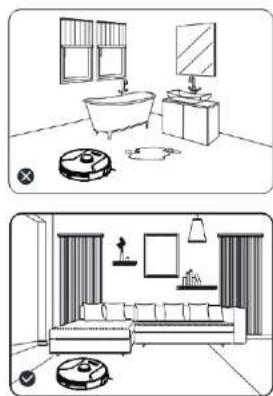
natural_image
Two line drawings of a living room layout: top shows a bathtub, monitor, and vacuum cleaner; bottom shows a sofa with coffee table and wall art (no text or symbols)Instalace
Instalace
natural_image
Technical line drawing of a mechanical assembly with no visible text or symbolsKryt HEPA filtru
natural_image
Technical line drawing of a mechanical bracket component (no text or symbols)Kontrolka signálu
DC konektor
Nabijeci elektroda
Příprava
natural_image
Top-down schematic of a circular device with control panel and directional arrows indicating left and right motion (no text or symbols)natural_image
Technical diagram showing a mechanical assembly with a hand and a close-up of a circular component (no text or symbols)natural_image
Line drawing of a robotic vacuum cleaner (no text or symbols)natural_image
Simple line drawing of a hand pointing at a circular component with a dial (no text or symbols)Pokyny k použití
natural_image
Line drawing of a mechanical component with hands operating it (no text or symbols)natural_image
Technical line drawing of a mechanical device with no visible text or symbolsnatural_image
Technical line drawing of a mechanical device with internal components (no text or symbols)- Umyjte predfiltr.
natural_image
Line drawing of a faucet pouring water into a drain (no text or symbols)natural_image
Illustration of hands assembling or adjusting electronic components on a circular device (no text or symbols visible)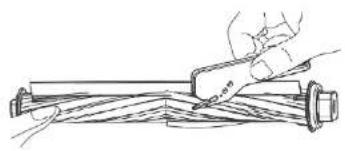
natural_image
Line drawing of a hand using a tool to cut or mark a mechanical component (no text or symbols)natural_image
Technical line drawing of a mechanical device with hands operating it (no text or symbols visible)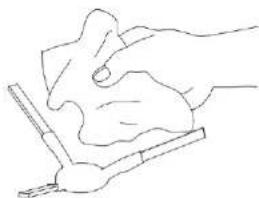
natural_image
Line drawing of a hand using a tool to lift or press a piece of material (no text or symbols)natural_image
Line drawing of a hand pressing a small electronic device (no text or symbols)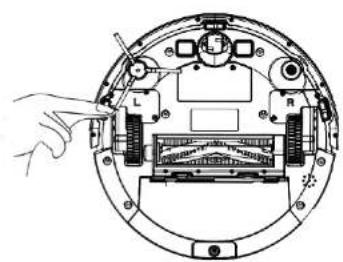
natural_image
Diagram of a mechanical device with labeled components (no text or symbols present)natural_image
Technical diagram of a mechanical assembly with labeled components (no text or symbols)Řešení problémů
Výrobce
Tesla Global Limited
Far East Consortium Building,
121 Des Voeux Road Central
Hong Kong
www.teslasmart.com
TT
TESLA
natural_image
Black robotic vacuum cleaner with circular head and control buttons (no visible text or symbols)TESLA SMART ROBOT VACUUM LASER AI200
POUŽÍVATELŠKÁ PRÍRUČKA
Bezpečnostné pokyny
natural_image
Technical diagram of a circular mechanical or electronic component with labeled parts (L, R, and internal structure)Nabijacia elektróda
Všesmerové koliesko
Bateria
natural_image
Cross-sectional diagram of a circular electronic device with internal components and wiring (no text or symbols)Inštalácia
Poznámky
natural_image
Line drawing of a modern living room interior with sofa, coffee table, and wall art (no text or symbols)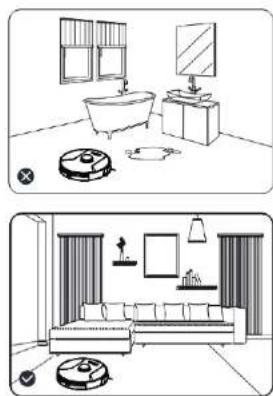
natural_image
Two line drawings of a living room layout: top shows a bathtub, monitor, and vacuum cleaner; bottom shows a sofa with coffee table and wall art (no text or symbols)Inštalácia
SK
Inštalácia
natural_image
Technical line drawing of a mechanical device with internal components and housing (no text or symbols)Kryt HEPA filtru
natural_image
Technical line drawing of a mechanical bracket component (no text or symbols)Kontrolka signálu
DC konektor
Nabijacia elektróda
Príprava
natural_image
Top-down schematic of a circular device with control panel and directional arrows indicating left and right motion (no text or symbols)natural_image
Technical diagram showing a hand operating a circular mechanical component with internal components, alongside an enlarged detail view of the internal structure (no text or symbols present)natural_image
Line drawing of a robotic vacuum cleaner (no text or symbols)natural_image
Simple line drawing of a hand pointing to a circular component with a dial (no text or symbols)natural_image
Line drawing of a mechanical component with hands operating it (no text or symbols)- Nainštalujte mopovaciu handričku.
natural_image
Line drawing of a robotic vacuum cleaner (no text or symbols)natural_image
Technical line drawing of a mechanical device with internal components (no text or symbols)- Umyte predfilter.
natural_image
Line drawing of a faucet pouring water into a drain (no text or symbols)A. Nainštalujte predfilter a HEPA filter späf do zásobnika na prach. Poznámka:
natural_image
Illustration of hands assembling or adjusting electronic components on a circular device (no text or symbols visible)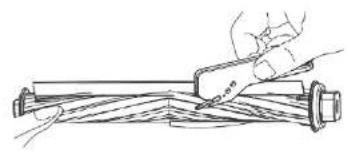
natural_image
Line drawing of a hand using a tool to cut or spread material on a mechanical component (no text or symbols)- Vyberte hriadel valčekovej kefy. 4. Vyčistite bočné kefy.
natural_image
Technical line drawing of a mechanical device with hands operating it (no text or symbols visible)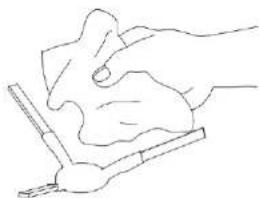
natural_image
Line drawing of a hand using a tool to lift or press a piece of material (no text or symbols)natural_image
Line drawing of a hand pressing a small electronic device (no text or symbols)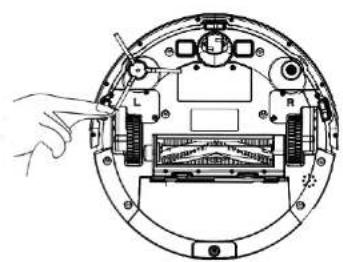
natural_image
Diagram of a mechanical device with labeled components (no text or symbols present)natural_image
Technical diagram of a mechanical assembly with labeled components (no readable text or symbols)115
Riešenie problémov
Výrobca
Tesla Global Limited
Far East Consortium Building,
121 Des Voeux Road Central
Hong Kong
www.teslasmart.com
TT
TESLA
natural_image
Black robotic vacuum cleaner with circular head and control buttons (no visible text or symbols)TESLA SMART ROBOT VACUUM LASER AI200
natural_image
Technical diagram of a circular mechanical or electronic component with labeled parts (L, R, and internal structure)Elektroda ładująca
Instalacja
Uwagi
natural_image
Line drawing of a modern living room interior with sofa, coffee table, and wall art (no text or symbols)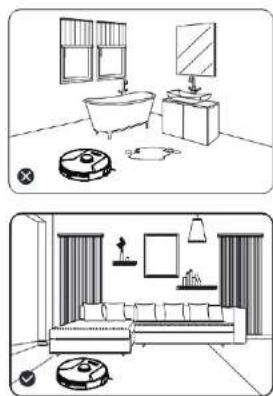
natural_image
Two-panel line drawing showing interior layouts: top panel shows a bathtub, mirror, and vacuum cleaner; bottom panel shows a living room with sofa, coffee table, and wall art (no text or symbols)Instalacja
PL
Instalacja
natural_image
Technical line drawing of a mechanical assembly with no visible text or symbolsOstona filtra HEPA
natural_image
Technical line drawing of a mechanical bracket component (no text or symbols)Kontrolka sygnaku
Złącze DC
Elektroda ładująca
Przygotowanie
Usuń taśmę ochronną
natural_image
Top-down schematic of a circular device with control panel and directional arrows indicating left and right motion (no text or symbols)natural_image
Technical diagram showing a hand operating a device with a close-up view of internal components (no text or symbols)natural_image
Line drawing of a robotic vacuum cleaner (no text or symbols)Uwaga:
natural_image
Simple line drawing of a hand pointing at a circular component with a dial (no text or symbols)natural_image
Simple line drawing of a door with ventilation slots and a handle (no text or symbols)natural_image
Line drawing of a mechanical component with hands operating it (no text or symbols)natural_image
Technical line drawing of a mechanical device with no visible text or symbolsnatural_image
Technical line drawing of a mechanical device with internal components (no text or symbols)- Umyj filtr wstępny.
natural_image
Line drawing of a faucet pouring water into a drain (no text or symbols)natural_image
Line drawing of hands installing or adjusting a mechanical component on a circular base (no text or symbols visible)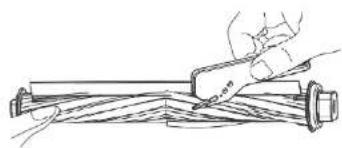
natural_image
Line drawing of a hand using a tool to lift a wooden beam (no text or symbols)natural_image
Technical line drawing of a mechanical device with gears and a handle (no text or symbols)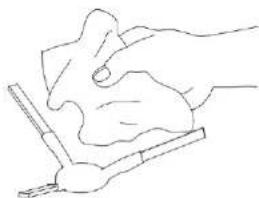
natural_image
Line drawing of a hand using a tool to lift or press a piece of material (no text or symbols)natural_image
Line drawing of a hand pressing a small electronic component (no text or symbols)natural_image
Diagram of a mechanical device with labeled components (L, R) and a hand pointing to a component, no text or symbols present.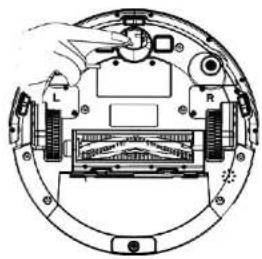
natural_image
Technical diagram of a mechanical assembly with labeled components (no readable text or symbols)145
Far East Consortium Building,
121 Des Voeux Road Central
Hong Kong
www.teslasmart.com
TT
TESLA
natural_image
Black robotic vacuum cleaner with circular head and control buttons (no visible text or symbols)TESLA SMART ROBOT VACUUM LASER AI200
FELHASZNÁLÓI KÉZIKÖNYV
natural_image
Technical diagram of a circular mechanical or electronic component with labeled parts (L, R, and internal structure)Töltőérintkező
Többirányú kerék
Akkumulátor
natural_image
Cross-sectional diagram of a circular electronic device with labeled components (no readable text or symbols)Telepítés
Megjegyzések
natural_image
Line drawing of a modern living room interior with sofa, coffee table, and wall art (no text or symbols)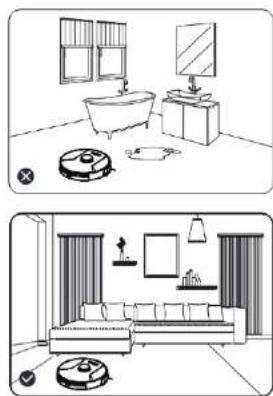
natural_image
Two line drawings of a living room layout: top shows a bathtub, monitor, and vacuum cleaner; bottom shows a sofa with coffee table and wall art (no text or symbols)Telepítés
Telepítés
natural_image
Technical line drawing of a mechanical assembly with no visible text or symbolsA HEPA szűrő fedele
natural_image
Technical line drawing of a mechanical bracket component (no text or symbols)Jel ellenörzö LED
DC csatlakozó
Töltö elektróda
Előkészítés
natural_image
Top-down schematic of a circular device with control panel and directional arrows indicating left and right motion (no text or symbols)A főegység töltése
natural_image
Technical diagram showing a hand operating a device with a close-up view of internal components (no text or symbols)natural_image
Line drawing of a robotic vacuum cleaner (no text or symbols)natural_image
Simple line drawing of a hand pointing at a circular component with a scale and arrow (no text or symbols)Használati útmutató
natural_image
Technical diagram of a rectangular structure with internal curved lines and a central circular feature, labeled with dimension 1.6 m (no text or symbols beyond measurement)natural_image
Line drawing of a mechanical component with hands operating it (no text or symbols)natural_image
Technical line drawing of a robotic vacuum cleaner (no text or symbols)natural_image
Technical line drawing of a mechanical device with internal components (no text or symbols)natural_image
Line drawing of a faucet pouring water into a drain (no text or symbols)natural_image
Line drawing of a hand inserting a component into a device housing (no text or symbols)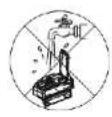
natural_image
Illustration of hands assembling or repairing electronic components on a circular device (no text or symbols visible)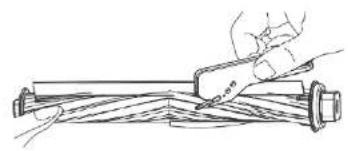
natural_image
Line drawing of a hand using a tool to cut or spread material on a mechanical component (no text or symbols)natural_image
Technical line drawing of a mechanical device with hands operating it (no text or symbols visible)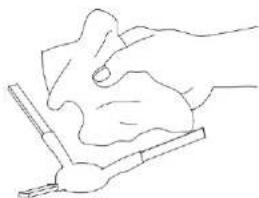
natural_image
Line drawing of a hand using a tool to lift or press a piece of material (no text or symbols)natural_image
Line drawing of a hand pressing a small electronic component (no text or symbols)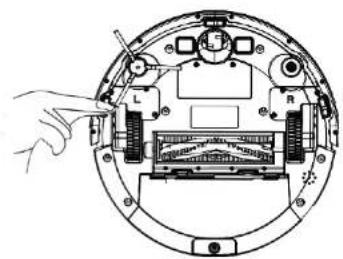
natural_image
Diagram of a mechanical device with labeled parts (L, R) and a hand pointing to a component, no readable text or symbols present.natural_image
Technical diagram of a mechanical assembly with labeled components (no text or symbols present)175
Hibaelhárítás
Far East Consortium Building,
121 Des Voeux Road Central
Hong Kong
www.teslasmart.com
TT
TESLA
natural_image
Black robotic vacuum cleaner with circular head and control buttons (no visible text or symbols)TESLA SMART ROBOT VACUUM LASER AI200
UPORABNIŠKI PRIROČNIK
Varnostni napotki
natural_image
Technical line drawing of a mechanical device with no visible text or symbolsPokrov
Laserska glava
Gumb zbiralnika za prah
Pogled od spodaj
natural_image
Technical diagram of a circular mechanical or electronic component with labeled parts (L, R, and internal structure), no readable text or symbols present.Polnilna elektroda
Kolo za premikanje
v katero koli smer
Akumulator
Sklop valjaste krtače
Namestitev
Opombe
natural_image
Line drawing of a modern living room interior with sofa, coffee table, and wall art (no text or symbols)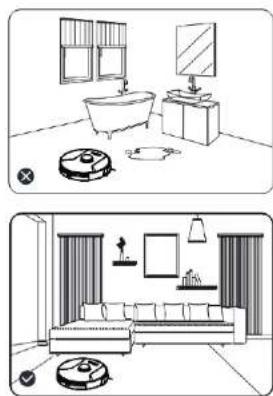
natural_image
Two line drawings of a living room layout: top shows a bathtub, monitor, and vacuum cleaner; bottom shows a sofa with coffee table and wall art (no text or symbols)Namestitev
Namestitev
natural_image
Technical line drawing of a mechanical device with internal components and housing (no text or symbols)Pokrov HEPA filtra
natural_image
Technical line drawing of a mechanical bracket component (no text or symbols)Kontrolna lučka signala
DC priključek
Polnilna elektroda
Priprava
natural_image
Top-down schematic of a circular device with control panel and directional arrows indicating left and right motion (no text or symbols)Polnjenje glavne enote
- Priključite polnilno postajo na vir napajanja.
- Namestite levo in desno stransko krtačo.
natural_image
Technical diagram showing a hand operating a device with an inset close-up of its internal components (no text or labels)natural_image
Line drawing of a robotic vacuum cleaner (no text or symbols)natural_image
Simple line drawing of a hand pointing at a circular component with a dial (no text or symbols)Navodila za uporabo
natural_image
Line drawing of a mechanical component with hands operating it (no text or symbols)natural_image
Line drawing of a robotic vacuum cleaner with a circular top and attached housing (no text or symbols)natural_image
Technical line drawing of a mechanical device with internal components (no text or symbols)- Pomijte predfilter.
natural_image
Line drawing of a faucet pouring water into a drain (no text or symbols)- Obrišite zbiralnik za prah s krpo. Zbiralnika za prah ne pomivajte z vodo.
natural_image
Illustration of hands assembling or adjusting electronic components on a circular device (no text or symbols visible)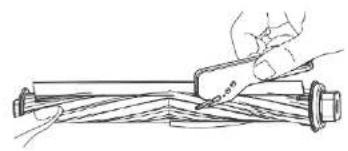
natural_image
Line drawing of a hand using a tool to cut or spread material on a mechanical component (no text or symbols)- Odstranite gred valjaste krtače. 4. Očistite stransko krtačo.
natural_image
Technical line drawing of a mechanical device with hands operating it (no text or symbols visible)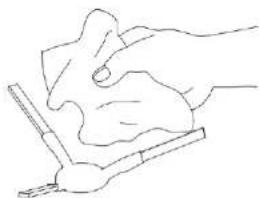
natural_image
Line drawing of a hand using a tool to lift or press a piece of material (no text or symbols)natural_image
Line drawing of a hand pressing a small electronic component (no text or symbols)- Očistite pogonsko in vsesmerno kolesce.
natural_image
Diagram of a mechanical device with labeled parts (L, R) and a hand pointing to a component, no readable text or symbols present.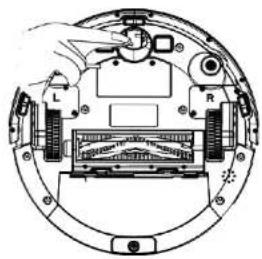
natural_image
Technical diagram of a mechanical assembly with labeled components (no readable text or symbols)Odpravljanje težav
Producent
Tesla Global Limited
Far East Consortium Building.
121 Des Voeux Road Central
Hong Kong
www.teslasmart.com

TESLA SMART ROBOT VACUUM LASER AI200
Producent
Tesla Global Limited
Far East Consortium Building,
121 Des Voeux Road Central
Hong Kong
www.teslasmart.com
- TESLA SMART ROBOT VACUUM LASER AI200
- Safety Instructions
- Cautions
- Warnings
- Table of Contents
- Product and Accessories
- Product Composition
- Front view
- Rear view
- Installation
- Notes
- Description of App Icons and Buttons
- Dust Box, Water Tank, and Mopping Cloth Assembly
- Preparations
- Charging the Main Unit
- Note:
- Product Use/ Start cleaning
- Use Instructions
- Power on and off the machine
- Start cleaning
- Tips:
- Pause cleaning
- Tip:
- Enter the sleep mode
- Charge the vacuum cleaner
- Faulty state
- Reset the Wi-Fi settings
- PIN N GO
- Set a restricted zone or virtual wall
- Selected zone cleaning
- Scheduled cleaning
- Configured zone cleaning
- Cleaning mode
- DND mode
- Using the Water Tank
- Parts Maintenance — Dust Box
- Regular maintenance
- Parts Maintenance - Water Tank and Mopping Cloth
- Parts Maintenance - Roller Brush and Side Brush
- Troubleshooting
- INFORMATION ABOUT DISPOSAL AND RECYCLING
- EU DECLARATION OF CONFORMITY
- TT
- TESLA
- Sicherheitshinweise
- Gebrauchshinweise
- Problemlösung
- Bezpečnostní pokyny
- Instalace
- Poznámky
- Příprava
- Pokyny k použití
- Řešení problémů
- Bezpečnostné pokyny
- Inštalácia
- Riešenie problémov
- Instalacja
- Uwagi
- Przygotowanie
- Telepítés
- Megjegyzések
- Előkészítés
- A főegység töltése
- Használati útmutató
- Hibaelhárítás
- Varnostni napotki
- Pogled od spodaj
- Namestitev
- Opombe
- Priprava
- Polnjenje glavne enote
- Navodila za uporabo
- Odpravljanje težav
Brand : TESLA
Model : AI200
Category : Vacuum Cleaner