
PHSM 9100 - Food processor Philco - Free user manual and instructions
Find the device manual for free PHSM 9100 Philco in PDF.


| Product Type | Food processor / Stand mixer |
| Model | PHSM 9100 |
| Brand | Philco |
| Power Supply | AC 220-240 V, 50 Hz, 1500 W |
| Speed Settings | 8 speeds (1-8) plus Blender setting |
| Bowl Capacity | 1.0 kg flour + 0.55 kg water (approx. 2.2 L) |
| Maximum Continuous Operation | 15 minutes |
| Cooling Time After Heavy Use | 30 minutes |
| Included Accessories | Dough hook, flat beater, balloon whisk, meat grinder (with cutting discs, sausage horn, noodle cutters), vegetable slicer (3 discs), blender jar with lid, food pusher, loading tray |
| Main Functions | Mixing, kneading, whisking, meat grinding, sausage making, pasta making, cookie making, vegetable slicing, blending |
| Safety Features | Safety mechanism prevents motor start when arm is tilted; overload protection; automatic shut-off |
| Cleaning | Wipe main body with damp cloth; wash removable parts in warm soapy water (not dishwasher safe) |
| Material | Stainless steel bowl, plastic and metal parts |
| Weight | Approx. 8 kg (estimate) |
| Dimensions (H x W x D) | Approx. 40 x 35 x 30 cm (estimate) |
Frequently Asked Questions - PHSM 9100 Philco
User questions about PHSM 9100 Philco
0 question about this device. Answer the ones you know or ask your own.
Ask a new question about this device
Download the instructions for your Food processor in PDF format for free! Find your manual PHSM 9100 - Philco and take your electronic device back in hand. On this page are published all the documents necessary for the use of your device. PHSM 9100 by Philco.
USER MANUAL PHSM 9100 Philco
Famous for Quality the World Over
STAND MIXER KUCHYŃSKÝ ROBOT KUCHYNSKÝ ROBOT ROBOT KUCHENNY KONYHAI ROBOTGÉP

natural_image
Product photo of a kitchen stand mixer with various kitchen utensils and kitchen tools (no visible text or labels)PHSM 9100
-
Important safety precaution .... 3
-
speed Control Switch....5
-
Features and Functions....6
-
Operating positions ...... 7
-
How to use: 8
Dough hook, Flat Beater, Balloon whisk 8
Meat grinder / Sausage maker / Pasta maker / Cookies maker 9
Vegetable Slicer 11
Blender 12
-
Cleaning and servicing.... 13
-
Capability of bowl....13
Application examples: 13
Dear customer,
Thank you for buying a PHILCO brand product. So that your appliance serves you well, please read all the instructions in this user's manual.
1. IMPORTANT SAFETY PRECAUTION
READ CAREFULLY AND STORE FOR FUTURE USE.
- Children must not use this appliance or play with it. Keep this appliance and its power cord out of reach of children.
- This appliance may be used by persons with physical or mental impairments or by inexperienced persons, if they are properly supervised or have been informed about how to use the product in a safe manner and understand the potential dangers.
• Make sure that all packaging material is out of reach of children, especially plastic bags.
WARNING!
Do not allow children to play with the packaging materials.
This presents a risk of suffocation.
- Before connecting this appliance to a power socket, make sure the voltage stated on its rating label corresponds to the voltage in your power socket.
- Never use accessories, which have not been supplied with this appliance or which have not been explicitly recommended by the manufacturer.
- The appliance is intended and designed for processing a standard amount of food in the household.
- Do not use the appliance for any other purposes than those intended.
- Do not use the appliance in an industrial environment or outdoors.
- Do not place the appliance on window sills or on unstable surfaces. Only place the appliance on an even, dry and stable surface.
- Do not place the appliance on an electric or gas stove, in the vicinity of an open flame or appliances that are sources of heat.
- Ensure that the power plug contacts do not come into contact with water or moisture.
• Never use multiple attachments simultaneously. - Do not wash the appliance (except for the removable parts) under running water and do not submerge it in water or any other liquid.
- Always turn off the appliance, disconnect it from the power socket when not be using it, when leaving it without supervision, and before assembling, disassembling, cleaning or moving it. Prior to disassembling the appliance and replacing accessories or accessible parts that move during use, wait until all moving parts come to a stop.
- For safety reasons, this appliance is equipped with a safety mechanism that prevents the motor from being started if the appliance's arm is tilted out.
- Before putting the appliance into operation, check that it is correctly assembled and that the arm is in the horizontal position.
- Allow hot liquids or food to cool down before mixing them.
- Do not attempt to grind bones, nut shells or other hard ingredients.
-
Do not leave the appliance in continuous operation under a heavy load for a period longer than 15 minutes. Before turning it on again, allow it to cool down for at least 30 minutes.
-
Do not tilt out the arm or put your hands or items, such as a kitchen knife, fork or wooden spoon, into the bowl while the appliance is running. Do not touch rotating parts of the appliance or attachments and ensure that foreign items such as clothing, hair, etc. are kept away. An injury could occur or the appliance could be damaged.
- If an item, such as a spoon, falls into the mixing bowl while the appliance is running, immediately set the speed control knob to position 0 (stand-by mode), disconnect the power cord from the power socket and take the item out of the bowl.
- If ingredients stick to the attachments or the inside of the bowl, turn off the appliance and disconnect it from the power socket. Use a spatula to clean the attachments and the inside of the bowl. Then you can continue mixing.
- Never use your fingers or other items to push ingredients through the feed tube of the meat grinder or the slicing and grating attachment. For this purpose there is a pusher included as an accessory to this appliance.
- Do not turn the appliance on when empty. The incorrect use of the appliance may negatively affect its lifetime.
• Before storing the appliance, check that the stand arm is tilted to the horizontal position. - Do not place heavy items on the power cord. Make sure the power cord does not hang over the edge of a table or that it does not touch a hot surface.
- Do not disconnect the appliance from the power socket by pulling on the power cord. This could damage the power cord or the power socket. Disconnect the cord from the power socket by gently pulling the plug of the power cord.
- If the power cord is damaged, have it replaced at a technical service centre. It is forbidden to use the appliance if it has a damaged power cord or plug.
- To avoid the danger of injury by electrical shock, do not repair the appliance yourself or make any adjustments to it. Have all repairs or adjustments of the appliance performed at an authorised service centre. By tampering with the appliance you risk voiding your legal rights arising from unsatisfactory performance or quality warranty.
AC 220 - 240 V 50 Hz
1500 W
Save these instructions
2. SPEED CONTROL SWITCH

natural_image
Close-up of a metallic circular dial with a black pointer and 'Dimistor OFF' label (no other text or symbols visible)| OFF Stop | |
| Setting 1 - 8 Operating speed | |
| Setting 1 Minimum speed - slow | |
| Setting 8 Maximum speed - fast | |
| Setting Blender Blender function |
* Do not use "Blender" to mix heavy mixtures (e.g. bread or short pastry)
* Set Speed Control Switch to "OFF" after the job complete.
RECOMMENDED SPEED SETTINGS AND OPERATION TIME
| Accessories Picture Speed level | Rotating Speed Time | |||
| Meat Grinder | 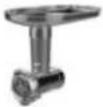 | Speed 4 - 5 for cookies | 80 - 100 rpm | 6 min |
| Speed 7 - 8 for meat | 130 - 150 rpm | |||
| Dough Hook |  | 1 | 40 - 50 rpm | 6 min |
| Flat Beater |  | 2 - 7 50 - 130 rpm | 6 min | |
| Balloon Whisk |  | 8 | 150 rpm | 6 min |
| Blender | 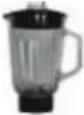 | Blender >20000 rpm | 2 min | |
| Vegetable slicer | 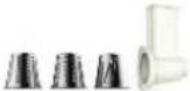 | 8 | 150 rpm | 3 min |
| Pasta maker | 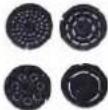 | 4 - 5 | 80 - 100 rmp | 6 min |
3. FEATURES AND FUNCTIONS


natural_image
Close-up of a metallic mechanical component with star-shaped features and a circular head (no text or symbols visible)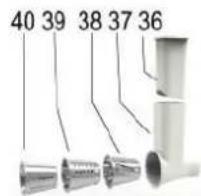
| 1 Cutting screw bar 21 Lead cover | ||
| 2 Cutting disc 22 Sausage horn | ||
| 3 Cutting disc 23 Round noodle cutter | ||
| 4 Cutting disc 24 Flat noodle cutter | ||
| 5 Cutting Blade 25 Hollow noodle cutter | ||
| 6 Worm shaft 26 Big flat noodle cutter | ||
| 7 Food pusher 27 Main Body | ||
| 8 Food tray 28 Rubber feet | ||
| 9 Cutting meat canister 29 Control Switch | ||
| 10 Stainless steel bowl 30 Release Knob for Arm | ||
| 11 Rotating axis 31 Blender blades | ||
| 12 Bowl cover 32 Blender base | ||
| 13 Front protection cover | 33 Glass jar | |
| 14 Rotating Arm | 34 Jar Lid | |
| 15 Safety cover | 35 Filler cap | |
| 16 Balloon whisk | 36 Slicer pusher | |
| 17 Dough hook 37 Slicer canister | ||
| 18 Flat beater | 38, 39, 40 | Slicer cutting discs: fine, thick, slice |
| 19 Meatball canister 41 Cookies maker accessory | ||
| 20 Cone |
4. OPERATING POSITIONS
Warning!
Do not operate the appliance more than 15 minutes.
After one time use, the Appliance should be cooled down for 30minutes.
Use speed 4 or 5 to make pasta.
Do not use two or more than two functions in the same time.
Do not make pasta exceed 500g dough continuously. After making pasta with 500g dough, the Appliance need 30 minutes rest to cool down.
Operate the appliance only when the accessory/tool is attached according to this table and is in the operating position.
Always keep the bowl in the appliance when during operation any function
| No. Output position Accessories | ||||
| 1 | 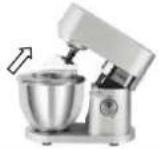 | 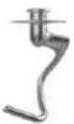 | 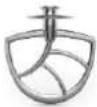 | 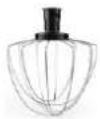 |
| 2 |  | 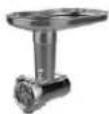 | ||
| 3 | 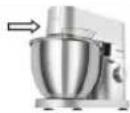 |  | ||
| 4 | 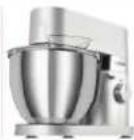 | 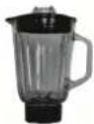 | ||
5 Assemble Doug  | er, or Balloon Whisk, according to your desire. | |||
Risk of injury from the rotating tools!
While the appliance is operating, keep fingers clear of the mixing bowl. Do not change tools until the appliance is at a standstill and has been unplugged. When switch off, the drive continues running briefly.
5. HOW TO USE:
DOUGH HOOK, FLAT BEATER, BALLOON WHISK
| 1 |  | Turn Release knob downside as picture show; meanwhile with another hand to lift the Arm to the elevated position as picture shows. |
| 2 |  | Fit the bowl filled with ingredients into base flute, turn it clockwise to make sure the bowl is securely locked in place. |
| 3 | 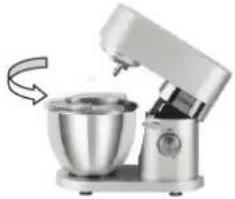 | Assemble the bowl cover into arm clockwise. |
| 4 |  | According to your need, assemble flat beater, balloon whisk, or dough hook into rotating axis, then revolve them counter-clockwise (as picture shows) until lock properly. |
| 5 | 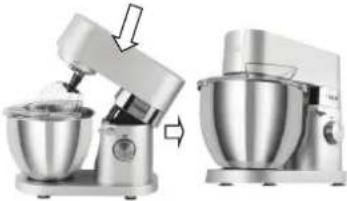 | Turn Release knob while press downwards the Arm, until the Arm in horizontal lock position as shown in picture.Power on.Set control switch to the appropriate speed level. |
| 6 |  | After food is ready, turn the control switch to “OFF”, then unplug. Turn the release knob downside and lift arm up to position as picture shows. |
| 7 | 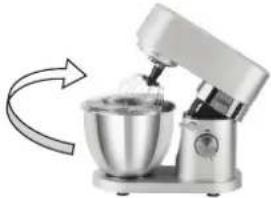 | Remove flat mixing hook (Flat beater, balloon whisk, or dough hook) clockwise. |
| 8 | 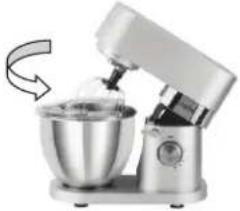 | Remove bowl cover. |
| 9 | Remove bowl with prepared food counter-clockwise. |
natural_image
Two views of a kitchen mixer with a side view showing the mixing process (no text or symbols visible)
natural_image
Three views of a metallic T-joint valve assembly with internal components and mounting holes (no text or symbols visible)
natural_image
Close-up of a metallic mechanical component with a spiral blade (no visible text or symbols)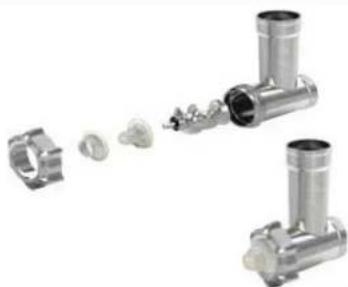
natural_image
Two metallic T-junction pipe fittings with plastic components emerging from them (no text or symbols visible)Following their sequence shown in picture, assemble worm shaft, conductor, meatball canister into cutting meat canister. then assemble cutting screw bar into Cutting meat canister clockwise.
* Please remember to disassemble cutting canister/cylinder from the appliance, when changing these accessories.
* Always keep the mixing bowl in appliance when use any function of the appliance.
 | Following their sequence shown in picture assemble worm shaft, lead cover, sausage canister into cutting meat canister; then assemble cutting screw bar into cutting meat canister clockwise. |
 | Following their sequence shown in picture, assemble worm shaft and noodle accessory into cutting meat canister, then assemble cutting screw bar into cutting meat canister clockwise. |
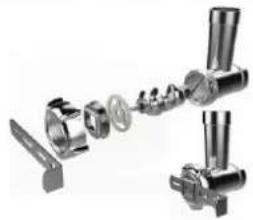 | Following their sequence shown in picture, assemble worm shaft, lead cover, and cookies maker accessory into cutting meat canister, then assemble cutting screw bar into cutting meat canister clockwise. |
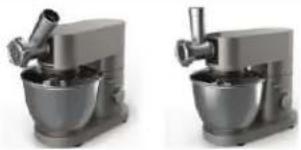 | Align arrow on end of cutting cylinder to the other one on arm, about 45 degree angle, then turn it counter-clockwise to assemble prepared cutting meat canister into arm front output shown in picture.Fasten cutting screw bar after cutting meat canister fixed correctly. |
 | Assemble loading tray into cutting meat canister then place another bowl or container under the outlet of cutting meat canister. |
 | Turn control switch to appropriate speed then put food into feeding inlet with pusher to push down food. |
 | When food ready, Turn Control switch to “OFF” position, Then unplug and cut off power.Remove pusher and loading tray. |
 | Press release button near the front output by one hand, while another hand to remove cutting meat canister from arm clockwise. |
 | Assemble the front protection cover downwards.Do not use other function when using meat grinder. |
VEGETABLE SLICER
 | According to your need, assemble one of the slicer cutting disc into slicer canister |
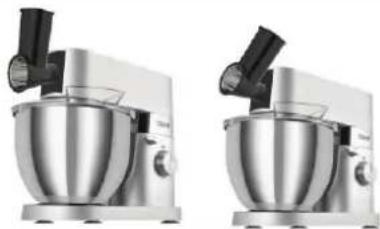 | Align arrow on cutting cylinder to the other one on arm then assemble prepared Slicer canister into arm counter-clockwise shown in picture. |
 | Turn control switch to appropriate speed then put food into feeding inlet with pusher to push down food. |
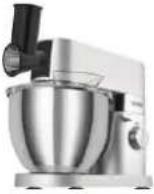 | Turn control switch to “OFF” counter- clockwise when food is ready, then unplug and cut off power.Remove pusher. |
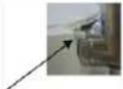 Release Button Release Button | Press release button near the front output, remove slicer canister from arm clockwise. |
 | Assemble the front protection cover downwards. Do not use other function when using vegetable slicer. |
BLENDER
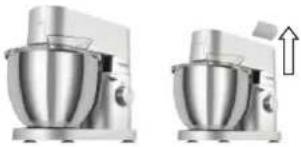 | Open the safety cover.Do not use other functions when using the blender |
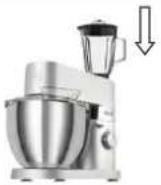 | Put the glass jar, with food loaded and covered by jar lid, on the Appliance properly.Power on.Set the speed control switch to „Blender”.Do not release the arm, when the glass jar on the Appliance. |
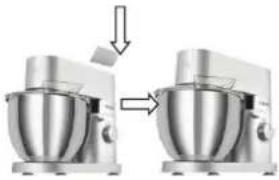 | Put the safety cover back after food ready. |
6. CLEANING AND SERVICING
Before cleaning, make sure to unplug the appliance from mains socket and allow it cool down.
Never immerse the base unit in water or hold under running water.
Do not use abrasive detergents or alcohol to clean main unit and bowl cover.
Wipe unit with a damp cloth, if required; use a little washing up liquid to clean the exterior of appliance.
Then wipe unit dry.
Mixing bowl and bowl cover can be washed under tap and need be wipe dry.
The dough hook, flat beater, balloon whisk, meat grinder, sausage maker and vegetable maker are not dishwasher safe.
Accessories should only be cleaned in warm, soapy water, and rinsed and dried thoroughly.
After washing and drying, immediately place attachment into the protective sleeve for storage.
Do not wedge plastic parts in the dishwasher as they could be warped.
7. CAPABILITY OF BOWL
1.0 kg flour and 0.55 kg water.
Application examples:
 | Beating of egg-white8 egg-white in the BOWL with the Balloon whisk at speed 8.Kb 6 - 8 minutes. |
 | Beating of cream600 g cream with the Balloon whisk in the BOWL at speed 2-7.Kb 6 - 8 minutes. |
 | Kneading of dough1000 g flour200 g chopped almonds15 g salt28 g butter28 g sugarApp. 550 g water (Temperature 40 +/- 2 °C).Kb 6 - 8 minutes at speed 1 |
Our company reserves the ultimate rights of explanation of this Instruction Manual.
INSTRUCTIONS AND INFORMATION REGARDING THE DISPOSAL OF USED PACKAGING MATERIALS
Dispose of packaging material at a public waste disposal site.
DISPOSAL OF USED ELECTRICAL AND ELECTRONIC APPLIANCES

The meaning of the symbol on the product, its accessory or packaging indicates that this product shall not be treated as household waste. Please, dispose of this product at your applicable collection point for the recycling of electrical & electronic equipment waste. Alternatively in some states of the European Union or other European states you may return your products to your local retailer when buying an equivalent new product. The correct disposal of this product will help save valuable natural resources and help in preventing the potential negative impact on the environment and human health, which could be caused as a result of improper liquidation of waste. Please ask your local authorities or the nearest waste collection centre for further details. The improper disposal of this type of waste may fall subject to national regulations for fines.
For business entities in the European Union
If you wish to dispose of an electrical or electronic device, request the necessary information from your seller or supplier.
Disposal in other countries outside the European Union
If you wish to dispose of this product, request the necessary information about the correct disposal method from local government departments or from your seller.

This product meets all the basic EU regulation requirements that relate to it.
Changes to the text, design and technical specifications may occur without prior notice and we reserve the right to make these changes.
OBSAH
-
DŮLEŽITÉ BEZPEČNOSTNÍ POKYNY .... 3
-
OTOČNÝ REGULÁTOR RYCHLOSTI 5
-
VLASTNOSTI A FUNKCE ....6
-
POUŽIVÁNÍ SPOTŘEBIČE 7
-
POUŽÍVÁNÍ PŘÍSLUŠENSTVÍ: 8
HNĚTACÍ HÁK, MÍSICÍ METLA, ŠLEHACÍ METLA 8
MLÝNEK NA MASO / NÁSTAVEC NA VÝROBU UZENIN / NÁSTAVEC NA VÝROBU TĚSTOVIN / TVOŘÍTKO NA CUKROVÍ......9
NÁSTAVEC NA STROUHÁNÍ......11
MIXÉR....12
-
ČIŠTĚNÍ A ÚDRŽBA....13
-
KAPACITA NÁDOBY....13
natural_image
Close-up of a metallic rotary dial with 'Dimistor OFF' label (no other text or symbols visible)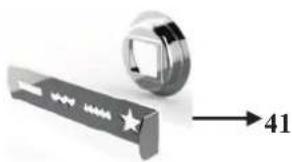
natural_image
Close-up of a metallic mechanical component with a star and arrow pointing to value 41 (no text or symbols on the main subject)
natural_image
Two views of a kitchen mixer with a side view showing the mixing process (no text or symbols visible)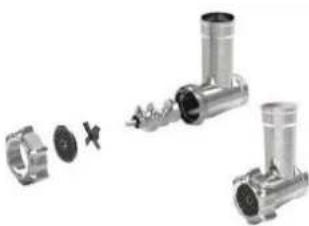
natural_image
Three metallic pipe fittings with exploded views showing internal components (no text or symbols visible)
natural_image
Close-up of a metallic mechanical component with three blades (no visible text or symbols)natural_image
Two metallic T-junction pipe fittings with plastic components and a separate inset showing internal threading (no text or symbols visible)natural_image
Close-up of a metallic circular dial with a black pointer, labeled 'Dimistor OFF' (no other text or symbols visible)
natural_image
Close-up of a metallic mechanical component with a star and arrow pointing to value 41 (no text or symbols on the main subject)
natural_image
Two views of a kitchen mixer with a side view showing the mixing process (no text or symbols visible)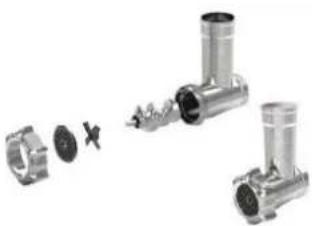
natural_image
Two metallic pipe fittings with exploded views showing internal components (no text or symbols visible)
natural_image
Close-up of a metallic mechanical component with three blades (no visible text or symbols)natural_image
Two metallic T-junction pipe fittings with plastic components and connectors, shown from different angles (no text or symbols visible)natural_image
Close-up of a metallic circular dial with a black pointer, labeled 'Dimistor OFF' (no additional text or symbols visible)3. WŁAŚCIWOŚCI I FUNKCJE


natural_image
Close-up of a metallic mechanical component with a star and arrow pointing to value 41 (no text or symbols on the main subject)
natural_image
Close-up of a metallic circular dial with a black pointer, labeled 'Dimistor OFF' (no other text or symbols visible)
natural_image
Close-up of a metallic mechanical component with star and arrow indicator (no text or symbols)
natural_image
Two views of a kitchen mixer with a side view showing the mixing process (no text or symbols visible)
natural_image
Three views of a metallic T-joint valve assembly with internal components and mounting holes (no text or symbols visible)
natural_image
Close-up of a metallic mechanical component with a spiral blade (no visible text or symbols)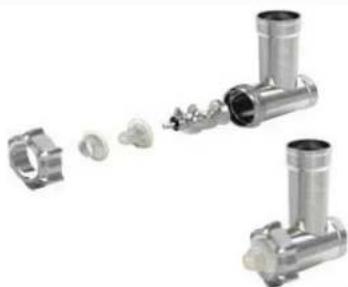
natural_image
Two metallic T-junction pipe fittings with plastic components emerging from them (no text or symbols visible)


- STAND MIXER KUCHYŃSKÝ ROBOT KUCHYNSKÝ ROBOT ROBOT KUCHENNY KONYHAI ROBOTGÉP
- Dear customer,
- IMPORTANT SAFETY PRECAUTION
- WARNING!
- Save these instructions
- SPEED CONTROL SWITCH
- RECOMMENDED SPEED SETTINGS AND OPERATION TIME
- FEATURES AND FUNCTIONS
- OPERATING POSITIONS
- Risk of injury from the rotating tools!
- HOW TO USE:
- CLEANING AND SERVICING
- CAPABILITY OF BOWL
- INSTRUCTIONS AND INFORMATION REGARDING THE DISPOSAL OF USED PACKAGING MATERIALS
- DISPOSAL OF USED ELECTRICAL AND ELECTRONIC APPLIANCES
- For business entities in the European Union
- Disposal in other countries outside the European Union
- OBSAH
- WŁAŚCIWOŚCI I FUNKCJE
Brand : Philco
Model : PHSM 9100
Category : Food processor